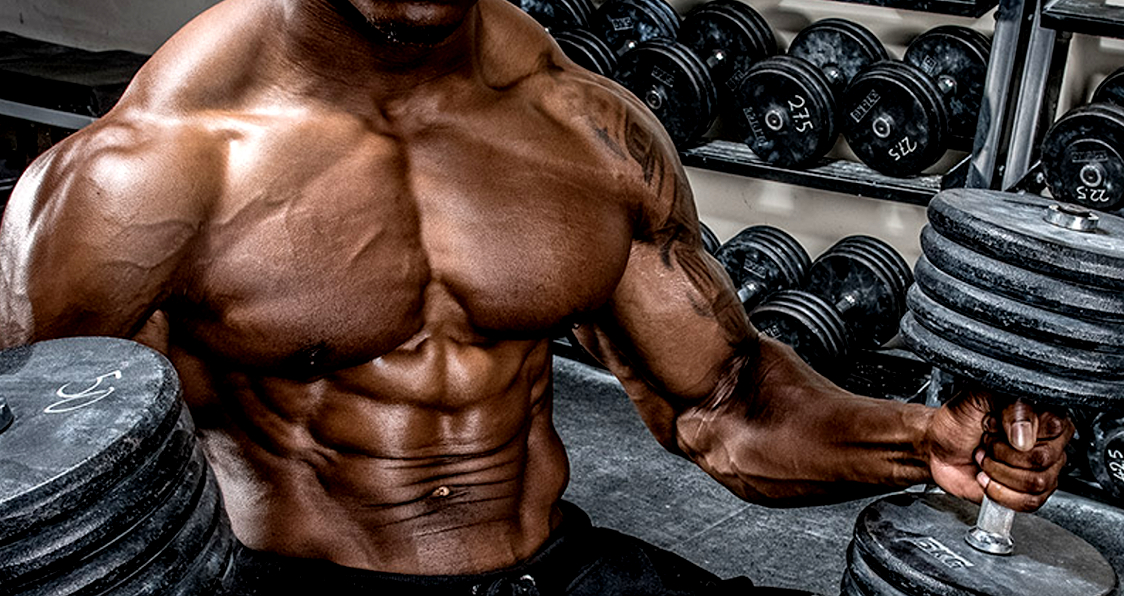
Tag: workout
5 Exercises for Building Balanced Biceps
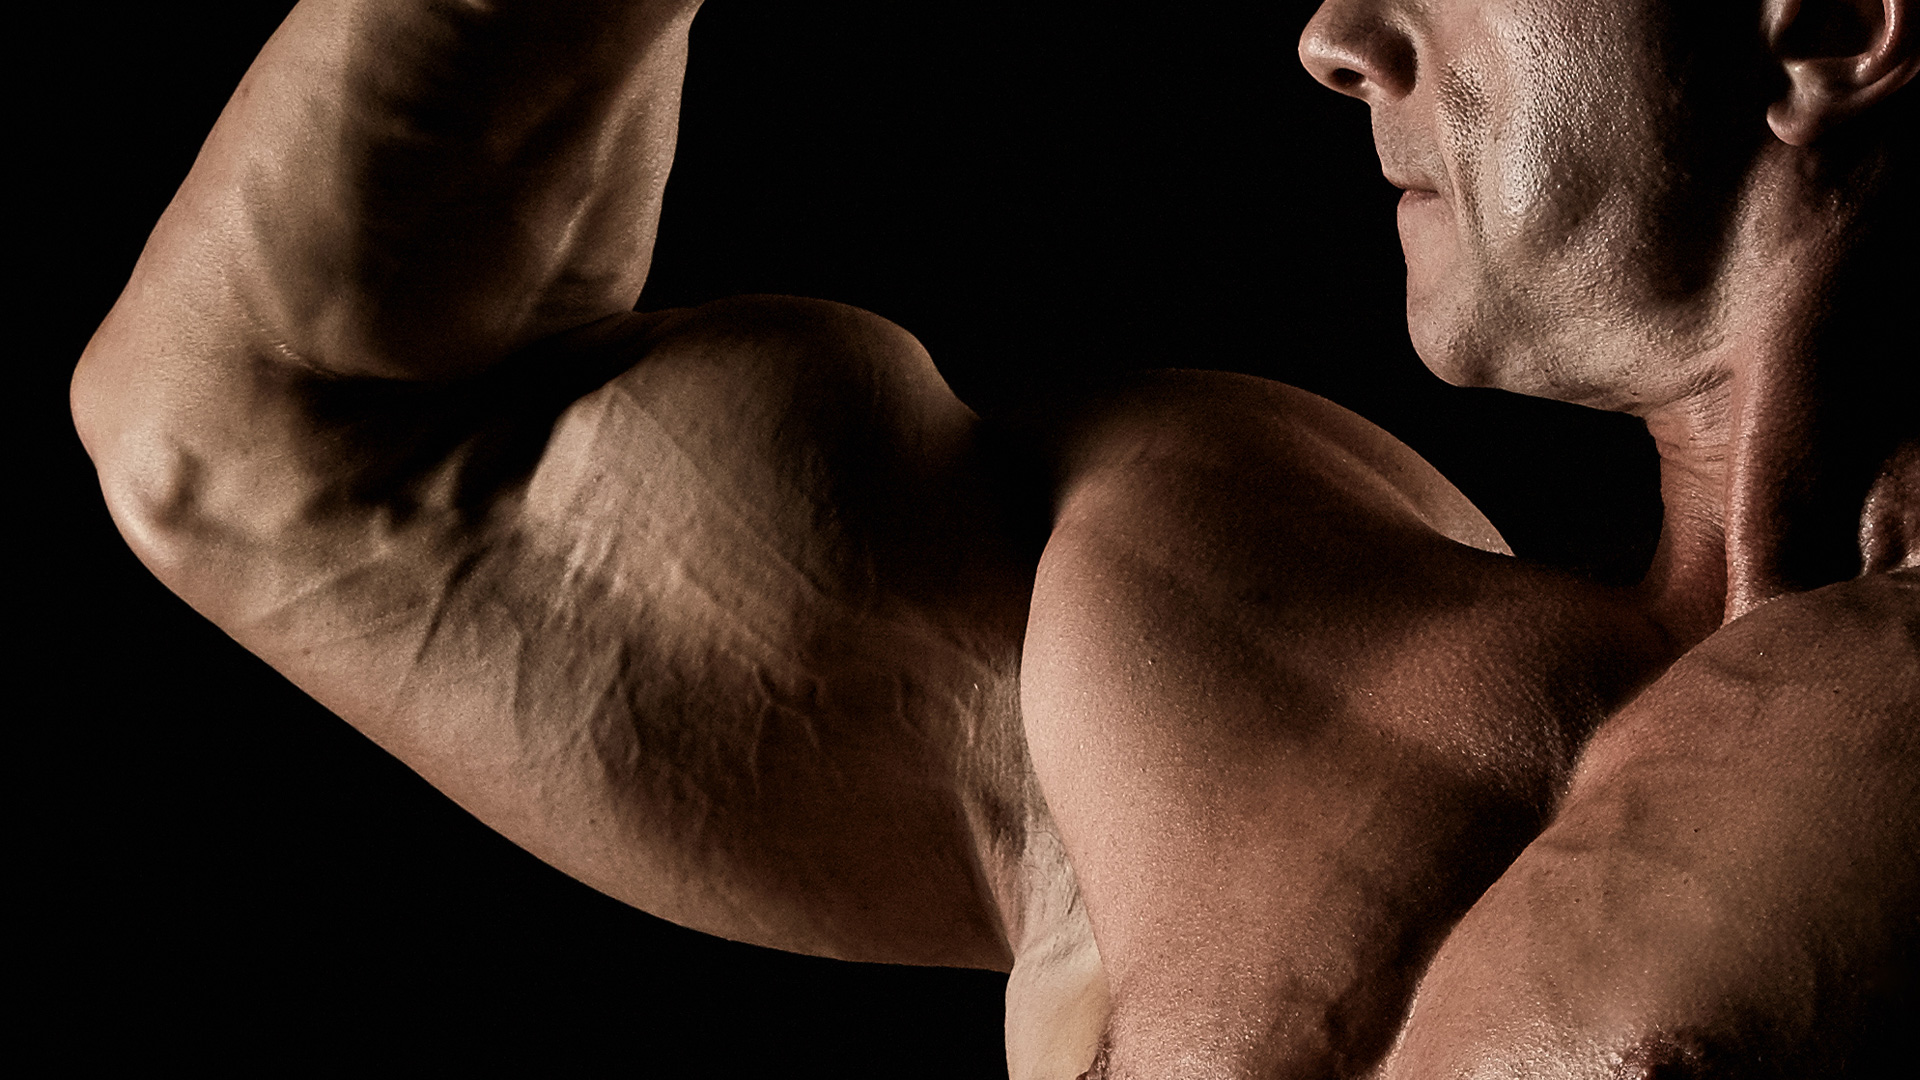
Developing Both Heads of the Biceps
Depending on how you train the arms, it is possible to overdevelop one head of the bicep and under develop the other.
As a result, the arms may not look full. It is not uncommon to come across individuals whose biceps look great from the side, but flat when viewed from the front.
Similarly, it is possible to build the biceps so that they look large from the front but formless from the side. The reason that this asymmetry occurs is because the two heads of the biceps are not being trained equally.
Everybody knows that the biceps brachii can be found in the upper arm, but few people are aware of the fact that the muscle has two-heads. The biceps consist of both a short and long head which, when contracted, cause flexion to occur at the elbow joint (1).
While the heads run parallel with each other, the short head runs along the inside of the upper arm. By building size in the short head, the arm will look fuller when observed from the front.
The long head meanwhile can be found on the outside of the upper arm and is most clearly seen when flexing the bicep. Considering that there is often asymmetry between the two, is it actually possible to work the heads individually and improve the balance between bicep heads?
While it is certainly possible to place more stress on a specific head, there does appear to be a certain degree of confusion as to which method is best.
There is some evidence to suggest that the type of grip used, grip width (2) and elbow positioning (3), amongst other factors, can determine which head is activated most. However, while these factors may contribute towards bicep development, often genetics will play the biggest role (4).
If you find that one bicep head is severely lagging behind and refusing to adapt, it may come down to genetics. As a result, the best method that you can adopt is to trial a number of different bicep resistance exercises and training techniques to see what brings the best results.
Resistance Exercises for Maximal Bicep Development
When it comes to bicep training, the bicep curl is the obvious, go-to exercise. However, there are a multitude of variations that can be used in order to build bicep head size.
Here are a number of powerful and effective bicep exercises for increasing mass in both the long and short head.
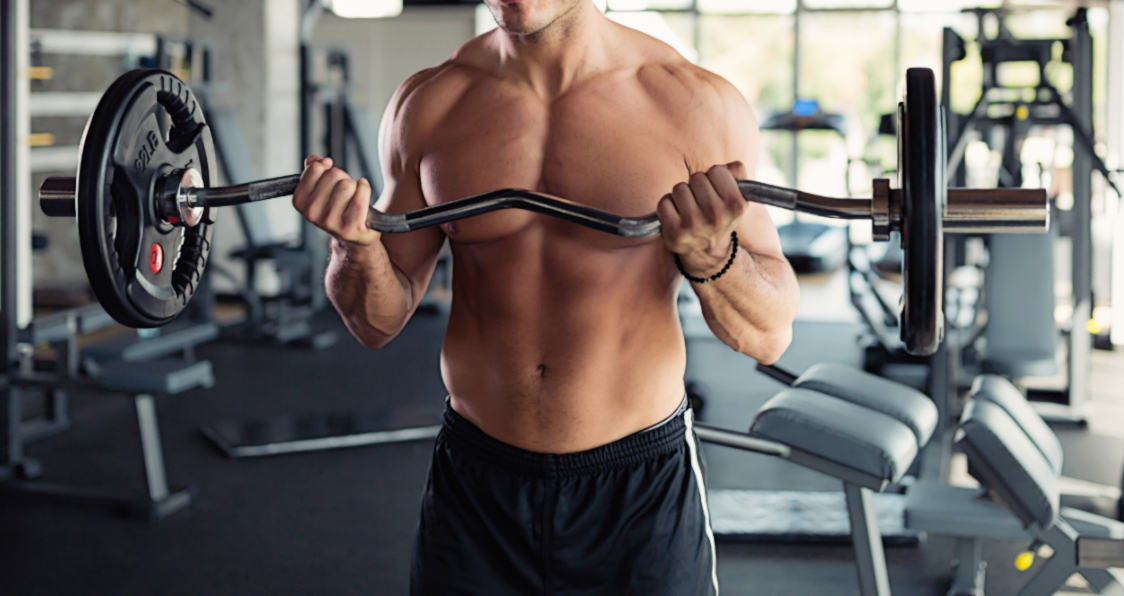
1) Long Head Exercise 1 – Alternating Incline Dumbbell Curl
Seen as one of the best long head exercises, the alternating incline dumbbell curl is an excellent place to start.
To safely and effectively perform this exercise, start by setting a bench on a 30 degree angle and select two dumbbells which are slightly lighter than normal.
The incline position will place more demand on the biceps and therefore you will quickly find that you cannot lift the same kind of load as you can with a standard dumbbell curl.
Lie back on the bench and start with the arms extended and hanging by the sides. This will ensure that the exercise begins with the biceps being fully stretched out.
The grip you use is entirely up to you however, it is recommended to start by using a hammer grip (palms facing each other) and switching to a supinated grip as you curl the weight up.
When using this method, think about pressing the thumb against the inner plate of the dumbbell which will make supinating the hand more challenging.
If using a supinated grip throughout, press the pinky against the inside plate of the dumbbell which will place more force through the thumb side of the bell and facilitate a greater bicep stretch.
The biggest error that is often made with this exercise (and many bicep orientated exercises in general) is moving the elbow away from the side of the body as the weight is lifted.
Imagine screwing the elbow in tightly to the ribcage as you perform this exercise to prevent this from occurring.
To add intensity, complete max incline reps before sitting upright and continuing to failure again. Finish off by standing and working to failure once more.
2) Long Head Exercise 2 – Standing Barbell Curl
Providing a narrow grip is assumed and the elbows are kept tight to the body, the barbell curl is an excellent long head isolator.
To properly perform this exercise, using a narrow grip grab a barbell and stand up tall. Push the chest up, pull the shoulders back and pin the elbows tightly to the sides.
From this position, flex at the elbow only, drive the weight upward and squeeze. Maintaining a slight forward lean from the trunk to maximize the tension going through the biceps.
Those who curl the weight up while maintaining a 90 degree angle at the elbow will fail to apply maximal stress to the biceps.
Again, thinking about the elbows, those who allow them to travel back and forth will also reduce stress from the biceps and move it on to the front delts (shoulders).
A final error often seen in the barbell curl is to keep the wrists flexed throughout the duration of the exercise or at to flex at the top of the movement.
In the same way that moving the elbow reduces bicep tension, flexing the wrists will shift the stress of the biceps and onto the forearm musculature instead.
If you struggle with this, think about letting the wrists “sag” when you grip the barbell which will prevent any wrist flexion.
3) Long Head Exercise 3 – Barbell Drag Curl
This exercise involves using either a barbell or the Smith’s machine.
From a standing position, grip the bar with the hands just outside the hips. From this position, look to drag the barbell up the body by pushing the elbows back. Continue dragging until the bar reaches the upper chest.
Because this exercise involves a restricted range of motion you may not find it to be highly effective for bicep development. However, many claim that it targets the long head effectively.
4) Short Head Exercise 1 – Preacher Curl
It is believed that to target the short head of the bicep, the elbows must be placed in front of the body.
This therefore makes the preacher curl the ideal exercise for short head development. Unfortunately, it is an exercise which is commonly performed incorrectly.
Many individuals drive their chest against the pad and place the full arm in direct contact. From there, they grab the bar with a narrow grip and allow the elbows to flair out.
As they drive the bar upward, they flex the wrists and lean backwards to facilitate the drive.
The issue with performing the preacher curl in this manner is that it once again fails to maximally activate the biceps and place a large amount of stress on the muscle.
For an efficient preacher curl, start by standing – this means raising the pad to chest height. Place only the lower portion of the tricep on the pad rather than the full upper arm.
The elbows should be approximately shoulder width apart but the hands should grip the bar slightly wider than shoulder width. Additionally, a slight backward trunk lean should be established.
As you contract the biceps, lean forward with the trunk to maintain bicep tension. As with the previous exercise, utilize a wrist “sag” if necessary to prevent the wrists from flexing excessively.
A number of individuals prefer to stop slightly short of full extension, however, working to a full range of motion is highly recommended to maximize the amount of stress placed on the muscle (5).
5) Short Head Exercise 2 – Spider Curl
Finally, the spider curl is an excellent exercise, not only for short head development, but also to ensure that you use a full range of motion. It is also practically impossible to “cheat” with the spider curl.
For the exercise, set up facing a preacher bench. Adjust the pad so that the supports of the bench don’t restrict movement. Lean over the top of the bench and let the arms hang down.
From that position, the movement is then exactly the same as the preacher curl.
As with the incline dumbbell curl, the body position means that you are likely to lift a lighter load than normal.
To add intensity to the spider curl, have a training buddy who can help you complete a number of forced repetitions after you have reached absolute muscular failure.
Final Word
At the end of the day, it makes very little difference knowing whether or not it is possible to fully isolate either bicep head. For optimal development, it makes sense to hit the biceps from a multitude of angles anyway.
Therefore, to grow full looking arms, consider using a number of the aforementioned bicep exercises while taking care to develop both the long and short head equally.
For more news and updates, follow Generation Iron on Facebook, Twitter, and Instagram.
References:
1-Tiwana, Manpreet S.; Varacallo, Matthew (2019), “Anatomy, Shoulder and Upper Limb, Biceps Muscle”, StatPearls, StatPearls Publishing, PMID 30137823
2-Marcolin, Giuseppe; Panizzolo, Fausto Antonio; Petrone, Nicola; Moro, Tatiana; Grigoletto, Davide; Piccolo, Davide; Paoli, Antonio (July 13, 2018). “Differences in electromyographic activity of biceps brachii and brachioradialis while performing three variants of curl”. PeerJ. 6. doi:10.7717/peerj.5165. ISSN 2167-8359. PMC 6047503. PMID 30013836.
3-Oliveira, Liliam F.; Matta, Thiago T.; Alves, Daniel S.; Garcia, Marco A.C.; Vieira, Taian M.M. (March 1, 2009). “Effect of the shoulder position on the biceps brachii emg in different dumbbell curls”. Journal of Sports Science & Medicine. 8 (1): 24–29. ISSN 1303-2968. PMC 3737788. PMID 24150552.
4-“Genes critical for muscle development and function in Caenorhabditis elegans identified through lethal mutations”. The Journal of Cell Biology. 124 (4): 475–490. February 2, 1994. ISSN 0021-9525. PMC 2119919. PMID 8106547.
5-Baroni, Bruno M.; Pompermayer, Marcelo G.; Cini, Anelize; Peruzzolo, Amanda S.; Radaelli, Régis; Brusco, Clarissa M.; Pinto, Ronei S. (2017-8). “Full Range of Motion Induces Greater Muscle Damage Than Partial Range of Motion in Elbow Flexion Exercise With Free Weights”. Journal of Strength and Conditioning Research. 31 (8): 2223–2230. doi:10.1519/JSC.0000000000001562. ISSN 1533-4287. PMID 27398917.
The Ultimate Workout To Build Ripped Hamstrings
Build Jacked Hamstrings With This Workout
Want to know what ripped hamstrings look like? Imagine a few steel chains running under the paper thin skin at the back of your legs. These chains are what are used to lower and raise your torso when you bend forward to touch your toes or in exercises like the deadlifts.
Hamstrings can be a stubborn muscle group to develop. It’s hard to establish a mind-muscle connection with the hamstrings as they’re at the back of your legs and you can’t look at them in the mirror while training.
Lying Leg Curls – 4 Sets 15 Reps
You’ll be performing a combination of isolation and compound exercises in this workout to smoke your hams. The compound lifts help in building strength and size of the muscle and the isolation movements improve the conditioning.
You’ll start off with the lying leg curls (an isolation exercise) to activate and engage your hams. The concentric (upward) movement should be explosive, and the eccentric should be slow and controlled.
Sumo Squats – 3 Sets 12-10-8 Reps
The sumo squats target the hamstring and abductors primarily. Stand with your feet placed more than shoulder-width apart and point your toes outwards. You should go as deep as possible without leaning forward to target your hamstrings optimally.
If you have trouble performing the barbell sumo squats, you can use a dumbbell. Stand on an elevated platform (like aerobic steps) and take the same stance as you would during the barbell squats.
Hold a dumbbell with both your hands while your arms are fully extended towards and perpendicular to the floor. Your arms will remain in the same position throughout the exercise.
Dumbbell Deadlifts – 3 Sets 12-10-8 Reps
Remember the steel chain reference at the beginning of the article? You need to bring it in practice in the dumbbell deadlifts. Place your toes on quarter plates to better isolate and recruit your hamstrings.
Maintain a slight bend in your knees and lower your torso by bending at your hips while pushing them back and focusing on your hamstrings. Keep your back arched and go as low as you can without recruiting your lower back.
Supersets
Standing Hamstrings Curls – 3 Sets 20-15-12 Reps
Standing hamstrings curls are an isometric exercise which helps in building conditioning and fixing any muscle imbalances. If you don’t have access to a standing hamstring curl machine, you can use a leg extension machine.
GHD Hyperextensions – 3 Sets 10 Reps
Superset the standing hamstrings curls with the GHD hyperextensions. The GHD hyperextensions were brought into the mainstream by CrossFit athletes and are an incredibly effective exercise to annihilate your hamstrings.
Barbell Hip Thrusts – 3 Sets 12-10-8 Reps
Barbell hip thrusts are one of the most underutilized exercises when it comes to hamstring training. Although the hip thrusts can help you in building meaty hams, you should avoid them if you have an impending lower back injury.
Place your upper back on a flat bench while you have a barbell placed across your groin. Use padding around the barbell to avoid it from digging in when you thrust. Hold and contract your hams at the top of the movement for a couple of seconds before returning to the starting position.
Header image courtesy of Envato Elements
Do you train your hamstrings and quads on the same day? Let us know in the comments below. Also, be sure to follow Generation Iron on Facebook and Twitter.
Build Yoked Traps With This Workout
Workout For Building Mountain-Like Traps
Although the traps or trapezius muscles are the top-most muscles on the body, they are also one of the most overlooked muscle groups. Yoked traps can add to the overall aesthetics of your physique and can make you look stronger.
Most people train their trapezius muscles by doing a couple of exercises at the end of their shoulder workouts. In this workout, we’ll focus primarily on the traps so that they look like a couple of mountains rising out the top of your shoulders.
Dumbbell Upright Rows – 3 Sets 12-10-8 Reps
Dumbbell upright shrugs are an incredible exercise to build the size in the traps. Most people make the mistake of using momentum by swinging back and forth to lift the dumbbells. Doing so takes the tension off the traps.
Make sure you stretch out your traps at the bottom of the movement to recruit all the muscle fibers. Prefer dumbbells over a barbell in the upright rows as you can get a better range of motion.
Dumbbell Shrugs – 3 Sets 12 Reps
Shrugs are a staple in a trap workout. While shrugs are one of the easiest exercises to perform, most people screw up their form by lifting heavier weights than they can handle. Grab a dumbbell in each hand extended at arm’s length with a slight bend in your elbows.
Lift up your shoulders explosively with an aim to touch your ears with your shoulders. Return to the starting position with a slow and controlled movement. Keep your neck and back straight throughout the exercise and don’t use momentum by jerking at your knees.
Superset
Farmer’s Carry – 3 Sets 12 Steps on Each Side
Farmer’s carry is a compound movement and can also help in building overall strength and muscle mass. Grab a heavy dumbbell in each hand and walk around in the gym. Focus on building the tension on your traps.
Rack Deadlift – 3 Sets 12 Reps
Deadlifts are yet again a compound exercise which can add a lot of volume to your back. We limit the range of motion of the deadlifts in this workout to focus primarily on the trapezius muscle.
Machine Shrugs – 3 Sets 15 Reps
You need the right balance between the compound and isolation exercises to build monstrous traps. Machine shrugs are an isolation exercise which can help in improving the conditioning of the traps.
If you don’t have access to a machine shrug machine at your gym, you can use a shoulder press machine by standing on the seat and grabbing on to the handles. Being creative inside the gym can take you a long way.
Behind-The-Back Barbell Shrugs – 3 Sets 12-10-8 Reps
Behind-the-back barbell shrugs are different as compared to the orthodox barbell shrugs. You should consider lifting comparatively lighter weights as it’ll be harder to maintain balance while performing the exercise with a barbell behind your hamstrings.
Performing the behind-the-back barbell shrugs will target the front side of your traps. With the barbell shrugs, you’ll have trained your traps from all the possible angles in this workout.
Header image courtesy of Envato Elements
Which is your favorite muscle group? Let us know in the comments below. Also, be sure to follow Generation Iron on Facebook and Twitter.
6 Forgotten But Incredibly-Effective Exercises Which Need To Be Brought Back
Reliving the Golden Days
The beautiful sport of bodybuilding has evolved with time. Machines, juices, and glamour have taken over the bodybuilding world. Don’t get us wrong, we are not complaining, and neither is this article meant to compare the current bodybuilders with the good old days. We’re here to talk about the six forgotten exercises that need to be brought back for bodybuilding’s sake.
With the emergence of the online fitness scene, we see a lot of “influencers” posting their workouts online. We can’t help but notice how different their workouts are from the typical old-school training routines.
It’s almost as if the workout vanity is as important as the physiques that are a result of it. Now, there is nothing wrong with that but we miss watching nasty bodybuilders grunting through their workouts in pain, sweat, and sometimes even blood.
We have put together a list of exercises that were a hit with the golden-age bodybuilders but have now faded with time. Make these exercises a part of your exercise arsenal if you love the golden-age aesthetics as much as we do.
6 Forgotten But Incredibly-Effective Exercises Which Need To Be Brought Back
Bench Tricep Dips
Imagine a sunny day in LA, and now picture yourself in a bare-bone gym in California surrounded by jacked dudes sporting staches, wearing tank tops and short shorts. Yep, we just narrated a scene out of the legendary documentary – Pumping Iron, and this is going to the theme of the article.
The triceps are an overlooked muscle. They don’t get the same love as their siblings – biceps. When people think “arm training” they usually picture themselves curling heavy dumbbells. Hardly anyone imagines themselves performing skullcrushers when arm training is brought up.
The bench tricep dips are on the verge of extinction and need to be rescued.
Steps:
Place your hands at a shoulder-width distance on a bench and lockout your elbows.
Your arms should be perpendicular to the floor at the top of the movement.
Extend your legs until your upper legs are parallel and your lower legs are perpendicular to the floor.
Place your feet flat on the floor.
Slowly lower your upper body until your chest reaches bench height.
Return to the starting position with an explosive movement and repeat for the recommended reps.
Modification: If you find this exercise too easy, you could add resistance by keeping your feet on an elevated platform or do what Arnold did – place a few weight plates on your lap and knock out the reps until the horseshoe muscles pop out at the back of your arms.
Barbell Wrist Curls
A few more years and you’ll only see people perform the barbell wrist curls in old bodybuilding videos or if a bodybuilding museum opens up someday. Forearms, these days, are considered nothing more than accessory muscles. People slap on a couple of fatgrips on their dumbbells or barbells and call it a day.
Steps:
Keep your forearms and elbows flat on a bench while holding a barbell with an underhand grip.
Curl the barbell using your wrists and pause at the top of the movement for a couple of seconds.
Return to the starting position and repeat for the desired reps.
Mod: While holding the barbell with an underhand grip targets the sides of the forearms, grabbing the bar with an overhand grip will work the top of your forearms. Don’t let your ego get the better of you while performing this exercise. Use weights you’ll be able to follow a full range of motion with.
Donkey Calf Raises
Back in the day, hitting the gym was about training with buddies. These days, machines and Instagram have consumed the roles of training partners. Most people like working out on machines in isolation.
We would recommend performing the donkey calf raises with people on your back as it adds a new dimension to your training – stability. Aesthetics are fine but you should also focus on training for functionality. Donkey calf raises ranks high on the list of forgotten exercises that need to be brought back.
Steps:
Place your toes on an elevated platform.
Bend over at your hips so that your upper body is taken out of the equation. It’s best to perform this exercise near a bench press or a smith machine as you’ll have something to hold on to.
Ask your training partner to hop onto your back while you perform the calf raises with a full ROM.
Hold and squeeze the life out of your calves at the top of the exercise.
Cross-Bench Dumbbell Pullovers
Dumbbell pullovers are one of the best exercises for building a V-tapered back, and yet only a few people consider adding them to their training routines. Performing the cross-bench dumbbell pullovers with a strict form will help open up your rib cage and add muscle mass to your lats.
Steps:
Lie down on a bench with your shoulder placed on the pads.
Grab a dumbbell with both your hands over your chest.
While keeping your elbows locked out, slowly lower the dumbbell until it is a few inches off the floor.
Return to the starting position and repeat for the recommended reps.
Keep your hips low to the ground and make sure you don’t lift them while you’re performing the exercise.
Arm Blaster Curls
The arm blaster curls have to be one of the most badass bicep exercises of all times. We still don’t understand how it lost its charm with time and ended up on a list of forgotten exercises. If your gym doesn’t have an arm blaster, add one to your gym bag, and your arms will thank you later.
Steps:
Adjust the arm blaster so it fits snugly under your chest.
Place the back of your elbows on the pads and grab a barbell while your arms are fully extended in front of you.
Curl the barbell by bending at your elbows with a strict form.
Only your lower arms should move while your upper arms stay in place.
Roman Chair Situps
How often do you see the current Mr. Olympias train abs on a Roman chair? Back in the day, a Roman chair was a staple in an ab training routine. The Roman chair situps can be much harder than normal crunches as it requires a lot more control from your stabilizers and a strong core.
Steps:
The Roman chairs usually have a lot of moving parts so you’d want to have the roller height and seat distance adjusted right.
Once you’re in position, place your hands on your chest or behind your head.
Slowly lower your torso backward until you’re at least parallel to the floor.
Return to the starting position with a slow and controlled motion.
Mod: You could make the exercise harder by adding resistance to the mix. Hold a dumbbell or a weight plate in front of your chest and perform the exercise to failure.
Do you use any of these forgotten exercises in your workout schedules? Let us know in the comments below. Also, be sure to follow Generation Iron on Facebook and Twitter.
4 Tips On How To Handle ‘Two-A-Days’ To Maximize Your Gains
Two a-days are a practice reserved for those with luxuries of time and strength of spirit.
In this age of increasing amateur fitness, more and more gym-goers are finding excuses to fit workouts in over 7 times a week. Here are some tips to help manage the grueling but rewarding practice of two- a days.
1. Recovery Is King
Of course this always applies, but extreme attention must be payed when doing two a-days. If one is not getting enough sleep or calories, two workouts a day will start to become a detriment rather than a boost. Also, sitting at a desk for 8 hours in between workouts is a recipe for a stiff inhibited body- vulnerable to injury. Extra care must be taken both during off time, and during warm ups/ cool downs to make sure the body is supple and ready to work.
2. Diversify Workouts
Two a-days are not meant to be just an acceleration of an average workout program. Doing a program twice as fast as intended usually means you’re not working hard enough, or the program sucks. Two a-days are beneficial for the individual looking to attack the body in multiple ways.
Cardio workouts are excellent pairings on heavy bodybuilding days, can be done with a variety of machines, and can be anaerobic or aerobic in focus. As far as weightlifting, hitting the same movements multiple times a week can be beneficial, but the law of diminishing returns always looms large.
Make sure you have multiple ways to hit each body part, and that resistance types, set, and rep ranges are altered to constantly provide a new stimulus while allowing for recovery.
3. Have A Goal
Often, the biggest danger of doing two-a-days is becoming confused in routine- making up workouts on the way to the gym, altering workouts senselessly while at the gym, etc. It’s easy to be swept up in the feeling of ‘the grind,’ doing a ton of work without actually having a specific intention behind any of it.
Write down exactly what you want to accomplish and plan around that, or at least use it to orient yourself every day, so that the work, which often becomes monotonous, does not become mindless. Putting in twice the work and not seeing results because the work had no clear purpose can be a damaging psychological blow.
4. Make sure you have the drive.
From my own experience in sports training, often doing two-a-days becomes half-assing two workouts instead of really pushing through one. When one knows that they will have to work out later in the day, it’s easy to take the first workout lightly. This is a nasty habit. Both workouts don’t need to be balls to the wall, but they need to be complete workouts. Don’t delude you’re doing twice the work if you’re really just taking twice the time every day.
How do you prepare for two-a-days?
Let us know in the comments below. Also, be sure to follow Generation Iron on Facebook, Twitter, and Instagram.

Powerful Chest Building Exercises
The Key To Chest Developing
Chest development is so often high on the priority list for many bodybuilders, powerlifters and gym regulars. There are a number of exercises that we can perform to place significant demand on the muscles of the chest and increase muscular size and strength. In order to develop the chest to its full potential, we must think about incorporating a number of chest strengthening exercises which place an adequate tensity on all muscles of the chest.
The pectorals are the muscle group of the chest which consists of 4 individual muscles that drive and control movement around the shoulder. The two major pectoral muscles are the pectoralis major and the pectoralis minor. The pec major muscle originates from the sternum (front of the ribcage) and clavicle (collarbone) and inserts directly on the humerus of the upper arm. The role of the pec major is to cause flexion, extension and rotation of the humerus (1). The pec minor, meanwhile, lies beneath the pec major, originates from the ribs and inserts on the scapula (shoulder blade). The pec minors role is different from it’s bigger brother as it works to stabilize the scapula.
There are two small muscles of the pecs which are often overlooked – the subclavius and the serratus anterior. As the name suggests, the subclavius can be found underneath the clavicle where it’s role is to depress or “pull” the clavicle down. The serratus anterior originates from the ribs and inserts on the scapula which allows it to pull the shoulder blade forward and around the side of the body.
If we are looking to add mass to the chest, the primary emphasis should be on exercises that challenge the pectoral major – considering it is the biggest muscle of the 4 and therefore has the greatest growth potential. With that being said, if we are looking for comprehensive chest development it’s important to select exercises which target the smaller pectoral muscles too.
The following exercises have been selected simply because they are supreme mass building exercises. However, a further reason for their inclusion is that they all effectively place a high demand on all 4 muscles of the pectorals and contribute to overall chest growth.
The Best Mass Building Chest Exercises
By reading through these 10 chest building exercises, you may quickly notice some similarities and trends. Many of the exercises do replicate the same or similar movement patterns. However, we will use different equipment or a change in the angle of application (i.e adding an incline) to effectively load the pectorals.
You will also find that the vast majority of the exercises are compound or “multi-joint” exercises. Since the goal is mass orientated, it would be appropriate to perform a number of compound lifts considering the substantial impact they have on the body (2). There are a couple of useful isolation or “single-joint” exercises listed, however, their purpose is to facilitate improvement with the compound exercises and iron out any weaknesses.
As stated, a wide range of equipment is utilized – machines, cables, dumbbells, barbells, and body weight. Each piece of equipment will provide a slightly different challenge and training stimulus for the pectorals.
1. Barbell Bench Press
The undisputed king of chest building exercises for a number of reasons. With free weight exercises, you will find that you can lift the heaviest loads when using the barbell, therefore, you can reasonably expect to lift a substantial weight with the barbell bench press. By lifting heavy, we increase the amount of mechanical load that the muscles are exposed to which will drive muscular hypertrophy (growth).
To execute the bench press, lie back on the bench and align your eyes with the barbell. Keeping feet flat on the floor, bring them under the hips to create a slight arch in the lower back. Grip the bar slightly wider than shoulder width to place maximal demand on the pecs. Having a narrower grip will involve the triceps more heavily, taking some demand away from the pecs. Drive hard through the heels and brace the core muscles before removing the bar from the rack and bringing it over the chest. Drop the bar down until it makes contact with the chest and then drive upward to return to the starting position. It is essential to ensure that the elbows are slightly down from the line of the shoulders throughout the duration of the movement. This is done to reduce any risk of shoulder impingement or injury.
If you are new to bench pressing, always start light and practice form first. As you become more competent you can gradually begin to increase the load lifted. Regardless of your experience in lifting, always prioritize safety when benching with the barbell. This means, setting up the rack appropriately to catch the bar in the case of failure or using a spotter to prevent becoming trapped under the bar.
2. Incline Barbell Bench Press
The flat bench press places the body in a position that is parallel with the floor. With the incline bench press, this angle is altered so that the body is placed at incline angle (typically anywhere between 15° and 50°. The purpose of this is to shift the demand to the upper portion of the pectoralis major however, be aware that if the angle is too steep, we will begin to involve the deltoids (shoulders) to a greater extent rather than the pecs (3). Therefore, it would be wise to keep the bench at a low angle in order to hit the upper chest most effectively.
The form for the incline press is identical to the flat press with the only difference between the two being the bench angle. However, don’t expect to bench the same kind of weight with the incline press as you do with the flat press. Because we are utilizing =the upper portion of the pec rather the entirety of the the muscle, you will find the incline press to be more challenging than a flat press.
The standard approach to “chest day”, is often to perform flat bench first before moving onto incline press later in the session. The problem with this approach is that you approach the incline press already in a fatigue state and therefore cannot lift as heavy as you could if you were fresh. With this in mind, I would recommend alternating the variation you start with on a regular basis so that you can perform at an optimal level for both exercises.
3. Dumbbell Bench Press
The dumbbell bench press is an excellent variation of the barbell version. While you will be capable of driving heavier loads with the barbell, there may come a time where you hit a plateau with your benching. At this point, it may be a good idea to switch to the dumbbell bench press which will provide a slightly different stimulus to the pectorals and recommence progress (4).
One of the biggest benefits to dumbbells is the fact that both sides have to work independently which challenges joint stability to large degree. As a result of this instability, a number of stabilizing muscles are recruited in order to control the movement. A further advantage with the dumbbell press is the fact that range of motion is increased. With the barbell press, as soon as the bar touches the chest you must drive back up – there is no physical way to drop any further. With the dumbbells, there is no restriction to stop you from dropping the weights down to the side of the body thus increasing the distance the weight travels and engaging the muscle to an even greater extent.
Finally, the dumbbell bench press may be a good option for beginners or those who are concerned about heavy barbell benching. With the dumbbell press, there is no concern about getting trapped under the bar or failing, as there is with the barbell variation. If you were to reach muscular failure with the dumbbells, you can simply drop them to the floor – no spotter or rack required.
4. Incline Dumbbell Press
As with the barbell press, the dumbbell press can also be completed on an incline bench. Feel free to play around with the angle of the bench which will allow you to target the muscle from a variety of angles and lead to a more comprehensive development.
One variation that can performed with dumbbells that cannot be before with barbells, is the usage of rotation. With a fixed bar, it is impossible to rotate through the shoulder, however, the individual dumbbells allow for a medial rotation of the humerus which causes considerable activation in the pectoralis major.
5. Incline Dumbbell Pullover
The dumbbell pullover is not only an impressive pec developer, but it actually activates a vast number of upper body muscles – including the lats and the delts. The intention with the pullover is to extend maximally through the shoulders, over the top of the head all while maintaining straight arms. This motion demands a great deal of stabilization, control and drive from the pectorals.
To complete the pullover, set a bench up with a slight incline, lie down, start with the dumbbell above the chest and gradually drop the dumbbell over the top of the head without bending at the elbows before returning to the starting position. Remember, this is a single-joint exercise which should be treated as accessory work and therefore be performed towards the end of your session.
6. Machine Chest Press
The primary benefit of using the chest press machine is the fact that the machine requires no stabilization work from the muscles. Because it is a machine, the handles only move in a fixed range, negating the need for muscular stabilization. This, in turn, removes demand from stabilizing musculature, places it all on the pecs and therefore may enhance hypertrophy. If you are looking to gain mass, it would be wise to complete sets on the machine chest press at the end of the session.
7. Machine Decline Press
The machine decline press is another machine based exercise that will hit the pecs from a different angle. The back support is slightly angled backward which places your upper body in a decline position. In the same way in which the incline targets the upper pecs, the decline will hit the lower portion of the pecs.
8. Machine Pec Deck
As with all machine-based exercise, the primary benefit of the pec deck is the fact that it will only follow one path removing the need for muscular stabilization. The machine starts with the handles out to the side of the body. Grasping the handles with straight arms, the pecs must powerfully contract and drive the arms together until they are approximately in line with the shoulders. Despite the different movement patterns, studies have suggested similar muscular activation of the pectorals with both the bench press and pec deck (5).
9. Incline Cable Fly
The incline cable fly is the next stage up from the pec deck machine. Simply, the chest fly is one of best single-joint exercises for isolating the muscles of the chest. The benefits of using cables for the fly is the fact that, unlike with free weights, the cable maintains tension on the pectorals throughout the entirety of the movement which will apply a large amount of stress to the muscle and enhance muscle growth.
10. Chest Dips
The only bodyweight exercise that makes the cut is the chest dip. This can be performed grounded or suspended; having the feet on the ground simplifies the exercise while holding the entire body of the floor presents a greater challenge. In order to target the chest, ensure you go with a wide grip as a narrow grip will place too much stress on the triceps rather than the pecs. The idea is to flex at the elbow and drop the body down towards the floor until the upper arm is parallel with floor. From there, the pecs and triceps must powerfully contract to drive the body back up to the starting position.
Final Word
Understandably, it will be challenging, if not impossible, to program in all 10 exercises into your training. Instead, adopt a small number of these exercises, integrate them into your strength program and be consistent with your training to bring about significant changes in chest size and strength.
For more news and updates, follow Generation Iron on Facebook, Twitter, and Instagram.
References:
1- Solari, Francesca; Burns, Bracken (2019), “Anatomy, Thorax, Pectoralis Major Major”, StatPearls, StatPearls Publishing, PMID 30252247,
2-Paoli, Antonio; Gentil, Paulo; Moro, Tatiana; Marcolin, Giuseppe; Bianco, Antonino (December 22, 2017). “Resistance Training with Single vs. Multi-joint Exercises at Equal Total Load Volume: Effects on Body Composition, Cardiorespiratory Fitness, and Muscle Strength”. Frontiers in Physiology. 8. doi:10.3389/fphys.2017.01105. ISSN 1664-042X. PMC PMCPMC5744434. PMID 29312007.
3-Travi, Alexandre. “Effects of Variations of the Bench Press Exercise on the EMG Activity of Five Shoulder Muscles”.
4-Welsch, Elizabeth A.; Bird, Michael; Mayhew, Jerry L. (2005-5). “Electromyographic activity of the pectoralis major and anterior deltoid muscles during three upper-body lifts”. Journal of Strength and Conditioning Research. 19 (2): 449–452. doi:10.1519/14513.1. ISSN 1064-8011. PMID 15903389.
5-Stastny, Petr; Gołaś, Artur; Blazek, Dusan; Maszczyk, Adam; Wilk, Michał; Pietraszewski, Przemysław; Petr, Miroslav; Uhlir, Petr; Zając, Adam (February 7, 2017). “A systematic review of surface electromyography analyses of the bench press movement task”. PLoS ONE. 12 (2). doi:10.1371/journal.pone.0171632. ISSN 1932-6203. PMC PMCPMC5295722. PMID 28170449.
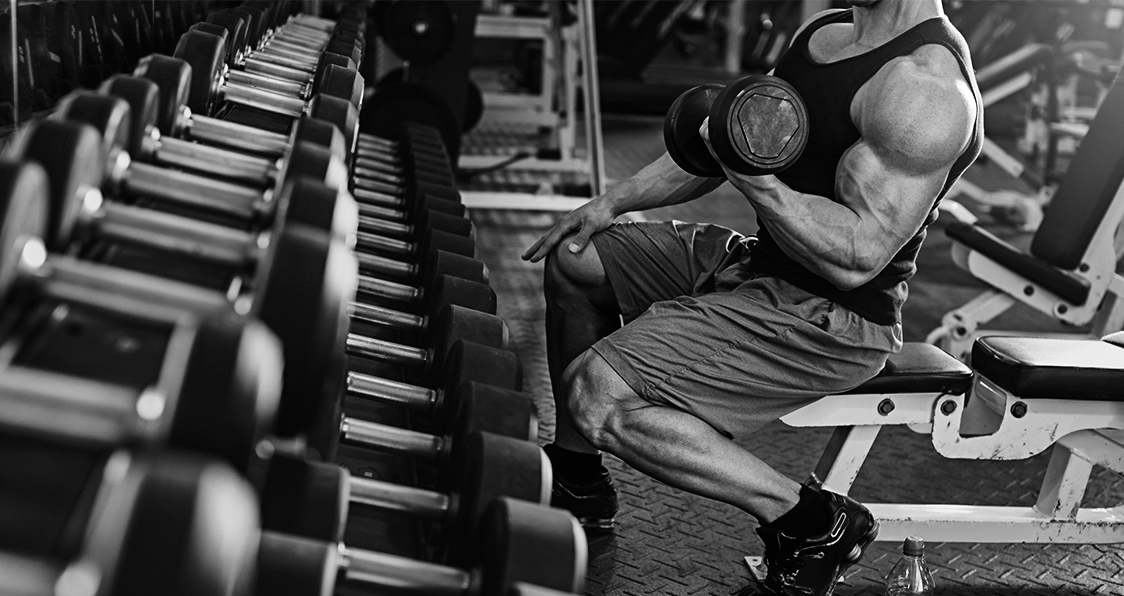
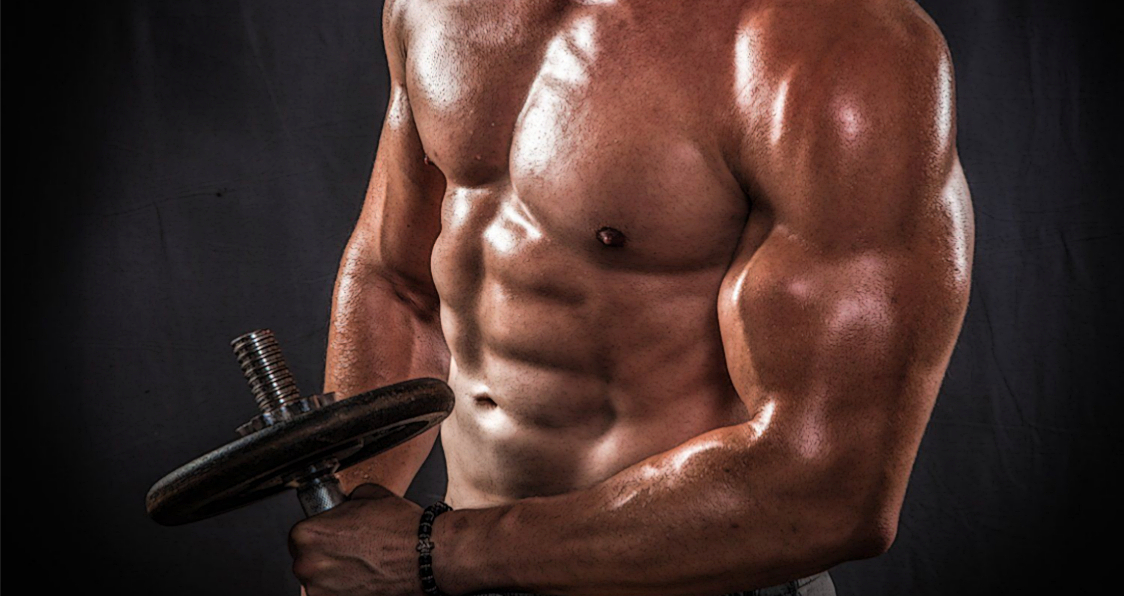
4 Bicep Curl Variations For A Serious Pump
Blast your biceps with these awesome curl variations.
Ask most guys who are serious about their fitness goals. When they think about being in great shape – more than likely the image they have in their heads is of a ripped and striated upper body. It’s what gives a bodybuilder that superhero appearance that so many bodybuilders covet. The building up of the chest, back, and abs are all integral to the process of having a well formed upper body. But the whole picture wouldn’t be complete with some well defined arms.
No matter what stage of the game you’re in there’s no way that an avid bodybuilder wouldn’t want some mountainous biceps to bring together their over all look. If you’re looking to make some major headway in building up your arms then check out these awesome variations for your biceps.
Incline Dumbbell Curl
This exercise is a great variation on your usual bicep curl. By using a seated bench and inclining the seat to just above the 45 degree angle you’ll ensure that you’ll give your arm full range of motion. While performing these be sure to twist your wrist as you get to the top of the curl and within a few reps you’ll be guaranteed to get a great pump. But remember, this exercise is all about form and if your technique sucks then you can forget about reaping the benefits of this great exercise.
21s
This variation is a high rep alternative that is sure to get your biceps burning. The exercise requires a manageable amount of weight in order to complete the 21 reps in one set. Too heavy and you won’t make it through the exercise. Too light and you won’t even feel anything. The first variation starts with your arms fully extended with a barbell or EZ bar in your grips. Curl the bar right up to your stomach then lower it slowly for 7 reps. Then bring the bar up to chest level and curl up to your chin for 7. Lastly, start from the bottom and curl up to your chin for full range of motions for the remaining 7 reps.
Spider Curl
For this variation you’ll need to have a preacher bench to perform the action. Where you would normally be in a seated position at the preacher bench, this exercise requires you to be standing when performing the motion. With the preacher pads right under your arm pits, grab a EZ bar, adjust to a narrow grip and perform the curl. This exercise is great for building up the short head muscles of the biceps and can add some great definition.
Standing Cable Curl
This exercise is a great finisher for your workout. The cable curl can be performed like the standard barbell or dumbbell curl, but it does allow for some variations that can be great for stimulating both the long and short head muscles of the biceps. You can move the shoulders forward to attack the short head muscles or lean backwards to work the long head muscles. You can choose to do a standard 10-12 reps with the movement or work to failure to really thrash the muscles.
What do you think about these bicep variations? Let us know in the comments below and be sure to follow Generation Iron Facebook and Twitter.
Want Major Muscle Development? Lift Fast!
Put some more speed into your lifts.
We’re always trying to find new ways to build muscle. It’s the number one reason that we hit the gym in the first place. Switching up your routine every now and then can really help your muscle building endeavors in more ways than one. Firstly, it will keep you from getting bored with your routine.
Training can become so mundane that following the same program week in and week out can prove pretty tedious on the road to gains. But most of all, it helps to avoid hitting the much feared plateau, giving you the opportunity to make your workout more challenging. Lifting speed is one method that has been proven to help and can make a big difference in your training.
When most people talk about muscle building, they’ll tell you that the key to making some major gains is to perform your lifts slowly so you can give your muscles a steady burn. While that is true, it’s not the only method that can be used to stimulate muscle growth. There have been studies that suggest lifting at faster speed can prove to give you even more gains than lifting slow. But how exactly can you benefit but performing your lifts faster? Let’s take a look.
Develop Strength (Movement Feels Lighter, You Can Use More Weight)
Lifting fast can be great for building your strength. While lifting moderate weight and lifting faster you’ll notice that the task of lifting the weight becomes easier. This is because of the momentum utilized by trying to lift faster. That same momentum, some will call cheating, will help you to lift heavier weight which in turn translate to more muscle and more strength to perform the movement. Do it enough times and eventually you’ll notice some improvements in your one rep max.
Develop Power (The Ability to Accelerate is Needed in All Sports)
Often confused with strength, the development of power has to do with two things. Power is a combination of strength and speed that allows for explosive movements. By lifting faster you improve your ability to explode into your lift. Your core strength will improve and it will translate into strength gain as well. Strength and power work in tandem together, the muscle strength and endurance allows you to last while the power allows you to push weight with more ease.
Work More Muscle Fibers (If You’re After Muscle Development: Lift Fast!)
This is perhaps the number one reason why you should be lifting fast. Faster movements activate more muscle fibers which in turn translates to greater gains. The explosive power and muscle strength from lifting work together to utilize an increased number of muscle fibers due to multiple muscle groups having to work together all at once.
Putting it simply, the explosive movement of lifting faster will help develop you fast twitch muscles which translate to a greater development of the entire muscle group that is being attacked. That means greater gains and greater muscle development.
What’s your views on fast lifting? Let us know in the comments below and be sure to follow Generation Iron on Facebook and Twitter.

The Romanian Deadlift: Muscles Involved, Benefits, Variations, Tips, and Exercise Steps
These tips and insights will make you a Romanian Deadlift master!
The Romanian deadlift (RDL) is at first glance just a conventional deadlift with a few small differences. Well, it is but these minor changes are significant enough that the exercise is more popular than ever.
But, it’s also effective for building a phenomenal physique and lots of full-body strength too…
Now, the Romanian deadlift is a functional movement which will carry over to athletic performance as well, so the benefits reach far beyond just aesthetics and power. But being a perfect posterior chain exercise, the RDL is a do-it-all movement.
So, we want you to get the best out of your workouts and that means familiarizing yourself with the Romanian Deadlift so that you can maximize your results.
Here’s some great important information about the Romanian Deadlift that we think you can benefit from. But first, we’ll start with how the RDL got its actual name…
RDL Origin
The Romanian deadlift admittedly has a name that creates a sense of curiosity about its origins. So, to answer the question… the RDL was named after a very accomplished Romanian weightlifter named Nicolae “Nicu” Vlad.
Apparently, a few American weightlifters spotted Vlad doing his version of the “deadlift” and named the lift after him since he was from Romania.
But, the RDL is technically not a deadlift since it not lifted off the ground, which makes the name a bit confusing.
Muscles Involved
Like previously mentioned, the RDL works the entire posterior chain (Backside of the body) of muscles. But there are also muscles which receive a lot of stimulation due to their assistance in the exercise.
A study showed hamstring activity to be very high during the RDL and this is a main target muscle. (1)
But, overall the rear muscles are worked pretty equally.
The muscles involved include:
Back (Rhomboids, Latissimus Dorsi, Trapezius and Erector Spinae)
Legs (Quadriceps, Hamstrings, and calves)
Gluteus Maximus
Core (Abdominals, Obliques)
Hip flexors
Biceps
Forearms
Benefits
There are numerous benefits to doing the Romanian deadlift.
From muscle and strength building to functionality and overall performance… the RDL is an excellent movement.
If you play sports, you need a strong posterior chain plus hip extension/flexion for pretty much all athletic movements (Jumping, running, bending, etc). But, fitness competitors and even people rehabbing from injury can benefit from the RDL. (2)
Now, another benefit is that you can learn hip flexion and extension independent of spine flexion. (3)
Variations
The beauty of weight training is that there is something for everyone. Some people may not have the mobility to train with barbells and so dumbbells can offer a great alternative. But, the Smith machine and even a trap bar can be very beneficial as an effective training method.
Here are the popular variations:
Dumbbell Romanian deadlift
Single-leg Romanian deadlift
Smith machine Romanian Deadlift
Trap bar Romanian deadlift
All of these variations have their own unique benefits.
Dumbbells – The dumbbell deadlift is a very effective variation for the RDL because it develops balance, stabilization, a freer range of motion, and motor control. (4)
Single-leg deadlift – This variation is ideal for unilateral (Affecting one side) development and being able to isolate each muscle is great for several reasons… (5)
Unilateral benefits:
Correct muscle imbalances
Increase core strength
Improve Balance
Rehabilitation
Smith machine deadlift – This variation is great for people who don’t quite have good balance or who prefer to only have to focus on moving the weight. There’s not much stabilization required and you can safely use heavy weights too.
Trap bar deadlift – The trap bar deadlift is very beneficial because it lessens the stress on your spine by allowing you to pull closer to your center of gravity and allows you to move through a more natural range of movement. (6, 7)
But, the grip placement is also different since it’s more like when training with dumbbells.
Training Tips
Since the Romanian deadlift varies in certain aspects from the conventional deadlift, it’s important to know how to execute the movement.
So, here are some tips for your training days to ensure you get the results you’re looking for…
Form
Keep your knees slightly bent during the exercise and your back should be straight while slightly arched. Then, keep your shoulders back and down.
You want to keep the weight as close to your body as possible and positioning yourself correctly will ensure this.
The movement
You can start the RDL with the bar on the ground or on a power rack. But make sure the bar is set high on the rack so you can start closer to the top of the movement.
Now, the deadlift isn’t technically a “deadlift,” which implies you’re pulling the bar from off of the ground. And the movement involves no contact with the ground except for the initial lift-off.
On the concentric (Positive) phase of the movement, you want to push upward through your heels and midfoot. But then you want to thrust your hips forward halfway through the movement to complete the lift in an erect position.
The hips are doing a lot in the RDL and even more so than with conventional DL where the quads are more heavily involved.
Range of motion
This is where the Romanian deadlift really differs from the Standard deadlift.
Instead of lowering the bar all the way down until it touches the floor, you’ll lower the bar to about mid-calf level with the RDL. This keeps constant tension on the posterior chain of muscles (Especially the hamstrings and glutes).
Then, you’ll come all of the way up until you’re erect as you would with a standard deadlift.
Sets/Reps
The Romanian deadlift is not much different than a conventional deadlift training structure. However, the RDL is not quite as taxing on the body, and therefore you can generally do a little more.
And of course, sets/reps schemes vary based on training experience. But, warming up and doing a pyramid up in weight is recommended to get the joints and nervous system conditioned for more intense sets with heavier weights.
Beginner – If you’re a beginner, it’s best to do about 3 sets with good form and light to moderate weight. This will help you stay injury-free and develop the best form possible. Reps should stay at around 10-15 until more advanced.
Intermediate – If you’re an intermediate lifter, go with 3-4 sets and train with more moderate to moderate/heavy resistance loads.
Intermediate lifters can train heavier and with lower rep ranges of 8-10 but it’s best to mix it up sometimes with higher reps.
Advanced – If you’re more advanced, then you likely know your body by now and can get away with more sets and more volume. So, 4 sets with heavier resistance loads should be completely appropriate for sufficient stimulus.
Advanced lifters have an advantage when it comes to training because they know their bodies very well. So, anywhere from 6 reps and up is perfectly fine, in combination in varying rep ranges.
Exercise Steps
If you want to experience all that the Romanian deadlift has to offer, then you’re going to need to know how to do it effectively.
It’s not like a regular deadlift regarding the focus of the movement and like mentioned before, the differences are notable.
So, here’s a quick step by step guide…
Start with the barbell on the floor or elevated on a power rack. If on a rack, start in a higher position at about mid-thigh level or even slightly higher.
Grip the bar at a shoulder-width or slightly wider position.
Arch your back and slightly bend your knees.
If starting from the floor, stick your butt out and keep your upper legs slightly above parallel to the floor. Now, push through your heels and midfoot while extending the hips until you’re standing straight.
If starting from the rack, bend your knees slightly and extend your hips upward to lift the weight off the bars until you’re standing straight.
Slowly lower the bar to mid-calf level by focusing on hip flexion while keeping your back arched.
Extend through your hips while keeping the pressure of the weight in your heels until you’re standing straight. Your shoulders should be down and back.
Then, you can repeat this movement as desired for repetitions.
Sample Workout Routine:
Warm up with 2 sets of progressive RDL’s at about 30 and 60% of your one-rep max before doing your working sets.
Romanian deadlift
3 sets x 10-12 reps
(Rest 60 seconds in between sets)
Lying hamstring curls
2 x 10-12
(Rest 30-45 seconds in between sets)
Alternating lunges
3 sets x 10-12 reps
(Rest 45 seconds in between sets)
Leg press calf raises
3 sets x 15 reps
(Rest 30 seconds in between sets)
Wrapping Up
The Romanian deadlift is a must for overall posterior chain development. It’s also an excellent variation and/or alternative to the conventional deadlift depending on your training goals.
But, it’s important to learn and develop proper technique while implementing progressive resistance to experience maximum results.
Now, since there are several variations, feel free to experiment to find what works best for you. There’s no one best method of training when doing the Romanian deadlift as long as the movement stays the same.
…We hoped you enjoyed this useful information about the much popular Romanian Deadlift and now you have everything you need to make some serious gains!
For more news and updates, follow Generation Iron on Facebook, Twitter, and Instagram.
References:
1– McAllister, Matt J.; Hammond, Kelley G.; Schilling, Brian K.; Ferreria, Lucas C.; Reed, Jacob P.; Weiss, Lawrence W. (2014-6). Muscle activation during various hamstring exercises. Journal of Strength and Conditioning Research. 28 (6): 1573–1580. doi:10.1519/JSC.0000000000000302. ISSN 1533-4287. PMID 24149748.
2– Deane, Russell S.; Chow, John W.; Tillman, Mark D.; Fournier, Kim A. (2005-8). Effects of hip flexor training on sprint, shuttle run, and vertical jump performance. Journal of Strength and Conditioning Research. 19 (3): 615–621. doi:10.1519/14974.1. ISSN 1064-8011. PMID 16095411
3–ACE – ProSource™: January 2016 – ACE Technique Series: Romanian Deadlift.
4–Free weights or machines? Choose what’s right for you
5–The Benefits of Unilateral Training
6–UCSB Science Line. scienceline.ucsb.edu.
7–Biomechanics of Safe Lifting. ergo.human.cornell.edu.
Header image courtesy of Envato Elements
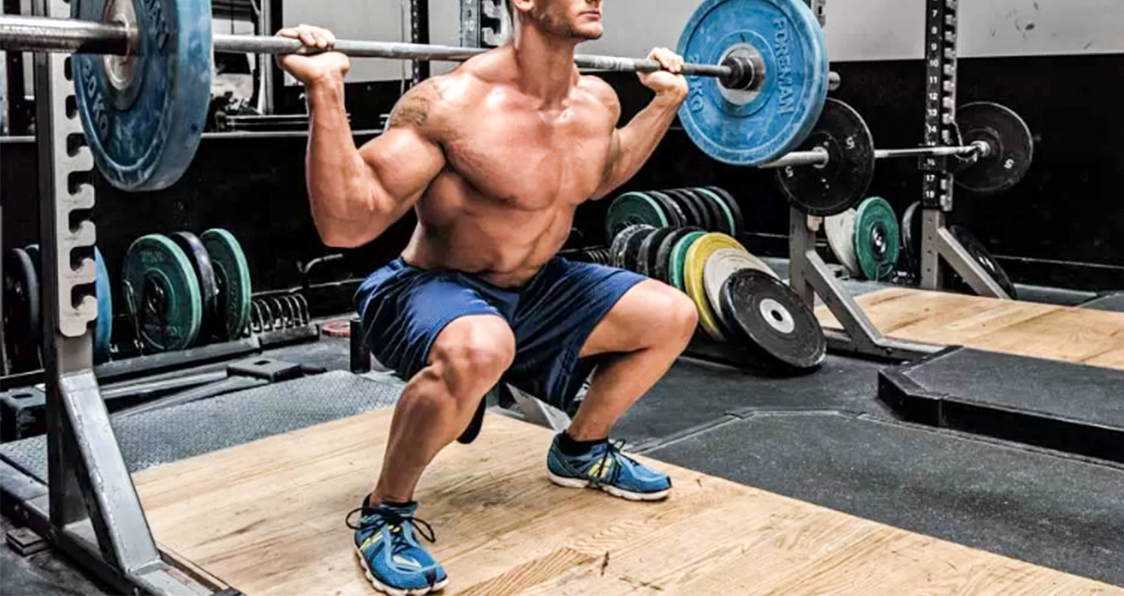
This Is How Deep You Should Squat
Which one gives you more gains? The Deep squat or regular parallel squat?
When it comes to leg training there seems to be a constant emphasis on knee pain and protecting the joint from damage. And why the hell not? The knees are perhaps the most important body parts to maintain for any athlete, serious or otherwise. Knee health is paramount for peak performance.
Speaking of which, if you want to wreck shit in the gym and have monster wheels – then what’s the one workout you’d look to? If you said anything but the squat, you deserve a punch right in the jaw. The squat is the number one workout for a reason and it has been said before. But there’s another underlying debate that many squat experts wonder about. Which is better, deep squatting or regular squats?
Deep Squats Vs Standard Squats
If you ask most people about squats and knee health they’d tell you that performing the movement too deep will damage the front knee joint, but it seems like that’s a misconceived notion. Studies have proven that a deeper squat will prove to provide stronger glutes, hamstrings, calves, and quads.
But that’s not all. It seems like deep squats also provide increased knee stability. The two major ligaments in the knee, the ACL and PCL, are less strained the more the knees are bent. What’s that mean for the deep squat? It seems that the deeper the squat the less pressure is put on the knees and ligaments.
So does that mean you shouldn’t bother with the regular parallel squat? Not at all. If you’re someone with chronic knee pain then it would probably be beneficial to stick to the parallel squat. Despite the fact that deep squats may prove beneficial to your knee health in the long run, it can be risky if you’re not used to performing the action.
Parallel squats are still great for your legs and knees when performed correctly, so truly you can’t go wrong. By having form and control while performing either squat, you’re sure to see some awesome results.
No matter which squat you prefer it’s always best to keep the basics in mind. If you want to come out the other end with some strong and well defined legs then you better focus on form. Squatting uses multiple muscle groups, not only in your legs but your core, back, and shoulders as well.
If you want to jump into deep squats, then avoid the heavy weight in the beginning until your form is sufficient. Once that’s out of the way then pack on the weight and watch your legs grow. And of course, don’t ignore knee pain – once you feel something isn’t right, stop putting pressure on that knee and go get it checked out.
So which type of squats do you use to get your wheels in fighting form? Let us know in the comments below and be sure to follow us on Facebook and Twitter.