 All Posts By Muscle Insider
Board Certified PHD
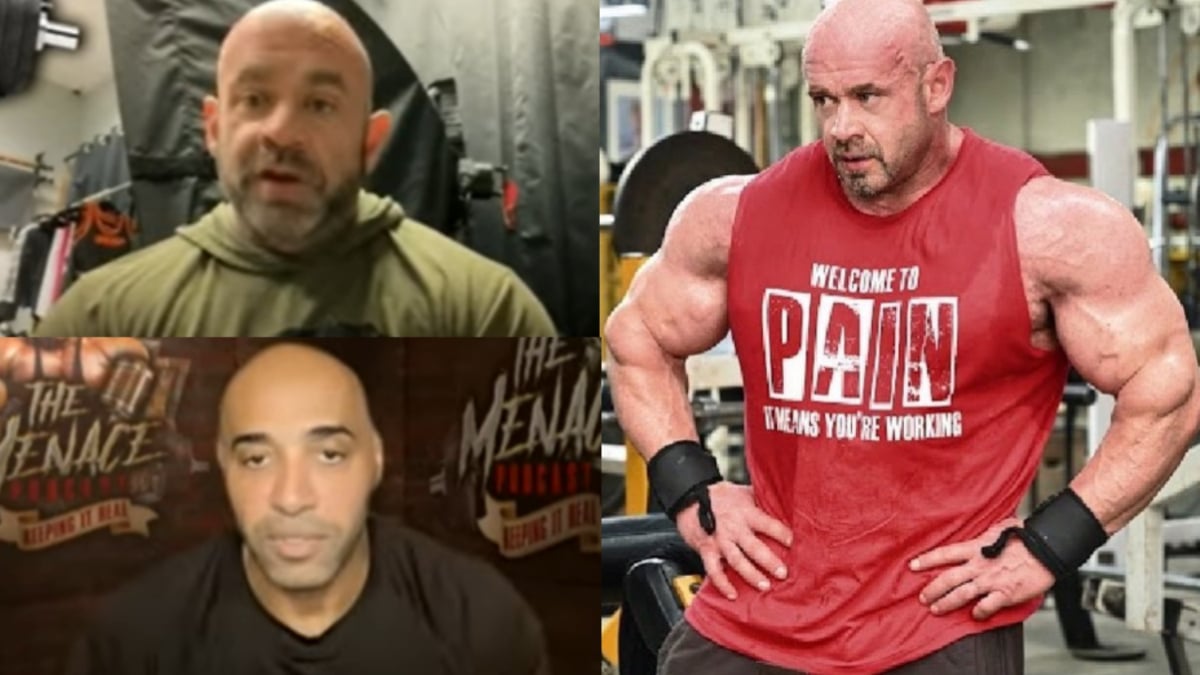
Branch Warren Talks Competing Natural as a Teenager and Achieving Grainy Muscle Maturity
Bodybuilding veteran Branch Warren touts an impressive résumé, having last competed in 2015. He recently joined Dennis James on The Menace Podcast to discuss a host of topics, like how he achieved grainy conditioning, what it’s like training with Johnnie Jackson, and competing naturally as a teenager.
During the 2000s, Warren emerged as Men’s Open threat in the IFBB Pro League. He asserted himself among the best in the world when he won two consecutive Arnold Classic contests in 2011 and 2012. Additionally, Warren narrowly lost to Jay Cutler in 2009 at Mr. Olympia. Looking back on the close call, Warren admitted the outcome was difficult to accept because he placed ahead of Dexter Jackson, who dethroned Cutler the previous year.
Widely respected for his work ethic and grainy muscle detail, Warren and his teammate Johnnie Jackson always pushed the limits as active competitors. While some have suggested their training methods were too extreme, Warren stands behind the sacrifices that guided him through a successful career.
At 48 years old, Warren remains in spectacular shape, especially his lower body. In retirement, Warren occasionally shares training footage. Recently, fans were privy to a massive barbell back squat workout, and given his shape, some believe Branch Warren could do well at the upcoming 2023 Masters Olympia. However, Warren has publicly stated he’s stopped and won’t return to the sport.
Branch Warren Talks Training with Johnnie Jackson and How He Achieved Grainy Muscle Detail
According to Warren, bodybuilders usually don’t peak with muscle maturity until the mid-30s, late 30s, and sometimes in the 40s.
“I think the graininess just comes with – I think everybody – I was in my 20s when I did that first show and I think as a bodybuilder we don’t really mature until we’re in our mid-30s, late 30s when you mature and peak out- maybe even 40 for some people. As far as conditioning, I don’t think I can get fat. I mean seriously, I was always the lean kid. Even now.”
Warren credited genetics for staying lean and mentioned he wouldn’t become overweight even if he exclusively ate junk food.
“Right now, you could step on the Masters Olympia stage right now, I don’t even think you would have to diet,” said Dennis James.
“I don’t, dude, even if I started eating junk food every day, I don’t think I could get fat. That’s just my metabolism and the genetics. When you combine eating right with training and all that stuff, you get that look.”
In 2001, Warren and Johnnie Jackson began training together. Unlike today’s era of bodybuilders, Warren stressed that earning a pro card was once far more difficult than how the process unfolds today.
“I hooked up with Johnnie in 2001. Johnnie was out of the military. He got out of the military a few years earlier. We competed against each other several times as amateurs, he always beat me. We did the nationals, USA, the USA, for all our listeners just getting into bodybuilding, back then, it was really hard to turn pro. At the USA, they had like one pro card, so they’re might be 100 or 200 guys in the Open division, and in the different classes, they just gave out one pro card. You could win your class at the USA Championships and not go pro.”
“That’s how we learned. I mean, Ronnie didn’t have good form right, all these guys. I’m always in control of the weight and I never once, never once, did I tell people they need to train the way I train. If you can take something I do and incorporate it into your program, that’s a win for me. I do what works for me. I don’t ever criticize what somebody else does. You know, a 100 pounds is a 100 pounds. That’s the way I learned how to train. My thing was go to failure and get as much blood into the muscle as you can, rest and repeat.”
After sharing thousands of training sessions together, Branch said he could out-bench press Jackson but couldn’t come close to his training partner’s deadlift max records.
“I can out-bench him, but on max deadlift, he’d kill me man. I mean, he’d beat me by almost 100 pounds. He could pull, 38, 40, I think he got almost 850 in the gym one day. He’s a legitimate deadlifter. Squat, probably about the same,” Warren said. “Everyone talked about his legs, but he was doing the exact same workouts I did for 20 years. That motherfuc**r would get it, that just shows you genetics play a part man.”
“I don’t think he’s doing it,” said Branch Warren. “He’s still got all that muscle. Man, he could legitimately win that show if he gets ready for it. You know, I don’t think he is because his contest is the say day here in Texas; I think that’s kind of a dealbreaker for him.”
Warren Opens Up on Decision to Retire and Competing Naturally as Teenager
Warren kept it simple regarding his decision to retire, and mentioned he didn’t want to be ‘forced out.’.
“I think I know when to say when. What I didn’t want to do is hang around too long and get forced out, you know what I mean,” Branch Warren explained. “
In a trip down memory lane, Warren told Dennis James, Milos Sarcev, and Chris Cormier a story about trying to get steroids when he was 19 competing naturally. He shared that his coach disallowed anyone from talking to him about the substances until he was older.
“I was 21, 22, so, I tried to. I remember I’ll tell you a quick story, so I’m 19, and I’m getting ready for this show, and I’m like, I want to take stuff because everyone else is in the gym taking this stuff. So, Mark went, I asked Mark about it, he said, ‘You’re young man, you need to stay off that stuff, you’re not old enough yet.’ I’m like, ‘Fu** that.’ I started asking everybody to get something; he went and told everybody, I mean everybody, to not give me anything.”
In a recent Straight Outta the Lair podcast with Flex Lewis, Warren reflected on stepping away from the sport and wishes he could have called it a career with at least one Olympia title. Even though he never accomplished that goal, he was thankful to end his career with no major injuries.
Following a tenure of highs and lows, Branch Warren is a valued member of the bodybuilding community who continues to share training insight and knowledge with the newer generation of talent.
Watch the full video below, courtesy of the Muscle and Fitness YouTube channel:
Published: 17 April, 2023 | 11:42 AM EDT
Jeff Nippard Destroys A Killer Leg Day Workout
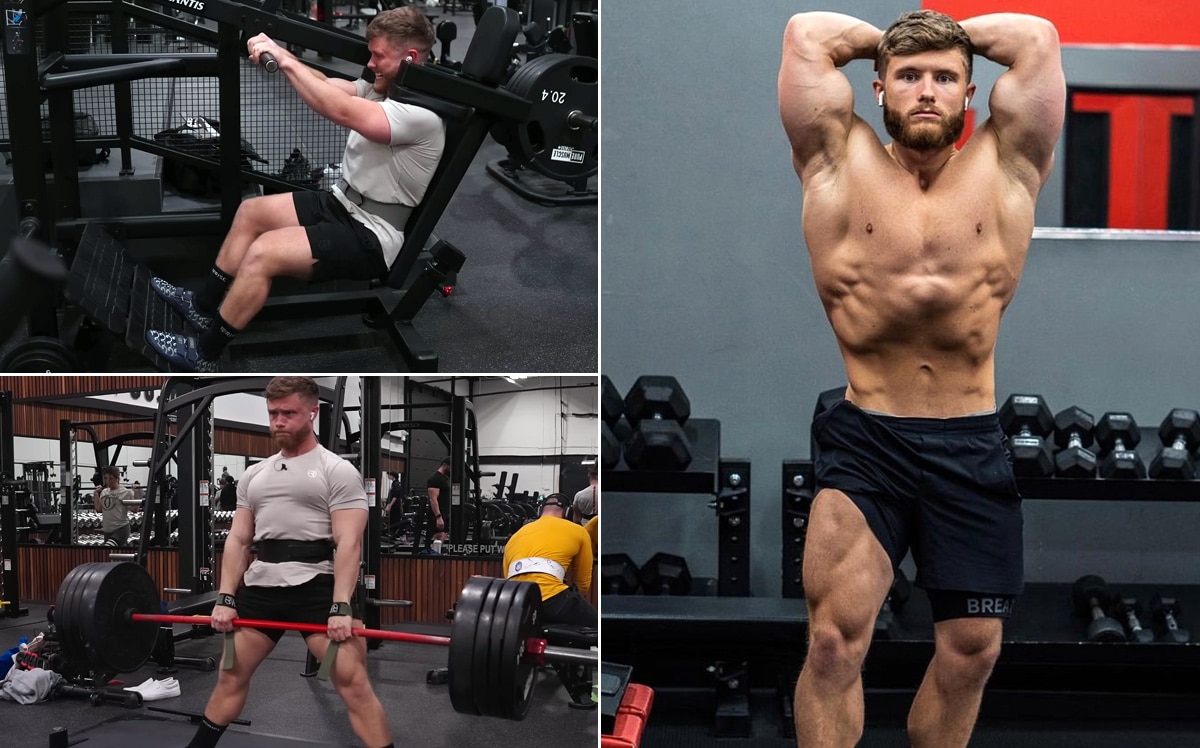
Fitness expert Jeff Nippard never ceases to amaze the fitness community with his science backed insights on training and nutrition. Recently, Nippard tackled a lower body training session and shared some insightful tips as he went along.
Jeff Nippard is a Canadian natural bodybuilder, powerlifter, fitness expert and personal trainer. He has carved a niche for himself in the YouTube fitness community with science backed content. Apart from years of training, Nippard’s knowledge comes from a bachelor’s degree in biochemistry.
Over the years, the Canadian has trained many natural bodybuilders and powerlifters. Nippard himself held the 2012 Mr. Junior Canada title and also had the Canadian national record for bench press attached to his name.
Nippard’s YouTube content revolves around sustainable and scientifically proven methods of training and diet. Over the last few months, he has shed light on topics like minimalist training principles and common nutrition mistakes. His six-part Push Pull Leg series based on minimalist training philosophy is also underway on his YouTube channel.
In his recent leg training session, Nippard trained with Layne Norton. He is a professional natural bodybuilder and a powerlifter who has led successful careers in both disciplines. He holds a bachelor’s degree in biochemistry and a PhD in Nutritional Sciences. As a result, the 38-year-old has also made significant contributions to the community with several publications. Norton guided Nippard to winning the Canadian National Gold Medal in 2012.
“He’s the first person who convinced me that you don’t actually need to eat clean to get shredded as long as you hit your macros,” Nippard stated.
Nippard attributes his knowledge of training and nutrition to Norton. So, let’s check out how the coach and student turned the clock back and got a good day’s work in.
Jeff Nippard goes through a science-based lower body training session
Warm-Up
Nippard and Nortan warmed themselves up with a few dynamic warm-up drills before jumping into the workout. They performed bird dogs and hip-Back opener for 5 reps per side and started the workout.
Exercise 1: Deadlifts
The duo took to the deadlifts next and worked their way up to one heavy top set of two reps (a heavy double). Nippard reiterated that one heavy set per week is enough to get most out of an exercise if you want to keep the volume low for injury prevention or if you don’t have a lot of time to spend in the gym.
“People confuse ‘what works’ with ‘optimal’. Is a single set per week ideal for strength? Probably not. However, for me it is much more important to be able to continuously and consistently be in the gym. If that means I should do a little bit less volume on the main lift so that I can stay healthy and stay in the gym, then that’s still better practically than what might be optimal in theory,” Dr. Layne Norton said.
Nippard and Lane performed a full warm-up pyramid to work their way up to the heavy top set. After performing the working set for two reps at 7 to 8 RPE, the duo moved on to the next exercise.
Exercise 2: Pendulum Squats
Nippard and Layne performed pendulum Squats as the second exercise of the lower body training session.
The pendulum Squats machine in Nippard’s gym offers great support to the lower back which is the reason it’s his favourite machine.
“And I find it offers a smoother movement path than a hack Squat. The counter balance is also behind you which I find makes it a little easier to get out of the hole and a little harder at the lockout. So that makes the strength curve feel very unique,” Nippard stated.
Additionally, the pendulum squat machine enables pushing close to failure safely which makes it a good hypertrophy exercise.
After a few warm-up sets, Nippard got a working set of 8 to 10 reps under his belt with an RPE of 9. Following this set, he moved on to the next exercise of the day.
Exercise 3: Glute-Hamstring Raises
This hamstring focused exercise followed the pendulum Squats. Nippard and Norton performed this movement on the glute hamstrings raise machine. It uses weight for assistance and not for resistance. Therefore, the less weight you use, the harder the movement gets.
The duo performed three sets of this movement for 8 to 10 reps and jumped into the next exercise.
Leg Extensions
Nippard and Layne Norton performed this quad isolation movement next to the Prime Fitness leg extensions machine. The machine has three plate horns and loading the plates on different weight horns emphasizes different aspects of the range of motion.
Loading the weight on the top horn emphasizes the stretch aspect while loading it on the middle horn spreads the load more evenly throughout the range of motion. However, using the bottom horn can help emphasize the contracted position at the top of the movement.
“If you think about where you are strongest in a leg extension, you are actually strongest at the beginning. So you’re strongest in the stretched position,” Norton said.
He added:
“Another point I like to make about leg extensions is you really want to get the leg Extensions so that the pad goes under the seat as far as possible. The further back this pad goes, the more stretch you get in the quads. There is pretty conclusive literature demonstrating that the stretched position is really critical for hypertrophy.”
Nippard and Norton performed three sets of leg extensions and focused more on the stretched position of the calves. They performed a few partial reps in the stretched position at the end of the set as an advanced intensity technique and took to the final exercise of the day.
Leg Press Toe Press
Jeff and Layne wrapped up the training session with this exercise to train the calves. They performed 3 sets of this exercise for 12 to 15 reps and called it a day in the gym.
Overall, the workout included:
Warm-up
Bird Dogs – 5 to 10 reps per side
Hip and Back Opener – 5 reps per side
Workout
Exercise 1: Deadlifts
First warm-up set – 4 to 5 reps with 45 percent of the weight you intend to use for the working set
Second warm-up set – 3 to 4 reps with 65 percent of the weight you intend to use for the working set
Third warm-up set – 1 to 2 reps with 85 percent of the weight you intend to use for the working set
Working set – 1 set of 2 reps (Heavy Double) @ RPE 7 to 8
Exercise 2: Pendulum Squats
Warm-up sets – 2 to 4 sets of 2 to 5 reps (gradually add more weight)
Working set – 1 set of 8 to 10 reps @ 8 to 10 RPE
Exercise 3: Glute-Hamstring Raises
3 sets of 8 to 10 reps
Exercise 4: Leg Extensions
3 sets of 10 to 12 reps
Exercise 5: Leg Press Toe Press
3 sets of 12 to 15 reps
Jeff Nippard’s YouTube content is a potent source of Pre-workout motivation and bodybuilding knowledge. Stay tuned with Fitness Volt for more such fitness content.
You can watch the full video here, courtesy of Jeff Nippard’s personal YouTube channel:
Published: 17 April, 2023 | 9:01 AM EDT

VOX Testing: Why Bodybuilders Must Be Tested Regularly
Many bodybuilders are increasingly getting obsessed with drinking breast milk. Yes, you read that right. What’s the first thing that comes to mind when you notice a grown man or woman taking breast milk meant for babies? Well, however, yuckish that mind sound, bodybuilders who have discovered its secret don’t care about naysayers. Supplemental breast milk comes with many fitness benefits only bodybuilders can explain.
But why human milk? Scientists and fitness experts have been scratching their heads to try and answer this. And although there isn’t sufficient data to support breast milk’s effectiveness in enhancing muscle growth, users have some positive results. In this article, we will try to find out the possible reasons bodybuilders have resorted to taking breast milk as a supplement.
What Science Says
It is important to note that breast milk is the most complex, nutrient-rich food for babies for all mammals. Babies derive many benefits from breast milk, including immune-boosting sugars and development nutrients. No wonder every bodybuilder wants a piece of this magical natural product to have the edge over their opponent. Breast milk has no side effects, unlike other synthetic products bodybuilders use as supplements.
Related Article:: Horse Chestnut and Other Supplements to Get Rid of Water Retention
The formula has been known to promote development in bodybuilders, just like it does babies. Bodybuilders will go to any length to build muscle and strength. There is a notion that bodybuilders are selective about the kinds of foods they take, and it is for the right reasons. It is not every meal you take that helps you to achieve your fitness goals. Importantly, bodybuilders must watch out for their diet lest they consume something that reaches the opposite of what they want as far as fitness is concerned.
Benefits of Supplemental Breast Milk to A Bodybuilder
There is a significant amount of protein in breast milk. It is one of the best sources of protein for athletes and bodybuilders. Bodybuilders take breast milk because it increases muscle growth, helps with recovery, and contains a lot of protein. Breast milk comprises between 50 and 60 percent water, 25 to 35 percent carbohydrates, and 10 to 15 percent protein.
It also contains fat, which is mainly in the form of triglycerides (which are a type of fat). It has plenty of vitamins and minerals that are important for bodybuilders. Breast milk also has immune-boosting properties that help fight bacteria and pathogens in the human body. While it is not as easy as a shake, breast milk can be stored in an airtight container in the refrigerator for up to 72 hours.
It is a good idea to store it if you are on vacation and need to keep fit. The B vitamin, niacin, is also in breast milk. It helps absorb other B vitamins in the body, and it helps fight off infections. The amount of protein in this milk is a significant part of what makes it a valuable source for bodybuilders. The amount of protein in breast milk is also essential to bodybuilders because they need a lot of protein in their diets.
Must Read:: What Are The Stages of Topical Steroids Withdrawal?
Preparing Supplemental Breast Milk At Home
If you’re going to prepare breast milk at home, then it is much easier than buying it from the store. To make a protein shake, mix 10-12 ounces (3/4 to 1 cup) of breast milk in one blender container with 15-20 ice cubes. Add 1/2 teaspoon of vanilla extract and 6-8 ounces of your favorite fruit juice (fruit or vegetable). Blend until smooth. You can also replace the fruit juice with water or soy milk, but you lose the nutritional benefits that come with breast milk.
Oprah Winfrey’s Take on Supplemental breast milk
Oprah Winfrey famously drinks a cup of breast milk daily, claiming it helps her sleep better and improves her skin. Some say that eating foods from animal sources such as meat, dairy, and eggs is bad for you because they contain cholesterol, saturated fats, and high omega-6 fatty acids. However, it is no secret that these products are, in fact, quite nutritious and healthy for the bodybuilder. When switching to a vegan diet to lose fat or enhance physical performance, athletes must carefully consider their intake of vitamins A, D, B12, and C.
Breast Milk Vs. Regular Supplements
Regular supplements are often extracted, purified, and concentrated on offering a high dosage of their key ingredient. The downside of this is that they don’t always provide the benefits associated with the original food. As an example, red wine contains antioxidants known to promote heart health. However, most red wine supplements are synthetic and have such a low concentration of these antioxidants that you need to drink about ten bottles for the same effect as one bottle of regular red wine.
When combining multiple supplements, it’s essential to consider that many of these substances have different effects (see the “When You Shouldn’t Take It” section below). Certain supplements may also interfere with each other. For example, some people find that they can exercise better when taking creatine along with the amino acid L-arginine. However, others find that this combination causes a headache. In general, it would be best not to accept these two supplements.
The Downside of Regular Supplements
Supplements are a great way to help bodybuilders reach their goals. However, there are some disadvantages to some supplements for bodybuilders. For example, there could be side effects from using these supplements. It is essential to research what the side effects might be before starting a supplement. It is not always necessary to use supplements to get the nutrients you need in your diet. Eating at least five servings of fruits and vegetables daily will get all the vitamins and minerals your body needs.
Some supplements may be necessary for bodybuilders, others could improve their performance, and others are just for fun. Some joint supplements for bodybuilders include creatine, protein powders and bars, glutamine, BCAA’s or leucine-enrichened proteins/whey products, multivitamins, and supplements for testosterone.
The main disadvantage of supplements is that they may contain harmful ingredients or too much of a particular nutrient. For example, creatine has been shown to cause liver damage in doses higher than the recommended daily allowance, so it is best to use it only when necessary. Other side effects could be allergic reactions or infections from bacteria found in supplements. Researching the potential side effects before taking any supplement is a good idea if you are going to use the supplement.
Breast Milk in The Black Market
Supplemental breast milk is sold for $1.50 per ounce, a popular item on the black market. Breast milk in the black market is a relatively new phenomenon. It started with the rise of the internet and social media, which made it easier for mothers to connect.
It’s a booming business that has been fueled by increasing demand from parents who are unable to breastfeed their children or by those who want to try out breastfeeding before they commit to it .” Due to the high demand, breast milk is now being sold in online marketplaces and real-life stores,” says Caroline Dyas, Senior Lecturer of Sociology at Goldsmiths College. “From a sociological perspective, there are many reasons why people buy or sell breast milk.”Breastfeeding rates worldwide have been steadily increasing as more mothers choose not to use formula because they believe it has adverse health effects.
Formula companies have responded by creating products that mimic the effects of breast milk, and as a result, demand for human milk has increased. The trade-in breast milk is also driven by the rise of “natural parenting” – a movement emphasizing breastfeeding over formula feeding. These mothers believe professional support and resources are insufficient to enable parents to breastfeed their children exclusively. “Women who want to get into the business often have difficulty finding lactating donors,” explains Dyas. “As a result, it’s straightforward for these.
Is Breast Milk Legal?
In the United States, buying or selling human breast milk is illegal, but providing breast milk for free is not unlawful. Women can be paid by companies that make formulas and baby food in exchange for their donated breast milk. Organizations like the Human Milk Banking Association of North America and Mothers’ Milk Bank of North Dakota have helped establish banks around the US where women can donate their excess breast milk without penalty.Breast milk is often donated for research in Japan because it is considered a superfood. To prevent breast milk from being in short supply, many women are attempting to donate their milk. This has created a market for human milk and its derivatives, such as infant formula, developed or improved over time by companies such as Nestle and Mead Johnson.
Overall
Breast milk is an excellent source of nutrients and is much better for bodybuilders than cow’s milk. The advantages of breast milk to bodybuilders are many. Breast milk contains the perfect balance of protein, fat, and carbohydrates, making it an excellent post-workout drink. It also has all the essential vitamins and minerals that your body needs to recover from a strenuous workout.
Supplemental breast milk is not just for kids. The protein in breast milk can help build muscles in adults too. Although there are other ways to get protein, it’s still a good option for lactose-intolerant bodybuilders or those who don’t like meat products. It is not uncommon for people to have intestinal issues when they eat meat. They may also think it’s easier to avoid meat altogether and give their bodies a break from saturated fat. With this in mind, breast milk has a much lower impact on the body and often includes less saturated fat than meats.
A theory exists that consuming these foods may allow the body to produce more human growth hormone (HGH), thereby increasing muscle and lean body mass in the short term. There is no scientific evidence to support this claim, however.
Also Read:: Are HMB Supplements Better than Steroids? – Research Review
Incline Hex Press Exercise Guide: How To, Benefits, Muscles Worked, and Variations
Nothing says ‘ripped’ better than a striated chest. The problem is that most folks limit their chest workouts to the bench press, dumbbell press, and machine press, and although these exercises are great for building chest size and strength, they aren’t the best to improve your inner pecs.
The dumbbell fly is the most popular free-weight exercise for improving inner chest conditioning. However, it is far from perfect. Most exercisers can only lift half on this exercise of what they can on the dumbbell press. Try to push the envelope on the dumbbell fly, and you’ll feel more tension in your shoulder rotator cuffs and biceps than your pecs.
The dumbbell hex press is the perfect fix to this problem. This exercise requires you to press two dumbbells into each other while holding them over your chest using a neutral (palms facing each other) grip. Since this exercise requires you to squeeze two dumbbells together, it is also known as the “squeeze press.”
The upper chest is a lagging muscle group for most people. Even when lifters succeed in building half-decent upper pecs, their upper inner chest definition is non-existent. The incline hex press fixes this!
The incline hex press promotes a better mind-muscle connection with your pecs as you’ll actively press the dumbbells into each other, leading to a sick muscle pump. The blood carries oxygen and nutrients to the working muscles, boosting hypertrophy.
In this article, we go over everything you need to know about the incline hex press, including its benefits, most common mistakes, muscles worked, and the best variations and alternatives for adding variety to your workouts.
What is an Incline Hex Press?
The incline hex press is a dumbbell press variation that focuses on the upper-inner pecs, which is an underdeveloped muscle group for a majority of lifters. You perform this lift on an incline bench set at a 45-degree angle with the floor.
The hex press got its name from the hexagonal dumbbells that are used to perform this exercise. You could also perform the incline hex press with round plate dumbbells; it can, however, increase your triceps engagement as you’ll constantly have to balance the weights throughout the range of motion.
Since the hexagonal dumbbells have flat sides, they stay in place while you’re squeezing the two dumbbells together. Pressing two round dumbbells into each other can result in the dumbbells slipping.
The incline squeeze press might look finicky, but it will set your inner pecs on fire. Unlike the conventional dumbbell press exercises that limit the pectoral muscle contraction to the top of the movement, the incline hex press keeps your muscles under constant tension throughout the range of motion.
Muscles Worked During Incline Hex Press
The incline hex press works the following muscles:
Chest
The incline hex press primarily works your pectoral muscles. The exercise setup and your hand placement will emphasize your upper-inner chest. You must follow a full range of motion for optimal pec stimulation.
Shoulders
Incline chest press exercises result in anterior deltoid engagement. If you feel greater tension in your front delts than your upper-inner pecs, lower the incline of the bench and slow down your rep tempo.
Triceps
All pressing movements involve the triceps; the incline hex press is no different. Avoid locking out your elbows at the top of the movement to limit your triceps engagement.
Benefits of Incline Hex Press
Adding the incline hex press to your training regimen entails the following benefits:
Build Muscle Mass and Strength
Doing the incline hex press regularly will help develop your upper chest and improve your physique aesthetics. Research has shown that performing 3-4 sets and 8-12 reps of an exercise using an appropriate weight is optimal for inducing hypertrophy. [1]
Keeps the Chest Under Constant Contraction
The incline hex press requires squeezing the dumbbells together throughout the range of motion. Actively pressing the dumbbells together keeps your inner pectoral muscles engaged for the duration of the exercise, resulting in sick muscle pumps. It is also more optimal for inducing muscle tissue growth than exercises where you can only contract your muscles once throughout the ROM.
Boosts Mind-Muscle Connection
Since you are actively squeezing the dumbbells during this exercise, it helps achieve a better mind-muscle connection, delivering better muscle pumps. Furthermore, this enhanced mind-muscle connection will also carry over to other exercises.
Your Elbows are Less Likely to Flare
Many lifters tend to flare their elbows during conventional chest press exercises, such as the barbell bench press and dumbbell bench press. Not only does flaring your elbows remove tension from your chest, but it also overexerts your shoulder rotator cuffs, increasing your odds of injury. Because you’ll be pressing the dumbbells against each other in the incline hex press, your elbows will automatically pull into your sides, allowing better pectoral engagement.
How To Do Incline Hex Press
This is how to perform the incline hex press with the correct form:
Steps:
Set the upper pad of an incline bench at a 45-degree angle with the floor.
Lie supine on the bench with your feet flat on the floor while holding a dumbbell in each hand with a neutral (palms facing each other) grip.
Maintain the natural curvature of your spine, as it will help in better upper pec stimulation.
Hold the dumbbells over your chest and press them into each other.
While pressing the dumbbells into each other, extend your elbows and raise the dumbbells toward the ceiling.
Your arms should be perpendicular to the floor at the top of the movement.
Pause and contract your pecs at the top.
Slowly return to the start position.
Repeat for recommended reps.
Incline Hex Press Tips:
Keep your core braced throughout the exercise. It will improve your balance and stability.
Avoid locking out your elbows at the top, as it will remove the tension from your pecs and put it on your elbows and shoulders.
There should be enough distance between your lower back and the bench for your hand to pass through. This ensures that your chest is raised, resulting in better pectoral engagement.
Keep your chin tucked in throughout the exercise. It will help contract your pecs.
Squeeze the dumbbells as hard as possible throughout the range of motion to get the most out of this exercise and achieve a nasty inner chest pump.
This exercise is as much about pressing the dumbbells into each other as it is about performing the dumbbell press movement.
In This Exercise:
Target Muscle Group: Chest
Secondary Muscle Groups: Shoulders and Triceps
Type: Strength
Mechanics: Compound
Equipment: Dumbbells
Difficulty: Beginner
Best Rep Range:
Hypertrophy: 8-12
Strength: 1-5
Common Mistakes While Performing Incline Hex Press
Avoid these lapses to reduce your risk of injury and make the most of the incline hex press:
Not Squeezing the Dumbbells
Due to being accustomed to the conventional pressing exercises, many lifters tend to focus more on the pressing movement rather than pressing the dumbbells into each other during the incline hex press, resulting in inadequate inner pec engagement.
Pressing at an Angle
Some exercisers push the weights up and in front of their chest during the concentric (upward) motion of the incline chest press. It is more evident in lifters whose shoulders overpower their chest. Pressing the dumbbells at an angle results in greater anterior delt engagement. You must make sure that the dumbbells move vertically throughout the exercise.
Going Too Heavy Too Soon
Lifting too heavy on the incline hex press will limit your range of motion and your ability to squeeze the dumbbells together. You must focus on nailing your exercise form to get the best bang for your buck in this exercise.
Variations and Alternatives of Incline Hex Press
Add the following incline hex press variations and alternatives to your training regimen to build a barrel chest:
Medicine Ball Incline Hex Press
The medicine ball incline hex press involves holding a medicine ball between the dumbbells. This variation allows you to maintain parallel forearms throughout the range of motion, reducing the strain on your shoulder rotator cuffs.
Steps:
Set the back of an incline bench at a 45-degree angle with the floor.
Sit on the bench while holding a dumbbell in each hand using a neutral grip and a medicine ball on your lap.
Squeeze the ball between the dumbbells, lie on the bench, and bring the ball and dumbbells over your chest.
While maintaining the natural curvature of your spine, press the dumbbells toward the ceiling.
Make sure you press the medicine ball between the dumbbells throughout the range of motion.
Slowly return to the start position.
Rinse and repeat.
Pro Tip: Since this exercise requires holding a medicine ball between the dumbbells, ensure you use a weight you can control comfortably. You don’t want the ball crashing into your face between the reps.
Smith Machine Hex Press
The Smith machine hex press is a great exercise for advanced lifters as it allows you to go super heavy. You will need a V-handle bar for this exercise.
Steps:
Place a flat bench under the Smith machine barbell, so it is perpendicular to the bar.
The bench should be placed on one side of the barbell.
Place your upper back on the bench and your feet on either side under the bar.
Adjust the V-handle under the bar so it is above and in the center of your chest. Grab the handle with a supinated grip.
Ask your training partner to unrack the barbell.
Slowly lower the bar to your chest.
Press the bar to the ceiling.
Repeat for recommended reps.
Pro Tip: You must focus on pushing your hands toward each other while performing this exercise to fire up your inner pecs.
Incline Plate Press
The plate press is an excellent exercise for beginners who can’t balance the dumbbells in the hex press and folks who don’t have access to dumbbells.
Steps:
Lie on your back on an incline bench.
Hold a weight plate over your chest between your palms so it is in the center of your chest.
Your hands should be at the center of the weight plate, and the plate should touch your chest at the bottom.
While pressing your hands into the plate, extend your elbows.
Pause and contract your pecs at the top.
Slowly return to the starting position.
Repeat for recommended reps.
Pro Tip: Since you’ll be holding the plate at its center, it will limit your range of motion compared to using dumbbells. You can compensate for it by squeezing your pecs for longer at the top.
Svend Press
The Svend press is a variation of the plate press. It is done standing and involves pressing two weight plates into each other.
Steps:
Stand upright with a shoulder-wide stance.
Hold two 5-10-pound weight plates between your palms.
Press the plates together and hold them in front of your chest.
Extend your arms in front of you so they are parallel to the floor.
Slowly return to the starting position.
Pro Tip: Press your hands actively into the plates throughout the range of motion for optimal inner chest stimulation.
Check out our complete Svend press guide here!
Incline Neutral-Grip Dumbbell Press
Some people experience shoulder rotator cuff discomfort while performing the conventional dumbbell press. The neutral-grip dumbbell press pulls your elbows toward your sides, reducing the strain on the troubled muscles and tendons.
Steps:
Lie on an incline bench while holding a dumbbell in each hand using a neutral grip.
The dumbbells will be at the sides of your chest and over your shoulders at the starting position.
Lift the dumbbells toward the ceiling by extending your elbows. Bring the dumbbells together during the concentric (upward) movement.
Pause and contract your pecs at the top.
Slowly return to the starting position.
Repeat for recommended reps.
Pro Tip: Ensure that the dumbbells are moving straight up and down. Lifting the weights at an angle reduces the tension on your upper pecs and puts it on your front delts.
Check out our complete neutral-grip dumbbell press guide here!
Decline Close-Grip Push-Up
This is an incredibly effective exercise for folks who train at their homes and do not have access to weights. The decline close-grip push-ups focus on your upper inner pecs without overtaxing your joints.
Steps:
Place your feet on an elevated surface like a chair or table.
Place your hands next to each other on the floor. Your thumbs should be touching.
Your body, from head to heels, should be in a straight line throughout the exercise.
Slowly lower your chest to the floor by bending your elbows.
Your chest should be touching or a few inches off the floor at the bottom.
Return to the starting position.
Rinse and repeat.
Pro Tip: Perform this exercise on parallettes to increase your range of motion and better stimulate your inner pecs.
Check out our complete close-grip push-up guide here!
Wrapping Up
The incline hex press is an incredibly effective exercise for working your upper-inner pecs. It keeps constant tension on your target muscles throughout the range of motion without overburdening your shoulder rotator cuffs.
The incline hex press can also boost your mind-muscle connection, which will carry over to other exercises. Add this movement or one of its alternatives and variations in each training session to bring up your inner pectoral muscles. Best of luck!
References
Krzysztofik M, Wilk M, Wojdała G, Gołaś A. Maximizing Muscle Hypertrophy: A Systematic Review of Advanced Resistance Training Techniques and Methods. Int J Environ Res Public Health. 2019 Dec 4;16(24):4897. doi: 10.3390/ijerph16244897. PMID: 31817252; PMCID: PMC6950543.

Shoulder Pain When Doing Overhead Triceps Extensions? Possible Causes and Solutions
The overhead triceps extension, also known as the French press, is one of the best ways to target the long head of your triceps. Hitting this triceps head means putting your arms into flexion, and the best way to do this is to raise them overhead.
Overhead triceps extensions take the target muscles through a large range of motion and provide the triceps with a deep stretch at the bottom of each rep. If you are serious about developing horseshoe triceps, overhead extensions are an excellent option.
However, this exercise has a downside: it can also cause shoulder pain. Pain in the stabilizing muscles is only to be expected and nothing to worry about. In contrast, joint pain could indicate that something more serious is wrong and needs fixing.
In this article, we reveal the possible causes of shoulder pain while doing overhead triceps extensions and how to prevent it.
Causes of Shoulder Pain During Overhead Triceps Extensions
There are several reasons that overhead triceps extensions can cause shoulder pain. Some are easy to fix, while others are less so. Some causes of shoulder pain may require rest or medical attention.
Seated Dumbbell Overhead Triceps Extensions
Use the following information to determine why overhead triceps extensions hurt your shoulders.
Poor mobility
Overhead triceps extensions involve raising your arms so your biceps are next to your ears. This requires above-average shoulder joint mobility, and your lats, pecs, and delts must also be flexible.
Tight muscles or immobile joints mean you’ll have to strain to get your arms into the correct position for overhead triceps extensions. Needless to say, if this is difficult for you to do, shoulder pain may be the result.
Related: Five-Minute Mobility Workout for Lifters
Improper technique
Many lifters turn overhead triceps extensions into a bastardized behind-the-neck overhead press. This may be because they lack the mobility necessary to get into the right position, are using too much weight, or simply don’t know any better.
There are two ways to perform most exercises – the right and the wrong way. The right way is generally safe, comfortable, and keeps the tension on the target muscles. The wrong way compromises your joints, takes stress off the target muscles, and is more likely to cause injuries.
Overhead triceps extensions are quite an unforgiving exercise, and even small technical errors can cause pain in all the wrong places.
Poor posture
Posture is the alignment of your joints, and it can be good or bad. Bad posture, such as rounded shoulders or slouching, makes it much harder to get into the correct position to do overhead triceps extensions safely.
This poor posture means you’ll need to change your technique to perform the exercise. Invariably, this puts more stress on your shoulders than it does your triceps.
Using too much weight
Overhead triceps extensions are an isolation or single-joint exercise. Once your upper arms are next to your head, only your elbows should move. Such a strict movement means you won’t be able to lift a lot of weight. As a result, overhead triceps extensions work best with light to moderate loads and medium to high reps.
However, despite this, some exercisers try to use very heavy weights with overhead triceps extensions, which puts a lot of stress on all the muscles and joints involved, including the shoulders.
An underlying shoulder problem
Shoulder problems are common among bodybuilders and weightlifters. The shoulder is a very hard-working joint and is involved in virtually every upper-body exercise you perform. As such, many lifters have chronic shoulder problems, such as bursitis, tendonitis, strains, and sprains.
While you might be able to do some exercises without pain, the overhead triceps extension involves an awkward arm position. Because of this, they may aggravate any existing shoulder injuries.
Not warming up properly
Warming up is crucial as it prepares your body for the workout and exercises you are about to perform. Overhead triceps extensions need a thorough warm-up because of the position of your arms. Not warming up could mean your shoulders feel stiff and immobile, which could cause pain if you force your upper arms up and next to your ears.
Poor shoulder stability and strength
While overhead triceps extensions are undoubtedly an arm exercise, you need strong, stable shoulders to keep your biceps next to your ears. Weak deltoids or unstable joints could cause shoulder pain, despite not targeting them directly.
Lack of shoulder muscle endurance could also mean your deltoids fatigue before your arms, and you’ll feel them burning painfully toward the end of your set.
Overhead triceps extensions don’t suit your body type
Exercise is good for everybody’s body. However, because of biomechanical differences such as shoulder width and arm length, not all exercises suit all lifters. Despite warming up, using good form, and lifting a sensible weight, overhead triceps extensions may still hurt your shoulders.
It’s not the exercise’s fault, but your genetics. Don’t worry, though; there are other ways to train your triceps long head.
How to Prevent Pain When Doing Overhead Triceps Extensions
Now that you know the possible causes of shoulder pain when doing overhead triceps extensions, here are some strategies to avoid it.
Warm up properly
Warming up increases tissue temperature, blood flow, joint mobility, and muscle flexibility. These things make getting your upper arms into the correct position to do overhead triceps extensions easier, reducing the risk of shoulder pain.
Focus on your shoulders, upper back, and elbows when preparing for overhead triceps extensions.
A warm-up for strength training should include the following:
Pulse raiser (light cardio)
Joint mobility
Dynamic flexibility
Movement prep/practice reps
Read more about warming up for strength training here.
Stretch your lats and pecs
It’s generally best to avoid statically stretching muscles before training them. Static stretches can reduce force production and make you weaker. However, with overhead triceps extensions, stretching your pectoralis major and latissimus dorsi should make achieving and maintaining the correct arm position easier.
Don’t worry about losing strength for your workout, as these muscles are not directly involved in overhead triceps extensions.
Check out this article to learn more about stretching your pecs and this article to discover the best exercises for stretching your lats.
Practice and perfect your technique
While overhead triceps aren’t the most technical bodybuilding exercise, they’re not the simplest, either. If you are new to this movement or have picked up some bad habits and don’t do them as cleanly as you should, it’s time to start practicing and mastering your form.
Do this exercise with a light dumbbell to ensure you are performing it correctly. Use a mirror or training partner for feedback. Also, consider videoing yourself for a post-set analysis. Do practice sets before your main workout and a few more before or after your other workouts so you can work on your form.
Fix whatever technical errors you spot to reduce your risk of shoulder pain.
Try using different training implements
There is more than one way to do overhead triceps extensions. Dumbbells might be the most common, but you may find cable or barbell overhead triceps extensions more common. You can also use an EZ bar or a “triceps bomber” bar, which has parallel grips.
All these options put your hands and upper arms in a slightly different position, which may be more comfortable for your shoulders.
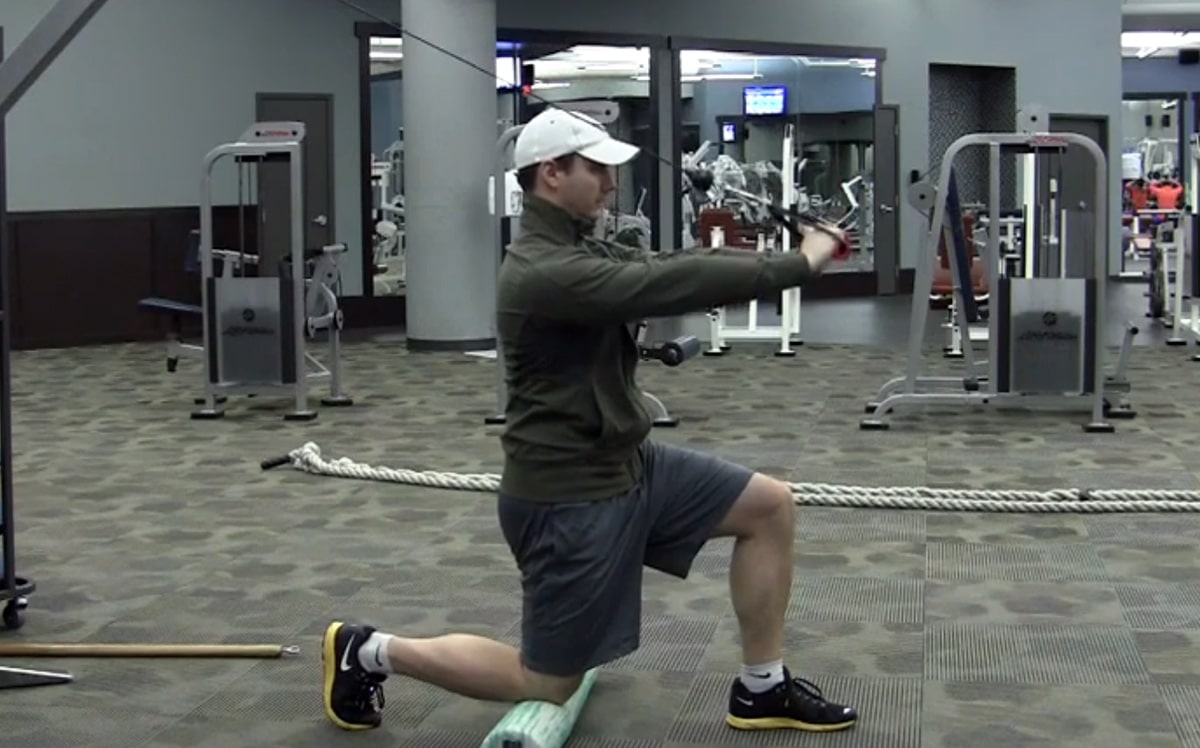
Cable Overhead Triceps Extensions
Use lighter weights and a slower tempo
If heavy weights hurt your shoulders, but light weights don’t challenge your triceps enough, try doing your reps more slowly. So, instead of the usual one-second up/one-second down tempo most lifters use, try a 2:2 or 3:3 tempo.
Lifting and lowering more slowly makes light weights feel heavier while taking stress off your joints.
You don’t have to lift heavy weights to fatigue your muscles; a slower tempo and light weights can be just as challenging.
Strengthen your rotator cuff
Overhead triceps extensions require strong rotator cuff muscles to stabilize your shoulder joint. The rotator cuff is the collective name for the small muscles beneath your deltoids.
The muscles that make up your rotator cuff are:
These muscles are often weak and the cause of many shoulder problems. Strengthen your rotator cuff by performing cable or resistance band internal and external rotations.
Fix your posture
Poor posture, especially a slouched upper back and rounded shoulders, makes it impossible to get your arms into the correct position to do overhead triceps extensions. Trying to do this exercise when you’ve got bad posture puts a lot of stress on the shoulders.
Pronged sitting and too much time using screens mean that many people have poor posture.
It’s beyond the scope of this article to tell you how to fix your posture, but stretching your chest and strengthening your upper back with face pulls and band pull-aparts will help. Mobilizing your thoracic spine will also be beneficial.
Get any underlying shoulder problems diagnosed
If your shoulders hurt despite using these tips, you may have an underlying joint, tendon, or muscle problem that needs diagnosing and fixing. While muscle pain in the areas you are training is normal, pain in nearby muscles and joints is not.
Pain is your body’s way of saying something is wrong, and it’s best not to ignore it. Training through pain is a great way to make minor injuries worse.
If overhead triceps extensions hurt your shoulders, stop doing them and find out the source of your pain.
Use alternative exercises
While overhead triceps extensions are an effective exercise, they aren’t the only way to target the triceps long head. There are other exercises that are just as effective but put much less stress on your shoulders.
Good options include:
Take overhead triceps extensions out of your workouts and do any of these shoulder-friendly arm exercises instead.
Frequently Asked Questions
Do you have a question about shoulder pain and overhead triceps extensions? That’s okay because we’ve got the answers!
1. I had sudden shoulder pain during overhead triceps extensions. What should I do?
Sudden onset or acute pain suggests you may have strained a muscle or sprained a ligament. In either case, you should stop what you’re doing to avoid making your injury worse.
Depending on the severity of the damage, you may also need to use RICE (Rest, Ice, Compression, and Elevation) to promote recovery.
Do not return to training until the pain has subsided. If the pain is severe, get it checked out by a medical professional. You can still work out, but you must avoid aggravating the injured area. Train around the injury and not through it!
2. Are overhead triceps extensions safe?
Overhead triceps are not the riskiest triceps exercise, but nor are they the safest. They tend to place a lot of stress on the shoulder joint and can be uncomfortable. However, providing you have stable, mobile shoulders, and perform them with good form, it would be an exaggeration to say that overhead triceps extensions are dangerous.
3. Do I even need to train my long triceps head separately?
While isolating any of the three triceps heads is impossible, you can emphasize each one by altering the position of your upper arm. Bodybuilders often do this to create the perfect horseshoe-shaped triceps.
However, suppose you are a recreational lifter who doesn’t care about developing a championship-ready physique. In that case, you probably don’t need to train the long head separately. General triceps training will most likely give you the results you want.
4. Can I do overhead triceps extensions even though they hurt my shoulders?
Just because you can do something doesn’t mean you should! Pain is your body’s way of telling you to stop and that something is wrong. Training through pain is a good way to turn a minor injury into something more significant.
If overhead triceps extensions hurt your shoulders, try to determine the cause of the problem and then apply the solutions outlined in this article. And remember, the overhead triceps extension is NOT compulsory, and there are plenty of other exercises you can do that are far more shoulder-friendly.
5. Are single-arm triceps extensions safer or better than the two-armed version?
We all respond to exercises differently, and you may find that single-arm overhead triceps extensions are more comfortable than the regular version. Try them and see! They involve a very similar movement, but using one arm at a time means you may be able to position your shoulder at a more forgiving angle. You can also use your free arm for stability and support.
Closing Thoughts
Just because overhead triceps extensions are effective for building muscle doesn’t mean you have to do them. If they bother your shoulders, you should seek alternatives. After all, there are plenty of similarly effective exercises that target the long head of your triceps.
However, if overhead triceps extensions hurt your shoulders, it may not be the fault of the exercise. For example, your shoulder pain could be the result of poor posture, inadequate mobility, a weak rotator cuff, or using too much weight.
Fix these problems, and you may find that overhead triceps extensions no longer cause discomfort.
Remember, though, you should avoid training through pain. Don’t ignore it, as it could be an indicator that something is wrong. The pain could get worse if you fail to do something about it.
Read also:
Michal Krizo Tackles An Off-Season Leg Workout For Bulking
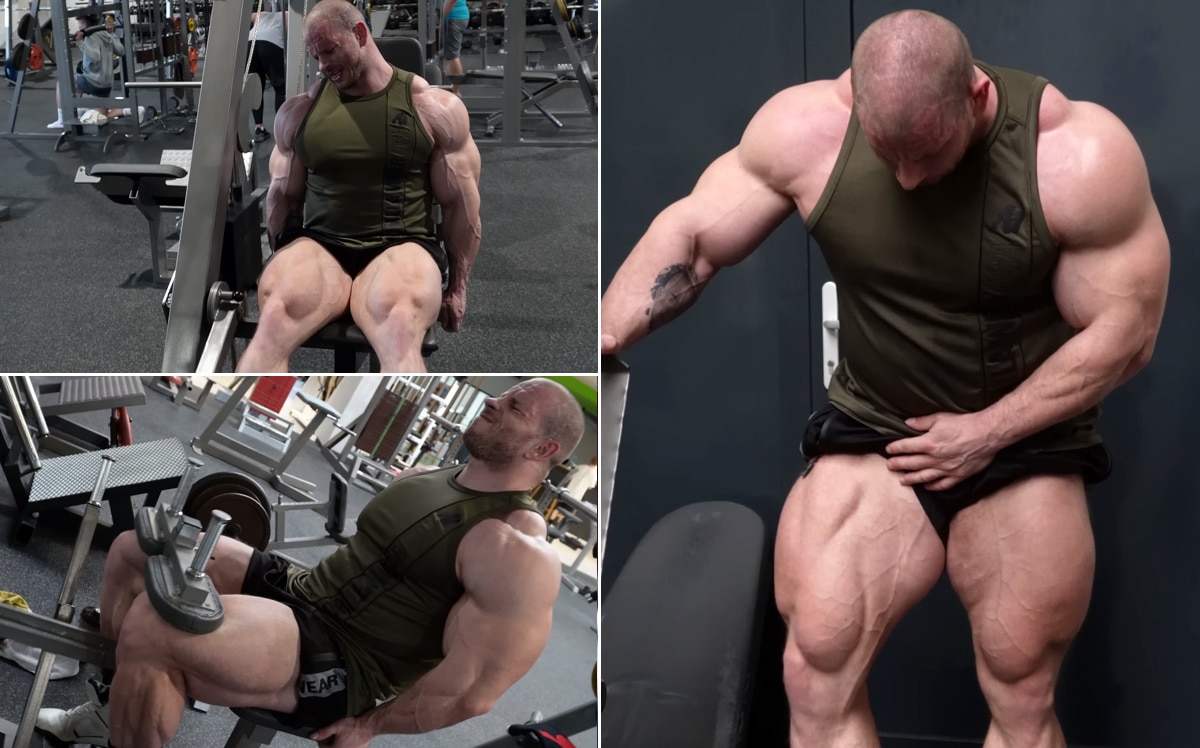
Bodybuilder Michal Krizo is utilising the off-season for bulking up. Recently, he went through a lower body workout to add more bulk to his girthy legs.
After a series of dominant performances in the IFBB Elite Pro League, Slovakia’s own Michal Krizo started his Olympia campaign by switching over to the NPC. He earned the IFBB Pro card with a dominant win at the 2022 Amateur Olympia Italy.
Making a return at the 2022 EVLS Prague Pro a few weeks later, Krizo managed to pull off a win in his Pro debut. However, his conditioning at the show became a big point of criticism. Undeterred by the negative feedback, Krizo went back to the drawing board and started preparing for the biggest challenge of his bodybuilding career as the win earned him a direct qualification to the 2022 Mr. Olympia.
The Men’s Open division at the 2022 Olympia boasted the most difficult line-up in recent memory. Krizo held his ground for the most part nevertheless and managed to finish in the top 15 on the grandest stage of bodybuilding.
Having received the necessary experience of competing at the elite level within a year of turning Pro, Krizo now readies himself to tackle the next competitive season. He is set to make a return at the 2023 Arnold Classic UK. The Slovak’s recent leg workout was a part of his effort to prepare his physique for the upcoming competitive season.
The short training session consisted of a few compound movements coupled with isolation movements for targeting major muscle groups in the lower body. The video of this session was posted on Krizo’s personal YouTube channel. So let’s jump right into it and see how Krizo is adding more bulk to his legs.
Michal Krizo goes through a leg workout
Hack Squats
Krizo kicked off the workout with this compound movement. Hack Squats offer similar benefits that traditional barbell squats offer in terms of primary muscle activation and strength gain. Just like the Barbell squats, Hack Squats target the quadriceps, hamstrings, glutes, hip flexors, calves and core muscles. However, they are generally safer than traditional squats and put far less stress on the lower back.
Krizo got a few good sets of this movement under his belt and took to a quad-focused exercise afterwards.
Leg Extensions
The Slovakian bodybuilder performed this quad isolation exercise next to stimulate the quadriceps further. After pushing through all the sets of leg extensions, Krizo went back to working with a heavy compound exercise.
Leg Press
Quadriceps, hamstrings, glutes, adductor and abductor muscles are the primary target muscles of leg press. It is a compound movement that can really help build bigger legs when done with correct form and technique. Krizo did a few reps of leg press in each set unilaterally and switched over to working with both legs for the last few reps. After working his way through some punishing sets, the 2022 EVLS Prague Pro winner took to the second isolation movement of the day.
Lying Leg Curls
Krizo next performed the lying leg curls which is a hamstrings isolation movement. Apart from working the hamstrings, leg curls are an excellent way to warm up the knee joints which are crucial in performing most of the lower body movements. Hence they make for a perfect first exercise as well. Krizo cranked out some solid sets of lying leg curls and took to the final exercise of the day.
Seated Calf Raises
Michal Krizo wrapped up the training session with a few sets of seated calf raises. This variation of calf raises works the soleus muscle that lies underneath the gastrocnemius muscle in the calf region.
Krizo pushed through a few heavy sets of the movement and called it a day in the gym.
Overall, the workout included:
Michal Krizo is one of the young up-and-coming contenders in the Men’s Open division of the IFBB Pro League. If he puts the right amount of work in and improves his physique enough, the Slovak can certainly push aside the older generation of bodybuilders and dominate the sport in the years to come.
You can watch the full workout video here, courtesy of Michal Krizo’s personal YouTube channel:
Published: 16 April, 2023 | 11:00 PM EDT
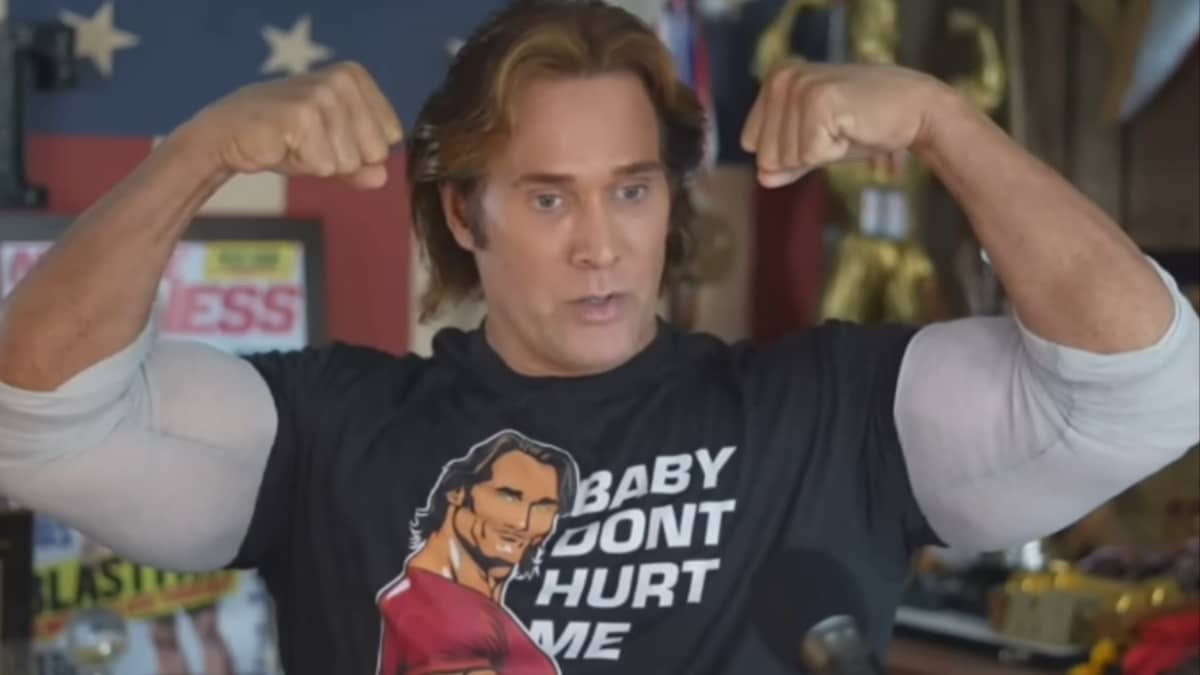
Mike O’Hearn Hits Back at Haters Who Fell for Synthol Fish Hook
American bodybuilder and model Mike O’Hearn carved his own space with his insane longevity in the fitness industry. In a recent video posted on his YouTube channel, O’Hearn hit back at the haters who got fish hooked about his use of Synthol.
Fitness sensation Mike O’Hearn has proven to be one of the most consistent athletes of the last few decades. He first gained attention for his jacked physique as a bodybuilder who won the Mr. Natural Universe title four times. Besides competition, O’Hearn’s aesthetic qualities led him to succeed in modeling. He won Fitness Model of the Year seven times and has graced the covers of more than 400 magazines.
O’Hearn found his passion for acting in the early 90s. He started his run with supporting roles before getting the role of Thor and Titan in American Gladiators. He also made several guest appearances in popular television series like Days of Our Lives.
Given the extraordinary build of O’Hearn, there has been a ton of speculation about the possibility of steroid or Synthol use. In Jul. 2022, O’Hearn declined using TRT (testosterone replacement therapy) and credited his physique to be consistent every day.
O’Hearn teamed up with Joseph Baena, son of bodybuilding legend Arnold Schwarzenegger, for a brutal arms workout in Aug. 2022. He opened up about his intense mindset about training as they performed the bicep and triceps routine.
The 54-year-old left the fans stunned with an impressive sneak peek of his role in the bodybuilding film Magazine Dreams last August. He showed off his shredded physique while playing the role of Brad Vanderhorn.
O’Hearn partnered with Baena for an ‘old-school’ upper body training session a few months ago. He mentored Baena through the back workout focused on enhancing longevity. He caused a stir in the community with his claims suggesting testosterone levels didn’t decline with time. Former Mr. Olympia Samir Bannout chimed in voicing his disagreement with O’Hearn beliefs last October.
Following the rise in steroid accusations lodged against him, O’Hearn issued a fiery message pushing back on the allegations in Sep. 2022.
Mike O’Hearn admits fish hooking haters on Synthol use
In a recent YouTube video, Mike O’Hearn talked about tricking haters with a fish hook about his fictitious use of Synthol. He explained the promo stunt was based on his character in an upcoming project.
“Let’s talk about the rumors with Synthol,” said O’Hearn. “That was an easy troll by me because I knew majority would jump on it, not read anything, bypass that and just go this is awesome, gotcha! That’s the reason I kinda did it to just make you a little awake. I think it is stemmed from hate.
“It doesn’t matter what I say, it matters what I do. The evidence is there of what I do and have been doing for a lifetime.”
“I hope you guys understand it really doesn’t matter what you say. You can say pretty much anything but your actions are going to prove who you are as an individual.”
“For everybody that got fish hooked from the post about Synthol, that’s my character I’m playing on Monday. He’s a character I play on 911 that gets busted for synthol, drugs, and stuff. It was too easy not to fish hook you guys.”
Check out the 9-1-1 promo below:
Two months ago, Mike O’Hearn collaborated with Baena for a fierce shoulder workout. He lauded Baena for the improvements he made to his fitness levels by working on his dancing skills.
O’Hearn’s latest update might come as a surprise to those who fell for it but it certainly helped bring more attention to his upcoming role.
You can watch the full video below:
Published: 16 April, 2023 | 2:44 PM EDT
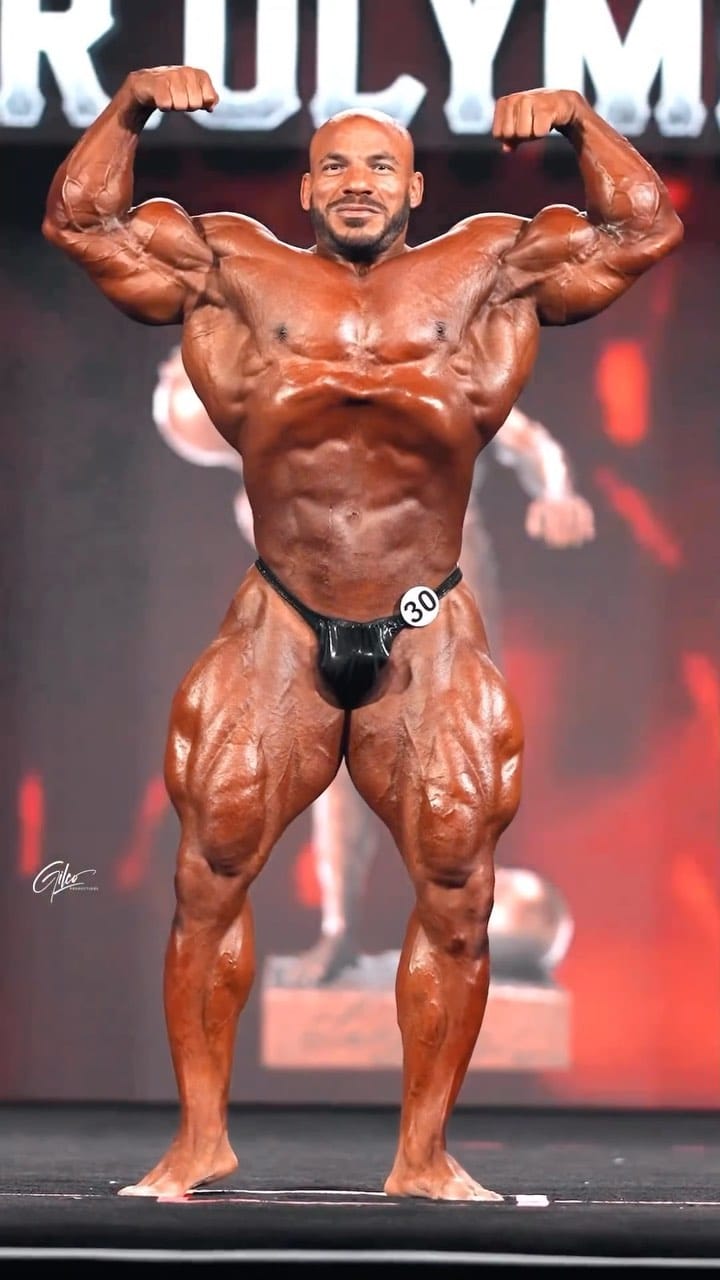
Big Ramy Clears the Air with Bob Cicherillo on Retirement Calls
Egyptian bodybuilder Mamdouh ‘Big Ramy’ Elssbiay is on a mission to redeem himself after slipping at the 2022 Mr. Olympia. In a recent video posted on YouTube, Ramy cleared the air with IFBB Pro League athletes’ representative Bob Cicherillo regarding the criticism he received after getting dethroned and his plans ahead.
Former two-time Mr. Olympia Big Ramy has been a regular feature of the Men’s Open division since 2013. He turned heads with his freakish muscle mass and size that overwhelmed many mass monsters in the category. He scored gold at the 2013 New York Pro and retained his title in 2014 while working his way up the ranks. In 2020, Ramy secured his maiden Sandow trophy by dethroning Brandon Curry. He added the second title under his belt at the 2021 Mr. Olympia.
Last season, Big Ramy was looking to extend his lead at the top as he went up against a crop of new talent and proven contenders at the 2022 Mr. Olympia. Ultimately, it was Hadi Choopan who knocked Ramy off the throne. Ramy suffered a setback and dropped down to the fifth place.
There was speculation about the possibility of an injury plaguing Ramy on stage in Las Vegas. Ramy did not let the result hold him back as he signed up for the 2023 Arnold Classic. He underwent stem cell treatment in preparation for the show. Dr. Khan reported positive findings after the treatment and expected Ramy to do better in Ohio.
Big Ramy at 2022 Olympia
His coach Chad Nicholls admitted the Olympia prep did not go according to plan. While he entered the event confident, a series of challenges halted the pair from bringing their best form.
Bodybuilding legend Jay Cutler extended his support for Ramy last month. He lauded Ramy for his impressive package and backed him to potentially pull off a triumphant comeback. In the end, Ramy slotted in fourth place at the 2023 Arnold Classic.
Bob Cicherillo counted out Ramy’s chances in the sport aftiner the outcome last month. He stressed the need for Ramy to completely transform his whole physique if he wanted to get back in the judges’ good graces. However, he expressed doubts about the prospect. He doubled down on his take days later when he called on Ramy to step on the sidelines.
The 38-year-old issued a fiery message aimed at the critics who suggested he hang up his posing trunks. He made it clear he was in the game to stay and will not be leaving anytime soon.
Big Ramy clears the air with Bob Cicherillo on calls for retirement
In a recent YouTube video, Big Ramy made peace with Bob Cicherillo in light of their differences regarding his career.
“I hear many things. If somebody can’t give the game 100 percent,” said Ramy. “We have many things in the sport we can do not only the state, but we can support the sport of many things else. But me and Bob agree I can do that if my body responds.”
Ramy faced backlash for missing the guest-posing appearance at the 2022 Pittsburgh Pro. He confirmed he’d be at this year’s edition a few weeks ago and teased the anticipated showing when asked about his road to the 2023 Mr. Olympia.
“Maybe in Pittsburgh. Jim offered me to come, being the biggest name in the sport. When you close to him, he’s a great person and supports everyone and I never think I can do disrespect for any reason. Last year what happened, I really feel bad because I miss this show. It’s important for me because I respect this game and the fans.”
Cicherillo believes Ramy is past his best days and argued against giving him false hope about potentially reclaiming the Olympia title.
Ramy may not possess the package that won him the coveted Sandow trophy but he’s ready to give it his all in hopes of adding to his glittering resume.
You can watch the full video below.
Published: 16 April, 2023 | 12:53 PM EDT
Kneeling Cable Pullover Exercise Guide: How To, Benefits, Muscles Worked, and Variations
Your back is the second biggest muscle group. A developed back can take your physique aesthetics to the next level. Wide latissimus dorsi muscles can accentuate your V-taper and add to the illusion of broad shoulders and a narrow waist.
The back includes muscles like lats, rhomboids, teres major and minor, traps, and erector spinae. Horizontal pulling movements like the lat pulldown and pull-ups help improve your back width, whereas rowing movements like the cable row and barbell and dumbbell bent-over row build your back thickness.
The problem with most back training routines is that they lack isolation exercises. Compound lifts like the barbell row, deadlift, and cable pulldown will help build size and strength. Still, you cannot overlook isolation exercises as they help fix muscle imbalances and improve strength and conditioning. This is where the cable pullover variations shine.
The kneeling cable pullover is a dumbbell pullover variation that primarily targets the lats. Using a cable instead of a dumbbell allows you to maintain constant tension on your lats throughout the range of motion.
During the dumbbell pullover, when the dumbbell is above your head, there is no tension on your lats. This is, however, not the case with the cable pullover. The cable will pull on your lats even when the bar is in front of your chest.
In this article, we cover everything you need to learn about the kneeling cable pullover to step up your lat game. You’ll discover this exercise’s correct form, benefits, target muscle groups, common mistakes, and best variations and alternatives.
What is a Kneeling Cable Pullover?
The kneeling cable pullover is a dumbbell pullover variation that primarily targets your lats. Most latissimus dorsi exercises result in biceps engagement, as your biceps are involved in the pulling motion required in most back exercises.
Since your biceps are a small muscle group, they fatigue before your lats, hampering your performance and leading you to leave gains on the table. The kneeling cable pullover eradicates this problem as the movement is limited to your shoulder joint in this exercise. There is no elbow flexion and extension involved in the kneeling cable pullover, which helps limit your pythons’ role in this exercise.
As the name suggests, the kneeling cable pullover is performed on a cable machine while kneeling. You’ll be facing away from the pulley during the exercise to achieve an optimal range of motion.
The kneeling cable pullover requires a strong core, especially if you plan to lift heavy on this exercise. We’ll also touch upon the half-kneeling cable pullover in this article, which is a preferred variation of this exercise, as its setup allows better balance and stability.
Muscles Worked During Kneeling Cable Pullover
The kneeling cable pullover works the following muscles:
Primary Muscles
The latissimus dorsi is the primary target muscle group of the kneeling cable pullover. Your lats are the primary movers in this exercise and help move your arms through the eccentric and concentric parts of the lift.
Secondary Muscles
The serratus anterior (located on the upper rib cage), triceps, shoulders, and core are the supporting muscle groups in the kneeling cable pullover. If you feel more tension in your secondary muscles than your lats, it is a sign that you’re doing something wrong and must fix your form.
Benefits of Kneeling Cable Pullover
Adding the kneeling cable pullover to your training regimen entails the following advantages:
Build a Bigger Back
The kneeling cable pullover keeps your target muscle under constant tension throughout the range of motion, resulting in better muscle stimulation and hypertrophy. You should stay in the 8-12 rep range if your goal is to build muscle mass [1]. Furthermore, since the kneeling cable pullover is an isolation exercise, it can also improve your back conditioning.
Improves Shoulder Mobility
The kneeling cable pullover involves movement at the shoulder joint. Furthermore, it stretches your lats and triceps, which are crucial in your overhead mobility. Performing kneeling cable pullovers will help achieve greater shoulder stability and control, improving your performance in compound lifts like the bench press, overhead press, and snatch.
Boosts Core Stability
Since you’ll be facing away from the pulley machine, you must keep your core engaged throughout the exercise to maintain a stable torso. You’ll also experience core stimulation during the eccentric and concentric motion of the kneeling cable pullover.
How To Do a Kneeling Cable Pullover
This is how to perform the kneeling cable pullover with the correct form:
Steps:
Set the cable pulley machine at the highest setting and attach a straight bar handle.
Grab the handle with a pronated (overhand) grip.
Kneel down half a step in front of the pulley with your back toward the pole.
Plant your toes on the floor for stability. Your torso should be perpendicular to the floor throughout the range of motion.
Your arms should be extended overhead, your hands should be over your calves at the starting position, and the cable should be taut at the start position.
While maintaining a slight bend in your elbows, pull down the straight bar until it is at your chest level.
Your arms should be parallel to the floor at the bottom.
Pause and contract your lats at the static contraction point.
Slowly return to the starting position.
Repeat for recommended reps.
Kneeling Cable Pullover Tips:
Keep your core and glutes engaged throughout the exercise for optimal balance and stability.
Sit on your heels if you have trouble maintaining a stable core while performing this exercise. However, your goal should be to build a strong core so you can do this exercise while kneeling.
Using a rope attachment in this exercise offers an enhanced range of motion.
Avoid arching your back during the eccentric (upward) motion of the exercise, as it can put unnecessary strain on your lower back.
Similarly, avoid rounding your back during the concentric (lowering) motion, as it can result in chest and ab engagement.
In This Exercise:
Target Muscle Group: Back
Secondary Muscle Groups: Shoulders, Triceps, and Abs
Type: Strength
Mechanics: Isolation
Equipment: Cable Machine
Difficulty: Beginner
Best Rep Range:
Hypertrophy: 8-12
Strength: 1-5
Common Mistakes While Performing a Kneeling Cable Pullover
Steer clear of the following lapses to make the most of the kneeling cable pullover:
Kneeling Too Far Away From The Pulley
Most people kneel too far away from the pulley. A significant gap between your torso and the pulley increases the risk of the cable rubbing into your head during the concentric (lowering) motion. Staying close to the pulley will ensure the cable misses your head.
Not Following a Full Range of Motion
You must follow a full range of motion to make the most of this exercise. Some lifters lower the bar to their neck level and stop the eccentric motion when their arms form a 90-degree angle with the floor. Limiting your range of motion will restrict your muscle fiber recruitment.
Using Momentum
Many lifters let their egos get the better of them in this exercise. They put more weight on the stack than they can handle and end up swinging their torso back and forth to lift the weight. Using momentum removes tension from your target muscle groups and puts it on your shoulders, triceps, and core. It also increases your risk of injury.
Variations and Alternatives of Kneeling Cable Pullover
Here are a few kneeling cable pullover variations and alternatives to add variety to your training regimen:
Half-Kneeling Cable Pullover
The half-kneeling cable pullover helps maintain better upper body stability as you have a better center of gravity. The steps for this exercise will remain the same as the conventional kneeling cable pullover. While performing this exercise, ensure that the upper and lower leg of the front leg is at a right angle, and the quad of the other leg is perpendicular to the floor.
Resistance Band Kneeling Cable Pullover
Folks that don’t have access to a cable pulley machine can use a resistance band to train their lats without taxing their biceps.
Steps:
Attach one end of the resistance band to an elevated object that is 8-10 feet high, such as a squat rack or a door.
Kneel down on the floor facing away from the door with the other end of the band wrapped around your hands.
Your arms should be extended overhead, and your hands over your calves at the starting position.
Brace your core and glutes, and bring your arms to your chest level.
Pause at the bottom and contract your lats.
Slowly return to the start position.
Pro Tip: Place your hands at varying distances to train your back from different angles. Alternate between holding your hands together, shoulder-wide, and in a snatch grip.
Lying Cable Pullover
The lying cable pullover is the closest you get to the dumbbell pullover while using a cable machine.
Steps:
Set the cable pulley machine at the lowest setting and hook up a rope attachment.
Set up a flat bench at an appropriate distance from the cable pulley so that the weight doesn’t rack at the bottom of the movement.
Place your upper back on the bench and your feet on the floor. You should be at a 90-degree angle to the bench.
Your hips should be as close to the floor as possible. This allows an optimal range of motion.
Hold the rope attachment with a neutral grip (palms facing each other).
Extend your arms so that your hands are over your chest.
Slowly lower your hands toward the pulley while maintaining a slight bend in your elbows.
Pause at the bottom and focus on stretching your lats.
Return to the starting position.
Pro Tip: As you get better at this exercise, you can increase the difficulty by performing it on a decline bench. The decline position helps isolate your lats better, resulting in a better mind-muscle connection.
Incline Cable Pullover
The incline cable pullover can deliver optimal lat engagement because of the lat stretch at the top of the rep.
Steps:
Set the cable pulley at the highest setting and connect a rope attachment.
Set up an incline bench facing away from the pulley. Adjust the bench’s incline to a 45-degree angle with the floor.
Lie on the bench and grab the rope attachment. Ensure that the cable is taut at the bottom of the movement.
While maintaining a slight elbow bend, pull the cable until your hands are in front of your chest.
Slowly return to the starting position.
Repeat for reps.
Pro Tip: Keep your back flat against the bench’s back pad. Arching your back and lifting your chest can result in pectoral engagement.
Straight Arm Lat Pulldown
The straight arm lat pulldown is a popular cable exercise to work the lats. It helps work your back without engaging your biceps.
Steps:
Set the cable pulley to the highest setting and affix a straight bar.
Grab the bar with an overhand grip and take a couple of steps back.
Bend your knees slightly, push back your hips, and lower your torso until it is at a 45-degree angle with the floor.
Brace your core and pull down the bar to your thighs while maintaining a slight bend in your elbows.
Slowly return to the starting position.
Repeat for reps.
Pro Tip: You can also perform this exercise while kneeling on the floor. It ensures you don’t use your lower body to generate momentum to pull down the weight.
Dumbbell Pullover
This is the OG pullover exercise. Add this movement to your exercise arsenal to build wider lats.
Steps:
Place your shoulders on a bench and your feet on the floor. You should be at a 90-degree angle to the bench.
Hold a dumbbell over your chest with both hands. Your arms should be extended and perpendicular to the floor.
Keep your hips low to the floor throughout the exercise for optimal lat engagement.
While maintaining a slight bend in your elbows, lower the dumbbell toward the floor behind your head.
Pause at the bottom.
Slowly return to the starting position.
Pro Tip: Use a barbell on this exercise to target your lats from a different angle. Also, avoid going super heavy on this exercise as the weight is directly over your head at the top. You don’t want to hit failure in this position.
Medicine Ball Slams
You probably weren’t expecting medicine ball slams on this list. However, it is a great movement to work your lats and core, as it involves explosive strength and power.
Steps:
Stand upright with a shoulder-wide stance.
Hold a medicine ball in front of your chest with both hands.
Squat down slightly to load the spring.
Lift the medicine ball overhead while extending your knees and raising your heels off the floor. Your body should be in a straight line, from hands to toes, at the top of the movement.
Use your lats, core, and arms to slam the medicine ball between your feet with as much force as possible.
Power the slam by lowering into a partial squat.
Repeat.
Pro Tip: Focus on contracting your lats in the overhead position and throwing the ball to the floor.
Wrapping Up
The kneeling cable pullover is an incredibly effective exercise to target your lats. Using a cable allows you to keep constant tension on your target muscle throughout the range of motion. This exercise will help you annihilate your lats without exhausting your biceps, which is the case with most pulling-based exercises.
We have also listed the kneeling cable pullover variations and alternatives in this article that will help you keep your training sessions interesting. Add 1-2 exercises from this list into your back training regimen for building an aesthetically-appealing back. Best of luck!
References
Krzysztofik M, Wilk M, Wojdała G, Gołaś A. Maximizing Muscle Hypertrophy: A Systematic Review of Advanced Resistance Training Techniques and Methods. Int J Environ Res Public Health. 2019 Dec 4;16(24):4897. doi: 10.3390/ijerph16244897. PMID: 31817252; PMCID: PMC6950543.
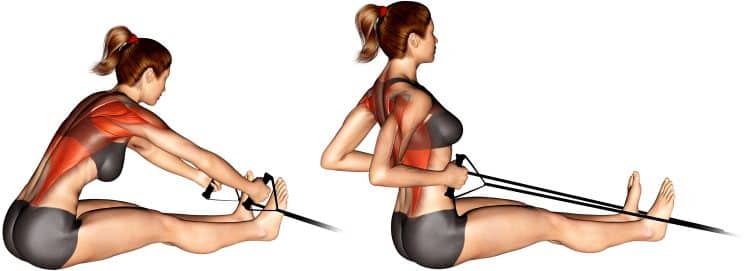
Band Seated Row Exercise Guide: Muscles Worked, How-To, Benefits, and Variations
Resistance bands and (back) home workouts go together like peanut butter and chocolate. Especially because of the space and money needed for a good home gym setup. Exercises like band seated rows and similar variations take up no space (a band weighs little and can fit anywhere) and cost no more than a Jackson ($20 bill), yet they are so effective. Additionally, finding good and challenging exercises for the back at home (especially without a pull-up bar, or the ability to do one) requires more work.
The mighty band is the answer and this guide tells you why, and how to utilize band seated rows to get those back gains.
Muscles Worked During Band Seated Rows
Everything from your waist and up gets a piece of stimulation from band seated rows. Learn about the benefits of training each muscle and how they interact to assist during the exercise.
Infraspinatus – Part of the shoulder blade, infraspinatus helps form the shoulder area, while helping to keep it mobile and stable. Rows involve shoulder motion, which recruits infraspinatus.
Latissimus Dorsi – A massive muscle by surface area, latissimus dorsi or lats cover as much of the upper and lower back. It spreads out to the sides behind the arms, and is a major activator during pull movements, especially pull-ups.
Teres Major – The teres major forms a bridge from the scapula (shoulder blades) to the humerus (upper arm bone). This muscle partners with the latissimus dorsi above to perform extension, adduction, and internal rotation of the humerus.
Teres Minor – Found above teres major, minor also connects from scapula to upper arm bone. However, unlike major, the latter is a rotator cuff muscle that contributes to shoulder joint stability and function.
Trapezius Lower Fibers – As the name tells, traps are a trapezoid shaped muscles divided in three sections, upper, middle, and lower fibers. The lower traps do downward movement of the scapula, and help the upper traps move it upward. Rows effectively light the traps on fire!
Trapezius Middle Fibers – Above the lower fibers are the middle trapezius that draw the scapula back during rows, really emphasizing these muscles.
Brachialis – One of the best side effects of back training is the arm muscles come along for the ride. Brachialis is hidden under the outer biceps and come out on a lean physique. But aside from aesthetics, brachialis is a powerful arm flexor, bending the elbow during band seated rows, and all similar movements.
Brachioradialis – Contributing to grip performance, brachioradialis inhabits the upper and lateral forearm where it crosses the elbow, functioning to bend the arm, and supine/pronate the forearm. Pulls and curls will naturally build and strengthen these lower arm muscles.
Deltoid Posterior – If you include rows in your workouts, you can bet the rear delts will benefit too. While there are three heads that make up your shoulder, the posterior head supports rearward arm movements, while the front head lifts the arm forward, and the lateral head lifts the arm out to the side.
Deltoid lateral – Your middle delts also get an intense workout from band rows. This head gives width and roundness to the upper body, and raises the arms out to the sides.
Other muscles involved – Aside from the primary muscles worked, band seated rows also engage the rectus abdominis (six pack muscles) and oblique muscles to keep your torso strong. This creates better force transfer, and muscular efficiency.
How To Do Band Seated Rows
To do band seated rows, you need the right tools, that include a quality resistance band, and a sturdy base like a power rack, thin pole, or even your feet if you can do it safely. And that’s half of it! The actual movement is not difficult, and most people can do it.
Below we’ve listed detailed band seated row steps and a short video demonstration.
Steps
Sit on the floor, a bench, or whatever is most comfortable for you.
Wrap one end of the resistance band around an immovable object like a power rack post, machine, or small pole. Then grab the other end and make sure both sides are even. The band should be at a height between your belly button and lower chest.
Move back to stretch the band, and do a few practice reps. The band should still be stretched when your arms are fully extended forward.
Sit up straight and pull your shoulders back.
Pull your elbows back behind your body, and squeeze your back muscles hard.
Stretch your arms forward and repeat steps 5 and 6 until you’ve completed the desired number of repetitions.
Tips
Having a platform to press your feet against is ideal if using very heavy resistance, to keep your body stable, and give you more pulling power.
You can also wrap looped bands under the bottom of your feet if you don’t have an object or base like a pole or piece of equipment.
Any type of band can work for this exercise.
Make sure the band is always stretched, to challenge and stretch your back muscles during the eccentric or negative phase of each rep.
This Exercise:
Target Muscle Group: Back
Secondary Muscles: Biceps, forearms
Type: Hypertrophy
Mechanics: Isolation
Equipment: Resistance band and solid base (optional)
Difficulty: Beginner
Benefits of Band Seated Rows
There is little to no reason not to incorporate band seated rows in your workouts. Here are the benefits that first come to mind when we think of this super effective exercise.
Resistance bands are versatility GOAT!
When we say the options are endless, it’s no exaggeration. Resistance bands are the GOAT (greatest of all time) of versatility. Not to mention they come in different forms, and levels of resistance.
If you have the right bands to match your strength level, and know what you’re doing, you can build as much muscle as you want. Of course, they do have some drawbacks as well, which we mentioned below. But overall, for the money and advantages, it’s hard to beat training bands for certain exercises.
Check out these resistance bands that we reviewed.
No excuse not to train your back
Without a pull-up bar or weights, one might say you’re screwed if training at home. While you should always find a way to train your back, and there are options, a five dollar band can be a gamechanger.
Not training your back and just doing push-ups, ad no rear training, is a recipe for muscle imbalance both functionally and aesthetically.
Comfort of movement
Unlike bulky weights or a bar that doesn’t move past your belly, using bands is arguably more comfortable. Consequently, you can focus on getting an amazing contraction.
Extremely user-friendly
99 percent of the population can do band seated rows. There’s not much to it, yet the benefits are worth it! In fact, similar variations are used for rehab purposes, because it’s so user-friendly.
Cheap and effective back workout
A resistance band can cost as low as a few bucks. There’s no reason not to have a few in your closet!
On the same side of the token, you get a fantastic upper body workout using bands and all of the possible variations. It’s much more practical for people who may not have the funds or time for gym training.
Drawbacks of Band Seated Rows
The pros outweigh the cons for sure. But we cannot ignore the few drawbacks of banded training.
Harder to gauge progress
One significant negative of resistance band exercises is that many people don’t take them seriously. Bands are not just a warm up or stretching device. They offer several levels of resistance, and can help to change your physique if you use them like other training tools.
When training with bands, you should make note of how far you are from the anchor point (where you attach the bands), and use a heavier strength band as you progress.
Try this Full-Body Resistance Band Workout For Home Exercisers
Bands are not as consistent…
Unlike free weights and machines, bands resistance is lighter at the start of a rep, and harder as it stretches out. Of course, you should pre-stretch the bands before starting the exercise, but more experienced exercisers know how to do it best.
Band training still requires technique to do right!
Another downside to band training is they can wear out, which may reduce their strength. Overall, though, for the person looking to improve their fitness, this shouldn’t be an issue.
Common Mistakes When Performing Band Seated Rows
Don’t make these mistakes and you’ll be good to go with band seated rows!
Sitting too close to the base
When using resistance bands, they should always be stretched, whether a little or a lot. You don’t want to sit too close to the base (where the other end of the band is wrapped around) so that when you reach forward, the band becomes un-stretched.
Using too much resistance
Ego training is nothing new. In fact, we’ve all done it and still do. Then there are the less experienced who don’t know any better.
That’s why it’s more important to focus on range of motion first, and then training heavy later. You’ll train the muscles correctly, get the most benefit, and also prevent pulling or injuring a muscles.
Mediocre range of motion
You should be training your back muscles through their entire range of motion. Otherwise, you won’t get a good stretch in your lats and surrounding muscles, shorting the potential of both phases of a rep that contribute to strength and hypertrophy gains!
Variations and Alternatives of Band Seated Rows
Band rows are typically for home or mobile training purposes. These variations and alternatives are superior at the gym, or if you can afford more hefty training equipment.
Standing band row
For a more athletic and functional variation, simply do the banded row while standing. You should also mix in training on your feet as it helps to develop and maintain our human ability to perform natural feats.
Steps
Secure the band around an object, and grip both ends evenly while standing on your feet.
With your arms outstretched in front of you, take a step or two back to stretch the band, and bend at the hips and knees. You can use a staggered stance with one foot forward and the other behind. Or, you can stand with your feet roughly shoulder width apart.
Push your chest up and keep your shoulders back, then pull your hands past your ribs and contract your back muscles.
Extend your arms forward until you feel a little stretch in your back muscles, and then repeat.
Below is a video example of standing rows, plus there are a few kneeling variations that remove leg involvement, focusing on just the upper body.
Standing bent over row
The best and most convenient banded row is the standing version that requires nothing but you and a band.
Steps
Grab the bands in both hands, and stand evenly on the center of the band with your feet shoulder width apart, then make sure both sides are the same length. Move your feet closer or further apart as needed. Just make sure there’s always tension in the band.
Bend your knees and hips then lean your torso forward at a roughly 45-degree angle to the floor.
Retract your shoulder blades, and straighten your back.
Tense your core, and drive your elbows back behind you, keeping them slightly flared out.
Squeeze your back muscles, stretch your arms back to the starting position, then repeat.
Cable seated row
The obvious closest variation or alternative to band seated rows is the cable version. Most people don’t own a cable machine, but a gym membership will give you access to one.
Overall, there are more advantages to using cables than bands. These include more handle options, a numbered weight stack, and equal resistance from start to finish of each rep. Additionally, cable training is more natural than using machines that lock you in a single movement path.
Machine seated row
Another must have in your back training rotation, the major advantage of machine rows include being locked in. That makes it very user friendly, eliminating the need to balance, stabilize, or think too much. Just sit, adjust the seat, assume proper training posture, and start rowing. The machine takes care of everything else.
Note: There are different machine variations, so you may need to read the machine label or ask for assistance.
Inverted suspension row
Almost as versatile as resistance bands, TRX trainers and similar alternative suspension trainers make it possible to do rows at home using your body’s resistance.
Ideally, you can set up your trainer in an area that allows you enough space to move freely, and consequently perform more advanced exercises. However, you can do an easier version if all you have is a door to hook your straps to.
Steps
Setup your suspension trainer so that it’s roughly about waist-height. Sit on the floor below the straps. Then grab the handles, allow your arms to fully extend, and place your feet flat on the floor. Lift your hips so that your body forms a straight line from your knees to your head.
Tense your core tight, bend your arms and pull your body up to the handles. Keep your elbows close to your sides and your wrists straight.
Extend your arms and repeat.
Pro tip: Build more strength and size by elevating your feet up onto a bench, or wear a weighted vest to add more resistance.
Related: Best TRX Back Exercises For a Thick Rock-Solid Back
Free weight rows
In its various forms, using dumbbells and barbells to perform row variations will get you the back you deserve. They’re more raw in nature, require total body activation, and recruit a ton of core. Additionally, you can buy a cheap barbell set for home training.
Check out our back training workouts that include a lot of free weight row variations.
FAQs
Are band seated rows as good as cable seated rows? Overall, cable rows have some major advantages over banded rows. However, for home training purposes, resistance bands are a viable tool that gets the job done when used ad progressed correctly.
What’s the best sets and reps for band seated rows? There’s no perfect one size fits all recommendation because we all have different goals. However, the majority of people will benefit from the following sets and rep ranges.
Note: We do recommend having a strategy in place to mix up the rep ranges, ad benefit from each one.
Strength: 3-4 sets x 5-7 reps
Hypertrophy and a little strength: 2-4 sets x 8-12 reps
Muscle endurance: 2-3 sets x 15+ reps
What type of band should I use for band seated rows? Almost any type of resistance band will work. Choose one based on your preference and budget.
Wrapping Up
By now you should be convinced of how awesome band seated rows are for building a sexier posterior! If you’ve ever trained at home, or prefer to make gains at home, it’s going to be a key tool in your back training arsenal. But the seated band row is just one band variation, and you should try the others that we also included in this guide.
Make sure to read through this article to understand the benefits and drawbacks of band seated rows, and always use a variety of exercises and techniques to reap the full benefits of training.