Tag: Cardio

GW-501516 (Cardarine)
GW-501516 (Cardarine) Trenbolones Perfect Match for Lean Gains When it comes to achieving lean gains and maintaining cardiovascular endurance, the combination of Trenbolone and Cardarine (GW-501516) is unparalleled. While bulking season may be the norm for many, some prefer to focus on recomping their physique without sacrificing leanness. This is where the dynamic duo of…
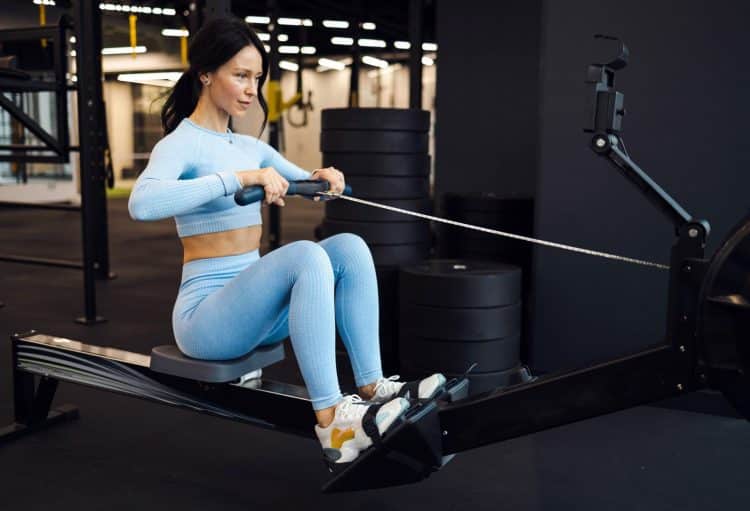
Rowing Machine Form Guide: Use The Rower To The Best Effect
There are plenty of options out there when it comes to getting a good cardio workout. As a personal trainer, I’ve tried them all. Yet after 30 years of training athletes, sports people, and everyday gym goers, I’ve settled on just one device — the rowing machine.
Rowing has a lot going for it. Besides working more than 80% of your muscles, it provides a joint-friendly way to get a great cardio workout. Your rowing workout, though, is only as effective as your form. Unless you learn how to do it right, you will develop poor habits that could lead to injuries. In this article, I’ll explain exactly what proper rowing machine form looks like. I’ll also cover the most frequent rowing machine form mistakes and address the most common rowing machine form questions.
Rowing Machine Benefits
Before we get into the specifics of how to row with proper form, let’s consider the benefits of rowing:
Full Body Training
Lower body muscles are the main focus of most cardiac activities. This is because their primary workout movement is typically some variant of walking. These workouts effectively tone and strengthen the quads, hamstrings, glutes, and calves. However, the upper body gets very little stimulation.
Rowing is different, as 85% of your body’s muscles are used during a rowing workout. Besides the leg muscles, rowing engages the latissimus dorsi and trapezius muscles of the upper back, the deltoids, biceps, and core, as well as the muscles that run down either side of the spine.
Working out on a rowing machine won’t give you bodybuilder-like muscles but will strengthen your muscles. You can increase the rowing resistance if you want to employ more pulling power to complete the rowing motion. The strength and endurance of your muscles will increase by performing hundreds or even thousands of repetitions while rowing.
Joint Friendly Cardio
Rowing is a classic example of a closed-chain exercise. This is because your feet are always in contact with the foot platform. In contrast, most cardio exercises have an open chain, which causes the feet to rise and drop frequently. This results in recurrent foot strikes.
Since rowing is a closed chain movement, there is minimal impact pressure on the ankles, knees, and hips. Rowing also relieves the compressive pressure on the spine because it is a sitting workout.
Rowing not only lessens the strain on your joints but it also improves the health of those joints. In a 2014 study, 24 participants were followed for eight weeks as they exercised on rowing machines. Their knee, shoulder, and elbow joints’ capacity for rotation had increased by an astounding 30% on average by the time the trial was over. [1]
Calorie Burn
Rowing burns a whole lot of calories. Your heart and lungs have to work harder to deliver the nourishment required for those muscles to work since you are using both your upper and lower body muscles. Because of this, rowing is a fantastic option for those looking to lose weight.
For a 180-pound person, a 30-minute workout of moderate-intensity rowing will burn about 200 calories. They could easily burn more than twice as many calories if they increased their effort. You can regularly lose weight by combining a daily rowing program with a calorie-reduced, nutritious diet.
Cardio Workout
Rowing is an excellent cardiovascular workout. Since cardiovascular exercise is aerobic, oxygen must be consumed to fuel the activity. That oxygen and other nutrients are delivered to the working muscles through the bloodstream. Your cardiovascular system facilitates this process.
Your heart is the central organ in your cardiovascular system. The stronger it is, the more effectively it will pump the blood that delivers the nutrients to your cells. Rowing strengthens the heart so it can act as a more efficient pump.
Understanding the Rowing Machine
Rowing machines are designed to simulate the experience of rowing on the water. The parts of a rowing machine work together to enable the user to perform the four key movements that a rower performs:
Catch
Drive
Finish
Recovery
Here are nine rowing machine parts that you need to become familiar with:
Flywheel: The flywheel is the large wheel at the front of the machine. It is connected to the handle by a cable. When you pull on the cable, you create resistance. This may be air resistance through fab blades, magnetic resistance through magnets, or water resistance as the flywheel churns through the water.
Damper: Air and water resistance rowers usually feature a damper. This is a lever that controls the amount of air that gets to the fan. Most dampers will have settings from 1 to 10. The higher you set the damper, the more air flows to the fan. This makes the rower feel heavier and, therefore, more challenging to operate.
Footplates: The footplates are positioned where the rail meets the front housing of the machine. The best footplates pivot to allow for natural ankle motion while rowing. They should also be adjustable and feature sturdy foot straps to allow you to lock your feet in place securely. Getting the correct foot placement will help with proper rowing form. You won’t be able to drive as hard and risk lower back damage if your heel height is too low. Your stroke length will be constrained, and your form will deteriorate if your feet are too high in the footplate.
Seat: Many modern seats are ergonomically contoured for comfort. Others are molded, padded, or flat. You can increase your sitting comfort by sitting a few inches forward from the back of the seat and not leaning back excessively at the top of each rowing stroke.
Seat Rollers: Seat rollers sit on the underside of the seat, connecting it to the rail. High-quality rollers will allow for smooth movement up and down the rail.
Handle: The handle may be ergonomically contoured for comfort. It should be long enough to allow you to grip it out wide. The best handles will also have a center cut out to allow you to row one-handed.
Rail: The rail is the central part of the frame that the seat moves up and down. It may use aluminum or steel. The rail may also be parallel to the floor or slightly angled. Angled rails are more challenging because they offer more resistance.
Monitor: The monitor displays your key training data, including your time, strokes per minute, total strokes, calories burned, and heart rate.
Frame: The frame of a rower may be made of aluminum, steel, or wood. It should have a maximum user weight of at least 50 pounds heavier than the user. This will ensure the rower is sturdy and won’t move around during use.
Proper Body Positioning
The correct rowing form starts with your setup. Begin by sitting on the rower seat and putting your feet on the foot pedals. Adjust the footrests so they are aligned with your feet, and then secure the foot straps so you are locked in.
Sit upright with a naturally slight back arch and lean forward to grab the handles with an overhand grip. Hold the handles with a relaxed grip, avoiding squeezing too tightly.
Lean slightly forward while maintaining a neutral spine position and bending your knees slightly. Keep your shoulders relaxed and down. Finally, engage your core to activate your abs and lower back muscles.
Executing the Rowing Stroke
The rowing stroke has four distinct parts — catch, drive, finish, and return. Let’s break down each part with an explanation of its purpose.
The Catch
The catch is the portion of the stroke where you are most squeezed and tense at the beginning. Your arms are straight, your knees and hips are bent, your ankles are dorsiflexed, and you feel like there is nowhere for your stomach to go. In terms of rowing on the water, this is the portion of the stroke where your oar has just been lowered into the water, and you are about to push or drag the oar through the water to propel the boat.
The Drive
During this phase of the stroke, you push incredibly hard with your leg muscles to propel the oar through the water and propel the boat forward. It is what determines the numbers on the rowing machine’s LCD that displays your split time and indicate how much effort you are exerting. This is what accelerates you. It is the portion of the stroke where you put in all the effort, requiring a powerful leg push.
The Finish
The finish comes at the conclusion of the drive. This is the point where the oar emerges from the water. Your core is tight, your arms are bent, your knees are straight, and your hips are extended further than before. After completing the movement of the handle, you are prepared to bring it back to the front, or the catch, position.
The Recovery
You must go through the recovery portion of the rowing stroke to get from the finish back to the catch. It is called recovery because you get to rest (very briefly) and recover during this part.
Putting It All Together
Each of the four phases is covered with the following cue:
“Legs, core, arms … arms, core, legs”
Many people have a natural tendency to think “pull” when in the catch position. They want to pull with their arms when they should be pushing with their legs first. Your legs provide 60% of the force for the movement.
So, most of the work is being performed by your leg muscles, the largest in your body. However, if you pull with your arms first, your smaller, weaker arms do most of the work, producing much less force and efficiency. So, straighten your knees and push back through your feet rather than pulling with your arms first while using those bigger, stronger leg muscles. Your legs will straighten, and the seat will slide backward.
Once your legs are straight, you can begin to open up your hips by moving from a slightly forward-bent position to a slightly backward position. Keep your core tight as you bring your arms into the action.
By this time, your legs have already exerted so much force that the flywheel is turning very quickly, and you do not need to exert much force with your arms to bend your elbows and pull the handle close to your body. About 20% of the power for the rowing stroke comes from the arms.
The driving phase of the stroke was formed by the three motions (legs, core, and arms). You are now in the finish position when your legs are straight, your core is slightly leaned back to the 1 o’clock position, your elbows are bent, and the handle is close to your body.
You must go through the recovery phase to return to the catch position. To do this, you simply reverse the actions you’ve just performed, making it arms, core, and legs.
As soon as you are in the finish position, immediately push your hands away from you and straighten your elbows to allow the handle to pull your arms in front of you. This will be made easier with the help of the handle and chain recoil. When your elbows are straight, you close the hip angle, which causes your trunk to go from 1 to 11 o’clock. You must perform the leg component of the stroke in reverse once your core and trunk have reached that position. This will bring you back to the catch position.
You are now ready to start the stroke cycle over again.
Common Mistakes to Avoid
Here are the ten common mistakes that people make on the rowing machine and how to fix them:
1. Overgipping the Handle
You should grip the handle with a relaxed grip. There is no need to grab it tightly or overgrip with the wrists angled downward. Your fingers should be comfortable around the handle with your thumbs underneath. Your wrists should remain flat throughout the entire rowing stroke.
2. Leaning Forward in the Catch Position
People frequently slump forwards at the catch to reach further forwards. This results in the rounding of the upper and mid-back. This is not the best position for your shoulders or back. Instead, try sitting straighter-backed and more upright, but not so straight that your spine is overextended.
If your back is rounded with your arms far in front of you in the catch position, you will struggle to maintain contact with your body. That’s because you rely more on your ligaments and arms to start rowing than back and shoulders.
You want to be in the catch position with your back straight, hips still tilted forwards at 11 o’clock, core engaged, and lats (back shoulder) engaged. Pull your shoulders back and down to engage the lats.
3. Breaking the Arms at the Catch
Your arms should be as straight as possible in the catch position. This allows you to more effectively connect the handle to the power of your leg drive. So, avoid the tendency to bend the elbows in the catch; that will come as you move into the drive.
4. Chicken Wing Arms
Chicken wing arms occur when you stick your elbows out to the side in the finish position. This results in quite a lot of energy loss. Allowing the elbows to return past the body with relaxed rather than hunched shoulders is far more efficient.
5. Lunging at the Catch
It’s common to see people lunging their torso forward just before the catch position. This puts excessive strain on your lower back and could result in pulling a muscle in the mid-back. Establish the proper forward upper body lean during recovery before you bend your knees to avoid this tendency. Your shoulders should be in front of your hips before you move into the catch position. Do not deviate from this position.
6. Overreaching at the Catch
Avoid reaching too far toward the flywheel in the catch position. Doing so puts you in a weaker, compromised position. You want your torso to be in a 1 o’clock position, with your shoulders in front of the hips. Do not overextend the shoulders, keeping them down and relaxed.
7. Leaning Too Far Back in the Finish Position
Leaning too back in the finish position is the most common mistake I see among rookies. Doing so negatively affects your balance and stability, puts excessive strain on the lower back, and prevents you from adequately engaging the upper back, glutes, quads, and hamstrings.
In the finish position, your torso should be in the 1 o’clock position. Another cue is to look at the chain or belt that connects the handle to the flywheel. It should be parallel to the floor throughout the stroke, including in the finish position. You are leaning too far back if it is angled upward in the finish position.
8. Only Pushing Through the Heel in the Drive Position
Let’s now focus on what part of your foot you are pushing through in the drive position. In the catch position, many people lift the heel and push through the toes. That is perfectly fine, but as you transition into the drive, you must drop your heels to push through the entire foot — not just the heel or toe.
Some people find they can only push through the heel as they complete the drive position. This can result in your shin and toe muscles being overworked, which can also result in an injury.
9. Bending the Knees Too Early on the Recovery
If you bend your knees too early on the recovery, your arms have to row too high or follow an arcing movement. Maintain a parallel chain position throughout the entire stroke. Achieve this by extending the arms and allowing your body to swing naturally so that the hands and handle clear the knees before you bend your knees.
10. Rushing the Slide
If you try to move forward too quickly on the rail as you transition from recovery to catch, you won’t be able to establish a smooth rowing cadence. Allow time during the recovery phase to breathe, and ensure you’re in the proper position for the next drive.
Watch The Correct Technique for Rowing Machine Exercise:
Frequently Asked Questions
Why is the rowing technique important?
By learning proper technique, you will be able to avoid common rowing machine injuries, especially those relating to the lower back. You will also become a more efficient rower, able to burn more calories with less wasted effort and to row faster and in a way that engages more muscles.
What key cues should I think about when rowing?
Good rowing form can be distilled to a simple six-word cue — “legs, core, arms … arms, core, legs.”
You can follow the proper bodily sequence to achieve proper rowing form by repeating this cue to yourself.
What muscles does rowing work the most?
The main muscles worked when rowing are the glutes, quadriceps, hamstrings, upper back, lower back, and core. Rowing has been described as a horizontal deadlift repeated hundreds of times over.
Wrap Up
Rowing is one of the most effective forms of cardio you can do. It is also one of the safest, being extremely joint-friendly. However, the benefits you’ll get from rowing are only as good as your technique. Take the time to apply the technique guidance we’ve provided, avoid the 10 common rowing mistakes, and your rowing workouts will be far more productive, safe, and enjoyable.
References
Kang SR, Yu CH, Han KS, Kwon TK. Comparative analysis of basal physical fitness and muscle function in relation to muscle balance pattern using rowing machines. Biomed Mater Eng. 2014;24(6):2425-35. doi: 10.3233/BME-141056. PMID: 25226943.

Rucking Basics for Fitness and Fat Loss
There are many different workouts you can use to get fit, lean, and healthy. And, contrary to what a lot of people will tell you, one is not better than the others. While some workouts may burn more calories per hour, the differences are marginal and easily offset by making small adjustments to your diet.
Rather, what separates a good workout from a great one is enjoyment and convenience. If you like what you are doing and can do it regularly, it’s more likely to provide results than the so-called best workout you hate and hardly ever do.
Because of that, it’s worth exploring all your workout options to find activities that fit best into your lifestyle and schedule.
In this article, we lift the lid on rucking, explaining why and how to do this popular workout.
What is Rucking?
Rucking is a military-inspired cardio workout that involves walking or hiking while carrying weight. In military circles, a ruck is a rucksack or backpack, so rucking means walking with a bag on your back.
As a cardio workout, rucking works your heart, lungs, and circulatory system. It’s an effective calorie burner and will help strengthen your core and legs. It’s a viable alternative to regular walking, jogging, running, cycling, etc., and provides a simple yet effective way to burn calories, get lean, improve your muscular endurance, and get fit.
Rucking is simple, low-tech, and effective, requiring no special athletic skills; if you can walk, you can ruck!
However, like most workouts, there is a right way and a wrong way to ruck. Mistakes can leave you exhausted and miles from home. That said, rucking is such a simple workout that such mistakes are easy to avoid, especially if you follow the guidelines in this article.
The Benefits and Advantages of Rucking
Not sure if rucking is the right workout for you? Consider these benefits and advantages and then decide!
Improved cardiovascular fitness
Cardiovascular fitness is your ability to take in, transport, and utilize oxygen, typically expressed as your VO2 max. Walking doesn’t usually have much of an effect on your cardiovascular fitness as the intensity is too low. However, that all changes when you strap on your ruck.
Rucking with weight will increase your heart rate as much as running, cycling, and other cardio workouts. As such, it can help you develop an impressively high level of cardiovascular fitness.
A higher VO2 max will make you more fatigue-resistant, help you recover faster between sets of strength training, improve your athletic performance, and may even help you live a longer, healthier life (1).
Stronger, more enduring legs
Walking briskly with a weight on your back feels very different from strolling without a backpack. It challenges your legs in a whole new way and will develop your muscular strength and endurance. Walking up and downhill is especially challenging, and as your heart rate soars, so too does the fatigue in your legs.
You can expect to feel rucking in your entire lower body, including your quadriceps, hamstrings, glutes, calves, and core.
It’s no coincidence that soldiers and long-distance hikers often have very well-develop legs. You can usually spot people who walk a lot by their well-developed (and often super-defined) calves.
An effective calorie burner
Several factors determine how many calories you’ll burn while rucking, including gender, age, speed, duration, and how much weight you are carrying. However, rucking could potentially burn as many calories as running. Walking with a weighted backpack will certainly burn more calories than walking without one.
As such, rucking can contribute to your weekly caloric expenditure and help you burn fat and lose weight. However, like all workouts, you’ll only lose weight if your diet is on-point.
Good for your posture and core
Walking is good for your posture. Firstly, it gets you up off your butt, onto your feet, and away from your keyboard or screen. Simply standing up straight can help fix your desk slouch and nerd neck.
Secondly, walking stretches and mobilizes your hips and lower back. This is also beneficial for your posture.
Finally, wearing a heavy backpack engages your deep core muscles. You must use your core to stop the pack from pulling you backward. A stronger core will also enhance your posture, as well as lowering your risk of back pain.
Accessible
You need very little equipment to start rucking. In fact, you probably have everything you need already (check out the next section for details). That means you can get started immediately and without having to buy any special equipment.
Rucking also requires no athletic skill, so it’s ideal for those with no sporting background.
As far as where to ruck, you can go anywhere you like. Put your backpack in your car and drive to the countryside or ruck around your neighborhood. You can ruck to and from work, ruck to the store to buy your groceries, or go rucking with your kids or dog – it’s a very convenient and accessible way to work out.
Remember, the best workout is the one that you can do frequently and that you enjoy. Rucking removes many of the barriers to regular exercise.
Low impact
While running is a popular cardio workout, it is not without risks. When you run, your feet hit the floor with a force equal to several times your body weight. All that impact can have an adverse effect on your feet, ankles, knees, hips, and lower back, plus all the associated muscles, tendons, and ligaments.
There is a reason that many athletic injuries are prefixed with the word running – such as runner’s knee and runner’s hip. Running-related injuries are very common.
In contrast, rucking is a low-impact activity, so despite the added weight, it puts far less stress on your joints. With a lower risk of injury, you are less likely to miss workouts because you are hurt.
Low-impact rucking is also an excellent workout for people who are overweight that would otherwise find running uncomfortable or risky.
Scalable
Rucking workouts can be modified to match your current fitness level. Start light and short, gradually increasing the weight and distance as you get fitter.
With this in mind, you can also ruck in a group of people with different abilities. For example, less fit individuals carry light packs, while the fitter members of the group carry heavier packs. With a little trial and error, everyone should be able to have a similar workout.
Sociable
Leading on from the point above, while there is nothing wrong with rucking alone, this workout is ideal for couples, families, and groups. You can ruck with your kids, your pets, your partner, or your friends.
If you enjoy group exercise classes but prefer to work out outdoors, rucking with friends could be perfect for you.
A functional workout
Functional workouts and exercises develop fitness that you can use outside of the gym. They prepare your body for the demands of daily life and sports.
For example, squats are very functional because the squat is one of the movements most people do many times each day. In contrast, machine leg curls are less functional because they aren’t an everyday movement.
Rucking is simply walking with weight, so it’s a very functional exercise. Humans have been doing it since they learned to stand on two legs.
Gear for Rucking
While rucking is a very low-tech, no-frills sort of workout, you still need a couple of things to do it.
A rucksack
The first thing you need to start rucking is a ruck, better known as a rucksack or backpack. Ideally, your ruck should be strong and sturdy, with a hip and chest strap to keep it secure on your back. The back panel and shoulder straps should be padded for comfort.
You don’t need a special rucking backpack, although such things are available. Rather, a standard hiking pack will suffice and is usually much cheaper.
Alternatively, you can wear a weighted vest. However, you’ll still need to find a way to carry water on your ruck, especially on longer workouts.
Weights
You can load your ruck with just about anything you have available. Small-denomination weight plates and dumbbells are a good option, as are tightly-sealed water bottles, bags of sand or gravel, rocks, books, and canned goods.
However, ensure that whatever you put on your ruck doesn’t poke you in the back. What started off as a mildly annoying pressure point can turn into a major pack rash when you start to get hot and sweaty. Wrap your weights in towels or old workout mats if you need extra padding.
You don’t need to buy specialist rucking shoes or military boots for your ruck workouts. However, your footwear needs to be supportive, cushioned, and comfortable. Trail running shoes are a good option, and walking shoes are another.
Regardless of what you choose, make sure your shoes don’t rub, as blisters can bring even the toughest soldier to their knees. This is not the time to wear new, untested shoes. Instead, stick with footwear you are familiar with and that you know are comfortable.
Appropriate clothing
The most important rule for rucking clothing is to dress for the elements. Wear layers when the weather is cold, and wear less on warm days to avoid overheating. Grab a wide-brimmed hat to protect your face from strong summer sunshine and warm gloves and a beanie in winter.
Remember, too, that the weather can change, and so too will your body temperature as your workout progresses. Make sure you can add or remove layers as conditions and your body temperature dictates.
And that’s all you really need to start rucking – a backpack, weights, shoes, and suitable clothes. That said, there are a couple of additional items that may enhance your workouts:
Water bottle – rucking is thirsty work. Wearing a rucksack means that heat cannot escape from your back, and your body temperate will probably increase more than usual. As a result, you’ll probably sweat more, which can lead to dehydration. Carry a water bottle and drink from it little and often to stay hydrated.
A smartwatch – handy for tracking steps, distance, and calories burned. Some can also be programmed with your rucking route.
Navigation app – downloading a navigation app to your phone means you can create and follow pre-planned routes. Navigation apps are an excellent alternative to a traditional map and compass. However, if you plan on rucking in wild country, you should also carry a map as phone batteries die, screens break, and apps crash.
Earbuds – rucking is a great way to unplug from technology and enjoy some time alone or with friends. However, if you prefer to work out to music or want to remain contactable during your ruck, earbuds will be invaluable. However, don’t turn the volume up too high, or you could fail to hear upcoming hazards, such as traffic.
First-aid kit – if you are rucking far from the maddening crowds, a first-aid kit is a must. While rucking is a very safe workout, you could still trip and fall, sprain an ankle, get snake-bit, get a blister, or otherwise get hurt. A first-aid kit means you can patch yourself up and get home safely.
Trekking poles – walking with trekking poles is very popular in Nordic counties. The poles are helpful for balance and extra traction on rough terrain and let you take some of the weight off your legs and put it on your arms. Using trekking poles turns a lower-body activity into a full-body workout.
How to Get Started with Rucking
While rucking is simple and accessible, it’s still possible to get it wrong and turn what should be an enjoyable workout into a painful nightmare. Follow these steps to ensure your first few rucking excursions go as smoothly as possible.
Pick your distance carefully
Walking with weight is much more challenging than walking while unencumbered. Short distances feel much further when you’re wearing a heavy pack. With that in mind, be conservative and keep your first few rucks relatively short. Choose distances you can cover comfortably in an hour or less, i.e., 2-4 miles.
While you’ll soon work up to rucking faster and further, not going too far too soon will make your first few outings much more enjoyable.
Be conservative with your ruck weight
While it might be tempting to load all the weight you can into your backpack, carrying too much weight too soon could put you off rucking for good. Heavy loads get heavier as you start to feel tired, and your shoulders and back probably aren’t used to being loaded down with a heavy pack.
So, start with no more than about 10% of your body weight. This will be enough to be challenging but not so heavy that you feel crushed under the weight of your backpack. If in doubt, use less weight rather than more. You can always increase the load on subsequent ruck outings if your pack isn’t heavy enough.
Start slow
While soldiers ruck at four miles an hour or faster, you don’t have to. In fact, you should start slow, feeling like you could go more quickly if needed. You can increase your speed as you get used to walking with a weight on your back. However, remember it’s the weight that makes rucking such an effective workout, and you don’t need to walk at top speed or break into a run for it to be effective.
Choose easy to moderate terrain
Rucking in wild countryside is an awesome workout, but uneven terrain and steep inclines can be too challenging for beginners. So, for your first few rucks, stick primarily to flat, easy paths and trials, saving the rough stuff for when you are more experienced.
Enjoy it!
Don’t turn your rucking workout into a race. Take your time, look around, open your ears, and enjoy your surroundings. Breathe deeply and easily, relax your shoulders and arms, and even try some moving meditations. Stay off your phone, and use your ruck as an opportunity to decompress.
Rucking Basics for Fitness and Fat Loss – FAQs
Do you have a question about rucking? No problem, because we’ve got the answers!
1. How fast should I walk when rucking?
There is no set speed for rucking. However, most people average between 3-4 miles per hour or 15-20 minutes per mile. Your rucking speed depends on the terrain, your fitness, how much weight you are carrying, and how far you plan on walking.
Adjust your speed so you are slightly out of breath but comfortable enough that you can maintain your pace for the duration of your ruck. However, if you cannot maintain three miles an hour, you may be carrying too much weight.
2. How far should I ruck?
Like rucking speed, distance is also dependent on numerous factors, including your fitness and the time you have available. If you are unsure how far to ruck, start with a couple of miles and increase gradually as you get used to the demands of the workout.
It’s usually best to under-commit and over-deliver, so you finish your workout feeling like you could have done more. This is a much better approach than a “death march” that you can only just complete and never want to repeat.
3. How often can I ruck?
While rucking is low impact, it will still take a toll on your muscles and joints, especially if you walk fast and with heavy loads. As such, you should probably do 3-5 rucking workouts per week.
While you could do more than this, e.g., every day, the accumulated stress could lead to aches, pains, and injuries.
So, you could do one “big” ruck per week, perhaps at the weekend, plus a couple of shorter rucks spread throughout your week. Experiment with different training frequencies to see what works best for you.
4. Do I need a specialist backpack or shoes for rucking?
While there are companies making and selling rucking-specific shoes and backpacks, you don’t need them for this style of training. In fact, all you really need is a hiking daypack and comfortable, supportive footwear, like your usual athletic shoes.
That said, if you plan on rucking over rugged terrain, a pair of hiking shoes may be beneficial.
So, while you can buy a specialist rucking pack and shoes, you don’t need them. If you are new to rucking, use the equipment you already have, and then upgrade if you make rucking part of your regular workouts.
5. Is rucking good for weight loss?
Like all types of exercise, rucking can help you lose weight when combined with a sensible, sustainable diet. It burns a similar number of calories as running. Still, the impact is less, so you may be able to do it longer and more often, making it potentially more effective for weight loss.
However, what makes rucking so great is how it requires no specialist equipment, and you can do it almost anywhere and anytime. The best workouts for weight loss are the most accessible and convenient, as you need to do them frequently and consistently for them to be effective.
Long story short? Yes, rucking is good for weight loss!
Closing Thoughts
Getting fit and losing weight often seem like complicated pursuits, but really, they don’t have to be. In fact, all you need to do is toss some weights in a backpack and go for a brisk walk. Eat a few more salads and a bit less junk food, and your body will start burning fat for fuel.
You see – not complicated at all!
That said, simple doesn’t mean easy, and working out and eating healthily are often incompatible with our modern, hectic lifestyles.
That’s why convenience and accessibility matter; the easier something is to do, the more likely you are to do it. Rucking is exceptionally simple yet extremely effective, providing a workout you can do almost anywhere and anytime.
So, if you are looking for an excuse-free workout, try rucking. It’s no better than any other type of training, but nor is it any worse. Instead, it’s just another tool you can use to lose weight and get fit.
References:
1 – Strasser B, Burtscher M. Survival of the fittest: VO2max, a key predictor of longevity? Front Biosci (Landmark Ed). 2018 Mar 1;23(8):1505-1516. doi: 10.2741/4657. PMID: 29293447. https://pubmed.ncbi.nlm.nih.gov/29293447/
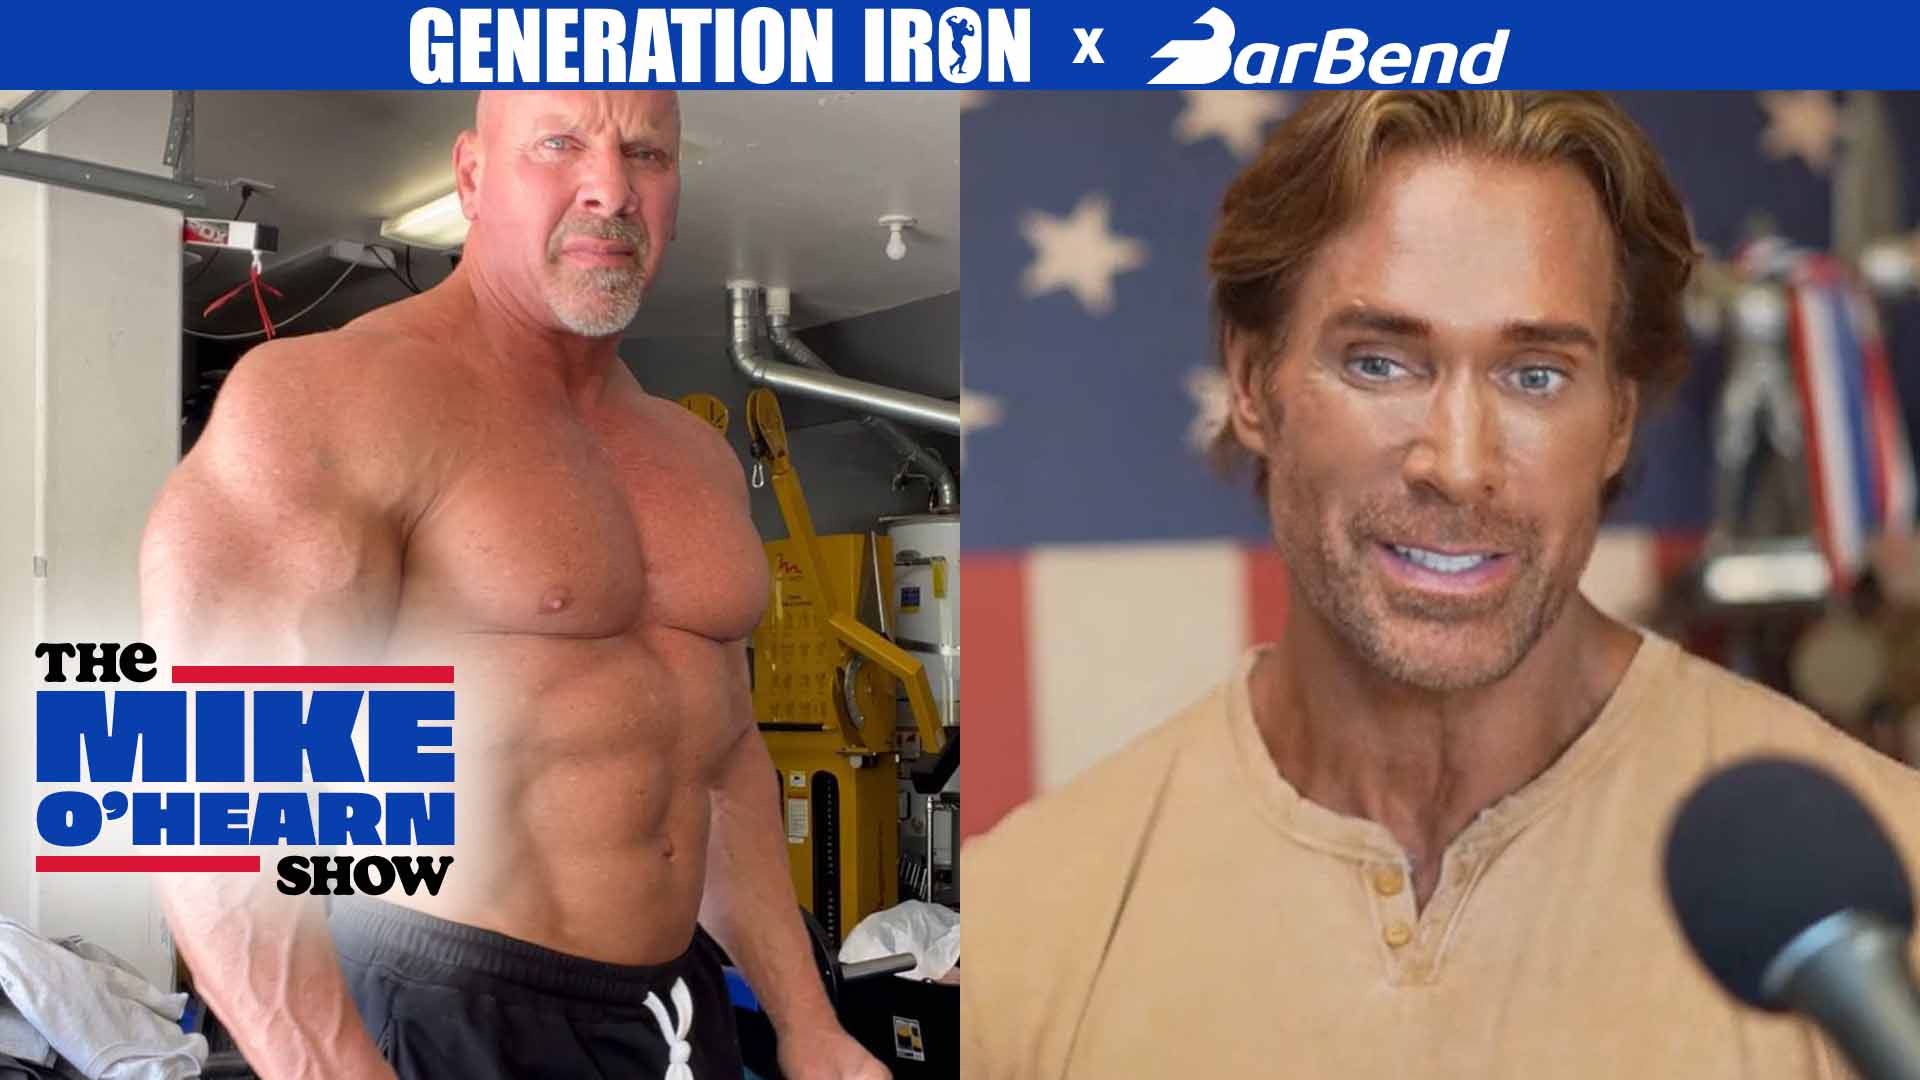
Stan Efferding: Cardio Is Nowhere Near As Important As You Think It Is | The Mike O’Hearn Show
[embedded content]
Stan Efferding & Mike O’Hearn want you to stop making cardio a religion.
Cardio sucks. Everyone knows it – and it’s particularly a thorn in the side of strength athletes and bodybuilders. However, the benefits of cardio for heart health and endurance are well known. As the fitness industry continues to grow in the mainstream – cardio has become a must-do activity for athletes and the regular person. In fact, it’s not uncommon to be guilted for not including cardio into your lifestyle – at risk of your life longevity. While cardio certainly has wonderful benefits, Mike O’Hearn believes many athletes are actually hurting their fitness goals with too much cardio. Pro bodybuilder and powerlifting legend Stan Efferding agrees. In Generation Iron and Barbend’s latest episode of the Mike O’Hearn Show, Stan Efferding explains how most fit individuals are doing way too much cardio.
Heart disease is one of the leading causes of death in the United States – especially for males. This reality has driven science and fitness experts to stress improving lifestyle via a better diet and increased cardio activity. While this may be an important truth for the average sedentary American – the message has also affected the athletic world. Mike O’Hearn and Stan Efferding are seeing a troublesome trend in modern athletes – they all do too much cardio.
Mike O’Hearn gets down into the weeds discussing this concept in detail with Stan Efferding – explaining how modern athletes often do cardio to the detriment of their fitness goals. Let’s break it down.
What Are METs In Cardiovascular Health?
A MET is the ratio of your working metabolic rate in relation to your resting metabolic rate. MET stands for metabolic equivalent – it’s the energy exhausted per unite of time. In simplest terms, it’s a scientific way to measure the intensity of exercise or an activity.
The base level, one MET, is your energy expenditure at rest. So when thinking about METs, you get a better idea of what it is measuring. 10 METs would be spending energy ten times more than when you are at rest.
Stan Efferding explains that for good cardiovascular health and decreased mortality rate – an individual should be able to maintain 8 METs during activity. 8 METs would be the equivalent of riding a bike on flat terrain. In comparison, running (at about 7mph) would equate to about 11-12 METs. This is important in understanding why he believes athletes and fit individuals are spending too much time on cardio. Let’s move on.
“Cardio is not a religion.”
– Mike O’Hearn
Stan Efferding Explains The Reason Athletes And Fit People Should Do Less Cardio
Mike O’Hearn and Stan Efferding make it clear from the top that this discussion is about fit individuals and athletes specifically. Their advice about cardio would change significantly for the average person or a person who lives a sedentary lifestyle.
Stan Efferding breaks down athletes into three categories regarding cardiovascular health:
People who meet 8 METs without needing cardio exercise
People who do cardio or weightlifting in order to successfully meet 8 METs
People who do cardio or weightlifting but still do not meet 8 METs
Stan Efferding claims that studies show the individuals who meet the first category are able to successfully commit to 8 MET activities despite not doing regular cardio. This can be due to genetics or overall lifestyle (such as an active job). But what is important to note, is that the individuals in category three, who do cardio regularly but still can’t meet 8 METs, have a higher mortality rate than the individuals in category one who do zero cardio.
What Stan Efferding is trying to point out here is that cardio in and of itself is not the singular solution to cardiovascular health. It’s not about the individual action, it’s about the outcome. What is important is that your cardio or weightlifting or activity leads to improvement in your ability. If you can’t measure an outcome – then you are simply doing a repetitive task, like cardio, for no reason.
This ties into the notion of diminishing returns in exercise. Over time your body will adapt, so you must adapt your training. If you do the exact same cardio routine every day for the rest of your life – you will not necessarily be gaining a cardiovascular benefit from the cardio.
“I find very few individuals who need more cardio if they are already generally fit.”
– Stan Efferding
Cardio Should Not Be A Religion, But It’s Also Not The Devil
Mike O’Hearn and Stan Efferding also want to stress that they are not saying you should never do cardio – or that cardio accomplishes nothing. What they are trying to say is that many fit athletes who don’t do cardio… probably don’t need to start doing it. The outcome or result of your lifestyle is more important than the exact mode that gets you there.
If you are a generally fit person but still suffer from factors such as high blood pressure, high lipids, or high blood sugar – cardio will help you become healthier, lower those levels, and decrease your mortality rate.
But if you are a bodybuilder without these issues and you can hit a consistent 8 METS of activity without cardio – that’s okay too.
At the end of the day, Stan Efferding values movement most above all else. If that movement is cardio and it fits your overall athletic goals, great. If that movement is weightlifting without cardio, that’s also okay.
Stan and Mike have far too often run into athletes who pressed too much cardio throughout their training regiment – and are now leading into a competition with limited options to improve because the cardio has worn them down. This is the worst situation when you are close to a competition. It leaves you with limited to no options and may pull away from your success at the competition.
This is why Mike O’Hearn and Stan Efferding are stressing to pull back on cardio if you are an athlete. Odds are you are doing too much. There are ways to keep longevity high without having cardio diminishing your muscle mass or your athletic ability. It ultimately depends on what sport you compete in – but for bodybuilders, don’t succumb to the pressure. You may not need cardio to stay healthy while you prepare for your competition. Each individual varies – but don’t fall for the blanket “cardio is always important” opinion.
Wrap Up
You can watch Mike O’Hearn and Stan Efferding talk about cardio in full detail by watching our latest episode of The Mike O’Hearn Show above. Make sure to catch new episodes every Friday only on the Generation Iron Fitness Network or wherever podcasts are downloaded.
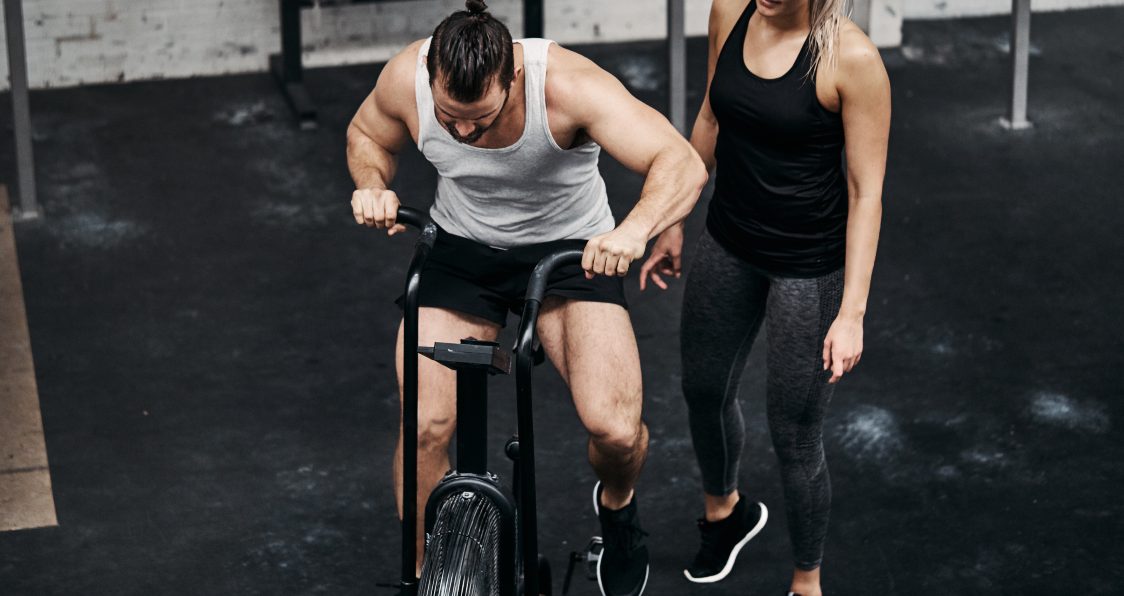
Top 5 Tips For Keeping Up With Your Cardio Indoors
There are ways to keep up with your cardio while working out at home.
Cardio might not be the most appealing type of exercise in the world, but it’s an important part of a healthy and well-rounded exercise routine. Keeping with your cardio can be a burden, but there are ways you can incorporate it into your daily workouts to make it more manageable.
If you’re still working from home, this is a great time to think about how you could incorporate exercise throughout the day since you no longer have going to the office taking up so much of your time.
Tip #1: The kettlebell is your friend.
Weight is your best friend when it comes to doing indoor cardio. Since you don’t have that much space to move around, the best trick is to utilize weights to force your body to break a sweat. The kettlebell is one of the best workout tools in this respect. You can do rapid kettlebell swings to get your heart rate up while standing in living room watching TV or on a Zoom call.
Doing twists while holding a kettlebell, when done rapidly, can also increase your cardio and help you lose weight! If you want to get serious about doing indoor cardio, definitely make sure you have one of these on hand, or an equivalent weighted tool you prefer like a medicine ball.
Tip #2: Sneak cardio into your strength training.
If you’re one of those people that absolutely dreads doing cardio, there are ways you can sneak cardio exercises into your strength training workouts. Simple modifications to common workouts are key. You could try doing five minutes of HIIT in between exercises as a way of getting cardio in while continuing to do whatever workout you normally do and enjoy.
Tip #3: Try jumping jacks, jump rope, and other ways of working out that don’t use equipment.
One of the biggest challenges of doing cardio at home is that — if you don’t have a home gym — you don’t have access to any of the fitness equipment like treadmills or rowing machines that make indoor cardio a breeze. You can still get cardio in at home with some tried and true classics like the jump rope.
Make a commitment to do fifteen minutes of jumping jacks before you start your day or before you go to bed. A jump rope is a cheap and easy way to do cardio in your house whenever you have the time. Remember, it’s the man that makes the workout, not the equipment.
Tip #4: High knees will help you break a sweat.
High knees are a cardio fundamental. It gets the blood pumping and you can do it pretty much anywhere. Plus, it burns fat in a pretty fast amount of time, so as long as you do it rapidly and with intensity you don’t even have to do it that long. Better yet, do it in small but intense bursts throughout the day to burn the most fat.
Tip #5: Don’t rely too much on HIIT for cardio, since it will disrupt your gains in strength training.
Lots of people choose HIIT as their weapon of choice when it comes to getting cardio in and it’s easy to see why. It’s quick, effective, and it gets the job done. But HIIT workouts can actually slim you down and decrease your gains from strength training since the exercises are designed to make your body more lean. If you’re trying to do cardio without sacrificing gains, make sure to not overdose on HIIT.
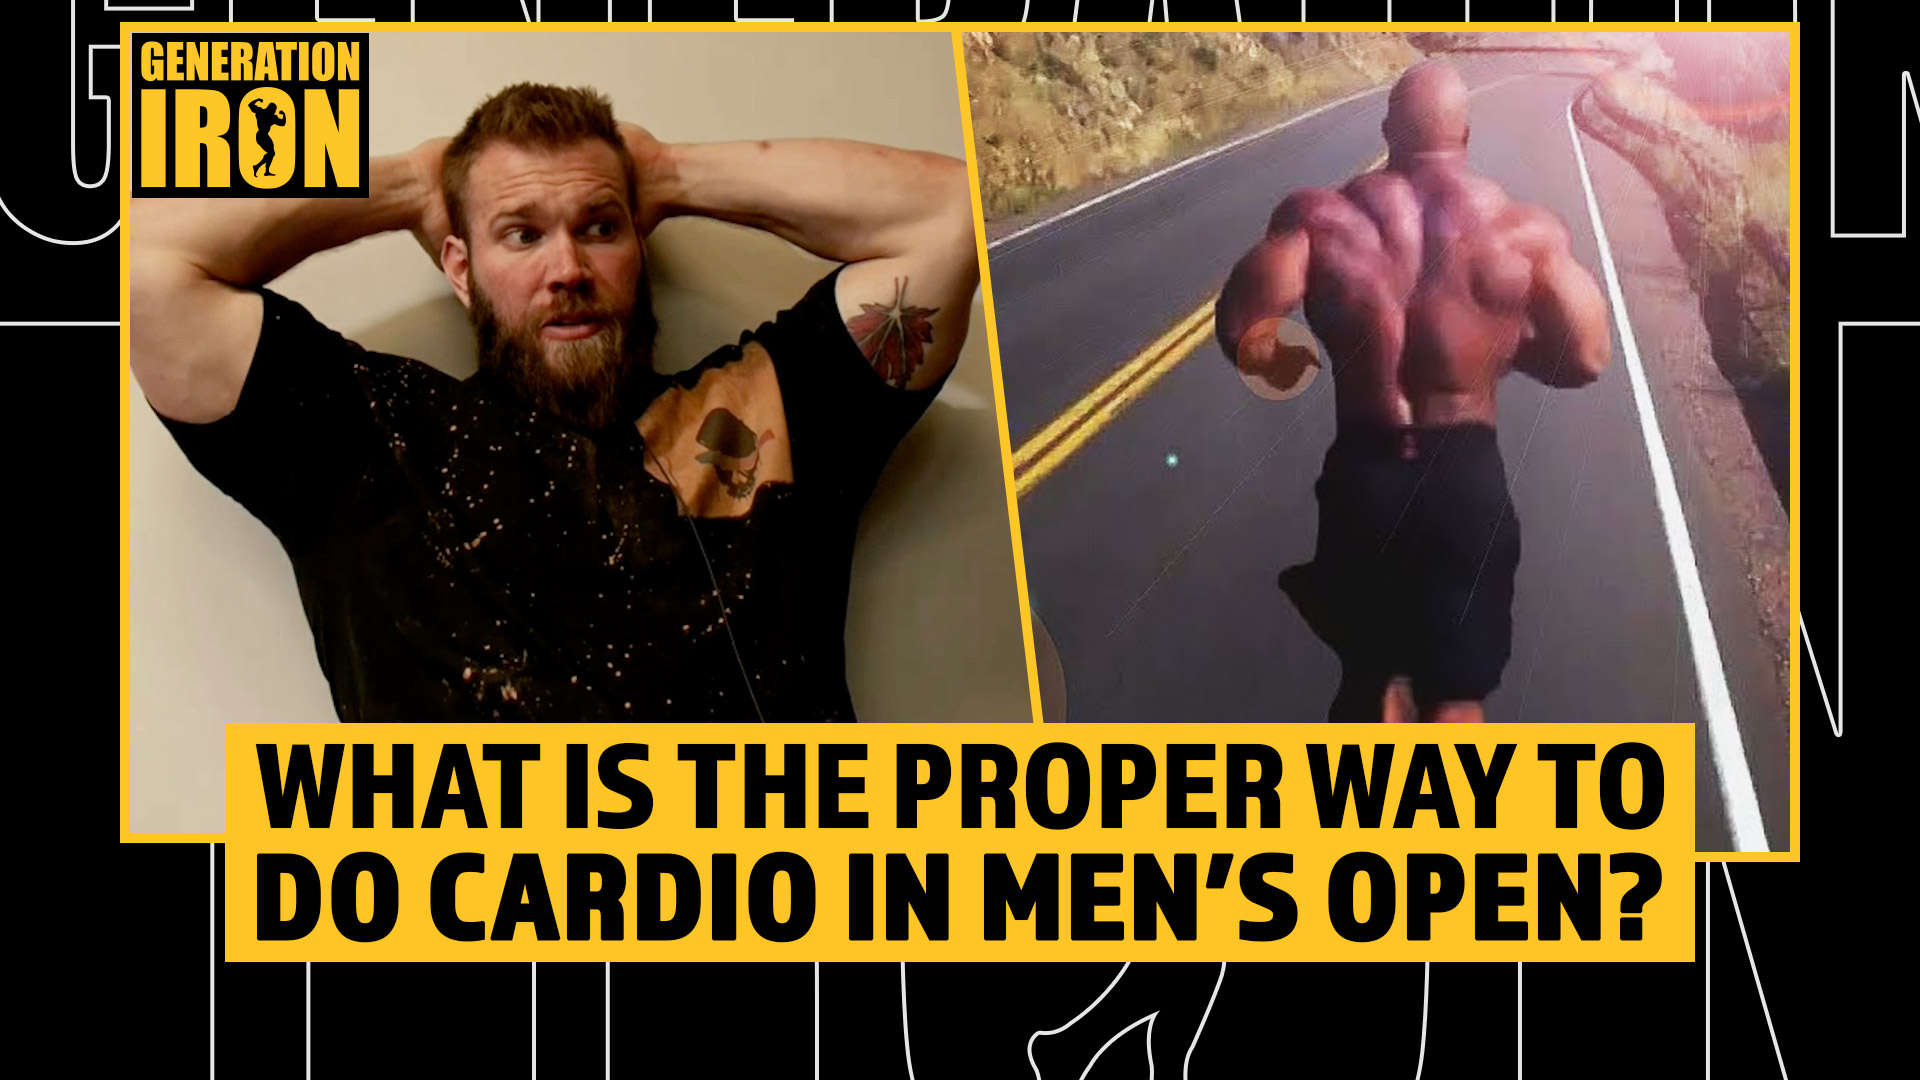
Jordan Shallow Answers: What Is Cardio’s Place In Men’s Open Bodybuilding?
[embedded content]
Jordan Shallow comments on different cardio tactics in Men’s Open Bodybuilding.
Bodybuilders hate cardio. At least, that’s the stereotype you often see within the sport. And this makes sense. Men’s Open competitors weigh in at around 250+ pounds. That’s a lot of weight, muscle or not, to move around with aerobic movement. That being said, all serious bodybuilders understand that cardio is a necessary part of training – whether they like it or not. The question is – how much cardio is too much? And how much is too little? What is the proper tactic for cardio in mass monster categories like Men’s Open bodybuilding? In our latest GI Exclusive, Jordan Shallow shares his advice on how to properly utilize cardio in a Men’s Open training program.
The biggest fear bodybuilders have about cardio is that it could burn away some of that hard earned muscle. Muscle, of course, is the key factor in sculpting a perfect physique and the lifeblood of a competitive bodybuilder’s career. However, a bodybuilder also needs to go through a cutting phase during contest prep to be as conditioned and shredded as possible on game day. Cardio is a part of that equation. On top of this, cardio has universal health benefits for your heart and lungs that should not be ignored.
So what’s the right answer here? We’ve heard of some successful pro bodybuilders who do zero cardio and others who do two hours of cardio during contest prep each day. What is the truly best tactic for including cardio into a Men’s Open bodybuilding program? The Muscle Doc Jordan Shallow gives his take on this very topic in our latest interview segment.
How to properly use cardio in a Men’s Open bodybuilding training program
Jordan Shallow believes that the days of a Men’s Open bodybuilder doing two hours of cardio during contest prep are over. The reason? Because more athletes are understanding that cardio during the offseason is not taboo but in fact vital towards building the proper core for contest prep later.
Shallow believes that a part of this shift is happening because competitors are wising up to the health risks of modern bodybuilding. Unfortunately, we had a tragic year of bodybuilding deaths in 2021 that has continued to bleed into the beginning of 2022. While we cannot directly correlate this to any specific aspect of the bodybuilding lifestyle – athletes are becoming more self aware of their health.
Jordan Shallow believes that doing three days of light cardio per week during the offseason is a huge benefit for a competitive athlete. It helps manage physical stress and also helps manage the emotional stress that comes with the competitive bodybuilding lifestyle.
Over time of building that simple cardio base during the offseason, a bodybuilder will require much less cardio during contest prep. If you combine this with thoughtful and tactical weight training that has cardio elements – you have a much more balanced training program and run less of a risk that you will burn muscle away.
Jordan Shallow points out Milos Sarcev’s giant sets as an example. Here’s what Shallow had to say in this example:
“You do a Milos giant set, that’s cardio. You’re running a marathon with your lats. You’re running a Milos lat marathon. But if you have a strong aerobic base you’ll be able to derive a more muscle building benefit in the actual duration of the set as well as have a greater toolbox to pull from to recover from that stimulus.”
Wrap Up
While Jordan Shallow is not a Men’s Open bodybuilder himself, he sees these kinds of changes happening on the inside of the industry. He believes that the taboo behind cardio is starting to lose its grip – which is beneficial for all in both terms of overall health and better contest prep.
You can watch Jordan Shallow’s full comments in our latest GI Exclusive interview segment above. He also talks about how the general public can learn to count their macros for fat loss.
Need Cardio But Hate Running? Here Are 5 Others Ways To Cardio-Infuse Your Workouts
Cardio is definitely one of the building blocks when it comes to exercise.
Unfortunately, not everybody can tolerate long jogs. In fact, for those of us who prefer going to the gym to lift weights or use the equipment, running on the treadmill can become a huge chore. Unfortunately, however much you might hate running, there’s no running from the truth: cardio is an essential component of bodybuilding and fitness that needs to incorporated into your workouts if you’re looking to maximize results.
But for those of us who truly dread going for a run, here are five easy ways you can add cardio into your workout without running.
1. Indoor Rock Climbing
If the monotony of running bores you, say no more. This isn’t a staple at most gyms but Google if there’s an indoor rock climbing gym near you; they’re around. Rock climbing requires the upper body to be in a state of constant exertion, which gets your heart rate up and keeps it up at an intensity equal to or better than going for a jog. So, if you find yourself avoiding the chore of more conventional cardio workouts, this might be a fun one for you to try out.
2. Boxing
All forms of boxing are another great source of cardio. If you go to the gym with a spotting buddy, try turning him into your sparring body and go for a couple rounds of boxing, kickboxing, Muay Thai — anything works. If you’re more of a lone wolf type in the gym you can try just punching the bag for a solid twenty or thirty minutes; that’ll get your blood pumping better than a relaxing jog in the park.
3. Try the rowing machine.
The rowing machine is a great piece of workout equipment available in almost any standard gym across the country that doesn’t get a lot of love. The truth is, the rowing machine has so much to offer: it’s a great source of cardio because of the adjustable tension in the bands, and it also gives you a great workout in your upper arms and back that you wouldn’t simultaneously be getting if you just go for a jog. What’s not to love?
4. Biking or stationary bike
This is a pick-your-poison type scenario. If the reason you hate jogging is because you don’t like being outdoors, than biking isn’t likely to help you get more cardio in. A stationary bike might be a good fit for you since they’re also available at almost any gym and can be knocked out in tandem with whatever workout you happen to be doing there.
However, if you’re looking to get some fresh air or be in nature, a long bike ride — try challenging yourself with an incline if you’re really looking to get your heart rate up — might be just what you’re looking for.
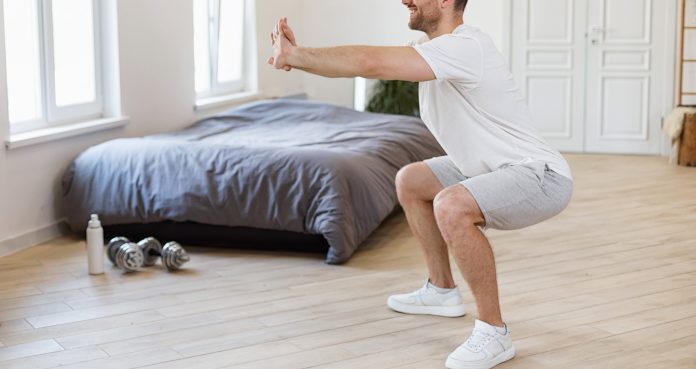
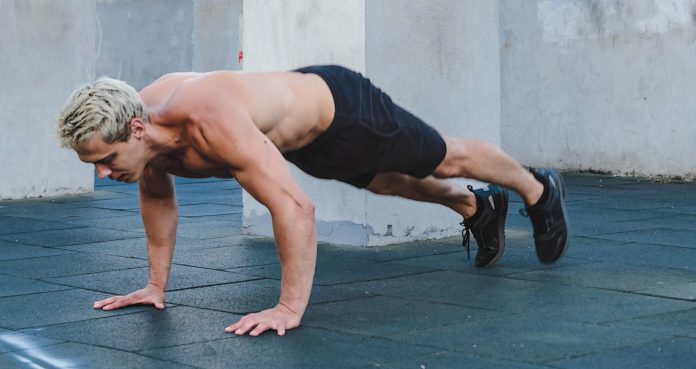
5. Jump squats or burpees
Finally, if you’re a fan of HIIT, this type of cardio infusion is more your speed. Jump squats and burpees, when done rapidly and in small amounts, can really increase your cardio and overall gains from your workouts. If biking or rock climbing seem like too much of a new time investment, this is an easy way to take whatever existing workout you’re working with and inject some cardio inside.
The next time you’re strength training, challenge yourself by doing 20 seconds of jump squats or burpees alternating with 20 seconds of rest for about 5 minutes — you’ll be amazed at how fast it gets your blood pumping.
Best No Equipment Cardio Workouts
Best no equipment cardio workouts.
Cardio! That dreaded word, whether it’s Low Intensity Steady State (LISS) cardio or High Intensity Interval Training (HITT) cardio.
Most people prefer LISS as the name suggests, it’s very low impact and very low intensity but done for a period of time (45 minutes to and hour prior to meal 1 is most bodybuilders preferred option).
And HITT is interval training which alternates short periods of intense anaerobic exercise with less intense recovery periods, during which a person’s heart rate reaches at least 80 percent of its maximum capacity.
There are many debates out there as to which is preferred and as to which burns more fat but I won’t delve into that today.
So if you’re bored of the treadmill at the gym, jogging outdoors in the cold, or fed up of rowing machine or even the legendary elíptical machines, then check out my list of the best no equipment cardio workouts around.
Skipping / Jump Rope
Now I did say you don’t need any equipment and you can actually simulate a jump rope without actually needing a jump rope.
Simply simulate the arms as if you are holding a rope and jump accordingly while being in sync with your arms (as if your jumping over a rope).
Now according to the Cooper Institute Aerobic Test, jumping rope for ten minutes is the equivalent of doing a 30 minute run.
Now, if you want to burn more calories you cannot go wrong with this exercise, and if you jump rope faster this will lead to a more intense workout, as a 180 lb individual jumping for 10 minutes at 100 skips per minute will burn approximately 126 calories, based on the Metabolic Equivalent of Task (MET), and in this case the MET is 8.8.
Now if you want a more accurate reading then there are many calorie calculators online that can assist you or use the formula below:
Calories burned per minute = (MET** x body weight in Kg x 3.5) ÷ 200
**MET – Metabolic Equivalent of Task
*MET for 100 skips or less per minute: 8.8
MET for 100-120 skips per minute: 11.8
MET for 120-160 skips per minute: 12.3
Can be done with or without a rope.
Shadow boxing
Another no equipment cardio routine you can utilize with minimal space, is shadow boxing.
And many boxers shadow box to improve foot speed, agility, hand eye coordination and technique but this can also really get the heart rate going.
You can take on a:
square stance (literally square on with feet shoulder width apart)
fighter stance (feet staggered , with arms raised to cover the face)
Fighters stance with foot work incorporated
Now if you are right hand dominant you are classed as ‘Orthodox’ and if you are left hand dominant you are classed as a ‘Southpaw’.
The main punches are the:
Jab
Cross
Left hook
Right hook
Left uppercut
Right uppercut
As this is for fitness purposes rather than getting into a ring you can just do straight forward punches or make your own combo or stick the traditional combo below:
Jab, Jab, Cross (1.1.2)
Jab, Cross, Left Hook (1,2,3)
Jab, Cross, Left Hook, Cross (1,2,3,2)
Jab, Jab, Cross, Left Hook, RIght Uppercut (1,1,2,3,6)
Jab, Right Uppercut, Left Hook, Cross (1,6,3,2)
Now if you want to figure out the calories you have burnt then MET breakdown below will help you figure out your calorie output.
MET for boxing
Boxing, punching bag. 5.5
Boxing, sparring. 7.8
Boxing, in ring, general. 12.8
Alternative: Add small dumbbells and hold then while punching, this will add an even more increased shoulder burn.
Box Jumps
Box jump, or in this case, if you don’t have a box or bench or stool you can utilise then the stairs will work just as good.
This is an exercise that will help develop your explosive power, speed and even your strength.
As it’s a plyometric exercise, also known as plyos, it is beneficial for producing power and strength simultaneously. Plyos generally involves a stretch followed by a contraction of the muscles (so a jump being a prime example).
And if you actually incorporate box jumps directly after a set of squats, Post Activation Potentiation (PAP), occurs, and this is essentially the pairing of a heavy strength movement (back squat) followed by a plyometric movement, which in this case would be the box jump.
According to Daniel Lorenz, DPT, ‘PAP is a phenomenon by which the force exerted by a muscle is increased due to its previous contraction.
Fatiguing muscle contractions impair muscle performance, but non-fatiguing muscle contractions at high loads with a brief duration may enhance muscle performance.
So the muscle fibers that were not recruited in the squats essentially are raring to go and post heavy load should enable you to have a better performance, ie able to jump higher.
Based on a 185 lb person, the calories burned can range from 311-444 per 30 minutes.
An alternative to box jumps: Jumping over a bench. You can have more stability by placing your hands on the bench and jumping from left to right over the bench itself. (If you do not have a bench use something similar which you can jump over, a box, a crate, a railing, etc).
Other suggestions
Cardio workouts that require equipment
Other cardio workouts I would have high on my list are:
Swimming – An awesome all body cardio workout that is easy on the joints but helps build strength and endurance. It’s great if you have access to a pool or gym that has one. Alternative being the closest lake (kidding).
Battle ropes – again if you have a set already or have access to them at your gym this is a great all round cardio workout that manages to hit pretty much all the major muscle groups.
Barbell thrusters – yes It does involve a barbell and weights but you don’t need to go heavy for it to really kick in. Another great all body exercise that will improve your cardiovascular endurance.
And below is a list of plyo cardio exercises you can do at home in a small spaces:
Skaters
Burpees
Tuck Jumps
High Knees
Mountain Climbers
Now that’s enough cardio for today. Happy holidays but more importantly happy lifting!
For more news and updates, follow Generation Iron on Facebook, Twitter, and Instagram.
https://www.cooperinstitute.org/2017/04/10/strength-training-for-fitnessgram
https://pubmed.ncbi.nlm.nih.gov/29278062/
https://www.sciencedaily.com/terms/jump_rope.htm
https://www.health.harvard.edu/diet-and-weight-loss/calories-burned-in-30-minutes-of-leisure-and-routine-activities
https://www.ncbi.nlm.nih.gov/pmc/articles/PMC4637913/
https://pubmed.ncbi.nlm.nih.gov/32187147/
https://link.springer.com/article/10.2165/00007256-200939020-00004
https://www.ncbi.nlm.nih.gov/pmc/articles/PMC3164001/
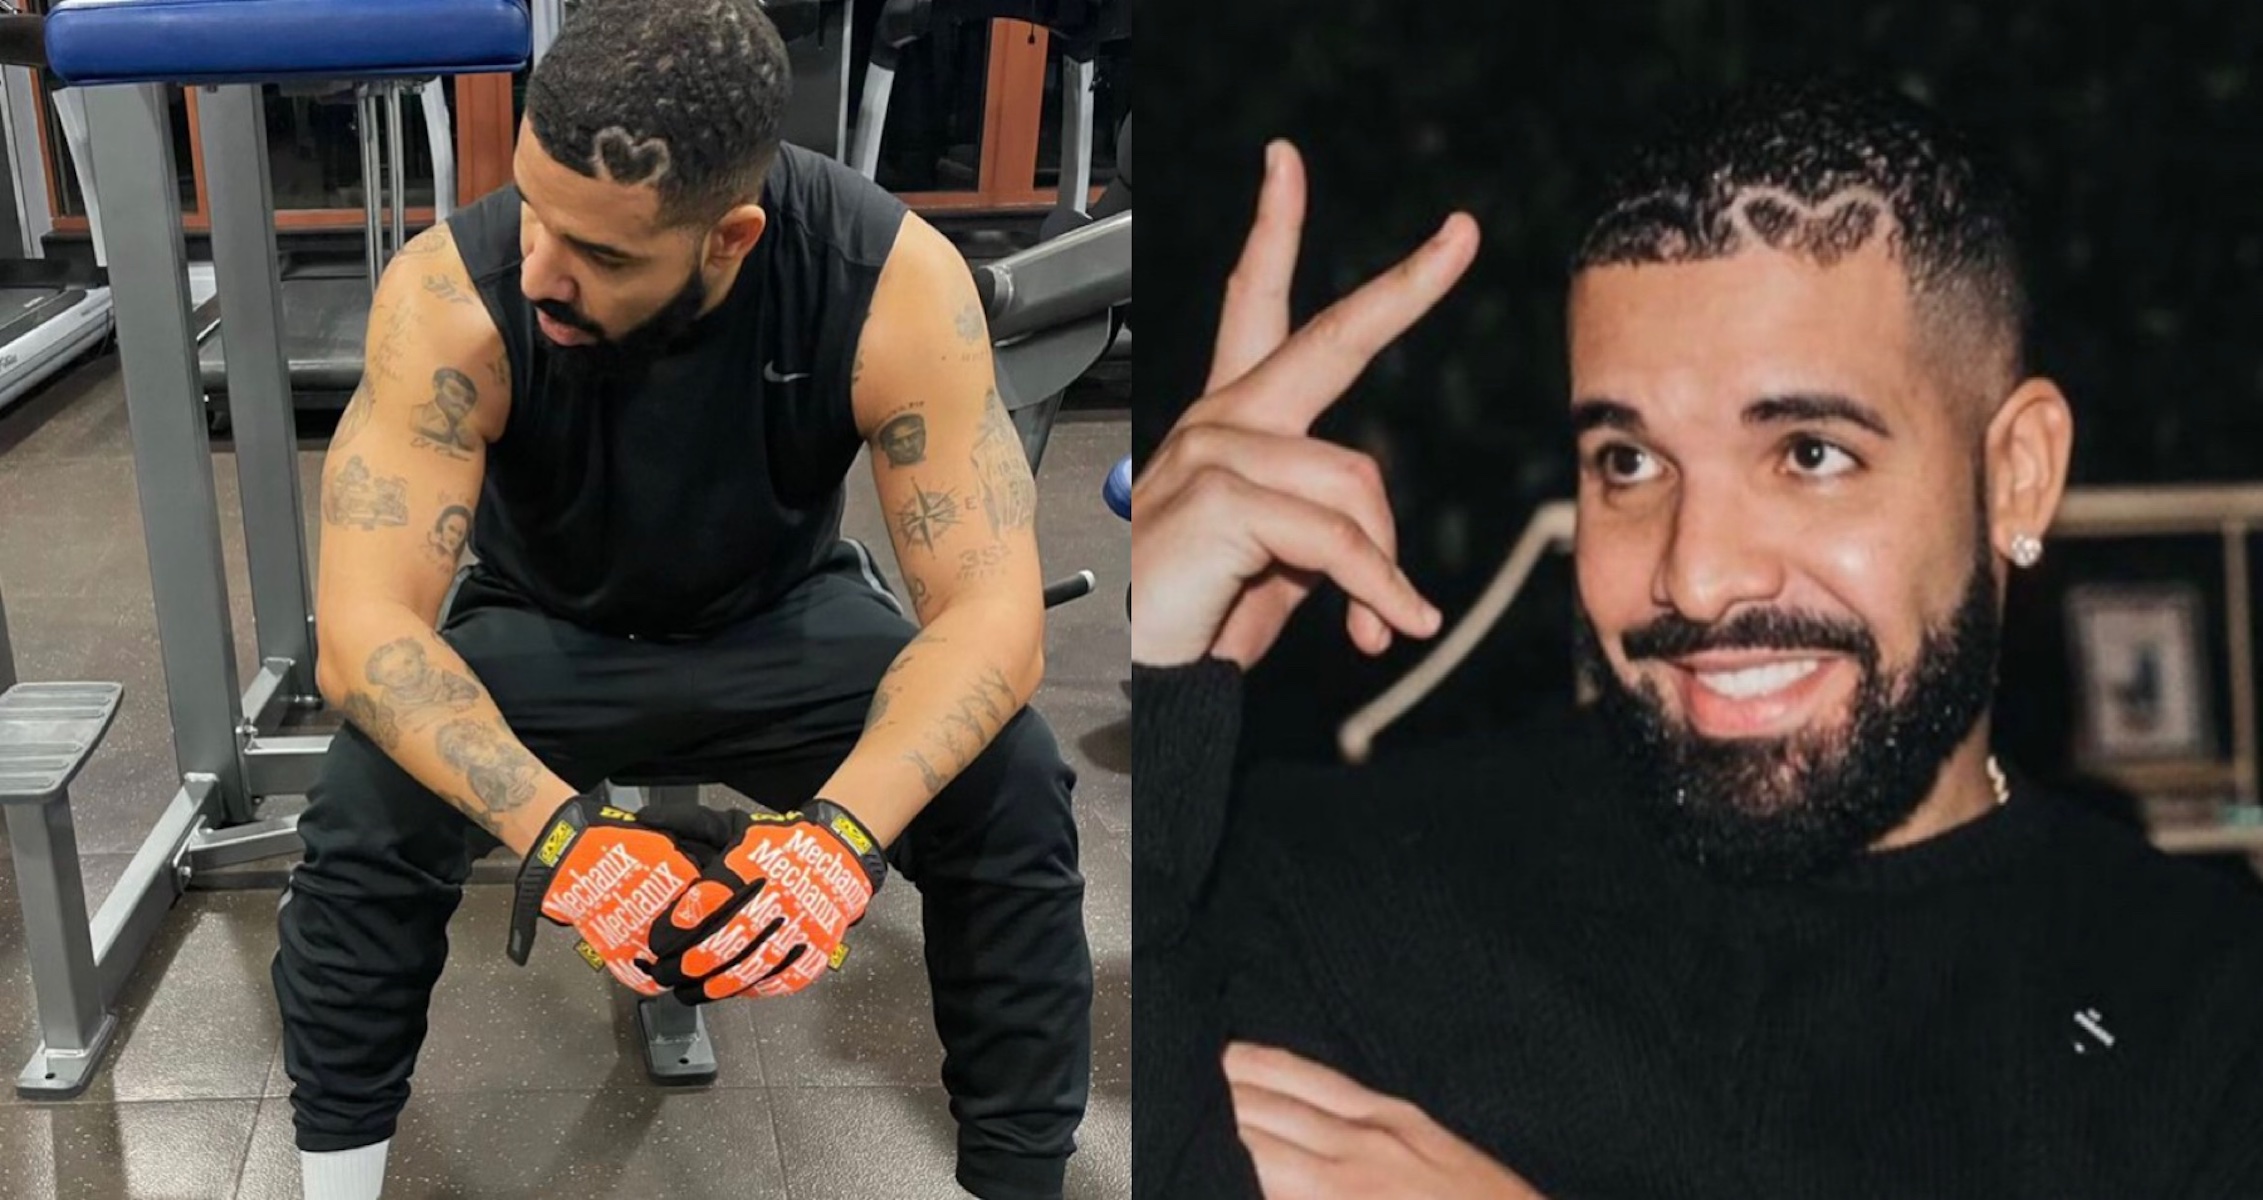
Recent Study Shows Drake’s Songs Make People Run Slower During Cardio
Drake might be one of the best artists in the world today but his music does not help in the gym.
It has been over a decade since “Best I Ever Had” was released as the third single from Drake’s Thank Me Later. Since then, the Canadian artist has turned into one of the biggest stars in the world and an icon in the music industry. While his music is some of the most listened-to in the world, Drake might not produce the tunes that could help in the gym.
A recent study done by Pour Moi took a look at which artists improved running speed while training and which impacted speed negatively. While Drake has created countless hits, his slower style in some songs is not what will improve running speed.
This study featured 60 joggers to see if the artists they listed to correlated with speed. These findings were compiled by recording times of 20 runners listening to multiple artists. They all ran one kilometer per artist and their speed was recorded using a fitness device.
Drake was at the bottom of that list by adding 21 seconds per kilogram to activity time. This equates to one minute and 45 seconds to a three-mile run and 14 minutes and 42 seconds to a marathon. Drake was not the only rapper near the bottom of this study. The pop group BTS finished second while Doja Cat and Nicki Minaj followed.
On the other side of the story, Beyonce is the artist who made speed increase. While listening to music by Beyonce, runners shared 33 seconds per kilometer off their personal best. This means athletes can do a three-mile run about two minutes and 45 seconds quicker and this also takes 23 minutes off a marathon. It is no surprise that Beyonce is finding new ways to be successful after creating 22 No. 1 hits over the course of her career.
Drake recently released “Certified Lover Boy” and it topped the charts right away. This was the sixth studio album released over his extremely successful career. Drake began his career portraying Jimmy Brooks on Degrassi: The Next Generation. He decided to venture into music and was signed by Young Money Entertainment in 2009. This was a label created by Lil Wayne.
Listening to music is a popular method in the gym to both create motivation and energy. Music allows the athlete to lock in mentally and sink into their zone. While we always knew that the type of music listened to impacted a person’s mood, it is interesting to see that it might subconsciously impact results as well. This is not to say that Drake should not be listened to in the gym but this study shows that you might want to turn something else on while using the treadmill.
For more news and updates, follow Generation Iron on Facebook, Twitter, and Instagram.
5 Exercises Which Will Burn Fat Better Than Cardio
Exercises Which Are More Effective Than Cardio
Most people get a gym membership because they want to shed weight. Losing weight is one of the most common New Year’s Resolutions. This is why there is an influx of new members in gyms around the world during that time.
Most people when they think weight loss, think about cardio. If you’re someone who doesn’t like the idea of spending time on a treadmill or don’t feel comfortable going for a walk or a run in the wild, this is the article for you.
1. Burpees
Burpees are one of the most brutal exercises. All the exercises on this list are high-intensity exercises which will put your cardiovascular system to a test. Apart from losing weight, HIIT workouts help you in building strength and stamina.
Stand with your feet shoulder-width apart. Perform a squat and place your hands on the floor, just inside your feet. Get into the pushup position, perform a pushup and return to the starting position. Reach your arms overhead and explosively jump up in the air. Land back and repeat for reps.
2. Alternate Kettlebell Swings
The benefit of performing HIIT exercises is, you can target specific muscle groups while burning fat. Alternate kettlebell swings will work your shoulders and back while burning those extra calories.
Stand with your feet in a wider than shoulder-width stance. Hold a kettlebell between your legs in your right hand. Swing the kettlebell so its parallel to the floor and at your shoulder level. Return to the starting position and repeat with your left arm.
3. Dumbbell Farmer’s Walk
Dumbbell farmer’s walk is an incredibly effective exercise if you’re looking to build grip strength. This exercise also helps in shedding weight while sculpting your body and strengthing your stabilizers.
Dumbbell farmer’s walk has different variations you can perform. You can use farmer’s walk bars, dumbbells, kettlebells or barbells for this exercise. You can also hold the dumbbells and kettlebells overhead to make the walk intense.
4. Step Up Jumps
If you have ever performed step-ups, you would know this exercise can smoke you. The trick with step-up jumps is you need to maintain a constant intensity. You could perform the bodyweight version of step-up jumps or could add resistance by using weights.
Stand behind a flat bench of knee height and place one foot on the elevated platform. Jump up, driving through the forefoot of the elevated leg. Switch legs in the air so that you land your opposite leg on top of the platform.
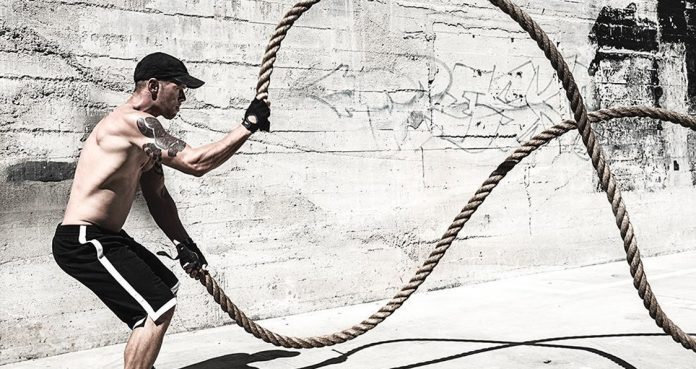
5. Battle Rope Wave
Battle rope training is a staple in unconventional gyms, and there’s a good reason behind it. They’re one of the most functional pieces of equipment for high-intensity training and hardcore conditioning.
Battle rope waves can exhaust you in a couple of minutes. This exercise might look easy but will take all you have. Hold the ends of the rope at arm’s length in front of your hips with your hands shoulder-width apart. Brace your core and begin alternately raising and lowering each arm explosively.
How long are your cardio sessions? Let us know in the comments below. Also, be sure to follow Generation Iron on Facebook and Twitter.
*Header image courtesy of Envato Elements.
- 1
- 2