Tag: Core
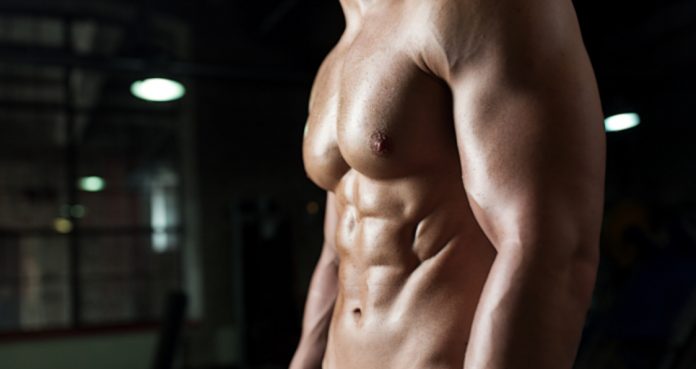
Build Six-Pack Abs at Home With This Workout
Ab Workout You Can Do at Your Home
The desire for obtaining a chiseled midriff is what gets many people to join a gym. What most people don’t realize is you don’t need to get a gym membership to build a six-pack. You can get the midsection of your dreams from the comfort of your home.
While many people train their core at home, a majority of them make the mistake of sticking to the good old crunches. You need to have a variety of exercises in your ab workouts to train your midriff from all angles.
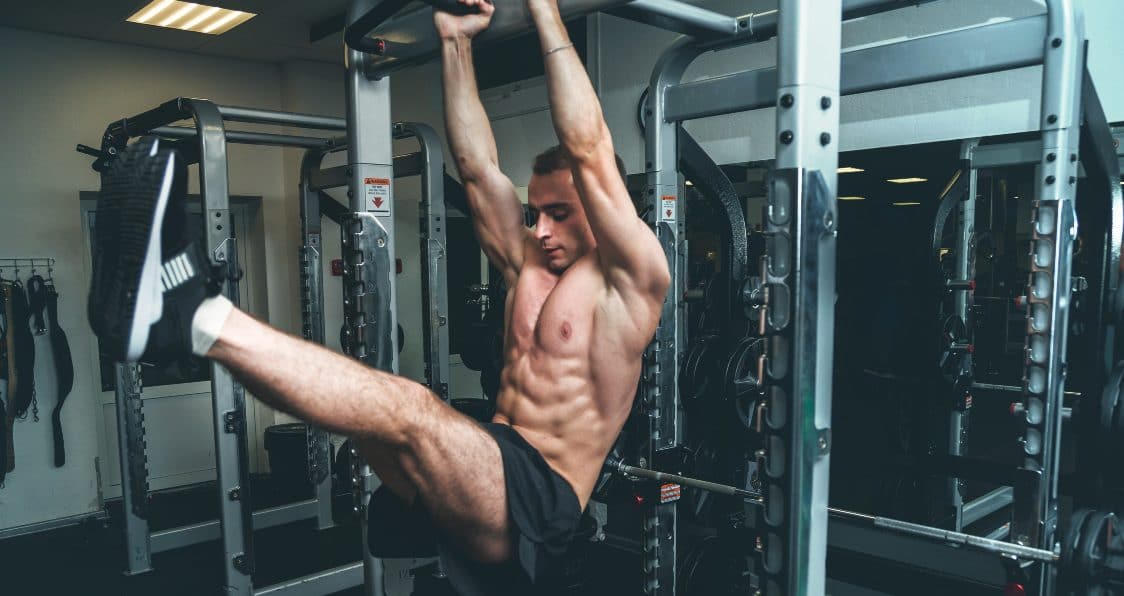
Leg Raises – 3 Sets 15 Reps
In this workout, we won’t leave any stones unturned. We will focus on the upper and lower abs along with the obliques. If you have a hard and sturdy elevated surface at your home, perform the bench leg raises.
Otherwise, you can perform the floor leg raises. While performing the leg raises, make sure your knees are bent at a slight angle and hold the position throughout the exercise. You can also perform the hanging leg raises if you have access to a hanging bar.
Feet Elevated Crunches – 3 Sets 20 Reps
Feet elevated crunches are a variation to the normal floor crunches. In the feet elevated crunches, you can better isolate your upper abs. Lie down with your back placed on the floor and place your lower legs on an elevated surface like a bed or chair.
Your upper legs should be perpendicular to the floor and your hands placed at the sides of your head. Raise your upper body by pushing your lower back into the floor and squeeze your abs at the top of the movement as you exhale. Return to the starting position and repeat for the recommended reps.
Russian Twists – 3 Sets 15 Reps (Each Side)
A midriff can’t be deemed complete without well-carved obliques. Obliques are the fish gill-like muscles present at the sides of your abs. Most people overlook training their obliques and hence lack the definition in their mid-sections.
Sit on the floor with your knees bent so your feet are placed flat on the floor. Lean back your upper body so it forms a 60-degree angle with the floor. Extend your arms straight forward so your hands are above your knees. As you exhale, turn to your right side by twisting your torso. Return to the starting position and repeat on the left side.
Reverse Crunches – 3 Sets 20 Reps
Reverse crunches are the exact opposite of the orthodox crunches. While the crunches work the upper abs, the reverse crunches train the lower abs. Lie down with your back on the floor and place your arms at your sides.
Bend at your knees so only your heels are touching the floor. As you raise your legs, breathe in and bend your knees so that your upper legs touch your torso at the top of the movement. Return to the starting position while breathing out.
Heel Touches – 3 Sets 20 Reps Each Side
Training for toned sides can be detrimental in building a perfectly crafted midriff. The heel touches are one of the easiest exercises on this list. Lie down with your back on the floor and place your arms at your sides.
Bend at your knees so your feet are placed flat on the floor. Lift your head off the floor so that there is tension on your upper abs. Crunch at your ride side to touch your right feet. Return to the starting position and repeat on the left side.
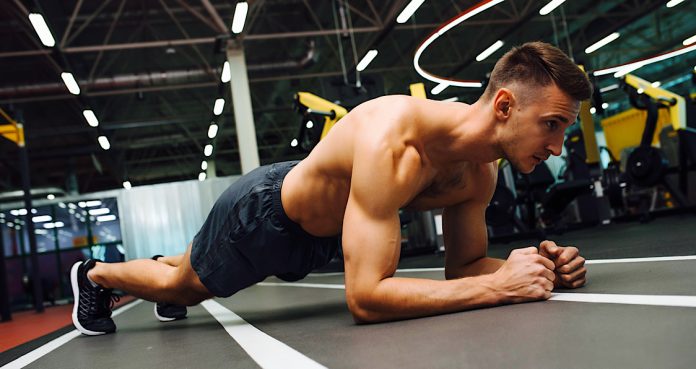
Planks – 3 Sets 2 Minutes
Planks are an incredibly effective core strengthing exercise. Performing the planks are must for anyone who wants to train at home. A strong core not only makes your abs rock hard but also helps in performing compound movements by improving and strengthening your body stabilizers.
Get into a prone position on the floor, supporting your weight on your toes and your forearms. Bend your arms so that your elbows are directly below your shoulders and your forearms are parallel to each other. Your body should remain in a straight line throughout the exercise. Don’t let your hips sack down or form a bridge to take off the tension from your abs.
Which is your favorite exercise to perform at home? Let us know in the comments below. Also, be sure to follow Generation Iron on Facebook and Twitter.
*Header image courtesy of Envato Elements
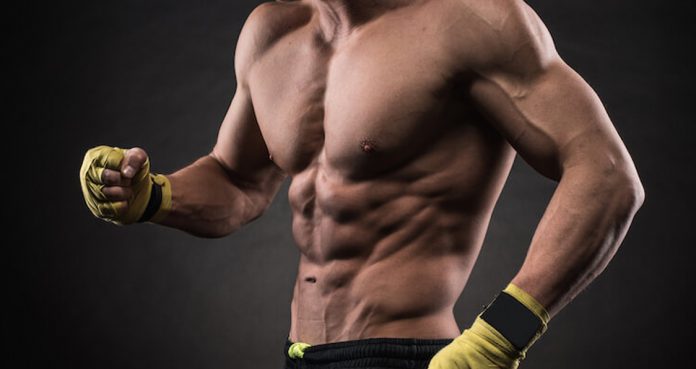
Build Shredded Obliques With This Workout
Get Ripped Obliques with this Workout
A midriff cannot be deemed complete without shredded obliques. Obliques are the fish gill-like muscles present on the side of your abs. Most people are too busy performing crunches and hanging leg raises that they completely forget about training their obliques.
While it is important to have a low body fat percentage to show the obliques, you still need to train them. The obliques need to be trained for both function and show. The oblique family plays a major role in many different movements and are an essential part of the core.
1. Cable Woodchoppers – 3 Sets 15 Reps
Unlike the free weight, cables are incredibly effective in maintaining constant tension on your working muscles. Cable woodchoppers target your obliques and will give you a muscle tearing pump by the end of the exercise.
Attach a D-handlebar to a tower, and move the cable to the highest pulley position. Stand at an arm’s distance from the pulley. With your right side to the cable, grab the bar with both hands. In one motion, pull the handle down and across your body to your front knee while rotating your torso. Repeat with your left side.
2. Decline Bench Oblique Crunches – 3 Sets 20-15-15 Reps
The decline oblique crunches are one of the most underutilized exercises. It’s important to squeeze and contract your obliques while performing these exercises and maintain a full range of motion.
Lie on your left side on a decline bench. Keep your right hand on the back of your head and place your left hand on your right obliques. Touch the bench at the bottom of the movement and your upper body should be perpendicular to the floor at the top of the movement. Repeat on your right side.
3. Side Planks – 3 Sets 1 Minute, 45, 45 Seconds on Each Side
Planks have earned a name for themselves for being a great core builder. Planks exploded onto the scene with the introduction of CrossFit. Side planks are a plank variation which helps in building definition in your obliques.
Start on your side with your feet place one on top of the other and one forearm directly below your shoulder. Raise your hips and contract your core until your body is in a straight line. Don’t let your hips fall down during the working set.
4. Landmines – 3 Sets 15 Reps Each Side
Landmines are a great core builder and your obliques take the most beating in this exercise. If you don’t have the landmine equipment at your gym, you can perform this exercise by placing a barbell in a corner and holding one end of the barbell with both your hands.
Stand with your feet shoulder-width apart while holding the barbell with both hands in front of your face. Keep your elbows locked out while you twist to your right side. Go as far as you can without twisting to your hips. Return to the starting position and repeat for the left side.
5. Russian Twists
Russian twists are one of the most common oblique exercises. Most people make the mistake of going too heavy on this exercise. Use a weight plate or a dumbbell with which you can follow a full controlled range of motion.
Sit with your feet placed flat on the floor and your back at a 60-degree angle. Hold a weight plate over your knees with your arms stretched out. Rotate to your right side and contract your obliques. Return to the starting position and repeat for the left side.
Which is your favorite oblique exercise? Let us know in the comments below. Also, be sure to follow Generation Iron on Facebook, Twitter, and Instagram.
*Header image courtesy of Envato Elements.
Best Exercises To Sculpt Your Obliques
Help make that six-pack pop with sculpted obliques.
When we picture a perfectly sculpted mid-section, we think of that washboard six-pack that stands front and center. But your obliques are equally as important as that shredded core. Not only do sculpted obliques make you look good, but they can provide great benefits to your overall physical health in terms of preventing lower back pain and offering great overall support. For the strongest, most sculpted looking core, your obliques need as much work as the rest of your abs.
Everyone is guilty of skipping an oblique exercise here and there in order to squeeze one more exercise in for those front and center abs. While your main core is equated to a building, your obliques are the support system that holds that building in place. The building only looks good if its able to stand for all to see.
So, while the argument can be made that your mid-section gets all the attention because that is what people see, think again. Every chiseled part of your abs matter for that toned physique and stellar V-shape taper. As the largest ab muscles, your obliques should never be neglected and with strong, stable oblique muscles, your lifts and ab workouts will be more effective and efficient.
What Are Your Obliques?
Located on either side of your abs, your obliques sit between your hip flexors and lats. As an important muscle and source of connection for your abs and lower back, these muscles are responsible for bridging two of the largest and most important muscles in the body. Otherwise known as your transverse abdominis, your obliques are responsible for assisting with rotational exercises and core stabilization.
Not only will strong obliques help with overall core function with other ab exercises, but they provide a source of balance and support for big lifts like the squat (1). For help in your total body transformation, your oblique muscles deserve as much love as everything else.
Benefits of Strong Obliques
The benefits of strong obliques are also reasons to make sure you do not skip over these muscles during your ab routine. That more toned appearance you desperately want will come as a result of working these obliques more and more. As the bridge between your abs and lats, this muscle can truly make both pop and show off those hard-earned wings and washboard abs. Working your obliques will not make you bulky or overly muscular, but will in fact totally change your appearance into one of a sculpted athlete, bodybuilder, or gym fanatic.
Aside from the benefit of a sculpted appearance, strong obliques can work to prevent injuries and assist in lower back pain. In order to compensate for weak obliques, your lower back takes much more strain than it actually wants, leading to tightness and added stress with the unfortunate side effect of potential injury (2). Working to your overall performance benefit, strong obliques can help strengthen your entire mid-section, so whether it’s a big powerlifting exercise, like the squat, bench press, or deadlift, high-intensity interval circuit, or a bodyweight routine, your entire body will be balance and stable for a great athletic boost (3).
Top Oblique Exercises
Russian Twists
As a widely used ab exercise by people of all fitness levels, Russian twists are great for working the obliques. As a great exercise for control, Russian twists work to build balance and rotational strength as well as isometric core strength, since your body maintains rigid form throughout the exercise. These can be done with no equipment or modified to use a med ball, plate, or dumbbell.
How to: Start seated with your knees bent and feet slightly elevated. Keeping a long spine and an engaged core, lean back slightly as you rotate from one side to the other. If you are holding a weight of some kind, hold it out in front of you.
Side Planks
Side planks are a classic core exercise that really work the obliques for balance and stabilization. The added benefit is that your glutes, hips, and shoulders also feel this workout. Side planks will help with good posture and better movement by really working to build your core.
How to: Laying on your side, raise your hips so only one elbow and your feet are touching the ground. Make sure your body is in a straight line from your head to your feet and really engage your core to stay balanced and firm.
Single Leg Toe Touches
Single leg toe touches work for overall balance and strength and work your obliques while also hitting your hamstrings and hips. As a simple movement, this is a convenient exercise to target your obliques and really ensure great growth in strength, balance, and coordination.
How to: Lie on your back and engage your core. Lift one leg and the opposite arm and bend upwards to touch them. Lower back down and repeat the same motion with the opposite arm previously used and the opposite leg as well.
Bicycle Crunches
Bicycle crunches are one ab workout that really works for body movement. Combined with a healthy diet and cardio, these can aid in weight loss and work to build muscles in your abs and obliques. By strengthening these muscles, you will work to add better movement to a host of other activities.
How to: Lying on your back, bend your knees at a 90-degree angle and put your arms on your head with your elbows out. Engage your core and twist upwards touching one elbow to the opposite knee. Straighten out your legs and repeat this movement with the other arm and leg.
Dumbbell Side Bend
Side bends in general are great for working your mind-muscle connection, as well as overall core strength and spinal mobility. Adding a dumbbell or a plate will only strengthen your obliques even more and for those who struggle to get up and down from the floor easily, these are a great standing oblique exercise.
How to: Stand tall with your shoulders back and core engaged. Holding the weight in one arm, slowly tilt downward toward the side with the dumbbell. Slowly return to standing straight and repeat for your desired number of reps.
Wrap Up
While our obliques are often overlooked, they provide great benefit for our overall core strength and toned physique. As a large abdominal muscle and bridge between our abs, hips, and back, it is important to work this muscle as equally as the others to avoid unwanted pain and to improve balance and stability. Don’t neglect this powerful muscle and see your overall growth and physique shine by working your sometimes overlooked yet always important obliques.
Let us know what you think in the comments below. Also, be sure to follow Generation Iron on Facebook, Twitter, and Instagram.
*Images courtesy of Envato
References
Martinez, Amy; Brookbush, Brent (2020). “Internal Obliques”. (source)
Kravitz, Len. “Super Abs Resource Manual”. (source)
Olson, Michele (2013). “Core Strength: The “Anatomy” of Investigating Abdominal Exercises”. (source)

The Abs Workout You’ll Feel Until Next Week
Abs Workout to Make You Sore
Most people treat their abs as accessory muscles which is why only a few people have a chiseled six-pack while the others are always figuring out a way to get them. You need to train your abdominals as you train all your other muscle groups.
Doing a couple of ab exercises at the end of a workout isn’t going to budge the needle when it comes to building a six-pack. There are only a few things more satisfying than having sore abs for a week after you train them.
Exercise 1 – Ab Wheel Rollouts – 3 Sets Failure
We start the abs workout with the ab wheel rollouts. The ab wheel rollouts work your complete upper body and help in building core strength. If you don’t have access to an ab wheel at your gym, use a barbell and put a quarter plate on each side.
Maintain a full range of motion while performing this exercise and pause for a second at the bottom of the movement. All the exercises in this workout will be done to failure. Don’t stop until there is nothing left in the tank.
Exercise 2 – Superset
– Hanging Leg Raises – 3 Sets Failure
– Kneeling Cable Crunches – 3 Sets Failure
We’ll be training the complete abdominal in this workout. The hanging leg raises target the lower abs while the kneeling cable crunches will train the middle and upper abs. Using cable in the crunches puts constant tension and resistance on the abs.
Maintain a constant repetition tempo while performing all the exercises. Don’t rush through the exercises and focus on maintaining a mind-muscle connection with your abs and contract your abs with every rep.
Exercise 3 – Giant Set
– Crunches – 3 Sets Failure
– Heel Touches – 3 Sets Failure
– Reverse Crunches – 3 Sets Failure
In the giant set, we will be training the upper, middle, lower abs along with the obliques. Obliques are the fish gill-like muscles at the sides of your abs and are one of the most overlooked muscles.
All the three exercises are done while lying on the floor so you don’t waste time switching positions. Go from one exercise to another without stopping for rest in between sets. You can take a minute’s rest after completing one giant set.
Exercise 4 – Superset
– Landmine Ab Twists – 3 Sets Failure
– Russian Twists – 3 Sets Failure
Your goal should be to complete this workout in half an hour. The abdominal is a small muscle group and doesn’t need a lot of time to recover between sets. Both the exercises in this superset are focused on developing your obliques.
For the landmine ab twists, anchor one end of a barbell in a corner. Grab the barbell from the other end with both hands at neck level. Perform the movement by rotating the trunk and hips as you swing the weight to the right side. Return to the starting position and repeat on the left side.
Exercise 5 – Planks – 3 Sets Failure
Planks have earned a name for themselves for being an ultimate core strength building exercise. We start and end the workout with core strengthening exercises. Hold the planks for as long as you can.
By the end of the workout, your abs should be filled with blood and lactic acid. Don’t be surprised if you cramp up during the workout. One workout like this in a week should be enough to get you the washboard abs.
How often do you train your abs? Let us know in the comments below. Also, be sure to follow Generation Iron on Facebook and Twitter.
How To Reduce Your Waist Size Without Doing Ab Exercises
Reduce Your Waist Size With This One Trick
Let’s face it; many people get a gym membership to lose weight and to fit into smaller clothes. Following the advice of the broscientists, these people spend most of their time on the cardio equipment. Since you’re reading this article, chances are you’re one of them.
It isn’t long before they lose the motivation and return to their old ways. They blame their genetics for their inability to lose the excess body fat. The ‘too busy to workout’ excuse follows.
The others don’t like spending their time on the dreaded treadmill or doing crunches. Hardly do they know, it’s not their genetics. It’s the lack of knowledge which makes them quit working out altogether.
Changes In Bodybuilding In The Recent Eras
Have you wondered how bodybuilders in the golden era had small waists even when there was no fancy electronic cardio equipment? They used techniques which are long forgotten but were way more efficient than the ones employed by the pros now.
Unlike the bodybuilders today, the golden era bodybuilder focused primarily on symmetry and maintaining a narrow and tight midsection. Most of the current pro bodybuilders focus on getting big and turning into mass monsters.
The Vacuum Pose
If you haven’t heard of this, you’re already missing out. Frank Zane brought this technique into the mainstream by performing this pose on the stage. Before him, the athletes usually performed this pose in the gym as an exercise.
In this pose, you have to suck in your stomach to your spine to make it look like it has completely disappeared. When you hit the vacuum pose, you’re contracting your transverse abdominis (TVA).
The TVA runs across your waist just like a weight belt. It works like a weight belt in your daily operation. You can only perform this kind of thing with your belly.
TVA lies under the rectus abdominis and obliques and is one of the deepest abdominal muscles. Unlike most other muscles, it doesn’t connect to or move bones closer together. Many of TVA’s fibers don’t attach to the bone at all.
You need to take baby steps when it comes to performing this exercise. It will also need a lot of patience and persistence if you have never tried hitting this pose before.
There are four steps to mastering this exercise. In this article, we will take you through each step assuming you’ve never tried this exercise at this point. Each step will be harder than the previous one.
Don’t get intimidated by the four steps; you need to take one step at a time. Once you master one level the next will be relatively easy to perform and will be more efficient than the previous step in achieving your goal of a narrow waist.
Supine Vacuum
[embedded content]
This is the first step in performing the vacuum. It’s also the easiest way to suck in your stomach since the gravity will be your friend in this exercise. Confused? Let us explain.
Lie on your back with your knees bent, so your feet are touching the floor. This will help you isolate and focus on your abdominal. Once you’ve assumed this position, exhale all the air you can. This will raise your diaphragm and shrink your stomach.
This is where your TVA will have the maximum contraction, and you’ll be able to hit the vacuum pose. In the beginning, you might be unable to see or feel the vacuum, but it will come with time.
Hold your breath and perform this exercise for 15 seconds in the beginning. As you get better with time, increase the contraction time to 60 seconds. Take small breaths in between if you’re unable to hold your breath.
Quadruped Vacuum
Once you’re confident with your abilities at the supine vacuum and can perform it at will with no problems, it is time to the move on to the quadruped vacuum. If you’re performing each variation every day, it should take you a couple of weeks at most to perform them optimally.
The quadruped vacuum is called so because you perform them while having four touch points with the ground. In this exercise, you’ll be working against the gravity, and this makes this exercise harder than the previous variation.
Begin in a knee push up position so your shoulders are vertically over your elbows and your wrists and hips are over your knees. Follow the same steps as in the supine vacuum; exhale and suck in your abdominal.
This exercise is harder than the supine vacuum. So, if you were doing 60 seconds on the supine version, you should start with 30 seconds and work up to the 60 seconds mark.
Seated Vacuum
We know what you’re thinking. Isn’t the anti-gravitational version harder than the sitting on your ass version? No, it’s not because many stabilizing muscles come into play while performing this exercise.
Sit on a stable surface without leaning on to anything. Taking the support of a wall or any other surface will reduce the effectiveness of this exercise.
Exhale, pull in your navel and hold it for 30 seconds. Work your way up to 60 seconds as you get better at this exercise. Also, use unstable surfaces like a swiss ball to make this exercise harder.
Functional Vacuum
This is when you become a pro at hitting the vacuum pose. You’ll be so good you could perform it at any time, anywhere. Functional vacuum is the real life variation of this exercise.
You could be performing the vacuum pose in a subway, on your office desk or anywhere else without the people beside you knowing it. As you get better at the vacuum poses, you’ll be able to hold them for long durations.
This can result in a tighter, narrower and firmer midsection. Once you’re at this stage, you’ll find yourself vacuuming throughout the day. You won’t have to wait for long before your waist size drops.
Which ab tightening technique works the best for you? Let us know in the comments below. Also, be sure to follow Generation Iron on Facebook and Twitter.
*Header image courtesy of Envato Elements.
The Best Hanging Leg Raise Alternative Exercises For Core Strength
Look to these alternatives to change up your routine to still see gains.
We all want that desired six-pack, right? While the hanging leg raise is a great exercise to achieve this, the best hanging leg raise alternative exercises can ensure we hit our abs from all the right angles. Setting yourself up with the right alternatives means you get a great chance to target your abs differently. This will work those muscles in many ways so they have no choice but to grow.
A strong core will offer a number of benefits. When it comes to those more functional and sport specific movements, strong abs will provide balance and stability so we can better tackle whatever comes our way. A strong core will also show off our six-pack and only add to our shredded aesthetic.
Let’s take a look at some of the best hanging leg raise alternative exercises to give you the best options as you seek to change up your workouts while also seeing huge gains. As a dedicated athlete, you are always seeking new ways to challenge yourself and with the right alternatives, you are well on your way to making that happen.
What Is The Hanging Leg Raise Exercise?
The hanging leg raise is an isolation exercise designed to build your abs, as well as your hips. While this may be a higher level exercise, with time, it can become part of your daily routine as you advance farther with it. The only equipment needed is a pull-up bar and you are well on your way to seeing great abdominal gains.
Benefits Of This Exercise
One of the main benefits of this exercise is the strength and development of your abs and hip flexors. As a challenging exercise, it really works these muscles and you will truly start to see great gains to not only strength, but definition. As a result of the added strength put on these muscles, you will see great stability, resulting from better form and more engagement (1). Grip strength will also improve, as will changes to your body composition and desired physique.
Best Hanging Leg Raise Alternative Exercises
Beginner
Lying Leg Raise
Many of us have incorporated the lying leg raise into our routines before. This exercise gets more challenging the more reps you do, but still is considered a beginner level ab exercise given the actual movement. What is important with this exercise is to keep your legs straight because the longer you extend, the more bodyweight your abs have to take. All that really means is the load on your abs will be more, thus creating more time under tension. That added challenge will really add to the burn in your midsection, thus building those muscles making them both bigger and stronger.
Reverse Crunch
A simple yet effective abs exercise, this is also considered to be beginner level. All this movement really entails us pulling your knees towards your stomach and keeping that core braced. For an added challenge, you can use a bench or attach a form of weights to only add increased time under tension. This is called the reverse crunch for the movement is simply opposite that of a normal crunch (2).
Intermediate
V-Ups
Moving into the intermediate level exercises, V-ups are great because they really give your hip flexors a good workout. The challenge with stability and this full body extension has its fair share of pressure on the spine. But with good form you’ll be just fine. Really giving your abs a workout, this is a great exercise to challenge yourself while still being able to tackle a lot of reps.
Roman Chair Leg Raises
This intermediate exercise gets pretty close to the hanging leg raise and virtually the only difference is that with this one, you are not hanging. The roman chair offers arm support as you rest them on pads during the exercise, so what you give up is the grip support as well. But in terms of an alternative that is pretty close to the actual exercise, this is a pretty good one.
Advanced
L-Sit
Now getting into those more advanced exercises, the L-Sit is a common one for those really looking to punish their abs. While this may not seem like a good alternative, the difference is a static hold as opposed to the repeated raising of your legs. So, while range of motion may not be the same, what is the same is the absolute strain on your core, forcing it to really grow.
Dragon Flag
The Dragon Flag is hard. A great advanced variation of the hanging leg raise exercise, this requires full hip extension, the right grip, and serious core engagement. But this also requires strong glutes, and the benefits to not just your abs with this exercise are hard to ignore.
Top Supplements To Boost Further Gains
While working out and following a strict dietary regimen are imperative to our gains, the right supplements will only advance this growth. With so many companies out there, finding the right ones and knowing what to look for will greatly affect our overall health and training. To start, the big three to know about are pre-workouts, BCAAs, and protein powders. A pre-workout can offer energy and pumps (3), BCAAs will keep that energy high and burst through fatigue, and protein powders will most certainly enhance growth and recovery (4). For additional muscle building supplements, as well as those that will change your body composition, look into creatine, mass gainers, and fat burners, for these are also very popular. And don’t forget a multivitamin to keep your health as a top priority.
Wrap Up
The best hanging leg raise alternative exercises can greatly affect all areas of your gains and really give you a nice change to those often times monotonous workouts. Of course, they will still work your abs the same since these are closely related to the hanging leg raise exercise. Don’t be afraid to really change things up and give yourself the best chance at real gains. You work hard and the results you see should show that.
Let us know what you think in the comments below. Also, be sure to follow Generation Iron on Facebook, Twitter, and Instagram.
*Images courtesy of Envato
References
Hibbs, A.; et al. (2008). “Optimizing performance by improving core stability and core strength”. (source)
Harvard Medical School (2012). “Core conditioning- It’s not just about abs”. (source)
Martinez, N.; et al. (2016). “The effect of acute pre-workout supplementation on power and strength performance”. (source)
Cintineo, H.; et al. (2018). “Effects of Protein Supplementation on Performance and Recovery in Resistance and Endurance Training”. (source)
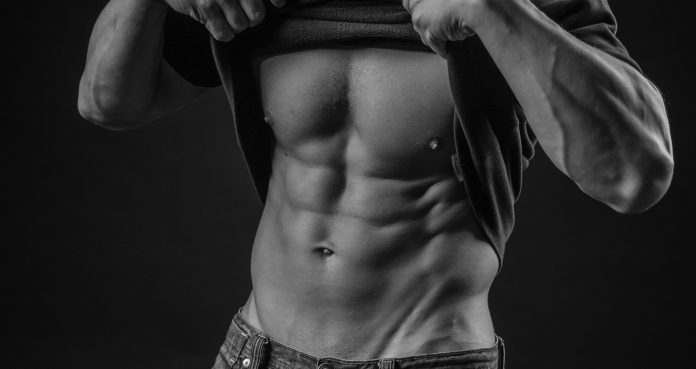
The 5 Biggest Planking Mistakes You Need To Stop Making
Portrait of young muscular man with bare chest doing plank exercise on floor during workout in modern gym
Most Common Planking Mistakes
Planks have a cult following amongst people who want stronger cores and shredded midriffs. While you might find several people performing the planks at your gym, only a few of them do them correctly.
If you’re reading this article, chances are even you’re making the five mistakes mentioned below while performing the exercise. Sit up and take note because fixing these errors can take your core game to the next level.
The Hanging Crotch
Yes, you read it right. The hanging crotch is a real planking problem. As easy as they might look, performing the planks can be hard, especially for beginners. A weak core tends to drop down from the correct position where the torso and lower body are in a straight line.
If you don’t have someone to correct your form, filming yourself while holding the plank can be a good way to review your set. Letting your torso hang below the straight line can result in the recruitment of your shoulders which can take away the tension from your midriff.
Forming A Bridge
While performing the planks, the fatigue which makes the torso hang low for some people can force the others to form a bridge. Both of these situations take the tension off the primary muscles and put them on the secondary muscles.
Some people lift their hips while planking to take the tension off their core. If you feel the fatigue setting in, it’s better to take a 5-10 second breather in-between your set rather than using a cheating posture.
Head Position
The head position is one of the most overlooked aspects of planking. Most of the people have the incorrect head position as they tend to look up straight or to their sides. Having a wrong head position while planking can cause neck pains in the long run.
Your neck will have the least amount of friction when it is in a straight line with the rest of the body. In an orthodox plank, you should be looking straight at the floor. Avoid moving your head to keep the tension on your mid-section.
Limb Position
Do you ever consider where and how you place your legs and arms while getting in the planking position? Most people don’t, and this is why they leave gains on the table. Some people make the mistake of keeping their hands interlocked and their legs placed together.
In the correct planking position, your feet should be placed shoulder-width apart and your elbows should be planted under your shoulders. Your upper arms should be parallel to each other, and your hands turned into fists.
TuT
TuT or Time Under Tension is arguably the biggest variable in the results you’ll see from the planks. If you’re a beginner, start by planking for 30-seconds and add 15-seconds every week as you get better at the exercise.
As you’re planking, make sure your core is tight and you’re focusing on contracting your abdominal. The more tension you can get on your abs while holding the right form, the better your results will be.
Which is your best planking time? Let us know in the comments below. Also, be sure to follow Generation Iron on Facebook and Twitter.
*Header image courtesy of Envato Elements.
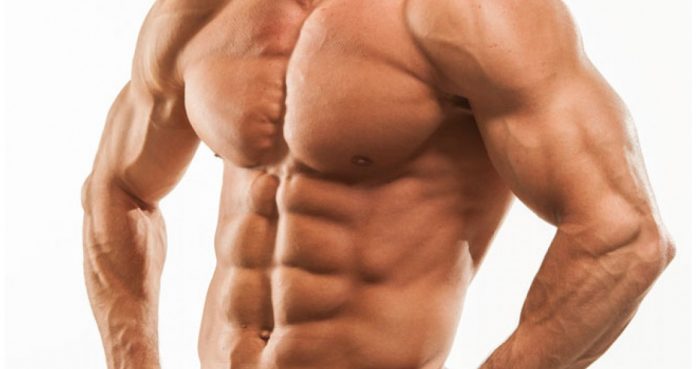
6 Moves For Shredded Lower Abs
6 Exercises To Target Your Lower Abs
A physique can’t be deemed complete without a shredded abdomen. Abs have become an aesthetic standard which every pro athlete needs to maintain. You will never see a bodybuilder without a six-pack on stage.
Lower abs are one of the most stubborn muscle groups. Love handles can be the hardest to lose. If you want a shredded six-pack, sticking to the crunches won’t get you a long way. You need to perform exercises which will target your lower abs.
1. Flat Bench Leg Raises
Performing exercises like the crunches work the upper abs. You need to have lower body exercises like the leg raise in your exercise arsenal to target the lower abs. You can perform the leg raises on a flat bench or a decline bench.
Lie down on a bench while facing the roof. Your upper body should be on the bench while your lower body hangs off the edge of the bench. Slowly raise your legs so they’re perpendicular to the floor. Your feet should be an inch away from the floor at the bottom of the movement.
2. Hanging Leg Raises
Hanging leg raises are an isolation exercise and your lower abdominal will be completely exhausted after this exercise. You could perform this exercise on a pull-up bar or parallel bars.
Most people make the mistake of using momentum to lift their legs. Doing this can eliminate the tension on your lower abs. Your upper body should not swing while you perform the hanging leg raises.
3. Scissors
The primary muscles involved in scissor kicks are the lower abs and your hip flexors. Lie down on the floor and with a slight bend at the knees, lift your legs up so that your heels are about six inches off the ground.
Now, lift your right leg about a 45-degree angle while your left leg is lowered until the heel is about 2-3 inches from the ground. Repeat on the other side by lifting the left leg and lowering the right leg.
4. Mountain Climbers
Mountain climbers are usually a part of a HIIT workout and will completely smoke your lower abs. Get into a high plank position with your feet placed at shoulder width. Make sure you keep your abs tight and contracted throughout the exercise.
Lift your right leg up to the chest between your hands. As you return the right leg back to the plank, lift left foot and draw left knee to the chest between your hands. Keep your upper body fixed in place and avoid hiking your hips.
5. Slider Knee Tuck
You will need sliders or a towel for this exercise. Place both your feet on the sliders and pull in your feet to your chest between your hands. Push feet back to the starting position and repeat for the target reps.
Maintain a tight core, exhale and contract your abs at the top of the movement. Make sure you don’t hunch your shoulders and back or lean forward too much while performing this exercise.
6. Reverse Crunches
Reverse crunches are the opposite of the conventional crunches. This exercise might look easy but can prove to be lethal. Lie on the floor with your hands under your lower back. Maintain a slight bend at your knees and lift your feet so they’re 2-4 inches off the ground.
Raise your knees to your chest while maintaining the bend at the knees. Return to the starting position and don’t let your feet touch the floor. You can also perform the reverse crunches on a flat bench. Doing this will increase the negative motion which in turn will increase the tension on your lower abs.
Which is your favorite lower abs exercise? Let us know in the comments below. Also, be sure to follow Generation Iron on Facebook and Twitter.

Debunked: The Top 5 Myths About Six Pack Abs
BroScience Revealed…
Abs. One of the most common tell tales of a physically fit individual. While we know it comes down to body fat and genetics, we still can’t help but be drawn to a tight set of perfectly ripped abdominals.
Perhaps its nature, perhaps it’s nurture, but even in 2020 people are looking for the perfect formula for the ever elusive 6 pack abs. While there are 8 packs, and sometimes even more, the 6er has always been a standard for a gold standard for a good looking body. Without it you’re like a burger without fries, always missing something. But with lots of buzz comes lots of rumors, and the 6- pack has been a hot topic for a long time.
Some myths start as excuses, some start as perceived truths that have been found out over time, and some are just to save face Either way they’re ruining your gains, and the gains of people around you. Here are some of the 5 top myths about 6-pack abs.
Myth #1 Carbs Are Bad
For the last couple of years carbs have been getting a bad rap. Damn near every fad diet condemns it, and carb loading is all but a thing of the past. What they’re not telling you is complex carbs are good, it’s the simple carbs that give you your spare tire. Things such as bread, processed sugars, sports drinks, and cereals, are all considered simple carbs because they break down easily. Try eating legumes, nuts, and and vegetables instead. All the benefits, none of the drama.
Myth #2 You Can Substitute A Bad Diet For A More Strenuous Workout
There’s an old adage that “abs are made in the kitchen”, and while we’re in the process of throwing out old theories, this one is actually true. Your diet is Quintessential to sculpted abs. The reason we say “sculpted” is because that’s exactly what you’re doing, trying to reveal the art surrounded by subcutaneous fat. So put down the Twinkies, and pack on the extra reps instead.
Myth #3 Eat Right, Work Out, The End…Right?
Wrong. While eating right and working out are definitely essentials, so is rest. By rest we don’t only mean Sleep, which is also a big component, but rest in the sense of being at ease. A state of being without stress. Stress through not sleeping right or a hectic lifestyle can actually build up cortisol levels which make it harder to lose stubborn fat. Take a walk, watch a movie, meditate…just do what you love.
Myth #4 You Can Shape Your Abs
The harsh reality about abs is what you get is what you got. You can’t add an extra pack or change your symmetry. Some abs line up, some don’t, all you can do is do the best with what you were given. However, you can improve muscle thickness and abdominal imbalances with a good workout routine.
Myth #5 The Be All And End All Of All Ab Exercises
While not all ab exercises are created equal, there’s no end all be all of ab exercises. The truth is your abs will get use to even the best exercises over time if you do them consistently. Switch up your exercises and the angles they’re performed to promote new stimulus and muscle confusion.
Are you underwhelmed with you ab development? Let us know by hitting up our comments below or head on over to our official Facebook and Twitter.
Best Six-Pack Abs Home Workout
Ten Workouts To Develop Abdominal Strength and Definition
A very common goal that many individuals have is to develop six-pack abs. Unfortunately, many individuals fail to understand what it takes to attain this goal and often fall short.
The main reason people fail to succeed with this goal is that they misunderstand the abdominals, how to best train them, and the importance of nutrition.
Therefore, this article will provide information on the abdominal muscles and their functions. It will then move onto discuss the steps that need to be taken to facilitate six-pack development.
Finally, it will outline ten highly effective home-based ab workouts that you can use to help improve the strength and tone of the abdominals.
Understanding The Abdominals
Many people understand the abdominals to be just one muscle – the one that is responsible for the “six-pack”.
In actuality, the abdominals are a muscle group that contains four individual muscles – rectus abdominis, transverse abdominis, external oblique, and internal oblique (1).
These muscles are responsible for generating a variety of different movements and help to flex, extend, bend, and rotate the trunk.
Furthermore, the abdominals can be considered as part of the “core”. The core is a complex series of muscles found in the trunk that work together to stabilize and support the body.Performing regular abdominal exercises can help to increase the strength and function of these muscles thus enhancing movement and muscular tone.
How To Get A Six-Pack
When it comes to developing a set of six-pack abs, exercise may help but ultimately it is your nutrition that will make the difference.
It is the rectus abdominis muscle that gives the six-pack its striking appearance. However, having a high percentage of body fat means that this muscle will not be seen.
Therefore, body fat needs to be reduced to the point where the muscle becomes visible.
In order to reduce body fat, a calorie deficit must be established and maintained over a prolonged period of time (2).
A calorie deficit is simply where more calories are burned than consumed. This forces the body to break down body fat to fulfill energy requirements.By regulating your calorie intake, you can most effectively create this calorie deficit. However, increasing exercise levels and the number of calories you burn can also help form a deficit.
At this point, it should be emphasized that ab exercises alone will not develop a six-pack.
This is highlighted most powerfully in a recent study that had participants engage in a six-week abdominal exercise program.Participant’s body composition was measured before and after the training program. The results clearly indicated that the abdominal exercise made no difference to body composition (3).
However, this is not to say that abdominal exercises are not valuable. Performing regular ab work can increase the size and tone of the muscles.As a result, once fat has been reduced far enough, the abdominals will look much more defined.
The Ab Workouts
Many ab workouts follow a similar format and include many of the same exercises. This may not be conducive to progress as boredom can quickly become problematic.
Another issue is that many ab workouts tend to focus on superficial muscles only such as the rectus abdominis.
However, there is great value to be found in performing exercises that work the deeper ab muscles such as the transverse abdominis.
The following ten ab workouts not only comprehensively work the abdominal muscles but also contain plenty of variations to keep you motivated and on track.
With ten to choose from, you can select the workout that is most suitable for your goals, levels of fitness, and preferences.
1) Unilateral Ab Workout
Performing unilateral (or single-sided) exercises forces the many deep core muscles to engage to promote stability and maintain good posture throughout the movement.
Perform the following workout for three rounds:
Exercise
Volume
Dumbbell Renegade Rows
20 reps
Single-Arm Overhead Press with Twist
20 reps
Split Squats
8 reps (per side)
Dumbbell Suitcase Walking Lunges
30 reps (per side)
Single-Leg Squats with Dumbbell Lateral Raise
8 reps (per side)
Side Plank with Dumbbell Fly
15 reps (per side)
2) The “No Crunch” Workout
The conventional crunch is often seen as the ultimate ab exercise – however, there is a wide array of exercises that effectively strengthen the abs.
Complete three rounds of the below workout to get the core burning!
Exercise
Volume
Lying Bicycle Crunches with Dumbbell Overhead
20 reps
Push-ups
10 reps
Side Plank
1 minute
Supermans
20 reps
Side Plank with Dumbbell Fly
15 reps (per side)
Plank Complex:– Forearm Plank– Right Leg Lifted– Left Leg Lifted– Right Arm Lifted
– Left Arm Lifted– Right Arm and Left Leg Lifted
– Left Arm and Right Leg Lifted
– Forearm Plank
15 seconds per position
3) Cardio Core Workout
As mentioned earlier, in order to have visible abs, it’s important to trim away excess body fat. Cardio can be an excellent tool to facilitate this.
Complete three rounds of this workout ensuring that you take a minute rest between each round.
Exercise
Volume
Skater Lunges
20 reps
Mountain Climbers
20 reps
Burpees
20 reps
Knee-Ins (Same Knee and Shoulder)
20 reps
Side Plank
1 minute
Knee-Ins (Opposite Knee and Shoulder)
20 reps
4) The Plank Workout
When performed correctly, the conventional forearm plank is a highly effective core strengthening exercise. However, not only is it fairly mundane, often form can slip thus increasing injury risk.
The following workout utilizes a range of enjoyable plank variations that keep you moving and focused throughout. Complete the following routine for two rounds.
Exercise
Volume
Forearm Plank with “Thread the Needle”
15 reps (per side)
Push-ups to Straight Arm Side Plank
10 reps
Side Plank
1 minute
Forearm Plank with Toe Taps
20 reps (per side)
Forearm Plank with Side-to-Side Hip Dips
20 reps
Knee-Ins (Same Knee and Shoulder)
20 reps
Knee-Ins (Opposite Knee and Shoulder)
20 reps
Forearm Side Plank with “Thread the Needle”
15 reps (per side)
5) Standing Core Workout
Not all core workouts need to involve floor-based activities. The following workout utilizes standing core exercises only to target the abdominals.
Complete three rounds of the below routine ensuring to take an adequate rest between each circuit.
Exercise
Volume
Dumbbell Chops
20 reps (per side)
Plank with Knee-Ins
20 reps (per side)
Forward Lunges
8 reps
Single-Leg Squats with Dumbbell Lateral Raise
8 reps (per side)
Dumbbell Overhead Press
12 reps
Dumbbell Swings
20 reps
6) Bodyweight Only Workout
This workout is perfect for adding to home workouts or for those who do not have any fitness equipment.
Once again, look to complete three rounds.
Exercise
Volume
Butterfly Kicks
20 reps
Crunches
20 reps
Russian Twists
20 reps
Elbow-to-Knee Crunches
20 reps
Butterfly Sit-Ups
20 reps
Side-to-Side Knee Drops
20 reps
Crunches
20 reps
Butterfly Kicks
20 reps
7) Anti-Flexion Core Workout
As highlighted, the core must engage to ensure that the body remains in a stable and safe position. This workout will place the body in positions where the core must work to resist flexion.
Perform three rounds of the following circuit.
Exercise
Volume
Supermans
20 reps
Dumbbell Pullovers
20 reps
Forearm Plank with Toe Taps
20 reps (per side)
Side Plank with Leg Pendulums
20 reps
Prone Reverse Crunches
20 reps
Side Plank with Dumbbell Fly
15 reps (per side)
Forearm Plank
1 minute
Supermans
20 reps
8) V-Cut Abs Workout
The purpose of this workout is to work and define the transverse abdominis and obliques which are the muscles responsible for creating the v-shape.
Perform the below routine for three rounds.
Exercise
Volume
Lying Alternating Leg Lifts
12 reps
Supine Reverse Crunches with Dumbbell Overhead
20 reps
Bicycle Crunches
20 reps
Inchworms
10 reps
Knee-Ins (Same Knee and Shoulder)
20 reps
Knee-Ins (Opposite Knee and Shoulder)
20 reps
9) Five-Minute Ab Blast
For those who are short on time yet still aspire to improve their core strength, the following five-minute circuit is the perfect solution.
Three rounds of this workout will last approximately five minutes. However, rounds can be added to increase the length of the workout if preferred.
Exercise
Volume
Dumbbell Pullovers
20 reps
Bicycles with Full Leg Extension
20 reps
Forearm Plank with Side-to-Side Hip Dips
20 reps
10) Rotational Ab Workout
The abdominals, specifically the obliques, are responsible for generating rotational power. This final workout utilizes rotational movements to work the core and develop this ability.
Having completed a thorough warm-up, complete two rounds of the following routine.
Exercise
Volume
Forward Lunges with Dumbbell Twist
8 reps (per side)
Dumbbell Overhead Press with Twist
12 reps
Dumbbell Renegade Rows
20 reps
Push-ups to Straight Arm Side Plank
10 reps
Forearm Plank with “Thread the Needle”
15 reps (per side)
Dumbbell Chops
20 reps (per side)
Side-to-Side Dumbbell Chops
10 reps (per side)
Final Word
If you aspire to get a six-pack, it is imperative that body fat is significantly reduced and ab exercises are performed regularly.
The ten workouts outlined in this article will effectively improve muscle tone and the appearance of the abdominals.
References:
1 – Flynn, William; Vickerton, Paula (2020), “Anatomy, Abdomen and Pelvis, Abdominal Wall”, StatPearls, Treasure Island (FL): StatPearls Publishing, PMID 31869113
2 – Strasser, B.; Spreitzer, A.; Haber, P. (2007). “Fat loss depends on energy deficit only, independently of the method for weight loss”. Annals of Nutrition & Metabolism. 51 (5): 428–432. doi:10.1159/000111162. ISSN 1421-9697. PMID 18025815.
3 – Vispute, Sachin S.; Smith, John D.; LeCheminant, James D.; Hurley, Kimberly S. (2011-09). “The effect of abdominal exercise on abdominal fat”. Journal of Strength and Conditioning Research. 25 (9): 2559–2564. doi:10.1519/JSC.0b013e3181fb4a46. ISSN 1533-4287. PMID 21804427.