Tag: Core
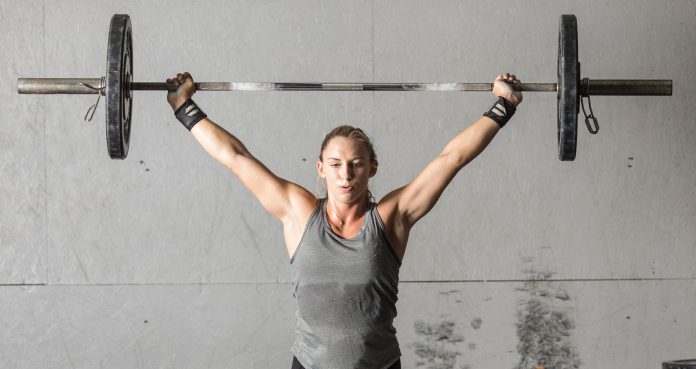
How To Master the Overhead Press
The Ultimate Shoulder Exercise for Size & Strength
The overhead press is well renowned as a strength and size builder, not just for the shoulder but for the chest, back, and core muscles too.There is no denying that it an impressive-looking exercise however, often those who are eager end up hurting themselves by overloading the bar.If you are unfamiliar with the overhead press, use the recommended exercise guide found in this article to allow you to gradually work up to a full overhead press.This article will also highlight an array of overhead press variations as well as providing detail on how to effectively perform the press.
Overhead Press Technique
To perform the overhead press, start by setting up a bar on a rack at shoulder height. Assuming a hip-width stance, use a shoulder-width grip on the bar and unrack.Before pressing the bar, squeeze the core muscles and the glutes to prevent the trunk and hips from moving. Push hard and drive the bar upward keeping it close to the face. Fully extend the elbows and finish with the bar directly overhead. Maintain a high chest and core brace as you reverse the movement and drop the bar back down to the upper chest.
Building up to Overhead Press
If you are a beginner or have never performed the overhead press previously, consider using the dumbbell seated overhead press first.For the dumbbell seated overhead press, start by setting a bench upright so that the upper back is firmly against the bench to prevent overarching.Using the seated version will reduce the demand on the core (1) and therefore allow you to focus more intently on the pressing movement.Dumbbells are an excellent tool when learning new exercises as they allow for greater control and a fuller range of motion.
Practicing the seated dumbbell overhead press will allow the nervous system to adapt and get to grips with the movement patterns required for the overhead press. Additionally, it will build a base level of strength first to suitably prepare you for progressing onto the barbell overhead press.After mastering the seated dumbbell overhead press, progress onto a standing dumbbell overhead press which will increase the need for stability and demand on the core muscles (2).Once you feel competent with the standing dumbbell overhead press, it’s time to move onto the barbell overhead press.
Overhead Press Coaching Points
When performing the overhead press, keep the following 4 coaching points in mind to allow you to complete reps efficiently.
1) Use a Shoulder-Width Grip
Using a grip that is too wide can adversely impact your pressing ability and cause you to lift less weight.Ideally, you should use a shoulder-width grip on the bar and look to keep the elbows tucked in so that they are directly under the wrists. This will put you in the most optimal position to press from.
2) Keep the Wrists Mobile
To allow for a solid press, it is important that both wrists are mobile so that they can flex backward slightly when holding the bar.If you can get the wrists in the correct position, the pressing motion will be much smoother. Good general mobility will also allow the elbows to slightly flare out during the upward drive.
3) Shoulder Blade Engagement
Prior to driving the bar up and overhead, ensure that you squeeze tightly between the shoulder blades.When pressing the bar upward, focus on powerfully engaging the shoulder muscles to initiate the movement. Also on the way back down, maintain tension through the shoulders to promote safety.
4) Adjust Head Position
The bar should start in contact with the upper chest. This means that when you press the bar, you will have to shift the head back to allow the bar to move straight up.Failing to do this may result in the bar catching you in the chin or the nose which is evidently something that you want to avoid.
5) Lift the Chest
Throughout the duration of the rep, it is crucial that the chest is lifted and kept high. This will keep the upper back strong and stable thus facilitating a more efficient press.Letting the chest drop can decrease shoulder stability and therefore may heighten the risk of experiencing a serious shoulder injury – especially if using a heavy load.
Overhead Press Variations
There are a number of overhead press variations which you may wish to use for a number of different reasons.For example, if you find the barbell overhead press too challenging you may wish to regress by selecting a slightly easier variation like the dumbbell overhead press.
Dumbbell Overhead Press
The movement patterns of the barbell and dumbbell overhead press are the same. However, using dumbbells will work both sides individually and therefore will work the shoulders in a slightly different way.Although this variation is excellent for beginners as they get to grips with the overhead press, those who are accomplished with the overhead press can still benefit from it.When it comes to the barbell press, imbalances can easily be masked. The dumbbell press will give a greater indication to whether one side is stronger than the other.This explains why it may be beneficial for more advanced individuals to perform the dumbbell variation on occasion, to check and see if strength levels are well balanced.A final benefit associated with the dumbbell overhead press is that dumbbell requires a greater degree of stability than barbells. As a result, smaller stabilizing muscles in the shoulder must contract to control the weight. Regularly performing the dumbbell variation may, therefore, lead to healthier shoulders.
Military Press
Often the overhead press and military press are confused and seen as the same exercise, however, they are distinct. The difference between these exercises is the width of the stance. The overhead press uses a hip-width stance wjhereas the military press brings the feet close – like a soldier standing at attention.This small change has a big impact on the dynamic of the exercise. Although the pressing motion remains unchanged, stability becomes more of a factor due to the narrow base of support.As a consequence, glute and core muscles must powerfully engage to facilitate stability, balance, and control. As a result of the increased demand for stability, it may be necessary to use a slightly lighter weight than you use for the conventional overhead press.
Push Press
In the overhead press, the lower extremities do not move however, the push press recruits the muscles in the legs to assist in the press. This makes it an excellent exercise for those who are finding it challenging to complete the overhead press.It can also effectively be used when reaching muscular failure in the overhead press. It’s fine to switch to push press mid-set to allow you to complete a few more reps and apply maximal stress to the shoulders.To perform the push press, start in the same position as the overhead press. Dip the hips and bend the knees so that you drop into a quarter squat before powerfully extending.The momentum generated from the extension of the knees and hips should then translate into pressing the bar directly overhead (3).
Thruster
There are great similarities between the thruster and the push press. However, for the thruster, you drop into a full squat rather than a quarter squat, before pressing overhead.Considering that the thruster incorporates both a full front squat and overhead press, it is the most challenging full-body variation in the list.With such a vast array of muscle groups being involved, the thruster will rapidly raise the heart rate which makes it a superb exercise to utilize in HIIT training or circuits.If you do decide to use the thruster in this way be conscious of your form as fatigue builds. Fatigue can adversely interfere with form thus increasing the risk of sustaining an injury.
Kettlebell Press
As with the dumbbell overhead press, the kettlebell variation is a superb exercise that can be used to reinforce the movement patterns of the overhead press.Because of the way the kettlebell is positioned, stability may be more of a challenge with this variation (4).Focus intently on pressing straight up in order to maintain shoulder integrity and reduce the risk of injury. Pressing out to the side or letting the weight shift backward can place undue strain on the shoulders.To perform the kettlebell variation, bring the kettlebells up to the shoulders and check that the elbows are directly under the wrists. Keep the chest up and core braced as you press the kettlebell directly upward. As you press, rotate the arm 90 degrees so that the palms are facing forwards at the top position.
Final Word
All serious lifters and athletes should be performing overhead work on a regular basis. For comprehensive, full-body development, the overhead press and variations of the overhead press should play a key role.
References:
1 – Saeterbakken, Atle Hole; Fimland, Marius Steiro (2012-05). “Muscle activity of the core during bilateral, unilateral, seated and standing resistance exercise”. European Journal of Applied Physiology. 112 (5): 1671–1678. doi:10.1007/s00421-011-2141-7. ISSN 1439-6327. PMID 21877146.
2 – Saeterbakken, Atle H.; Fimland, Marius S. (2013-07). “Effects of body position and loading modality on muscle activity and strength in shoulder presses”. Journal of Strength and Conditioning Research. 27 (7): 1824–1831. doi:10.1519/JSC.0b013e318276b873. ISSN 1533-4287. PMID 23096062.
3 – Soriano, Marcos A.; Suchomel, Timothy J.; Comfort, Paul (2019). “Weightlifting Overhead Pressing Derivatives: A Review of the Literature”. Sports Medicine (Auckland, N.z.). 49 (6): 867–885. doi:10.1007/s40279-019-01096-8. ISSN 0112-1642. PMC 6548056. PMID 30924081.
4 – DICUS, JEREMY R.; HOLMSTRUP, MICHAEL E.; SHULER, KYLE T.; RICE, TYLER T.; RAYBUCK, SHAWN D.; SIDDONS, CHELSEA A. (June 1, 2018). “Stability of Resistance Training Implement alters EMG Activity during the Overhead Press”. International Journal of Exercise Science. 11 (1): 708–716. ISSN 1939-795X. PMC 6033506. PMID 29997723.
10 Best Bodyweight Home Workouts For A Chiseled Physique
Why go to a gym when you can build a Greek God physique with these home workouts?
Most people have come to believe that they need to work out with dumbbells and barbells to build muscle mass. This is why they get a gym membership when they could have conveniently trained at home.
On the other hand, some people miss out on being a part of the fitness lifestyle because their busy schedule does not allow them the luxury of going to the iron paradise.
These individuals give up on their dream physique because, by watching their favorite Instagram fitness athletes train at fancy gyms, they have subconsciously internalized that a gym membership is indispensable for a body transformation.
The Holy Grail Of Physique Transformation
All fitness enthusiasts need to hear this – Your muscles do not know if you are training at a gym or home. They do not know if you are lifting iron or using resistance bands. Muscle tissues are damaged during a workout, and they grow back bigger and stronger with the correct diet and recovery time. As simple as that.
But how do you damage muscles during a bodyweight home workout?
Progressive overload.
As your workouts advance and you get stronger, you should increase your reps, time under tension, decrease rest time between each set and exercise, incorporate advanced training techniques in your training, and push yourself to failure in every set.
Oh, so you want to know if this could lead to overtraining?
Here is the harsh truth – most lifters who train at a modern gym with fancy equipment cannot train hard enough (even if they wanted to) to hit the overtraining stage, let alone people who are training at home. So, give home workouts all you have got and forget about overtraining.
The day people learn to use their body weight as resistance, gyms will have a hard time selling memberships.
Related Read: Training Programming: Progressive Overload is Your New Best Friend
Before you begin your home workouts, make sure you:
Warm-Up
Just because you are training at home does not mean you are free to skip warm-ups. Stretching and warming up will help fire up your muscles during your workouts.
Reasons why you should never miss a warm-up session:
Lower risk of injury – According to a study, an elaborate warm-up routine can reduce your risk of injury as it relaxes and loosens your muscles.
Mental focus – With time, a warm-up routine turns into a ritual that automatically puts you in the zone.
Improves flexibility & mobility – Being more flexible can improve your range of motion.
Increased blood flow – Blood carries oxygen and nutrients to different parts of your body. Warming up loosens your muscles which results in an increased blood flow throughout the body.
Reduction in muscle tension and pain – Muscles that are warm and relaxed move with less friction and are less likely to stiffen during and after a workout.
Better performance – Studies have shown that warmed-up muscles can help you work out more effectively.
10 Best Bodyweight Home Workouts For A Shredded Body
Workouts laid out in this article are perfect for lifters of any experience level. They will help you in building muscle and core strength and losing body fat. It also includes an all-out 20-minute HIIT (high-intensity interval training) workout.
#1 – Beginner Home Workout
Squat – 20 Reps
Walking Lunges – 10 Reps (each side)
Push-Up – 10 Reps
Single Arm Bent-Over Row (Resistance Bands) – 15 Reps (each side)
Plank – 30-seconds
Jumping Jacks – 30 Reps
Time: 20 minutes
Rest: 10 seconds between exercises
Circuits: 5
Firstly, this is as easy as it gets in the home workout program. Secondly, it is not that easy – as you will soon find out.
Perform each exercise for the desired repetitions and rest for 10 seconds before starting the next exercise. Make sure you are following a full range of motion while performing these workouts. Since this is a bodyweight workout program, you will be leaving gains on the table by performing partial reps.
In each workout, you will be doing at least one advanced exercise. In this workout, you will be performing single-arm bent-over rows with resistance bands.
Steps:
Stand with your right foot ahead of the left.
Lean forward so that your torso is at a 60-degree angle with the floor.
Place one end of the resistance band under your front foot.
Rest your right forearms on your right thigh.
Grab the other end of the resistance band with your left hand.
With your hand extended down, there should be no slack in the band.
While keeping your elbow close to your body, bring your arm up to your side.
Hold and contract at the top for a couple of seconds.
Return to the starting position and complete 10 reps before switching sides.
#2 – Core Workout
Circuit A
Skater – 30-seconds
Push-Up – 30-seconds
Shoulder Tap – 30-seconds
Forearm Plank Reach – 30-seconds
Circuit B
Skater – 30-seconds
Burpee – 30-seconds
Plank Jack – 30-seconds
Plank – 30-seconds
Time: 25 minutes
Rest: No rest between exercises in a circuit; 45-second rest between circuits.
Circuits: 5
After you complete all exercises in circuit A, take a 45-second rest before starting circuit B. Repeat until you complete five rounds of the circuits. One thing is for sure – your core will be sore for at least a couple of days after this workout. Core – sore. See what we did there?
#3 – 20-Minute HIIT Home Workout
Circuits X 8
Side Kick-Through – 20-seconds
Rest – 10-seconds
Circuits X 8
Skater Hop – 20-seconds
Rest – 10-seconds
Circuits X 8
Crab Toe Touch – 20-seconds
Rest – 10-seconds
Circuits X 8
Frogger – 20-seconds
Rest – 10-seconds
Circuits X 8
Curtsy Lunge – 20-seconds
Rest – 10 seconds
Time: 20 minutes
Rest: 10 seconds between exercises
Circuits: 8
The 20-minute HIIT workout is dialed-in to the T. You cannot afford to waste a single second during this training session. It might be a little harder for you if you are a beginner as you need good stamina, endurance, and cardiovascular health for this workout.
But do not use this as an excuse to skip this workout. Push your boundaries and go as hard as you can. Remember: There are no shortcuts to building your dream physique.
#4 – 7-Minute Home Workout For Ultimate Gains
Jumping Jack – 30-seconds
Wall Sit – 30-seconds
Push-Up – 30-seconds
Crunch – 30-seconds
Step-Up – 30-seconds
Squat – 30-seconds
Tricep Dips – 30-seconds
Plank – 30-seconds
High Knees Running in Place – 30-seconds
Lunge – 30-seconds
Push-Up with Rotation – 30-seconds
Side Plank – 30-seconds
Time: 7 minutes
Rest: 10 seconds between exercises
Circuits: 1
The 7-minute workout is for people with packed schedules. No matter how time-poor you are, you can always squeeze in a 7-minute workout in your day. In fact, you could even perform this training circuit on Air Force One.
According to a 2013 study conducted by the American College of Sport’s Medicine Health and Fitness Journal, this HIIT workout improves overall fitness levels and helps with weight loss.
#5 – Bodyweight Leg Home Workout From Hell
Squat (with a towel) – 10 Minutes 15 Reps
Bulgarian Split Squat – 5 Sets 30 Seconds (each side)
Squat Jump (with floor touch) – 3 Sets 15 Reps
Bridge Kick – 10 Minutes 10 Reps (each leg)
Superset
Burpee – 10 Sets 10, 9, 8, 7, 6, 5, 4, 3, 2, 1 Reps
Jump Lunge – 10 Sets 10, 9, 8, 7, 6, 5, 4, 3, 2, 1 Reps
Time: 45 minutes
Rest: 30 seconds between exercises
Circuits: 1
No, we are not trying to kill you. But even if we were, do not forget – what doesn’t kill you, makes you stronger.
In the first exercise, hold a towel with your arms extended straight overhead. The fact that this is a bodyweight workout should not stop you from mimicking Olympic lifts.
In the first (squat with a towel) and fourth (bridge kick) exercises, set a timer for ten minutes and perform 15 reps of the exercise at the start of each minute. After completing the desired reps, rest for the remainder of each minute. Repeat the cycle for 10 minutes.
#6 – No-Equipment Arm Workout
Decline Push-Up – 15 Reps
Up-and-Down Plank – 20 Reps
Crab Crawl – 10 Reps (each side)
Diamond Push-Up – 15 Reps
Inch Worm – 15 Reps
Tricep Dips – 15 Reps
Time: 20 minutes
Rest: 30 seconds between exercises
Circuits: 3
In the home workout program, you will be working on your aesthetics as well as functional strength. A chiseled physique without functional strength is as good as a Ferrari without an engine.
The number of repetitions in this workout is only for reference purposes. You are supposed to perform each exercise until you hit failure.
While performing push-ups, pause at the top of the movement for a few seconds, and contract your triceps as hard as you can.
#7 – Bodyweight Home Workout For Boulder Shoulders
Push-Back Push-Up – 12-15 Reps
Plank to Down Dog – 12-15 Reps
Pike Push-Up – 15 Reps
Wall Walk-Up – 6 Reps
Prone T (and Y) – 10 Reps
Pro: Handstand Push-Up / Bridge Push-Up – 10 Reps
Time: 30 minutes
Rest: 30 seconds between exercises
Circuits: 3
After you are done with the bodyweight shoulder workout, you will question the need for dumbbells and barbells and going to a gym for shoulder training.
The last exercise of this workout is only for pros. While most people know what a handstand push-up is, let’s go over bridge push-up.
How to perform bridge push-up:
Lie with your back on the floor, knees bent, and feet as close to butt as possible.
Place your right hand near your right ear and your left hand near your left ear. Your thumbs should be next to your ears, and your fingers pointing towards your heels.
Push up your hips, arch your back, and press hands into the floor to lift into bridge pose.
Once you gain stability in the bridge pose, start performing push-ups by bending at your elbows and lowering your head towards the floor.
#8 – Bodyweight Home Workout For A Stirated Chest
Resistance Band Push-Up – 15 Reps
Standing Chest Press – 15 Reps
Alternating Shuffle Push-Up – 15 Reps (7 on each side)
One-Arm Push-Up (on an elevated platform) – 15 Reps (each side)
Dynamic Push-Up – 12 Reps
Time: 30 minutes
Rest: 30 seconds between exercises
Circuits: 3
For this workout, you will need resistance bands that can be anchored to a door. We highly recommend the Serious steel resistance bands for this purpose.
How to perform resistance band push-up:
Wrap a resistance band around your back so that it is placed just under your armpits.
Loop the resistance band around your hands to tighten it.
Get into a push-up position, and perform 15 reps.
How to perform alternate shuffle push-ups:
Get into a push-up position.
Move your right hand to the left until both your hands are next to each other.
Slide your left hand further left until your hands are shoulder-width apart again.
Perform a push-up.
Repeat by moving to the right this time. Alternate between sides until you complete the desired reps.
You could also incorporate TRX in your bodyweight home workouts.
Related: How To Use The TRX To Build A Bigger Chest
Also, Check Out: Best Resistance Bands For Home Workouts & Gains (Updated 2021)
#9 – Bodyweight Home Workout For A Cobra Back
Pull-Up – Failure
Suspension Row – 15 Reps
Hindu Pushup – 15 Reps
Prone Back Extension – 15 Reps
Single-Arm Resistance Band Bent-Over Row – 15 Reps
Time: 30 minutes
Rest: 30 seconds between exercises
Circuits: 3
To annihilate your back with home workouts, you will need a sturdy pull-up bar that you can install in your doorway.
Best Pull-Up Bars For At-Home Gains & Convenience 2021
The best thing about a pull-up bar is that you can perform a range of exercises on it. By adding a TRX to a pull-up bar, you can use it to train your back, arms, chest, legs, and abs.
How to perform Hindu push-ups:
Get into a push-up position.
Push your hands into the floor to drive your weight back so your hips rise into the air.
Your back should be straight and your head behind your hands.
Lower your body in an arcing motion so that your chest scoops downward and nearly scrapes the floor.
Continue moving forward as you press your body up so your torso is vertical and your legs are straight and nearly on the floor.
#10 – Full-Body Finisher Bodyweight Home Workout
Side Plank Twist – 30-seconds AMRAP
Squat Pulse – 30-seconds AMRAP
Crunch – 30-seconds AMRAP
Lying Leg Raise – 30-seconds AMRAP
Push-Up – 30-seconds AMRAP
Mountain Climber – 30-seconds AMRAP
Bicycle Kicks – 30-seconds AMRAP
Time: 20 minutes
Rest: 10 seconds between exercises
Circuits: 3
This full-body bodyweight workout will make fat melt off your body.
For each exercise, you will perform as many reps as possible (AMRAP) in 30 seconds. You are allowed a 10-second rest between exercises and a 30-second rest between circuits.
Conclusion
Although these are home workouts, you could do these anywhere, even when you are traveling. You might have to purchase a few pieces of equipment (like resistance bands and a pull-up bar) for this workout but look at them as long-term investments. The dividends alone will be more than what you pay for the equipment.
How often do you workout at home?
Let us know in the comments below. Also, be sure to follow Generation Iron on Facebook, Twitter, and Instagram.
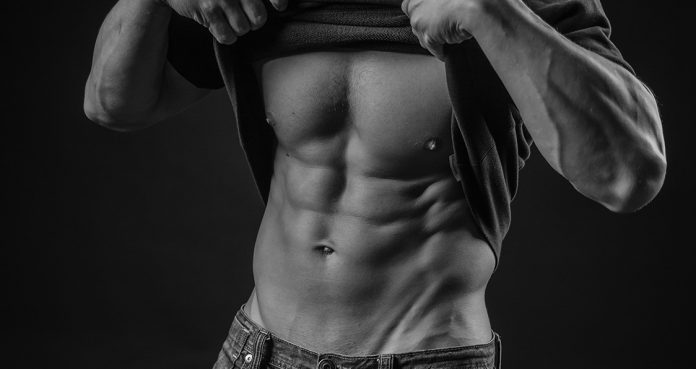
Build A Six-Pack With These 6 Moves
6 Exercises For A Shredded Core
A shredded midsection is what separates the men from the boys. You need to have your diet and exercise on point if you want to build solid abs. While it’s true abs are made in the kitchen, you need to train your core optimally to get the desired definition in your midriff.
Most people rely on a few exercises to build abs. Your core is divided into three parts; upper, middle and lower. You need to have exercises in your workouts which train all the three sections of your midriff.
1. Cable Crunches – 3 Sets 20 Reps
Using cables helps you maintain constant tension on your abs throughout the exercise. The problem with free weight exercises is, you have tension on your muscles on the concentric motion but have no tension on the eccentric motion.
Cable crunches focus on your upper abs. Make sure you keep your core tight throughout the movement. Exhale and squeeze your abs at the bottom of the movement to make the most of this exercise.
2. Crunches – 3 Sets 20 Reps
Crunches are the gold standard when it comes to ab training. The range of motion is the key while performing this exercise. You should be touching your knees at the top of the movement and lie flat on the floor at the bottom of the movement.
If body weight crunches are too easy for you, feel free to add resistance by using weights. Most people just go through the motions when doing crunches. You should keep your core tight and contract your abdominal muscles with every rep.
3. Hanging Leg Raises – 3 Sets 15 Reps
Hanging leg raises can be a brutal exercise if done correctly. This exercise work on your middle and lower abs. Fat on the lower belly can be the hardest to lose and this exercise can help you see results.
While performing this exercise make sure you’re not swinging your body. You need to keep your upper body stable and only have movement in the lower body. Hold your legs at the top of the movement and bring them back slowly.
4. Decline Crunches – 3 Sets 15 Reps
Decline crunches will set your lower abs on fire. While doing decline crunches, keep your hands on either side of your head. Don’t lock your fingers at the back of your head. Avoid using momentum to lift yourself up.
Maintain a mind-muscle connection with your abs. Exhale, contract and squeeze your abs at the top of the movement and pause at the top for a second. Slowly lower your body to the starting position and repeat.
5. Russian Twists – 3 Sets 15 Reps
Obliques are one of the most overlooked muscle groups while training abs. A midriff can never be deemed shredded if it doesn’t have ripped fish-gills like obliques. Russian twists are an incredibly effective exercise in developing your obliques.
Lie down on the floor with your knees bent and your feet four inches off the ground. Your quads and upper body should be forming an imaginary V-shape. Hold a weight plate in front of your chest while locking out your elbows. Rotate to your right side, exhale and squeeze your obliques, repeat for the left side.
6. Planks – 3 Sets 1 Minute Each
Planks have earned a name for themselves when it comes to building a strong core. Your abs will already be smoked by the time you reach this exercise. Planks can strengthen your core which will not only help in building abs but will also make you stronger at other exercises.
While performing the planks, make sure your body is in a straight line. Your hips shouldn’t be hanging low or be forming a bridge. Keep your core tight throughout this exercise and your head and neck in line with your body.
Which is your favorite ab exercise?
Let us know in the comments below. Also, be sure to follow Generation Iron on Facebook and Twitter.

Top Training Tips For Ab Development
8 Underrated Methods That Will Transform Your Ab Training
When it comes to ab training there are many different methods in existence. In the pursuit of strong, well-defined abdominals, most individuals concentrate on one specific method.
Some individuals will look at isometric exercises where they remain entirely rigid, others will focus on exercises that move the limbs in a variety of different ways.
Still others believe that weight machines are the way forward while some argue that bodyweight is all that is required for efficient abdominal development.
Regardless of which method you believe to be best, everyone can benefit from learning new abdominal training techniques in order to comprehensively develop the abs.
This article will provide you with 8 ab training secrets that can transform your training and bring about significant improvements in abdominal strength and definition.
8 Abdominal Training Secrets
Before looking at the 8 underrated abs techniques, it must be emphasized that while training these muscles may build strength and improve muscle tone, they will not give you a six-pack (1).
This can only be achieved by restricting calories so that body fat is reduced to the point where the muscles become visible. (2)
While it is clear that it is proper nutrition that will reveal the abdominal muscles, it is still important that we train the abdominal muscle group regularly.
1) Round The Back
For almost every single resistance exercise, rounding the back is something that is to be avoided. In fact, it’s likely that you’ve spent much time teaching yourself how to keep the spine neutral.
It is absolutely imperative that the spine is neutral during exercises like deadlifts, squats, rows and any bent-over exercises. It is done in order to prevent injury occurring to the spine.
For exercises that target the abdominals however, you may have to unlearn this skill as maintaining a flat back will limit the degree of abdominal contraction.
It’s not uncommon to see gym-goers performing exercises, like the cable crunch, with a flat back which causes them to bend at the hips rather than the waist.
By bending at the waist, the rectus abdominis shortens and fully contracts whereas bending at the hips causes an isometric contraction and the abdominals remain the same length.
You may have heard it said that spinal flexion exercises are risky, however, often the risk is overstated. Your spine is designed to bend and therefore, exercises like crunches are entirely legitimate.
Simple crunches will not cause lower back pain if performed properly, however, performing the same abdominal workout for months and months may cause overuse injuries or low back problems.
Therefore, variety is extremely important for abdominal training. Ensure to add in some sagittal and lateral abdominal work as well as performing crunches.
2) Target Specific Areas
Isolation exercises can be useful when it comes to developing the abdominals. An isolation exercise is simply an exercise that entirely focuses on working one muscle.
While it may not be entirely possible to isolate particular portions of certain muscles, it is possible to emphasize one area over another.
Core training tends over the past few years have revolved around developing the core overall with a particular focus on the transverse abdominis.
While this is undoubtedly a good focus to have, there is value in targeting the upper and lower portions of the abdominals.
For the upper areas, use exercises that stabilize the lower body and focus on curling the back so that the ribcage is pulled down towards the hips.
To effectively target the lower areas, flip it around. Stabilize the upper body and bring the pelvis up towards the ribcage.
The cable crunch is an example of an effective “upper ab” exercise whereas a hanging leg raise serves a great example of a “lower ab” exercise.
A few ab exercises actually involve the pelvis and ribs move towards each other simultaneously to bring about a peak abdominal contraction. This type of exercise targets the upper and lower abs equally.
Finally, all exercises which involve twisting, rotation or lateral movement will effectively work the oblique muscles. Side bends are a great example of an effective oblique-focused exercise.
3) Use Progressive Overload
When performing ab routines most individuals use the same amount of sets, reps, and weight every time.
The problem with this is that the muscles have adapted to the point that they comfortably deal with the stress of this workout, therefore, they fail to adapt further.
Consider the other work you do in the gym. With heavy lifting, you are always aspiring to improve by lifting heavier or for a greater total volume. The same principle should apply to your ab training.
Progressive overload is the process of gradually adding more load over time to ensure that the body continually adapts. It is absolutely foundational to all strength training (3).
When considering ab training, you should program, execute and apply progressive overload in the same way as you would with other resistance exercises.
Here are the 3 most common methods of applying progressive overload:
– Increasing the weight– Increasing total volume (sets x reps)– Reducing rest periods
Look to improve in one variable at a time and ensure that the increments are gradual. Focusing on all three and overloading too quickly will more than likely cause regression rather than progression.
4) Start with Loaded Resistance
The abdominals are primarily made up of slow-twitch muscle fiber (4) which are particularly resistant to fatigue, however, this should not mean that you use high-reps only.
Although there is a greater percentage of slow-twitch, the abdominal region also contains many fast-twitch fibers that respond best to low-to-moderate rep ranges.
Keeping this in mind, to develop these fast-twitch it may be useful to start your routines with weighted ab exercises using a low-to-moderate rep range.
A useful recommendation is to use a weight that brings you to the point of muscular failure while still allowing you to perform 8-12 reps.
If using bodyweight exercises, you can still increase this resistance by manipulating your body position. The best examples of this are seen in ab / TRX rollouts.
5) Use Holds
Peak-contraction training involves consciously squeezing the muscle at the top of the rep for a short period of time. Adding this method to a number of ab exercises can increase the overall intensity.
Let’s say you can comfortably complete 12 reps of the hanging leg raise. Adding a 1-second hold at the top of the leg raise will suddenly make the 12 reps feel much more challenging.
By using the peak-contraction technique you may find that you perform fewer reps than before simply because the muscles are put under a greater load – this is totally fine.
Remember that movement quality and exercise intensity are much more important than reaching a predetermined rep target.
6) Maintain Time Under Tension
When using machines, if the weight makes contact with the stack, muscle tension immediately dissipates and the training stimulus disappears.
While it may be evident when this occurs with machine-based exercises, it may be less clear with bodyweight exercises.
During all bodyweight exercises which involve lying flat on your back, look to keep the shoulder blades off the floor as resting them on the floor will reduce the time under tension.
Again, don’t concern yourself too much with the number of reps you perform, instead, focus on maintaining muscle tension throughout the exercise.
7) Be Aware of Your Hip Flexors
The hip flexors are the muscle group responsible for generating movement around the hips, as the name suggests. For a number of exercises it is possible to work the hip flexors instead of the lower abs.
An exercise where this is commonly seen is the hanging leg raise. During the leg lift, if the lower back remains entirely flat, it is likely that the hip flexors are doing the work.
For exercises that involve anchoring the lower body, it is also possible to drive through the thigh muscles rather than engage the abdominals to pull the torso up.
Often, the hip flexors will become too heavily recruited when exercise technique is incorrect or less than optimal. Therefore, it is important to assess your technique regularly.
8) The Importance of the Plank
The plank plays a part in many gym-goers ab workouts – and rightly so! It is one of the best core exercises for strength, stability, and function.
Let’s consider the movement patterns and requirements for a number of heavy compound lifts – deadlifts, squats, bench, bent rows, overhead presses and so on.
Bracing and maintaining a strong torso is pivotal to all of these exercises and certain points of specific exercises actual resemble a plank and activate ab muscles in a similar fashion (5).
Therefore, developing planking and bracing abilities can have a positive impact on your performance with other resistance-based exercises.
Check out our Abs Exercise Guide here for exercises and further instructions.
Final Word
Abdominal training does not have to be boring or mundane. Utilizing these methods, varying your abdominal workout on occasion and effectively applying progressive overload will yield excellent results.
References:
1-Vispute, Sachin S.; Smith, John D.; LeCheminant, James D.; Hurley, Kimberly S. (2011-09). “The effect of abdominal exercise on abdominal fat”. Journal of Strength and Conditioning Research. 25 (9): 2559–2564. doi:10.1519/JSC.0b013e3181fb4a46. ISSN 1533-4287. PMID 21804427.
2-Redman, Leanne M.; Ravussin, Eric (January 15, 2011). “Caloric Restriction in Humans: Impact on Physiological, Psychological, and Behavioral Outcomes”. Antioxidants & Redox Signaling. 14 (2): 275–287. doi:10.1089/ars.2010.3253. ISSN 1523-0864. PMC 3014770. PMID 20518700.
3-Lorenz, Daniel S.; Reiman, Michael P.; Walker, John C. (2010-11). “Periodization”. Sports Health. 2 (6): 509–518. doi:10.1177/1941738110375910. ISSN 1941-7381. PMC 3438871. PMID 23015982.
4-Häggmark, T.; Thorstensson, A. (1979-12). “Fibre types in human abdominal muscles”. Acta Physiologica Scandinavica. 107 (4): 319–325. doi:10.1111/j.1748-1716.1979.tb06482.x. ISSN 0001-6772. PMID 161688.
5-van den Tillaar, Roland; Saeterbakken, Atle Hole (June 13, 2018). “Comparison of Core Muscle Activation between a Prone Bridge and 6-RM Back Squats”. Journal of Human Kinetics. 62: 43–53. doi:10.1515/hukin-2017-0176. ISSN 1640-5544. PMC 6006542. PMID 29922376.
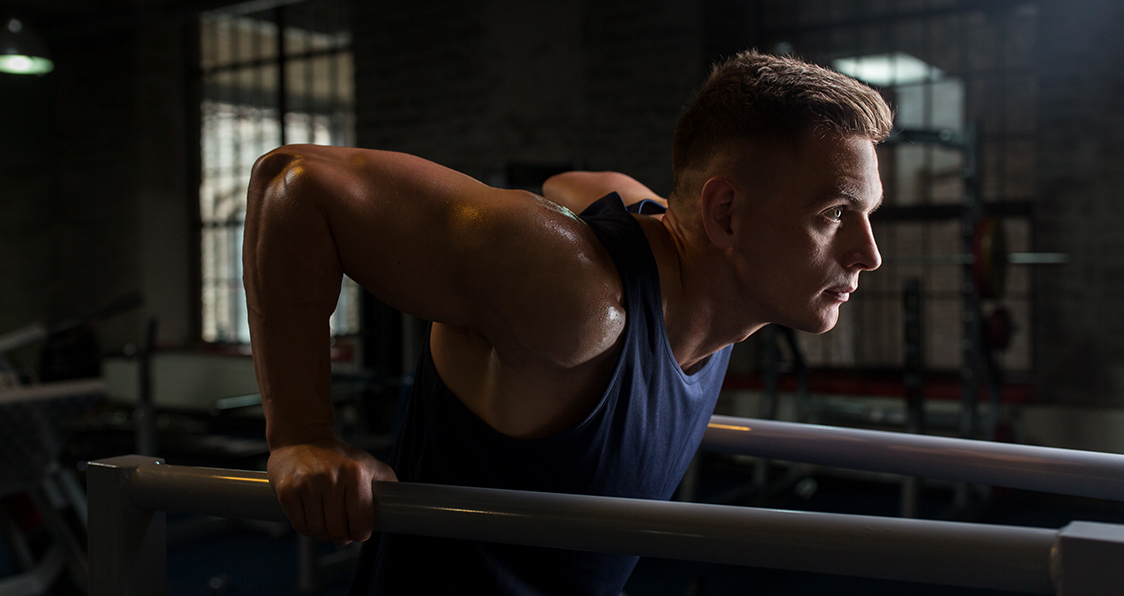
Want The Ultimate Upper Body? Dips And Pull Ups Are The Trick
Never overlook these exercises.
Building an aesthetic physique is a goal that every bodybuilder should aspire to. Not everyone is capable of packing on as much muscle as a Phil Heath or a Kai Greene. Most people will only reach a certain level of muscle growth. If you’re a fan of mass monsters and wish to aspire to that body type, go for it. Track your macros closely, get that pump and get some gains. But if you’re genetically incapable of doing such a thing, which let’s face it most of are, then you’re probably going to have to settle for building an aesthetic, if not massively muscled, physique.
For most men and some women, building the upper body is a priority, not solely for aesthetics but for functional strength as well. Core strength is paramount for any athlete. Whether you’re looking to swing a golf club or build a massive chest, the core of your body plays a major role in perform the even the most simplest of actions.
The core of your body is like an engine and working it can improve upon your overall fitness. But since building muscle is definitely your priority, you should definitely use these two methods for building a strong upper body: dips and pull ups.
What makes these two so special? Well let’s dissect it.
Works Multiple Muscle Groups
Dips and pull ups are great for working more than one muscle group. The dip is essentially a pushing exercise that can not only work your chest, but your triceps and delts as well. The pull up works your back, specifically the lats in the upper quadrant. Pull ups are also great for working your biceps. The whole key to maximizing the potential of each exercise is to utilize proper form and technique.
If you swing your legs while doing pull ups to much of the focus will be shifted to your arms doing all the work rather than your lats. By focusing on keeping your legs steady it can essentially work your lower body as well. The dips can work your chest from different angles and, depending on how deep your reps are, can either completely focus on your pecs or multiple different muscle groups for an overall upper body workout.
[embedded content]
They Are Versatile
As athletes we are always looking to master a particular workout or technique. With pull ups and dips, the possibility of mastery near impossible. What does that mean exactly? Well, of course it’s possible to master the form and technique of the exercises, but they’re also very versatile.
If bodyweight dips and pull ups start to lose their luster, then you can always switch to using chains or a weighted vest or belt to further challenge yourself. Once your strength level grows you can challenge yourself by setting personal rep records. No matter how you look at it, there are always different ways to make pull ups and dips new and fresh.
Are dips and pull ups apart of your workout regimen? Let us know in the comments and forums. Also, be sure to follow Generation Iron on Facebook and Twitter.
Look Like Frank Zane With These 5 Brutal Vacuum Exercises
“Here I come to save the day!”
The above quote is a catch-phrase from Mighty Mouse, a 1940’s cartoon that still has an impact to this day. The iconic character is a small mouse with big powers and an even bigger heart who… well, saves the day. So why are we writing about this on a bodybuilding site? Just as iconic as the cartoon itself, is the way Mighty Mouse was drawn, his hip to waist ratio was out of this world.
Much like many cartoon strongmen and super heroes, the over exaggerated massive chest and V-taper was truly inspiring to the concept of “mass muscle.” I remember thinking as a kid, “Can anyone have a body like that?” As builders we’re constantly striving for perfection in areas most people don’t even see. Well, we’re here to tell you that you can have that mighty mouse profile and we’ll show you how.
We know what you’re thinking, “How could I possibly have a waist like that? That’s stuff’s all genetics, I can’t change my bone structure.” Well you’re right. Barring some very painful and probably expensive surgeries you’re stuck with the hip length you have. However, it is possible to customize your workout towards attaining a more classic physique as well as getting you the classic V-shape of a Golden Era God.
The transverse muscle (TVA) is a band like muscle that runs along the sides of your midsection. It’s there to stabilize your spine and core, nature’s weightlifting belt if you will. Without a stable spine, one aided by proper contraction of the TVA, the nervous system fails to recruit the muscles in the extremities efficiently, and functional movements cannot be properly performed. The TVA and lumbar multifidus support posture and control deep breathing during power movements therefore affecting a persons cardio as well as symmetry.
Cool. Now that you know what it is how can you train it? Well, we thought that you’d never ask. Here’s the key points in learning how to vacuum your stomach.
Standing
Stand upright and place your hands on a desk (or elevated flat surface, hip height is ideal)
knees slightly bent with back humped slightly (placing weight on desk
Place your chin on your chest.
Deeply inhale and exhale sharply.
As you exhale, expand your chest and bring your stomach in as far as possible. Hold the pose but Do Not Hold Your Breath!
On your back
Lie on your back. For example while in a tanning bed or other firm surface.
Reach your arms over your head and keep your legs flat and straight.
Begin by exhaling your air.
Lift your chest and arch your back.
Draw in your stomach for seconds at a time.
Continue to try and hold your stomach in for longer and longer periods of time.
Kneeling
Begin on all fours with your shoulders vertical over your elbows and wrists, hips over your knees, and your neck in a neutral position.
Exhale, then pull your navel in as close to your spine as possible.
Weighted Dumbbell pullovers
Lie on upper back perpendicular to bench.
Flex hips slightly.
Grasp one dumbbell from behind or from side with both hands under inner plate of dumbbell.
Position dumbbell over chest with elbows slightly bent.
(Keeping elbows slightly bent throughout movement) lower dumbbell over and beyond head until upper arms are in-line with torso.
Pull dumbbell up and over chest. Repeat.
Pull down crunch
This one’s simple. Have a seat on a pull down machine and perform your best vacuum pose. Hold it while at the same time reaching up and grabbing the pull down bar. Keep your arms straight up and use your breath to slightly pull the power up and down on your inhales and exhales. Still not getting it? Check out the instructional video above.
So now that we’ve given you the building blocks to perfecting your V-shape is there anything we left out? Do you have exercises that you use to keep your symmetry on point? Let us know in the comment section below. Feel Free to respond with a picture message if you see any massive changes due to these exercises.

Use The Cable Pull Through For Increased Strength & Gains
Ultimate strength.
Many people out there are looking to build some great, quality muscle in order to be as shredded as their favorite superhero. It’s only natural that anyone influenced by comics and television would want to look like their favorite action hero. Think about it. There’s no doubt that when many of you first saw Predator or The Terminator with Arnold Schwarzenegger your thought process by the end of those movies was, “I want to look like that!”
There’s no shame in that at all. Every bodybuilder needs a spark that will get their engines revving. But sometimes focusing purely on aesthetics right out of the gate can end up backfiring in the long run. Building quality muscle is great, but what’s equally as important is not only building muscle that looks great, but that serve a higher purpose in your overall fitness. Building functional strength should be just as high a priority as getting ripped abs or bulging biceps.
There are plenty of ways you can build up functional strength. There are deadlifts, a perfect pull exercise, there are squats, the absolute king of all lifting exercises, but there’s perhaps one that many lifters never really consider… the cable pull through.
Sure at first glance it may seem to be some useless exercise, more like a fad than anything that can be of use for a bodybuilder or weightlifter. But in reality this movement is a truly classic exercise that many strength athletes have been using for years in order to gain increased strength. So why is the cable pull through such an effective exercise?
Stronger Posterior Chain
One reason this exercise should be in your regimen is because it gets your posterior chain in great condition. That means your hamstring, glutes, lower back, and even calves are worked by performing this exercise. It’s truly helpful in strengthening the lower body and core as well, so it can help you in other lifts.
Improved Squat and Deadlift
Speaking of improving your lifts, the cable pull through is great for giving you a stronger squat and deadlift. Because the exercise improves lower body strength as well as core strength, lifting more weight with the deadlift and squat is a given. It’s certainly a great exercise to use if you plan on hauling increased weight.
Easy to Learn
Perhaps the greatest benefit to using the cable pull through is that it’s extremely simple to learn and master. It doesn’t require too much to actually get the movement down. The form is fairly simple and because of that it’s an exercise that can be easily added to your routine.
Is the cable pull through apart of your training routine? Let us know in the comments and forums. Also, be sure to follow Generation Iron on Facebook and Twitter.
How The Barbell Burpee Will Increase Full Body Strength
This variation of a traditional burpee is great for a workout.
The burpee alone is a challenging workout, let alone adding a bar. One that is comprised of both strength and cardiovascular movements, this workout is the perfect bodyweight exercise to increase full body strength and increase endurance. The burpee is further proof that bodyweight exercises can be just as demanding as any with weights.
But the barbell burpee is unique in that it adds additional elements to an already difficult exercise. Working with a combination of traditional burpee movements including a squat and a pushup, the barbell burpee adds the extra component of a power clean and push press with the barbell to make this is a highly effective exercise to do with a bar.
Used as an aerobic exercise in combination with strength training, the barbell burpee will increase cardio, strength, balance, and flexibility to give you an all-in-one workout to help burn fat and keep you on your feet and working your chest every time for however many reps you want.
Although difficult, the barbell burpee has great benefits and is worth adding to your fitness regimen. Able to attack all of your muscles, including your legs, glutes, core, back, chest, arms, and shoulders, along with the ability to raise your heart rate and get you breathing hard, this burpee is the perfect compound exercise to do with a bar each time.
For those looking to burn fat and increase endurance, as well as aid in power performance, the barbell burpee is great for athletes of any kind. Working many muscles at once also allows you less time working out with the barbell burpee.
All-Around Workout
The barbell burpee allows for increased strength in a variety of muscles including your lower body and upper body. Your legs and glutes are targeted during the jump back into a pushup position as well as the start to the power clean portion of the exercise. Once on the ground, your shoulders provide support as you descend into that all too familiar pushup using the bar as a point of support, especially with the jump up.
With more balance required for the burpee, your core activates and your arms and chest join the workout until that pushup is done as part of this burpee. The fun begins when you lift the barbell into a push press and rely on your fitness to take over as you lower the bar and continue with more reps.
By adding weight, your overall strength increases significantly as opposed to sticking with just your bodyweight (1). As a complex compound exercise, the barbell burpee is sure to fire you up on all cylinders and those gains will really show.
Promotes Fat Burn
As a physically demanding exercise, the barbell burpee is one that will burn off loads of calories, only supported by the fact that so many different muscle groups are being worked. With the ability to increase endurance, your metabolism will work harder for you and your ability to burn more calories will only intensify (2).
Fat loss happens when you consume less than you burn and while dieting can be tricky, the barbell burpee is one exercise to give you a great boost in calorie loss to start you on the right path towards fat loss and the jump and cardio portion of this is great for that.
Increases Endurance
When it comes to increasing your endurance and lung capacity, this workout is one that will do the trick. While running, cycling, or other cardio exercises will get you there as well, the barbell burpee is one that will boost your endurance while at the same time increasing strength and muscle growth (3). A long session of barbell burpees can be all you need for a good day’s work in the gym.
As fatigue sets in, your endurance will allow you to work longer and harder in all other aspects of your training and athletic performance. Along with working your circulatory system, muscular-skeletal system, and central nervous system, the barbell burpee will give your cardiovascular system a great boost to ensure a more effective and longer-lasting lift to add to the rest of your workouts to keep your working hard.
Enhance Explosive Power
Along with increased strength and endurance comes the ability for more power and explosiveness with workouts and competition. Barbell burpees will target your fast-twitch muscle fibers which allow for shorter bursts of speed and power (4). The back and forth jumping into and out of the pushup position mixed with the power of the press at the top will help generate increased speed and power for those looking to get the edge in their workouts.
Having speed and power is not only important for sprinters or jumpers, but for anyone looking to step their game to the next level and this burpee is great for that as you get moving on your hands and feet for a great workout to keep your gains flowing.
Time Efficient
Barbell burpees are time efficient since they include multiple muscles in many muscle groups, as well as targeting your cardio. While you do need a barbell for the barbell burpee, if one is not available, then a traditional burpee will provide almost all of the same benefits. For those who work or feel tight on time in the gym, adding barbell burpees to your workout routine is somewhat of a must.
You will look great, feel better, and know that even if you spent minimal time in the gym and more time off your feet, that you accomplished more with a barbell burpee to keep you doing things you love and start seeing gains.
How To Perform The Barbell Burpee
You will need a barbell and whatever desired weights you want. Place the barbell on the ground and grip the bar with your hands slightly more than shoulder width apart. Kick your legs back into a pushup position and lower to the bar. Push back up to complete the pushup and take your hands off the barbell.
Once on your feet, execute a power clean by lifting the bar to your waist, thrusting to your chest and completing a push press over your head, driving through your feet. Lower to the ground and repeat from the beginning. Keep a tight core and good form throughout to avoid strain or injury from this burpee exercise and rest is important to start seeing growth with all your reps.
Wrap Up
Burpees are never fun and can offer a real challenge for those still working on their fitness. But burpees are a great overall body exercise to get lean and put on muscle while also building a great foundation for endurance. Adding a barbell to the traditional burpee will only add to the fun and increase your gains. The barbell burpee can be challenging and will require balance and flexibility.
You will get better at the barbell burpee and be more fit, only encouraging those gains and increasing your confidence. Don’t let this deter you from maximizing your gains and allow yourself to thrive by adding the barbell burpee to your workout regimen so the rest of your workouts only add to it.
Let us know what you think in the comments below. Also, be sure to follow Generation Iron on Facebook, Twitter, and Instagram.
*Images courtesy of Envato
References
Baker, J. S.; Davies, B.; Cooper, S. M.; Wong, D. P.; Buchan, D. S.; Kilgore, L. (2013). “Strength and Body Composition Changes in Recreationally Strength-Trained Individuals: Comparison of One versus Three Sets Resistance-Training Programmes”. (source)
Ratamess, Nicholas A.; Rosenberg, Joseph G.; Klei, Samantha; Dougherty, Brian M.; Kang, Jie; Smith, Charles R.; Ross, Ryan E.; Faigenbaum, Avery D. (2015). “Comparison of the Acute Metabolic Responses to Traditional Resistance, Body-Weight, and Battling Rope Exercises”. (source)
Kazior, Zuzanna; Willis, Sarah J.; Moberg, Marcus; Apro, William; Calbet, Jose A. L.; Holmberg, Hans-Christer; Blomstrand, Eva (2016). “Endurance Exercise Enhances the Effect of Strength Training on Muscle Fiber Size and Protein Expression of Akt and mTOR”. (source)
Serrano, Nathan; Colenso-Semple, Lauren M.; Lazauskus, Kara K.; Siu, Jeremy W.; Bagley, James R.; Lockie, Robert G.; Costa, Pablo B.; Galpin, Andrew J. (2019). “Extraordinary fast-twitch fiber abundance in elite weightlifters”. (source)
2 Overlooked Exercises You Should Do For A Shredded Six Pack
The Six-Pack, The Holy Grail of Fitness…
No matter how hard you work it’s safe to say most of us in the fitness world never feel quite complete without that six-pack. Sure maybe you’ve hit your lifting goals or maybe you’re on top of your cardio, but you still want that carved mid-section. When you’re playing shirts vs. skins and one of your buddies unveils a golden six-pack of abs that can be seen from every angle, there’s a pang of awe and jealousy that shoots through you. We’ve all been there. Well bathe in envious despair no more! We’re going to show you two simple exercises that you either forgot about or overlooked while in the gym.
We’re sure most of you have heard the term “Abs are made in the kitchen”, and that’s partly true. You can build as much muscle as you want but unless your nutrition game is on point seeing those muscular squares of goodness will stay hidden. But we’re going to assume you’ve read our intermittent fasting, and get right into it. We hope you’re taking notes – read on for two exercises you should not ignore for a killer six pack.
Get on your knees
Yes, the rope pull down is an exercise I literally forgot about until the other day at the gym. After some powerlifting I wanted to do a little sculpting to change up my routine. While wondering around the mirror I saw someone doing lat pulldowns, I knew I didn’t want to do that. So I figured I’d practice my baseball swing on the machine with a lower weight and hit my abs in the process. I felt it, but not in the way I wanted to. Then “ding” the light bulb went off. I got on my knees and did some skull-crusher crunches and boy have I never felt better.
The basic of the exercise is displayed in the picture above. Get on your knees, keep your hands close to your head and try to concentrate on using your abs. If you want to get freaky with it try touching opposite elbow to opposite knee to work on your obliques. You can change up the range of motion to hit your abs from all different angles. You can even change the attachment and use the straight bar from behind the head. This exercise gives you that good burn and you’ll see the results almost immediately. I did.
Gymnast Rejoice
[embedded content]
Best known as the L-sit, this exercise is an oldie but goodie for gymnast and laymen alike. The beauty of the L-sit is it’s simpleness and practicality, it can be done damn near anywhere. No dip bars? Don’t despair, you can use anything from a bench, to chairs, to yoga blocks. The basics of this exercise is to sit down and push against a surface below you keeping your legs straight out in front of you, in turn holding your legs up using your abs. This will give your body an L shape and should shred your abs.
Now if you’re not use to this you might have trouble achieving full leg extension in the beginning so might want to start of with your legs tucked as displayed in the video above. When you do get to full leg extension we recommend sets of 30 to 60 seconds starting off in a 5-10 second reps. Meaning hold for 5-10 seconds then release, then go again until it adds up to 30 seconds, then 60. When you can do it straight for 60 seconds then you can either go for multiple sets or extend your sets even longer. Get creative with it. Rules are made to be broken!
So let us know what you think. Did these exercises help? Are there better alternatives on the ones we’ve mentioned? Feel free to leave your comments below or hit us up on our official Facebook and Twitter.
A Killer Circuit Workout To Smoke Your Abs
Build Your Dream Abs With This Circuit Workout
Abs are one of the most desired muscles and yet only a few possess them. A set of aesthetically appealing washboard abs are the result of proper training, diet, and recovery. You can’t build the abs of your dreams if one of the components is out of proportion.
Performing a circuit training workout can be more effective in developing the shape and conditioning of your abs as compared to the vanilla training routine of 3 sets of 10-12 reps. Try this ab workout the next time you train your abs and let us know how it goes.
You’ll be performing a total of three circuits where each circuit will have five exercises. After each exercise, you’ll rest for 30-seconds before performing the next exercise. After completing a circuit, you’ll rest for a minute before starting the second round.
Reverse Crunches – 20 Reps
In this circuit workout, you’ll be training your midriff from all the angles to ensure overall development. The reverse crunches work the middle and lower abs and are one of the most underutilized exercises when it to abdominal development.
Lie down with your back on a floor mat and your arms placed at your sides. Keep your feet flat on the floor by bending at your knees. Bring your quads to your chest by lifting your hips off the floor while maintaining the bend in your knees. Slowly return to the starting position and repeat for the recommended reps.
Russian Twists – 20 Reps (Each Side)
Obliques are one of the most overlooked muscles when it comes to abdominal training. The obliques are the fish gill-like muscles at the side of your abs. Twisting and turning movements are the ones which target the obliques most effectively.
If you feel the bodyweight version of the exercise is too easy for you, feel free to add resistance by holding a weight plate in front of your chest with your arms extended over your knees.
Cable Crunches – 20 Reps
While you don’t need to use added resistance in every ab exercise, using weights can help bring out the definition and separation in your midriff. Make sure you’re following a full range of motion while performing all the exercises mentioned in the article.
If you want to do this ab workout at home, you can perform the orthodox crunches instead of the cable version. Controlled breathing plays an important role in abdominal training. You should be breathing out and squeezing your abs at the contraction point and breathing in while returning to the starting position.
Leg Raises To Heels To Heaven – 20 Reps
Leg raises to heels to heaven bring the goodness of two exercises into one. Lie down on an exercise mat with your arms extended at your sides. Perform a leg raise by elevating your legs off the floor while keeping your legs straight.
As you form a 90-degree angle with your legs and the floor, raises your legs towards the roof by lifting your hips off the floor. Return to the starting position in the same manner with a slow and controlled movement.
Planks – 1 Minute
Most people make the mistake of overlooking their core strength when it comes to ab training. Core strengthening exercises will not only help you in shaping your abs but will also improve your performance in functional exercises.
Perform the orthodox planks in the first set and switch to doing the side planks in the next two circuits. If you give your all in this circuit workout, your abs will be on fire by the end of the first circuit and asking for mercy by the last.
Header image courtesy of Envato Elements
How often do you train your abs? Let us know in the comments below. Also, be sure to follow Generation Iron on Facebook, Twitter, and Instagram.