Tag: exercises
The 10 Best Bodybuilding Exercises Of All Time
The 10 Best Exercises You Can Do
Some lifts are better than the others at giving you the results you have been working for. The exercises we’ll be sharing with you have passed the test of time and have proved their mettle.
In this article, we’ll give you a mix of compound and isolation exercises which can put your muscles gain on the fast track. We’ll list out at least one exercise for each muscle group which, according to us, is the best.
Make these lifts a part of your workout arsenal, and the results will speak for themselves.
Bench Press
The bench press is probably one of the first exercises taught to a beginner and for good reasons. Since the bench press is a compound exercise, it can help in building your core strength, muscle stabilizers along with your chest.
Deadlifts
Deadlifts are one of the most bad-ass exercises. The deadlifts can help in building a strong foundation as they work almost your entire body. Getting your form right in the beginning is critical to getting the most out of the lift.
Machine Preacher Curls
Most people join a gym to build some killer guns. The machine preacher curls are an isolation exercise which works the peak of your biceps. If you don’t have a machine preacher bench in your gym, you can use a normal preacher bench combined with a low pulley machine.
Single-Arm Overhead Tricep Extensions
The long head of the triceps is arguably the hardest part to train and develop. Overhead exercises like the single-arm dumbbell overhead tricep extensions with a controlled movement can help you effectively target the muscle group.
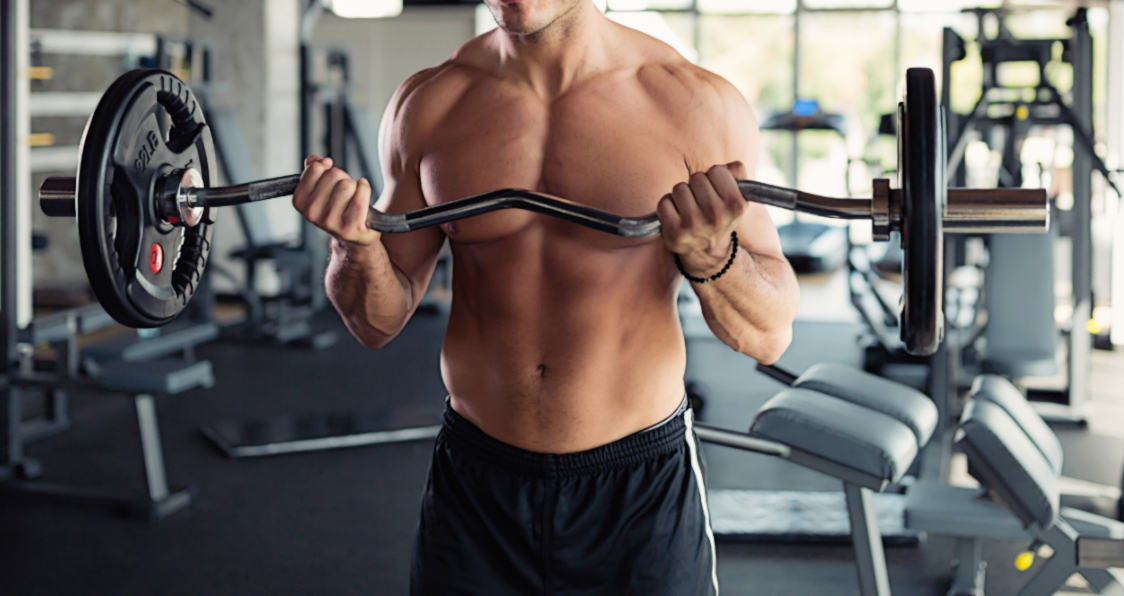
Barbell Curls
Most people make the mistake of using momentum by swinging back and forth while performing the barbell curls. Maintain a strict form with an upright torso to make sure you don’t leave any gains on the table. You could also use an EZ bar if the straight barbell is too harsh on your joints.
Arnold Presses
The Arnold presses were invented by the GOAT, Arnold Schwarzenegger. The Arnold presses train the majority of your shoulder. It trains the two out of three shoulder heads i.e. the anterior and medial deltoids.
Cable Flyes
The interior pectoral muscles can be hard to train and develop using the compound exercises. Cable flyes do a great job of isolating and annihilating your pecs and help in building the conditioning and striations in your chest.
Dumbbell Shrugs
The dumbbell shrugs are one of the easiest exercises to perform, and yet many people do them incorrectly as they let their egos get the better of them. Using dumbbells instead of the barbell gives you more leverage and range of motion which can help in better targeting your shoulders.
Standing Calf Raises
Calves are one of the most overlooked muscles groups. The calves are made up of two muscles, gastrocnemius and soleus. The standing calf raises can be performed on a calf machine or a smith machine and targets the gastrocnemius.
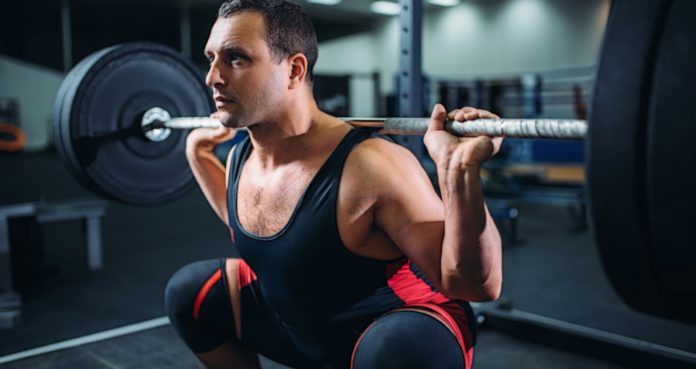
Squats
Did you think we were going to leave out the squat from the list? Could not happen in a century. The squats are the king of all exercises and help in building your legs, core, and overall strength.
Which other exercises deserve a place on this list? Let us know in the comments below. Also, be sure to follow Generation Iron on Facebook, Twitter, and Instagram.
Header image courtesy of Envato Elements
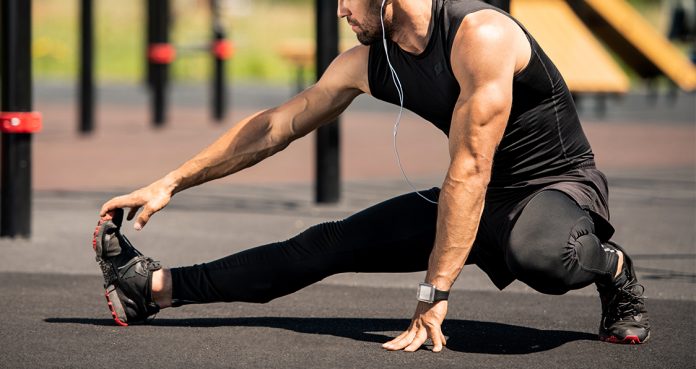
8 Mobility Exercises You Need To Do Before A Workout
Improve Your Mobility With These Movements
The worst thing you could do when you enter the gym is to go straight into your workout – and it’s exactly what most people do. Warming up by doing a few mobility exercises can greatly reduce the chances of an injury.
Working on your mobility can prime your joints and muscles for your workouts and facilitate your mind-muscle connection and pumps. In short, you should make performing the mobility movements an indispensable part of your warm-up ritual.
Shoulder Rotator Cuff Dumbbell Extensions
Your shoulder cuffs are a stiff muscle group and don’t have a lot of mobility. Not warming them up before a workout can lead to discomfort or an injury. Stand with a dumbbell in each hand and lock your elbows to your side. Bend your arms at the elbows so your lower arms are parallel to the floor.
While keeping your elbows pinned, slowly turn the dumbbells outwards as far as you can by moving at your forearms. Reverse the motion and turn the dumbbells inwards. Perform this exercise until you feel your shoulder joints have warmed up.
Foam Rolling
While there are hundreds of mobility and flexibility exercises out there, in this article, we’ll be focusing on the exercises you can do on your own. Foam rolling is a great way of loosening up your tense muscles.
It’s a form of self-myofascial massage which can be done for the majority of muscle groups. Foam rolling before a workout can help with mobility and can help speed up the recovery process when done after a workout.
Hip Openers
Hip openers are a great exercise for people who have problem squatting. Stand upright with your hands placed on your sides. Raise your right leg so your upper leg is parallel to the floor while keeping your left foot planted on the floor.
Make a circle with your right knee by bringing it across your body, and then out to the side. Repeat for the recommended reps and switch to the left leg.
Shoulder Pass Throughs
Stand with your feet placed shoulder-width apart. Hold a broomstick overhead with a grip that is as wide as possible. Bring the broomstick behind your back as far as you can without bending at your elbows. Return to the starting position and bring the stick forward so it rests against your quads. Repeat for the recommended reps.
Low Lunge With Push Back
Start with placing both your hands on the floor and in a low-lunge position with your left foot in front. Bring the left foot back to meet the right, send hips high, and press your chest back while coming into a bent-knee downward dog position.
Shift forward, stepping the right foot forward to the outside of the right hand, coming into a low lunge on the other side. Then step the right foot back and return to the downward dog position.
Seated Toe Touch
Seated toe touch is one of the most common stretching exercises. Sit on the floor with an upright torso. Lean forward to touch your toes without lifting your hams off the floor by bending at your knees.
Thoracic Bridge
Start in a kneeling push-up position. While keeping your left arm on the floor, rotate your body to the right side while keeping your heels planted on the floor and thrust up with your back and glutes to form a bridge while extending your right arm overhead and to your left side. Return to the starting position and repeat with your left arm.
Bicep Stretches
Stand beside a wall and place your right hand on the wall so your arm is perpendicular to the wall while your body is parallel to it. Rotate to your left while keeping your right arm stationary. Repeat with your left arm.
Header image courtesy of Envato Elements
How much time do you spend doing mobility exercises every day? Let us know in the comments below. Also, be sure to follow Generation Iron on Facebook, Twitter, and Instagram.
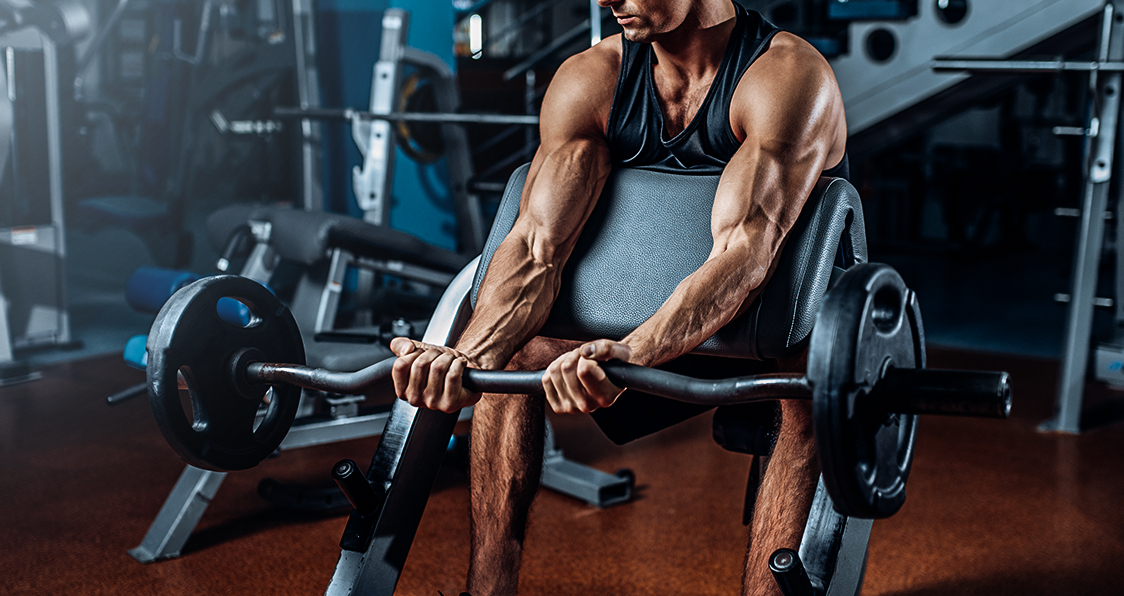
5 Ways To Improve Your Grip & Deadlift More Than Larry Wheels
You are only as strong as your grip strength.
There comes a day in every lifter’s life when he is handed a stuck jar to open. And then there comes a day when you run out of excuses to defend your poor grip strength – “I just washed my hands,” “The jar lid is greasy,” or “I am neither your butler nor Larry Wheels” only work for so long. No matter how hard you try to save face, people will eventually look into your eyes and see your sorry soul.
The day your grip strength starts becoming a problem in your workouts is the day you have entered the pro territory. As you gain experience, get stronger, and lift heavier, your grip might start giving out at knee level while deadlifting.
Also, Check-Out: Deadlift – Exercise Guide
A grip failure while deadlifting should bring you both – joy and sorrow.
You should be joyous because you are finally strong enough to have a grip problem and sorrowful because it takes time to build grip strength – meaning you will be stuck on a plateau for a while.
If your grip gives up before your target muscle, know that you are getting stronger. It is also one of the most common yet unspoken phenomenons in the fitness industry.
The Instagram fitness celebrity you see deadlifting 585lbs will tell you the importance of wearing a weightlifting belt and using lifting straps, but they will never tell you the role of grip strength in a deadlift. We do not mean this in the sense that they are trying to hide something. The truth is – talking about grip strength is not sexy enough for Instagram.
If you want to improve your physique, you need to work on every aspect – from muscle composition and symmetry to grip strength.
You might be able to add to your deadlift by using lifting accessories like straps, but your grip will eventually become the limiting factor.
https://www.instagram.com/p/CG7-ISepG0Y/
Breaking Down Grip Strength
To begin with, grip strength is not limited to hand strength. It includes everything from the muscle near the elbow down to your fingertips. Fun Trivia: 35 forearm and hand muscles are involved in moving the fingers.
The majority of muscles used during grip work begin between the elbow and upper portions of the forearm bones (ulna and radius) and go down into the thumb or fingers (phalanges).
On top of this, the scope of grip strength extends far beyond deadlifts. It is required for almost every physical activity and more so for every sport. Doing laundry, driving a car, wrestling, playing badminton, cricket, golf, and tennis; all need good grip strength.
Grip Strength Has More To It Than Meets The Eye
In 2015, the international Prospective Urban and Rural Epidemiological (Puree) researched 140,000 adults over four years and found that there is a significant relationship between a decrease in grip strength and an increase in the risk of cardiovascular disease
A paper published in the American Journal of Preventive Medicine conducted in 2015 concluded that people with a lower grip strength were more likely to be diabetic or record higher blood pressure.
The sports science journal Shoulder & Elbow published a study in 2016 that concluded there is a strong correlation between grip strength and lateral rotator strength. The study stated that “Each 11-pound decrease in grip strength throughout the study was linked to a 17% higher risk of dying from heart disease, a 9% higher risk of stroke and a 7% higher risk of a heart attack.”
Types of Grip Strength Exercises
There are four main types of grips that we use in our workouts and day-to-day life. Each of these forms engages different muscles and hence requires different training techniques.
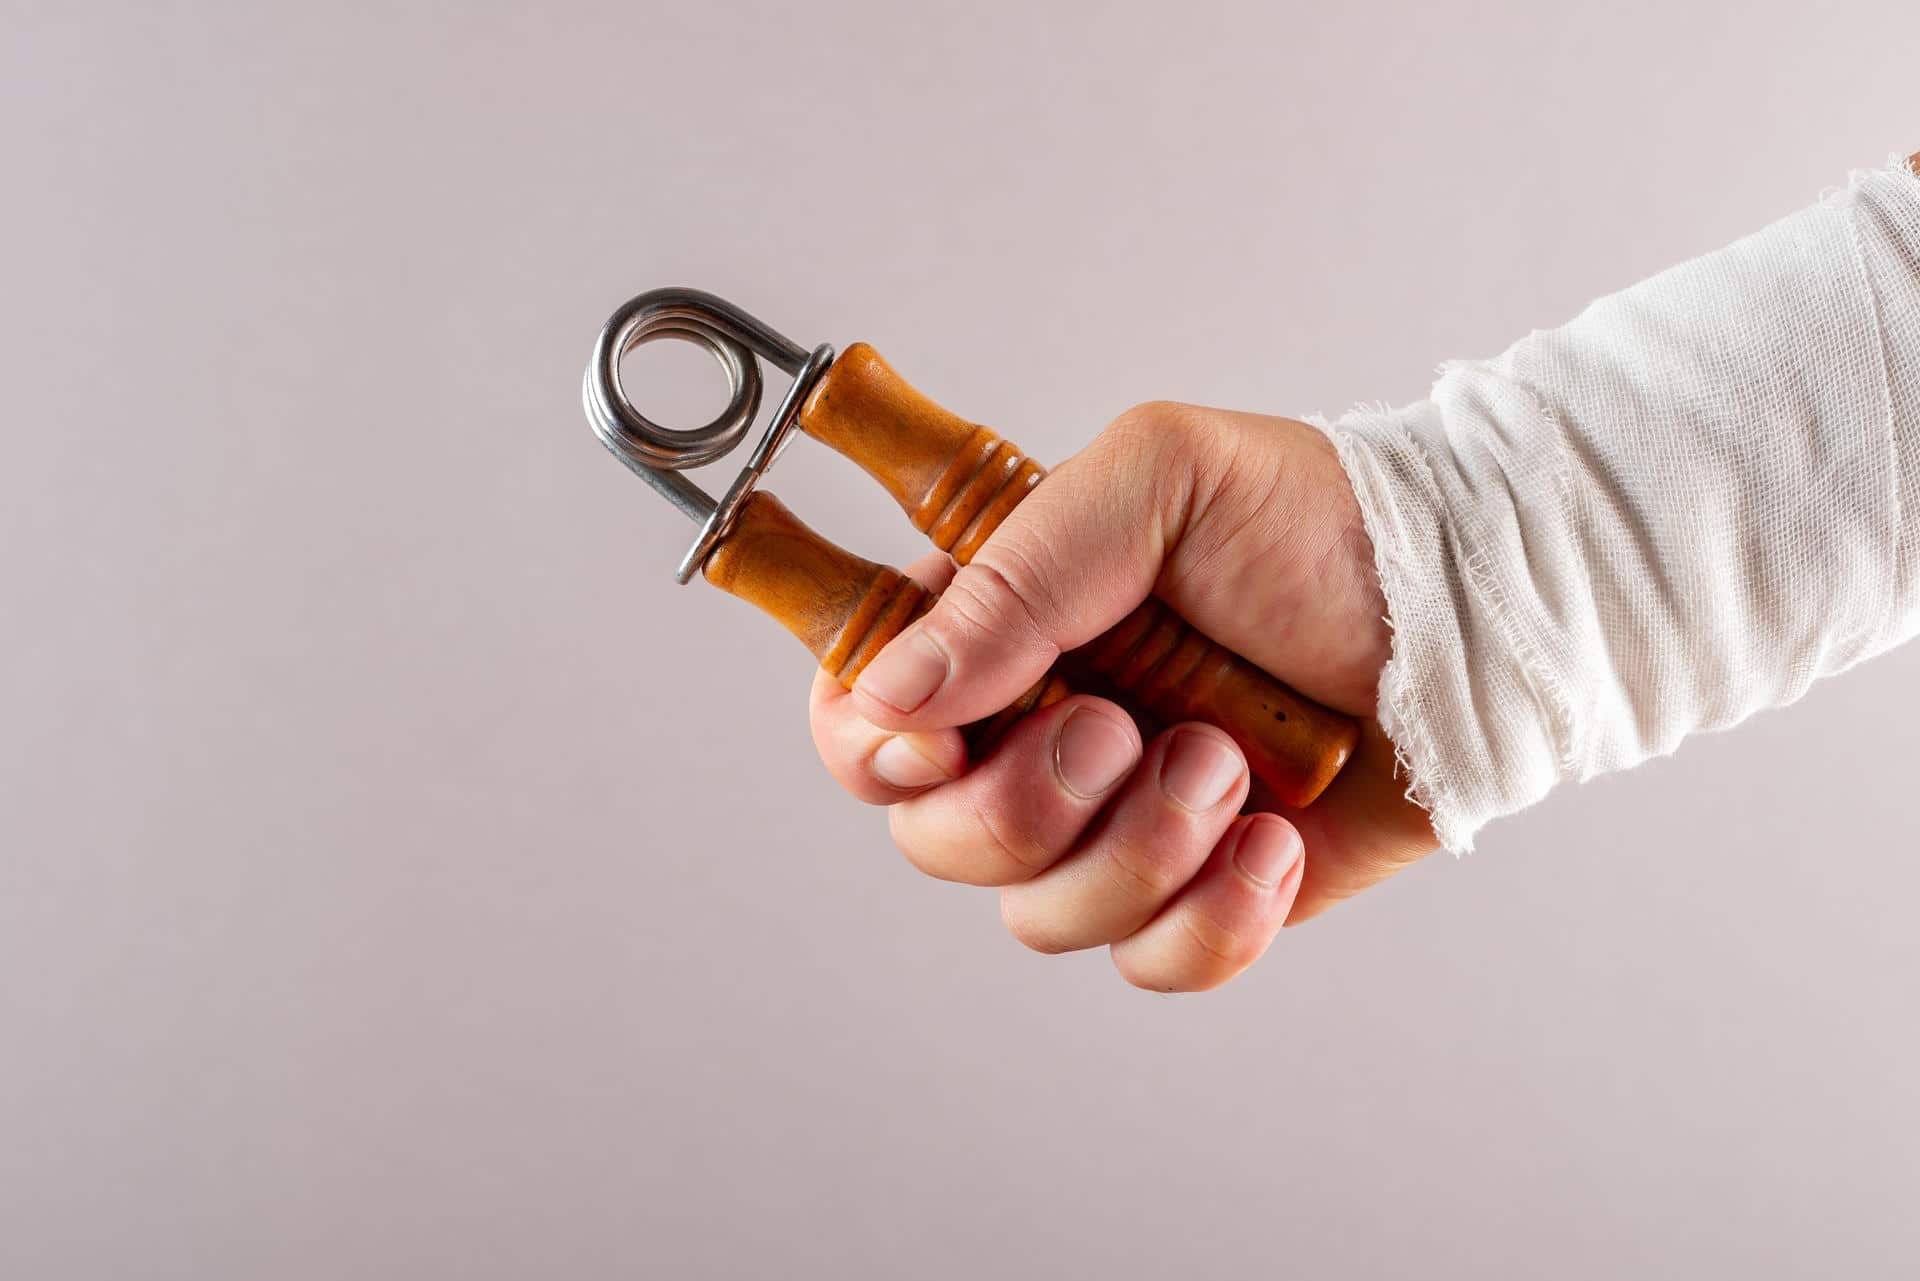
1. Crush
It is the act of closing fingers against resistance. When most people think of grip strength, they think about crushing exercises using grip strengtheners.
Although crushing exercises get you the macho-man handshake, it does close to nothing for your deadlift. To crush a deadlift, you need to have monster strength in at least one of these grips: overhand grip, hook grip, or mixed (over-under) grip.
Since a crushing exercise only lasts for a few seconds, it is not the best choice for building grip strength for a deadlift. TuT (time under tension) is a crucial factor in building grip strength. If you want to develop your grip strength, you would be better off performing exercises where TuT is substantial.
To put it precisely – if grip workout was a love-making session, you want to be a brown antechinus and not a jackrabbit.
Related Read: How To Increase The Time Under Tension To Maximize Your Gains
2. Pinch
Make an alligator mouth with your hands and chomp down on weight plates. This grip tends to be a lot more stress/work on the thumb. You cannot afford to miss pinching exercises if you want to improve your grip strength.
3. Support
Supporting includes lifting something where your fingers take the majority of the load. These exercises test your ability to hold resistance for extended periods.
4. Extension
If you did not notice, all the three types of grip exercises mentioned above are contracting movements – meaning you need to pull your fingers towards your palms to perform the exercises.
The human hand has evolved to be great at grabbing and holding onto things, so the muscles used in extension exercises are not usually as strong as the flexion muscles.
For balanced grip strength, you need to add extension movements to your exercise arsenal.
5. Bonus: Wrist Work
When it comes to arm, forearm, or grip strength training, wrists usually get a step-motherly treatment.
Little do people realize that the wrist is where the magic happens – if you know what we mean.
Wrist strength, mobility, and stability play a crucial role in your upper body strength. To transfer energy from the body through the hands, you need to make sure every link in the chain is strong.
Remember the stuck jar example in the opening paragraph of this article? You can never open a jammed jar with puny writ strength.
How To Test Your Grip Strength
Before you start working on your grip, you should know your current grip strength level. Your grip strength result can act as a benchmark against which you can gauge your current strength and track your progress.
For the grip strength test, you will need a handgrip dynamometer to measure the maximum isometric strength of the hand and forearm muscles. Here is the dynamometer we recommend.
Perform at least three squeezes on each hand to get an accurate reading.
If you want a better reading of your grip strength, you can take a pinch strength test in addition to the handgrip dynamometer test. A pinch strength test measures the maximum isometric strength of the hand and forearms muscles when performing a pinching action.
According to numerous pinch stress tests conducted across different age ranges, fitness levels, and athletic ability, a scorecard for adults (in both kgs and lbs) was produced:
Excellent: >141lbs ( >64kg)
Very good: 123-141lbs (56-64kg)
Above average: 114-122lbs (52-55kg)
Average: 105-113lbs (48-51kg)
Below average: 96-104lbs (44-47kg)
Poor: 88-95lbs (40-43kg)
Very poor:
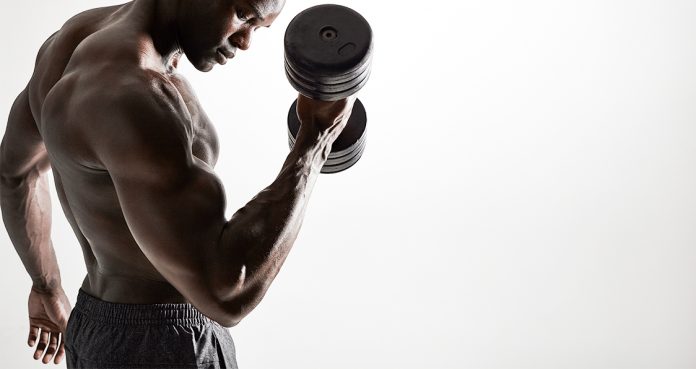
5 Arm Exercises To Make Your Guns Pop
Best Arm Exercise For Bigger Arms
If you’re a gym regular and still can’t build your arms, you might already know to grow your pythons takes more than doing a few curls. You need to train your biceps and triceps with a balanced approach to build symmetry and proportions.
Having muscle symmetry and the right proportions can add delusion and make your arms look bigger than they actually are. Follow the exercises mentioned in the article to make the most of your arm training.
21’s
If you haven’t tried 21’s, you have no idea what a brutal bicep pump feels like. You’ll have to drop your ego at the door before performing the 21’s as you’ll only be ab able to lift around 30-40% of your normal bicep curl weight.
For the first seven reps, lift the barbell from the bottom to the mid-way point. From the top to the bottom will be the next seven reps, and you’ll finish the set by performing seven barbell bicep curls with a full range of motion.
Floor EZ Bar Skullcrushers
Most people make the mistake of limiting their range of motion by overloading the bar while performing the barbell skullcrushers. In this exercise, you need to lie down with your back on an exercise mat and an EZ bar placed right next to the top of your head.
While keeping your elbows and upper arms parallel to each other and perpendicular to the floor, lift the barbell by extending at your elbows. Contract your tris at the top of the movement. Return to the starting position and touch the floor with the weight plates on the bar before repeating for another rep.
Arm Blaster Hammer Curls
The arm blaster is one of the most underutilized accessories in the gym. Using the arm blaster turns your normal dumbbell curls into an isolation exercise by eliminating the possibility of using momentum to lift the weights.
Performing the dumbbell hammer curls using an arm blaster will help in developing the length and peak of your guns. Make sure you squeeze your bis and tris with every rep while performing the exercises mentioned in the article.
Single Arm Cable Extensions
Unilateral exercises like the single-arm cable extensions are an incredibly effective way of fixing muscular imbalances. Performing the single-arm cable extensions can also help you achieve a better mind-muscle connection and hence a better pump.
Hold the cable in one hand with a neutral (palms facing the side) grip and the pulley should be at the highest position. With a slight bend in your back, push the cable towards the floor while maintaining your elbows in the same position. Hold and contract your tris at the bottom of the movement and repeat for the recommended reps.
Double Arm Overhead Cable Curls
Ask someone to show you their guns, and they’ll probably hit the front double biceps pose. Performing the double-arm overhead able curls can help you build the roundness, peak, and separation in your bis which can make your guns pop.
To perform the overhead curls, attach the pulley at a height where it is slightly above your shoulder level. Your upper arms should be in a straight line and parallel to the floor while you’re performing the exercise. Contract the life out of your pythons as you flex them at the front double biceps pose position.
What is your favorite arm exercise? Let us know in the comments below. Also, be sure to follow Generation Iron on Facebook, Twitter, and Instagram.
Header image courtesy of Envato Elements
The Absolute Best Leg Exercises For Men
7 Workouts For Building Mass in the Glutes, Hamstrings and Quads
Leg-day tends to divide bodybuilders. There are those who really enjoy a hard leg-based workout and those who’d rather replace leg day with chest day. With so many methods and pieces of equipment at our disposal, it can be challenging to know where to start.
The methods employed and the exercises selected should be dictated by the primary goal that has been set. While it’s true that there will be similar components with the majority of leg workouts, each one should be tailored to a specific goal.
For example, understandably squats tend to be a part of the majority of leg workouts – however, there are a number of squat variations which can be used to focus on a specific muscle group. Additionally, there are a number of advanced training techniques – such as supersets and pre-exhaust – which can be utilized in order to bring about specific changes to the muscle.
To highlight the importance of specificity in training, let’s take an individual who is looking to start bodybuilding. It would not be sensible for them to immediately dive in to heavy squats, leg presses, and deadlifts, considering their lack of experience and readiness. Instead, they must first lay a solid foundation by establishing efficient movement. Only once this has been done, can they consider gradually moving on to heavier, more complex exercises.
7 Leg Workouts For Every Type of Goal
Taking this into account, the following 7 workouts all have a different focus. Each workout has been carefully designed so that it can easily be incorporated into a typical bodybuilding “split” program. Providing consistency and intensity are prevalent in one’s training, the muscles of the legs will be forced to adapt and improve in strength and size.
1) Building Foundations
The first workout of the 7 is perfect for the beginner or novice. There is no denying that the squat is one of the best leg development exercises that can be performed. However, being able to squat with safety and efficiency does not happen overnight – practice is required.
When learning to squat, or when learning any new skill, the movements may initially feel strange, uncoordinated and unstable. This comes down to the nervous systems control over the body. When learning a new skill, it takes time and repetition in order to establish neural pathways in the brain and allow the body to “understand” the movements required (1).
The best example of this is a toddler learning to walk. Initially, they are unstable and can’t manage more than a few steps before falling to the floor. However, with practice, these neural pathways become established to the point that they can efficiently walk and falling over is no longer an issue.
Therefore, with this workout, the goal is to allow the user to get to grips with the movements required for the squat. Gradually, as efficiency and confidence improve, the load being lifted can be increased to maximize changes in leg strength.
The rest of the workout is heavily machine based, as machine-based exercises do not require as great a degree of coordination and understanding of movement as the squat. Incorporating weight machines at this stage is recommended as they will provide a controlled introduction to weight training and effectively load the muscles without running the risk of sustaining injury.
Exercise
Sets x Reps
Goblet Squat
4 x 10 – 12
Leg Press
3 x 10 – 12
Leg Extensions
3 x 10 – 12
Leg Curls
3 x 10 – 12
Calf Raises
3 x 15 – 12
2) Mass Building
When it comes to building size, it is important that we focus first on “big” compound exercises which target the greatest number of muscles. These exercises place a large stress on the muscles which forces them to adapt in size. It would make sense to start with the exercises that require the largest degree of exertion and energy as these are the exercises that will have the most profound effect on developing size.
Additionally, it is imperative that the overall training volume is relatively high and that we train to muscle failure often as a studies have indicated that these are important factors when it comes to packing on size (2).
Finally, it may be sensible to change the dynamic of specific exercises in order to target the muscles in a slightly different way. A good example that may be worth considering is altering foot placement with the leg press or squat. A slightly wider stance will take the emphasis from the quadriceps and shift it onto the glutes and hamstrings, whereas a narrower stance will accentuate the quads.
This workout involves a number of free weight and resistance machine exercises that target all 4 muscle groups of the legs – the glutes, quads, hamstrings and calves. Additionally, it uses an advanced training method known as the reverse pyramid which simply involves varying the number of reps and load lifted per set.
The reverse pyramid is beneficial as it accommodates for muscular fatigue and allows the user to continually hit maximal fatigue with each and every set. As the rep range increases, look to decrease the load that is being lifted and look to reach muscular failure with each set.
Exercise
Sets x Reps
Barbell Squat
4 x 6, 8, 10, 12
Leg Press
4 x 8, 10, 10, 12
Dumbbell Walking Lunges
3 x 10, 12, 14
Leg Extensions
3 x 10 – 12
Lying Leg Curls
3 x 8, 10, 12
Calf Raises
4 x 10, 10, 12, 12
3) Improving Definition
For many, the belief is that high reps and light weight is optimal for building muscle definition. However, research does not seem to support this theory. Application of heavy loads are equally as effective at maintaining muscle size and developing muscle tone.
Ultimately, the strength training method used will be less significant than one’s nutrition when it comes to enhancing leanness. If leanness is the goal, the primary focus should be on nutrition to bring about a reduction in overall stored body fat. Without a thick layer of body fat over the top of the muscles, they will immediately look more defined and lean. This can only be done by maintaining a calorie deficit over a prolonged period.
Strength training is super important in a calorie deficit. Without appropriate training, there may be a reduction in muscle size along with a reduction in body fat, however, regular strength training can prevent muscle atrophy (3).
The workout involves a multitude of compound exercises, straight sets and supersets to target all muscle groups of the legs. Supersets involve completing one exercise straight into a second exercise (with no rest); this method can be used to effectively increase the overall volume of one’s training and therefore assist in maintaining muscle size.
Exercise
Sets x Reps
Smith Machine Squat
4 x 8 – 10
Leg Press (Superset 1)
3 x 10 – 12
Goblet Squat (Superset 1)
3 x 10 – 12
Barbell Reverse Lunge (Superset 2)
3 x 10 – 12
Leg Extensions (Superset 2)
3 x 12 – 15
Lying Leg Curls (Superset 3)
4 x 10 – 12
Donkey Calf Raises (Superset 3)
4 x 12 – 15
4) Glute Building
The following 3 workouts will target a specific muscle group. For many bodybuilders, they may find that a specific muscle group is perhaps lagging behind the others and therefore requires additional attention. Selecting the correct exercises is imperative when looking to target a specific muscle group as some exercises are undoubtedly superior than others.
With this in mind, each of the following exercises has been carefully selected based on the fact that they activate the muscles of the glutes to a large degree. The workout structure is similar to the mass gaining workout and uses a reverse pyramid to encourage muscular fatigue with each set.
Exercise
Sets x Reps
Wide Stance Barbell Squat
4 x 6, 8, 10, 12
Leg Press
3 x 8, 10, 12
Barbell Reverse Lunge
3 x 10 -12
Unilateral Cable Kickback
3 x 8, 10, 12
Romanian Deadlift
4 x 8, 8, 12, 12
5) Hamstring Building
Unfortunately, for so many individuals, the hamstrings are neglected as many of the movements and exercises that we regularly perform are quad and glute dominant. This can lead to an overdevelopment of the quads and glutes while simultaneously underdeveloping the hamstrings. Failing to develop the hamstrings will not only hamper bodybuilding progress but can actually increase the risk of injury.
Once again, the exercises that have been selected place the greatest demand on the hamstrings and will therefore accelerate the rate of hamstring development. The romanian deadlift, for example, has been found to be one of the best exercises for activating the hamstrings and increasing overall hamstring strength (4).
Following a similar structure as the glute-specific workout, this workout uses reverse pyramid sets to increase volume, intensity and accelerate the rate of muscle hypertrophy.
Exercise
Sets x Reps
Romanian Deadlift
4 x 6, 8, 10, 12
Hamstring Bridge
3 x 8, 10, 12
Glute Ham Raises
3 x 8, 10, 12
Leg Curl (Dropset)
3 x 10, 10, 12
6) Quad Building
The final muscle-specific workout, is the quad building workout which places a greater emphasis on the quads through the use of compound exercises, such as the front squat, and isolation exercises, such as leg extensions.
Using a combination of compound (multijoint) and isolation (single joint) exercises is recommended for all muscle-targeted workouts. Compounds contribute towards making substantial improvements in terms of leg strength and size whereas the isolation exercises will place a greater load on a specific muscle (in this case, the quads), to promote growth further and assist in improving compound lift performance.
The quad workout follows exactly the same structure as the hamstring specific workout. This is because, ideally, these muscles should develop at a similar rate in terms of both strength and size. Equal development is important when we consider that these two muscles work together to control and generate movement around the knee and hip. Having one muscle group significantly stronger than the other may increase one’s injury risk.
Exercise
Sets x Reps
Barbell Front Squat
4 x 6, 8, 10, 12
Hack Squat
3 x 8, 10, 12
Leg Press
3 x 8, 10, 12
Leg Extensions (Dropset)
3 x 10, 10, 12
7) Plateau Busting
In any bodybuilding journey, there will be times where a plateau is reached. This is simply where strength and size gains have become stagnant. To efficiently move past any plateau, changes need to be made to one’s training in order to introduce a new training stimulus to the body (5). As a result of this new stimulus, the body will react by adapting and improvements in strength and size will recommence.
This workout uses an advanced training method known as pre-exhaust. The purpose of this method is to partially fatigue the muscles through an isolation exercise before moving onto a heavier compound exercise. This method will push the muscles to their limit and as a result, force them to adapt.
Do be aware that with this method, it may be necessary to lower the weight for the compound lifts. This is because the muscles will already be fatigued prior to performing the compound lift and as a result, it may not be possible to lift as heavy as normal.
Exercise
Sets x Reps
Leg Extensions
5 x 8 – 10
Smith Machine Squat
4 x 8, 10, 10, 12
Hack Squat
3 x 10 – 12
Dumbbell Lunges
3 x 10 – 12
Final Word
In order to maximize results and advance towards the set goal, look to perform the chosen workout over a 4-8 week period. After completing this stint, assess progress and consider switching over to another specialized leg workout to continue improving. By doing this, significant changes in leg size and strength will occur, providing that the workouts are performed consistently and with the right intensity.
For more news and updates, follow Generation Iron on Facebook, Twitter, and Instagram.
References:
1- “Neural Centers Responsible for Movement”.
2- “Resistance Training Volume Enhances Muscle Hypertrophy but Not Strength in Trained Men”.
3- “Preserving Healthy Muscle during Weight Loss”.
4- Schmitt, Kayla (September 28, 2017). Electromyographic comparison of the hamstring muscles during various exercises
5- Sports Health. 2010 Nov; 2(6): 509–518. doi: 10.1177/1941738110375910. PMCID: PMC3438871.PMID: 23015982

5 Best Exercises You Can Do at the Gym, According to Personal Trainers
These Are The Best Exercises According To Fitness Trainers
No matter who you are, where you are from, or what you do, you’ll need some guidance and coaching when you start working out. Since everyone starts at a square zero in the gym, you want to stay clear of the bro scientists and look for advice from pros with a track record.
Every fitness noob wants to know how they can jump ahead in their muscle-building conquest. While there are no shortcuts in bodybuilding, we’ve put together a list of five exercises that are endorsed by certified personal trainers to boost your muscle gain.
Push-Ups
We’re sure you’ve seen pigeon-chested people in your gym who’ve been doing all the fancy TRX, dumbbell and machine exercises but to no effect. And then there are some dudes who credit push-ups for their bulging pecs.
According to Ben Booker (Second Chance Fitness), the great thing about push-ups is that there are so many variations of the exercise that anyone can do it – no matter their experience level.
Squats
We’re sure you’re not surprised at finding the squats on this list. The squats are the king of leg exercises and have Mike Dewar of J2FIT Strength and Conditioning as their backer. the squats are a functional (multi-joint) exercise and can help with building overall strength, stamina, and conditioning.
Performing the exercises mentioned in this article with the correct form is of utmost importance. Using incorrect posture or momentum can result in an injury and keep you out of the gym for weeks.
Burpees with a Jumping Knee Tuck
If you’ve never tried the burpees before, you’re in for a surprise – a big painful surprise. Burpees are one of the major reasons why CrossFit athletes are in great shape and conditioning.
Patrick Frost (Nike Master Trainer) recommends performing the burpees with a jumping knee tuck over the vanilla version. The jumping knee tuck works the abs while the burpees give the extra metabolic push.
Cable Face-Pulls
Cable face pulls are one of the most underutilized shoulder building exercises. They can help in developing boulder shoulders as they work your medial and posterior deltoid heads.
As per Ridge Davis (Ridgid Fitness), the cable face-pulls are a great exercise for correcting rounded shoulders and poor upper-body posture. If you spend long hours looking at your phone or sitting at your computer, don’t skip these.
Deadlifts
We’ll be summing up the article with another compound lift. “The deadlift is one of the best exercises when you’re looking to build muscle and practical strength—so, basically, the two main reasons you work out,” says Mike (J2FIT).
Even better than that, though, developing the ability to handle heavy loads has been shown to boost anabolic hormone levels and increase muscle synthesis, which can help your body reach peak performance levels.
Which is your favorite exercise? Let us know in the comments below. Also, be sure to follow Generation Iron on Facebook and Twitter.
These Are The Most Underrated Gym Exercises
Underutilized Exercises That Need To Try Today
No two exercises are created equal. Some exercises have gained a cult following and most people choose them over all the other options. There are some lifts which aren’t widely popular but can give you incredible results.
You should give these lifts a try as adding variety to your workouts can ignite growth by shocking your muscles. Warning – these exercises might look easy but will leave you on your knees by the end of the workout.
Rolling Barbell Chest Flyes
For this exercise, you’ll need two barbells. You need to place a 45lb plate at both the ends of the barbells. Get in position by placing the barbells at your sides so that they’re parallel to each other.
Slowly roll out the barbell mimicking the motion of dumbbell flyes. Extend your arms until your chest is a couple of inches off the floor. Return to the starting position by bringing the barbells close together and squeeze your pecs at the top of the movement.
Inverted Rows
Contrary to popular belief, you don’t always need to use weights to train your muscles optimally. The inverted rows train your lats, mid and upper back. You could perform this exercise in a squat rack, smith machine or with TRX straps.
Most people make the mistake of using momentum while performing the exercise. You need to be in total control throughout the movement and need to lift and lower your body at the same speed.
Zotterman Curls
Zotterman curls are a complete arm builder and you’ll hardly see anyone every performing this lift. This exercise should be a part of your arsenal as it trains both the heads of your biceps and your forearms.
At the start of the exercise, your palms should be facing each other. Curl the dumbbells as you raise them to your shoulders. Rotate your wrists to a pronated grip as you lower the weights to the starting position.
Bodyweight Extensions
The bodyweight extensions might look easy but your triceps will be asking for mercy by the end of the exercise. You can use a fixed barbell or a bench, and the height of the surface will depend on your experience level.
Grab a barbell with a shoulder wide grip and get in a push-up position. Slowly lower your body towards the barbell by bending at your elbows. The exercise should feel like the skullcrushers but instead of a barbell, you’ll be using your bodyweight.
Sissy Squats
Do not let the name fool you. There is nothing sissy about this movement. The teardrop in the quads can be one of the most stubborn muscles to develop. Sissy squats are a brutal exercise that can help in accentuating the conditioning of your quads.
Stand with your heels elevated shoulder-width apart. Slightly bend backwards creating a straight line with your body from your knees to your neck. Begin to lean your body backward as you bend at the knees going as low as you can without losing balance. Return to the starting position and repeat for the recommended reps.
How many of the exercises mentioned above have you tried? Let us know in the comments below. Also, be sure to follow Generation Iron on Facebook and Twitter.
Mastering The Straight Arm Pulldown
The straight arm pulldown is an excellent lat-isolating strength exercise which has been derived from the classic lat pulldown exercise. Unlike the lat pulldown, the straight arm variation involves assuming a standing position rather than seated. Additionally, as the name suggests, the exercise involves maintaining straight arms throughout the entirety of the movement, whereas the lat pulldown involves a large degree of elbow flexion.
Straight Arm Pulldown Analysis
The exercise can be considered an isolation exercise which means that movement occurs across one joint only – in this case, the shoulder joint. The lat pulldown, meanwhile, would be considered a compound exercise as movement is generated across more than one joint – the shoulder and elbow (1).
Isolation exercises are specifically beneficial when looking to develop specific muscles or muscle groups. Performing isolation exercises regularly can also facilitate improvements with bigger, heavier compound exercise and may also assist in ironing out any muscular weaknesses and imbalances that exist.
In the case of the straight arm pulldown, the idea is to isolate the latissimus dorsi – the biggest and most powerful muscle group of the back. While the lat pulldown does work the lats to a significant degree (2), the lats work through a shorter range of motion when compared to the straight arm pulldown. The large range of motion found with the straight arm pulldown increases the demand and stress on the lats which forces it to adapt and grow stronger.
While it is the lats that are predominantly driving the movement of the straight arm pulldown, there are other muscles and muscle groups that work to generate and control movement. The rhomboids and traps (upper back), the rear deltoids (back of the shoulders), triceps (upper arm), pectorals (chest) and core, must all contract in some capacity to assist in the movement.
Straight Arm Pulldown Benefits
In addition to strengthening the lats, there are a number of benefits associated with regularly performing this exercise. Firstly, this exercise is excellent for improving the mind-muscle connection. As the name suggests, the mind-muscle connection simply refers to the level of activation felt when performing exercise. Studies suggest that one can actually increase the level of muscle activation by focussing on the working muscle when exercising (3).
The lats are notoriously difficult to “feel” and many lifters find it challenging to feel the lats contracting and relaxing during conventional lat pulldown-type exercises. With the increased range of the straight arm pulldown and the fact that this is an isolation exercise, it becomes much easier to feel the lats.
As mentioned earlier, isolation exercises can have a substantial impact on improving movement and form with compound exercises. This is certainly the case with the straight arm pulldown and the deadlift.
The pulldown strengthens the lats and places them in a similar position to the deadlift. For many people, the deadlift can be a very tricky exercise to learn and rounding of the spine is a common problem.
Often, this rounding can be overcome by engaging the lats. Because the lats assist in lumbar spine flexion and extension (4), learning to activate them properly can help in maintaining a neutral spine alignment. Therefore, performing the pulldown regularly will strengthen the lats, allow for a greater engagement during the deadlift and facilitate deadlift form.
Straight Arm Pulldown Coaching Points
For the straight arm pulldown, a cable pulley and attachment are required. A rope is recommended as the attachment as it will allow for the greatest range of motion. A bar will suffice, however, the range will be slightly more limited using a bar, as the legs prevent the bar moving further back. The rope, however, allows the user to continue pulling backward until the hands are aligned the hips.
Increasing the range of motion will have a knock-on impact on the amount of the lat activation. As suggested earlier, the greater the range, the greater the activation of the muscle. If possible, consider using two ropes rather than one; this will allow for a wider grip and may enhance activation further.
In order to effectively perform the straight arm pulldown, follow the 6 coaching points below.
1) First, select a high pulley, or if adjustable, move the pulley up until it is approximately at head height. Attach the rope to the pulley and grasp both ends of the rope firmly.
2) Before moving into position, focus on pulling your shoulder blades back and down. Squeeze the muscles in order to hold the shoulder blades in this position throughout.
3) Pull your ribcage down, tuck your tailbone under the body and squeeze all core musculature. From there, focus on pushing your hips backwards so that your upper body tips forward by 30-45 degrees.
4) Still holding that solid position, step away from the pulley to create cable tension. As you move backwards, the arms should extended fully overhead and the feet set at hip-width. At this point, you should already be feeling a stretch in the lats.
5) From this position, maintaining straightness, drive the arms down in an arching motion until the hands are by the hips or even slightly beyond the line of the hips. Focus on squeezing the lats at this point.
6) In a controlled fashion begin to reverse the movement. Once again, maintain straight arms and focus on bracing the core in order to control the movement back to the starting point (5).
Look to complete 10 – 15 reps for 3 sets and ensure to rest for 1-2 minutes between sets.
As emphasized a number of times, it is vitally important to maintain straight arms at all times during this exercise. If flexion is allowed to occur at the elbow, some of the emphasis will move away from the lats and onto the triceps, biceps and rhomboids.
Using the Straight Arm Pulldown
As touched on earlier, the straight arm pulldown can have a knock-on impact on one’s deadlifting ability. Therefore, it may be appropriate to perform the pulldown, or another lat-specific exercise, prior to deadlifting. In addition to this, the stretch that is applied during the pulldown can enhance back and shoulder mobility and therefore, performing the exercise at the start of a workout, may be beneficial.
This pulldown variation may also prove to be useful for those who suffer with lower back issues. This is because the body position protects the lower back and the movements required do not involve any motion around the hips or spine.
If your goal is to build muscle size, consider perform 10-15 reps of the straight arm deadlift toward the end of the workout. For maximizing muscle growth, take short rest periods between sets as this will cause a large degree of muscle damage – a key mechanism for muscle growth.
Straight Arm Pulldown Progressions and Regressions
If the straight arm pulldown is a new exercise, be prepared to work with lighter loads for the first few weeks. This will give the nervous system time to safely learn the movement patterns required. If using the equipment is challenging or the movement feels uncontrolled, consider switching to a resistant band which will simplify the demands of the exercise substantially.
For those who find the arching arm movement a challenge, consider performing the exercise while standing more upright instead of hinging right over. This will reduce the stretch placed on the lats and consequently enhance movement control.
The most obvious way to increase the challenge of the pulldown is to add more load to the pulley. However, as mentioned earlier, it is possible to increase the range of motion by using two ropes or by selecting a longer rope which will effectively increase the intensity of the exercise.
Straight Arm Pulldown Alternatives
There are a couple of alternative exercises that can be performed to replicate the movement and stress of the straight arm pulldown. They are ideal for those who do not have access to a pulley and rope.
Dumbbell / Kettlebell Pullover
To set up for the pullover, grab a single dumbbell or kettlebell and lie back on a flat bench. Dig the heels into the floor and hold the weight in both hands directly above the chest. Keeping the arms straight, gradually lower the arms over the head until the upper arms are next to the head. The lats will be stretched out maximally at this point. From that position, drive the weight back up to the starting point above the chest.
Gironda Pulldown
The gironda pulldown is a combination of both a pulldown and a row. The movement places a great demand on a number of back muscles however, it does not provide the same type of isolation as a straight arm pulldown.
Final Word
The straight arm pulldown is undoubtedly one of the best lat isolating exercises. It can provide a wide range of benefits – from developing lat strength to improving one’s deadlift technique. Regardless of your health and fitness goals this exercise should be considered when designing a workout or training program.
For more news and updates, follow Generation Iron on Facebook, Twitter, and Instagram.
References:
1- Gentil, Paulo; Soares, Saulo; Bottaro, Martim (2015-6). “Single vs. Multi-Joint Resistance Exercises: Effects on Muscle Strength and Hypertrophy”. Asian Journal of Sports Medicine. 6 (2). doi:10.5812/asjsm.24057. ISSN 2008-000X. PMC 4592763. PMID 26446291.
2- Lehman, Gregory J; Buchan, Day Deans; Lundy, Angela; Myers, Nicole; Nalborczyk, Andrea (June 30, 2004). “Variations in muscle activation levels during traditional latissimus dorsi weight training exercises: An experimental study”. Dynamic medicine : DM. 3: 4. doi:10.1186/1476-5918-3-4. ISSN 1476-5918. PMID 15228624.
3- Calatayud, Joaquin; Vinstrup, Jonas; Jakobsen, Markus Due; Sundstrup, Emil; Brandt, Mikkel; Jay, Kenneth; Colado, Juan Carlos; Andersen, Lars Louis (2016-3). “Importance of mind-muscle connection during progressive resistance training”. European Journal of Applied Physiology. 116 (3): 527–533. doi:10.1007/s00421-015-3305-7. ISSN 1439-6327. PMID 26700744.
4- Bhatt, C.R.; Prajapati, B.; Patil, D.S.; Patel, V.D.; Singh, Binodkumar G.P.; Mehta, C.D. (March 7, 2013). “Variation in the insertion of the latissimus dorsi & its clinical importance”. Journal of Orthopaedics. 10 (1): 25–28. doi:10.1016/j.jor.2013.01.002. ISSN 0972-978X. PMC 3768243. PMID 24403744.
5- “Straight Arm Pulldown”. exercise.wsu.edu.
5 Exercises for Building Balanced Biceps
Developing Both Heads of the Biceps
Depending on how you train the arms, it is possible to overdevelop one head of the bicep and under develop the other.
As a result, the arms may not look full. It is not uncommon to come across individuals whose biceps look great from the side, but flat when viewed from the front.
Similarly, it is possible to build the biceps so that they look large from the front but formless from the side. The reason that this asymmetry occurs is because the two heads of the biceps are not being trained equally.
Everybody knows that the biceps brachii can be found in the upper arm, but few people are aware of the fact that the muscle has two-heads. The biceps consist of both a short and long head which, when contracted, cause flexion to occur at the elbow joint (1).
While the heads run parallel with each other, the short head runs along the inside of the upper arm. By building size in the short head, the arm will look fuller when observed from the front.
The long head meanwhile can be found on the outside of the upper arm and is most clearly seen when flexing the bicep. Considering that there is often asymmetry between the two, is it actually possible to work the heads individually and improve the balance between bicep heads?
While it is certainly possible to place more stress on a specific head, there does appear to be a certain degree of confusion as to which method is best.
There is some evidence to suggest that the type of grip used, grip width (2) and elbow positioning (3), amongst other factors, can determine which head is activated most. However, while these factors may contribute towards bicep development, often genetics will play the biggest role (4).
If you find that one bicep head is severely lagging behind and refusing to adapt, it may come down to genetics. As a result, the best method that you can adopt is to trial a number of different bicep resistance exercises and training techniques to see what brings the best results.
Resistance Exercises for Maximal Bicep Development
When it comes to bicep training, the bicep curl is the obvious, go-to exercise. However, there are a multitude of variations that can be used in order to build bicep head size.
Here are a number of powerful and effective bicep exercises for increasing mass in both the long and short head.
1) Long Head Exercise 1 – Alternating Incline Dumbbell Curl
Seen as one of the best long head exercises, the alternating incline dumbbell curl is an excellent place to start.
To safely and effectively perform this exercise, start by setting a bench on a 30 degree angle and select two dumbbells which are slightly lighter than normal.
The incline position will place more demand on the biceps and therefore you will quickly find that you cannot lift the same kind of load as you can with a standard dumbbell curl.
Lie back on the bench and start with the arms extended and hanging by the sides. This will ensure that the exercise begins with the biceps being fully stretched out.
The grip you use is entirely up to you however, it is recommended to start by using a hammer grip (palms facing each other) and switching to a supinated grip as you curl the weight up.
When using this method, think about pressing the thumb against the inner plate of the dumbbell which will make supinating the hand more challenging.
If using a supinated grip throughout, press the pinky against the inside plate of the dumbbell which will place more force through the thumb side of the bell and facilitate a greater bicep stretch.
The biggest error that is often made with this exercise (and many bicep orientated exercises in general) is moving the elbow away from the side of the body as the weight is lifted.
Imagine screwing the elbow in tightly to the ribcage as you perform this exercise to prevent this from occurring.
To add intensity, complete max incline reps before sitting upright and continuing to failure again. Finish off by standing and working to failure once more.
2) Long Head Exercise 2 – Standing Barbell Curl
Providing a narrow grip is assumed and the elbows are kept tight to the body, the barbell curl is an excellent long head isolator.
To properly perform this exercise, using a narrow grip grab a barbell and stand up tall. Push the chest up, pull the shoulders back and pin the elbows tightly to the sides.
From this position, flex at the elbow only, drive the weight upward and squeeze. Maintaining a slight forward lean from the trunk to maximize the tension going through the biceps.
Those who curl the weight up while maintaining a 90 degree angle at the elbow will fail to apply maximal stress to the biceps.
Again, thinking about the elbows, those who allow them to travel back and forth will also reduce stress from the biceps and move it on to the front delts (shoulders).
A final error often seen in the barbell curl is to keep the wrists flexed throughout the duration of the exercise or at to flex at the top of the movement.
In the same way that moving the elbow reduces bicep tension, flexing the wrists will shift the stress of the biceps and onto the forearm musculature instead.
If you struggle with this, think about letting the wrists “sag” when you grip the barbell which will prevent any wrist flexion.
3) Long Head Exercise 3 – Barbell Drag Curl
This exercise involves using either a barbell or the Smith’s machine.
From a standing position, grip the bar with the hands just outside the hips. From this position, look to drag the barbell up the body by pushing the elbows back. Continue dragging until the bar reaches the upper chest.
Because this exercise involves a restricted range of motion you may not find it to be highly effective for bicep development. However, many claim that it targets the long head effectively.
4) Short Head Exercise 1 – Preacher Curl
It is believed that to target the short head of the bicep, the elbows must be placed in front of the body.
This therefore makes the preacher curl the ideal exercise for short head development. Unfortunately, it is an exercise which is commonly performed incorrectly.
Many individuals drive their chest against the pad and place the full arm in direct contact. From there, they grab the bar with a narrow grip and allow the elbows to flair out.
As they drive the bar upward, they flex the wrists and lean backwards to facilitate the drive.
The issue with performing the preacher curl in this manner is that it once again fails to maximally activate the biceps and place a large amount of stress on the muscle.
For an efficient preacher curl, start by standing – this means raising the pad to chest height. Place only the lower portion of the tricep on the pad rather than the full upper arm.
The elbows should be approximately shoulder width apart but the hands should grip the bar slightly wider than shoulder width. Additionally, a slight backward trunk lean should be established.
As you contract the biceps, lean forward with the trunk to maintain bicep tension. As with the previous exercise, utilize a wrist “sag” if necessary to prevent the wrists from flexing excessively.
A number of individuals prefer to stop slightly short of full extension, however, working to a full range of motion is highly recommended to maximize the amount of stress placed on the muscle (5).
5) Short Head Exercise 2 – Spider Curl
Finally, the spider curl is an excellent exercise, not only for short head development, but also to ensure that you use a full range of motion. It is also practically impossible to “cheat” with the spider curl.
For the exercise, set up facing a preacher bench. Adjust the pad so that the supports of the bench don’t restrict movement. Lean over the top of the bench and let the arms hang down.
From that position, the movement is then exactly the same as the preacher curl.
As with the incline dumbbell curl, the body position means that you are likely to lift a lighter load than normal.
To add intensity to the spider curl, have a training buddy who can help you complete a number of forced repetitions after you have reached absolute muscular failure.
Final Word
At the end of the day, it makes very little difference knowing whether or not it is possible to fully isolate either bicep head. For optimal development, it makes sense to hit the biceps from a multitude of angles anyway.
Therefore, to grow full looking arms, consider using a number of the aforementioned bicep exercises while taking care to develop both the long and short head equally.
For more news and updates, follow Generation Iron on Facebook, Twitter, and Instagram.
References:
1-Tiwana, Manpreet S.; Varacallo, Matthew (2019), “Anatomy, Shoulder and Upper Limb, Biceps Muscle”, StatPearls, StatPearls Publishing, PMID 30137823
2-Marcolin, Giuseppe; Panizzolo, Fausto Antonio; Petrone, Nicola; Moro, Tatiana; Grigoletto, Davide; Piccolo, Davide; Paoli, Antonio (July 13, 2018). “Differences in electromyographic activity of biceps brachii and brachioradialis while performing three variants of curl”. PeerJ. 6. doi:10.7717/peerj.5165. ISSN 2167-8359. PMC 6047503. PMID 30013836.
3-Oliveira, Liliam F.; Matta, Thiago T.; Alves, Daniel S.; Garcia, Marco A.C.; Vieira, Taian M.M. (March 1, 2009). “Effect of the shoulder position on the biceps brachii emg in different dumbbell curls”. Journal of Sports Science & Medicine. 8 (1): 24–29. ISSN 1303-2968. PMC 3737788. PMID 24150552.
4-“Genes critical for muscle development and function in Caenorhabditis elegans identified through lethal mutations”. The Journal of Cell Biology. 124 (4): 475–490. February 2, 1994. ISSN 0021-9525. PMC 2119919. PMID 8106547.
5-Baroni, Bruno M.; Pompermayer, Marcelo G.; Cini, Anelize; Peruzzolo, Amanda S.; Radaelli, Régis; Brusco, Clarissa M.; Pinto, Ronei S. (2017-8). “Full Range of Motion Induces Greater Muscle Damage Than Partial Range of Motion in Elbow Flexion Exercise With Free Weights”. Journal of Strength and Conditioning Research. 31 (8): 2223–2230. doi:10.1519/JSC.0000000000001562. ISSN 1533-4287. PMID 27398917.
Master The Power Snatch and Watch Your Gains Skyrocket!
Developing Max Power
For many athletes and sportspeople, being powerful is absolutely crucial and can prove to be the difference between success and failure. This article will break down one of the greatest power-based exercises that can be performed for athletic development – the power snatch.
The Benefits of the Power Snatch
The power snatch is an exercise that is typically performed by Olympic weightlifters looking to improve their snatch performance. However, nowadays Olympic lifting is being performed more frequently by athletes from other sports as it is a method for increasing overall power output (1).
There are a number of specific benefits associated with the power snatch and therefore, for any individuals looking to improve power, it is worthwhile considering incorporating the power snatch into their training.
Bar Height
In the power snatch, it is not necessary to drop down into a squat in order to catch the bar. As a result of this, the bar must be pulled higher and with more power to allow it to be caught in a more upright position. Those who particularly struggle with final phase of the snatch or with the high pull will find this exercise to be of great benefit and it may improve their overall snatching ability.
Second and Third Pull Power
In a similar vein, the power snatch is an excellent developer of the second and third pull. The power snatch forces the lifter to pull maximally and “throw” the bar overhead. With a full snatch, dropping down quickly and deeply into a squat can compensate for a poor or inefficient pull.
Being capable of pulling powerfully and extending quickly through the hips will cause the bar to accelerate faster and facilitate a more efficient snatch (2). Therefore, practicing the power snatch regularly and improving one’s rate of force development will help to accelerate the bar to a greater extent and improve overall snatch performance.
Learning the Snatch
The snatch is a highly technical lift that takes time to learn properly – it is very important that time is taken and progress is gradual. Typically, coaches will start with the block or hang power snatch so that the individual can begin to learn the movement patterns and requirements for the snatch. Once this has been established, they can then be progressed to the floor. When pulling from the floor, a specific emphasis should be placed on developing both the 1st and 2nd pull (3).
The power snatch tends to be slightly easier to instruct than the full snatch due to the fact that the barbell can be caught in high and there is no need to drop into the overhead squat position. Once the power snatch has been perfected, then the overhead squat position can be taught through exercises. such as snatch balance, to gradually advance them to the point where they are eventually ready to perform a full snatch.
Snatching with Limited Mobility
Snatching with poor mobility is a recipe for disaster. Every single joint must be utilized during the snatch and must therefore be supple and be capable of moving through a great range of motion (4). For every serious lifter mobility should be a priority and should be worked on frequently.
However, for those who have restricted mobility, performing the power snatch is recommended. The full snatch is a lot more demanding on the joints as they are required to move through a larger range than the power snatch.
Increased Technical Training
For the Olympic Lifter, it’s unwise to practice heavy lifts with every session. With any type of physical training, it’s essential to program in a tapering period to allow for recovery.
Regularly performing technique-focused power snatches with moderate loads will not be overly taxing on the body and can therefore be performed very regularly without impacting the recovery process. Additionally, this may refine technique, enhance power and therefore improve one’s overall snatching ability.
How To Power Snatch
As mentioned, the power snatch differs from a full snatch in during the power snatch the bar is caught relatively high and a deep squat is not required. The full snatch involves driving the bar up and overhead but then rapidly dropping into a deep squat in order to catch the bar.
The main benefit of the power snatch is that, because the bar must be caught high, the lifter must generate maximal power in order to get the bar directly overhead and establish a strong and stable overhead position.
The following number of points run through how to appropriately and effectively complete a power snatch.
1) Assume the snatch position
Feet slightly wider than hips, toes pointed out, bar in close proximity to the shins, gripping the bar with straight arms and hands wider than shoulders. The way in which a lifter sets up is determined by their physical attributes and therefore, there is not a “universal” snatching position.
2) Perform a standard snatch pull (first, second and third pull)
This involves initially lifting the bar from the floor, bringing the bar up to the thighs, extending powerfully through the hips and pulling aggressively upward on the bar.
3) Catch the bar high
Look to “catch” the bar high and do not not allow it to push the body down into a deep squat – the lifter should not drop beyond parallel with the floor. Catching high will ensure that maximal power is produced during the pulls and lead to an efficient turnover and strong overhead position (5).
When performing a power snatch, it is essential that the lifter does not change anything about their snatch technique or adjust their mechanics to allow them to complete the lift. For example, a common error is to jump the legs out wide when catching the bar overhead to give them an advantage and prevent them from dropping too deep.
Adjusting movement patterns and mechanics for the power snatch may cause movement problems with the full snatch. Therefore, if movement begins to break down or inconsistencies begin to creep in with the power snatch, consider reducing the weight on the bar so that proper movement is restored.
Power Snatch Programming
Power snatches can be incorporated into many different training regimes but should only be included if it aligns with the individuals goals and targets. If a lifters goal is to improve their snatching ability, then it would make a great deal of sense to program in regular power snatches to improve their bar speed and pulling power.
It may be the case that an individual is already efficient at the power snatch, if this is the case, it would be worthwhile spending a greater amount of time on the full snatch to allow them to become more accustomed to handling heavier loads.
Testing a lifters one rep max can be beneficial for consequent programming to ensure that the correct weight and intensity are prescribed (6).
For developing bar speed and technique, it is recommended to perform 1-3 repetitions using 50-75% of the lifters full snatch 1 rep max.
For developing strength speed and for lighter training days, it is recommended to perform 1-2 repetitions using 70-85% of the lifters full snatch 1 rep max.
While improving the power snatch can certainly be beneficial, it should not be more important than improving the full snatch. Therefore, it is worthwhile assessing one’s full snatch regularly and look to pinpoint weak areas that can be improved.
Those who can power snatch a great deal of weight (more than 85% of their full snatch), may be stronger pullers already and therefore should focus more on the transition and getting under the bar quickly.
Conversely, those who can already rapidly drop under the bar and catch, may be better suited to concentrating on the power snatch for a period of time in order to develop their power generation and technique.
Final Word
There is no denying that the power snatch is one of the best exercises that can be performed for developing speed and power. Therefore, this exercise is highly recommended, not only for Olympic lifters, but also for athletes, sportspeople and lifters looking to develop their overall power.
For more news and updates, follow Generation Iron on Facebook, Twitter, and Instagram.
References:
1-Hackett, Daniel; Davies, Tim; Soomro, Najeebullah; Halaki, Mark (2016-7). “Olympic weightlifting training improves vertical jump height in sportspeople: a systematic review with meta-analysis”. British Journal of Sports Medicine. 50 (14): 865–872. doi:10.1136/bjsports-2015-094951. ISSN 1473-0480. PMID 26626268.
2-Hornsby, W. Guy; Gentles, Jeremy A.; MacDonald, Christopher J.; Mizuguchi, Satoshi; Ramsey, Michael W.; Stone, Michael H. (October 13, 2017). “Maximum Strength, Rate of Force Development, Jump Height, and Peak Power Alterations in Weightlifters across Five Months of Training”. Sports. 5 (4). doi:10.3390/sports5040078. ISSN 2075-4663. PMC 5969034. PMID 29910439.
3-Harbili, Erbil; Alptekin, Ahmet (May 1, 2014). “Comparative Kinematic Analysis of the Snatch Lifts in Elite Male Adolescent Weightlifters”. Journal of Sports Science & Medicine. 13 (2): 417–422. ISSN 1303-2968. PMC 3990899. PMID 24790499.
4-Gourgoulis, V.; Aggelousis, N.; Mavromatis, G.; Garas, A. (2000-8). “Three-dimensional kinematic analysis of the snatch of elite Greek weightlifters”. Journal of Sports Sciences. 18 (8): 643–652. doi:10.1080/02640410050082332. ISSN 0264-0414. PMID 10972413.
5-“Power Snatch Technique”. educ.jmu.edu.
6-Faigenbaum, Avery D.; McFarland, James E.; Herman, Robert; Naclerio, Fernando; Ratamess, Nicholas A.; Kang, Jie; Myer, Gregory D. (2012-2). “RELIABILITY OF THE ONE REPETITION-MAXIMUM POWER CLEAN TEST IN ADOLESCENT ATHLETES”. Journal of strength and conditioning research / National Strength & Conditioning Association. 26 (2): 432–437. doi:10.1519/JSC.0b013e318220db2c. ISSN 1064-8011. PMC 3561668. PMID 22233786.