Tag: hypertrophy

Training to Failure on Every Set
Training to Failure on Every Set Maximizing Gains: The Pros and Cons Training to failure—pushing your muscles until they can no longer complete a repetition in a set—is a topic of much debate in the fitness community. Advocates argue it maximizes muscle growth and strength, while critics caution against potential injuries and the toll it…

Testosterone in Bodybuilding
The Role of Testosterone in Bodybuilding In bodybuilding, testosterone is often seen as the cornerstone of muscle growth. Its anabolic effects can significantly increase muscle mass and strength, which are key goals for many athletes. Testosterone also aids in recovery, allowing for more frequent and intense training sessions. Furthermore, it can improve body composition by…
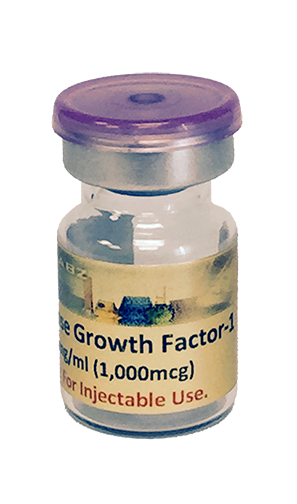
Insulin-Like Growth Factor-1 Long Arginine 3 (IGF-1 LR3)
Insulin-Like Growth Factor-1 Long Arginine 3 (IGF-1 LR3) is a modified form of the naturally occurring Insulin-Like Growth Factor-1 (IGF-1). It plays a significant role in muscle growth and has gained popularity in bodybuilding for its potential to enhance muscle development and recovery. Here’s an overview of IGF-1 LR3 in the context of bodybuilding, including…

The Science of Isometric Training — Explained!
Can you build a stronger and more aesthetically appealing physique by not moving? Wild idea, but that’s what isometric training is all about. On the outside, it looks like nothing is happening. However, on the inside, your muscle activation is off the charts.
Isometric training is not as popular as its dynamic counterpart. I mean, an explosive snatch or a powerful bench press obviously looks pretty exciting. Isometric training doesn’t necessarily attract Instagram views or get your gym crush to give second glances. That said, it’s one of the most researched-backed methods you’re missing out on.
What is Isometric Training?
Isometric training involves static muscle contractions without any visible movement at the joints. The muscle length remains constant during these exercises, and the joint angle doesn’t change. Instead of the traditional range of motion seen in dynamic exercises like squats or bicep curls, isometric exercises focus on maintaining a fixed position against an immovable force.
The plank is a classic isometric exercise where the individual holds a push-up position with arms extended and the body straight. The muscles in the core, arms, and legs engage to keep the body stable against gravity’s attempt at sinking your midsection to the floor.
But isometric training is far more useful than just increasing stability. It will get you strong, jacked, and keep your joints happy forever.
Benefits of Isometric Training
Isometric training is often neglected, but it has a host of benefits. Holding static contractions against resistance will activate lots of muscle fibers and stimulate many favorable adaptations.
Hypertrophy
Unlike dynamic exercises, where you are moving against force, isometric exercises involve exerting force against an immovable object or resisting force applied by external resistance. This produces high tension levels, which is what you need for muscle growth.
You technically don’t need the muscles to change length during your isometric training set. In fact, it might even be advantageous to utilize isometrics when a muscle is in a shortened position. Research has shown this can help promote hypertrophy. (1)
During isometric contractions, motor units are recruited, generating tension within the muscle fibers. This tension increases muscle activation, stimulating muscle fibers to adapt and grow over time. While isometric training is often associated with improving static strength and joint stability, research indicates that it can also play a crucial role in hypertrophy. (2)
The key to growing from isometrics is similar to dynamic strength training. You need to train with enough intensity so high levels of motor unit recruitment occur along with sufficient tension imposed on muscle fibers.
Enhance Your Mind-Muscle Connection
Lifters love feeling their muscles. That burning sensation indicates that we are training what we intend to. It gives us confidence that we are training optimally and, in some cases, can even enhance our muscle growth. Many lifters report a better mind-muscle connection with their stubborn muscles after incorporating isometrics into their workouts.
Isometrics can also be incredibly effective for warming up before a workout. The mind-muscle connection you develop will prepare those muscles to activate in the workout.
Developing Strength
You’re only as strong as your weakest muscles. If you consistently fail your squat in the hole, it’s worth doing isometrics in that position. The same principle applies if you can’t lock out your bench press. Developing isometric strength in that position will be crucial for strengthening the whole exercise. Isometric training also allows you to engage your muscle fibers better and generate more force.
This also translates to improved athletic performance. Many sports, like rock climbing, martial arts, and gymnastics, involve isometrics, where you must hold muscle contractions for extended durations.
Injury Prevention and Rehab
Isometric training improves muscle fiber activation without overburdening your joints and connective tissues. The adaptations from isometric training can also increase joint stability and allow you to keep training for strength and hypertrophy while reducing the risk of injury.
From a rehab perspective, isometric training allows you to train your muscles in specific positions that you can tolerate without doing the full range of motion.
Incorporating Isometric Training Into Your Routine
Most people are clueless about how to incorporate isometric training. It can be simpler than you think. Here’s your go-to checklist for your next workout involving isometrics.
Identify Targeted Muscle Groups
Determine the muscle groups you want to focus on. You can use isometric exercises for various muscle groups, including chest, shoulders, back, core, legs, and arms.
Choose the Right Exercises
Select isometric exercises that target your desired muscle groups. Popular examples include planks and wall sits. However, you don’t necessarily need specific exercises. You can simply take an exercise you already planned on doing and do an isometric hold at a specific point in the lift.
Gradual Progression
Start with shorter holds and gradually increase the duration of contractions. Aim for 10-30 seconds initially and work your way up to 60 seconds or more as you gain strength and muscle endurance. You can use additional resistance as you gain more experience. Isometrics can be highly fatiguing, especially when added on top of your current training load.
Add Them Anywhere in Your Workouts:
If you struggle with your mind-muscle connection, isometrics can be a game-changer at the start of the workout. For example, if your knees are always achy during your leg workout and you never seem to feel your quads, it might be worth pausing at the top of a leg extension’s range of motion or doing a set of wall sits as your first exercise. This recruits your quads and reduces the stress on your knees, giving you a more effective and joint-friendly workout.
However, saving them for the end of your workout can be the way to go if you want a brutal finisher. For example, after you’ve already destroyed your quads on leg day, you can finish with an isometric split squat or a wall sit to failure.
Combine with Dynamic Exercises
Combine isometric training with dynamic exercises for optimal results. A common example of this is to pause at the most challenging point of a dynamic exercise. For example, you can add a four-second pause at the bottom of each squat. This is the most difficult portion of the squat, where muscle activation and muscle tension are highest due to the difficulty and stretched position.
For other exercises where the top is harder, you can pause for three seconds at the top of the range of motion. For example, pause four seconds at the top of a row to develop a good mind-muscle connection while minimizing momentum.
Rest and Recovery
Allow sufficient rest and recovery between isometric training sessions to promote muscle repair and growth. As I mentioned, isometric exercises can be pretty fatiguing, and many people don’t consider this when adding them to their already fatiguing workouts. It’s important to assess your training volume and adjust over time as needed, especially when adding isometrics to the mix.
Full Body Isometric Workout
As mentioned earlier, you can warm up with isometric training or finish with it to torch your muscles. You can also do a full-on isometric workout. It will feel quite different than your typical workout but don’t let the novelty of static movements fool you. These workouts are killer.
Here is a sample full-body isometric workout that you can try.
Exercise
Sets
Reps/Time
Rest
Pause Squats
3
8-12
3 min
Pause RDL
3
8-12
3 min
Pause Bench Press
3
10-15 sec
2 min
Pull Up Hold
3
20-30 sec
2 min
Wall Sit
3
30-60 sec
2 min
Overhead Carry
3
30-60 sec
2 min
Aim for the higher end of the rep range and select a load that is challenging enough to reach close to muscular failure. Rest sufficiently between sets to allow the nervous system to recover.
Popular Isometric Exercises
Here is an overview of some great isometric exercises from the sample program, along with detailed instructions to get the most bang out of your isometric training.
Wall sit
You probably did these in your middle school gym class. They are hard and don’t require any fancy equipment. One set of these will hit your brain with nostalgia and your quads with nasty burns.
Locate a sturdy and clear wall space where you can perform the exercise without any obstructions.
Stand with your back against the wall, ensuring your feet are shoulder-width apart. Keep your feet flat on the ground and your toes pointing slightly outward.
Slowly slide your back down the wall while bending your knees. Lower your body until your thighs are parallel to the ground as if sitting on an invisible chair. Your knees should be directly above your ankles, and your back should be firmly against the wall.
Hold this position as you squeeze your core and quads.
Pro tip: Hold a dumbbell or kettlebell for added resistance.
Pause Squats
Squats are great for targeting the quads, glutes, and core muscles. Pause squats involve pausing at the bottom, increasing the tension at the bottom position and forcing you to stay tighter and more stable. They also build tons of strength coming out of the hole aka the bottom of the squat.
Position yourself with your feet shoulder-width apart or slightly wider, with your toes pointing slightly outward.
Take a deep breath and brace your core.
Initiate the squat by pushing your hips back and bending your knees.
Once you reach the desired depth of your squat, pause and hold the position for the prescribed duration.
Stand back up keeping your spine neutral
Pro tip: Practice releasing your breath at the bottom to feel your quads and glutes more
Pause Bench Press
The bench press often has sticking points where the barbell seems to stall during the lift. By pausing at these sticking points, you can focus on building strength in those specific ranges, ultimately helping you push through plateaus and improve your full-range bench pressing.
Lie on the bench with your eyes directly under the barbell. Grip the barbell with a shoulder-wide overhand grip.
Unrack the bar and lower it towards your mid-chest.
Pause in this position or press it a couple inches up and hold that position for your desired amount of time. I suggest four seconds.
Complete the lift by pressing all the way up.
Pro tip: You can also hold the isometric by pressing up against safety pins.
Pause RDLs
The Romanian deadlift (RDL) is a highly effective exercise for targeting the posterior chain, including the hamstrings, glutes, and lower back. It is an excellent movement for building strength and enhancing the stability of the hip hinge pattern. However, by incorporating a pause into the RDL, you can take the benefits of this exercise to a whole new level by leveraging the benefits of isometric training.
Stand with your feet shoulder-width apart or slightly narrower. Position the barbell in front of you, resting on your thighs, with a pronated grip (palms facing you).
Initiate the movement by pushing your hips back, allowing the barbell to slide down your thighs. Keep the barbell close to your body as you lower it.
Once you reach the desired depth of your RDL, hold the position for 2-3 seconds.
Drive through your heels to rise back to the starting position.
Pro tip: Use straps if you are dealing with crazy heavy weights.
Planks
The plank is a simple yet incredibly effective bodyweight exercise that targets the core muscles, including the rectus abdominis, transverse abdominis, and obliques. It is renowned for strengthening the entire core, improving posture, and enhancing overall stability. The OG in isometric training, if you will.
Place your forearms flat on the ground, directly below your shoulders. Keep your elbows bent at a 90-degree angle.
Lift your body off the floor by pressing through your forearms and toes. Maintain a straight line from your head to your heels.
Hold the plank position for as long as you can maintain proper form.
Pro tip: Add a small weight plate to your lower back to make the exercise more challenging.
Overhead Carry
With any loaded carry, you’re technically moving, but your hips and upper body are rock solid in this variation to create tightness. These translate well to many sports that require high levels of stability as they train your shoulders, core, and arm muscles in a static position.
Choose an appropriate weighted object for the overhead carry, such as a dumbbell or kettlebell.
Press the weight overhead, fully extending your arms and keeping your biceps close to your ears. Your palms should face forward.
Begin walking forward in a controlled manner while keeping the weight overhead.
To finish the overhead carry, carefully lower the weight back to shoulder height before returning it to the starting position.
Pro tip: You can use dumbbells, kettlebells, or even barbells for this exercise, depending on how spacious your gym is.
Unleash Your Static Potential
Isometric training is a valuable addition to any hypertrophy-focused workout regimen. By targeting high motor unit recruitment, prolonged time under tension, and an increased mind-muscle connection, you will unlock new levels of muscle growth. Not to mention, you can do so without the aches and pain associated with traditional dynamic strength training.
References
Nunes J. Does stretch training induce muscle hypertrophy in humans? A review of the literature. Clinical physiology and functional imaging. 2020. Accessed July 28, 2023. https://pubmed.ncbi.nlm.nih.gov/31984621/.
Oranchuk D. Isometric training and long-term adaptations: Effects of muscle length, intensity, and intent: A systematic review. Scandinavian journal of medicine & science in sports. 2019. Accessed July 28, 2023. https://pubmed.ncbi.nlm.nih.gov/30580468/.
Arnold Schwarzenegger Unveils His 3-Tier ‘Hierarchy of Muscle Gains’
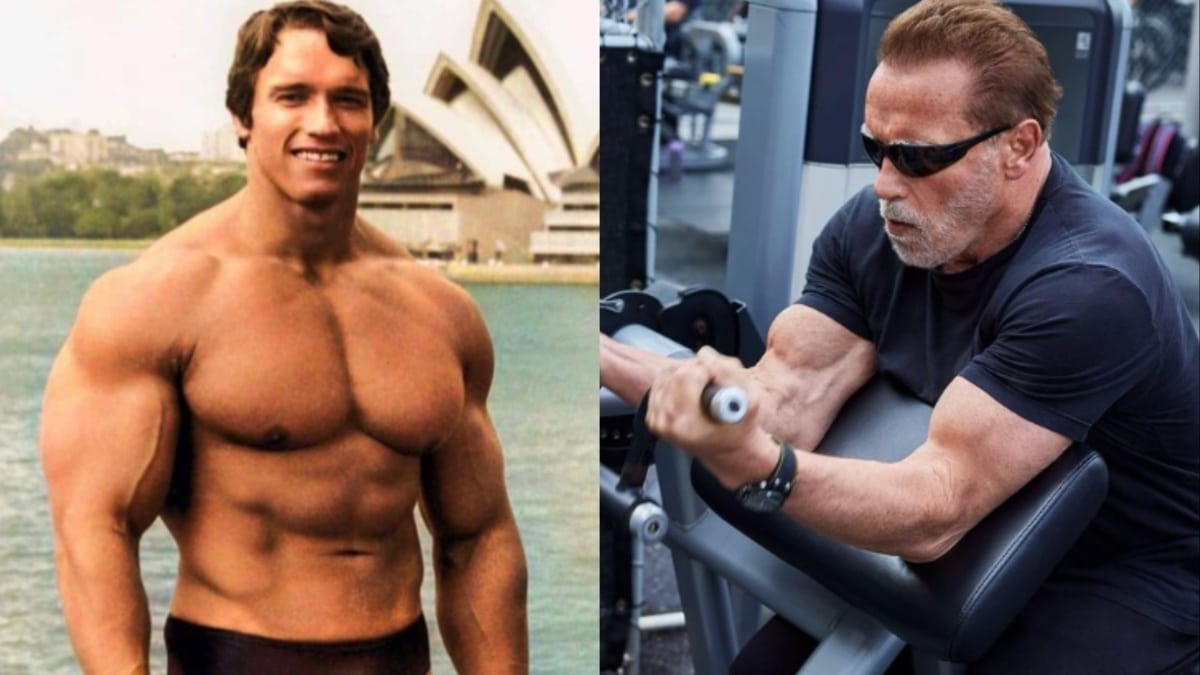
Arnold Schwarzenegger is a living legend who credits much of his success to health and fitness. He’s a former seven-time Mr. Olympia champion who graced bodybuilding’s biggest stages throughout the 1970s and 80s. In a recent edition of his newsletter, Arnold’s Pump Club, Schwarzenegger shared a ‘hierarchy of muscle gains’ which consisted of three tiers.
As one of the greatest bodybuilders of all time, Arnold Schwarzenegger still carries a deep passion for the sport. In retirement, he hosts the Arnold Sports Festival every year, an invite-only bodybuilding event, exclusive only to the most famous names in the IFBB Pro League. In addition to hosting these huge competitions, Schwarzenegger maintains an exceptional level of fitness at 75 years old.
Schwarzenegger was widely respected for his size, symmetry, and proportions throughout his bodybuilding career. He possessed huge arms, a slim waist, and a commanding chest, which helped him stand out on stage against competition. Before calling it a career, Schwarzenegger pushed himself against greats Franco Columbu, Frank Zane, and Sergio Oliva.
Given his status as one of the world’s best-built men, Schwarzenegger admits it’s been difficult to accept his physique as he’s gotten older. He’s also been more open about other sensitive aspects of his career, such as performance-enhancing drug use. According to Schwarzenegger, he utilized a two-compound cocktail of Dianabol and testosterone for most of his Olympia reign.
From governing the state of California to philanthropy and acting, Schwarzenegger has done it all. His love for working out and bodybuilding has persisted for decades despite his busy schedule. One of the last tips he offered fans was suggestions on achieving more youthful skin. This time, he’s teaching us how to extract the most out of consistent training sessions.
Arnold Schwarzenegger Breaks Down Hierarchy of Muscle Gains
When mapping out a workout plan, Schwarzenegger emphasized the importance of locking down a goal. The bodybuilding legend also underlined that consistency and compliance are most crucial for those aiming to build muscle or strength by working out.
“Scientists found that if you’re stressing about optimizing the number of workouts, days per week, or specific exercises, you’re missing the forest from the trees. Consistency and compliance are the most important variables for building more strength and muscle.
The researchers found that the weight you can lift and the number of sets you perform are not the main drivers of muscle growth. First, it’s consistency, and then it’s total volume. In other words, if you did ten sets of 10 reps using 20 pounds (10 reps x 20 pounds x 10 sets = 2000 pounds of total volume), it would be more effective at building muscle than three sets of 3 reps using 100 pounds (3 reps x 100 pounds x 3 sets = 900 pounds of total volume)…assuming the ten reps at 20 pounds was near failure.”
While glorifying heavy weights is easy, consistency is most important, and volume pushes your muscles to their limit. If ten reps of 20 pounds are easy, then that won’t force your muscles to work towards their capacity, which means even though you have high volume, you won’t grow. So if you wanted to create a hierarchy of muscle gains, it would be
1. Build consistent habits for training.
2. Push your body as hard as possible at each training session (most people don’t push themselves hard enough, and that’s why they don’t grow).
3. Focus on total volume.
Schwarzenegger mentioned that the frequency of training sessions can also have a dramatic impact on gains, whether for strength or muscle growth.
“If your goal is increasing strength, the variables change. You’re ability to become stronger is determined by progressively using more weight, the frequency of your training sessions (three times per week appears to be the sweet spot), and exercise order influences muscular strength.
Focus on your habits, make them automatic, and then you can figure out how to push yourself hard enough to see the desired results.”
Schwarzenegger’s impact on the sport is undeniable. Olympia judge Terrick El Guindy recently assessed his legacy on a special YouTube appearance. During the video, El Guindy called Arnold an ‘icon of modern times’ with a legacy that will last forever. El Guindy also examined Schwarzenegger’s physique before and after he became a Mr. Olympia winner.
READ MORE:
Similar to Joey Swoll’s mission, Arnold Schwarzenegger wants to see the world embrace fitness. He hopes to inspire and motivate people around the world with his workouts, recipes, techniques, and personal stories from his newsletter.
Published: 27 July, 2023 | 11:03 PM EDT
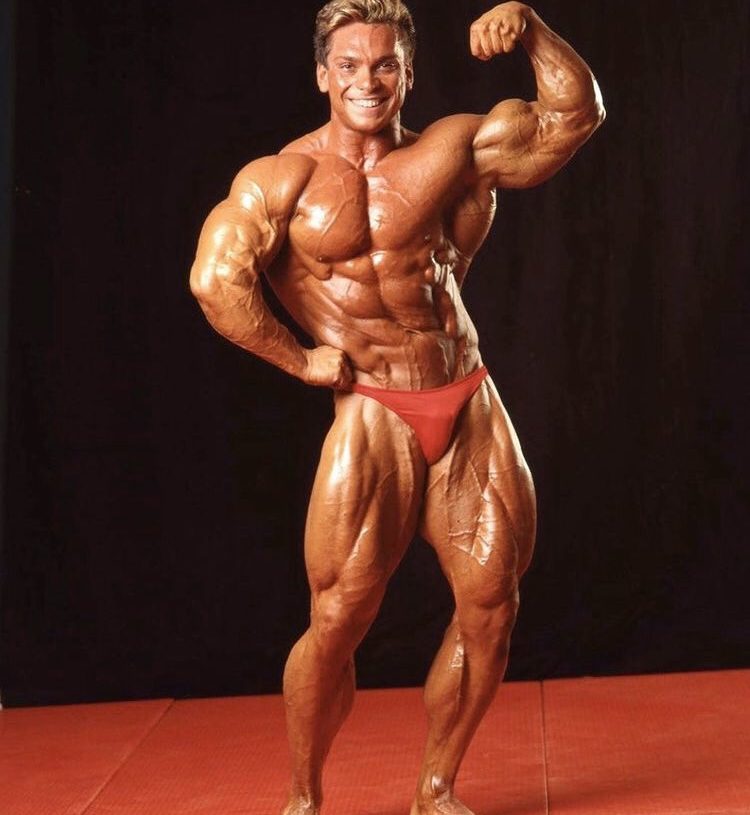
Rich Gaspari Shares Abs Exercise for Strength & Training Intensity Tip for Hypertrophy: ‘Total Annihilation’
Bodybuilding veteran Rich Gaspari is a strong proponent of using intensity to enhance his package in the gym. Although he moved on from professional competition years ago, his decades of experience have turned him into a revered figure in the community. In recent posts shared on Instagram, Gaspari shared an abs exercise for building strength and offered a tip on how to boost training intensity for hypertrophy.
Rich Gaspari first gained attention for his insane muscle mass, definition, and granite conditioning in the mid-1980s. He’s widely regarded as the first Men’s Open competitor to display striated glutes. Although he did not win Mr. Olympia, Gaspari was a perennial contender who participated in seven Mr. Olympia contests and took three silvers to eight-time champion Lee Haney. He also made history by becoming the inaugural champion of the Arnold Classic. Following a glittering career, he was inducted into the IFBB Hall of Fame in 2004.
Gaspari opened up about the cost of bringing dry conditioning on stage earlier this year. He revealed he never took harsh diuretics and achieved the grainy conditioned look with consistent training and also credited genetics. Given the focus on being dry in contemporary competition, Gaspari bashed coaches for risking their athletes’ lives with diuretics.
Three months ago, Gaspari fired shots at the Women’s Bikini and Wellness athletes for the rampant use of PEDs (performance-enhancing drugs) in competition. He believes trainers push athletes to use heavy amounts of gear when it’s not necessary, making even regional shows hard to compete in as a natty.
Rich Gaspari / Instagram
Gaspari has kept up with training regularly post-retirement and often educated his audience on topics related to fitness. He detailed the anti-aging peptide stack he’s utilizing to improve his quality of life months ago.
The 60-year-old fired shots at modern bodybuilders for not giving much attention to their calf muscle development three months ago. He offered donkey calf raises as an effective exercise for enhancing muscle growth and definition in the group. Then, he provided some of his best tips to grow legs and techniques for increasing intensity on leg day.
Rich Gaspari shares abs exercises for building strength
In a recent Instagram post, Rich Gaspari shared leg raises, crunches, and twisting crunches as effective abs exercises for building strength.
“Training abs strengthens your core that can help you with training other parts of your body,” wrote Gaspari. “Leg raises are great to do for training lower Abs. I also do ab crunches to work overall abs along with twisting crunches to work intercostals. Rep range on abs for 15-50. Do Abs at least 2-3 times a week.”
Rich Gaspari is not a fan of the modern Men’s Open division. He voiced his disapproval of the evolution of the category, arguing a loss in the creative element three months ago. He feels bodybuilding is an art form instead of a sport and praised the Classic Physique division for keeping the art alive.
Gaspari issued a cautionary message against the use of trenbolone two months ago. While he conceded the steroid could result in impressive gains, he highlighted the adverse effects it may cause to the liver and cardiovascular system.
Gaspari’s tip on increasing training intensity for hypertrophy
Gaspari shared tips on how to get in the right mindset for intensity training and boost it further for hypertrophy.
“I still train with total intensity, train a muscle to failure. I don’t have my phone with me that I’m constantly texting or reading e-mails or looking at YouTube or doing whatever,” he said. “I’m going to the gym to train a certain body part I’m training. What I see right now is I see too many people distracted. And they are not making the gains. You really have to train with intensity.
“When I went to a gym training for competition, I went to the gym with the mindset I was going to battle, to war, to train a body part to total annihilation or total failure. If I didn’t do a certain weight or personal max in reps, drop set, giant set, if I didn’t finish that I imagined that my whole family is going to get killed and they were going to kill me. That’s really extreme but when you have that type of mindset going to the gym for total annihilation, you’re going to train a muscle much harder than you’ve ever trained before. That’s what it’s going to take for hypertrophy and muscle to grow.”
Rich Gaspari laid out a modified version of sumo squats to boost lower-body strength two months ago. He recommended using a platform to elevate feet for added range of motion to target glutes.
Gaspari extended his support for four-time Classic Physique Olympia champion Chris Bumstead for his dominant reign last month. He backed Bumstead to be competitive in the Open class if he packed on about 40 pounds of muscle mass.
His latest offerings are sure to help many fans take their fitness game to the next level with a strong core and intense mindset.
Published: 2 July, 2023 | 11:44 AM EDT
Rest Time for Hypertrophy: How Long Between Sets for Maximal Muscle Growth?
Hypertrophy training programs are typically built around a range of variables. These include training frequency and split, exercise selection, rep range, number of sets per exercise and muscle group, and recovery time between sets.
In most cases, program writers put a lot of thought into things like the training split and exercise selection but very little into how much rest time you should take between sets. Some don’t even mention it, leaving you to fill in this missing piece of information yourself.
This is unfortunate because not only is the length of your interset rest a variable you can manipulate, but it may also have a direct impact on the effectiveness of your program.
In this article, we investigate how the rest time between sets can affect your progress and if there is an optimal rest time for building muscle.
Rest Time for Hypertrophy – The Standard Recommendation
While a lot of exercisers just rest as long as needed between sets, the standard recommendation interset rest period for hypertrophy training is 30-90 seconds. So, for example, if you do a set of bench presses, you would rest 30-90 seconds before beginning your next set.
Some lifters favor the short end of this scale (30-60 seconds), while others prefer slightly longer rests (60-90 seconds). Oftentimes, rest periods are modified depending on the exercise performed, e.g., less rest between sets of isolation exercises and longer rests for compound exercises.
Regardless of the exact duration, 30-90 seconds has worked for thousands of bodybuilders. It’s just long enough for levels of lactic acid to subside and to catch your breath. However, it’s not so long that your muscles recover fully, so each set will be more demanding than the one preceding it.
Resting from 30 to 90 seconds between sets will give you a good pump and burn, producing the mechanical and metabolic stress that is necessary for building muscle. However, while 30 to 90-second interset rests undoubtedly work, there are disadvantages too.
These include:
Accumulated fatigue
With incomplete rests between sets, your set-by-set rep count will probably decrease, reducing the quality and amount of work you can perform. This may have a negative effect on workout productivity.
For example:
Set 1 – 12 reps
Set 2 – 9 reps
Set 3 – 7 reps
Alternatively, if you want your reps to remain more or less constant, you may have to reduce the weight as you get tired or hold back on your first few sets so you are less fatigued. Both of these strategies could make your workout less effective.
Cardiovascular overload
While hypertrophy training is generally anaerobic, a strenuous set of most compound exercises can leave you out of breath with your heart racing. Even if you are in good shape, you may find that when it’s time to do your next set, you are still out of breath, which limits how many reps you can do.
In short, your heart and lungs fatigue before your muscles. Doing fewer reps because you are out of breath will significantly undermine the effectiveness of your workout.
Needless to say, this effect is generally strongest with leg exercises as they demand the most oxygen and energy. This is one of the reasons that leg workouts are so hard (and daunting!).
The “rush factor”
Training with short interset rests means you have very little time between sets to gather your thoughts, get psyched up, change weights, grab a drink, update your workout diary, or do any of the other things that can help make your workout more productive. You may even start your next set before you feel ready and perform poorly as a result.
There is more to building muscle than just rushing through your workout. Successful hypertrophy training involves training smart, too. Short rests between sets definitely make for an intense workout. However, evidence suggests that longer rests may be more effective for building muscle.
Summary:
While 30-90 seconds is the traditional interset rest time for bodybuilding, it’s not without disadvantages, such as accumulating muscular and cardiovascular fatigue. However, given how many people have successfully used short rests to build muscle, it’s clear that it works.
In Support of Longer Rests for Hypertrophy
It’s generally accepted that longer rests (three minutes or more) are best for developing maximal strength. For example, maximum strength training typically involves lifting heavy weights (85%+ of your one-repetition maximum) for low reps (1-5 per set).
Low-rep, heavy-weight training creates less cardiovascular fatigue and minimal lactic acid compared to bodybuilding training. This suggests that shorter rests should work.
However, this type of training has a massive impact on the central nervous system, or CNS for short. The CNS controls how much force you can generate and needs to fully recover before you can lift the same load again.
This recovery takes time, and three minutes is considered the minimum rest period between sets of heavy lifts. Some exercisers rest five or more minutes between sets of very heavy strength training, even if their set only takes a few seconds to complete.
Longer rests for hypertrophy training
A growing number of studies and meta-analyses (a statistical analysis that combines the results of multiple scientific studies) suggest that more extended rest periods may result in more significant muscle growth and aren’t just for building strength (1).
Longer interset rests (3 to 5 minutes) allow you to lift heavier weights, creating more mechanical tension, and do more reps with that heavier weight, which is linked to greater hypertrophy.
This is expressed as your training volume, which is:
Reps x Weight x Sets
A higher overall training volume is usually associated with an increased adaptive response.
In addition, lifting big weights also builds more strength, making future workouts more productive, as you’ll be able to train even heavier.
Also, resting for three vs. one minute may lower the overall workout RPE or rating of perceived exertion, which is how hard you feel you are working (2). A high RPE is usually associated with feelings of fatigue and reduced motivation. In contrast, if your RPE is lower, you will be inclined to train harder and longer, leading to a more stimulating workout.
On the downside, resting more will make your workouts longer. This may be a problem if you are already pressed for time and struggle to fit training into an already-packed schedule.
Summary:
Longer rest periods allow you to do more reps with heavier loads, increasing training volume. Combined with a lower workout RPE, this should make your workouts more effective for hypertrophy, albeit only marginally. However, it’ll also make your workouts longer, which may be a drawback for some people.
How to Use This Information
While 30 to 90-second rests between sets undeniably work, there may be advantages to taking longer breaks. Resting for three vs. one minute could allow you to lift more weight or do more reps. It may also make your workout feel more manageable.
But how do you put this information into practice? And do you really need to overhaul your entire workout and double all your rest periods?
Probably not.
In fact, longer rest periods are probably best used with big, heavy, tiring compound exercises like squats, deadlifts, bench presses, overhead presses, and weighted pull-ups. After all, these are the most demanding and the most productive exercises.
For these exercises, longer rests are entirely appropriate and will ensure you reap all of the hypertrophic benefits they can deliver
In contrast, most isolation exercises are much less demanding and far easier to recover from, e.g., leg extensions, biceps curls, and lateral raises. As such, shorter rests are more applicable for these exercises.
So, using this information, a leg workout could end up looking something like this:
#
Exercise
Sets
Reps
Recovery
1
Squats
4
6-8
3 minutes
2
Romanian deadlift
4
6-8
3 minutes
3
Leg press
3
8-12
2 minutes
4
Leg extension
3
12-15
90 seconds
5
Leg curl
3
12-15
90 seconds
6
Calf raise
3
15-20
60 seconds
The rest periods get shorter as the exercises get easier, i.e., use fewer muscles or move from a high cardiovascular demand to a lower cardiovascular demand. You can apply this rationale to all body parts where you go from heavy compound to light isolation exercises.
Rest Time for Hypertrophy – FAQs
Do you have a question about how long to rest between sets for muscle growth? No problem, because we’ve got the answers!
1. So, how long should I rest between sets for hypertrophy?
Conceivably, you can rest anywhere from 30 seconds to 3-5 minutes between sets and build muscle. Shorter rests mean more metabolic stress, while longer rests allow you to lift heavier weights and do more reps.
According to science, longer rest periods are somewhat better for hypertrophy than short rests, but both can work.
So, try short (30-60 seconds), moderate (90 seconds to two minutes), and long (three minutes plus) rests and see which you prefer. Alternatively, adjust your rest period to the difficulty of the exercise you are performing and take advantage of the benefits of short and long rest periods.
2. Long rests between sets make my workout too long; got any solutions?
The biggest drawback to resting three minutes or more between sets is how much longer your workout will become. For example, it could add 30 minutes or more to your training session, which may be impractical.
One way around this is a method I call “lazy supersets.” Unlike regular supersets, where you move quickly from one exercise to the next, with lazy supersets, you transition more slowly, so one exercise will not affect your performance of the next but still makes good use of your recovery time.
For example, let’s say you’re training back and chest. For lazy supersets, do one set of bench presses, rest 60-90 seconds, and then do a set of pull-ups. Rest another 60-90 seconds and return to the bench press.
Using this method, you can rest for 3-4 minutes between sets without being completely idle and wasting so much time.
3. How much better are long rests than short rests for hypertrophy?
Studies suggest that the benefit of long vs. short rests is “statistically significant,” which means they can put a numerical value to it. However, in actuality, the benefits are pretty small, so it could be argued that there are more important things you should focus on, like exercise selection, training proximity to failure, eating right, and getting enough sleep.
So, if you like resting 30-90 seconds between sets and you’re happy with your progress, there is no need to change your approach. If you ARE missing out on any gains, it won’t be by much.
However, if you are training hard and consistently, eating right, and sleeping and recovering like a boss, longer interset rests may optimize your workouts, making each one as productive as possible (3).
Resting three instead of one minute means more downtime between sets. Here are a few things you can do during your longer rests:
Stretching
Pre-hab/rehab of other muscle groups
Short bouts of cardio (e.g., 30 to 40 seconds of jump rope)
Warming up for your next exercise
A set of a non-competing exercise, e.g., calves or core
Update your training diary
However, you should still keep track of your rest periods so you don’t get distracted. This is NOT the time to start updating your social media status or watching YouTube videos. Instead, stay focused on training. After all, that’s what you are there to do.
5. What is the best way to control my rest periods?
There are several methods you can use to control how long you rest between sets. Firstly, you could simply time yourself. Start your stopwatch (on your phone or wristwatch) as soon as you finish your last rep, and then start your next set three minutes later.
Or, if you only have access to a regular watch or clock, you can use the add-on method. Look at the time when you finish your set and add on however many minutes you need to rest. Do your next set at that time. For example, if your set ends at 17.00 and 45 seconds, and you want to rest for three minutes, start your next set at 17.03 and 45 seconds.
Finally, you can use a variation of EMOM, which stands for every minute on the minute. For example, let’s say your set takes an average of 40 seconds to complete, and you want to rest for three minutes between efforts.
Simply set a repeating alarm to sound every three minutes and 40 seconds. Start each set when you hear the beep; your rest periods should be roughly three minutes every time.
6. I like taking short rests between sets; do I really need to switch to longer interset breaks?
Most training methods have been studied scientifically. While some have been found to be better than others, the differences are often so small that it doesn’t really matter which one you do. The best one often comes down to personal preference.
For example, the benefits of doing three vs. one set, training to failure vs. close to failure, doing five vs. 15 reps per set, and full-body vs. split routines.
All of these methods produce similar results. Instead, what matters most is training consistency, and that usually hinges on enjoyment. Even the best program in the world won’t produce work if you don’t like it and, therefore, don’t do it.
So, while long rests may be slightly better for building muscle, if you prefer shorter rest periods between sets, then that’s the type of training you should stick to.
That said, don’t dismiss a type of training without trying it. Something that looks wrong on paper could be the missing training link you’ve been searching for.
So, give longer rests a try, but feel free to go back to shorter rests if that’s what you prefer. Be your own experiment, and build your workouts around what you enjoy and what works best for you.
Rest Time for Hypertrophy – Closing Thoughts
Many lifters feel guilty when they rest more than a minute or so between sets. They think they’re being lazy if they aren’t sweating, panting, and hustling from one set to the next.
However, research suggests that slowing down and taking more time between could allow you to train harder and heavier than shorter rests. This may help build muscle faster and will also enhance strength gains.
On the downside, longer rests invariably mean longer workouts, which may be problematic for busy lifters who already struggle to find the time to train.
So, don’t get too hung up on your rest periods. 30 to 90 seconds has been the go-to rest time for generations of bodybuilders. And if it worked for them, it’ll work for you too. But if you want to squeeze every last drop of productivity from your workouts, rests of three minutes or more could help.
References:
Grgic J, Lazinica B, Mikulic P, Krieger JW, Schoenfeld BJ. The effects of short versus long inter-set rest intervals in resistance training on measures of muscle hypertrophy: A systematic review. Eur J Sport Sci. 2017 Sep;17(8):983-993. doi: 10.1080/17461391.2017.1340524. Epub 2017 Jun 22. PMID: 28641044. https://pubmed.ncbi.nlm.nih.gov/28641044/
Senna, Gilmar W.; Willardson, Jeffrey M.; Scudese, Estevão; Simão, Roberto; Queiroz, Cristiano; Avelar, Raoni; Martin Dantas, Estélio H.. Effect of Different Interset Rest Intervals on Performance of Single and Multijoint Exercises With Near-Maximal Loads. Journal of Strength and Conditioning Research 30(3):p 710-716, March 2016. | DOI: 10.1519/JSC.0000000000001142 https://journals.lww.com
Schoenfeld BJ, Pope ZK, Benik FM, Hester GM, Sellers J, Nooner JL, Schnaiter JA, Bond-Williams KE, Carter AS, Ross CL, Just BL, Henselmans M, Krieger JW. Longer Interset Rest Periods Enhance Muscle Strength and Hypertrophy in Resistance-Trained Men. J Strength Cond Res. 2016 Jul;30(7):1805-12. doi: 10.1519/JSC.0000000000001272. PMID: 26605807. https://pubmed.ncbi.nlm.nih.gov/26605807/
Master the Art of Cluster Sets: Boost Your Workouts and Unlock Your True Potential!
The set is the basis of everything you do in the gym. It comprises a certain number of reps, after which you rest briefly before moving on to your next set. But, just as there’s more than one way to skin a cat, there are several ways to structure your sets. If your goal is to lift as heavy as possible and turn up the intensity, then you need to know about cluster sets.
Cluster sets are an advanced training technique, but there is some confusion surrounding them. Some people confuse them with rest-pause training, while others mix them up with drop sets. In this article, we’ll clear up the confusion as we explain exactly what cluster sets are, why they’re a good technique for increasing strength and muscle, and how you can program them into your routine.
What are Cluster Sets?
Cluster sets are like a series of mini-sets within a larger set. You do a certain number of reps, then rest for a few seconds before doing the next cluster of reps. Typically, a cluster set will consist of three or four of these mini-sets. Cluster sets are considered an inter-set form of training.
Cluster set training is popular among powerlifters and other strength athletes. There is a large body of research investigating its benefits to enhance strength and power. That research tells us that different forms of cluster training are more beneficial for different outcomes.
There are three primary reasons that you would include cluster set training in your routine:
Strength
Power
Hypertrophy
When it comes to power training, the goal is to develop explosiveness. You should use a reduced weight that is 40 to 65% of your one-rep max. The focus will be on completing three to five clean, explosive reps. You then rest for around 20 seconds before completing the same number of reps again. You will usually complete three of these many sets while focusing on maintaining excellent form and producing as much explosive power as possible.
Power training cluster sets aim to train for power rather than exhausting your muscle fibers. This type of training has also been shown to improve the neurological pathways between your muscles and brain.
Cluster sets for strength training should see you working with between 80 and 90% of your one-rep max. So you might take a weight that you can perform four reps on and do two reps. You then rest for around 30 seconds and then do two more. If you did this for a total of four mini-sets of two reps each, you would end up doing eight reps within that cluster set. That represents double the volume and a substantially increased amount of intensity compared to if you were to just do a traditional set of four reps.
When it comes to hypertrophy, cluster sets are an excellent intensity-enhancing tool. That is because it allows you to train with heavier weights than you could usually do to complete the set. It also increases your time under tension. But unlike traditional sets, where it’s usually only the last two or three reps that could be described as high threshold time under tension, with cluster sets, every rep is a high threshold time under tension rep.
Finally, cluster sets allow you to achieve muscle overload. For example, you might choose a weight with which you could normally do eight reps and perform a cluster set of six, four, and three-rep mini sets. That’s a total of 13 reps — five more than you previously would have done.
Cluster Set Research
The vast majority of the research into cluster sets focuses on strength and power training. This research highlights five key benefits of cluster set training.
Rep Quality
According to some research, cluster set training improves the technical precision of each rep within the cluster set. That makes sense because, unlike with straight-set training, there is no fatigue accumulation to impair performance on the last few reps. Doing a technically demanding exercise like the clean and jerk or snatch using the standard high rep approach can lead to form breakdown. However, when you’re only doing a couple of reps and then having a short rest, you are far more likely to maintain correct form. [1]
Greater Power Output
Research suggests cluster sets can result in greater power output on each rep than straight-set training. Again that’s because there is less accumulated fatigue going into each new rep. Greater power output means more explosiveness in sports like basketball, football, and powerlifting. [2]
Reduced Inter-Set Fatigue
Cluster set training, when done in power training and strength training style, will reduce the cumulative fatigue effect from set to set and exercise to exercise. This is beneficial when you want to move to a new exercise fresh and relatively unaffected from the previous exercise. That is what you want when you are training for power and strength. With hypertrophy training, of course, your goal is the opposite — you want to increasingly fatigue the muscle as the workout progresses. [3]
Power Endurance
A 2008 study showed that cluster set training could help develop power endurance very effectively. This type of muscular endurance is needed by cyclists, soccer players, and people who play racquet sports. [4]
Increased Strength and Power
Cluster sets have been shown to produce superior results than traditional straight sets in terms of power and strength gains. In a 2013 study, 22 men were assigned to either a cluster set or a traditional set training protocol. Each group followed a 12-week training program. At the end of the study, the cluster set group showed significantly greater improvement in the bench press, vertical jump, and squat. However, the two groups had no significant difference in lean mass gains. [5]
What a Hypertrophy Cluster Set Looks Like
When using cluster set training as part of your muscle-building routine, you should select a weight that allows you to perform eight reps if you were lifting in traditional set form. On the first set, perform six reps, even though you know you could do a couple more.
Now rest for exactly 20 seconds. During that rest period, put the weight down and let go of the bar.
On the next mini-set, leave one rep in the tank. So, if you know that you can get five reps, stop after the fourth rep. Rest for another 20 seconds, then go to failure, which will probably be around three or four reps.
You can also experiment with higher starting reps. So you might begin with the weight you can do for 12 reps. In this case, you perform ten reps, rest for 20 seconds, then do your next mini-set, stopping with one rep in reserve. In the final mini-set, you go to failure.
What Exercises Should You Use for Cluster Set Training?
The exercises you choose for cluster set training will depend on your objective. If you’re using it for power or strength training, compound exercises like squats, deadlifts, and bench presses are ideal. With this type of training, you’re using 50 to 65% of your one-rep max. That means your risk of injury due to muscular failure and form breakdown is relatively low.
However, when using cluster sets for hypertrophy training, your muscular fatigue goes through the roof. That increases the likelihood that you will fail on the last rep or two of the cluster set. You want to avoid that from happening when using maximum weights on compound movements like the squat or bench press. For that reason, you should select exercises that are relatively safe if you fail on a rep.
So, rather than doing a cluster set on squats when training quads, do it on the leg press. If you fail on the last rep of a leg press, you won’t injure yourself the way you could on a squat. Similarly, when training the chest, you are better off using dumbbells or a chest press machine than a barbell. All those options will allow you to bail out of a rep without ending up with 90% of your one-rep max crushing down on your rib cage.
What an Explosive Power Cluster Set Looks Like
When using cluster sets for explosive power development, you should reduce the weight to about 50-65% of your one-rep max. Compared to hypertrophy or strength training, your reps will be relatively high.
For example, if you were doing squats, you might choose a weight with which you can do 10 quality reps. Perform five clean reps, concentrating on an explosive drive out of the hole on each rep. Now re-rack the weight and rest for exactly 30 seconds. Now do another five reps. Complete for a total of three mini sets within the cluster set.
Perform three or four cluster sets as part of your power training program one or two times per week.
What an Explosive Power Cluster Set for Strength Looks Like
Cluster sets for strength training typically involve the use of heavier weights than for hypertrophy or power. Choose a weight that is between 80-90% of your one-rep max and keep each mini-set to 1-2 reps. Here’s what that might look like for deadlifts:
Load the bar with 85% of your one-rep max.
Perform two reps.
Rest for 30 seconds.
Do your second mini-set of two reps.
After another 30-second rest, complete your third and final mini-set of two reps.
Complete a total of three cluster sets to complete your deadlift workout. Your rest between cluster sets should be 3-5 minutes.
How To Program Cluster Sets into Your Routine
When training for muscle gain, you don’t want to do cluster sets at the beginning of your workout. That’s because they are so fatiguing that your performance on the rest of the workout will probably be compromised. You should add a cluster set on the third exercise for a body part. For example, if you are training your chest, you might begin with three or four sets of dumbbell bench presses, then go to the incline barbell bench press for four sets before moving to the Hammer Strength machine chest press. This is the exercise you should do a cluster set on. Make it the final set for that exercise.
So, if you are doing the Hammer Strength machine chest press, you might do two sets of 10 reps. The third and final set is going to be a cluster set. If you were doing a traditional set with the same weight you did on the previous set, you might be able to get eight reps. It is because you’re fatigued and can’t get to the 10 reps of the previous set. For the cluster set, though, you will pump out six reps. You then rest for exactly 20 seconds and do another four reps. After another 20-second recovery, you keep going to failure. That might be three or four reps, taking your total for the cluster set to 13 or 14 reps.
At this point of your workout, your chest muscle fibers will be on fire. However, you may choose to do a final exercise. This will likely be an isolation move like dumbbell flyes or the pec dec. If you can handle it, do a final cluster set on the last set of that exercise to max out the intensity of your chest workout.
So, as you can see from the example, just one or two cluster sets per workout are all you need. This is an extremely intense form of training that places exceptionally heavy demands on your muscle fibers. If you overuse the technique, you will overtax the muscle and inhibit your ability to recover fully between workouts.
Who Should Use Cluster Sets?
Cluster set training is not designed for beginners. If you are still within your first two years of consistently working out, you should stick with traditional sets. They will give you all the muscle stimulation you need for growth. Then, once you’ve been training for a couple of years, have built your strength base, and are able to develop the mind-muscle connection that you need to know how many reps you’ve got left in the tank, then you can start experimenting with cluster sets.
The more advanced you become, the more beneficial cluster sets will be for you. The longer you’ve been training, the harder it will be to keep making strength and muscle gains. So an advanced technique like this will help you to push the envelope.
FAQs
Are cluster sets the same thing as rest-pause training?
Though cluster sets and rest-pause training are very similar, the key difference is that cluster sets are pre-programmed. At the outset, you know how many reps to do in all but the last mini-set (which is to failure). You also know how long your rest between each mini-set will be. When it comes to rest-pause training, though, you do reps to failure, then rest for just long enough to allow you to pump out another 2 or 3 reps.
How do cluster sets differ from drop sets?
Drop sets and cluster sets are both an extended set form of training. With drop sets, though, you start with a weight that will allow you to perform 6-8 reps. You then immediately decrease the weight slightly and pump out another few reps. You continue doing this for further drops until you reach muscle failure.
In contrast, cluster sets involve using the same weight for each of the mini sets that make up the cluster set.
Are cluster sets effective for building muscle?
Yes, cluster sets are an effective muscle-building strategy. It allows you to increase your training volume and time under tension while pushing a muscle to maximum fiber stimulation. This advanced technique can help you break through a muscle-building plateau and continue making progress.
How are cluster sets written on an exercise program?
Cluster sets can appear a bit like an algebra equation when you first see them. Here’s what they look like:
1(4 x 4) -20s w/ a 6RM
This means you will do one cluster set consisting of four mini-sets of four reps. Your rest between each mini-set will be 20 seconds. You will choose a weight that you can do six reps with.
Wrap Up
Cluster sets are a safe, effective way to maximally stimulate your muscle fibers for muscle gain. They are also great for increasing strength and power with load and rep modifications. This is a tool to be used in a careful, targeted manner. If you aim to build muscle, you don’t have to do more than one or two cluster sets in your workout to achieve results. Program them towards the end of the workout, during the third or fourth exercise, for maximum benefit.
References
Haff, Guy & Hobbs, Ryan & Haff, Erin & Sands, William & Pierce, Kyle & Stone, Michael. (2008). Cluster Training: A Novel Method for Introducing Training Program Variation. Strength & Conditioning Journal. 30. 67-76. 10.1519/SSC.0b013e31816383e1.
Lawton TW, Cronin JB, Lindsell RP. Effect of interrepetition rest intervals on weight training repetition power output. J Strength Cond Res. 2006 Feb;20(1):172-6. doi: 10.1519/R-13893.1. PMID: 16503678.
Lawton, Trent & Cronin, John & Lindsell, Rod. (2006). Effect of Interrepetition Rest Intervals on Weight Training Repetition Power Output. Journal of strength and conditioning research / National Strength & Conditioning Association. 20. 172-6. 10.1519/R-13893.1.
Haff, Guy & Burgess, SJ & Stone, Michael. (2008). Cluster training: theoretical and practical applications for the strength and conditioning professional. Prof. Strength and Cond.. 12. 12-17.
Oliver JM, Jagim AR, Sanchez AC, Mardock MA, Kelly KA, Meredith HJ, Smith GL, Greenwood M, Parker JL, Riechman SE, Fluckey JD, Crouse SF, Kreider RB. Greater gains in strength and power with intra set rest intervals in hypertrophic training. J Strength Cond Res. 2013 Nov;27(11):3116-31. doi: 10.1519/JSC.0b013e3182891672. PMID: 23736782.
Cite this page: Theunissen, S. (2023) ‘Master the Art of Cluster Sets: Boost Your Workouts and Unlock Your True Potential!’, Fitness Volt. Available at: https://fitnessvolt.com/cluster-sets/ (Accessed: 5 May 2023).

The Best Cable Hypertrophy Workout Program
Most hypertrophy training programs are built around compound freeweight exercises. There is a firmly held belief that movements like squats, bench presses, and deadlifts are superior for building muscle.
However, the truth is that your muscles cannot differentiate between freeweight, machine, and bodyweight exercises. Rather, they just know tension and work.
Providing you train hard enough, long enough, and often enough, your muscles will grow and get stronger. It doesn’t matter if you lift barbells, kettlebells, or your own body weight. As far as your muscles are concerned, work is work (1).
That’s not to say that the classic freeweight exercises are ineffective. After all, they provide a convenient if low-tech way to overload your muscles. However, they are not the only training tool available for building the body of your dreams.
In this article, we reveal how cable machines can help you reach your hypertrophy goals and provide you with a cable hypertrophy workout to try.
What’s So Great About Cable Machines?
Cable exercises can offer several advantages and benefits over other types of resistance training. These include:
More constant tension on your muscles
When you do freeweight training, the tension on your muscles tends to vary depending on leverage and the angle of your limbs.
For example, squats are hardest when your knees are deeply bent but get easier as your legs straighten. With biceps curls, the tension on your arms is greatest as your elbows approach 90 degrees. This means some parts of your reps are more effective than others.
With most cable machines, the workload is distributed more evenly, and your muscles are kept under more constant tension. This means every rep performed is potentially more effective.
Less joint stress
During many freeweight exercises, you have to support the load on extended joints, which pushes the ends of the bones together. This can cause discomfort and even severe injury. Cable exercises tend not to do this, so they’re often more joint-friendly. You can also modify your chosen exercise based on your unique biomechanics, adding to your workout comfort.
So, if years of heavy freeweight training have given you painful elbows, hips, knees, or shoulders, doing more cable exercises could be a good option.
Hit your muscles from a variety of angles more easily
When it comes to building an aesthetic physique, training angles matter. For example, you must develop your upper, mid, lower, inner, and outer pecs to sculpt the perfect chest. Using cables makes it easy to alter the angle of your limbs and target the muscle fibers you want to develop.
In contrast, doing the same thing with freeweights invariable means using different-angled benches and different grips. Cables make training muscles from a variety of angles much more straightforward.
A safer workout
Building muscle invariably involves training close to failure. For this reason, most freeweight exercises are best performed with a spotter or in a power rack. Even then, you could still find yourself pinned under a heavy weight, possibly getting injured in the process.
Cable exercises are much safer as you are never beneath a weight – heavy or otherwise. Instead, you can just drop the weight if you cannot perform more reps. The worse thing that can happen is you make a big clanging noise.
Perfect for muscle-building drop sets
Drop sets are a bodybuilding technique that allows you to train your muscles beyond failure. You rep out with your chosen weight, and then, on reaching failure, you lower the load by 10-20% and crank out a few more reps. Bodybuilders use drop sets to wring the last bit of energy from their muscles and make their workouts more intense.
Cable machines with selectorized weight stacks are perfect for drop sets. In contrast, drop sets are usually less convenient with barbells as reducing the weight takes too long.
Quicker transitions between exercises
If you like doing supersets, you’ll love training with cables. Supersets involve moving quickly from one exercise to another. Delaying your transition between movements makes supersets less effective. Switching pulleys or changing handles on a cable machine takes no more than a few seconds, so your superset workouts will go more smoothly.
Suitable for all levels of exerciser
Beginner, intermediate, and advanced exercisers can all benefit from training with cables. In contrast, some beginners find freeweight exercises tricky. There are also exercises that are best learned under the tutelage of a trainer or coach because they’re so technical, e.g., power cleans, front squats, and barbell bent-over rows. However, most cable exercises are quite straightforward, so even raw beginners can quickly get to grips with them.
A more functional workout
A functional exercise is a movement that replicates everyday or sporting activities. The best functional exercises are performed standing because that’s how your body usually works in nature.
Most cable exercises can be considered functional as they closely mirror the demands of everyday and athletic activities. However, the same cannot be said about some freeweight exercises.
For example, when was the last time you had to lie on your back and press a heavy weight off your chest? In contrast, standing cable chest presses are much more common, e.g., pushing open a heavy door or shoving an opponent in football.
Cable Hypertrophy Workout Overview
While you could just add a few cable exercises to your current workout, you can also immerse yourself completely in cable training. That way, you can fully experience and appreciate the power of cable exercises.
Here is cable machine hypertrophy training plan to try.
Upper body cable workout
#
Exercise
Sets
Reps
Recovery
1
Cable crossover
3-4
12-20
60-90 seconds
2
Single-arm cable chest press
3-4
12-20
60-90 seconds
3
Straight arm cable pulldown
3-4
12-20
60-90 seconds
4
Single-arm cable row
3-4
12-20
60-90 seconds
5
Cable lateral raise
3-4
12-20
60-90 seconds
6
Single-arm biceps cable curl
3-4
12-20
60-90 seconds
7
Cable triceps pushdown
3-4
12-20
60-90 seconds
Lower body + core cable workout
#
Exercise
Sets
Reps
Recovery
1
Cable goblet squat
3-4
12-20
60-90 seconds
2
Cable stiff-legged deadlift
3-4
12-20
60-90 seconds
3
Cable single-leg extension
3-4
12-20
60-90 seconds
4
Cable single-leg curl
3-4
12-20
60-90 seconds
5
Cable lunge
3-4
12-20
60-90 seconds
6
Kneeling cable crunch
3-4
12-20
60-90 seconds
7
Cable Paloff press
3-4
12-20
60-90 seconds
This program utilizes an upper body/lower body (and core) split so you can train your major muscle groups one, two, or three-times a week according to your preferences and the time you have available.
Your training frequency options are:
Monday
Tuesday
Wednesday
Thursday
Friday
Saturday
Sunday
Option 1
Upper body
Rest
Rest
Lower body
Rest
Rest
Rest
Option 2
Upper body
Lower body
Rest
Upper body
Lower body
Rest
Rest
Option 3
Upper body
Lower body
Upper
body
Lower body
Upper body
Lower body
Rest
Choose the training frequency that best matches your experience and energy levels.
Of course, before you start either of these workouts, you should take a few moments to prepare your muscles and joints for what you are about to ask them to do. Begin with 5-10 minutes of easy cardio followed by dynamic mobility and flexibility exercises for the body parts you’re going to train.
Read more about warming up for strength training here.
Cable Hypertrophy Workout Exercise Instructions
There are two ways to perform an exercise – the right way and the wrong way. The right way is safe, productive, and time efficient. The wrong way increases your risk of injury and is less effective.
Use these instructions to ensure you perform all the exercises in your workouts correctly.
Upper Body Workout
1. Cable crossover
Cable crossovers are an isolation exercise for your chest. Doing this exercise before the following chest pushing exercise will pre-exhaust your pecs and make that second exercise more challenging.
Muscles worked:
Pectoralis major, anterior deltoids.
Steps:
Set your cables to shoulder height and attach a D-shaped handle to each pulley.
Grab the handles and stand between the cables with your arms extended to the sides. Use a split stance for balance. Brace your core.
Keeping your elbows slightly bent but rigid, sweep your arms forward and down so they meet in front of your hips.
Open your arms, get a stretch in your chest, and repeat.
Tips:
Move smoothly to keep the tension on the target muscles.
Pause at the midpoint of each rep to maximize muscle engagement.
You can also do this exercise horizontally or go from low to high to hit different parts of your chest.
2. Single-arm cable chest press
Most chest exercises work both sides of your pecs at the same time. Unfortunately, this can disguise left-to-right strength imbalances and lead to uneven chest development. Using one arm at a time means you can fix these imbalances and prevent them from happening in the first place.
Muscles worked:
Pectoralis major, triceps, anterior deltoids.
Steps:
Attach a single D-shaped handle to a cable machine set to chest height.
Hold the handle in one hand, turn your back on the weight stack, and then adopt a split stance for balance. Brace your core.
Drive your arm forward at shoulder height.
Return to the starting position and repeat.
Do the same number of reps with both arms.
Tips:
Use a neutral or palms-down grip as preferred.
Push your arm upward to hit your upper chest more, or push downward to work your lower chest if you wish.
You can train both sides of your chest simultaneously if you have a narrow dual cable machine.
3. Straight arm cable pulldown
Like doing cable crossovers before single-arm chest presses, doing straight-arm pulldowns before single-arm rows will pre-fatigue your lats to make the subsequent exercise more effective. In addition, this sequence of events will help strengthen your mind-muscle connection for a more effective workout.
Muscles worked:
Latissimus dorsi, triceps, posterior deltoid.
Steps:
Attach a straight bar to a head-high cable machine.
Hold the handle with an overhand, shoulder-width grip. Brace your abs.
Keeping your arms straight, use your lats to push the bar down to your thighs.
Raise your arms and repeat.
Tips:
You can do this exercise on a cable crossover or a lat pulldown machine.
Pause with the bar lightly touching your legs to maximize muscle engagement.
Think about leading with your elbows and pulling them down and back to contract your lats as fully as possible.
4. Single-arm cable row
As with single-arm chest presses, single-arm cable rows allow you to train one side of your body at a time. Not only is this an excellent way to ensure both lats are developed equally, but it also provides your core and lower back with a welcome additional workout.
Muscles worked:
Latissimus dorsi, biceps, posterior deltoids.
Steps:
Attach a single D-shaped handle to a cable machine set to chest height.
Hold the handle and take 1-2 steps back to tension the cable. Brace your core and pull your shoulders down and back.
Bend your arm and pull the handle into your lower ribs.
Extend your arm and repeat.
Do the same number of reps on both sides.
Tips:
Lead with your elbow and drive it back to fully engage your lats and upper back muscles.
Experiment with an underhand and neutral grip to see which you prefer.
Use a staggered stance for extra balance if required.
5. Cable lateral raise
Cable lateral raises target your medial or side deltoid. This is the deltoid head that gives your shoulders their width, contributing to your V-taper. Using cables instead of dumbbells makes this exercise much more effective because it keeps your muscles under tension for longer.
Muscles worked:
Medial deltoids.
Steps:
Attach a D-shaped handle to a low pulley machine. Stand sideways onto the weight stack and hold the handle in your furthest hand so the cable runs in front of your hips. Brace your core.
Keeping your elbows slightly bent but rigid, raise your arm to the side until your hand is level with your shoulder.
Lower your arm and repeat.
Do the same number of reps on both sides.
Tips:
Try doing this exercise with the cable behind you to change the feel of the movement.
Lead with your elbows and not your hands to get more from this exercise.
You can also do this exercise with both arms at the same time if you wish:
6. Single-arm biceps cable curl
When it comes to building bigger biceps, your range of motion matters. Single-arm biceps cable curls start with your upper arm extended behind you, putting your biceps into a stretched position. This move is the cable equivalent of incline dumbbell curls, which is another renowned arm builder. This exercise is also known as a Bayesian curl.
Muscles worked:
Biceps, forearms.
Steps:
Attach a D-shaped handle to a low cable pulley. Grab the handle with one hand and turn your back to the weight stack. Take 1-2 steps forward and adopt a split stance for balance. Your arm should be extended slightly behind you.
Keeping your hips and shoulders square, bend your arm and curl your hand up to your shoulder.
Extend your arm, getting a stretch in your working biceps, and repeat.
Tips:
You can also do this exercise with a resistance band.
Use a neutral hammer grip to emphasize your brachioradialis and brachialis muscles.
Adjust the height of the pulley to hit your biceps from different angles.
7. Cable triceps pushdown
Cable triceps pushdowns are a classic cable arm exercise. While they’re simple and ideal for beginners, more experienced lifters will benefit from this exercise which is why it features in so many triceps workouts. As the saying goes, if it ain’t broke, don’t fix it!
Muscles worked:
Triceps.
Steps:
Attach a straight bar to a high cable pulley. Grip the bar with a shoulder-width overhand grip.
Pull your upper arms into your sides, brace your core, and set your shoulders down and back.
Extend your arms and press the bar down to your thighs. Pause for 1-2 seconds.
Bend your arms as far as you can without letting your upper arms move away from your sides.
Continue for the specified number of reps.
Tips:
You can also perform this exercise with a V-shaped bar or a rope handle if preferred.
Try using an underhand grip for variety.
Keep your torso uptight to avoid turning this into a pressing exercise. Instead, isolate your triceps, and don’t use your abs and shoulders to push the weight down.
Lower Body Workout
1. Cable goblet squat
Most people do goblet squats with a dumbbell or kettlebell. However, they work just as effectively with a cable machine. As an added advantage, using cables means you can adjust the weight more quickly, making them good for drop sets.
Muscles worked:
Quadriceps, hamstrings, gluteus maximus, core.
Steps:
Attach a handle to a low pulley. Hold the handle in front of your chest, just below your chin. Set your shoulders and brace your core.
Take a small step backward and stand with your feet about shoulder-width apart, toes turned slightly outward.
Bend your legs and squat down until your thighs are roughly parallel to the floor. Do not round your lower back.
Stand back up and repeat.
Tips:
Work your glutes harder by putting a booty band around your knees.
Hit your quads harder by placing your heels on weight plates.
Experiment with different bars and handles to see which feels the most comfortable.
2. Cable stiff-legged deadlift
The hamstrings are a biaxial muscle, meaning they cross and affect two joints. As such, you need to do knee flexion AND hip extension exercises to fully develop your hammies. Cable stiff-legged deadlifts are a very effective hip extension exercise working not just your hamstrings but your entire posterior chain.
Muscles worked:
Gluteus maximus, hamstrings, core.
Steps:
Attach a bar or rope handle to a low pulley.
Take hold of the handle, stand up, and take 1-2 steps back to tension the cable.
Stand with your feet hip-width apart, knees slightly bent. Brace your core and pull your shoulders down and back.
Push your butt back and lean forward from your hips, reaching out with your arms. Do not round your lower back.
Push your hips forward and stand back up, squeezing your butt as you do so.
Continue for the required number of repetitions.
Tips:
The further back you stand from the weight stack, the more effective this exercise becomes.
Experiment with your stance width to see which works best and feels most comfortable.
You can also do this exercise with just one leg – single-leg cable stiff-legged deadlifts.
3. Cable single-leg extension
While there is nothing inherently wrong with seated leg extensions, they put one of your quads (rectus femoris) in a relaxed position which means they can’t contribute much to the movement. This standing variation hits the rectus femoris much harder, making it a more complete quad-builder.
Muscles worked:
Quadriceps, hip flexors, core.
Steps:
Put on an ankle strap and attach it to a low cable machine. Turn your back to the weight stack. Take 1-2 steps forward to tension the cable.
Bend your knee and move your hip backward.
Next, drive your leg forward and extend your knee against the load.
Return to the starting position and repeat.
Change legs and do the same number of reps on the opposite side.
Tips:
Brace your core to stabilize your lumbar spine and hips.
Hold onto the back of an upright exercise bench for balance.
For home workouts, you can do this exercise with a resistance band.
4. Cable single-leg curl
While most gyms have seated and prone leg extension machines, standing leg curls are not as common. That’s a shame because the standing leg curl is a superb hamstring exercise. Don’t worry, though; you can replicate this classic old-school hamstring exercise with a cable machine and your trusty ankle strap.
Muscles worked:
Hamstrings, gluteus maximus, core.
Steps:
Put a cuff around your ankle and attach it to a low pulley machine. Stand facing the weight stack and use your arms for balance. Shift your weight onto your supporting leg and brace your core.
Extend your leg backward and simultaneously bend your knee, curling your foot up toward your butt.
Lower your foot back down and repeat.
Tips:
You can also do this exercise with a resistance band.
Make sure you do the same number of reps on both legs.
Try to keep your calf relaxed to ensure your hamstrings do most of the work during this exercise. The calves also help flex the knee.
5. Cable lunge
Bodyweight and freeweight lunges are great exercises, but you can add an extra dimension to your leg workouts by doing them with a cable machine. Cable lunges force you to work harder to decelerate and accelerate the load, challenging your lower body muscles in a whole new way.
Muscles worked:
Quadriceps, hamstrings, gluteus maximus, core.
Steps:
Attach a D-shaped handle or rope handle to a low pulley.
Hold the handle with both hands and take 1-2 steps back to tension the cable. Stand tall, brace your abs, and pull your shoulders down and back.
Take a big step forward, bend your legs, and lower your back knee down to within an inch of the floor.
Push off your front leg and return to the starting position.
Repeat for the desired number of reps.
Tips:
Do all your reps on one leg and then switch or use an alternating leg action as preferred.
You can also do backward cable lunges.
Try holding the handle with just one hand to increase the stability demands of the exercise and work your core a little more.
6. Kneeling cable crunch
While we can’t guarantee that kneeling cable crunches will give you a six-pack, we can say that this is one of the best exercises for overloading your abs and making them thicker. Get your body fat levels down, and this exercise will give you a great-looking midsection.
Muscles worked:
Rectus abdominus, obliques, hip flexors.
Steps:
Attach a rope handle to a high cable machine.
Kneel down and pull the handles down to the front of your shoulders.
Flex your spine and curl your shoulders down toward your hips.
Kneel upright and repeat.
Tips:
Exhale as you bend forward to maximize abs engagement.
Kneel on a folded mat or foam pad for comfort.
Try not to flex your hips too much. Most of the movement should come from your spine.
7. Cable Paloff press
Invented by physical therapist John Paloff, the Paloff press is an anti-rotation exercise. As such, you’ll use your abs to stop your body from twisting. This is how your core works during many fitness and general activities, from running to pushing a heavy door open. The Paloff press is a very functional core exercise that will also give you a rock-hard waist.
Muscles worked:
Obliques, rectus abdominus, transverse abdominis.
Steps:
Set a cable machine to about chest height and attach a D-shaped handle to it. Hold the handle in both hands and stand sideways on. Brace your core and pull your hand into your chest.
Without twisting either your hips or shoulders, extend your arms out in front of you, keeping them parallel to the floor.
Pull your hands back into your chest and repeat.
Change sides and repeat.
Tips:
Adopt an athletic stance with your knees slightly bent and weight on the balls of your feet for better balance.
You can also do this exercise in a half or full-kneeling position to reduce the tendency to use your legs.
Do this exercise with a resistance band if preferred.
Cable Hypertrophy FAQs
Got a question about our cable hypertrophy workout program? No worries because we’ve got the answers!
1. Is this a cutting or bulking program?
You can use this workout plan for cutting or bulking. That’s because it’s your diet that determines whether you gain weight or lose fat. Create a significant calorie surplus to bulk or a calorie deficit to burn fat and cut weight.
Read more about cutting vs. bulking here.
2. Can I change some of the exercises?
You certainly can! However, ensure you are hitting the same muscle groups with your new exercise. For example, you can do lat pulldowns instead of single-arm rows, as both work your upper back. However, doing cable chest presses instead of cable crunches is not a suitable exchange.
3. What weights should I use?
Unfortunately, this is the one question we cannot answer because we don’t know how strong or experienced you are. So, pick weights that take you close to failure in the specified repetition range of 12-20. If you cannot do 12 reps, your chosen weight is too heavy. But if you can do more than 20, it’s too light.
Determining the correct weights will take a little trial and error, but you should have it figured out within a couple of workouts.
However, you also need to challenge your muscles with gradually harder workouts. To do this, you can either use the same weight but do more reps or keep your reps the same and lift more weight.
This is called progressive overload and is the key to building bigger, stronger muscles.
4. What should I do if one of the exercises causes pain?
Effective bodybuilding training is normally uncomfortable, but there is a big difference between exercise-induced discomfort and pain. Pain is your body’s way of telling you that something is wrong.
If an exercise causes pain, you should stop what you are doing, check your form, and reduce the load. This may be all you need to do to eliminate the hurt.
But, if that pain persists, you may have an injury, and you should stop training and seek medical advice.
In most cases, muscle injuries are treated using PRICE, the acronym for protection, rest, ice, compression, and elevation. Most mild soft tissue injuries heal in a week or so. However, joint injuries can take much longer.
Depending on the nature of your injury, you may be able to train around it. However, it’s usually a bad idea to train through pain, as that just makes matters worse and delays your recovery.
5. Can I use training systems to make this workout harder?
Training systems are recognized methods you can use to push your muscles beyond failure. Popular training systems for bodybuilding include drop sets, partial reps, supersets, and 21s.
If you are familiar with these methods, you are free to use them in conjunction with this workout. However, there is no need to use them all the time, as straight/standard sets, when performed correctly, are usually sufficient to trigger hypertrophy.
More Cable Exercises:
Closing Thoughts
A lot of exercisers reserve the cable machine for isolation and finishing exercises, preferring to use freeweights for the majority of their workouts. While such an approach can work, there is no need to view cable training as supplementary to your main workout.
In fact, you can do all your training on a cable machine if you wish.
Take our cable machine workout for a spin to experience the power of cable machine training for yourself.
References:
Signorile JF, Rendos NK, Heredia Vargas HH, Alipio TC, Regis RC, Eltoukhy MM, Nargund RS, Romero MA. Differences in Muscle Activation and Kinematics Between Cable-Based and Selectorized Weight Training. J Strength Cond Res. 2017 Feb;31(2):313-322. doi: 10.1519/JSC.0000000000001493. PMID: 28129277. https://pubmed.ncbi.nlm.nih.gov/28129277/

The Best CrossFit Workouts for Building Muscle to Break Through Plateaus
You probably didn’t come to CrossFit for the muscles. Instead, you probably showed up because you were looking to improve your cardiovascular health, get stronger, or just find a fitness community. But, if we’re honest, the muscles probably didn’t hurt.
If you’ve ever even glanced in the direction of the CrossFit Games, you’ll have noticed that CrossFitters tend to be absurdly ripped. For the uninitiated, this can be intimidating, to say the least. But you don’t have to take your shirt off during your WODs (workouts of the day) to be a real CrossFitter. You’ve just got to keep showing up — the muscles will likely show up, too.
Credit: Denis Kornilov / Shutterstock
But if you did come to CrossFit for all that sweet muscle mass, don’t worry. We’ve got the best CrossFit workouts for building muscle just for you. Because even though your average WOD will help you get jacked, these CrossFit-style workouts are designed to focus on hypertrophy — muscle growth — and take your boulder shoulders and teardrop quads to the next level.
Editor’s Note: The content on BarBend is meant to be informative in nature, but it should not be taken as medical advice. When starting a new training regimen and/or diet, it is always a good idea to consult with a trusted medical professional. We are not a medical resource. The opinions and articles on this site are not intended for use as diagnosis, prevention, and/or treatment of health problems. They are not substitutes for consulting a qualified medical professional.
Best CrossFit Workouts for Building Muscle
Best CrossFit Workout for Building Upper Body Muscles
CrossFitters use their upper bodies like nobody’s business. Even if a movement seems to be about their lower bodies, it’ll often be performed in a way that taxes the upper body. For example, lunges seem like they’re all about your lower body until you’re performing them front-racked or overhead.
But for this workout, you’re going to focus entirely on your upper body. The goal here is to really shore up the smaller muscles of your upper body that risk getting overshadowed by your back and chest. Your triceps and biceps are going to get a lot of play, so get ready to feel a pump.
The Workout
CrossFit workouts are about pushing your limits. Even when workouts look simple on paper, they’re designed to present extreme challenges in practice. Here, the rep scheme combined with working against the clock will get very taxing, very quickly.
12-minute AMRAP (as many rounds as possible)
Especially since you’ll be performing strict chin-ups instead of kipping pull-ups, you’ll have to be very strategic about how you’re splitting up your reps. Consider modifying the movements later in the workout even if you don’t have to right away.
Movement Modifications
This workout is deceptively simple, but the fatigue will build extremely quickly. Since there are only two moves — and they’re both upper-body focused — your exhaustion will have nowhere to hide.
You might not have to modify this workout right out of the gate. But to keep working up to the 12-minute mark, you might need to use variations of these exercises to get you to the finish line with sharp form.
Some modifications for the chin-ups follow:
Some alternatives for the bar dip follow:
Band-Assisted Dip
Bench Dip
Close-Grip Push-Up
Best CrossFit Workout for Building Lower Body Muscles
CrossFit will take a toll on your lower body, plain and simple. Anyone who’s ever suffered through a WOD can probably tell you that it’s like getting hit with multiple leg days at once when you try to hobble out of bed the next day.
But that’s no reason not to give your legs a little extra love. The more attention you give your legs — as long as you’re recovering well — the better equipped you’ll be to face down the rigors of your next WOD.
The Workout
This workout will go after all areas of your legs, including one place where it’s notoriously difficult to build muscle — your calves. Make sure that you’re giving your heels and ankles ample attention in your warm-up and recovery time.
Five rounds, for time:
For each lift, choose a weight that feels very manageable during the first round but will be challenging by round three. It should be quite difficult to get through unbroken by round five.
Movement Modifications
Unless otherwise specified, calling for back squats and front squats indicates using a barbell. If you need to modify, you can instead use dumbbells.
To get the stimulus of a back squat, stand with each foot on a bumper plate or a step riser, with a gap in between just wide enough to accommodate a dumbbell. Squat while holding a dumbbell between your hands with your arms long. Keep your torso tall.
This position will allow you to sink deep into the squat while using a significantly heavier weight than you might be able to goblet squat.
Speaking of goblet squats, this is an excellent option for modifying your barbell front squat. If you need unweighted versions, you can use a PVC pipe or even a broomstick to simulate the positions of a barbell in both types of squats. You can also, of course, simply perform air squats.
Instead of doing a barbell Romanian deadlift, you can also swap in dumbbells. You can also perform hip hinges with the same form as a Romanian deadlift, but with empty hands. Just focus on maintaining tension in your glutes and hamstrings. Move slowly and with control.
If you can’t pull off a single double-under, let alone 20, try for single-unders — regular jump rope skips. Without a jump rope, you can simply simulate jumping rope with small hops. If your feet, knees, or hips can’t abide jumping, you can opt instead for eccentric calf raises. Be sure to stretch your calves — maybe even treat yourself to a calf and heel massage — afterward.
Best CrossFit Workout for Building Core Muscles
You do not need a six-pack to be an incredible CrossFitter. You can, indeed, be incredibly strong and fit without your muscles showing through a low body fat percentage (which is how one acquires a visible six-pack).
But if you’re looking to build out your core muscles, you’ve come to the right place. This workout will have you taking advantage of some classic CrossFit moves to help you build an incredible amount of core strength and muscle mass.
The Workout
Here, you’ll be performing some of the most well-known CrossFit exercises in one of the most well-known CrossFit formats: the descending rep ladder of 21, 15, and nine reps. You’ll perform 21 reps of each exercise first. Then, do 15 of each exercise. Finish off your workout with nine of each movement.
21-15-9 reps, for time:
Movement Modifications
If need be, you can sub in a goblet squat or even an air squat to make the front squats more accessible. Try to use a weighted variation if you can, as the front-loading of the weight is what makes the front squat move particularly good for core strength.
Without access to a glute-ham developer (GHD), you can perform sit-ups on a decline bench. You can also simply perform regular sit-ups.
If you can’t do a full toes-to-bar, consider hanging leg raises or even hanging knee raises. No access to a pull-up bar? Try lying leg raises instead.
A modified workout might go like this:
21-15-9 reps, for time:
Goblet Squat
Sit-Up
Hanging Knee Raise
Best Beginner CrossFit Workout for Building Muscle
CrossFit beginners truly have their work cut out for them. Not only are they fighting an uphill battle of learning new skills, but they’re also developing strength and high-intensity endurance all at the same time.
To help ease the transition into CrossFit, beginners might find a muscle-building workout more their speed. It’s less traditional CrossFit and more introductory style to help athletes find their footing. You’ll be using a classic, sport-specific rep scheme — a descending ladder — but you’ll be doing it with an eye toward hypertrophy.
The Workout
These movements look simple on their own, but they get very intense, very quickly. If you’re less used to the descending ladder nature of many CrossFit workouts, think of this workout as one big drop set. But instead of dropping the weight, you’re dropping the number of reps you perform with each round.
Three to five rounds, for time:
Movement Modifications
While this workout is already designed for beginners, that doesn’t mean everyone’s beginner level looks the same.
For example, ring rows might be too unstable for you. In that case, try inverted rows in a Smith machine or with a barbell anchored in a power rack. You can also perform light barbell rows — the sheer volume of reps will add up.
Bulgarian split squats may not be accessible to you in terms of balance or your current level of hip mobility. In that case, try forward or reverse lunges. If you need to, hold onto the handles of a TRX suspension trainer or equivalent to help give you a counterbalance. Your upper body’s engagement can also give your legs a little bit more strength if need be.
The box step-ups can be replaced with a regular step instead of a full plyo box. Or, you can substitute high knee marches in place.
If you can’t lift overhead, consider swapping in bench presses. In situations where an empty barbell is too heavy for you, you can also simply use lighter dumbbells.
Best No-Equipment CrossFit Workout for Building Muscle
Just because a workout is bodyweight-only doesn’t make it equipment-free — especially in CrossFit. Bodyweight moves include everything from ring muscle-ups to box jumps, all of which require equipment.
But with this equipment-free CrossFit workout, you’ll be able to build muscle (and get your heart rate going) anytime, anywhere. You’ll need enough space on the ground for you to essentially be able to lie down. Otherwise, space won’t be an issue.
The Workout
Don’t mistake the lack of equipment for easiness. This workout is tricky — especially if you’re looking to perform each move to your maximum potential. With your overhead squats, keep your upper body just as engaged as you would if you were holding a loaded barbell.
Be just as disciplined with your form as you would be hefting a lot of weight. This diligence will pay off in spades when you start to notice all the muscle you’ve built.
21-15-9 reps, for time:
Movement Modifications
If any of these movements aren’t for you, that’s alright — they’re relatively simple to swap out.
For athletes who struggle with burpees, there are a few options. You can step back into a plank position instead of jumping back. If you’re pregnant or otherwise can’t get your belly on the ground, you can hike your hips up to help lower your chest. You don’t need to perform a jump at the top, and you can similarly eliminate the push-up from the bottom.
With the bodyweight overhead squat, simply keep your hands down or out in front of you instead of overhead if the reach is too intense for you. You might also sit down on a stable chair instead of going to full depth if need be.
Perform a regular push-up instead of a pike push-up if you have to. You can also do a wall push-up, an incline push-up, or a push-up from your knees.
Finally, eliminate the jumping part of the jump squat and simply squat, down to a steady chair if you need to. To maintain a similar explosive stimulus from jumping, sink into your squat slowly. When you’ve reached your full range of motion, explode upward quickly. No need for your feet to leave the floor for you to start generating power.
Benefits of Building Muscle for CrossFitters
But should CrossFitters focus specifically on building muscle? If you’re able to dedicate the recovery you’ll need to accommodate any extra training sessions, then the short answer is yes — you probably should.
Prevent or Break Through Plateaus
Make no mistake — even smaller muscle groups get a tremendous amount of work from the functional compound movements found in any CrossFit WOD. But by building those smaller muscles, you’ll likely be able to improve your lifts a tremendous amount. How?
Take kipping pull-ups, for example. Your entire body and core will be taken to town in an incredibly intense way. Your grip will be on fire by the end of your sets. And, yes, that will give a tremendous amount of strength and development — even size — to your forearms.
Credit: UfaBizPhoto / Shutterstock
But when the workload gets to be too much, your smaller muscles are likely to burn out before your bigger muscles. That creates a limiting factor in how many reps you can handle unbroken before taking a break to shake it off.
Pausing between reps costs valuable time and can hamper your gains. Relatively underdeveloped smaller muscle groups may even be the culprit behind your latest plateau.
Building up your smaller muscles (like your forearms, biceps, and triceps), you’ll be shoring up the bottom line of your bigger lifts. In doing so, you’ll be raising the bar on all of your lifts and WODs, helping you improve that much more before facing down your next plateau.
Combat Muscle Imbalances
Since so many CrossFit movements are bilateral — barbell work and deficit handstand push-ups, for example — it’s easy for your dominant side to take over. If you’re a lefty, the left side of your body might bear more of the brunt of weight distribution during bilateral work. This can create both strength and muscle imbalances.
Perfect symmetry might not matter all that much to you if you’re not a physique athlete. But it’ll likely matter to you in terms of injury prevention. Keeping your muscles as balanced as you can be able to help make your body more resilient against injury. And the longer you can go without injury, the more likely you are to tackle each WOD to the best of your ability.
Help Transition Into CrossFit
Coming over to the dark side from a different strength sport? Welcome in. You’re likely used to performing a set number of sets and reps to induce a certain adaptation — say, building more strength or stimulating hypertrophy.
In CrossFit, you’ll be counting reps alright. But you’ll be doing it staring down a ticking clock and burning lungs and muscles all over your body. Training for hypertrophy — giving a CrossFit flair to the types of workouts you’re already familiar with — can help CrossFit beginners feel confident about their new sport.
CrossFit Warm-Up for Hypertrophy
No matter what your specific session goal is, you always want to warm up before tackling your WOD. Warm-ups not only prepare your body for the rigors of your upcoming workout — but they also optimize your performance and help make you more resilient against potential injuries.
When you’re training for hypertrophy, you’ll want to pay close attention to smaller, often overlooked muscle groups. You’ll focus closely on these muscle groups — think, your rear delts, triceps, and biceps — during your hypertrophy training. So, you’ll also want to single them out during your warm-up.
Cater each warm-up to the specific movements you’ll be doing that day. For example, spend extra time on hip mobility if you’re going to be snatching, front squatting, or lunging. Take extra time with your shoulders and thoracic mobility if you’re going to be doing any kipping or overhead work.
But generally speaking, CrossFit workouts are going to involve your whole body in some way, shape, or form. Because of that, a good CrossFit warm-up should cover all your bases.
Air Bike: 3-5 minutes, low intensity
Band Pull-Apart: 15-20
Active Frog Stretch: 60 seconds
World’s Greatest Stretch: 6 per side
Lateral Lunge: 8 per side
Half-Kneeling T-Spine Rotation: 8 per side
Bear Crawl: 30 seconds forward, 30 seconds backward
Crab Reach: 8 per side
Session-Specific Strength Exercise: 2-5 ramp-up sets, 3-6 reps per set*
*For each main lift of the day, get a feel for the movement with your bodyweight only or an unloaded barbell. Gradually increase the intensity of the movement in separate sets until you approach the weight or intensity of the exercise as prescribed in your workout.
Don’t perform so many reps that you’ll tire yourself out, but aim to get your blood pumping and your muscles firing.
How to Program CrossFit Workouts for Building Muscle
In CrossFit, you’ll be challenging pretty much all your muscles in every session. It’s a big commitment to toss in an additional focus on intentionally building certain muscles. Here’s how to program intelligently to make sure that you’re maximizing your gains and minimizing your risks.
Focus on Recovery
There’s no getting around it — CrossFit is a whole lot of work. Adding more sessions to your regimen to build muscle can run the risk of interfering with your body’s ability to adequately recover from one session to the next.
Help your muscles recover by ensuring that you’re getting enough sleep and food to fuel your performance. Make sure you’re warming up and cooling down before and after each workout to help you stay more resilient against injury. Consider self-myofascial massage with foam rollers and filling out your stretching routine with resistance bands.
The more you focus on recovery, the more you’ll be giving your muscles the space and fuel they need to grow.
Program on Separate Days
This option may be especially appealing to strength athletes who are newer to CrossFit. If you’re currently doing one or two CrossFit WODs per week — on your weekends, perhaps — consider sprinkling these muscle-focused workouts into the rest of your week. That way, you won’t be taking away from your recovery.
You will also be giving your body a more familiar way to sink into CrossFit training. The sets and rep schemes typical of hypertrophy training in other sports like powerlifting, weightlifting, and bodybuilding can help you ease into the conditioning and mental rigors of CrossFit. You’ll be building muscle and getting better at CrossFit as you go.
Add Hypertrophy Finishers
For those who are more experienced with CrossFit, you might have trouble adding extra hypertrophy-based sessions to your program. You may already be doing two-a-day workouts or simply doing an intense WOD every day.
In those situations, it might eat into your recovery — or simply not work logistically — to add another standalone workout into your program. To solve this problem wisely and with an eye on your recovery, simply add a short hypertrophy-focused session to the end of your WOD.
Complete your WOD, grab some water, wipe off the sweat, and dive back in for a slightly less intense bout of muscle-building. Stack your hypertrophy sessions strategically. If you’re looking to drive muscle growth in your legs, choose that session after a legs-focused WOD. That way, your legs will get all the action in one day and you can consolidate your recovery period.
Program Around Your Weak Points
Be smart about which muscle-building workouts you want to focus on. Focus on what aspects of your performance are lagging during your WODs.
Having trouble with your shoulder-to-overheads? Focus on upper body hypertrophy, since your troubles may lie with weaker triceps for lockout strength. Having trouble with your deadlift lockout? Work on building those glutes and hamstrings with a lower-body hypertrophy workout instead.
Build Those Muscles
There’s no way around it — CrossFit pros are ripped. If you’re looking for your piece of the hypertrophy pie, you might not want to depend on WODs alone. While you can (and probably will) gain a lot of high-quality muscle mass with just your regular training, you can pack more muscle onto your frame with hypertrophy-specific CrossFit workouts.
Integrate these CrossFit workouts for building muscle into your training program after your typical sessions or on their days entirely. Make sure your recovery is dialed in, then proceed to build up your weakest links with hypertrophy sessions. Your WODs will thank you — and so will the size of your muscles.
If you’re ready to find out more about everything CrossFit training, here are some articles to sink your teeth into next.
Featured Image: Denis Kornilov / Shutterstock
- 1
- 2