Tag: Legs
Instantly Improve Your Squats and Leg Gains with these 5 Tips
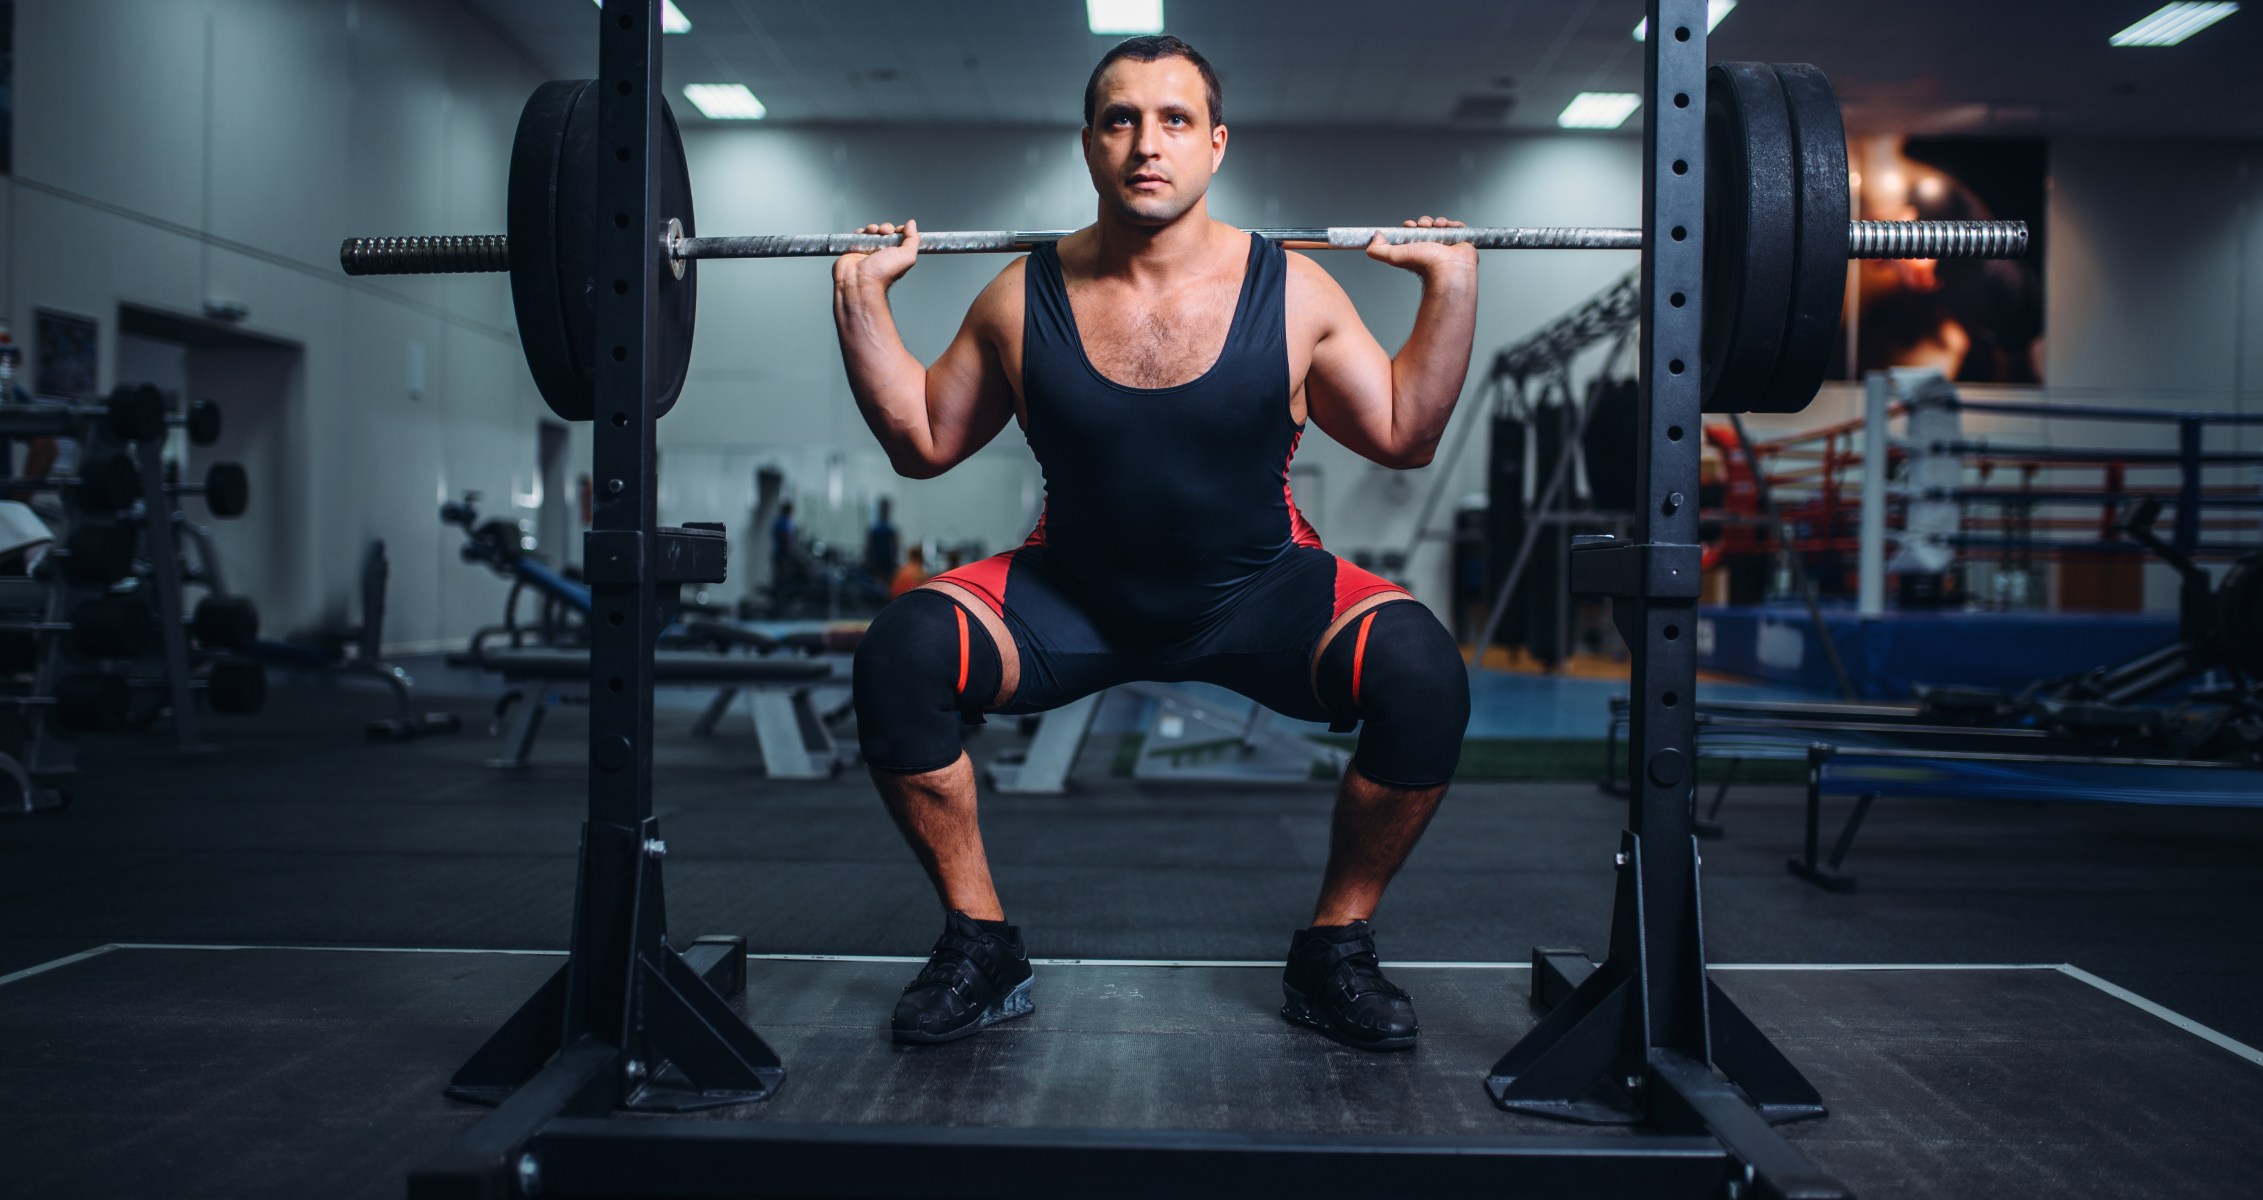
5 Tips to Improve Your Squats
Chicken legs are probably one of the most common sights to be seen in gyms around the world. It is no secret leg days are one of the most despised days in the life of a bodybuilder. But make no mistake, a pair of shredded wheels is what separates the men from the boys.
Legs are the foundation of your physique. If you want to have a strong upper body, you need to have a rock solid lower body. Leg presses and leg extensions are cute, but it’s the squats which have proven to be the most effective leg builders.
People don’t like to squat since they are hard to perform. Most of the people who do perform them, don’t do it right. In this article, we will help you fix your form so you can reap the most rewards from this exercise.
1. Don’t Bend Your Back
Most people make the mistake of bending their back while squatting. While a normal arch on the way down is okay, it shouldn’t look like you’re performing half squat and half good mornings.
You can use your nose as a pivot point. While you squat your nose should look like you’re jumping straight into a swimming pool. If it looks like you’re diving into the pool, you’re doing it wrong.
2. Keep Your Head Turned Up
Warming up your lower back and legs before a leg workout is always a good idea. If for some reason you have a stiff lower back or hamstrings, you might have a tendency to bend forward. Doing so will put pressure on your glutes and lower back and take off the stress from your quads.
Keeping your head turned up and looking towards the roof can help you in keeping your back straight. The more you keep your back straight, more will be the tension on your quads.
3. Flair Out Your Knees on the Way Down
While squatting, some people push their hips back which brings their back into the movement as they have to bend forward to complete the movement. The right way of performing a normal squat is to push your knees out and going straight down while keeping your back straight.
The right starting position for a normal squat is to have a shoulder-wide stance with your toes pointing out slightly. Imagine as if you were sitting in between your knees. Don’t push your hips back as if you were to sit on a chair.
4. Keep Your Body Tight
Like every other exercise, squatting isn’t about going through the motions. You need to maintain a mind-muscle connection with your quads throughout the movement. Keep your quads tight and squeeze the hell out of them at the top of the movement.
If you want an intense quad pump, perform this exercise with a constant momentum while keeping your body tight. Don’t pause at the top or the bottom and flex your quads at the starting position.
Breathing is another very important aspect of squatting. While you’re at the starting position, take in a deep breath. Hold your breath and keep your core tight on the way down. Breathing out on the way up will help you generate thoracic pressure.
5. Use Accessories
Using accessories in your workouts can improve the results. A weightlifting belt can help you to generate thoracic pressure and will enable you to lift more weight. Knee wraps and sleeves can provide you support on heavier lifts by giving you that extra push from the bottom of the movement.
A Barbell squat pad is another great accessory which many people diss. Greats like Tom Platz used the barbell squat pad, so you should check your ego before stepping into the squat rack the next time.
How much do you squat? Let us know in the comments below. Also, be sure to follow Generation Iron on Facebook and Twitter.
Three Unconventional Unilateral Exercises to Improve Leg Strength
Performing Unilaterals To Enhance Performance
As a beginner, due to the fact that the body is unaccustomed to the stimulus of strength training, deadlifting and squatting regularly will significantly and rapidly build full-body strength.However, as you become more highly conditioned it may be necessary to make a number of substantial changes to your training in order to continue hitting personal bests. Not only does the rate of strength improvement begin to slow over time but muscular imbalances may also be established if the focus is constantly on bilateral (two-limbed) exercise.Incorporating unilateral (single-limb) exercise into your training program can yield great benefits and allow you to surpass your squat and deadlifts PB’s.
Three Benefits of Unilateral Training
This first section will briefly highlight three substantial benefits associated with unilateral training that will ultimately allow you to perform heavy compound lifts more efficiently.
1) Eliminating Muscular Imbalances
Muscular imbalances are not uncommon and it is likely that everyone suffers from imbalances to one degree or another and there are a number of reasons why they develop.Firstly, everyone tends to have a dominant side – right or left. In everyday activities, exercise and sport, it is likely that one side is used more heavily than the other.As a result, the dominant side may increase in strength to a greater degree than the non-dominant side thus causing an imbalance between the right and lift side.While it is typically the case that the weaker side is the non-dominant side, be aware that this is not always the case and the dominant side may well be the weaker side.Another potential cause of an imbalance is injury. As a consequence of injury, often weakness and instability are apparent around the injured site (1). While rehabilitation exercises will help to restrengthen the injured site, an imbalance between sides may still remain.Furthermore, imbalances can become exacerbated by bilateral training. The stronger side can compensate for weakness on the other side and cause the imbalance to develop further.Imbalances need to be assessed and rectified through unilateral training as they may negatively affect performance and may even increase the risk of sustaining an injury.
2) Injury Prevention
Imbalances and weaknesses can significantly alter or interfere with exercise technique which can significantly impact performance.For example, during the squat, if the stronger side is compensating for weakness on the other side, the hips will likely significantly shift towards the stronger side (2).By strengthening the weaker side and correcting any muscular imbalance that exists, the way in which you move will become more efficient and technique will improve.Becoming more competent with your technique will allow you to lift a greater load which will increase the training stimulus and consequent rate of adaptation to the muscles.Stronger muscles will allow the body to cope with a greater amount of stress will also improve the function of joints thus reducing the injury risk.As touched on, having significant muscular imbalances can increase the risk of sustaining an injury, therefore, by reducing imbalances the risk of injury will be significantly lessened.
3) Enhanced Muscle Recruitment
Research comparing electrical activity of muscle during both unilateral and bilateral leg exercises has indicated that unilateral exercise activates muscle to a greater extent in comparison to bilateral exercise (3).Part of the reason for this is that when performing a unilateral exercise you have only one base of support whereas you have two during a bilateral movement. Having just a single base of support increases the instability of the exercise and therefore a large activation from a number of leg muscles is required to assist in stabilization.Not only does unilateral exercise require a greater activation from the lower extremities, the core must also activate more highly to enhance control and stability.Using a single-leg stance will strengthen all of these muscles in a highly functional way. Many everyday activities require you to maintain balance and stability while in a single-leg stance.Some examples that demonstrate this include walking, stepping up, running, sprinting, and changing direction.With this understanding, it is imperative that a number of unilateral strengthening exercises such as lunges, split squats and single-leg deadlifts and incorporated into our training programs.
Three Unilateral Exercises for Leg Strength
The following three unilateral exercises would not be seen as your conventional-type unilateral exercises, however, there is no denying their effectiveness.The following section will provide detail on the exercise, its uses, benefits, the required technique and how it should be programmed into your strength training.
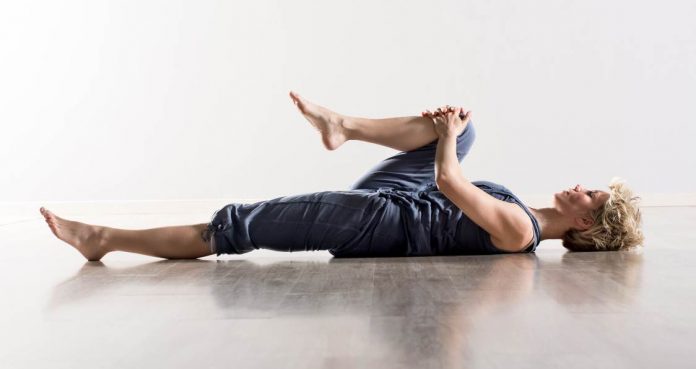
1) Single-Leg Hip Extension with Hamstring Curl
Considering that the hamstrings control the extension of the hips and knee flexion, this exercise will effectively train the hamstring as it incorporates both of these movements.Furthermore, the use of the swiss ball will increase the need for stability which will place an additional demand on a number of stabilizing muscles.Improving the strength and function of the hamstrings will have a significant impact on the deadlift considering that the deadlift is a hamstring-dominant exercise.While this is undoubtedly an excellent accessory exercise for improving both the deadlift and squat, it is also highly recommended for runners as the exercise replicates the demands of road running.Be aware that this exercise is highly demanding on the hamstrings and therefore high repetitions may be something that you wish to avoid. Start with 2-3 sets of 6 reps per side and gradually increase the reps as the week’s progress.
Technique:
1) Lie flat on the floor and start by placing one foot on top of the swiss ball. Ensure that the heel is pressed into the ball and that the toes are pointed upward.2) Perform the hip extension by engaging the core and driving through the hips so that they lift from the floor and hold them in position. 3) Keeping the hips up, pull the ball in towards your glutes by bending the knee until it reaches a 90-degree angle.4) Briefly pause in this position before beginning to extend the knee and slowly return to the starting position all while keeping the glutes engaged.5) Once the leg has been fully extended, gradually drop the hips down until they return to the floor. Repeat this process until the prescribed number of reps have been completed.
2) Kettlebell Swap
When performing the squat and deadlift, the knees should be pushed wide and track over the toes while the feet remain stable. Some individuals find that, when they squat and deadlift, pronation occurs and the feet fold inward. This is something that should be avoided as far as possible as it can lead to injury (4).Allowing the ankles to pronate may place undue stress and strain on the knees and consequently make it more challenging to engage the glutes and lockout the hips. The kettlebell swap is an exercise that is highly recommended for those who experience this pronation of the foot during the squat and deadlift. The exercise places you in a single-leg position in order to improve balance and effectively build strength around the ankle joint.Regularly performing the kettlebell swap and strengthening the ankles and feet will not only work to prevent injury, it will also put you in a stronger and more stable position when squatting or deadlifting.In addition, in order to pass the kettlebell under control and to prevent swinging, the core muscles and a number of hip muscles must powerfully contract.If this exercise is new to you, consider starting with a light load (18-26lbs) and gradually increase the weight over time.The kettlebell swap can serve as an excellent warm-up activity or can be effectively paired with the squat or deadlift. Look to perform sets of 6 reps per side.Be aware that it is possible to use a dumbbell for this exercise if you do not have access to kettlebells.
Technique:
1) Start by standing tall while holding the kettlebell in your left hand. Keep the arm straight so that the weight hangs by the hip. Engage your core muscles, slowly lift one foot from the floor and find your balance.2) Under control, reach across the body with the left hand and pass the kettlebell to the right hand while maintaining a vertical trunk position and return the weight to the side of the hip.3) While still maintaining a core brace, pass the weight back to the left hand and returning to the starting position – this is one rep. 4) Continue to swap back and forth from left to right until you have completed the desired number of reps. Repeat the above steps again but this time starting with the weight in the right hand.
3) Offset Lateral Lunge
When it comes to leg development, often major muscles like the glutes, hamstrings, and quads are prioritized. The adductors can be overlooked yet they play such a crucial role in hip strength and mobility.Having adductors that are weak or tight can interfere with movement generated around the hips and can, therefore, impact deadlift and squatting ability.Lateral lunges are a superb resistance exercise that can be used to build strength in the adductors (as well as the quads and glutes).The lateral lunge is particularly effective as it simultaneously works the adductors of the leading leg and stretches the adductors of the trailing leg.To add a further challenge, using one kettlebell rather than two will decrease stability. If two kettlebells were to be used, the weights counterbalance each other and stability demands decrease.Using one kettlebell will increase the demands on core and lower extremity musculature as they work to increase stability and prevent any rotation or bending through the trunk.On a side note, you may wonder why a lunge exercise is considered a unilateral exercise specifically because both feet are placed in direct contact with the floor.When you review the demands and biomechanics of the exercise it becomes clear that the lunge is really a unilateral exercise (5).During the lunge (and lunge variations) it is the front leg that drives the movement and is exposed to a great amount of stress; the rear leg simply enhances stability and is not activated as highly during the movement.The offset lateral lunge is best used as an accessory exercise after completing sets of squat and deadlift. Keeping in mind that this is an accessory, extremely heavy loads should be avoided. Depending on your strength levels you may wish to start anywhere between 26 – 53 pounds.Look to complete sets of 8 – 12 reps per leg. For comprehensive hip development, consider pairing the lunge with a hip mobility exercise such as split stance adductor mobs.
Technique:
1) Start by standing tall and bringing the kettlebell up to the rack position. This is where the kettlebell is brought up to shoulder height and sits comfortably on the bent arm.2) Before stepping laterally, push the chest up and brace the core. Take a large step to the side which is not holding the weight and plant the foot.3) Bend the knee of the leading leg and drop your backside down towards your heel all while keeping the trailing leg straight – you should feel a significant adductor stretch in the trailing leg.4) Push hard through the heel of the leading leg to drive the body back up to standing. Imagine you are trying to drive your heel through the floor.5) Repeat until the prescribed number of reps has been completed then move the kettlebell to the other side and perform the same number of reps on the other side.
Final Word
Considering the impact that muscular imbalances can have on strength development and injury risk, a significant portion of your training program should be dedicated to unilateral exercise.If you aspire to improve your squat and deadlift performance, incorporating the three aforementioned unilateral exercises into your training is highly recommended.
References:
1 – Fulton, Jessica; Wright, Kathryn; Kelly, Margaret; Zebrosky, Britanee; Zanis, Matthew; Drvol, Corey; Butler, Robert (2014-10). “INJURY RISK IS ALTERED BY PREVIOUS INJURY: A SYSTEMATIC REVIEW OF THE LITERATURE AND PRESENTATION OF CAUSATIVE NEUROMUSCULAR FACTORS”. International Journal of Sports Physical Therapy. 9 (5): 583–595. ISSN 2159-2896. PMC 4196323. PMID 25328821.
2 – Myer, Gregory D.; Kushner, Adam M.; Brent, Jensen L.; Schoenfeld, Brad J.; Hugentobler, Jason; Lloyd, Rhodri S.; Vermeil, Al; Chu, Donald A.; Harbin, Jason; McGill, Stuart M. (December 1, 2014). “The back squat: A proposed assessment of functional deficits and technical factors that limit performance”. Strength and conditioning journal. 36 (6): 4–27. doi:10.1519/SSC.0000000000000103. ISSN 1524-1602. PMC 4262933. PMID 25506270.
3 –McCurdy, Kevin; O’Kelley, Erin; Kutz, Matt; Langford, George; Ernest, James; Torres, Marcos (2010-02). “Comparison of lower extremity EMG between the 2-leg squat and modified single-leg squat in female athletes”. Journal of Sport Rehabilitation. 19 (1): 57–70. doi:10.1123/jsr.19.1.57. ISSN 1056-6716. PMID 20231745.4 – Lee, Jong Dae; Koh, Da Hyun; Kim, Kyoung (2015-1). “The kinematics of the lower leg in the sagittal plane during downward squatting in persons with pronated feet”. Journal of Physical Therapy Science. 27 (1): 285–287. doi:10.1589/jpts.27.285. ISSN 0915-5287. PMC 4305583. PMID 25642092.
5 – Riemann, Bryan L.; Lapinski, Shelley; Smith, Lyndsay; Davies, George (2012-8). “Biomechanical Analysis of the Anterior Lunge During 4 External-Load Conditions”. Journal of Athletic Training. 47 (4): 372–378. ISSN 1062-6050. PMC 3396296. PMID 22889652.
5 Exercises for Shredded Legs
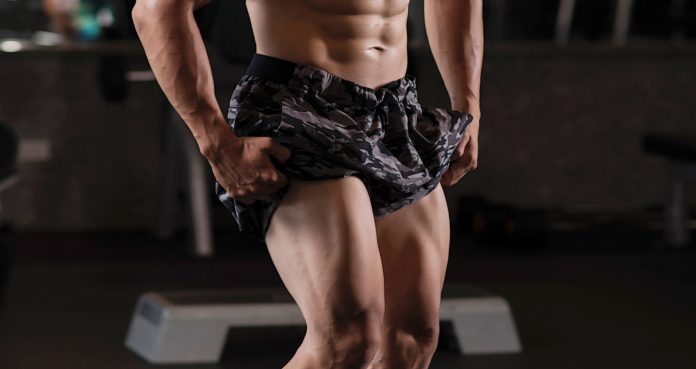
Get Shredded Legs with these 5 Exercises
Shredded legs are what separate the men from the boys. You need to have strong and muscular wheels as your legs are the foundation of your body. While legs are one of the most important muscles to train, many people around the world skip training them.
You need a combination of compound and isolation exercises in your workouts to take your wheels to the next level. Time under tension, volume and intensity play a major role in developing your legs.
Hack Squats – 3 Sets 15 Reps
Hack squats are one of the most underutilized exercises when it comes to leg training. The hack squat machine helps you to tweak your movement to target your quads from different angles.
Arnold in his book ‘Encyclopedia of Bodybuilding’ said that you are supposed to maintain a full range of motion while performing the hack squats. Place your feet under your body and push your knees forward on the negative motion. Pause at the bottom of the movement and explode back to the starting position.
Leg Extensions – 3 Sets 15, 12, 10 Reps
Most people perform the leg extensions incorrectly. They load the extension machine with more weights than they can handle and use momentum and a jerking movement to lift the weights. The most effective way of doing the leg extensions is to pause for a couple of seconds at the top of the movement.
The positive movement should take one second, hold the weights on the contraction for two seconds, take four seconds on the negative movement and take no rest by racking the weights at the starting point.
Good Mornings – 4 Sets 8 Reps
Since your Hamstrings are at the back of your legs, it is harder to train and develop them as compared to your quads. It also becomes harder to establish a mind-muscle connection with your hams since you can’t see them in the mirror.
Good mornings are a hard exercise to execute and you need to keep the movement slow and controlled to get the best results. If you perform the good morning in a squat rack, set-up safety bars at your belly button level and bend until the barbell touches the safety bars.
Nordic Curls – 3 Sets 15 Reps
[embedded content]
Chances are you might not have seen anybody perform the Nordic curls exercise in your gym. Nordic curls can set your hamstrings on fire and you will need a spotter if you have weak hams.
The lat pulldown machine is the best place to perform this exercise. Put your ankles between the knee pads and the seat and place your knees on the seats. Bend your back so it is parallel to the floor. This will be your starting position. Lower yourself using your hamstrings without moving your back, so your face is 8-10 inches away from the floor.
Cannonball Squats – 3 Sets 15, 12, 10 Reps
Perform the squats at the end of your workouts when your legs are completely exhausted. This way you won’t have to lift super heavy weights and your legs will be warmed up so you will have a better range of motion.
While performing the cannonball squats, you need to stand with the balls of your feet placed together and your toes facing outwards. The cannonball squats is a compound exercise which helps in developing the inner sweep of your quads.
Which is your favorite leg exercise? Let us know in the comments below. Also, be sure to follow Generation Iron on Facebook and Twitter.
How To Perform the Nordic Hamstring Curl
Understanding The Benefits and Uses of This Multi-Functional Exercise
It’s not uncommon for exercises to go through popular phases. Right now, the nordic ham curl appears to be one of those exercises.From top athletes to the general population, the nordic hamstring curl (sometimes referred to as the Russian hamstring curl) is forming part of training sessions. So, why exactly has the nordic ham curl rapidly grown in popularity?This article will detail how to perform the Nordic ham curl, discuss the many reasons behind why it is such an effective resistance exercise and detail considerations to be made in regards to the exercise.
50Performing the Nordic Hamstring Curl
The Nordic hamstring curl is primarily an isolation exercise for the hamstrings. The exercise involves starting from a kneeling position and hinging forward from the knees. While the conventional method requires a partner to anchor you, it can still be performed without the need for a partner.This section will detail how to execute the Nordic hamstring curl safely and effectively.
Step One: Start by kneeling down and anchor the feet to the floor. This can be done using a partner or by using weight or appropriate apparatus. Anything that has an opening a few inches from the floor and allows you to lock the feet in position will suffice. Place something soft under your knees to protect them.Step Two: Prior to hinging forward, push the chest high, pull the shoulders back and squeeze the abs to ensure that the trunk of the body is held upright.Step Three: Begin to fall towards the floor by moving through the knees only. Resist gravity for as long as you can as you hinge forward.
Step Four: As you near the floor, place both hands on the floor and then perform an explosive push-up to propel the body back up to the starting position.
Nordic Hamstring Curl Benefits
The main reason that the nordic hamstring curl has become so popular in recent times is that there have been a vast number of studies looking at the benefits of the exercise.The results have indicated that there are many benefits associated with regularly performing the Nordic ham curl.The exercise has been linked to significantly improving the strength of the hamstrings. More specifically, the eccentric strength of the hamstring has been found to significantly increase (1).A concentric contraction occurs when muscle contracts and shortens whereas an eccentric contraction refers to the contraction that occurs when a muscle lengthens.During the nordic ham curl, the hamstring muscles slowly eccentrically contract under tension as the body drops towards the floor. This helps to explain why the hamstring eccentric strength is significantly improved through performing the Nordic ham curl.This increase in eccentric strength has a direct impact on reducing the risk of injury to the hamstring (2). Considering that hamstring is a commonly injured site, performing the Nordic ham curl regularly is particularly recommended for athletes and sportspeople.As well as enhancing strength, further studies have indicated that the exercise can also bring about substantial hamstring growth (3).Lastly, the nordic can serve as an excellent exercise for developing sprinting ability (4) and therefore, should be used by those who participate in sports that demand short, sharp bursts of sprinting.
Nordic Ham Curls vs Glute Ham Raises
Another common posterior strengthening exercise is the glute-ham raise and there are a number of similarities between the two exercises.Both are bodyweight-based resistance exercises that focus primarily on knee flexion. The difference between the two is the equipment used.While Nordics don’t typically require any equipment, the glute-ham raise uses something known as a GHD (glute-ham developer). This piece of equipment puts the body at a more optimal angle for working the hamstrings (and glutes) and increases the range of motion.While the glute-ham raise may be slightly more effective, it’s important to recognize that both exercises are effective for developing strength and can be used to fulfill different needs and demands.
Can Nordics Improve Deadlift Performance?
Many may conclude that strengthening the hamstrings through Nordic ham curls will increase deadlift performance as the hamstrings play a major role in the deadlift. However, this is not necessarily the case.While Nordics are associated with an array of benefits, it may not directly impact your ability to lift heavy.The reason for this is that the nordic ham curl primarily develops hamstring eccentric strength. When it comes to heavy deadlifts, it is concentric strength that is most important.Therefore, increasing the eccentric strength of the hamstrings will have little to no impact on the amount of weight that you can pull from the floor.
Another consideration to make is that the nordic ham curl is knee-dominant exercise whereas deadlifts are hip-dominant exercises. Consequently, Nordics are not really specific to strength sports as they train the hamstrings in a different manner.If you are looking to increasing hamstring in a sport-specific manner, hip-dominant exercises such as stiff-leg deadlifts, back extensions, and reverse hypers, are recommended. However, be aware that there are occasions where poor hamstring eccentric strength can hinder your performance.When performing nordic ham curls, if you find that you are struggling to resist gravity and drop immediately you may have poor hamstring eccentric strength.
If this is the case, it may be beneficial to perform Nordics to increase eccentric strength.
Final Word
If you are an athlete, the nordic ham curl can serve as a practical and effective exercise for enhancing eccentric strength, improving muscle size and reducing the risk of injury. However, it may not be the most optimal choice for improving powerlifting performance.
References:
1 – Ditroilo, Massimiliano; De Vito, Giuseppe; Delahunt, Eamonn (2013-10). “Kinematic and electromyographic analysis of the Nordic Hamstring Exercise”. Journal of Electromyography and Kinesiology: Official Journal of the International Society of Electrophysiological Kinesiology. 23 (5): 1111–1118. doi:10.1016/j.jelekin.2013.05.008. ISSN 1873-5711. PMID 23809430.
2 – Ribeiro-Alvares, João Breno; Marques, Vanessa B.; Vaz, Marco A.; Baroni, Bruno M. (2018-05). “Four Weeks of Nordic Hamstring Exercise Reduce Muscle Injury Risk Factors in Young Adults”. Journal of Strength and Conditioning Research. 32 (5): 1254–1262. doi:10.1519/JSC.0000000000001975. ISSN 1533-4287. PMID 28459795.
3 – Seymore, Kayla D.; Domire, Zachary J.; DeVita, Paul; Rider, Patrick M.; Kulas, Anthony S. (2017-05). “The effect of Nordic hamstring strength training on muscle architecture, stiffness, and strength”. European Journal of Applied Physiology. 117 (5): 943–953. doi:10.1007/s00421-017-3583-3. ISSN 1439-6327. PMID 28280975.
4 – Ishøi, Lasse; Hölmich, Per; Aagaard, Per; Thorborg, Kristian; Bandholm, Thomas; Serner, Andreas (2018-07). “Effects of the Nordic Hamstring exercise on sprint capacity in male football players: a randomized controlled trial”. Journal of Sports Sciences. 36 (14): 1663–1672. doi:10.1080/02640414.2017.1409609. ISSN 1466-447X. PMID 29192837.
3 Ways To Save Your Knees On Leg Day
You can’t workout if you don’t have knees to stand on.
When it comes to training injuries there’s no doubt that the most common, not to mention most irritating, are knee injuries. There’s nothing worse than to fall prey to a knee injury, particularly since it will slow a great deal of your progress. If you looking to have some mammoth wheels, some well defined quads and massive calves then a knee injury will kiss all that goodbye. With a knee injury your progress with the squat, deadlift, and numerous other exercises will be halted.
But it doesn’t have to be that way. The thing about knee injuries is that the occurrence is so common that there has been plenty of research into injury prevention. If you’re looking to hit the gym hard on leg day without having to worry about injuries, then do yourself a favor and take some of these tips under consideration.
It’s All In The Warm Up
First thing’s first, if your warm up looks like crap then your knees are likely to end up feeling the same way. If you want to ensure that you’ll have healthy knees after a hard training session then you better be sure to warm up properly. The key is not to jump into the deep end and start lifting heavy right off the bat.
Take your time with the warm up and use lighter weight, being sure to work on form and technique before all else. This will get your muscles prepped for the hard training to come and the mental focus on form will have you perfecting the movement even as you move up in weight. Try some leg extensions at a lighter weight and get the blood pumping before deciding to hit the leg press.
No Lockout Needed
Locking your knees during exercise can ultimately spell trouble for your joints by the end of your training session. Keeping a slight bend in the knees will prevent all the weight from being transferred to the joints. The whole point of training is to build the muscle not to stress your joints beyond repair. Keeping that tension will help work the muscle itself as well as save your joints from punishment.
Choose Your Cardio Wisely
Yes, cardiovascular training should be apart of your routine as a bodybuilder, but many people go about cardio training the wrong way. They believe that you have to do long distance running on the road or treadmill to get in their cardio. A better way to perform your cardio training is to pick an exercise and equipment that will supplement your leg training.
The elliptical and the stationary bike are two pieces of equipment that provide less stress on the knees as well as offering the cardio benefits you need. Running is a high impact activity. When you’re going to squat you don’t want to be worried about shin splints and other running related issues. Your legs should be fresh and strong in order to complete the workout to the best of your ability. That means when you decide to do your cardio choosing low impact exercise machines like the elliptical and the bike are key to better performance.
What nagging injuries set you back during your training? Let us know by hitting up our comments below or head on over to our official Facebook and Twitter.
10 Best Bodyweight Home Workouts For A Chiseled Physique
Why go to a gym when you can build a Greek God physique with these home workouts?
Most people have come to believe that they need to work out with dumbbells and barbells to build muscle mass. This is why they get a gym membership when they could have conveniently trained at home.
On the other hand, some people miss out on being a part of the fitness lifestyle because their busy schedule does not allow them the luxury of going to the iron paradise.
These individuals give up on their dream physique because, by watching their favorite Instagram fitness athletes train at fancy gyms, they have subconsciously internalized that a gym membership is indispensable for a body transformation.
The Holy Grail Of Physique Transformation
All fitness enthusiasts need to hear this – Your muscles do not know if you are training at a gym or home. They do not know if you are lifting iron or using resistance bands. Muscle tissues are damaged during a workout, and they grow back bigger and stronger with the correct diet and recovery time. As simple as that.
But how do you damage muscles during a bodyweight home workout?
Progressive overload.
As your workouts advance and you get stronger, you should increase your reps, time under tension, decrease rest time between each set and exercise, incorporate advanced training techniques in your training, and push yourself to failure in every set.
Oh, so you want to know if this could lead to overtraining?
Here is the harsh truth – most lifters who train at a modern gym with fancy equipment cannot train hard enough (even if they wanted to) to hit the overtraining stage, let alone people who are training at home. So, give home workouts all you have got and forget about overtraining.
The day people learn to use their body weight as resistance, gyms will have a hard time selling memberships.
Related Read: Training Programming: Progressive Overload is Your New Best Friend
Before you begin your home workouts, make sure you:
Warm-Up
Just because you are training at home does not mean you are free to skip warm-ups. Stretching and warming up will help fire up your muscles during your workouts.
Reasons why you should never miss a warm-up session:
Lower risk of injury – According to a study, an elaborate warm-up routine can reduce your risk of injury as it relaxes and loosens your muscles.
Mental focus – With time, a warm-up routine turns into a ritual that automatically puts you in the zone.
Improves flexibility & mobility – Being more flexible can improve your range of motion.
Increased blood flow – Blood carries oxygen and nutrients to different parts of your body. Warming up loosens your muscles which results in an increased blood flow throughout the body.
Reduction in muscle tension and pain – Muscles that are warm and relaxed move with less friction and are less likely to stiffen during and after a workout.
Better performance – Studies have shown that warmed-up muscles can help you work out more effectively.
10 Best Bodyweight Home Workouts For A Shredded Body
Workouts laid out in this article are perfect for lifters of any experience level. They will help you in building muscle and core strength and losing body fat. It also includes an all-out 20-minute HIIT (high-intensity interval training) workout.
#1 – Beginner Home Workout
Squat – 20 Reps
Walking Lunges – 10 Reps (each side)
Push-Up – 10 Reps
Single Arm Bent-Over Row (Resistance Bands) – 15 Reps (each side)
Plank – 30-seconds
Jumping Jacks – 30 Reps
Time: 20 minutes
Rest: 10 seconds between exercises
Circuits: 5
Firstly, this is as easy as it gets in the home workout program. Secondly, it is not that easy – as you will soon find out.
Perform each exercise for the desired repetitions and rest for 10 seconds before starting the next exercise. Make sure you are following a full range of motion while performing these workouts. Since this is a bodyweight workout program, you will be leaving gains on the table by performing partial reps.
In each workout, you will be doing at least one advanced exercise. In this workout, you will be performing single-arm bent-over rows with resistance bands.
Steps:
Stand with your right foot ahead of the left.
Lean forward so that your torso is at a 60-degree angle with the floor.
Place one end of the resistance band under your front foot.
Rest your right forearms on your right thigh.
Grab the other end of the resistance band with your left hand.
With your hand extended down, there should be no slack in the band.
While keeping your elbow close to your body, bring your arm up to your side.
Hold and contract at the top for a couple of seconds.
Return to the starting position and complete 10 reps before switching sides.
#2 – Core Workout
Circuit A
Skater – 30-seconds
Push-Up – 30-seconds
Shoulder Tap – 30-seconds
Forearm Plank Reach – 30-seconds
Circuit B
Skater – 30-seconds
Burpee – 30-seconds
Plank Jack – 30-seconds
Plank – 30-seconds
Time: 25 minutes
Rest: No rest between exercises in a circuit; 45-second rest between circuits.
Circuits: 5
After you complete all exercises in circuit A, take a 45-second rest before starting circuit B. Repeat until you complete five rounds of the circuits. One thing is for sure – your core will be sore for at least a couple of days after this workout. Core – sore. See what we did there?
#3 – 20-Minute HIIT Home Workout
Circuits X 8
Side Kick-Through – 20-seconds
Rest – 10-seconds
Circuits X 8
Skater Hop – 20-seconds
Rest – 10-seconds
Circuits X 8
Crab Toe Touch – 20-seconds
Rest – 10-seconds
Circuits X 8
Frogger – 20-seconds
Rest – 10-seconds
Circuits X 8
Curtsy Lunge – 20-seconds
Rest – 10 seconds
Time: 20 minutes
Rest: 10 seconds between exercises
Circuits: 8
The 20-minute HIIT workout is dialed-in to the T. You cannot afford to waste a single second during this training session. It might be a little harder for you if you are a beginner as you need good stamina, endurance, and cardiovascular health for this workout.
But do not use this as an excuse to skip this workout. Push your boundaries and go as hard as you can. Remember: There are no shortcuts to building your dream physique.
#4 – 7-Minute Home Workout For Ultimate Gains
Jumping Jack – 30-seconds
Wall Sit – 30-seconds
Push-Up – 30-seconds
Crunch – 30-seconds
Step-Up – 30-seconds
Squat – 30-seconds
Tricep Dips – 30-seconds
Plank – 30-seconds
High Knees Running in Place – 30-seconds
Lunge – 30-seconds
Push-Up with Rotation – 30-seconds
Side Plank – 30-seconds
Time: 7 minutes
Rest: 10 seconds between exercises
Circuits: 1
The 7-minute workout is for people with packed schedules. No matter how time-poor you are, you can always squeeze in a 7-minute workout in your day. In fact, you could even perform this training circuit on Air Force One.
According to a 2013 study conducted by the American College of Sport’s Medicine Health and Fitness Journal, this HIIT workout improves overall fitness levels and helps with weight loss.
#5 – Bodyweight Leg Home Workout From Hell
Squat (with a towel) – 10 Minutes 15 Reps
Bulgarian Split Squat – 5 Sets 30 Seconds (each side)
Squat Jump (with floor touch) – 3 Sets 15 Reps
Bridge Kick – 10 Minutes 10 Reps (each leg)
Superset
Burpee – 10 Sets 10, 9, 8, 7, 6, 5, 4, 3, 2, 1 Reps
Jump Lunge – 10 Sets 10, 9, 8, 7, 6, 5, 4, 3, 2, 1 Reps
Time: 45 minutes
Rest: 30 seconds between exercises
Circuits: 1
No, we are not trying to kill you. But even if we were, do not forget – what doesn’t kill you, makes you stronger.
In the first exercise, hold a towel with your arms extended straight overhead. The fact that this is a bodyweight workout should not stop you from mimicking Olympic lifts.
In the first (squat with a towel) and fourth (bridge kick) exercises, set a timer for ten minutes and perform 15 reps of the exercise at the start of each minute. After completing the desired reps, rest for the remainder of each minute. Repeat the cycle for 10 minutes.
#6 – No-Equipment Arm Workout
Decline Push-Up – 15 Reps
Up-and-Down Plank – 20 Reps
Crab Crawl – 10 Reps (each side)
Diamond Push-Up – 15 Reps
Inch Worm – 15 Reps
Tricep Dips – 15 Reps
Time: 20 minutes
Rest: 30 seconds between exercises
Circuits: 3
In the home workout program, you will be working on your aesthetics as well as functional strength. A chiseled physique without functional strength is as good as a Ferrari without an engine.
The number of repetitions in this workout is only for reference purposes. You are supposed to perform each exercise until you hit failure.
While performing push-ups, pause at the top of the movement for a few seconds, and contract your triceps as hard as you can.
#7 – Bodyweight Home Workout For Boulder Shoulders
Push-Back Push-Up – 12-15 Reps
Plank to Down Dog – 12-15 Reps
Pike Push-Up – 15 Reps
Wall Walk-Up – 6 Reps
Prone T (and Y) – 10 Reps
Pro: Handstand Push-Up / Bridge Push-Up – 10 Reps
Time: 30 minutes
Rest: 30 seconds between exercises
Circuits: 3
After you are done with the bodyweight shoulder workout, you will question the need for dumbbells and barbells and going to a gym for shoulder training.
The last exercise of this workout is only for pros. While most people know what a handstand push-up is, let’s go over bridge push-up.
How to perform bridge push-up:
Lie with your back on the floor, knees bent, and feet as close to butt as possible.
Place your right hand near your right ear and your left hand near your left ear. Your thumbs should be next to your ears, and your fingers pointing towards your heels.
Push up your hips, arch your back, and press hands into the floor to lift into bridge pose.
Once you gain stability in the bridge pose, start performing push-ups by bending at your elbows and lowering your head towards the floor.
#8 – Bodyweight Home Workout For A Stirated Chest
Resistance Band Push-Up – 15 Reps
Standing Chest Press – 15 Reps
Alternating Shuffle Push-Up – 15 Reps (7 on each side)
One-Arm Push-Up (on an elevated platform) – 15 Reps (each side)
Dynamic Push-Up – 12 Reps
Time: 30 minutes
Rest: 30 seconds between exercises
Circuits: 3
For this workout, you will need resistance bands that can be anchored to a door. We highly recommend the Serious steel resistance bands for this purpose.
How to perform resistance band push-up:
Wrap a resistance band around your back so that it is placed just under your armpits.
Loop the resistance band around your hands to tighten it.
Get into a push-up position, and perform 15 reps.
How to perform alternate shuffle push-ups:
Get into a push-up position.
Move your right hand to the left until both your hands are next to each other.
Slide your left hand further left until your hands are shoulder-width apart again.
Perform a push-up.
Repeat by moving to the right this time. Alternate between sides until you complete the desired reps.
You could also incorporate TRX in your bodyweight home workouts.
Related: How To Use The TRX To Build A Bigger Chest
Also, Check Out: Best Resistance Bands For Home Workouts & Gains (Updated 2021)
#9 – Bodyweight Home Workout For A Cobra Back
Pull-Up – Failure
Suspension Row – 15 Reps
Hindu Pushup – 15 Reps
Prone Back Extension – 15 Reps
Single-Arm Resistance Band Bent-Over Row – 15 Reps
Time: 30 minutes
Rest: 30 seconds between exercises
Circuits: 3
To annihilate your back with home workouts, you will need a sturdy pull-up bar that you can install in your doorway.
Best Pull-Up Bars For At-Home Gains & Convenience 2021
The best thing about a pull-up bar is that you can perform a range of exercises on it. By adding a TRX to a pull-up bar, you can use it to train your back, arms, chest, legs, and abs.
How to perform Hindu push-ups:
Get into a push-up position.
Push your hands into the floor to drive your weight back so your hips rise into the air.
Your back should be straight and your head behind your hands.
Lower your body in an arcing motion so that your chest scoops downward and nearly scrapes the floor.
Continue moving forward as you press your body up so your torso is vertical and your legs are straight and nearly on the floor.
#10 – Full-Body Finisher Bodyweight Home Workout
Side Plank Twist – 30-seconds AMRAP
Squat Pulse – 30-seconds AMRAP
Crunch – 30-seconds AMRAP
Lying Leg Raise – 30-seconds AMRAP
Push-Up – 30-seconds AMRAP
Mountain Climber – 30-seconds AMRAP
Bicycle Kicks – 30-seconds AMRAP
Time: 20 minutes
Rest: 10 seconds between exercises
Circuits: 3
This full-body bodyweight workout will make fat melt off your body.
For each exercise, you will perform as many reps as possible (AMRAP) in 30 seconds. You are allowed a 10-second rest between exercises and a 30-second rest between circuits.
Conclusion
Although these are home workouts, you could do these anywhere, even when you are traveling. You might have to purchase a few pieces of equipment (like resistance bands and a pull-up bar) for this workout but look at them as long-term investments. The dividends alone will be more than what you pay for the equipment.
How often do you workout at home?
Let us know in the comments below. Also, be sure to follow Generation Iron on Facebook, Twitter, and Instagram.
Monster Leg Workout With Klaus Myren Riis
Check out this mean but effective leg workout from bodybuilding pro Klaus Myren Riis.
Leg day. We all know we need it, but too often we make an excuse and jump over to the bench press. It’s easy to spot who in the gym has skipped a leg day (or two), and for those of us who take pride in working out our legs, sometimes we find ourselves struggling for diversity. Some people argue the basics work best and that going back to fundamental movements and exercises will increase muscle growth. Others preach more complex workouts to target many muscles at once to promote big gains. But which one is best?
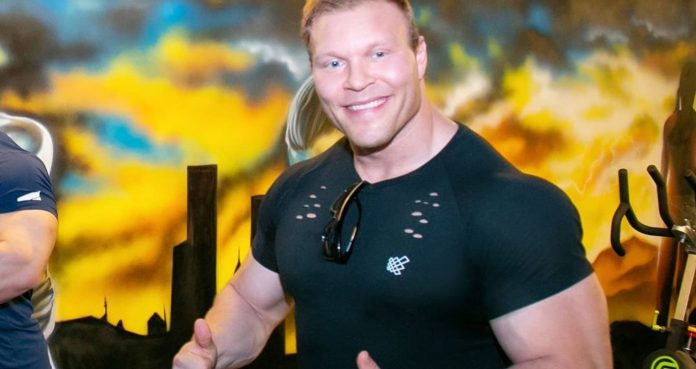
Professional bodybuilder Klaus Myren Riis says that the basics are just as effective as anything else. As a coach, fitness instructor, and personal trainer, Riis has helped so many people find their niche and see those big gains they thought would never come. Starting out as a fitness model and partaking in fitness competitions, Riis became known for his generosity and knowledge by those looking for guidance when it came to their own health and fitness. As Denmark’s first professional bodybuilder, he has competed in many different competitions and amassed a large following.
His work as a coach and personal trainer has done wonders for so many looking to progress in their own lives. He has helped so many competitors on the national and international level as coach of Team Riis Physiques take home the top prize and his 18 years of experience has given him great clout amongst fitness enthusiasts and athletes seeking a healthier lifestyle.
As a spokesmodel for health and fitness, he loves traveling the world and meeting fans from his massive social media following. For Riis, “Being fit, working out, and living a healthy lifestyle is what I love and live for. It has gotten me to experience different, exciting and challenging jobs and activities all around the world.”
This basic but effective leg day workout is a great way to improve your overall performance and see huge muscle growth. Give this routine a try and take advice from one of the best in the business.
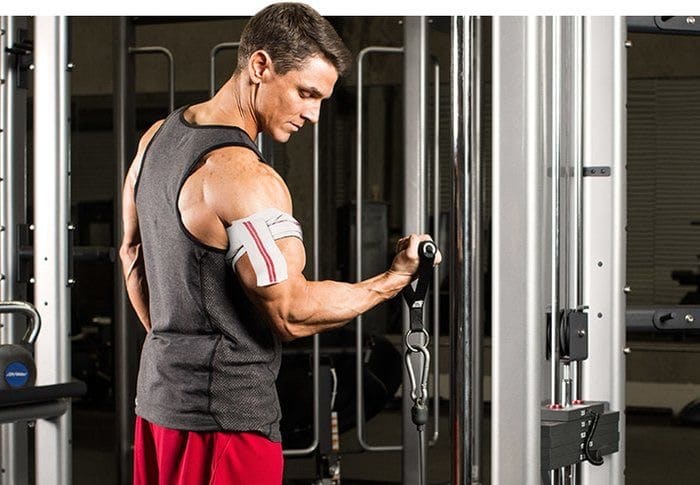
Leg Extensions
Leg extensions are great for targeting the quads and are considered an open chain kinetic exercise, meaning the chain of movement is open and your legs are free to move. A strong quad can have great benefits to strengthen key attachments at the knee joint (1).
How to: Place your hands on the bar and your knees will be on the pad at 90 degrees. Lift your legs until they are extended straight, but do not lock them out. As you lower your legs, exhale to the starting position.
Total: 4 set of 15 reps each. On the last set, do 10 reps, drop the weight, do 10 more reps, drop the weight again, and do 10 more reps plus 10 partial reps.
[embedded content]
Seated Leg Curls
Seated leg curls are a great hamstring exercise that move the weight through the knee. At the starting position, your hamstrings are relatively stretched, but as the weight starts to move, they contract to move the weight. The longer the muscle length, the more resistance can be applied to the muscle.
How to: Your back will be against the pad and your thighs under the leg pad. Your legs will be fully extended out in front of you and parallel to the starting position. Bending your knee, begin to lower your legs to a 90-degree angle. After a slight pause, raise your legs to the starting position.
Total: 4 sets of 10 reps. With each set, do 10 reps leaning forward off the back pad and 10 reps leaning back.
Good Old Squats
The squat is a great leg exercise that many of us already incorporate into our leg day. Squats can strengthen your core which provides benefits to posture and can increase balance. By strengthening the muscle of your lower body, squats will allow for better execution of full body movements to reduce the risk of injury (2).
How to: Place the bar just below shoulder height and rest it on the top of your back. Your feet should be slightly wider than shoulder width apart. Lower so your hips are below your knees and on the way up, drive through your feet and push your hips back to the starting position.
Total: 10 sets of 10 reps pyramiding up in weight on each set.
[embedded content]
Sissy Squats
Sissy Squats are an underutilized exercise and a great way to supplement a quad exercise because they don’t put excessive pressure on your joints. These are great for those with a bulge in the back of the thighs because they work out your quads without any involvement from the glutes or hamstrings.
How to: With your feet slightly closer than shoulder-width apart, maintain a flat back and tight core and sit back as if a chair was under you. Maintain a constant breathe and stay moving at a gradual speed.
Total: 4 sets of 15 reps.
Lunges
Lunges are great quad builders with the added benefits of strengthening your knees and increasing high leg muscle activity (3) while toning your glutes. They can also increase hip flexibility, core strength, and improve balance.
How to: Maintaining a tight core, step one foot forward slightly off center and bend to the ground. Alternate each leg and do so in a continuous movement.
Total: 4 sets of 30 reps.
[embedded content]
Tips From Riis
Too often does Riis see people in the gym not pushing themselves, either by texting or talking on the phone and not going back to the BASICS. A lot of influencers on social media will try and make money by inventing new, complex ways to work out, but all you need are the basics to see big gains. If you push yourself to your limit, your legs will be trembling and burning and you will feel the effect of this monster leg workout.
Instead of relying on hashtags like beastmode, nodaysoff, or workhard to get you there, use correct form to maximize intensity and these basic workouts will prove to be more than effective. Riis says, “You can’t sculpt something if there’s no clay on there to begin with”, and he could not be more right. Rely on the basics for foundational strength and let your hard work show by the effort you put in.
Instead of excuses year after year, build muscle faster and more efficient by pushing your limits and having fun doing so. Try this monster leg workout for big gains and take advantage of this amazing advice from an all-time pro and champion coach in Klaus Myren Riis.
Let us know what you think in the comments below. Also, be sure to follow Generation Iron on Facebook, Twitter, and Instagram.
*Images courtesy of Klaus Myren Rys Instagram
References
Journal of Orthopaedic & Sports Physical Therapy (2014). “Knee Pain: Safely Strengthening Your Thigh Muscles“. (source)
Case, Marcus J.; Downey, Darcy L.; Knudson, Duane V. (2020). “Barbell Squat Relative Strength as an Identifier for Lower Extremity Injury in Collegiate Athletes”. (source)
Jakobsen, Markus D.; Sundstrup, Emil; Andersen, Christoffer H.; Aagaard, Per; Andersen, Lars L. (2012). “Muscle activity during leg strengthening exercise using free weights and elastic resistance: Effects of ballistic vs controlled contractions”. (source)
The Ultimate Guide To Blood Flow Restriction Training (BFR Calf Workouts Included)
Everything you need to know about blood flow restriction training
There comes a point in every lifter’s life when he cannot seem to make any progress, no matter how hard he tries. The plateau can cause despair and confusion in his ongoing struggle. Most people can relate to the scene, but not the pros. Pros incorporate advanced training techniques in their training routines, and so should you.
What are advanced training techniques?
We are glad you asked.
Follow the same exercises long enough, and your muscles will catch up to your training style. As soon as your body gets used to your workouts, it will stop responding, and your gains will begin to taper off. You will then need to shock your muscles to stimulate muscle growth and break through the overhead ceiling.
Enter advanced training techniques.
Advanced training techniques shock your muscles by adding variety and increasing the intensity of your workouts. Most advanced techniques overload your muscles by increasing your muscle’s TuT (time under tension).
Also Read: How To Increase The Time Under Tension To Maximize Your Gains
Types of Advanced Training Techniques
1. Superset
A superset is when you perform two or more exercises in succession without any rest. It could include training agonist and antagonistic muscles groups.
Related Read: Best Supersets to Build Muscle
2. Dropset
It includes progressively decreasing resistance after every set (with no rest in between) until you hit failure.
3. Intraset Stretching
The intraset stretching technique includes holding resistance at the ‘stretched’ position after you have completed the desired number of reps of an exercise. After pausing at the bottom of the movement for 10-15 seconds, you then perform the same number of repetitions you did previously without racking the weight.
4. Negatives
While performing negatives, your training partner (or coach) helps you through the concentric phase of the exercise so that you can perform additional reps on the eccentric part of the motion. Lower the weight in a slow and controlled manner while performing negatives.
5. Rest-Pause
Perform as many reps as possible, rest for a few seconds, then perform additional repetitions. Repeat until you hit absolute muscle failure.
While most advanced techniques make you lift heavy or increase your muscle’s TuT, blood flow restriction training does things differently.
Pre-Requisites For Advanced Training Techniques
1. They Are Not For Everyone
They are called ‘advanced’ training techniques for a reason. If you are a beginner or an intermediate lifter, you should stick to orthodox bodybuilding exercises. Only think about adding an advanced training technique to your routine when you have milked the good old lifts.
Years of experience in the gym and knowledge of the body are needed to make the most of ATTs. They get you the best results when orchestrated with strategically planned regimens.
2. Don’t Push Yourself Too Hard
Many novice lifters are too hard on themselves when they can’t budge the needle in the right direction. They throw logic and reasoning out of the window and try to add as many ATTs as they can possibly think of in their workouts.
Several techniques (like BFR) should be used during planned overreaching, whereas techniques like prioritization can be followed throughout the year.
Remember: going crazy with ATTs can stagnate progress as it increases the risk of overtraining and injury.
3. Switch Them Up
Follow the same advanced training techniques for too long, and you’ll end up where you started. We understand that you love dropsets, but if you don’t want them to lose their charm, you shouldn’t perform them at the end of every set. Treat ATTs like creatine. Cycle them to get the best results.
Blood Flow Restriction Training
Blood flow restriction (BFR) training is also known as occlusion training, hypoxic training, KAATSU, and ischaemic training. BFR training includes restricting blood flow to your target muscle groups for building strength and size.
How Blood Flow Restriction Training Helps In Building Muscle
BFR training cuffs hinder the flow of oxygenated blood to the target muscles and prevents deoxygenated blood from returning out.
It forces blood to stay inside your target muscles throughout the set resulting in a nasty pump.
This process creates a by-product accumulation effect and induces an oxygen-low muscle state. It stimulates anaerobic adaptations that are favorable for muscle growth.
Blood flow restriction training causes a swelling effect on muscles and a buildup of metabolites, such as lactic acid, that stimulate muscle growth.
The direct fatigue to muscles caused by the bands forces the nervous system to recruit fast-twitch muscle fibers. These fast-twitch fibers have the highest capacity to grow.
But isn’t restricting blood flow to a muscle bad?
Well, it is bad if you are restricting blood flow for long periods. A typical BFR set does not last longer than 60-seconds, so we are good here. BFR of veins increases your blood’s lactate concentration. It helps you work out at a lower intensity while giving the feeling of a much harder workout.
Yes, there are mind games at work here too. When your brain thinks your body is experiencing a physical challenge, it signals the pituitary gland to release more growth hormones. GH (growth hormones) are responsible for building muscle mass and strength.
To put all BFR safety worries to rest, St. Mary’s University conducted a study. The research found that compared with low-load training, low-load BFR training is more effective, tolerable, and therefore a potential clinical rehabilitation tool.
Another study concluded that BFR training led to no prolonged reduction in muscle function or increase in indications of muscle damage in blood tests.
Benefits of Blood Flow Restriction Training
Improves strength.
Better muscular hypertrophy.
Increases aerobic capacity.
Different Types of Blood Flow Restriction Training Equipment
1. KAATSU Device
Have you ever seen a bro walking around with cuffs in the gym? No, he is no Christian Grey looking for his Anastasia Steele. Those cuffs are known as KAATSU devices. These cuffs are specialized BFR training tools used to restrict venous blood flow.
2. Pressure Cuff
If you want to take your BFR training a step further, you should invest in a pair of pressure cuffs. With this BFR equipment, you can dial in the exact amount of pressure you want around your muscles. We recommend this to people who know what they are doing.
3. Knee and Elbow Wraps
Blood flow restriction training on a budget doesn’t get better than this. Knee and elbow wraps are incredibly effective substitutes for dedicated BFR equipment.
Which type of band should you use?
A 2012 study of 116 people indicated a measurable difference in using narrow and wide cuffs in BFR training. Wide BFR cuffs restrict flow at a lower pressure and can be less effective than narrow cuffs. BFR training is all about chasing the pump, and you will have to try different bands tied at varying pressures to find out what works best for you.
Most Common Mistakes While Blood Flow Restriction Training
1. Tying The Bands At The Wrong Place
While BFR training, you should only wrap at the top of the arm or leg. You can wrap your arms for a shoulder or chest workout and your legs for a glute workout.
According to research, compared to a 13+ cm cuff, a 5-9 cm cuff reduces the risk of occluding the arteries. For the same reason, if you are using knee or elbow wraps for BFR training, you should wrap them at the top of your limbs in a layered manner rather than a spiral down the arm or leg.
2. Your Blood Flow Restriction Bands Are Too Tight
Some people make the mistake of tying the bands too tight. Overly tight bands/cuffs could lead to a restriction of both – arteries and veins. Here is a high school biology lesson for you:
Arteries – bring blood to muscles.
Veins – take blood away.
For a maximal swelling response, you want blood coming to the muscles and staying there. Meaning – you want the arteries to work just fine but restrict the veins.
In fact, there is evidence that if you occlude both arteries and veins, you might end up decreasing muscle growth at the site wrapped.
You can solve this problem by modifying perceived pressure on blood flow during BFR training. Wrap your muscles at a perceived pressure ranging between 0-10, with 10 being the tightest.
Perceived pressure of 7 out of 10 for legs and 6 out of 10 for arms provide the best result. A 10 out of 10 perceived pressure will result in total restriction of both – arteries and veins.
3. Skipping Warm-Ups and Cool-Downs
Before you begin your BFR workout, you should perform a light warm-up of around five minutes (walking or cycling), followed by 15 unwrapped reps with the weight you will use for your first BFR set. Doing this routine will get your blood pumping.
After your blood flow restriction exercise, you should take off your cuffs/wraps and stretch out your muscles. Stretching can help flush out the built-up lactic acid in your muscles.
4. Going Too Heavy
Perform a blood flow restriction set at the same intensity as a normal warm-up set. You don’t need to be lifting more than 30-50% of your one-rep max (1RM) while performing any BFR exercise. Going heavier than this will only sabotage your form and won’t add anything to the bottom line.
The primary advantage of BFR is that it can help increase muscle size while training at low intensities. A study shows that training at 40% of your 1RM can be the sweet spot for blood flow restriction training. Going heavier than this does not increase muscle fiber recruitment.
5. Performing BFR Training Every Day
Although blood flow restriction training causes greater fatigue immediately after a training session, there are no increases in muscle damage or declines 24 hours later.
Since this type of training has low recovery demands as compared to high-intensity training, it can be followed on alternate days. A study found that 2-3 days of BFR training per week is best for gains in strength and muscle.
6. Not Training To Failure
Blood flow restriction training recruits the larger, fast-twitch muscle fibers. These fibers are either activated by heavy resistance or fatigue. Research shows that the closer you get to muscular failure, the greater is the fast-twitch muscle-fiber recruitment. So, training to failure in low-intensity conditions is necessary for optimal muscle fiber recruitment while performing BFR training.
Blood Flow Restriction Calf Workout
Calves are one of the most stubborn muscle groups. Since you use your calves throughout the day, they are accustomed to taking a beating and might not respond to your vanilla calf workouts. BFR calf workouts help trap the blood inside your calves during your sets. The pump can provide the necessary stimulus required for turning your calves into full-grown bulls.
1. BFR Calf Resistance Training Routine
a) Standing Calf Raise
1 Set – 30 Reps (20-30% of your 1RM)
30-seconds rest
3 Sets – 15 Reps (30-40% of your 1RM)
30-second rest after each of the three sets
b) Seated Calf Raise
1 Set – 30 Reps (20-30% of your 1RM)
30-seconds rest
3 Sets – 15 Reps (30-40% of your 1RM)
30-second rest after each set
The beauty of BFR training is that it can take your gains to the next level while making minor adjustments to your existing routine. You don’t need to be doing weird and complicated exercises for breaking the plateau.
2. BFR Walk Training For Calve
Walk at a brisk pace for 3 minutes
Rest for 1 minute
Repeat 4 times for a total of 20 minutes
You don’t have to be a bodybuilder to make the most of BFR calf training. Research shows that walking while wearing BFR bands can result in increased muscle size in the thighs and lower legs.
You could perform the second calf workout on a treadmill or out in the open. Using a treadmill gives you the option to add resistance by walking on an incline.
Most people make the mistake of placing the BFR cuffs just below or above their knees while training calves. There are superficial nerves in these areas, and wearing bands too close to the joints increases the risk of causing nerve damage.
While training lower or upper legs, BFR bands should be placed at the top of the thighs.
Conclusion
Blood flow restriction training can help increase muscle growth as a standalone training routine and even as part of your regular training program. We recommend using BFR training on a light recovery day or for annihilation at the end of a workout.
BFR training can be a godsend for people recovering from an injury. This advanced training principle causes very little muscle damage and can be used during de-loading periods to supplement as much as 60 percent of the high-intensity workload.
Do you use blood flow restriction technique in your workouts?
Let us know in the comments below. Also, be sure to follow Generation Iron on Facebook, Twitter, and Instagram.
Build Shredded Legs With This Dumbbell Workout
There can be many reasons why people don’t want to use a barbell. It could be because of a back pain or your general dislike for the barbell that you want to stay away from it. It is said compound movements with a barbell are the best way to build big legs.
This is complete BS! Your muscles have no idea if you’re using a barbell or dumbbells. All they know is if you have trained them to failure. You can completely eliminate barbells and other machines from your leg workouts and still build monster wheels.
1. Goblet Squats – 3 Sets 15 Reps
Goblet squats can be a life saver if you’re suffering from a back injury. This exercise forces you to keep your back straight and hence eliminates all the tension from it. Goblet squats target your quads and will leave you limping by the time you’re done with this exercise.
Stand with your feet slightly wider than shoulders width apart. Hold a dumbbell in front of your chest with both your hands. Perform a squat until your hams touch your calves. Keep your back straight, and head and chest up.
2. Dumbbell Lunges – 3 Sets 15 Reps On Each Leg
The range of motion is the key while performing this exercise. Most people make the mistake of placing their feet way too far apart or way too close to each other. Use weights with which you can complete 30 reps in one set.
Your front knee should not extend farther than your big toe and the quad of the second leg should be parallel to the calf of the front leg while you’re at the bottom of the movement. This is the optimal position to perform dumbbell lunges.
3. Dumbbell Romanian Deadlifts – 3 Sets 10 Reps
Dumbbell Romanian deadlifts are one of the best exercises to target your hams. Using dumbbells instead of a barbell will help you increase your range of motion. Barbells can limit your motion by making you follow a straight line of movement.
Using dumbbells lets your arms free and you can follow a movement where you have the greatest amount of tension on your quads. Most people complain about lower back recruitment while using a barbell, this problem is eliminated when you use dumbbells.
4. Dumbbell Step Ups – 3 Sets 12 Reps On Each Leg
Dumbbell step ups are a complete leg buster. This exercise will set your quads on fire. If you don’t have access to an elevated platform at your gym, you can use a flat bench for this exercise.
Stand while facing the platform with dumbbells at your sides. Step onto the platform with your right foot, extend your right leg and hip at the top of the movement. Place your left foot on the platform as well. Step down with your left foot and repeat with the right leg.
5. Dumbbell One-Legged Deadlifts – 3 Sets 12 Reps On Each Leg
Dumbbell one-legged deadlifts are a unilateral exercise. Unilateral exercises are the ones which work one side of your body at a time. This can help with developing the muscles and strength on your weaker side.
One-legged deadlifts help with isolating the hamstring and establishing a mind-muscle connection. Hamstrings can be a hard muscle group to train and develop as you can’t see them in the mirror and hence it becomes harder to develop a connection with them.
Have you ever tried a dumbbells only leg workout?
Let us know in the comments below. Also, be sure to follow Generation Iron on Facebook and Twitter.

Improve The Shape And Size Of Your Glutes With This Workout
It’s time to improve the shape and size of your glutes with this workout
Contrary to the common assumption, glute workouts aren’t just for women. If you have a muscular upper body and shredded legs, a flat rear can make you look awkward. Muscle symmetry and balance are important if you’re aiming for aesthetics.
When people talk about leg workouts, their primary focus is quads, hams, and calves. They completely overlook training their glutes. All pro athletes, male and female, work on their glutes in one way or the other.
1. Squats – 3 Sets 12 Reps
Squats are an overall leg builder. This is a compound exercise which can help in developing your glutes, hams, quads, and calves. Squats should be a staple in your leg workouts. This exercise has enough variations that you can try a new one every time you perform them.
For optimal results, you need to make sure you maintain a full range of motion while performing glute exercises. Going only parallel to the floor isn’t going to do anything for your butt. ‘Ass to the grass’ is the way forward.
2. Donkey Kicks – 3 Sets 12 Reps
Donkey kicks are an isolation exercise. All the tension is placed on your glutes during this exercise. There are two versions of this exercise which you can try. The first is the bodyweight version and the second is performing it on a leg extension machine.
You can start performing this exercise with body weight and as you get better you can switch to using weights on the leg extension machine. You need to have a strict form throughout the exercise otherwise you might recruit your hamstrings.
3. Barbell Hip Thrusts – 3 Sets 12 Reps
Glutes are the target muscle group for barbell hip thrusts. Lie down across a flat bench with only your shoulders on the bench and place a barbell on your thighs. Your feet should be placed flat on the floor so that your calves are perpendicular to the floor.
Try touching the floor with your butt at the bottom of the movement. Thrust your crotch upwards and try forming a bridge with your body. Hold and squeeze your glutes at the top of the movement. Return to the starting position and repeat.
4. GHD Hyperextension – 3 Sets 15 Reps
GHD (glute ham developer) is brought into the mainstream by CrossFit. This is an incredibly effective exercise if you want to develop the back of your legs. Keep your glutes tight throughout the exercise and flex them at the top of the movement.
If you don’t have an access to a GHD at your gym, you can use a flat bench for this exercise. Place your knees at the edge of the bench and ask someone to sit on your ankles. Hold onto some weights to make this exercise harder.
5. Reverse Abductor Press – 3 Sets 12 Reps
Reverse abductor press focuses on the outer sides of your rear. This exercise can also improve your hip mobility. Stand while facing the seat and place your feet on the foot rests and your knees against the knee pads.
Hold onto the seat to improve your range of motion. You need to establish a mind-muscle connection to make the most of this exercise. Don’t just go through the motions while performing the abductor presses. Hold and squeeze your glutes at the top of the movement.
Which is your favourite glute exercise? Let us know in the comments below. Also, be sure to follow Generation Iron on Facebook and Twitter.