Tag: rowing machine
Rowing Machine Form Guide: Use The Rower To The Best Effect
There are plenty of options out there when it comes to getting a good cardio workout. As a personal trainer, I’ve tried them all. Yet after 30 years of training athletes, sports people, and everyday gym goers, I’ve settled on just one device — the rowing machine.
Rowing has a lot going for it. Besides working more than 80% of your muscles, it provides a joint-friendly way to get a great cardio workout. Your rowing workout, though, is only as effective as your form. Unless you learn how to do it right, you will develop poor habits that could lead to injuries. In this article, I’ll explain exactly what proper rowing machine form looks like. I’ll also cover the most frequent rowing machine form mistakes and address the most common rowing machine form questions.
Rowing Machine Benefits
Before we get into the specifics of how to row with proper form, let’s consider the benefits of rowing:
Full Body Training
Lower body muscles are the main focus of most cardiac activities. This is because their primary workout movement is typically some variant of walking. These workouts effectively tone and strengthen the quads, hamstrings, glutes, and calves. However, the upper body gets very little stimulation.
Rowing is different, as 85% of your body’s muscles are used during a rowing workout. Besides the leg muscles, rowing engages the latissimus dorsi and trapezius muscles of the upper back, the deltoids, biceps, and core, as well as the muscles that run down either side of the spine.
Working out on a rowing machine won’t give you bodybuilder-like muscles but will strengthen your muscles. You can increase the rowing resistance if you want to employ more pulling power to complete the rowing motion. The strength and endurance of your muscles will increase by performing hundreds or even thousands of repetitions while rowing.
Joint Friendly Cardio
Rowing is a classic example of a closed-chain exercise. This is because your feet are always in contact with the foot platform. In contrast, most cardio exercises have an open chain, which causes the feet to rise and drop frequently. This results in recurrent foot strikes.
Since rowing is a closed chain movement, there is minimal impact pressure on the ankles, knees, and hips. Rowing also relieves the compressive pressure on the spine because it is a sitting workout.
Rowing not only lessens the strain on your joints but it also improves the health of those joints. In a 2014 study, 24 participants were followed for eight weeks as they exercised on rowing machines. Their knee, shoulder, and elbow joints’ capacity for rotation had increased by an astounding 30% on average by the time the trial was over. [1]
Calorie Burn
Rowing burns a whole lot of calories. Your heart and lungs have to work harder to deliver the nourishment required for those muscles to work since you are using both your upper and lower body muscles. Because of this, rowing is a fantastic option for those looking to lose weight.
For a 180-pound person, a 30-minute workout of moderate-intensity rowing will burn about 200 calories. They could easily burn more than twice as many calories if they increased their effort. You can regularly lose weight by combining a daily rowing program with a calorie-reduced, nutritious diet.
Cardio Workout
Rowing is an excellent cardiovascular workout. Since cardiovascular exercise is aerobic, oxygen must be consumed to fuel the activity. That oxygen and other nutrients are delivered to the working muscles through the bloodstream. Your cardiovascular system facilitates this process.
Your heart is the central organ in your cardiovascular system. The stronger it is, the more effectively it will pump the blood that delivers the nutrients to your cells. Rowing strengthens the heart so it can act as a more efficient pump.
Understanding the Rowing Machine
Rowing machines are designed to simulate the experience of rowing on the water. The parts of a rowing machine work together to enable the user to perform the four key movements that a rower performs:
Catch
Drive
Finish
Recovery
Here are nine rowing machine parts that you need to become familiar with:
Flywheel: The flywheel is the large wheel at the front of the machine. It is connected to the handle by a cable. When you pull on the cable, you create resistance. This may be air resistance through fab blades, magnetic resistance through magnets, or water resistance as the flywheel churns through the water.
Damper: Air and water resistance rowers usually feature a damper. This is a lever that controls the amount of air that gets to the fan. Most dampers will have settings from 1 to 10. The higher you set the damper, the more air flows to the fan. This makes the rower feel heavier and, therefore, more challenging to operate.
Footplates: The footplates are positioned where the rail meets the front housing of the machine. The best footplates pivot to allow for natural ankle motion while rowing. They should also be adjustable and feature sturdy foot straps to allow you to lock your feet in place securely. Getting the correct foot placement will help with proper rowing form. You won’t be able to drive as hard and risk lower back damage if your heel height is too low. Your stroke length will be constrained, and your form will deteriorate if your feet are too high in the footplate.
Seat: Many modern seats are ergonomically contoured for comfort. Others are molded, padded, or flat. You can increase your sitting comfort by sitting a few inches forward from the back of the seat and not leaning back excessively at the top of each rowing stroke.
Seat Rollers: Seat rollers sit on the underside of the seat, connecting it to the rail. High-quality rollers will allow for smooth movement up and down the rail.
Handle: The handle may be ergonomically contoured for comfort. It should be long enough to allow you to grip it out wide. The best handles will also have a center cut out to allow you to row one-handed.
Rail: The rail is the central part of the frame that the seat moves up and down. It may use aluminum or steel. The rail may also be parallel to the floor or slightly angled. Angled rails are more challenging because they offer more resistance.
Monitor: The monitor displays your key training data, including your time, strokes per minute, total strokes, calories burned, and heart rate.
Frame: The frame of a rower may be made of aluminum, steel, or wood. It should have a maximum user weight of at least 50 pounds heavier than the user. This will ensure the rower is sturdy and won’t move around during use.
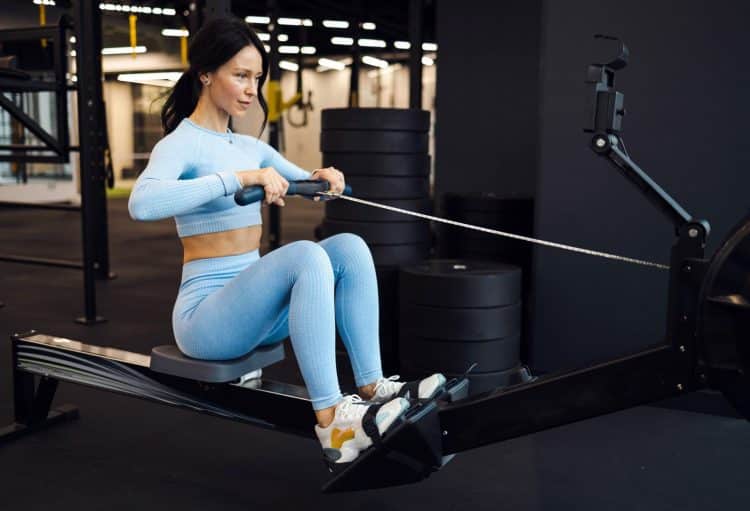
Proper Body Positioning
The correct rowing form starts with your setup. Begin by sitting on the rower seat and putting your feet on the foot pedals. Adjust the footrests so they are aligned with your feet, and then secure the foot straps so you are locked in.
Sit upright with a naturally slight back arch and lean forward to grab the handles with an overhand grip. Hold the handles with a relaxed grip, avoiding squeezing too tightly.
Lean slightly forward while maintaining a neutral spine position and bending your knees slightly. Keep your shoulders relaxed and down. Finally, engage your core to activate your abs and lower back muscles.
Executing the Rowing Stroke
The rowing stroke has four distinct parts — catch, drive, finish, and return. Let’s break down each part with an explanation of its purpose.
The Catch
The catch is the portion of the stroke where you are most squeezed and tense at the beginning. Your arms are straight, your knees and hips are bent, your ankles are dorsiflexed, and you feel like there is nowhere for your stomach to go. In terms of rowing on the water, this is the portion of the stroke where your oar has just been lowered into the water, and you are about to push or drag the oar through the water to propel the boat.
The Drive
During this phase of the stroke, you push incredibly hard with your leg muscles to propel the oar through the water and propel the boat forward. It is what determines the numbers on the rowing machine’s LCD that displays your split time and indicate how much effort you are exerting. This is what accelerates you. It is the portion of the stroke where you put in all the effort, requiring a powerful leg push.
The Finish
The finish comes at the conclusion of the drive. This is the point where the oar emerges from the water. Your core is tight, your arms are bent, your knees are straight, and your hips are extended further than before. After completing the movement of the handle, you are prepared to bring it back to the front, or the catch, position.
The Recovery
You must go through the recovery portion of the rowing stroke to get from the finish back to the catch. It is called recovery because you get to rest (very briefly) and recover during this part.
Putting It All Together
Each of the four phases is covered with the following cue:
“Legs, core, arms … arms, core, legs”
Many people have a natural tendency to think “pull” when in the catch position. They want to pull with their arms when they should be pushing with their legs first. Your legs provide 60% of the force for the movement.
So, most of the work is being performed by your leg muscles, the largest in your body. However, if you pull with your arms first, your smaller, weaker arms do most of the work, producing much less force and efficiency. So, straighten your knees and push back through your feet rather than pulling with your arms first while using those bigger, stronger leg muscles. Your legs will straighten, and the seat will slide backward.
Once your legs are straight, you can begin to open up your hips by moving from a slightly forward-bent position to a slightly backward position. Keep your core tight as you bring your arms into the action.
By this time, your legs have already exerted so much force that the flywheel is turning very quickly, and you do not need to exert much force with your arms to bend your elbows and pull the handle close to your body. About 20% of the power for the rowing stroke comes from the arms.
The driving phase of the stroke was formed by the three motions (legs, core, and arms). You are now in the finish position when your legs are straight, your core is slightly leaned back to the 1 o’clock position, your elbows are bent, and the handle is close to your body.
You must go through the recovery phase to return to the catch position. To do this, you simply reverse the actions you’ve just performed, making it arms, core, and legs.
As soon as you are in the finish position, immediately push your hands away from you and straighten your elbows to allow the handle to pull your arms in front of you. This will be made easier with the help of the handle and chain recoil. When your elbows are straight, you close the hip angle, which causes your trunk to go from 1 to 11 o’clock. You must perform the leg component of the stroke in reverse once your core and trunk have reached that position. This will bring you back to the catch position.
You are now ready to start the stroke cycle over again.
Common Mistakes to Avoid
Here are the ten common mistakes that people make on the rowing machine and how to fix them:
1. Overgipping the Handle
You should grip the handle with a relaxed grip. There is no need to grab it tightly or overgrip with the wrists angled downward. Your fingers should be comfortable around the handle with your thumbs underneath. Your wrists should remain flat throughout the entire rowing stroke.
2. Leaning Forward in the Catch Position
People frequently slump forwards at the catch to reach further forwards. This results in the rounding of the upper and mid-back. This is not the best position for your shoulders or back. Instead, try sitting straighter-backed and more upright, but not so straight that your spine is overextended.
If your back is rounded with your arms far in front of you in the catch position, you will struggle to maintain contact with your body. That’s because you rely more on your ligaments and arms to start rowing than back and shoulders.
You want to be in the catch position with your back straight, hips still tilted forwards at 11 o’clock, core engaged, and lats (back shoulder) engaged. Pull your shoulders back and down to engage the lats.
3. Breaking the Arms at the Catch
Your arms should be as straight as possible in the catch position. This allows you to more effectively connect the handle to the power of your leg drive. So, avoid the tendency to bend the elbows in the catch; that will come as you move into the drive.
4. Chicken Wing Arms
Chicken wing arms occur when you stick your elbows out to the side in the finish position. This results in quite a lot of energy loss. Allowing the elbows to return past the body with relaxed rather than hunched shoulders is far more efficient.
5. Lunging at the Catch
It’s common to see people lunging their torso forward just before the catch position. This puts excessive strain on your lower back and could result in pulling a muscle in the mid-back. Establish the proper forward upper body lean during recovery before you bend your knees to avoid this tendency. Your shoulders should be in front of your hips before you move into the catch position. Do not deviate from this position.
6. Overreaching at the Catch
Avoid reaching too far toward the flywheel in the catch position. Doing so puts you in a weaker, compromised position. You want your torso to be in a 1 o’clock position, with your shoulders in front of the hips. Do not overextend the shoulders, keeping them down and relaxed.
7. Leaning Too Far Back in the Finish Position
Leaning too back in the finish position is the most common mistake I see among rookies. Doing so negatively affects your balance and stability, puts excessive strain on the lower back, and prevents you from adequately engaging the upper back, glutes, quads, and hamstrings.
In the finish position, your torso should be in the 1 o’clock position. Another cue is to look at the chain or belt that connects the handle to the flywheel. It should be parallel to the floor throughout the stroke, including in the finish position. You are leaning too far back if it is angled upward in the finish position.
8. Only Pushing Through the Heel in the Drive Position
Let’s now focus on what part of your foot you are pushing through in the drive position. In the catch position, many people lift the heel and push through the toes. That is perfectly fine, but as you transition into the drive, you must drop your heels to push through the entire foot — not just the heel or toe.
Some people find they can only push through the heel as they complete the drive position. This can result in your shin and toe muscles being overworked, which can also result in an injury.
9. Bending the Knees Too Early on the Recovery
If you bend your knees too early on the recovery, your arms have to row too high or follow an arcing movement. Maintain a parallel chain position throughout the entire stroke. Achieve this by extending the arms and allowing your body to swing naturally so that the hands and handle clear the knees before you bend your knees.
10. Rushing the Slide
If you try to move forward too quickly on the rail as you transition from recovery to catch, you won’t be able to establish a smooth rowing cadence. Allow time during the recovery phase to breathe, and ensure you’re in the proper position for the next drive.
Watch The Correct Technique for Rowing Machine Exercise:
Frequently Asked Questions
Why is the rowing technique important?
By learning proper technique, you will be able to avoid common rowing machine injuries, especially those relating to the lower back. You will also become a more efficient rower, able to burn more calories with less wasted effort and to row faster and in a way that engages more muscles.
What key cues should I think about when rowing?
Good rowing form can be distilled to a simple six-word cue — “legs, core, arms … arms, core, legs.”
You can follow the proper bodily sequence to achieve proper rowing form by repeating this cue to yourself.
What muscles does rowing work the most?
The main muscles worked when rowing are the glutes, quadriceps, hamstrings, upper back, lower back, and core. Rowing has been described as a horizontal deadlift repeated hundreds of times over.
Wrap Up
Rowing is one of the most effective forms of cardio you can do. It is also one of the safest, being extremely joint-friendly. However, the benefits you’ll get from rowing are only as good as your technique. Take the time to apply the technique guidance we’ve provided, avoid the 10 common rowing mistakes, and your rowing workouts will be far more productive, safe, and enjoyable.
References
Kang SR, Yu CH, Han KS, Kwon TK. Comparative analysis of basal physical fitness and muscle function in relation to muscle balance pattern using rowing machines. Biomed Mater Eng. 2014;24(6):2425-35. doi: 10.3233/BME-141056. PMID: 25226943.
Need Cardio But Hate Running? Here Are 5 Others Ways To Cardio-Infuse Your Workouts
Cardio is definitely one of the building blocks when it comes to exercise.
Unfortunately, not everybody can tolerate long jogs. In fact, for those of us who prefer going to the gym to lift weights or use the equipment, running on the treadmill can become a huge chore. Unfortunately, however much you might hate running, there’s no running from the truth: cardio is an essential component of bodybuilding and fitness that needs to incorporated into your workouts if you’re looking to maximize results.
But for those of us who truly dread going for a run, here are five easy ways you can add cardio into your workout without running.
1. Indoor Rock Climbing
If the monotony of running bores you, say no more. This isn’t a staple at most gyms but Google if there’s an indoor rock climbing gym near you; they’re around. Rock climbing requires the upper body to be in a state of constant exertion, which gets your heart rate up and keeps it up at an intensity equal to or better than going for a jog. So, if you find yourself avoiding the chore of more conventional cardio workouts, this might be a fun one for you to try out.
2. Boxing
All forms of boxing are another great source of cardio. If you go to the gym with a spotting buddy, try turning him into your sparring body and go for a couple rounds of boxing, kickboxing, Muay Thai — anything works. If you’re more of a lone wolf type in the gym you can try just punching the bag for a solid twenty or thirty minutes; that’ll get your blood pumping better than a relaxing jog in the park.
3. Try the rowing machine.
The rowing machine is a great piece of workout equipment available in almost any standard gym across the country that doesn’t get a lot of love. The truth is, the rowing machine has so much to offer: it’s a great source of cardio because of the adjustable tension in the bands, and it also gives you a great workout in your upper arms and back that you wouldn’t simultaneously be getting if you just go for a jog. What’s not to love?
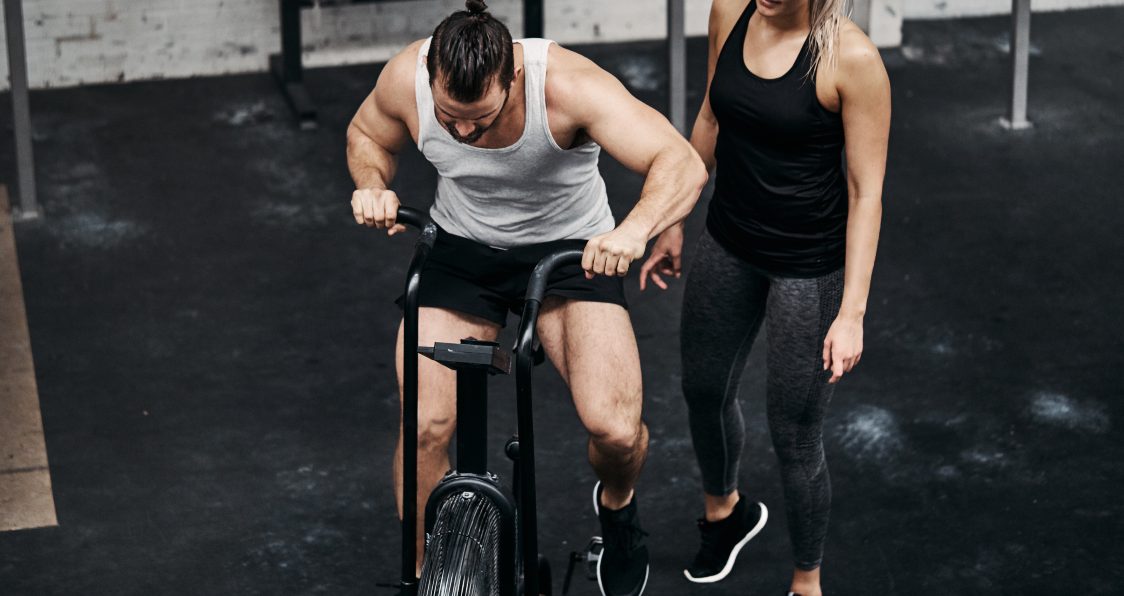
4. Biking or stationary bike
This is a pick-your-poison type scenario. If the reason you hate jogging is because you don’t like being outdoors, than biking isn’t likely to help you get more cardio in. A stationary bike might be a good fit for you since they’re also available at almost any gym and can be knocked out in tandem with whatever workout you happen to be doing there.
However, if you’re looking to get some fresh air or be in nature, a long bike ride — try challenging yourself with an incline if you’re really looking to get your heart rate up — might be just what you’re looking for.
5. Jump squats or burpees
Finally, if you’re a fan of HIIT, this type of cardio infusion is more your speed. Jump squats and burpees, when done rapidly and in small amounts, can really increase your cardio and overall gains from your workouts. If biking or rock climbing seem like too much of a new time investment, this is an easy way to take whatever existing workout you’re working with and inject some cardio inside.
The next time you’re strength training, challenge yourself by doing 20 seconds of jump squats or burpees alternating with 20 seconds of rest for about 5 minutes — you’ll be amazed at how fast it gets your blood pumping.
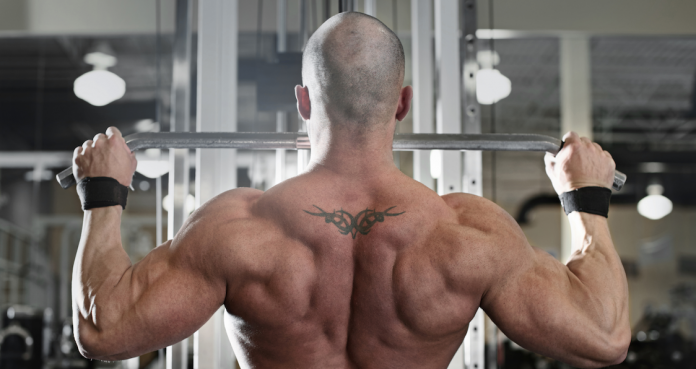
Top 5 Moves for a Totally Shredded Back
Looking to get a ripped back but don’t know where to start? We’ve got you covered.
The back can be one of the most complicated parts of the body to work on. A lot of the muscles aren’t intuitive, meaning you don’t use them in everyday life that often, so it can be hard to figure out how to get it right. There’s a huge overlap between back and arms, so a lot of these you can expect to help out on arm day as well. Here’s five great exercises to get a totally ripped back.
1. Reverse Lat Pulldown
The reverse lat pulldown is one of the most challenging exercises you can do for your back, but definitely has a high impact and increases muscle gains. A reverse lat pulldown is a regular pulldown with your hands reversed, which increases the amount of work done by your back. It’s also a great workout for your arms because it’s essentially a modified pull-up. This is a great high impact workout that should definitely be included in any back workouts you have planned.
2. Bent-over Barbell Row
The bent-over barbell row is another great back workout. It’s essentially the same as a regular barbell deadlift except you’re bent over at a 90-degree angle. By keeping your back completely straight while you lift, you get a great back workout out of a workout that’s typically just for the arms. Again, another great workout that serves a dual purpose.
3. Rowing Machine
The rowing machine is definitely an underrated piece of equipment in the gym. It’s not a fan favorite, but it gets the job done well. Spending 20 or even 30 minutes on the rowing machine in the gym can really work our your arms and lower back. Just back sure to use proper posture, otherwise the workout will only be in your arms! You should be bending forward and pulling all the way back with a straight back each time.
4. Stiff Leg Barbell Deadlift
Just a modified barbell deadlift — the stiff leg barbell deadlift is a deadlift where you keep your legs completely straight. You bend over at the waist to lower the barbell and repeat. Make sure to keep your back completely straight — that’s the key to a lot of back workouts. Not only is it the only way to make sure your gains are actually in your back, but it’s important to prevent injuries like pulling a muscle.
5. Wide-Set Pull-up
Wide-set pull-ups are another great way to keep your back in shape. It’s essentially just a pull-up where your arms are really far apart. This increases the use of the muscles of your upper back and the area in between your neck and along your spine. It’s definitely an exhausting style of pull-up, but worth it for the killer workout you get through the upper back and arms. When you place your arms on the bar, keep them shoulder-length apart, and then add about four to six inches on either side of that.