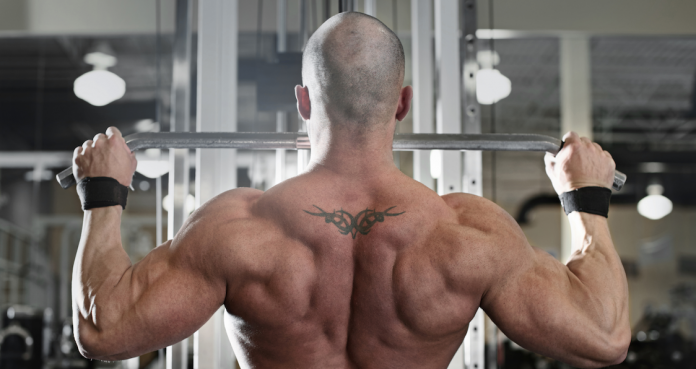
Tag: Back
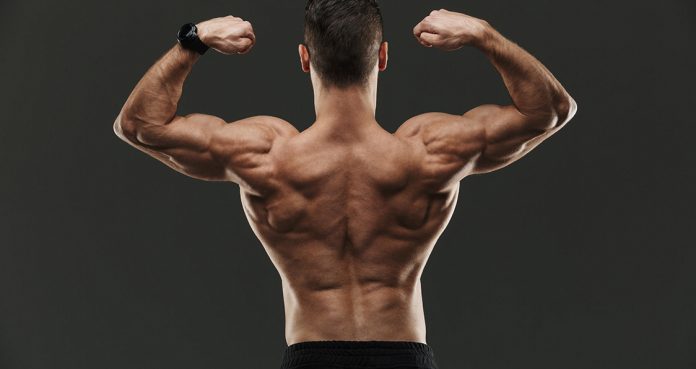
Top 4 Exercises To Unleash A Truly Massive Back
Get bat wings.
When it comes to improving strength and physical form it sometimes requires an athlete to implement new methods into their program. To solely rely on the same methods of training is to more than likely ensure running into a wall. Whether it’s bodybuilding or some other athletic endeavor, you never want to be going backwards. Instead it’s all about making one improvement after another on the road to shaping what’s considered to be the perfect physical form.
Of all the muscle groups and body parts that make up the human body, the back is definitely one of the most important to develop. Building up your back muscles are a great way to bring together your upper body. There’s a tendency to overdue ab exercises as well as focusing too much on the chest, leaving the back isolated and looking less than impressive. The whole point of bodybuilding is to bring together your body to make the ultimate package. It’s no simple task to get a symmetrical upper body and be as shredded and defined as you hope to be.
But building up the back isn’t solely about building muscles, it’s also ensuring that the stabilizers in the back are strong as well. By strengthening the back stabilizers it will guarantee that the most important lifts you perform, the squat and deadlift specifically, will be taken to the next level. Try adding these helpful exercises to your routine.
ISO Hold Front Squat
The iso hold front squat is a great method for building up strength in the upper back. The fronts aren’t something most people think about when considering back development, but the truth of the matter is that the back is engaged while squatting as well, specifically at the top of the movement. With iso hold front squats you load as much weight as your one rep max, lift the barbell in a front squat position and hold in a static position for a five to ten second hold.
Dumbbell Back Extentions
This exercise is great for building up the thoratic spine which is located in the upper region of the back. The movement is performed on a glute-ham developer and not only works the upper back region, but the entirety of the back itself. With some heavy dumbbells held at chest level this exercise can help improve compound lifts like the squat and deadlift.
Band Good Mornings
This exercise may not include any weight lifting, though there is a chain variation that can be considered, but he band good morning is a great technique help with upper back development without putting too much stress on the body. While standing on one end of the rubberband and wrapping the other around the neck you lift the upper body up from the bent over state until you’re fully erect and repeat the motion for reps. This a great and easy way to gain tremendous back strength.
Will you add these exercises to your routine? Are they already apart of your training? Let us know in the comments and forums. Also, be sure to follow Generation Iron on Facebook and Twitter.
How The Barbell Burpee Will Increase Full Body Strength
This variation of a traditional burpee is great for a workout.
The burpee alone is a challenging workout, let alone adding a bar. One that is comprised of both strength and cardiovascular movements, this workout is the perfect bodyweight exercise to increase full body strength and increase endurance. The burpee is further proof that bodyweight exercises can be just as demanding as any with weights.
But the barbell burpee is unique in that it adds additional elements to an already difficult exercise. Working with a combination of traditional burpee movements including a squat and a pushup, the barbell burpee adds the extra component of a power clean and push press with the barbell to make this is a highly effective exercise to do with a bar.
Used as an aerobic exercise in combination with strength training, the barbell burpee will increase cardio, strength, balance, and flexibility to give you an all-in-one workout to help burn fat and keep you on your feet and working your chest every time for however many reps you want.
Although difficult, the barbell burpee has great benefits and is worth adding to your fitness regimen. Able to attack all of your muscles, including your legs, glutes, core, back, chest, arms, and shoulders, along with the ability to raise your heart rate and get you breathing hard, this burpee is the perfect compound exercise to do with a bar each time.
For those looking to burn fat and increase endurance, as well as aid in power performance, the barbell burpee is great for athletes of any kind. Working many muscles at once also allows you less time working out with the barbell burpee.
All-Around Workout
The barbell burpee allows for increased strength in a variety of muscles including your lower body and upper body. Your legs and glutes are targeted during the jump back into a pushup position as well as the start to the power clean portion of the exercise. Once on the ground, your shoulders provide support as you descend into that all too familiar pushup using the bar as a point of support, especially with the jump up.
With more balance required for the burpee, your core activates and your arms and chest join the workout until that pushup is done as part of this burpee. The fun begins when you lift the barbell into a push press and rely on your fitness to take over as you lower the bar and continue with more reps.
By adding weight, your overall strength increases significantly as opposed to sticking with just your bodyweight (1). As a complex compound exercise, the barbell burpee is sure to fire you up on all cylinders and those gains will really show.
Promotes Fat Burn
As a physically demanding exercise, the barbell burpee is one that will burn off loads of calories, only supported by the fact that so many different muscle groups are being worked. With the ability to increase endurance, your metabolism will work harder for you and your ability to burn more calories will only intensify (2).
Fat loss happens when you consume less than you burn and while dieting can be tricky, the barbell burpee is one exercise to give you a great boost in calorie loss to start you on the right path towards fat loss and the jump and cardio portion of this is great for that.
Increases Endurance
When it comes to increasing your endurance and lung capacity, this workout is one that will do the trick. While running, cycling, or other cardio exercises will get you there as well, the barbell burpee is one that will boost your endurance while at the same time increasing strength and muscle growth (3). A long session of barbell burpees can be all you need for a good day’s work in the gym.
As fatigue sets in, your endurance will allow you to work longer and harder in all other aspects of your training and athletic performance. Along with working your circulatory system, muscular-skeletal system, and central nervous system, the barbell burpee will give your cardiovascular system a great boost to ensure a more effective and longer-lasting lift to add to the rest of your workouts to keep your working hard.
Enhance Explosive Power
Along with increased strength and endurance comes the ability for more power and explosiveness with workouts and competition. Barbell burpees will target your fast-twitch muscle fibers which allow for shorter bursts of speed and power (4). The back and forth jumping into and out of the pushup position mixed with the power of the press at the top will help generate increased speed and power for those looking to get the edge in their workouts.
Having speed and power is not only important for sprinters or jumpers, but for anyone looking to step their game to the next level and this burpee is great for that as you get moving on your hands and feet for a great workout to keep your gains flowing.
Time Efficient
Barbell burpees are time efficient since they include multiple muscles in many muscle groups, as well as targeting your cardio. While you do need a barbell for the barbell burpee, if one is not available, then a traditional burpee will provide almost all of the same benefits. For those who work or feel tight on time in the gym, adding barbell burpees to your workout routine is somewhat of a must.
You will look great, feel better, and know that even if you spent minimal time in the gym and more time off your feet, that you accomplished more with a barbell burpee to keep you doing things you love and start seeing gains.
How To Perform The Barbell Burpee
You will need a barbell and whatever desired weights you want. Place the barbell on the ground and grip the bar with your hands slightly more than shoulder width apart. Kick your legs back into a pushup position and lower to the bar. Push back up to complete the pushup and take your hands off the barbell.
Once on your feet, execute a power clean by lifting the bar to your waist, thrusting to your chest and completing a push press over your head, driving through your feet. Lower to the ground and repeat from the beginning. Keep a tight core and good form throughout to avoid strain or injury from this burpee exercise and rest is important to start seeing growth with all your reps.
Wrap Up
Burpees are never fun and can offer a real challenge for those still working on their fitness. But burpees are a great overall body exercise to get lean and put on muscle while also building a great foundation for endurance. Adding a barbell to the traditional burpee will only add to the fun and increase your gains. The barbell burpee can be challenging and will require balance and flexibility.
You will get better at the barbell burpee and be more fit, only encouraging those gains and increasing your confidence. Don’t let this deter you from maximizing your gains and allow yourself to thrive by adding the barbell burpee to your workout regimen so the rest of your workouts only add to it.
Let us know what you think in the comments below. Also, be sure to follow Generation Iron on Facebook, Twitter, and Instagram.
*Images courtesy of Envato
References
Baker, J. S.; Davies, B.; Cooper, S. M.; Wong, D. P.; Buchan, D. S.; Kilgore, L. (2013). “Strength and Body Composition Changes in Recreationally Strength-Trained Individuals: Comparison of One versus Three Sets Resistance-Training Programmes”. (source)
Ratamess, Nicholas A.; Rosenberg, Joseph G.; Klei, Samantha; Dougherty, Brian M.; Kang, Jie; Smith, Charles R.; Ross, Ryan E.; Faigenbaum, Avery D. (2015). “Comparison of the Acute Metabolic Responses to Traditional Resistance, Body-Weight, and Battling Rope Exercises”. (source)
Kazior, Zuzanna; Willis, Sarah J.; Moberg, Marcus; Apro, William; Calbet, Jose A. L.; Holmberg, Hans-Christer; Blomstrand, Eva (2016). “Endurance Exercise Enhances the Effect of Strength Training on Muscle Fiber Size and Protein Expression of Akt and mTOR”. (source)
Serrano, Nathan; Colenso-Semple, Lauren M.; Lazauskus, Kara K.; Siu, Jeremy W.; Bagley, James R.; Lockie, Robert G.; Costa, Pablo B.; Galpin, Andrew J. (2019). “Extraordinary fast-twitch fiber abundance in elite weightlifters”. (source)
Top 5 Dumbbell Exercises You Should Be Doing
Getting back to the basics
Ah dumbbells. I don’t know about you guys but they remind me of Junior high school. Before all these crazy machines were popular – dumbbells were the way to get strong. Everybody remembers doing dumbbell curls in your friend’s basement with his dad’s weights and thinking “Oh my God I’m so strong, the girls are gonna love this.” Well it’s no secret that dumbbells are just as valuable today as they were back then, if you know how to use them that is.
Dumbbells are great because they provide you with a wide range of motion while lifting as well as being economical on space. You may not have the room to hold a barbell and plates but most of us have enough room for a couple of dumbbells. With that being said, just because you have the equipment doesn’t mean you’re using it to the best of your ability. We’re going to show you some compound exercises to help you get the most out of those barbells and shred your bodies in the process.
Curl and Press
This is a great exercise that combines two singular movements (the bicep curl and shoulder press) in a natural progression movement that will get you strong and lean.
Stand with your feet slightly wider than hip-distance apart. Hold one dumbbell in each hand next to your legs. Face your palms forward with your thumbs farthest from your body.
Exhale, bend your elbows and raise the dumbbells to your shoulders. Inhale and rotate your wrists so that your palms are facing away from your body.
Exhale and lift the dumbbells over your head.
Inhale, bend your elbows and lower the weights to your shoulders. Exhale, rotate your wrists and face your palms toward your body.
Inhale, straighten your arms and lower the weights to your sides into the starting position.
Complete one to three sets of 10 to 15 repetitions. Rest for 45 to 60 seconds in between sets.
Alteration
If you want to up the exercise try starting in a squat position with weights held by your sides ad squat up into the curl and press. Still not enough? Hold the press at the top and squat into that also. After a couple, you’ll feel it.
The Crush Grip Goblet Squat
The goblet squat is a great exercise that was popularized by legendary strength & conditioning coach Dan John. This exercise not only hits all your leg muscles but because of the grip it engages your core and chest.
Stand holding a light dumbbell by the horns close to your chest. This will be your starting position. You want to actively squeeze into the dumbbell either by the head or the body. This activates the chest muscles.
Squat down between your legs until your hamstrings are on your calves. Keep your chest and head up and your back straight.
At the bottom position, pause and use your elbows to push your knees out. Return to the starting position, and repeat for 10-20 repetitions.
Alteration
If you like this exercise you might also want to try the Dumbbell Front Squat. It’s a regular squat but you bend your elbows and put both dumbbells on the meaty part of your shoulders. Pause at the bottom and then come back to starting position. This will strengthen your core as well as giving you strength and stability.
The Dumbbell Bench Press
This exercise is preferred to the the barbell bench press for many bodybuilders. For one, it adds additional difficulty because not only do you have to lift the weight but also balance them individually. This move also allows for a deeper stretch and better symmetry as you can work each side individually.
Sitting on the end of the bench, with the dumbbells resting against your abdomen and thighs, slowly lay back onto the bench. Lift the dumbbells to a position directly over your chest.
Lower the dumbbells until they are slightly lower than your chest and then press the dumbbells to full extension.
After performing your set number of repetitions, lower the dumbbells back to your abdomen and sit back up so the dumbbells are again resting against your thighs and abdomen.
Alteration
If you want to make things interesting try making sure the sides of the dumbbells clink at the top of each extension and then rotate your wrist inward so that the sides of each barbells touch before breaking them back to your chest. This will keep your arms extended longer and the range of motion will hit different muscles.
Bulgarian split squats
This exercise will not only test your strength but your balance. This is a movement that will keep you limber and strong in the off season.
Hold a dumbbell in each hand, stand facing away from a bench, and place the top of one foot on the bench.
Try to keep all the weight on your front (standing) foot as you bend at the knee and descend into a one-legged squat.
Alteration
If you’re feeling froggy try curling the weights either as you go down or when you’re in the up position.
Dumbbell Pullover
You can look at this movement as a back exercise or an upper chest exercise but either way you should incorporate this into your dumbbell repertoire.
Place a dumbbell standing up on a flat bench.
Ensuring that the dumbbell stays securely placed at the top of the bench, lie perpendicular to the bench with only the back of your shoulders touching the bench and your legs holding up your lower body (almost in a back bridge pose) . Hips should be below the bench and legs bent with feet firmly on the floor. The head will be off the bench as well.
Grasp the dumbbell with both hands and hold it straight over your chest with a bend in your arms. Both palms should be pressing against the underside one of the sides of the dumbbell. This will be your starting position.
While keeping your arms locked in the bent arm position, lower the weight slowly in an arc behind your head until you feel a stretch on the chest.
At that point, bring the dumbbell back to the starting position using the arc through which the weight was lowered.
Go back to staring position and continue for your set amount of reps.
Alteration
To direct this exercise toward your chest, keep your elbows close, choke up towards the head of the dumbbell, and concentrate on powering the movement with your hands. To direct it toward your back and lats, let your elbows flair out more and concentrate on using your elbows to power the movement.
There you have it, the top 5 dumbbell workouts that will keep you lean and strong in the off season. Have you tried any of these before? Are we leaving any killer ones out? Let us know.
Can’t Afford The Gym? Try The Jailhouse Method
Insane gains the prison way.
In this day and age gyms are more pricey than they’ve ever been before. Many people wish to get into shape and make some serious gains, but their lack of funds keep them from being able to get into the gym and achieve their fitness goals. It can be a bit depressing knowing that you want to make a change, but can’t manage to because of economic interference.
So does that mean you might as well give up and forget about ever making some serious improvements on your body? Hell no! Though machines in the gym do help a great deal in getting your body into ripped and massive condition, that doesn’t mean you can’t make some development without them. When the tools are lacking for the task at hand, the next step is to innovate and do the next best thing. Workout without them.
This is where the concept of the prison workout can help a great deal in improving your physique. For the incarcerated, there aren’t a bunch of fancy machines or dumbbells lying around. For them to improve their strength, muscle endurance, and physique, they must rely on bodyweight exercises to make the difference. So what would a prison workout consist of? For the most part the exercises consist of pushing and pulling motions that will thrash your muscle into shape. We have a list of some prison inspired exercises that are sure to make all the difference to your routine with or without machines.
Upper Body Workout
There are a number of push up and pull up variations that are sure to work your chest, triceps, back and even your core. The key to building up a strong upper body is variety, consistency and attacking different muscle groups with the same intensity. This list of push up and pull up variations will add some variety to your routine and ensure that your muscles are attacked from multiple different angles.
Diamond Push Ups
3 sets, 20 reps
Wide Grip Push Ups
3 sets, 20 reps
Chin Ups
3 sets, 10 reps
Wide Grip Pull Ups
3 sets, 10 reps
Lower Body Workouts
The lower body workout routine is likely to look fairly similar to what you would see in the gym. The lack of weights to give added resistance is a bit of a hurdle to get around, but in exchange for the usual weighted variations, the focus should be on muscle endurance. By the time you’re ready to do a weighted squat the muscle endurance will aid you in pushing some weight.
Body Weight Squat
4 sets, 20 reps
Lunge
4 sets, 10 reps
Calf Raises
4 sets, 25 reps
But you’re still looking to build up muscle then having a training partner for these exercises can be a huge help. For instance, you can have your partner sit on your shoulders during a squat or on your back while doing a calf raise variation (donkey calf raises). They may be a bit more difficult to pull off, but if you’re in a tight situation it should do the trick for muscle growth.
Would you ever use the body weight workout in a bind? Let us know in the comments below and be sure to follow Generation Iron on Facebook and Twitter.
Top 5 Moves for a Totally Shredded Back
Looking to get a ripped back but don’t know where to start? We’ve got you covered.
The back can be one of the most complicated parts of the body to work on. A lot of the muscles aren’t intuitive, meaning you don’t use them in everyday life that often, so it can be hard to figure out how to get it right. There’s a huge overlap between back and arms, so a lot of these you can expect to help out on arm day as well. Here’s five great exercises to get a totally ripped back.
1. Reverse Lat Pulldown
The reverse lat pulldown is one of the most challenging exercises you can do for your back, but definitely has a high impact and increases muscle gains. A reverse lat pulldown is a regular pulldown with your hands reversed, which increases the amount of work done by your back. It’s also a great workout for your arms because it’s essentially a modified pull-up. This is a great high impact workout that should definitely be included in any back workouts you have planned.
2. Bent-over Barbell Row
The bent-over barbell row is another great back workout. It’s essentially the same as a regular barbell deadlift except you’re bent over at a 90-degree angle. By keeping your back completely straight while you lift, you get a great back workout out of a workout that’s typically just for the arms. Again, another great workout that serves a dual purpose.
3. Rowing Machine
The rowing machine is definitely an underrated piece of equipment in the gym. It’s not a fan favorite, but it gets the job done well. Spending 20 or even 30 minutes on the rowing machine in the gym can really work our your arms and lower back. Just back sure to use proper posture, otherwise the workout will only be in your arms! You should be bending forward and pulling all the way back with a straight back each time.
4. Stiff Leg Barbell Deadlift
Just a modified barbell deadlift — the stiff leg barbell deadlift is a deadlift where you keep your legs completely straight. You bend over at the waist to lower the barbell and repeat. Make sure to keep your back completely straight — that’s the key to a lot of back workouts. Not only is it the only way to make sure your gains are actually in your back, but it’s important to prevent injuries like pulling a muscle.
5. Wide-Set Pull-up
Wide-set pull-ups are another great way to keep your back in shape. It’s essentially just a pull-up where your arms are really far apart. This increases the use of the muscles of your upper back and the area in between your neck and along your spine. It’s definitely an exhausting style of pull-up, but worth it for the killer workout you get through the upper back and arms. When you place your arms on the bar, keep them shoulder-length apart, and then add about four to six inches on either side of that.

Top 6 Deadlifting Mistakes You Might Still Be Making
A change in bad habits leads to a change in life.
The deadlift is one hell of a monster workout. And as simple as it may look in theory, it is much more complex in practice. So how does a seemingly simple exercise leave so much leeway to do it incorrectly? Well, you’ve got to remember there’s a lot of moving parts. This exercise takes strength, coordination, and explosiveness, not to mention moving your bodies in ways that aren’t completely intuitive.
What many people forget is that the deadlift is a FULL body exercise. It’s not just engaging your legs but everything from your feet, to your core, to your shoulders. Many trusted fitness advisers have repeatedly said if they had to choose anyone exercise to do for the rest of their lives it would be the deadlift.
With all that movement it’s no wonder this exercise is so commonly performed incorrectly. This could lead to wasted gains and, even worse, injuries that keep you out of the gym. So let’s put the problems to rest with these top 6 deadlifting mistakes that you might making without even realizing it.
6. Rounding your back
This is by far the most common mistake we’ve seen by newbies and even some higher level lifters if they’re getting lazy. You don’t want to round your back or overcompensate by arching either. You want a flat back from the back of your head to your caboose. Instead of looking at the bar or at the ceiling try picking a spot a few feet in front of the bar and focusing on that throughout the lift.
5. Jerking your deadlifts
A lot of times guys get a hard on with deadlifts. They see all that weight and their emotions start to rise. They want to tackle it like Jenny Spinelli on prom night. While we’re all about getting in touch with your primal side, we’re going to recommend a controlled craziness on this one. Though you do push massive weight – this is actually a controlled exercise best performed with the arms locked. Try to keep everything tight and think of slowly pushing the floor away. Remember it’s a full body exercise, your arms are used as a lever.
4. Turning your dead into a squat
Of course, we’re not talking literally – but a common mistake with intermediates and even some experienced guys, leaning back too far on the bar will turn your deadlift into a squat. To remedy this raise your hips so your shoulders are over the bar. Keep the bar over your mid-foot with back straight. You can make adjustments according to your limbs but it’s pretty hard to screw it up from here.
3. Leaning back at the top
When you lean back at the top of a rep it squeezes the disk in your lower back which can possibly result in injury like a herniated disc. Stop when you knees and hips are locked, nothing more, nothing less. Sure pro powerlifters might do it but this is to show judges they’ve locked out. Some UFC fighters also fight with their hands down but I wouldn’t recommend that either.
2. Shin crushing
Do you dread the deadlift not because of the weight but because of the pain of the iron crashing into your shins at the beginning of each rep? Well stop it, it doesn’t have to be that way. As we mentioned in “squatting your deadlifts” keep the bar over your midfoot. This should keep it close enough to move along your body but far enough to eliminate unnecessary pain.
1. Switching your hand grip too early
Yes, we know it looks cool and all your friends are doing it, but switching to an inverted hand grip can be potentially dangerous. Changing the arm position also changes the muscles being used on by your back. By changing to an inverted lift before necessary – it can tweak a muscle or cause lower back injury. Try to stick with a traditional grip as long as you can. When the weight gets higher and you do eventually have to change over be sure to wear a lifting belt and go up gradually.
Well there you have it. Now that you’ve corrected these common mistakes you should be deadlifting like a true pro in no time. Don’t say we never gave you anything. So what do you think of these common mistakes? Were you performing any of these? Did we miss any? Hit up the comments section below and put in your two cents.
Programming Vertical Pulling For Greater Back Gains
Programming Vertical Pulling
Achieving a chiseled body requires a lot of work and some methodical training. And by methodical, I’m talking about doing a bit more vertical pulling. Vertical pulling exercises (pull-ups and pulldowns) stresses a lot of muscles, but particularly the lats, biceps, and upper back muscles. As a result, you get a wider and fuller back along with some juicy biceps. You can even make the argument that with enough vertical pulling, horizontal pulling becomes obsolete.
Let’s talk about how to incorporate 2 key vertical pulling variations.
1. PULL-UPS/CHIN-UPS
Pull-ups and chin-ups are often mistaken as the same exercise because they only differ in grip position. These exercises also considered bodyweight exercises, but any advanced lifter (especially men) should be able to do them weighted with a weight belt or squeezing a small dumbbell between your legs.
STANDARD GRIP
Pull-ups use an overhand grip which targets the mid/lower traps more especially if you arch your back which you’ll likely have to in order to get the bar to tap your chest. Pull-ups are generally harder to perform.
On the other hand, chin-ups target the biceps more and are easier to perform. I prefer to start females with chin ups and males with pull ups. Women also have more mobility and anecdotally, they seem to tolerate the wrist position better than men.
As for setting up the exercise, be sure to use a box or some sort of assistance to the bar. Jumping up the bar is fine too, but can cause some momentum being used the first few reps. Not a good habit.
Anyways, with pull-ups the standard grip is about 5 inches wider than shoulders. With chin ups, you’ll be a couple inches closer in, but feel free to adjust based on personal preference on both. Then lift your body until your chest touches the bar. Chin being over the bar is not enough. There is still room for muscles to shorten if your chest isn’t touching the bar. Pausing at the top for about a second can help you lower with control.
Rinse and repeat for gains.
NEUTRAL/HAMMER GRIP PULL-UP
Some people may experience elbow pain when doing either pull-ups or chin-ups because the wrist positions aren’t as natural especially with chin-ups.
Switching to a neutral or hammer grip often solves any joint pain. This is the position where your palms are facing each other and many pull up bars should offer this grip position.
This position is also great for lat development.
If joint pain is still an issue, the most joint friendly position isn’t on a fixed bar. Instead find a way for the wrist and elbows to move freely based on your anatomy. Gymnastic rings will be your best friend.
This is the most pain free variation although it’s also the most unstable, so it can be suboptimal for hypertrophy if you’re not strong or stable enough.
MODIFICATIONS
If you’re too weak to do full range pull-ups. You can use the assisted pull-up machine or add a band to assist you.
As you get stronger, use less weight to assist you or use a lighter band to lighten the assistance.
If you’re too strong for unweighted pull-ups and chin-ups, add weight or pause longer at the top of the exercise.
2. PULL-DOWN
Pulldowns can also be a viable alternative as a variation when pull-up progression plateaus or as a regression to work up to your first pull-up or chin-up.
EXECUTION
Sit comfortably with feet flat on the floor. Adjust the height of the bar where your outstretched arms is grabbing the bar. You may have to stand to do so.
Take a wider grip. This is the standard position. We can get fancy with grips later.
Then find a stable seated position. Pull the bar towards your chest using some, but minimal momentum. Keep your forearms straight and bring the bar towards your chest until it touches. Arch your back hard and this will give you a very full range of motion that biases the upper back muscles.
This is a traditional pulldown which I like to call a wide grip pulldown instead of a lat pulldown because the lats don’t produce as much force as most people think in this position.
To make the pulldown more lat focused, use a neutral grip attachment or do single arm version. If possible, you can also change the seat angle so you’re no directly under the handles. This allows your arms to pull from in front of you and to put the lats in a better position to produce force.
Lastly, brace your abs and don’t arch your back to prevent the upper back muscles like the traps and rhomboids from taking over.
That’s a true lat pulldown to hypertrophy the lats.
As always, return the bar slowly with control.
FORM CONSIDERATIONS
Excessive yanking on any vertical pulling exercise can lead to a waste of time or worse, a snapping injury. Beginners should focus on being as controlled as possible.
Once you get more advanced, some momentum is ok to get to the fully shortened position because that’s where most of the tension is during a vertical pull.
This is primarily a back/lat exercise, but it’s also common for people to feel it more in their biceps. This isn’t necessarily bad, but switching to a more pronated grip can help.
Anecdotally, pulling more from the pinky, ring, and middle fingers while using the thumb over grip will reduce contribution from the biceps. Straps or Versa grips also help.
PROGRAMMING CONSIDERATIONS
The key to overall strength and fitness is to incorporate both over the course of the same program or across multiple programs.
Pull ups teach you to lift your whole body weight while enhancing the upper body muscles especially the back and biceps. If you load them properly, they can be very fatiguing, so don’t program them too frequently.
Easier horizontal pulling like db rows and inverted rows make great program additions if you’re keen on improving your pull-ups. These variatons are also less fatiguing.
Vertical pulling also tax the forearms significantly, so use straps if needed and if possible, don’t pair them with deadlift or row variations.
Vertical pulling also decompresses the spine and oppose vertical pressing, so supersetting vertical pulling with vertical pressing like overhead presses are a great idea.
Aiming for a variety of rep range will be best for hypertrophy
At least three sets of vertical pulling per week should be the bare minimum especially for advanced lifters.
Switching between upper back and lat focused variations or switching grip width is great for variation.
For more news and updates, follow Generation Iron on Facebook, Twitter, and Instagram.
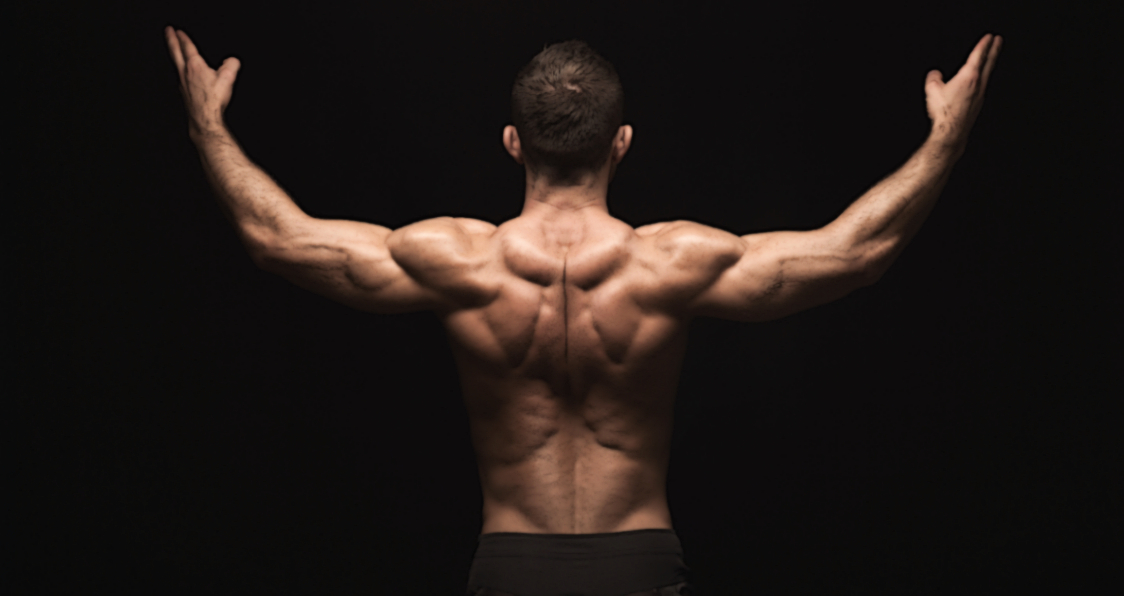
Master Bent Over Rows for Major Back Gains!
Developing A Strong And Healthy Back
For many, the muscles of the back are neglected and underused which can lead to problems with posture and consequent discomfort or pain (1). In the modern world, many work at a desk and remain seated for prolonged periods of time which can place the back under a great deal of stress and strain. Over time, the shoulders will begin to pull forward thus causing tightness and stiffness in the chest and neck muscles.
Even for those who attend the gym, the back often does not receive as much attention as is perhaps required, whereas the more visible muscles (such as the chest, shoulders and arms) are regularly targeted. This can lead to underdevelopment of the back and can exacerbate any existing back issues. Recent research has highlighted the importance of regular strength training for reducing back pain and preventing back problems (2).
Benefits Of The Barbell Bent Row
There are a number of useful back resistance exercises that can be performed with the barbell bent row being one of the most effective. While it is the latissimus dorsi (lats) which are primarily responsible for this exercise, there are a number of back and shoulder muscles which must engage in order to drive this movement – such as the trapezius, rhomboids, and rotator cuff muscles (3).
Considering the role that each of these muscles play in maintaining good posture, strengthening these muscles will have a substantial impact on posture and movement. Additionally, in the bent position, the core musculature must contract in order to hold the trunk of the body in the correct position (4). Strengthening the core will also contribute to better posture.
Finally, for those who enjoy pressing movements – such as the bench or overhead press – focusing on the bent row may facilitate a greater performance with these lifts while also helping to balance out the upper body muscles symmetrically – both in terms of size and strength. Conversely, having a muscular imbalance can potentially increase the chances of experiencing injury (5).
Barbell Bent Row Form
When performing the barbell bent over rows, it is important to put technique before ego. Loading the barbell with excessive weight is a sure way to compromise form. Instead, keep the weight manageable and focus on the movements required to bring the bar into the body. Controlled movements, which maximally engage the working muscle, are far superior to uncoordinated and wild movements.
To properly execute the barbell bent row, follow the 4 coaching points listed below…
1. Place the loaded barbell on the floor. Ensure that the feet are approximately hip width apart. Prior to picking the barbell up, push the chest high and pull the shoulder blades together. Hinge forward and grip the bar using an overhand grip, placing the hands roughly shoulder width apart. Keeping the core tight and back flat, pick the bar up and stand tall.
2. From here, focus on pushing the hips back so that the upper body tips forward while maintaining a flat back. Keep a very slight bend in the knees and keep the bar as close to the legs. The bar should be in a hanging position close to the knees.
3. Squeeze the core muscles tightly before driving the bar into the area between the chest and the stomach. As you pull, focus on keeping the shoulders down and the elbows as tight as possible to the ribcage. At the top portion of the rep, aim to squeeze the shoulder blades together.
4. Once contact has been made, reverse the movement and control the barbell back down to the original starting position. Remember to keep the core contracted as the bar moves to avoid moving out of neutral spinal alignment.
Barbell Bent Row Tips
When performing the row, instead of thinking about pulling the bar up to the chest, focus on pulling the elbows behind the body. This will do two things – firstly, it will help to activate the right muscles, specifically the lats, and secondly it will facilitate a better rowing motion.
Another practical tip for the bent row is to pause briefly at the top of the movement and focus on maximally squeezing the shoulder blades together. Once again, this will lead to a greater activation of back and shoulder musculature and have a profound effect on posture and overall back health.
Barbell Bent Row Variations:
Underhand Grip Barbell Bent Row
The only difference between this variation and the conventional bent row is the grip on the bar. Instead of an overhand grip, this variation uses an underhand (supinated) grip. This places more stress on the lats and lower traps.
Pendlay Row
The Pendlay row involves rowing the bar off the floor instead of from a static hanging position – other than this, the form is identical. To get into the position for this row, the trunk must assume a more parallel position and therefore requires a great degree of hamstring flexibility. As a result, many may find getting into this position, all while maintaining a flat back, quite challenging.
Yates Row
For the Yates row, a more upright stance must be assumed so that the trunk is approximately angled 30-40° from the floor. As a result of this position, the bar will travel to the lower abdominals instead of the sternum when rowed. Once again, this will predominantly target the lats and also the mid to low traps.
One Arm Barbell Row
For the unilateral barbell variation, stand side on to the barbell and use a neutral grip (palm facing the body). Look to pick up the bar near the plates, assume the conventional rowing position and complete full repetitions.
Dumbbell Bent Over Rows
The dumbbell variation of this exercise is a superb way of balancing out the strength of both sides. With a barbell row, the stronger side can begin to dictate the movement, whereas with the dumbbells, both sides must work individually to drive the weight upward. A secondary benefit is that dumbbells also require a greater amount of control and stability which places a large demand on the core muscles (6).
One Arm Dumbbell Row
A simple variation on the dumbbell row is a single sided row. For this variation, place the left hand and knee on a bench for stability and row from the right side, ensuring to maintain control and squeezing the muscles around the shoulder blade. Once a number of reps have been completed, swap sides and repeat.
Dumbbell Incline Row
For those who find it difficult to maintain a flat back during the row, use an incline bench, lie directly on top of it and let the dumbbells hang. From that position, row as normal ensuring that the chest stays in contact with the bench at all times.
Bent Over Flyes
For the final variation, assume the rowing position while holding two dumbbells. However, instead of rowing, keep the arms straight and drive the dumbbells out to the side of the body while focussing on pulling the shoulder blades together.
Final Word
The need to perform back strengthening exercises is very great for so many as it can effectively prevent dysfunction, pain and injury. There is no doubt that the bent row is one of the best exercises that can be performed for building back strength and maintaining overall health.
For more news and updates, follow Generation Iron on Facebook, Twitter, and Instagram.
References:
1-Services, Department of Health & Human. “Posture”. www.betterhealth.vic.gov.au.
2-Westcott, Wayne L. (2012-7). “Resistance training is medicine: effects of strength training on health”. Current Sports Medicine Reports. 11 (4): 209–216. doi:10.1249/JSR.0b013e31825dabb8. ISSN 1537-8918. PMID 22777332.
3-Edelburg, Holly (September 29, 2017). Electromyographic analysis of the back muscles during various back exercises
4-Fenwick, Chad M. J.; Brown, Stephen H. M.; McGill, Stuart M. (2009-3). “Comparison of different rowing exercises: trunk muscle activation and lumbar spine motion, load, and stiffness”. Journal of Strength and Conditioning Research. 23 (2): 350–358. doi:10.1519/JSC.0b013e3181942019. ISSN 1533-4287. PMID 19197209.
5-Knapik, J. J.; Bauman, C. L.; Jones, B. H.; Harris, J. M.; Vaughan, L. (1991-1). “Preseason strength and flexibility imbalances associated with athletic injuries in female collegiate athletes”. The American Journal of Sports Medicine. 19 (1): 76–81. doi:10.1177/036354659101900113. ISSN 0363-5465. PMID 2008935.
6-Saeterbakken, A.; Andersen, V.; Brudeseth, A.; Lund, H.; Fimland, M. S. (2015-11). “The Effect of Performing Bi- and Unilateral Row Exercises on Core Muscle Activation”. International Journal of Sports Medicine. 36 (11): 900–905. doi:10.1055/s-0034-1398646. ISSN 1439-3964. PMID 26134664.
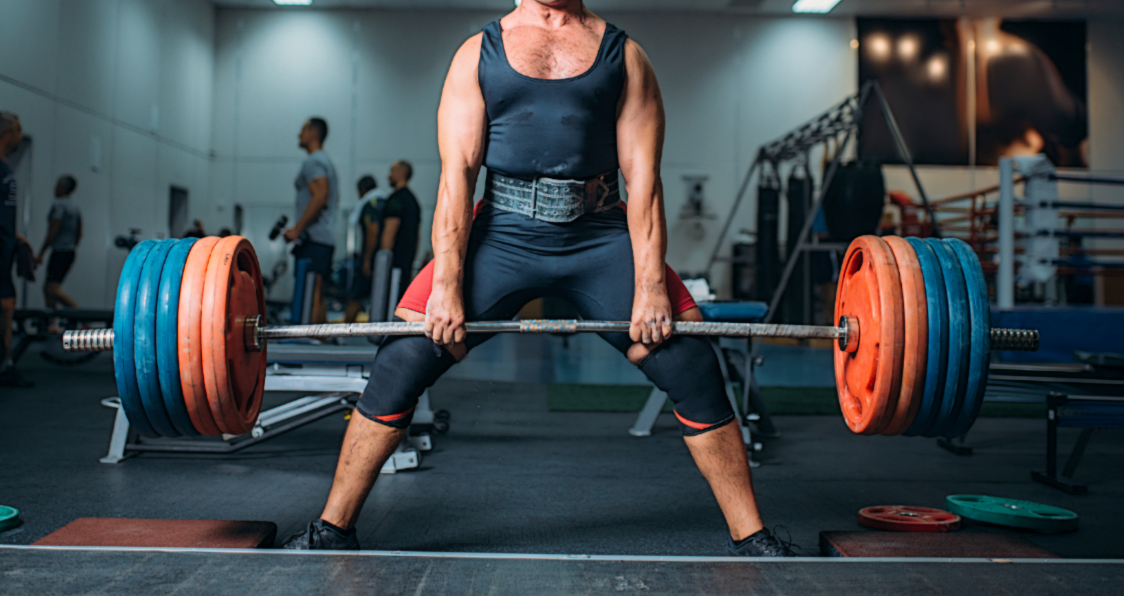
How To Deadlift Without Passing Out
Don’t fall face first into the weights.
We’ve all seen it before. Guys passing out from doing heavy deadlifts. It’s a phenomenon that has left many viewers holding their ribs in mind numbing laughter while leaving others scratching their heads. What the hell causes that to happen in the first place? Is it the mental stress of performing the lift or is there some other cause behind this strange occurrence?
When you’ve been lifting for a long time you’ll notice that guys in the gym usually tend to train the deadlift considerably less than they do the bench and the squat. At least they do when they start going heavy. The amount of stress benching and squatting puts on the body pales in comparison to how much deadlifts can take out of you. So what makes deads so different than the others?
Well for one, because of the nature of the lift, the fact that it’s a pulling exercise, the lifter is able to haul more weight than what you’d expect out of the bench and the squat. If you took a look at your own numbers you’d probably realize that your deadlift is in some cases double the amount of what you bench. It’s the reason deadlifts are trained 3 to 4 times a month as opposed to being apart of a lifters typical back routine 3 to 4 times a week.
Despite the fact that deadlifts are awesome for back gains they’ve proven to be dangerous. Here are some tips that every lifter should consider when performing this powerful exercise.
If you want to get even more in-depth, make sure to check out Generation Iron Plus for online bodybuilding courses, training guides, nutrition plans, and more. It’s the ultimate tool to become the best bodybuilder version of yourself.
1. The effect on the central nervous system
The stress that deadlifts put on the central nervous system is substantial. Performing the lift successfully can be a daunting task and be taxing both physically and mentally. You’re lifting the bar from a static position which requires the lifter to generate a substantial amount of strength. Be mindful of the amount of stress you’re putting your body under.
2. Rest Periods
Recovery is also paramount to performing this exercise consistently and frequently. Rest intervals are important to build up enough strength to perform the action again and if you rush things you can find yourself passing out from the sheer fatigue and pressure.
3. Be mentally prepared
It may seem a bit self explanatory, getting your head in the game to perform a heavy lift, but it’s essential that when you’re performing the deadlift that your mind is completely focused on the task. Where performing a back squat virtually depends on you completing the action or being crushed under the barbell’s weight, the deadlift requires you to do the lift from a static position. You’re mind forces you to complete the squat or face serious injury giving you a mental edge. When you perform the deadlift you have to approach the bar with a positive attitude and the mental fortitude to not just try and lift the bar, but know that you’ll lift it without a doubt in your mind.
The deadlift can be mentally and physically taxing, but if you have an iron will and play things smart then you’ll be performing the deadlift with ease in no time. While there is no sure fire miracle tip that will 100% prevent you from passing out – keep these three key elements in mind every time you go into the deadlift.
What are your thoughts on the deadlift? Let us know in the comments below and be sure to follow Generation Iron on Facebook and Twitter.