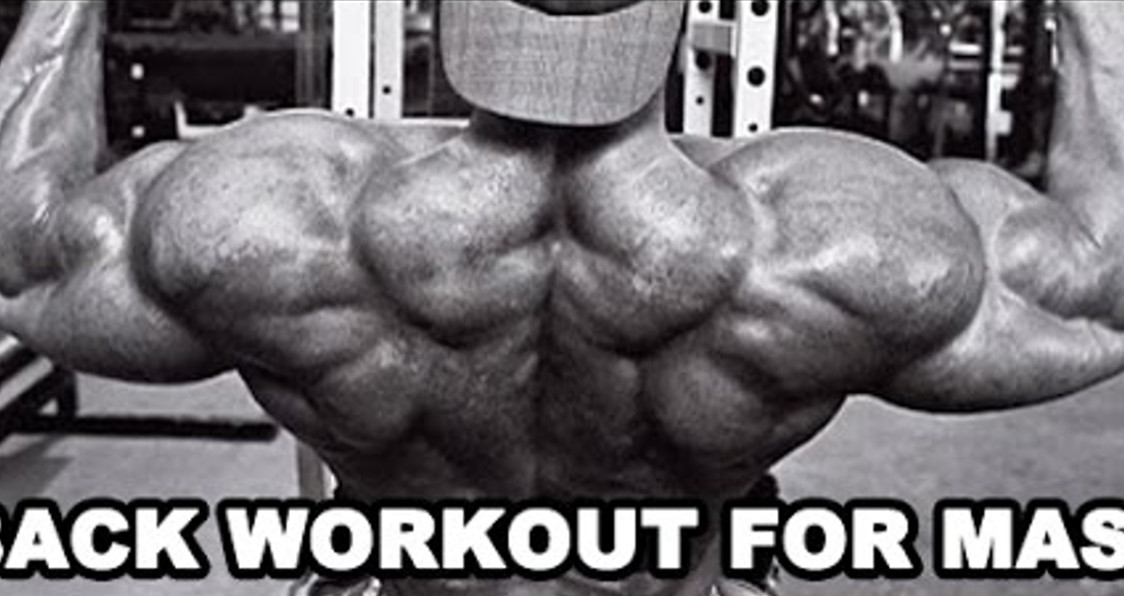
Tag: Back

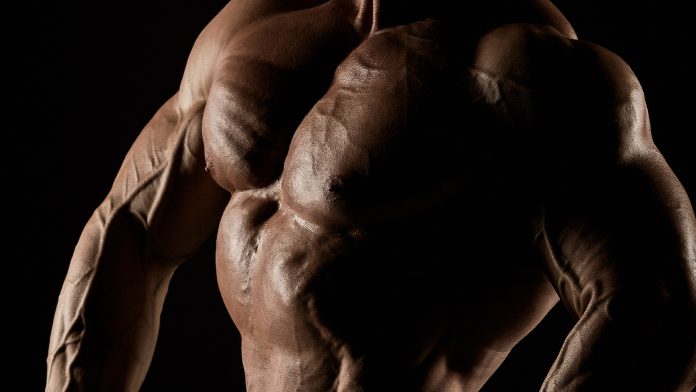
5 Exercises For Building A Cobra Back
5 Exercises For Building A Cobra Back.
Your back is the biggest muscle group after your legs. It can also be one of the hardest muscle groups to train since you can’t see your back directly in the mirror and hence it can be comparatively hard to establish a mind-muscle connection.
If done right, a good back workout should be as grilling as a brutal leg workout. You should be running on fumes when you’re done with your back workout. Building a cobra back can take a lot of effort, patience, and persistence. It is no surprise only a few people have a jacked back.
1. Pull-Ups – 50 Reps
You need to have a broad back if your goal is to build a shredded back. Pull-ups are one of the most efficient exercises when it comes to building a wide back and giving you a V-taper. Arnold performed 50 reps of this exercise at the beginning of his back workouts.
There are no fixed number of sets you need to complete these 50 reps in. Try to take as few sets as possible. As you get better at this exercise, you can start using weights to make it harder for yourself. If you’ve just started working out, use a pull-up assistance machine or ask for a spot from someone at your gym.
2. Deadlifts – 3 Sets 5 Reps
Deadlifts are a complete back builder. It’s a compound (multi joint) exercise which works your entire body. It is better to perform this exercise at the beginning of your back workout when you’re at your strongest.
You don’t need to do a lot of reps to get the most out of deadlifts. Lifting heavy weights with an explosive movement can get you better results. Deadlifts can help you gain muscle mass and strength which can make you stronger at every other exercise.
3. Dumbbell Bent Over Row – 3 Sets 12 Reps
While overhead pulling movements can add to the width of your back, rowing movements will add the much-needed thickness. You need to have a combination of both these movements to build a Cobra back.
Dumbbell bent over rows help isolate your back and will give you an incredible pump. Have a full range of motion to recruit all the muscle fibers in your back. Hold and squeeze your back at the top of the movement.
4. Lat Pull Downs – 3 Sets 12 Reps
Lat pull downs are incredibly effective at targeting your lats. Many people make the mistake of using momentum while performing this exercise. Make sure you don’t swing yourself and use momentum to lift the weights.
Try bringing the bar close to your chin while sitting straight. Hold and squeeze your lats at the bottom of the movement. Use lifting gear like straps to eliminate recruiting your forearms. Doing this will also help in lifting more weight and performing more reps.
5. Ground Pulley – 3 Sets 12 Reps
The ground pulley is a great exercise when it comes to developing a V-taper. Use weights you can comfortably lift for 12 reps. Lifting heavier weights can lead to leaning way too far at the bottom and the top of the movement.
Keep your reps slow and deliberate to completely annihilate your back. You can try variations of this exercise by using different handle bars. Each new grip will target your back from a different angle and will recruit different muscle tissues.
Which is your favourite back exercise? Let us know in the comments below. Also, be sure to follow Generation Iron on Facebook and Twitter.
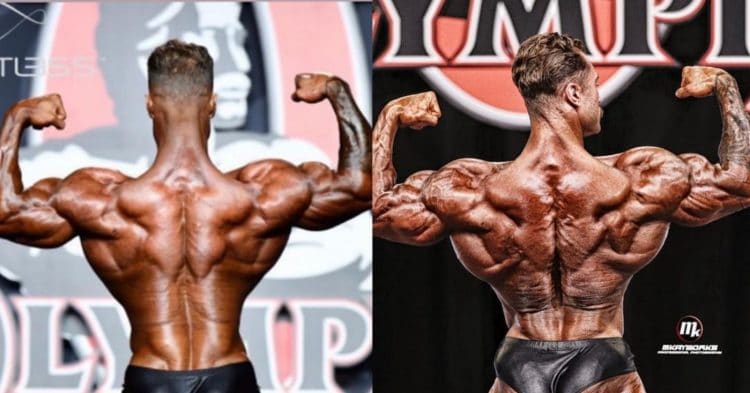
Chris Bumstead Back Workout For A Sprawling Christmas Tree
3x Classic Physique Olympia champion Chris Bumstead shares a massive back workout!
Believe us when we say there will be major posterior pounding on the Chris Bumstead back workout routine. Honestly, we would be disappointed if we did not have to crawl out of the gym by the end of the 3X Mr. Olympia Classic Physique champion’s training regimen.
Building a V-taper is easier said than done. Your back is the second largest muscle group after legs. An effective back training session can be as taxing (if not more) than a leg workout. You need to target your back from every angle to ensure overall development.
Check Out: Chris Bumstead Gives Answer On Whether or Not to Use Steroids
Chris Bumstead Stats
Name: Christopher Adam Bumstead
Nickname: CBum
D.o.B: 2 February 1995
Birthplace: Ottawa, Ontario, Canada
Height: 6’0”
Weight: 225 pounds
Chest: 51″ (130 cm)
Waist: 30″ (76 cm)
Bicep: 20″ (51 cm)
Chris Bumstead Story
The reigning Mr. Olympia Classic Physique champ was born in Ottawa, Canada. He was involved in multiple sports through his childhood, playing football, baseball, basketball, and hockey in high school.
CBum started lifting at the age of 14 and fell in love with working out. He went from 170 to 225 pounds between the ninth and twelfth grades, growing his legs the most.
After building what he thought was a good physique, Bumstead met his sister’s boyfriend (a pro bodybuilder), Iain Valliere, and things started to change for the better. Iain made Chris believe that he could compete and become a fierce competitor.
Check Out: Iain Valliere Deadlifts 675lb Five Times Ahead Of 2021 Arnold Classic
In 2016, at the age of 21, he earned his pro card after taking home the IFBB North American Bodybuilding Championship trophy.
Chris Bumstead draws inspiration from the golden age bodybuilders. He focuses on keeping his waist small and building broad shoulders. It would be safe to say that CBum is one of the most popular bodybuilders of our time.
Bodybuilding legends like Jay Cutler have predicted that Chris could win the Mr. Olympia crown if he were to change divisions in the future. Given his monster size and razor-sharp conditioning, we would not be surprised to see him lift the Sandow a few years down the line.
Trivia: In 2021, Chris Bumstead won his third consecutive Mr. Olympia Classic Physique title at the age of 26. He was the runner-up in 2017 and 2018.
Next Read: Chris Bumstead’s Rules For Cheat Meals & Alcohol
Chris Bumstead Back Workouts Principles
CBum follows a 5-day training split, and some of his favorite exercises include squats, incline dumbbell press, and bent-over barbell rows. He uses the following training principles to make the most of his back workout:
1. Get the Form Right
Chris Bumstead is big on building a strong foundation. Before he starts prepping for a show, he takes a few weeks to work on his lifting form. Once in tune with the exercises, he adds weight to the bar (or machine) and gets after it.
Most rookies let their egos get the better of them in the gym. Remember – weightlifting and bodybuilding are two different sports. Chasing weights before nailing down your form can put you at risk of injuries.
If you are new to the fit lifestyle, do not hesitate to ask for help from more experienced lifters in your gym. Tip: If you are in it for longevity, you should steer clear of the broscientists.
Next Read: 5 Uncomfortable Truths About Exercise Form
2. Do Not Pull With Your Biceps
Many lifters use their biceps to pull the weight during back training. Doing this takes the tension off the back and puts it on your upper arms. If you have a more intense pump in your arms compared to your lats at the end of a back exercise, you are probably doing it wrong.
Focus on pulling the weight using your elbows and keep them close to your sides while performing back exercises. Flaring out your elbows distributes the tension to your biceps and shoulders.
For some people, gripping the dumbbell, barbell, or machine handle too hard has been known to ignite bicep and forearm recruitment. If you face similar issues, weightlifting straps can take the tension off your arms and transfer it to your target muscles.
Watch: Chris Bumstead Is The Next Generation Of Jacked And Shredded Bodybuilder
3. Focus on Lat Isolation
You should be able to see your lats and shoulder blades move during your back exercises. If you only notice arm movement, you are not following a full range of motion. On top of that, with every rep, pause and squeeze the life out of your lats.
For optimal lat recruitment and stimulation, you need to follow a full range of motion and contract your muscles with every rep. Just going through the motions for the sake of it is not going to cut it. You need to have a strong mind-muscle connection to make the most of your workouts.
If you face muscle or strength imbalances, unilateral lifts will help better isolate your lats and fix the issues. Research has shown that most athletes can benefit immensely from adding unilateral training to their training regimen.
Related: Chris Bumstead Shows Off Dungeon Style Gym and Training
4. Use Different Grips
Switching grips can make your back light up like the 4th of July. A pronated (palms facing downward), supinated (palms facing upward), and neutral (palms facing each other) all target your back differently.
You also have the option of adding more variations in your back training by using W or V-bars during cable exercises. Having a mix of these grips in your back workouts can ignite muscle growth and help grow that sprawling Christmas tree.
5. Include a Ton of Variety
You need to constantly add variety to your training to ensure that you never hit a wall. Performing the same exercise over and over for weeks on end is a sure-shot way of hitting a plateau.
Chris Bumstead changes up the start of his back workout after every three back days. He rotates through deadlifts for three back workouts, then switches to rack pulls for the next three sessions, and then skips both, moving right to dumbbell rows for the last three workouts of the cycle.
Apart from switching exercises, you could also add variety to your workouts by using advanced training principles like supersets, dropsets, intraset stretching, and experimenting with the number of reps, sets, and time under tension (TuT).
Must Read: Four Plateau-Busting Strategies To Apply To Your Training
6. Keep Rest Between Sets to a Minimal
If you are eating 5,000 monster calories like Chris Bumstead, you need to utilize every opportunity you can find to burn them off. While performing the Chris Bumstead back workout, limit your rest duration between sets and exercise to less than 60 seconds.
Note: Do not waste your resting time checking Instagram or clicking selfies. Use it to stretch your muscles and pose. Posing can improve your mind-muscle connection and help induce muscle-ripping pumps.
Related: Chris Bumstead Details 5,000-Calorie Diet During Bulking Phase
Chris Bumstead Back Workout
If you have seen Chris Bumstead hitting back poses on stage or his Instagram page, you know there are no weak spots in his posterior muscle chain. Let kids near CBum while he is posing, and they might end up hanging lights and stockings on his sprawling Christmas tree.
Building thickness in his already-wide back is one of Chris Bumstead’s back workout goals.
During Mr. Olympia 2021 presser, Bumstead explicitly mentioned that his back gains were on another level, and he had added 10 pounds of muscle mass just in his back.
Watch: Dennis James – Can Chris Bumstead Improve His Back Enough To Beat Breon Ansley?
Chris Bumstead Back Training Routine
Here is the Chris Bumstead back workout that will help you achieve similar results:
1. Deadlift: 6 sets of 6-8 reps
Steps:
Stand behind a barbell with a shoulder-width stance and your knees slightly bent.
Hinge at your hips and bend slightly at your knees.
Push back your butt while keeping your core engaged so that your back stays flat.
Squat down and bend at your knees to grab the bar with a mixed grip – one hand in supinated and the other in a pronated position.
Keeping your core tight, push through your heels, and lift the weight, straightening your knees first, keeping your back flat, and then reversing the hinge at your hip to stand up.
Pause at the top of the movement and contract your lats and shoulder blades.
Return to the starting position in a controlled motion.
Repeat for recommended reps.
Check Out: Chris Bumstead Answers: Is Classic Physique Easier Than Men’s Open? | GI Vault
2. Single-Arm Neutral-Grip Dumbbell Row: 4 sets of 10-12 reps (each arm)
Rather than using a staggered stance on dumbbell rows, Chris Bumstead likes to square his feet to the bench where he stabilizes his body with his resting arm. It makes the movement more concentrated.
Steps:
Set an incline bench at a 60-degree angle to the floor.
Place your left hand on the edge of the inclined side of the bench, take a step back, and stand with a narrower than shoulder-width stance.
Grab a dumbbell with your right hand using a neutral grip.
Pull your elbow back and upwards towards the roof without letting it flare out.
Pause and contract your lat at the top of the movement.
Return to the starting position with a slow and controlled motion.
Repeat for recommended reps before switching sides.
3. Seated Cable Row: 4 sets of 10-12 reps
Use a V-handle attachment on the cable row machine. To hit your lower lat, make sure you are performing seated rows low – below your belly button.
Steps:
Sit on the cable row machine with your knees bent and grab the V-bar attachment with a neutral grip.
Position yourself with your knees slightly bent and so that you have to reach to grab the handle with outstretched arms yet without curling the lower back over.
Pull the handle toward your lower abdomen without using momentum and swinging back and forth.
Keep your torso upright and chest raised throughout the movement.
Contract your shoulder blades and lats at the top of the movement.
Return to the starting position with a controlled motion.
Repeat for recommended reps.
4. Close Grip Lat Pulldown (rope attachment): 4 sets of 12-15 reps
Incorporating both close and wide-grip pulldowns in the Chris Bumstead back workout help target different posterior muscles.
Steps:
Sit on the pulldown machine with an upright torso.
Secure your legs under the thigh pad.
Grasp the rope attachment with a neutral grip (palms facing each other).
While keeping your chest raised, pull the rope down until your elbows move behind you.
Keep your elbows close to your body throughout the movement.
Pause and contract your shoulder blades and lats at the bottom of the movement.
Slowly return to the starting position.
Repeat for recommended repetitions.
5. Wide-Grip Lat Pulldown: 2 sets of 12-15 reps (dropset)
Wide-grip lat pulldowns consist of dropsets. After performing 12 reps, you will drop down the weight and perform another 15 reps. Choose a weight that will make you hit failure in the dropset.
Steps:
Choose your weight, and sit down on the pulldown machine with an upright torso.
Adjust the thigh pad so that your legs fit snuggly under the support.
Grasp the bar with a pronated (overhand) grip, with your hands more than shoulder-width apart.
Pull down the bar until it is a few inches away from your upper chest.
Pause and contract your shoulder blades and lats at the bottom of the movement.
Return to the starting position with a controlled motion.
Repeat for recommended reps.
6. Dumbbell Pullover: 4 sets of 10-12 reps
While performing the dumbbell pullover, focus on a deep stretch and only come about 3/4th of the way up to keep tension on the lats.
Steps:
Lie across a stable flat bench. Your upper back, neck, and head should be fully supported.
Plant your feet shoulder-width apart on the floor.
Hold a dumbbell at its neck with both hands.
Extend your arms toward the ceiling, over your chest. Your palms should be facing each other, and your elbows slightly bent.
As you inhale, extend the weights back and over your head, keeping a strong back and core.
Exhale slowly and come about 3/4th of the way up.
Repeat for recommended reps.
Related: Golden Era Lifts: 5 Exercises From The Iconic Era You Need To Try
7. Back Extension (bodyweight): 2 sets to Failure
Back extension is one of the most effective ways of training your lower back. CBum performs two bodyweight sets of back extensions to failure.
Steps:
Position yourself on the back extension machine with your hips on top of the cushioned pads and your feet secured under the leg anchor.
Your body should be in a straight line at the starting position.
Place your arms behind your head or cross them in front of your chest.
Lower your torso until your head is a few inches off the floor.
Return to the starting position explosively and lift your torso a few inches.
Pause and contract your back for a couple of seconds.
Repeat for recommended reps.
Conclusion
By the end of the Chris Bumstead back workout, your muscles will be begging for mercy. Remember – Do not engage in ego lifting. If you do not feel a pump after every set, you should lower the weight and focus on contracting your back with every rep.
Put in the work, and the Gods of bodybuilding shall bless you with the physique of your dreams. Good luck!
Who is your favorite bodybuilder? Let us know in the comments below. Also, be sure to follow Generation Iron on Facebook, Twitter, and Instagram.
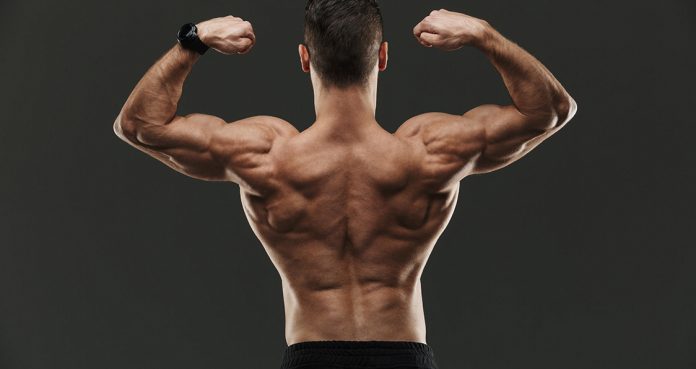
The 10 Best Back Exercises For Men
The Ultimate Back Exercises
A shredded back is what separates the men from the boys. A good back training session should be as brutal as a hardcore leg day. You should be running on fumes by the end of your back workouts.
If you want a cobra back, you need to constantly shock your muscles with different exercises. Your back is one of the biggest muscle groups and you need to target it from every angle for optimal results. We have put together the list of back exercises you can try during your next workout.
1. Pull-Ups
Pull-ups are one of the best back workouts. Arnold Schwarzenegger swore by them and performed 50 reps of pull-ups at the beginning of his back workouts. If bodyweight pull-ups are too easy for you, try the weighted version.
2. Seal Rows
Seal rows are an isolation exercise which works your lats. Lie facedown on a bench and perform barbell rows. Doing so will keep you from using your secondary muscles and momentum to lift the weights. You can also perform this exercise on an incline bench to target your lower lats.
3. Pull-Overs
Pull-overs are one of the most underutilized exercises. This exercise is incredibly effective in building a V-taper. Keep your elbows locked out throughout the movement and maintain a full range of motion.
4. T-Bar Rows
Rowing exercises like the T-bar rows help in building the thickness in your back while exercises like pull-ups and lat pull-downs help with broadening your back. If you don’t have an access to a T-bar row machine at your gym, use a barbell for this exercise.
5. Lat Pulldowns
Lat pulldown is a textbook back exercise. It is great at targetting your lats. Most people make the mistake of going too heavy on this exercise. Make sure you sit straight and don’t use momentum to bring the bar down.
6. One Arm Cable Rows
Using cables in your exercises help you in maintaining constant tension on your target muscles. One arm cable rows will help you in isolating your lats. You can perform this exercise while standing or seated.
7. Barbell Rows
Barbell rows are a compound exercise and will help in building muscle mass and strength in your back. Keep an arch in your back while performing this exercise. Bring the bar to your lower abs at the top of the movement.
8. Wide Grip Seated Cable Rows
Wide grip seated cable rows will add to the width of your back. Don’t lean back while performing this exercise. You could also try the underhand grip or a different cable attachment.
9. Dumbbell Rows
Dumbbell rows are incredibly effective at building size, definition, and thickness in your lats. You can perform the single-arm or the double-arm variation of this exercise. Using lifting gear like lifting straps can help you lift more weights as it eliminates your grip.
10. Deadlifts
We saved the best for the last. Deadlift is a compound exercise which should be a part of your back workouts. It is best to perform this exercise at the beginning of your workouts when you’re fresh.
Which is your favorite back exercise? Let us know in the comments below. Also, be sure to follow Generation Iron on Facebook and Twitter.
Build A Thick and Wide Cobra Back With This Workout
Build A Cobra Back With This Back Workout
Hitting the lat spread pose should look like you’re drawing curtains on the people standing behind you. Bodybuilding is a game of illusions, and a V-Taper can make you stand out by making your upper body look bigger and meaner.
An effective back workout should have a combination of isolation, compound, pulling, and pushing movements to target your lats optimally. We’ve designed a workout for you which will take your back gains to the next level.
Pull-Ups – 50 Reps
We took this tip from the Governator himself. Arnold used to perform 50 reps of pull-ups at the beginning of each back workout. Pull-ups are a great way of warming up your back and building the width in your lats.
You must hit your back from all the angles. Make sure you’re not just going through the motions. Squeeze and contract your muscles with every rep to make the most of the exercises.
T-Bar Rows – 3 Sets 12-15 Reps
The pulling movements help in building the width in your lats and the rowing lifts develop the thickness in the back. If you don’t have a T-Bar machine at your gym, you can use a barbell as the T-Bar by placing one end of the bar in a corner so it doesn’t move.
Most people make the mistake of standing upright or bending over too much while performing the T-Bar rows. Your torso should be forming a 45-degree angle with the floor throughout the exercise.
Superset
Wide-Grip Lat Pulldowns – 3 Sets 12-15 Reps
Straight Arm Cable Pulldowns – 3 Sets 12-15 Reps
While performing the wide-grip lat pulldowns, make sure you are not using momentum by swinging back and forth. Using the jerking movement takes off tension from your lats by recruiting your arms.
The straight arm cable pulldowns work the thickness of your back. Your elbows will be locked at an angle and your torso will be at a 45-degree angle with the floor. Keep your upper body stationary throughout the exercise.
Single-Arm Dumbbell Rows – 3 Sets 8-12 Reps
Dumbbell rows are a staple in the back workouts. Perform the dumbbell rows by placing one hand and knee on a flat bench while holding a dumbbell in the other hand, and the other foot on the floor.
While rowing the dumbbell, keep all the tension on your lats. If you feel stress building up in your biceps, it means you’re using momentum which is leading to the recruitment of the secondary muscles.
Superset
Barbell Pullovers – 3 Sets 12-15 Reps
Weighted Hyperextensions – 3 Sets 12-15 Reps
Barbell pullovers are one of the most underutilized back exercises. Perform the barbell pullovers by lying across a flat bench while holding a barbell above your chest. You need to keep your elbows locked so your arms are in a straight line. The barbell pullovers help in developing the V-taper. A broad back can make your shoulders look wider and the stomach thinner.
Developing the separation and conditioning in the lower back can be one of the trickiest things. You can perform the weighted hyperextensions by holding a barbell, weight plates or dumbbells in front of your chest.
Which is your favorite back exercise? Let us know in the comments below. Also, be sure to follow Generation Iron on Facebook, Twitter, and Instagram.
Header image courtesy of Envato Elements
5 Landmine Exercises For A Shredded Body
The Best Landmine Exercises
Landmines are one of the most underrated exercises. You could perform the landmines as a compound or unilateral lift to fix your strength or muscles imbalances. There is a variation of the landmines you can perform to train every muscle group.
The landmine exercises force you to use your muscle stabilizers which can help strengthen your core. In a landmine exercise, you place one end of a barbell in a corner where it doesn’t move or use a T-bar machine.
Landmine 180s
If you know about the landmine exercises, it’s probably because of the 180s. The 180s are arguably the most popular landmine exercise. 180s work your obliques and core and will set them on fire. Get in position by standing with a shoulder-width stance.
Extend your arms forward and grab the end of the barbell with both your hands. Your hands should be in front of your face at the starting position. Take a deep breath and rotate to the right side until the end of the barbell is at your waist level. Return to the starting position while breathing out and repeat on the left side.
Landmine Squats
If you’re someone who has back problems and can’t perform the orthodox squats with the barbell on your back, the landmines squats are a lifesaver for you. The landmine squats take off all the tension from your back and put them on your quads.
Stand with a shoulder-width stance and grab one end of the barbell with both your hands. Bend your arms at your elbows and place your hands in front of your chest. Inhale and perform a squat. Return to the starting position while breathing out. Repeat for recommended reps.
Single-Arm Bent Over Landmine Rows
Performing the bent-over rows on a landmine setup can turn the compound exercise into an isolation lift. You can perform the single-arm bent over landmine rows with your body parallel or perpendicular to the barbell.
Both the variations will give the barbell a different movement pattern and target your back uniquely. Make sure you’re not just going through the motions. Hold and contracts your muscles at the top of movement while performing each exercise.
Landmine Shoulder Press
Landmine presses are a killer shoulder exercise. You should make the exercise a part of your arsenal if you want to see some insane results. Most people make the mistake of using momentum by pushing through their legs while performing the landmine presses.
You need to keep a strict form to get the most out of this exercise. The jerking motions can reduce the tension on your shoulders and divert it to secondary muscles like your arms and legs.
Single-Leg Landmine Romanian Deadlifts
The single-leg landmine Romanian deadlifts might be one of the hardest compound exercises to perform. The main objective of the landmine RDLs is to put tension on your stationary leg while getting the maximum height with your back leg.
You don’t need to worry too much about touching the floor with the barbell. Stand perpendicular to the barbell (this will give you a similar feeling as the dumbbell RDLs) and place your feet right behind the end of the barbell. You should use your free arm to balance yourself without obsessing over which side your arm should point towards.
Have you ever tried one of these exercises? Let us know in the comments below. Also, be sure to follow Generation Iron on Facebook, Twitter, and Instagram.
Header image courtesy of Envato Elements
In Depth: How To Workout Your Back For Optimal Mass
[embedded content]
The full deets on a getting a massive back.
Building up a great physique is very much like constructing a skyscraper. It requires a sturdy foundation as well as strong internal structuring and maintenance in order to remain strong and aesthetic. When it comes to building muscle there’s always a delicate balance involved. People’s bodies are all different which means that everyone reacts differently to nutrition and exercise. But for the most part if you eat well, exercise smart, and have perfect form coupled with the optimal weight then gains are no doubt going to be in your future..
Building up every body part is key having impressive symmetry. If you want to have a proportional figure then it means you have to give equal attention to every part of your body. So for example, if you wanted to build up your chest for instance it means you have to work the opposite, or anterior, muscle groups as well. That means training the entire back for optimal growth for both the lats and the pectorals.
Why build up the back?
“Why not?!” would be a pretty adequate response to such a question, but since the devil is in the details, let’s explore the notion for a bit shall we.
First off, let’s consider what the back really does. In reality, the back is perhaps the most important body part to build up. While the front side of our bodies get a tremendous amount of attention, the back is vastly important when it comes to performance. Ask any athlete who has ever had a back injury and they’ll tell you that it is paramount to their overall athletic performance. As said before, everyone needs to build a strong foundation in order to excel and tap into their true potential. While the legs are quite literally the foundation of the human body, and is just as important to strengthen, the back is also a core component of ensuring high level athletic execution.
Coming from a purely aesthetic stand point, the back is also key in being able to make the illusion of massive. While the shoulders may work as the overall frame from size perspective, the back is also paramount if you want to really look jacked. Focusing purely on your arms just simply isn’t going to cut it.
Building the outer and lower lats are going to go a long way in creating the illusion of a tiny waistline. While many man may complain and worry about love handles, the reality is that one of the best ways to mitigate the flaw is by building up the lats in order to cut a broader figure to your upper half. Along with building the shoulders, having great lats are the key to constructing the coveted V-Taper that so many classic bodybuilders were known for possessing.
But building wide lats simply isn’t enough if you want to have total back dominance. You’ll need to add depth to your back as well, meaning training the inner back. Where building the outer and lower lats can be done by performing lat pull downs and pull ups, among other exercises, the muscle for the inner back can be carved out by performing dumbbell, barbell, or cable rows. Deciding which is a matter of preference, but trying a combination of all of them is a key to success.
Still not convinced that you need to make back training your priority? (Who said we didn’t?) If you still need more evidence to the fact then think about every bodybuilding champion who crushed the competition on the way to winning the Olympia. All of them had impressive attributes, including a truly out of this world back.
When it comes to bodybuilding and training advice there are few people out there that can match IFBB pro bodybuilder Benjamin Pakulski in terms of sheer intricate knowledge and experience. The man is an advocate of the scientific approach to getting the body to perform at optimal levels in order to both condition the body as well as acquiring great muscle growth.
The IFBB pro’s YouTube page is dedicated the best advice and knowledge Ben has acquired over years of studying and trial and error. If you’re looking to build an impressive back then we have no doubts that Pakulski’s intricate break down on training the lats is something you’re going to want to see. Check out the video below for some detailed knowledge into how to train the back.
Would you want to train under Ben Pakulski’s tutelage? You can also get a deeper inside look into Ben Pakulski’s bodybuilding journey way back from our original Generation Iron film. Available to stream here.
For more news and updates, follow Generation Iron on Facebook, Twitter, and Instagram.
Managing Editor at Generation Iron, Jonathan Salmon is a writer, martial arts instructor, and geek culture enthusiast. Check out his Instagram, Twitter and Facebook to keep up with his antics.
How To Master the Overhead Press
The Ultimate Shoulder Exercise for Size & Strength
The overhead press is well renowned as a strength and size builder, not just for the shoulder but for the chest, back, and core muscles too.There is no denying that it an impressive-looking exercise however, often those who are eager end up hurting themselves by overloading the bar.If you are unfamiliar with the overhead press, use the recommended exercise guide found in this article to allow you to gradually work up to a full overhead press.This article will also highlight an array of overhead press variations as well as providing detail on how to effectively perform the press.
Overhead Press Technique
To perform the overhead press, start by setting up a bar on a rack at shoulder height. Assuming a hip-width stance, use a shoulder-width grip on the bar and unrack.Before pressing the bar, squeeze the core muscles and the glutes to prevent the trunk and hips from moving. Push hard and drive the bar upward keeping it close to the face. Fully extend the elbows and finish with the bar directly overhead. Maintain a high chest and core brace as you reverse the movement and drop the bar back down to the upper chest.
Building up to Overhead Press
If you are a beginner or have never performed the overhead press previously, consider using the dumbbell seated overhead press first.For the dumbbell seated overhead press, start by setting a bench upright so that the upper back is firmly against the bench to prevent overarching.Using the seated version will reduce the demand on the core (1) and therefore allow you to focus more intently on the pressing movement.Dumbbells are an excellent tool when learning new exercises as they allow for greater control and a fuller range of motion.
Practicing the seated dumbbell overhead press will allow the nervous system to adapt and get to grips with the movement patterns required for the overhead press. Additionally, it will build a base level of strength first to suitably prepare you for progressing onto the barbell overhead press.After mastering the seated dumbbell overhead press, progress onto a standing dumbbell overhead press which will increase the need for stability and demand on the core muscles (2).Once you feel competent with the standing dumbbell overhead press, it’s time to move onto the barbell overhead press.
Overhead Press Coaching Points
When performing the overhead press, keep the following 4 coaching points in mind to allow you to complete reps efficiently.
1) Use a Shoulder-Width Grip
Using a grip that is too wide can adversely impact your pressing ability and cause you to lift less weight.Ideally, you should use a shoulder-width grip on the bar and look to keep the elbows tucked in so that they are directly under the wrists. This will put you in the most optimal position to press from.
2) Keep the Wrists Mobile
To allow for a solid press, it is important that both wrists are mobile so that they can flex backward slightly when holding the bar.If you can get the wrists in the correct position, the pressing motion will be much smoother. Good general mobility will also allow the elbows to slightly flare out during the upward drive.
3) Shoulder Blade Engagement
Prior to driving the bar up and overhead, ensure that you squeeze tightly between the shoulder blades.When pressing the bar upward, focus on powerfully engaging the shoulder muscles to initiate the movement. Also on the way back down, maintain tension through the shoulders to promote safety.
4) Adjust Head Position
The bar should start in contact with the upper chest. This means that when you press the bar, you will have to shift the head back to allow the bar to move straight up.Failing to do this may result in the bar catching you in the chin or the nose which is evidently something that you want to avoid.
5) Lift the Chest
Throughout the duration of the rep, it is crucial that the chest is lifted and kept high. This will keep the upper back strong and stable thus facilitating a more efficient press.Letting the chest drop can decrease shoulder stability and therefore may heighten the risk of experiencing a serious shoulder injury – especially if using a heavy load.
Overhead Press Variations
There are a number of overhead press variations which you may wish to use for a number of different reasons.For example, if you find the barbell overhead press too challenging you may wish to regress by selecting a slightly easier variation like the dumbbell overhead press.
Dumbbell Overhead Press
The movement patterns of the barbell and dumbbell overhead press are the same. However, using dumbbells will work both sides individually and therefore will work the shoulders in a slightly different way.Although this variation is excellent for beginners as they get to grips with the overhead press, those who are accomplished with the overhead press can still benefit from it.When it comes to the barbell press, imbalances can easily be masked. The dumbbell press will give a greater indication to whether one side is stronger than the other.This explains why it may be beneficial for more advanced individuals to perform the dumbbell variation on occasion, to check and see if strength levels are well balanced.A final benefit associated with the dumbbell overhead press is that dumbbell requires a greater degree of stability than barbells. As a result, smaller stabilizing muscles in the shoulder must contract to control the weight. Regularly performing the dumbbell variation may, therefore, lead to healthier shoulders.
Military Press
Often the overhead press and military press are confused and seen as the same exercise, however, they are distinct. The difference between these exercises is the width of the stance. The overhead press uses a hip-width stance wjhereas the military press brings the feet close – like a soldier standing at attention.This small change has a big impact on the dynamic of the exercise. Although the pressing motion remains unchanged, stability becomes more of a factor due to the narrow base of support.As a consequence, glute and core muscles must powerfully engage to facilitate stability, balance, and control. As a result of the increased demand for stability, it may be necessary to use a slightly lighter weight than you use for the conventional overhead press.
Push Press
In the overhead press, the lower extremities do not move however, the push press recruits the muscles in the legs to assist in the press. This makes it an excellent exercise for those who are finding it challenging to complete the overhead press.It can also effectively be used when reaching muscular failure in the overhead press. It’s fine to switch to push press mid-set to allow you to complete a few more reps and apply maximal stress to the shoulders.To perform the push press, start in the same position as the overhead press. Dip the hips and bend the knees so that you drop into a quarter squat before powerfully extending.The momentum generated from the extension of the knees and hips should then translate into pressing the bar directly overhead (3).
Thruster
There are great similarities between the thruster and the push press. However, for the thruster, you drop into a full squat rather than a quarter squat, before pressing overhead.Considering that the thruster incorporates both a full front squat and overhead press, it is the most challenging full-body variation in the list.With such a vast array of muscle groups being involved, the thruster will rapidly raise the heart rate which makes it a superb exercise to utilize in HIIT training or circuits.If you do decide to use the thruster in this way be conscious of your form as fatigue builds. Fatigue can adversely interfere with form thus increasing the risk of sustaining an injury.
Kettlebell Press
As with the dumbbell overhead press, the kettlebell variation is a superb exercise that can be used to reinforce the movement patterns of the overhead press.Because of the way the kettlebell is positioned, stability may be more of a challenge with this variation (4).Focus intently on pressing straight up in order to maintain shoulder integrity and reduce the risk of injury. Pressing out to the side or letting the weight shift backward can place undue strain on the shoulders.To perform the kettlebell variation, bring the kettlebells up to the shoulders and check that the elbows are directly under the wrists. Keep the chest up and core braced as you press the kettlebell directly upward. As you press, rotate the arm 90 degrees so that the palms are facing forwards at the top position.
Final Word
All serious lifters and athletes should be performing overhead work on a regular basis. For comprehensive, full-body development, the overhead press and variations of the overhead press should play a key role.
References:
1 – Saeterbakken, Atle Hole; Fimland, Marius Steiro (2012-05). “Muscle activity of the core during bilateral, unilateral, seated and standing resistance exercise”. European Journal of Applied Physiology. 112 (5): 1671–1678. doi:10.1007/s00421-011-2141-7. ISSN 1439-6327. PMID 21877146.
2 – Saeterbakken, Atle H.; Fimland, Marius S. (2013-07). “Effects of body position and loading modality on muscle activity and strength in shoulder presses”. Journal of Strength and Conditioning Research. 27 (7): 1824–1831. doi:10.1519/JSC.0b013e318276b873. ISSN 1533-4287. PMID 23096062.
3 – Soriano, Marcos A.; Suchomel, Timothy J.; Comfort, Paul (2019). “Weightlifting Overhead Pressing Derivatives: A Review of the Literature”. Sports Medicine (Auckland, N.z.). 49 (6): 867–885. doi:10.1007/s40279-019-01096-8. ISSN 0112-1642. PMC 6548056. PMID 30924081.
4 – DICUS, JEREMY R.; HOLMSTRUP, MICHAEL E.; SHULER, KYLE T.; RICE, TYLER T.; RAYBUCK, SHAWN D.; SIDDONS, CHELSEA A. (June 1, 2018). “Stability of Resistance Training Implement alters EMG Activity during the Overhead Press”. International Journal of Exercise Science. 11 (1): 708–716. ISSN 1939-795X. PMC 6033506. PMID 29997723.
Want The Ultimate Upper Body? Dips And Pull Ups Are The Trick
Never overlook these exercises.
Building an aesthetic physique is a goal that every bodybuilder should aspire to. Not everyone is capable of packing on as much muscle as a Phil Heath or a Kai Greene. Most people will only reach a certain level of muscle growth. If you’re a fan of mass monsters and wish to aspire to that body type, go for it. Track your macros closely, get that pump and get some gains. But if you’re genetically incapable of doing such a thing, which let’s face it most of are, then you’re probably going to have to settle for building an aesthetic, if not massively muscled, physique.
For most men and some women, building the upper body is a priority, not solely for aesthetics but for functional strength as well. Core strength is paramount for any athlete. Whether you’re looking to swing a golf club or build a massive chest, the core of your body plays a major role in perform the even the most simplest of actions.
The core of your body is like an engine and working it can improve upon your overall fitness. But since building muscle is definitely your priority, you should definitely use these two methods for building a strong upper body: dips and pull ups.
What makes these two so special? Well let’s dissect it.
Works Multiple Muscle Groups
Dips and pull ups are great for working more than one muscle group. The dip is essentially a pushing exercise that can not only work your chest, but your triceps and delts as well. The pull up works your back, specifically the lats in the upper quadrant. Pull ups are also great for working your biceps. The whole key to maximizing the potential of each exercise is to utilize proper form and technique.
If you swing your legs while doing pull ups to much of the focus will be shifted to your arms doing all the work rather than your lats. By focusing on keeping your legs steady it can essentially work your lower body as well. The dips can work your chest from different angles and, depending on how deep your reps are, can either completely focus on your pecs or multiple different muscle groups for an overall upper body workout.
[embedded content]
They Are Versatile
As athletes we are always looking to master a particular workout or technique. With pull ups and dips, the possibility of mastery near impossible. What does that mean exactly? Well, of course it’s possible to master the form and technique of the exercises, but they’re also very versatile.
If bodyweight dips and pull ups start to lose their luster, then you can always switch to using chains or a weighted vest or belt to further challenge yourself. Once your strength level grows you can challenge yourself by setting personal rep records. No matter how you look at it, there are always different ways to make pull ups and dips new and fresh.
Are dips and pull ups apart of your workout regimen? Let us know in the comments and forums. Also, be sure to follow Generation Iron on Facebook and Twitter.
How To Perform The Cable Face Pull
The Ultimate Exercise for Building Strong Shoulders
The face pull is one of the most effective resistance exercises for developing the muscles of the upper back and shoulders.
One of the biggest benefits associated with this exercise is that it specifically targets the rear deltoids which are so often neglected during strength training.
Developing strength in the posterior delts will not only build general shoulder strength but it can also help to rectify postural issues and prevent muscular imbalances from forming (1).
This article will provide a step-by-step guide to the face pull, assess the benefits, investigate common errors and cover two simple face pull modifications.
Cable Face Pull Form & Muscles Worked
The cable face pull primarily works the shoulder muscles – the deltoids. More specifically, the movement places great stress on the posterior portion of the delt.
As well as the deltoids, the face pull works the rhomboids, trapezius and rotator cuff muscles.
Although the face pull is considered an intermediate level of difficulty, the movements involved are fairly straightforward.
If you suffer from shoulder or back problems, speak to your doctor or physical therapist first and always follow their recommendations closely. Additionally, if you ever experience pain during the face pull, stop immediately.
For an effective cable face pull, follow the subsequent 4 steps.
Step 1
Start by adjusting the cable machine so that the pulley is situated slightly above your head. Attach a rope to the pulley and with both hands, hold the rope at either end ensuring that the palms face each other.
While holding onto the rope, take a few steps backwards until the arms are fully extended. From this position, lean back slightly (no further than 20°) and contract all your trunk muscles.
Step 2
Before pulling, ensure that there is some tension the cable by pulling a little so that the weight comes away from the weight stack.
Prior to starting the drive phase, pull the shoulders back and down to prevent the shoulders from rolling or hunching.
Step 3
Pull powerfully in towards the forehead letting the elbows flare out to the sides to maximize the action of the rear delts.
As best as possible prevent the elbows from dropping and look to maintain a neutral grip on the rope throughout.
Step 4
Once you have pulled the weight in to the face, keep the core engaged and in a highly controlled fashion, reverse the movement by slowly extending at the elbows.
Considerations
Face pulls are best programmed into training as an accessory exercise and are specifically recommended at the end of a back workout – 2 sets of 20 reps each will suffice.
Be aware that it is unlikely that you will need a heavy weight to effectively work the shoulder. Use lighter weights and concentrate on keeping the movements smooth and controlled.
Benefits Associated with the Face Pull
In terms of upper back and shoulder strength development, the face pull is an excellent choice. Not only will strength substantially increase, the exercise also promotes posture.
Many individuals suffer from rounded shoulders which is where the shoulders are significantly pulled forward; focusing too heavily on chest and front deltoid development can cause this.
The face pull will strengthen the rear delts and consequently prevent the shoulders from moving forward.
Having strong shoulders is pivotally important for assisting in a wide range of day-to-day activities and for athletic movements- any actions that involve pressing, pulling, and arm rotations.
For the athlete or lifter, building strength and size in the shoulders will facilitate an improved performance for a range of exercises – such as overhead press and bench press.
The deltoids are responsible for driving and controlling all overhead movement. For example, they must contract to allow you to reach high shelves, take a basketball shot or placing a child on your shoulders.
Typically, the deltoids are divided into 3 distinct sections – the anterior (front), middle and posterior (rear) deltoid (2) – with each section playing its own role in causing shoulder movement.
Because the deltoids have these 3 sections, it is vital that you use a range of resistance exercises to hit the delts from different angles and facilitate comprehensive gains.
A combination of exercises such as shoulder presses, lateral raises, front raises, rear delt flyes and face pulls will lead to effective development the shoulder muscles.
However, more often than not, too much emphasis is placed on the anterior and middle deltoid. As a result, these sections develop well but the posterior delt is neglected.
The reason for this is that the majority of pushing and pressing exercises primarily require effort from the front and middle delt.
Overdevelopment of these sections and underdevelopment of the posterior delts is what causes muscular imbalances, postural problems, shoulder pain and injury (3).
Considering all of these points, the importance of performing posterior delt focused exercises, such as the face pull, should be clear.
Common Face Pull Errors to Avoid
There are 2 errors which are most commonly seen with the face pull exercise and they are often connected to each other.
Poor Form
It’s important to remember that the purpose of this exercise is to work the rear delts, therefore, if you fail to feel these muscles working, assess your form.
Ideally, you should feel fatigue building in the backs of the shoulder and into the upper back between the shoulder blades.
If you are feeling it more in the biceps and back, it is likely that you are either pulling too low and letting the elbows point down rather than out or are failing to maintain a neutral grip.
If you are pulling and the arms are not at right angles to the body, you will be performing a pull down rather than a face pull.
Using Excessively Heavy Weight
The second common error is to use a weight that is simply too heavy. The deltoids are a relatively small muscle and therefore do not have the capacity to pull extremely heavy loads.
If lifting too heavy, it is likely that a number of muscles outwith the rear delts will contract to assist the movement. This will only lessen the stress placed on the rear delts.
Furthermore, attempting to lift an excessively heavy load will likely cause form to deviate significantly or utilize momentum rather than muscular contraction alone.
If form begins to break down, a combination of heavy weight and improper movement may contribute towards injury.
Consider reducing the load if you find that you are using momentum during the pull, are failing to control the weight on the way back down or find that the body is constantly being pulled forward.
Face Pull Regression and Progression
Depending on your level of experience and training goals, it may be necessary to modify the face pull.
Resistance Band Face Pull
If you have limited equipment or have never performed the cable face pull previously, it may be useful to start with a resistance band face pull.
Simply attach the resistance band to a high resistance point (something like a pull-up bar, for example) and complete exactly the same face pull movement as you would with the cable.
Be aware that if you are already highly conditioned or have trained the posterior delts previously, resistance bands may not provide a big enough challenge for you.
If you have access to neither resistance bands or a cable machine, focus on using an array of dumbbell exercises to work the rear delts.
Although not a like-for-like replacement for the face pull, exercises like the banded and dumbbell rear delt fly are highly effective for rear delt development (4).
Underhand Face Pull
Changing the grip to underhand can present a new proposition and increase the challenge of the exercise. As a result, when using this progression, ensure you stick with lighter weights and promote control.
If it is your goal to build muscle size, consider completing this modified face pull in a seated position.
Being seated will keep the trunk more stable, negate lower body involvement and increase the demand on the upper back and shoulders.
Final Word
Considering the benefits of strengthening the posterior delts, the majority of individuals will profit from programming in rear delt specific exercises into their training.
The face pull is an excellent resistance exercise that will effectively build shoulder strength, prevent muscular imbalances and promote posture & general shoulder health.
References:
1-Schory, Abbey; Bidinger, Erik; Wolf, Joshua; Murray, Leigh (2016-6). “A SYSTEMATIC REVIEW OF THE EXERCISES THAT PRODUCE OPTIMAL MUSCLE RATIOS OF THE SCAPULAR STABILIZERS IN NORMAL SHOULDERS”. International Journal of Sports Physical Therapy. 11 (3): 321–336. ISSN 2159-2896. PMC 4886800. PMID 27274418.
2-Elzanie, Adel; Varacallo, Matthew (2019), “Anatomy, Shoulder and Upper Limb, Deltoid Muscle”, StatPearls, StatPearls Publishing, PMID 30725741,
3-Kim, Mi-Kyoung; Lee, Jung Chul; Yoo, Kyung-Tae (2018-3). “The effects of shoulder stabilization exercises and pectoralis minor stretching on balance and maximal shoulder muscle strength of healthy young adults with round shoulder posture”. Journal of Physical Therapy Science. 30 (3): 373–380. doi:10.1589/jpts.30.373. ISSN 0915-5287. PMC 5857441. PMID 29581654.
4-Bergquist, Ronny; Iversen, Vegard Moe; Mork, Paul J; Fimland, Marius Steiro (March 23, 2018). “Muscle Activity in Upper-Body Single-Joint Resistance Exercises with Elastic Resistance Bands vs. Free Weights”. Journal of Human Kinetics. 61: 5–13. doi:10.1515/hukin-2017-0137. ISSN 1640-5544. PMC 5873332. PMID 29599855.
Train Lats For A Bigger Chest With This Workout
Want a bigger chest? Then get your back in order.
On the journey to building up the perfect pecs, most guys in the gym often focus on exercises associated with the chest. Seems pretty obvious that if you want to get your chest into fighting form then you’re going to have to perform exercises associated with the muscle group. It doesn’t take a rocket scientist to figure that out.
But guys will often times obsess on building the chest alone while neglecting some of the other important muscle groups associated with building a maintaining pecs that would make other guys jealous and make women swoon.
So what muscle group should be worked in order to get a bigger and better chest. If you read the title of this article then it’s a safe bet that you know it’s the lats. But why exactly will building up your lats prove to be the secret to building up a desirable chest? Well, there’s a theory of building up the opposing muscle group in order to see full development in the area you’re targeting. The opposing muscle group is essentially the opposite muscle group to what you’re hoping to develop. For the chest it’s the lat muscles.
Now if you have a man boob issue that you wish to be taken care of then you’re going to have to work your opposing back muscles to avoid your moobs from growing my prominent. Everything must be balanced. You obviously work your chest muscles to get the definition and muscle growth in your pecs and you work your back, specifically your lats, so that you have a more natural posture.
By only working your chest the likelihood of your shoulders hunching forward, making your chest muscles bunch together in a more narrow space will lead to you making your man boobs appear all the bigger. Working you lats will cause your posture to maintain more of natural position through your shoulders and allow your chest to spread for a wider and more aesthetic appearance.
Here’s a list of exercises to prioritize your chest and back.
Barbell Bench Press
3 sets, 5 reps
Incline Dumbbell Bench Press
3 sets, 10-12 reps
Dumbbell Flyes
3 sets, 10-12 reps
Deadlifts
3 sets, 3 reps
Pull Ups
5 sets, To Failure
One Arm Dumbbell Rows
2 sets, 20-25 reps
Try out this chest and back routine and let us know your results and be sure to follow Generation Iron on Facebook and Twitter.
Managing editor of Generation Iron, Jonathan Salmon is a writer, martial arts instructor, and geek culture enthusiast. He has been writing about bodybuilding, combat sports, and strength sports for over 8 years. Check out his YouTube, Instagram, Twitter, Facebook, and Sound Cloud for in-depth MMA analysis.