Tag: Training Exercises
The Best Anti-Core Exercises for Increased Lumbar Stability
When most people talk about core training or working out in general, they tend to mean exercises that involve movement. For the core, that means things like crunches, sit-ups, hanging leg raises, Russian twists, side bends, etc.
These exercises usually feature a concentric or shortening phase followed by an eccentric or lengthening phase. After all, what goes up, must come down, right?
However, in many instances, the core muscles work isometrically, generating force without changing length. They contract to prevent unwanted movement, which is what the term core stability means.
Training to prevent movement might seem kinda odd. Still, it’s actually critical for various sports and activities in and out of the gym. For example, squats and deadlifts require incredible levels of static core stability, as do overhead barbell presses, push-ups, and barbell curls.
Fitness experts call these static core strengtheners anti-core exercises. The anti refers to how the core muscles work to prevent movement rather than cause it.
Whether you are training for improved aesthetics, better performance, weight loss, or health, anti-core exercises deserve a place in your workouts. If nothing else, preventing unwanted movement of your lumbar spine could help stop lower back injuries.
In this article, we reveal the best anti-core exercises.
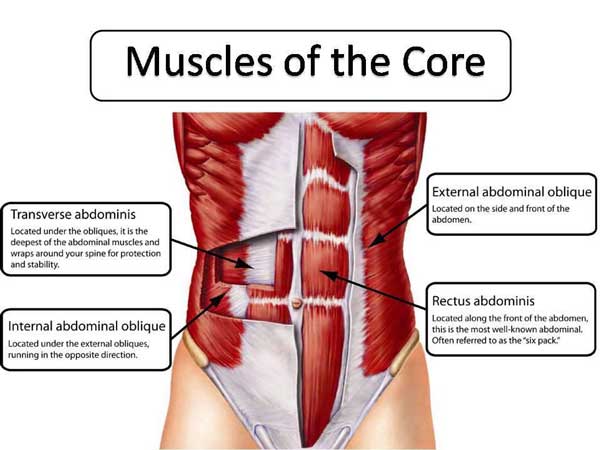
Core Anatomy Basics
Core is the collective term for the muscles that encircle your midsection. Some fitness folk also like to include other muscles in the core, such as the glutes and lats, but that just confuses matters. So, for the purposes of this article, the core is the muscles in and around the abdominal region.
The primary muscles that make up the core are:
Rectus abdominis
Located on the front of your abdomen, the rectus abdominis is the large, flat muscle that, when you are lean, has that unique six-pack appearance. The rectus abdominis is responsible for the flexion of your spine and also contributes to lateral flexion.
In anti-core terms, the rectus abdominus prevents extension and lateral flexion of the spine.
Obliques
The obliques are essentially your waist muscles. There are two sets of obliques on each side of your abdomen – internal and external. They work together to rotate and laterally flex your spine.
In anti-core terms, the obliques prevent rotation as well as initiating it.
Transverse abdominis
Known as the TVA for short, this muscle surrounds your abdominal contents like a corset or weightlifting belt. It contracts inward to increase intra-abdominal pressure, stabilizing your spine from within.
If prizes were being given for the most critical anti-core muscle, the TVA would be a shoo-in for the gold medal!
Erector spinae
Erector spinae is a group of muscles that run up either side of your spine, including the
iliocostalis, longissimus, and spinalis, each of which can be subdivided into three further sections. The erector spinae are responsible for extending your spine as well as lateral flexion.
In anti-core terms, the erector spinae prevents flexion and lateral flexion.
Movements of the spine
The spine is a column of 33 individual bones called vertebrae. It’s divided into five sections:
Cervical spine – your neck – made up of 7 vertebrae
Thoracic spine – your upper back – made up of 12 vertebrae
Lumbar spine – your lower back – made up of 5 vertebrae
Sacrum – part of your pelvis – made up of 5 immovable/fused vertebrae
Coccyx – your “tailbone” – made up of 4 immovable/fused vertebrae
The cervical, thoracic, and lumbar vertebrae are separated by intervertebral discs, which are sections of tough fibrous cartilage. These discs absorb shock and compress to allow movement.
Speaking of which, the spine is capable of four main movements:
Flexion, i.e., bending forward
Extension, i.e., bending backward
Lateral flexion, i.e., bending sideways
Rotation, i.e., twisting
Movements can also be combined, e.g., flexion with rotation during a twisting crunch.
As such, there are four groups of anti-core exercises, each one designed to prevent one (or more) of these movements. For example, anti-extension exercises emphasize the rectus abdominis, while anti-rotation exercises emphasize the obliques. However, all anti-core exercises involve the transverse abdominis.
Benefits and Drawbacks of Anti-Core Exercises
Not sure if you need to include anti-core exercises in your workouts? Consider these benefits and then decide!
Very functional
Functional training is a very misused term. Many people confuse functional training with technically demanding exercises involving a lot of balance, e.g., squats on a stability ball or curls while slacklining. While these are impressive feats, they’re not examples of real functional training.
In contrast, functional training means doing exercises that have a carry-over to your life outside of the gym, i.e., they improve how you function.
Anti-core exercises train your midsection in a very functional way. People often have to use their core muscles this way during their daily lives, in the gym, or on the sports field. Anti-core exercises will have a significant carry-over to your everyday life.
Spine-friendly
Like any joint, the spine is prone to wear and tear. If you do a lot of crunches, sit-ups, Russian twists, etc., you can cause stress to both the vertebrae and intervertebral discs, and these structures can become worn and damaged.
By their very nature, anti-core exercises involve no movement, so there will much less stress on your vertebrae, spinous ligaments, or discs. In fact, anti-core exercises should not cause lower back stress or pain of any sort – done correctly, of course!
Easy to learn
With no movements to think about, most anti-core exercises are very straightforward and easy to learn. You just have to keep still and prevent movement. That’s not to say these exercises are easy – far from it. However, from a technical performance perspective, the learning curve for most anti-core exercises is pretty short.
While anti-core exercises are mostly beneficial and safe, there are also a few drawbacks to consider:
Usually done for time instead of reps
Many anti-core exercises are held for a predetermined time, e.g., 30 seconds. This means you’ll need to use a timer or be able to see a clock with a second hand. Also, some people prefer to pump out reps, and keeping still may be less appealing.
Elevated blood pressure
Isometric anti-core exercises can cause a short-term increase in blood pressure (1). This is because the muscles are contracted, which reduces blood flow. This should be no issue for people with healthy blood pressure but could be problematic for anyone with hypertension.
This problem can be reduced by never holding your breath during anti-core exercises. Breath-holding can have a significant effect on blood pressure.
Speak to your doctor if you have high blood pressure before doing any of the exercises in this article.
Five Best Anti-Flexion Core Exercises
Anti-flexion exercises emphasize your erector spinae muscles. These exercises are good for improving your posture and protecting your lower back from pain and injuries.
1. Back extension hold
Anti-flexion exercises don’t come much simpler than the back extension hold. Done for time, this exercise teaches you to use your back muscles to resist the pull of gravity. Back extension holds are an excellent stepping stone onto more demanding exercises and is ideal for beginners.
Steps:
Mount your back extension machine (45-degree or horizontal) and get into the mid-point of the exercise so your body is straight. Brace your core and engage your glutes and hamstrings.
Without holding your breath, maintain your position for as long as possible.
Yes, all that shaking is perfectly normal.
Relax, rest a moment, and repeat.
Muscles targeted:
Erector spinae, core, gluteus maximus, hamstrings.
Benefits:
Very easy to learn.
Very accessible as most gyms have a back-extension machine.
Easy to progress/regress by altering the time of each hold.
Tips:
Work up to holding for 2-3 minutes per rep.
Make this exercise harder by holding a weight to your chest or using resistance bands.
Keep your knees slightly bent throughout for comfort and safety.
2. Cobra Superman hold
No back-extension machine? No problem! You can work on your anti-flexion strength with this straightforward floor exercise. On the downside, it can be a little uncomfortable, so make sure you use a mat to avoid any unnecessary pain.
Steps:
Lie on the floor on your front and place your hands on your temples.
Lift your head, chest, arms, legs, and feet a few inches off the floor so you’re balancing on your abdomen and hips only.
Hold this position for as long as possible.
Muscles targeted:
Erector spinae, gluteus maximus, hamstrings, core, trapezius, rhomboids, deltoids.
Benefits:
An ideal exercise for home workouts.
No equipment required.
Good for improving spine mobility.
Tips:
Place a folded mat under your hips for comfort.
Take care not to hyperextend your spine.
Do not hold your breath.
3. Dual kettlebell front rack carry
While stationary exercises like back extension and Superman/cobra holds are effective, they don’t teach you to stabilize your spine during movement. As such, they’re good preparatory exercises but also need to be progressed. Dual kettlebell front rack carries train you to resist flexion while moving your legs, so they’re much more functional.
Steps:
Rack and hold two kettlebells on your shoulders. Pull your shoulders down and back, and brace your core. Look straight ahead.
Keeping your torso upright, walk around your training area until you start to tire.
Lower the weights to the floor, rest, and repeat.
Muscles targeted:
Erector spinae, gluteus maximus, hamstrings, core, trapezius, rhomboids, deltoids.
Benefits:
A highly functional exercise.
Good for integrating your core with your upper and lower body.
An excellent general strength and conditioning exercise.
Tips:
Use dumbbells instead of kettlebells if preferred.
Use gym chalk to stop your hands from slipping.
Use one weight only to add anti-lateral flexion to this exercise.
4. Romanian deadlift
While most people do RDLs to strengthen their glutes and hamstrings, it’s actually a very effective anti-flexion exercise. However, you need to be able to resist flexion in isolation first, e.g., with back extension holds, before attempting this exercise.
Steps:
Hold a barbell with an overhand, shoulder-width grip. Stand with your feet between shoulder and hip-width apart, knees slightly bent.
Brace your core and pull your shoulders down and back.
Hinging from your hips, lean forward and lower the bar down the fronts of your legs. Do NOT round your lower back.
Drive your hips forward, stand up straight, and repeat.
Muscles targeted:
Erector spinae, gluteus maximus, hamstrings, core, trapezius, rhomboids, deltoids, forearms.
Benefits:
An excellent exercise for your entire posterior chain.
Easy to scale by adding or subtracting weight.
A proven way to learn how to hip hinge, which is a prerequisite for many more demanding exercises, such as kettlebell swings and power cleans.
Tips:
Remove your shoes to keep your heels on the floor and your weight toward the back of your feet.
Use chalk or lifting straps to reinforce your grip.
Keep your chest up and your lower back slightly but tightly arched throughout.
Related: Romanian Deadlifts (RDLs) Guide
5. Deadlift
The barbell deadlift is one of the best bang-for-your-buck exercises you can do. Working a large percentage of the muscles in your body, deadlifts have the potential to build muscle size and strength like no other. However, the key to a good deadlift is keeping your spine extended, which is what also makes them an excellent anti-flexion exercise.
Steps:
Place a loaded barbell on the floor. Ideally, the bar should be about mid-shin height.
Stand with your toes under the bar, feet between shoulder and hip-width apart.
Bend down and hold the barbell with an overhand or mixed shoulder-width grip.
Straighten your arms, drop your hips, and lift your chest. Brace your core and pull your shoulders back and down.
Drive your feet into the floor and stand up, ensuring your hips don’t rise faster than the bar.
Push your hips back, bend your legs, and lower the weight back to the floor.
Allow it to settle for a couple of seconds, reset your core and grip, and repeat.
Muscles targeted:
Erector spinae, gluteus maximus, hamstrings, quadriceps, core, trapezius, rhomboids, deltoids, forearms.
Benefits:
One of the most productive barbell exercises you can do.
Teaches you how to lift heavy objects off the floor safely.
A very time-efficient exercise that trains multiple muscle groups at the same time.
Tips:
Place your barbell on blocks or in a power rack if you tend to round your back when deadlifting from the floor.
Do NOT bounce the bar off the floor. Instead, allow the weight to “go dead” between reps for safety and best results.
Experiment with an overhand and mixed grip to see which you prefer.
Related: 9 Weeks to a Bigger Deadlift Program
Five Best Anti-Extension Core Exercises
Anti-extension exercises target your rectus abdominis. Working on your anti-extension strength will lessen the likelihood of hyperextending your spine during athletic and everyday activities.
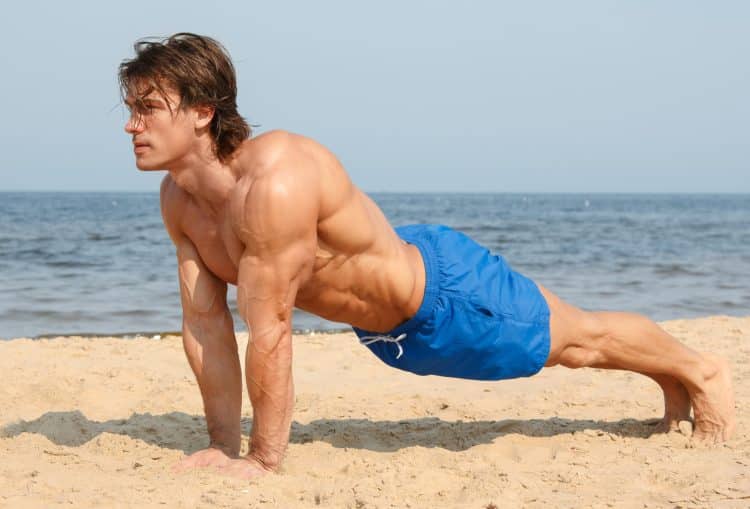
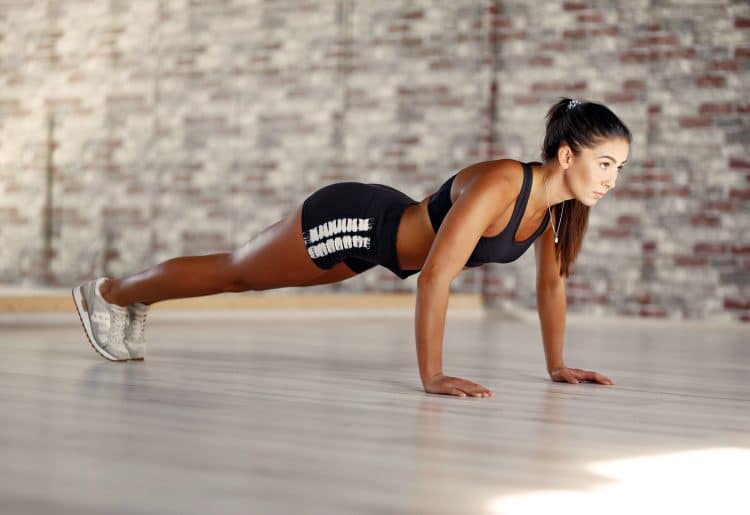
1. Plank
The plank is the original anti-extension core exercise. With roots in yoga and Pilates, this exercise has been around for centuries. However, despite being so common, many people do this exercise incorrectly. Don’t be one of them!
Steps:
Kneel down and rest your forearms on the floor. Your elbows should be under your shoulders, lower arms parallel. Brace your core and pull your shoulders back and down.
Walk your feet out and back to form a straight line with your shoulders and hips.
Hold this position for the required duration. However, do not hold your breath.
Muscles targeted:
Rectus abdominus, core, hip flexors.
Benefits:
No equipment required.
An excellent preparatory exercise for more advanced movements.
An easy exercise to progress or regress.
Tips:
Try to increase muscle tension instead of holding for excessively long durations.
Bend your legs and rest on your knees to make this exercise easier.
Rest your forearms on a stability ball to make this exercise more challenging.
Related: Plank Progressions and Variations for Stronger Abs
2. Dead bug
Dead bugs teach you to resist extension while moving your arms and legs, which is how your core muscles often have to work in nature. This is a highly functional anti-core move that’s suitable for all levels of exerciser.
Steps:
Lie on your back with your legs bent and arms extended up toward the ceiling. Brace your core and press your lower back into the floor.
Extend your left arm and right leg and lower them to the floor. Keep your lower back pressed down.
Return to the starting position and repeat on the opposite side.
Continue alternating arms/legs for the duration of your set.
Muscles targeted:
Rectus abdominus, core, hip flexors.
Benefits:
A very lower back-friendly exercise.
A very functional anti-extension core exercise.
No equipment required, so ideal for home workouts.
Tips:
Make this exercise easier by only lowering your arms OR legs.
Make it more challenging by lowering both arms and legs together.
Increase the intensity of this exercise by holding dumbbells or a medicine ball.
3. Overhead Pallof press
The Pallof press was invented by Bostonian physical therapist John Pallof. Unlike many anti-core exercises, this one uses weights to overload your muscles. As such, it can be progressed just like any other strength-training exercise, i.e., by increasing the load. Unlike the traditional anti-rotation Pallof press, this is an anti-extension exercise.
Steps:
Attach a rope handle to a high pulley. Grab the handle and then turn your back to the cable machine. Hold your hands at shoulder height. Brace your core and adopt a split stance for balance.
Without leaning forward or backward, raise your arms above your head. Note how the tension on your core increases as you extend your arms.
Lower your hands back to your shoulders and repeat.
Muscles targeted:
Rectus abdominis, core, pectoralis major, latissimus dorsi, deltoids.
Benefits:
Can be made as easy or as challenging as required by adjusting the weight.
Teaches you how to integrate your upper and lower body with your core.
A good exercise for improving shoulder mobility and stability.
Tips:
The narrower/closer your feet are, the more challenging this exercise becomes.
You can also do this exercise with a resistance band.
Experiment with different height cables to see what works best for you.
4. Rollout
Rollouts are like a moving plank. As you extend your arms, the tension on your core increases dramatically, and you’ll have to work harder to prevent lumbar spine extension. Rollouts also provide an intense lat workout. An ab roller is an excellent investment!
Steps:
Kneel down and hold your roller with an overhand grip. Place the roller on the floor in front of your knees. Brace your core and pull your shoulders back and down.
Push the roller out in front of you and lower your chest and abdomen down to the floor. Do not allow your lower back to extend.
Using your abs and lats, pull the roller back up to your legs.
That’s one rep – keep going!
Muscles targeted:
Rectus abdominus, core, latissimus dorsi, triceps.
Benefits:
A low-tech exercise that’s ideal for home workouts.
Can be modified to suit most levels of exerciser.
A challenging, effective anti-extension core exercise.
Tips:
Do this exercise from standing for a more intense workout.
Don’t extend your arms so far to make this exercise less challenging.
No ab roller? No problem! You can also do this exercise with a barbell.
Related: Rollouts: Benefits, Technique, And Alternatives
5. Extended plank
Planks are an excellent exercise. However, if you can do them for over a minute or two, they probably aren’t challenging enough to increase core strength. This variation takes your hands and feet further apart to make them much more demanding.
Steps:
Firstly, lie on your back with your arms stretched out to the side. Make marks on the floor with your fingertips to determine your “wingspan.”
Next, place your feet on one mark and your hands on the other. This is your extended plank position.
Brace your core and hold the extended plank position for as long as possible, taking care not to hyperextend your lumber spine or hold your breath.
Muscles targeted:
Rectus abdominus, core, hip flexors.
Benefits:
No equipment required.
A much more challenging way to do planks.
An excellent anti-extension move for advanced exercisers.
Tips:
Shorten the distance between markers if you cannot do this exercise correctly, or you can feel it in your lower back.
Ensure your hands are dry and won’t slip to avoid accidentally face-planting the floor.
This is a very challenging core exercise, so proceed with caution.
Five Best Anti-Lateral Flexion Core Exercises
Anti-lateral flexion exercises strengthen your obliques, rectus abdominis, and erector spinae muscles, albeit one side at a time. Improving your ability to resist lateral flexion will ensure you can keep your torso upright when dealing with unilateral or unbalanced loads.
1. Side plank
The side plank is an excellent introduction to anti-lateral flexion exercises. It’s a little harder than front planks but just as simple to learn. This exercise is popular in group workout classes for a reason!
Steps:
Lie on your side and rest on your forearm. Your body and legs should be straight. Brace your core.
Lift your hips off the floor and hold them up for the required duration.
Lower your hips back to the floor, roll over, and repeat on the opposite side.
Muscles targeted:
Obliques, rectus abdominus, erector spinae, deltoids.
Benefits:
No equipment required, so ideal for home workouts.
Easy to learn and master, so perfect for novice exercisers.
An excellent preparatory exercise for more demanding anti-lateral flexion movements.
Tips:
Rest your elbow on a folded exercise mat or foam pad for comfort.
Bend your legs to make this exercise easier.
You can also do this exercise with your supporting arm extended:
2. Single-arm farmer’s walk
Exercises don’t come much more functional than the single-arm farmer’s walk. However, despite its simplicity, this exercise can be extremely challenging. All you need is a single dumbbell, kettlebell, or heavy bag, so this exercise is ideal for home workouts.
Steps:
Hold a heavy weight in one hand, arm by your side. Brace your core and make sure your hips and shoulders are level.
Without leaning sideways, go for a walk around your training area.
On completion, lower the weight to the floor, swap hands, and repeat.
Muscles targeted:
Obliques, rectus abdominus, erector spinae, forearms.
Benefits:
A highly functional core.
Can be modified for all levels of strength by increasing or reducing the weight.
An excellent way to develop a stronger, more enduring grip.
Tips:
Chalk your hands or use lifting straps to reinforce your grip if necessary.
Walk in zigzags to destabilize the weight and make this exercise more demanding.
Take care not to lean sideways or shrug your shoulders during this exercise.
3. Single-arm waiter’s walk
The single-arm waiter’s walk is similar to the farmer’s walk, but the weight is held overhead and not down by your side. This increases the stability demand of this exercise. Take care not to go too heavy too soon with this exercise; it’s harder than it looks!
Steps:
Lift and hold a single dumbbell or kettlebell overhead. Brace your core and engage your shoulders and upper back to stabilize the load.
Without leaning sideways, go for a walk around your training area.
On completion, lower the weight to the floor, swap sides, and repeat.
Muscles targeted:
Obliques, rectus abdominus, erector spinae, deltoids.
Benefits:
A challenging and effective anti-lateral flexion exercise.
Builds stronger, more stable shoulders.
Can be modified for all levels of strength by increasing or reducing the weight.
Tips:
Chalk your hands or use lifting straps to reinforce your grip if necessary.
Walk in zigzags to destabilize the weight and make this exercise more demanding.
Take care not to lean sideways or shrug your shoulders during this exercise.
4. Single-arm overhead press
Overhead presses are great for building bigger shoulders and triceps. However, when you switch from using both arms to just one, they become an excellent ant-lateral flexion exercise. Requiring just one weight, this anti-core move is ideal for home workouts.
Steps:
Hold a dumbbell or kettlebell in one hand at shoulder height. Stand with your feet shoulder-width apart and brace your core. Make sure your hips and shoulders are level.
Without leaning sideways, press your weight up and overhead to arm’s length.
Lower the weight back to your shoulder and repeat.
Switch hands and do the same number of reps with your other arm.
Muscles targeted:
Obliques, rectus abdominus, erector spinae, deltoids.
Benefits:
A very functional upper-body and core exercise.
An excellent way to identify and fix left-to-right strength imbalances.
A very accessible, practical exercise.
Tips:
Do this exercise in front of a mirror to ensure you’re keeping your shoulders level.
Use less weight than you would for a two-handed overhead press.
You can also do this exercise with a barbell, which is an exercise called the javelin press:
5. Suitcase deadlift
The suitcase deadlift is so-called because it’s the same technique you’d use to pick up a single bag at the airport. This awesome exercise teaches you how to maintain a neutral and stable spine while generating force with your legs.
Steps:
Place a kettlebell or dumbbell on the floor and then stand sideways on to it. The handle should run parallel to your feet.
Squat down and grab the handle with a neutral or palms-in grip.
Pull your shoulders down and back, brace your core, and look straight ahead.
Drive your feet into the floor and stand up straight, taking care not to lean sideways.
Lower the weight back to the flood and repeat.
Turn around and do the same number of reps on the opposite side.
Muscles targeted:
Obliques, rectus abdominus, erector spinae, gluteus maximus, hamstrings, forearms.
Benefits:
A high degree of crossover with activities outside of the gym.
An effective and functional anti-lateral flexion exercise.
An excellent deadlift assistance exercise.
Tips:
Use gym chalk or lifting straps to stop your hands from slipping.
Do this exercise in front of a mirror to ensure your torso, hips, and shoulders are straight.
Experiment with your stance width to see what works best for you.
Five Best Anti-Rotation Core Exercises
Anti-rotation exercises target your obliques. Having stronger obliques will help you prevent unwanted twisting during activities like running, kicking, and throwing. Anti-rotation is especially important during contralateral activities where you use one arm and the opposite leg, e.g., running.
1. Bird-dogs
Bird-dogs are one of the most basic anti-rotation exercises around. Ideal for beginners, this exercise teaches you how to stabilize your core as you move your arms and legs. Bird-dogs are also an excellent muscle activation exercise and are perfect for warm-ups.
Steps:
Kneel on all fours with your shoulders over your hands and your hips over your knees.
Brace your core and set your shoulders down and back.
Keeping your hips and shoulders level, extend your right arm and left leg.
Lower them back to the floor and repeat.
On completion of your set, swap sides and do the same number of reps with the opposite arm and leg. Or, if preferred, you can use an alternating arm and leg action.
Muscles targeted:
Obliques, rectus abdominis, gluteus maximus, hamstrings, deltoids, erector spinae.
Benefits:
An excellent exercise for lower back pain sufferers.
A great movement for beginners.
No equipment required, so ideal for home workouts.
Tips:
Kneel on a folded exercise mat for comfort.
Use ankle/wrist weights to make this exercise more challenging.
You can also do this exercise in a high plank position like this:
2. Pallof press
The Pallof press is one of the most widely-performed anti-rotation core exercises. Popular with almost every type of exerciser, it’s safe to say that this move delivers. If you’ve never done Pallof presses before, you are in for a treat, but if you’re already doing them, you should definitely continue!
Steps:
Attach a D-shaped handle to a cable machine set to mid-chest height.
Stand side-on to the pulley and hold the handle on both hands. Your feet should be about shoulder-width apart, with your knees slightly bent. Brace your core.
Pull your hands into your chest and step away from the machine to load the cable.
Without moving your hips or shoulders, extend your arms out in front of you. Feel how the tension on your muscles increases as you straighten your arms.
Bend your arms and return your hands to your chest.
Repeat for the required number of reps and then switch sides.
Muscles targeted:
Obliques, rectus abdominis, erector spinae, pectoralis major, deltoids, triceps,
Benefits:
An ideal exercise for beginners.
A very spine-friendly anti-core exercise.
Very scalable – just adjust the load to reflect your current strength.
Tips:
You can also do this exercise with a resistance band.
Vary the height of your arms to work your core from different angles.
Try doing Pallof presses in a half-kneeling position for variety, like this:
3. Single-leg Romanian deadlift
While regular Romanian deadlifts are an excellent anti-flexion exercise, switching to one leg/one arm means you’ll also have to work hard to prevent twisting. This exercise is also great for improving balance and stability and is ideal for runners and other athletes.
Steps:
Stand with your feet together and a dumbbell or kettlebell in your left hand. Shift your weight over onto your right foot. Brace your core and pull your shoulders back and down.
Hinge forward from your hips and lower the weight down the front of your leg. Extend your left leg out behind you for balance.
Stand back up and repeat.
Rest a moment and then do the same number of reps on the opposite leg, remembering to switch hands, too.
Muscles targeted:
Obliques, hamstrings, gluteus maximus, rectus abdominis, erector spinae.
Benefits:
A time-efficient way to train your core and lower body simultaneously.
An excellent exercise for better balance and coordination.
Easier on your lower back than two-legged Romanian deadlifts.
Tips:
Rest your non-working foot lightly on the floor for balance if needed, i.e., B-stance or kickstand RDLs.
Try holding the weight in the same hand rather than the opposite hand. This is considerably more demanding.
Do this exercise next to a wall or handrail for balance if required.
Related: Why the Single Leg Romanian Deadlift Deserves to Be the Hero of Your Workout
4. Renegade row
Renegade rows are among the most challenging anti-rotation exercises, even with light to moderate weights. However, if you’ve mastered Pallof presses and can do bird-dogs in your sleep, this is the exercise you’ve been waiting for!
Steps:
With a dumbbell in each hand, squat down, and place them on the floor.
Walk your feet out into the push-up position. Brace your core and tense your legs.
Bend one arm and row your dumbbell up and into your lower ribs.
Lower the weight back to the floor, switch arms, and repeat.
Alternate arms for the required number of reps.
Muscles targeted:
Obliques, rectus abdominus, latissimus dorsi, biceps, triceps, deltoids, erector spinae.
Benefits:
A total core exercise that teaches you to stabilize your core as you move your arms and legs.
A time-efficient conditioning exercise that burns lots of calories.
A challenging movement that’s ideal for intermediate and advanced exercisers.
Tips:
Wear a weighted vest to make this exercise even harder.
Use hexagonal dumbbells for increased stability and safety.
Combine renegade rows with push-ups for a complete upper-body and core workout:
Related: Renegade Rows Guide
5. Single-arm cable chest press
While the single-arm chest press is not an especially good exercise for your pecs, it is an excellent anti-rotation core exercise. It teaches you how to integrate your core with your upper and lower body.
Steps:
Attach a D-shaped handle to a chest-high cable machine. Hold the handle and turn your back on the machine so the cable runs outside your arm. Adopt a split stance for balance. Brace your core.
Keeping your hips and shoulders stationary, push your arm forward and out to full extension.
Bend your arm, bring the handle back to your chest, and repeat.
Switch sides and do the same number of reps with the other arm.
Muscles targeted:
Obliques, rectus abdominus, pectoralis major, deltoids, triceps, erector spinae.
Benefits:
A very lower back-friendly anti-rotation exercise.
Infinitely scalable by increasing or reducing the weight.
Suitable for beginner, intermediate, and advanced exercisers.
Tips:
Press up at an incline to change the feel of this exercise.
Do this exercise with your feet together to challenge your core and balance more.
Do this exercise with a resistance band or in a half-kneeling position:
Anti-Core Exercises – FAQs
Do you have a question about anti-core exercises? No problem, because we’ve got the answers!
1. How many reps and sets should I do?
There is no magic number of reps you should use to train your core. You will make progress whether you do 10 or 30 reps per set. That said, lower reps are generally more time-efficient, so it’s worth choosing exercises that are demanding enough to fatigue your muscles relatively quickly, e.g., between 12-20. Wherever possible, avoid very high-rep sets, e.g., 50.
In terms of sets, 3-5 should be sufficient for most people. If you can do more, the chances are that you a) aren’t getting close enough to failure or b) are resting too long between efforts.
2. How often should I do anti-core exercises?
It’s generally accepted that it takes 48-72 hours for a muscle or muscle group to recover from a workout. As such, you should aim to do anti-core exercises 2-3 times per week on non-consecutive days, e.g., Monday and Thursday, or Monday, Wednesday, and Friday. This provides a good balance between work and recovery.
Training your core more often, i.e., daily, won’t necessarily produce better results, and could even lead to overtraining.
3. Will anti-core exercises give me a six-pack?
While doing anti-core exercises will develop your six-pack muscle (the rectus abdominis) and other critical core muscles, you won’t be able to see them until your body fat percentage is low enough. This usually means under ten percent for men and 15 percent for women.
It’s true what they say – six-pack abs are made in the kitchen, and your diet will determine if your abs and core muscles are visible.
4. Are anti-core exercises safe?
Because they involve minimal movement, most anti-core exercises are very safe. As long as you brace and stabilize your spine correctly, there should be very little stress on your intervertebral discs or spinous ligaments, so many are even okay for folk who suffer from back pain.
That said, exercises that involve additional movements, e.g., suitcase deadlifts and single-arm overhead presses, are somewhat riskier than static exercises like planks and side planks.
However, if performed correctly and with appropriate loads, there is a very low risk of injury with most anti-core exercises.
5. Do I have to do anti-core exercises – aren’t regular core exercises enough?
While all core exercises are beneficial, anti-core exercises are often more functional. That’s because you often need to use these muscles to prevent unwanted movement of your lumbar spine, e.g., during deadlifts, push-ups, and overhead presses.
If your core is strong, you may not need to do a lot of anti-core training. However, if your lumbar spine lacks the stability it needs, then anti-core exercises are a must.
Wrapping Up
Whether you’re training for performance, aesthetics, or health, your workouts should include anti-core exercises. Anti-core exercises teach you how to stabilize your lumbar spine, which will protect you from lower back injury.
A more stable spine will also let you do more reps with heavier loads, making the rest of your workout more effective.
With 20 anti-core exercises to choose from, you have more than enough options to keep you busy and progressing for years to come. Include anti-core exercises in all your midsection workouts for best results.
References:
Hanson P, Nagle F. Isometric Exercise: Cardiovascular Responses in Normal and Cardiac Populations. Cardiol Clin. 1987 May;5(2):157-70. PMID: 2884033. https://pubmed.ncbi.nlm.nih.gov/2884033
How to Get Better at Push-Ups
Push-ups, or press-ups as the Brits call them, should be at the top of every exerciser’s to-do list. Working your chest, shoulders, and triceps, push-ups are more joint-friendly than bench presses, require no equipment, so they’re the perfect excuse-free exercise and can be modified to suit all fitness and experience levels.
Being able to do push-ups is a sign that you are fit and healthy. In fact, in studies, people who could do an above-average number of reps had a lower risk of heart disease, diabetes, and all-cause mortality (1).
Unfortunately, a lot of people are bad at push-ups. Either their form needs work, or they can’t do many reps. Needless to say, you can’t wish yourself to get better at push-ups – it takes time and effort!
However, that work will pay off. With dedication, perspiration, and time, you’ll soon be banging out push-ups like a pro.
We reveal the best strategies for becoming a certified push-up master!
How to Perform the Perfect Push-Up
Before we reveal the best methods for getting better at push-ups, it’s worth spending a moment to check that you know how to do this classic exercise correctly. Poor form wastes energy, making push-ups less effective, and could even lead to injury.
So, revise your push-up technique and make sure that each and every rep will make your inner drill instructor proud!
Kneel down and place your hands on the floor so your fingers point forward and are about shoulder-width apart.
Brace your core, pull your shoulders down and back, and rotate your elbows in towards your sides to engage your lats.
Contract your glutes and quadriceps to increase full-body rigidity.
Walk your feet out and back until your body and legs are perfectly straight. Lengthen your neck and tuck your chin in.
Keeping your body straight, bend your arms and lower your chest to within an inch of the floor. Pause for one second.
Drive your hands into the floor and push yourself back up to full arm extension.
Pause for a second and then descend into another rep.
Inhale as you bend your arms, and exhale as you straighten them.
Looking good, bro! Now you’ve got your technique dialed in, it’s time to look at the strategies and methods you can use to boost your push-up numbers.
How to Get Better at Push-Ups
Whether you are a beginner or an experienced expert, these methods will help reinforce your technique and improve your push-up numbers:
1. Grease the groove
To get better at push-ups, you need to practice doing push-ups. This is the heart of training specificity, one of the most important fitness principles. Grease the Groove (GTG) is a training method popularized by strength specialist and former Soviet special forces instructor Pavel Tsatsouline.
With the GTG method, you do multiple low-rep sets of your chosen exercise spread throughout the day. You avoid training to failure, which causes fatigue. Instead, each set is only about 50% of your maximum and ideally separated by an hour or more.
So, for example, if you can do a maximum of ten push-ups, to grease the groove you do multiple sets of 4-6 reps, focusing on making each push-up as technically perfect as possible. Remember, this is meant to be push-up practice and not a fatiguing workout.
Aim to clock up 6-10 GTG sets per day for the next 21-28 days. Then, when you retest your maximum, you should find that you can do more reps despite not having done any max-rep sets.
2. Train using a more challenging push-up variation
If you want to get better at bench presses or squats, you don’t just load up the bar with the same old weight and use that load for every workout. As every lifter knows, that’s a great way to go nowhere fast.
Instead, you gradually put more plates on the bar, forcing your muscles to adapt and get stronger. This is called progressive overload and another critical fitness principle.
While you could wear a weighted vest to make push-ups harder, it’s usually more convenient to overload your muscles with more demanding push-up variations. For example, putting your feet on a raised box shifts more weight onto your arms, and using push-up handles increases your range of motion. Both make your reps harder.
So, spend the next few weeks focusing almost entirely on a more demanding push-up variation. Then, when you return to standard push-ups, they’ll feel more manageable, and you’ll be able to crank out more reps.
Related: 15 Intense Push-up Variations for Bodybuilders
3. Train your push-ups like you mean it!
Wanting to get better at push-ups is not the same as training to get better at push-ups! So, if you want to become a push-up pro, you must make them the cornerstone of your workouts.
Ideally, you should do a push-up workout three times a week, working a little harder each time you train. So, for example, you could do 3-5 straight sets per workout, pushing each one to failure, or follow one of the push-up workouts in this article.
Either way, if you want to get better at push-ups, you must prioritize them.
Related: How to Train for 20 Consecutive Pull-ups and 50-Push-ups
4. Strengthen your core
While push-ups are undeniably a chest, shoulders, and triceps exercise, they also require plenty of core strength. If your core is weak, your midsection will sag and collapse, and some of the force generated by your arms will be lost.
Think about a sportscar spinning its wheels – all that smoke and rubber looks impressive, but until the car starts going forward, all that energy is wasted.
Plug your energy leaks by strengthening your core. That way, your whole body will move as one solid unit, and all of your efforts will go into pumping out push-ups.
The best core strengtheners for better push-ups mirror the demands of the exercise you’re training for. Planks are a great choice, as are Pallof presses, hollow body holds, body saws, pot stirrers, and ab wheel rollouts.
These are anti-core exercises, meaning they prevent rather than promote movement, so your core muscles work the same way they do during push-ups, i.e., as stabilizers.
5. Pump up the volume with some easier push-up variations
How do you train to do more push-ups when you can’t do very many push-ups yet? Short of moving to Mercury, where gravity is about two-thirds of Earth, the most obvious way is to regress your push-ups and perform a less demanding variation.
Making push-ups easier means you’ll be able to do more reps, developing your muscular endurance and work capacity simultaneously.
Ways to make push-ups easier include:
Three-quarter or kneeling push-ups
Incline push-ups (hands on a bench or similar)
Wall push-ups
Band-assisted push-ups
Do a few sets of regular push-ups, and then, as fatigue sets in, switch to a less challenging variation so you can do more sets. This extra volume will lead to greater and more rapid increases in push-up performance.
6. Strengthen your triceps
Lots of muscles are involved in push-ups, but the most common “weak link” is the triceps. This is hardly surprising, given the size of the triceps compared to the chest. As such, a lot of people find that their arms fail before their pecs, bringing their sets to a premature end.
Avoid this trap by working on triceps strength and training them separately. Good exercises for this purpose include:
Spending extra time on your triceps will turn what is usually a push-up weak link into a much stronger one.
7. Beef up your upper back
Believe it or not, your upper back plays a crucial role during push-ups. Muscles like your lats, traps, and rhomboids must work hard to stabilize your shoulders and prevent unwanted movement. A weak upper back can undermine your push-up performance, like doing chest presses on a wobbly bench.
So, for every set of push-ups you do, make sure you also perform at least one set of upper back training.
Good upper back exercises include:
In addition, complementing your push-up training with upper back exercises will prevent any muscle imbalances and keep your shoulders healthy.
8. Be consistent
Getting better at push-ups will take time. You must train hard and often to develop the muscles that drive your body up and away from the floor against the pull of gravity. Not only do these adaptations take time, but they’re also quickly lost if you fail to keep up your training.
In other words, consistency matters.
So, don’t expect any quick fixes; you’re not going to become a push-up stud overnight. However, if you keep pumping out the push-ups 3-4 times a week for the next few months, your performance will improve, and your hard work will pay off.
Set yourself some targets, e.g., doing 10, 30, or 50 perfect push-ups, to help keep you motivated and to remind yourself what you’re trying to achieve.
9. Eat for success
Good nutrition goes hand in hand with better push-up performance – or it should do! You are what you eat, and if your diet consists mainly of junk food, your muscles will probably perform like junk, too.
Eating healthily ensures your body gets all the nutrients it needs to power your muscles and recover from your workouts. Of course, food is also one of life’s pleasures, so you should enjoy what you eat, too.
This all means you need to adopt a balanced, mostly healthy diet, with a little wiggle room left for the occasional unhealthy snack. Make sure that you consume enough protein for muscle repair and growth, adequate carbohydrates for energy, and sufficient healthy fats. You’ll also need vitamins, minerals, and fiber, all of which are easily sourced from vegetables, fruits, and whole grains.
Finally, adjust your food intake based on your dietary goals, i.e., eat more for muscle growth and less for fat loss.
There is no need to adopt a strict diet. Rather, it’s best to create your own eating plan based on your grocery budget, likes and dislikes, and your cooking ability.
10. Have a plan
You now have all the information you need to become a fully qualified push-up ninja! However, it would be a mistake to try and use all these tips and strategies at once. That will probably cause a “system overload,” and you’ll end up making no progress at all.
Instead, you need a plan!
A plan will help you focus on what’s important while ignoring what is not. It’ll provide you with a path to follow, taking you gradually closer toward your goal. Training without a plan is like going on a journey without a map; you might end up in the right place, but if you do, it’ll be more by accident than design.
So, grab a sheet of paper and start planning your future push-up workouts, starting with some goals. Then, decide on how many push-up workouts you will do per week and what training methods you will use.
Example goal – 50 straight push-ups
Monday – three max rep sets, two minutes rest between each one
Wednesday – 100 push-ups in as few sets as possible
Friday – 10 push-ups every minute, on the minute (EMOM)
Grease the groove push-up workouts twice a week (Tuesday and Saturday)
Don’t worry if your plan isn’t quite right – you can finetune it as you go. Just make sure it’s progressive, i.e., you do a few more reps each week.
Get Better at Push-Ups – FAQs
Do you have a question about getting better at push-ups or push-ups in general? No sweat because we’ve got the answers!
1. What muscles do push-ups work?
Push-ups are a compound exercise, meaning they involve multiple muscles and joints working together. As such, they use a comprehensive list of muscles.
Because you must work hard to keep your body straight and stable, push-ups work virtually every muscle on the front of your body, including your legs and abs. However, the load on these muscles is relatively small. Instead, the push-up mainly works your upper body pushing muscles.
These muscles are:
Pectoralis major – located on the front of your chest and known as your pecs for short, these muscles are the agonist or primary mover during push-ups. In other words, they’re the muscle doing most of the work.
Anterior deltoids – the deltoids are your shoulder muscles. There are three groups of fibers or heads: anterior (front), medial (middle), and posterior (rear). All three are involved in push-ups, but the anterior deltoids are the most active.
Triceps – located on the back of your upper arm, the triceps are responsible for extending your elbows during push-ups. The triceps are often the first muscle to fatigue when you do a high-rep set of push-ups.
Serratus anterior – so called because it looks a little like the edge of a serrated blade, the serratus anterior is located to the side of your chest and helps keep your scapulae or shoulder blades flat against your ribs. Well-developed serratus anterior muscles look super cool!
Rotator cuff – the rotator cuff is the collective name for the four small muscles that control and stabilize your shoulder joint. They are the supraspinatus, infraspinatus, teres minor, and subscapularis. With no bench to support your shoulders, you’ll need to use these muscles to prevent unwanted shoulder joint movements.
Other push-up muscles include your rectus abdominis, hip flexors, quadriceps, and tibialis anterior.
2. Aren’t push-ups a beginner exercise?
While many exercisers do push-ups when starting out, they usually progress to bench presses as they get stronger and more experienced. This suggests that push-ups are only useful for novices.
This is not the case!
While you can bench press more weight, push-ups teach you to use your entire body, making them much more functional. With no bench to support you, you’ll need to stabilize yourself, just like in “real life” outside of the gym.
Plus, there are many ways to make push-ups more demanding and as effective as bench presses for increasing strength and muscle mass.
The bench press is arguably the most popular gym exercise. Still, in terms of bang for your buck, push-ups could be better and are the most widely performed exercise on the planet. Push-ups are definitely not a beginner’s exercise, and everyone who works out should do them.
3. I can’t do a single push-up – what can I do?
Plenty of people can’t do a single push-up. However, almost everyone can learn and train to do this awesome exercise.
Your first step is to regress the push-up until you find a variation you CAN do. For example, you can do kneeling push-ups, countertop push-ups, or wall push-ups. Work on mastering that variation and then progress to a more difficult one when you feel ready. Continue in this way until you can do regular push-ups.
You can also supplement your push-up training with strength exercises such as chest presses, bench presses, machine dips, and triceps pushdowns. All of these exercises can be scaled and progressed to match your current strength level.
The other thing to consider is your body weight. If you are very overweight, push-ups are bound to be challenging. Start trying to lose a few pounds, and you should find push-ups begin to feel easier.
4. Push-ups hurt my wrists – what can I do?
Many people suffer from tight forearms and wrists, especially those who spend a lot of time using a keyboard, performing repetitive manual tasks, or otherwise keeping their hands and fingers clenched.
Doing push-ups takes your wrists into extension, which means those tight muscles are strongly stretched, and can be uncomfortable or even painful.
Ideally, you should work on your forearm flexibility to alleviate this problem with targeted stretching. The prayer and kneeling forearms stretches are ideal for this purpose:
In the short term, using push-up handles allow you keep your wrists straight, which should take pressure off your joints so you can do push-ups without the pain.
5. How many push-ups should I be able to do?
The number of push-ups you can do will depend on your age, gender, weight, fitness, and experience level. That said, there are norm tables that indicate how many push-ups the average person should be able to do.
For example, men in their 30s should be able to do 41 push-ups, while women should be able to do 19.
Check out this article to see how many push-ups YOU should be able to do.
Closing Thoughts
Push-ups are a fantastic exercise! You can do them anywhere and anytime, and you don’t need any equipment, so they won’t cost you a dime. Regular push-up workouts will develop a stronger, more muscular upper body, pumping up your pecs, delts, and triceps. They’re even good for your health, and people who can do a lot of push-ups generally live longer (1) and suffer fewer cardiovascular events.
There are lots of different push-up variations to try, from beginner to ultra-advanced. There are also several ways to organize your push-up workouts, from straight sets to ladders to pyramids.
Push-ups need never be boring!
That said, you CAN have too much of a good thing, and it’s probably a bad idea to do push-ups every day. In fact, you should be good results from 3-4 push-up workouts per week.
Use the strategies and tips in this article to master the push-up and become a certified push-up master. Your efforts will be rewarded!
References:
Yang J, Christophi CA, Farioli A, et al. Association Between Push-up Exercise Capacity and Future Cardiovascular Events Among Active Adult Men. JAMA Netw Open. 2019;2(2):e188341. doi:10.1001/jamanetworkopen.2018.8341 https://pubmed.ncbi.nlm.nih.gov/30768197/
5 Simple Exercises – A Routine for Daily Calisthenics Training
There are several variables you need to consider when writing a workout plan. Once you’ve determined your training goal, you must choose a split, pick your exercises, put those exercises in the correct order, select a set and rep scheme, and allocate appropriate loads and interset rest times.
Invariably, your first draft won’t be perfect, so you’ll need to make changes on the fly, finetuning your workout until you’re 100% happy with it.
It’s no wonder some fitness professionals charge so much to design programs!
However, even the most well-designed workout routine is not worth the paper it’s written on if you don’t actually do it.
And that’s the rub, isn’t it?
You’ve got your gym membership, new workout, training shoes, lifting belt, knee sleeves, chalk, and all that other stuff you drag around in your gym bag. But, if you can’t get your butt in the gym and work out, you’ll never build muscle, get fit, or lose weight.
So, while variables like your training split, set and rep scheme, and exercise sequence ARE undeniably important, the most critical consideration for effective training is consistency, and consistency is KING!
In this article, we share an excuse-free calisthenic workout you can do at home. It’s designed to create an unbreakable exercise habit and make skipped workouts a thing of the past.
Use this workout when you are too busy to hit the gym or as an alternative to complicated, time-consuming gym-based programs.
Calisthenics for Excuse-Free Workouts
While there is nothing wrong with dumbbells, barbells, and machine-based strength training, you’ll need access to all this stuff if you want to use it. Of course, that usually means joining a gym.
Unfortunately, gym memberships can be expensive, and just getting to and from a gym can be time-consuming. When time is short, your workout will probably be the first casualty. After all, exercise is a leisure activity, and things like your job and family commitments will always take precedence.
While you could buy some equipment and build a home gym, this is not always practical; you’ll need enough space for your training equipment and the money to buy it.
The good news is that you can get a GREAT workout using just your body weight. In fact, the only equipment you really need is a pull-up/chin-up bar, which can be purchased very cheaply.
Calisthenics, or bodyweight training, has a long and storied history. The word calisthenics has its roots in ancient Greek and comes from the words for beauty and strength. Bodyweight workouts are the ultimate in fitness convenience, as you can do them almost anywhere and anytime.
And because you won’t have to travel to train, you should have no problem squeezing your workouts into even the busiest of schedules. With fewer barriers, sticking to your exercise routine should be a breeze.
But you’ll need to do more than a few push-ups a day to get fit, lose weight, or build muscle. Instead, you’ll need an effective but straightforward routine. And that’s where we come in.
In the next section, we share a simple yet powerful bodyweight workout program that always delivers excellent results!
The 5 Simple Exercises Routine – Overview
As its name implies, the 5 Simple Exercises Routine revolves around five basic calisthenic movements performed five days per week. You get weekends off for rest and recuperation.
The exercises are:
Push-ups
Air squats
Pull-ups
Reverse lunges
Hanging knee raises
However, rather than do the same number of sets and reps each day, you’ll do one set of four of the exercises and five sets of the other. This adds up to nine high-quality sets per week, which is more than enough to produce good results (1).
This is a form of daily undulating periodization, where the volume/intensity of your workouts varies from day to day. However, the exercises are sequenced in such a way that you do each one back-to-back, which makes for a very time-efficient workout. In fact, even if you take it easy, you should be finished in 15-20 minutes.
Here are your workout plans:
Monday
Focus exercise: Push-ups
#
Exercise
1
Push-ups
2
Air squats
3
Push-ups
4
Pull-ups
5
Push-ups
6
Reverse lunges
7
Push-ups
8
Hanging knee raises
9
Push-ups
Tuesday
Focus exercise: Air squats
#
Exercise
1
Air squats
2
Pull-ups
3
Air squats
4
Reverse lunges
5
Air squats
6
Hanging leg raises
7
Air squats
8
Push-ups
9
Air squats
Wednesday
Focus exercise: Pull-ups
#
Exercise
1
Pull-ups
2
Reverse lunges
3
Pull-ups
4
Hanging leg raises
5
Pull-ups
6
Push-ups
7
Pull-ups
8
Air squat
9
Pull-ups
Thursday
Focus exercise: Reverse lunges
#
Exercise
1
Reverse lunges
2
Hanging leg raises
3
Reverse lunges
4
Push-ups
5
Reverse lunges
6
Air squats
7
Reverse lunges
8
Pull-ups
9
Reverse lunges
Friday
Focus exercise: Hanging leg raises
#
Exercise
1
Hanging leg raises
2
Push-ups
3
Hanging leg raises
4
Air squats
5
Hanging leg raises
6
Pull-ups
7
Hanging leg raises
8
Reverse lunges
9
Hanging leg raises
How many reps?
The number of reps you perform depends on your current abilities and how you feel on any given day. So, for single sets, you do as many reps as possible (AMRAP), and for the five sets of your focus exercise, you do about 50-60% of your last AMRAP score.
For example, if you can do 25 push-ups in a single set, do five sets of 12 to 15 reps on your push-up focus day.
It’ll probably take you a week to get used to this program and zero in on the correct number of reps. That’s okay and no different from finetuning your weights for a gym-based workout. So long as you a) take your sets to within 1-3 reps of failure and b) strive to do more reps week by week, you WILL make progress!
As for rest periods, these, too, are based on how you feel. Move as quickly as you can between exercises but don’t feel you need to rush. Rest long enough that you can perform at your best, but don’t dawdle, either. You may need to rest longer between some exercises than others, e.g., after a leg exercise that leaves you feeling out of breath.
As you get fitter and more accustomed to the routine, you should find you can move more quickly between exercises and complete each program a little faster.
Related: Sets vs. Reps: Everything You Need to Know
The 5 Simple Exercises Routine – Exercise Instructions
One of the best ways to maximize the effectiveness of any workout is to perform each exercise with perfect form. This keeps the tension on the muscles you want to work and stress off your joints. So, not only will your workout be more productive, but it’ll also be safer.
While you may be familiar with the simple exercises in this program, review the instructions below to ensure you are performing them correctly.
1. Push-ups
Push-ups are the most widely performed exercise in the world, yet many people fail to do them properly. That’s a shame because a well-performed push-up is a thing of beauty! So make sure your push-ups are perfect – make your inner drill instructor proud!
Steps:
Place your hands on the floor roughly shoulder-width apart and your fingers pointing forward.
Walk your feet out and back until your legs and body are straight. Brace your core, rotate your elbows in toward your sides to engage your lats, and pull your shoulders down and back.
Bend your arms and lower your chest to within an inch of the floor.
Push yourself back up and repeat.
Do not allow your hips to lift or drop out of alignment at any time.
Muscles targeted:
Primary: Pectoralis major, deltoids, triceps.
Secondary: Core.
Benefits:
One of the best upper body exercises – period!
Teaches you how to use your whole body in a coordinated, synergistic way.
Can be modified and adapted for all levels of exerciser.
Tips:
Use push-up handles to increase your range of motion and take stress off your wrists.
Bend your legs and rest on your knees to make this exercise easier.
Raise your feet to put more weight on your arms and make push-ups more challenging.
2. Air squats
The bodyweight or air squat is a CrossFit staple. Working all your major lower body muscles, air squats are also great for hip and knee mobility and health. A high-rep set of air squats is very cardiovascularly demanding, so it’ll help improve your fitness and burn lots of calories, too.
Steps:
Stand with your feet roughly shoulder width apart, toes turned slightly outward.
Brace your core and pull your shoulders back and down. Look straight ahead.
Bend your legs and squat down until your thighs are roughly parallel to the floor. Do not round your lower back. Extend your arms in front of you for balance if required.
Stand back up and repeat.
Muscles targeted:
Primary: Quadriceps, hamstrings, gluteus maximus.
Secondary: Core, abductors, adductors.
Benefits:
The undisputed king of lower body exercises.
Highly functional.
Great for improving knee and hip health and mobility.
Tips:
Raise your heels on a one-inch block for a more quads-centric workout.
Use a wider stance to increase inner and outer thigh and hip engagement.
Pause for 2-3 seconds at the bottom of each rep to make this exercise more challenging.
3. Pull-ups
Pull-ups are probably the most challenging exercise in this workout routine. However, by doing one to five sets of pull-ups five days per week, it’s an exercise you’ll soon master. If you can’t do pull-ups, you can do inverted rows instead, which work the same muscles but involve lifting less of your body weight.
Steps:
Hang from your pull-up bar with an overhand, slightly wider than shoulder-width grip.
Pull your shoulders back and down and brace your core. Bend your legs if necessary, so your feet are clear of the floor.
Leading with your elbows, bend your arms and pull your chest up toward the bar.
Extend your arms and lower yourself back down under control.
That’s one rep – keep going!
Muscles targeted:
Primary: Latissimus dorsi, biceps, forearms.
Secondary: Core.
Benefits:
An excellent back and biceps builder.
A good indicator of body weight.
An effective way to stretch and decompress your spine.
Tips:
Start each rep from a dead hand – no swinging or kicking your legs.
You can also do underhand grip chin-ups if you prefer.
Use a resistance band for assistance if required, like this:
4. Reverse lunges
Working your posterior chain with simple bodyweight exercises is not always easy. Most effective movements for this region involve weights, e.g., deadlifts, kettlebell swings, reverse hypers, etc. Reverse lunges are more glute and hamstring-centric than forward lunges and are a great complementary exercise to air squats, which are more quads-dominant.
Steps:
Stand with your feet together and arms by your sides. Brace your core and look straight ahead.
Take a step back, bend your legs, and lower your rearmost knee down to within an inch of the floor.
Push off your back foot and bring your legs back together.
Switch legs and repeat on the opposite side.
Alternate legs for the duration of your set.
Muscles targeted:
Primary: Gluteus maximus, hamstrings, quadriceps.
Secondary: Abductors, adductors.
Benefits:
Good for identifying and fixing left-to-right strength imbalances.
An excellent mobility and balance exercise.
Provides an effective indirect cardiovascular workout.
Tips:
Lean forward slightly as you step back to increase glute and hamstring engagement.
Start each rep standing on a two to four-inch platform to increase your range of motion and the difficulty of this exercise.
Do this exercise next to a wall or handrail for balance if required.
5. Hanging knee raises
With so many bodyweight core exercises to choose from, it can be hard to decide which one to do. However, most are too easy to deliver much of a core strengthening effect. Hanging leg raises are much more challenging and effective, which is how they made it into this workout program.
Steps:
Hang from your pull-up bar with your arms, legs, and body straight.
Brace your core, bend your legs, and pull your knees up to at least level with your hips. Tilt the bottom of your pelvis forward to maximize abs engagement.
Lower your legs and repeat.
Muscles targeted:
Primary: Rectus abdominus, transverse abdominus, hip flexors.
Secondary: Obliques, forearms.
Benefits:
A challenging and effective core exercise.
An excellent way to strengthen your grip.
Provides a useful way to stretch and decompress your spine.
Tips:
Use chalk or lifting straps to reinforce your grip.
Progress to straight legs if your abs are strong enough.
You can also do this exercise sat on the end of a bench for a similar but easier workout:
Simple Exercises Routine – FAQs
Do you have a question about this workout routine or any of the exercises in it? No worries because we’ve got the answers!
1. Is it safe to do the same exercises every day? What about recovery?
While it’s generally accepted that muscles take 48-72 hours to recover from a workout, that’s only true when you do intense bodybuilding-style workouts consisting of several exercises and multiple sets per muscle group
Simple bodyweight exercises are much less taxing, and providing you keep the volume relatively low, you should have no problem recovering from one workout to the next. In fact, you are only doing one hard training session per exercise per week, and the workouts themselves are very short.
So, rather than being dangerous or difficult to recover from, you should find that daily workouts lead to quicker improvements in your fitness and strength, plus you’ll master the exercises and become more proficient at doing them.
2. Can I change the exercises?
You can, and we actually encourage you to do so! Doing the same exercises daily could become boring, so use variations to keep your workouts fresh and interesting. For example, you could rotate between push-ups, decline push-ups, deficit push-ups, paused push-ups, and diamond push-ups.
While so much variation will make it a little harder to manage your rep count, provided you take each set to within 1-3 reps of failure, it will have the desired results.
3. How can I work some cardio into this routine?
The best cardio options for home exercisers are those you can either do at home or start and finish at home. This avoids having to travel for your workout, e.g., driving to the gym to ride an exercise bike, which is a colossal waste of time.
So, good cardio options that complement this workout routine include:
Try to accumulate a minimum of 10,000 steps (or the equivalent) per day for your fitness and health.
4. Are push-ups and pull-ups enough to build bigger arms?
While push-ups are predominately a chest exercise and pull-ups mainly work your upper back, both also involve your arms. Push-ups hit your triceps, while pull-ups also work your biceps.
In fact, your arms will probably fail before your bigger chest and back muscles when you do these exercises.
As such, push-ups and pull-ups have the potential to help, you build bigger arms.
That said, if more muscular arms are one of your training goals, you may want to finish your workouts with a couple of sets for your biceps and triceps. For example, you could do a biceps and triceps workout 2-3 times per week or train your biceps one day and your triceps the next.
However, avoid the temptation to do lots of direct arm training. Too much could lead to overtraining and interfere with your pull-up and push-up performance. That would be unfortunate given how productive these exercises are.
5. What is the best way to warm up for this workout
One of the great things about bodyweight exercises is how joint-friendly they tend to be. As such, you won’t need a long, in-depth warm-up before your workouts. However, you should still spend 5-10 minutes preparing your muscles and joints for what you’re about to do. This will not only reduce your risk of injury but also improve your performance, leading to a better workout.
Start with five minutes of easy cardio followed by dynamic mobility and flexibility exercises for your main muscles and joints. Finish your warm-up with one sub-maximal set (e.g., 50% of your normal reps) of each exercise. After that, you should be good to go!
6. Is 20-30 minutes of exercise per day enough for weight loss and fat burning?
Weight loss and fat burning have more to do with your diet than your workout plan. It’s much easier to eat less than it is to exercise more. Providing you have a sufficient caloric deficit, your body will have no choice but to burn fat for fuel. Adding exercise into the mix merely increases your energy expenditure and raises that deficit.
If you aren’t losing weight with 20-30 minutes of exercise per day, the chances are that you are still consuming too many calories. Adjust your diet to create a large calorie deficit. More exercise is not always the best way to lose weight, as it’s seldom sustainable.
Closing Thoughts
The 5 Simple Exercises Routine probably sounds too easy to be effective. After all, most workouts are much longer and harder, right? However, those workouts are also much more difficult to do consistently, and sticking to them requires cast-iron willpower, motivation, and lots and lots of time.
And that’s the problem, isn’t it?
For any workout to be effective, you actually have to do it. Not just for a week or a month, but for as long as it takes to get and stay in shape.
In other words, forever!
And that’s where following a simple, convenient workout comes up trumps. With fewer barriers to participation, you’ll start completing more workouts than you miss, and that’s what will give you the results you want.
Simple, frequent workouts will always produce better progress than complicated workouts you hardly ever do.
So, if you are fed up with starting workout programs you can’t stick to, try doing something so straightforward that it’s excuse-proof. Don’t let the power of simplicity fool you. It WILL deliver results.
References:
Baz-Valle E, Fontes-Villalba M, Santos-Concejero J. Total Number of Sets as a Training Volume Quantification Method for Muscle Hypertrophy: A Systematic Review. J Strength Cond Res. 2021 Mar 1;35(3):870-878. doi: 10.1519/JSC.0000000000002776. PMID: 30063555. https://pubmed.ncbi.nlm.nih.gov/30063555/

The 10 Best Quad Exercises for Bad Knees
No pain, no gain, or so the popular saying goes. However, there is a huge difference between the pain caused by fatigue and oxygen debt in your muscles and joint pain. While the former is part and parcel of an effective workout, the latter should set alarm bells ringing.
Exercisers ask a lot of their knees, and as such, knee pain is very common. High-impact activities like running are often associated with painful knees, and so is heavy strength training.
However, that doesn’t mean that knee pain signals the end of your exercising or lifting career. In fact, staying in shape can prevent some types of knee pain from progressing and may even make the pain more manageable (1).
That said, if you have knee pain, you should modify your workouts to avoid making it worse. You should also get the source of the pain checked out to ensure that you aren’t inadvertently turning a minor injury into a major one.
In this article, we reveal ten of the best quadriceps exercises for lifters with bad knees.
Knee Anatomy Basics
The knee is a hinge joint that opens (extends) and closes (flexes) and can laterally and medially rotate slightly when bent. It comprises the femur or thigh bone and the tibia, which is the bigger of your two shin bones. The ends of the bones are covered with a smooth, slippery substance called hyaline cartilage, which aids in the movement of the joint.
As a weight-bearing joint, the knee must be very strong and stable. As such, it’s held together by tough, inelastic cords called ligaments, and the end of the femur sits in small cartilaginous cup-like structures called the meniscus.
These structures (hyaline cartilage, ligaments, and meniscus) are prone to wear and tear and injuries. In some cases, surgical repair is necessary, while in others, rest and rehab are all that is needed. In most cases of knee pain, these are the cause of the problem, e.g., a torn ligament or meniscus or worn hyaline cartilage.
The knees are controlled by several muscles, including:
Quadriceps – also known as the quads and consisting of the vastus lateralis, vastus intermedius, vastus medialis, and rectus femoris. The quads extend your knees.
Articularis genus muscle and tensor vastus intermedius – two small but powerful knee extenders sometimes listed as part of the quadriceps group.
Popliteus – a small muscle behind the knee that initiates flexion.
Hamstrings – the collective name for the semimembranosus, semitendinosus, and biceps femoris, which are located on the back of your thighs. The hamstrings flex the knee.
Sartorius – also known as the tailor’s muscle, the sartorius is the longest muscle on the human body. It is responsible for the flexion of the knee.
Gastrocnemius – the larger of the two calf muscles, gastrocnemius works with your hamstrings to flex your knee.
While knee pain can be unpleasant, it doesn’t have to mean quitting your workouts. Instead, providing you avoid activities that exacerbate or worsen your pain, you can often train around whatever ails your knees.
In fact, stronger quadriceps help stabilize your knees, which is why it’s worth seeking out quads exercises even if you have bad knees.
The 10 Best Quad Exercises for Bad Knees
Is knee pain making it hard for you to build the quads of your dreams? We hear you! Try these exercises to see if they provide the workout you want without the discomfort. However, it’s generally best to get knee pain checked out by a medical professional. In some cases, continuing to train may make it worse.
1. Seated straight leg raises
If bending your knees causes pain, you need a quads exercise that lets you keep your leg extended. Seated straight leg raises put plenty of tension through your quads, emphasizing the often hard-to-hit rectus femoris. This is a common quads exercise in early-stage post-injury rehab.
Steps:
Sit on the floor with your legs extended in front of you. Place your hands behind your hips and use your arms for support. Pull your toes up to increase quads engagement.
Contract the quads of the leg you want to train first.
Keeping your knee straight, lift your foot 12-24 inches off the floor.
Lower your leg and repeat.
Switch legs and do the same number of reps on the other leg.
Muscles Targeted:
Primary: Quadriceps.
Secondary: Hip flexors.
Benefits:
A joint-friendly isometric quads exercise.
Virtually no stress on the knee joint.
No equipment is required.
Tips:
Use an alternating leg action if preferred.
You can make this exercise harder by wearing ankle weights or putting a resistance band around your legs.
Pause for 2-3 seconds with your leg raised to make this exercise more challenging.
2. Wall squat
The wall squat is another isometric or static exercise that puts plenty of stress on your muscles but virtually none on your joints. The key to this exercise is pushing as hard as possible to fatigue your muscles in 30 seconds or less. Long, passive holds are much less time-efficient.
Steps:
Stand with your back to a smooth wall, feet about 18 inches away.
Lean your back on the wall and then slide down until your thighs are roughly parallel to the floor. Your shins should be vertical.
Push your lower back into the wall and hold for the prescribed duration.
Muscles Targeted:
Primary: Quadriceps, hamstrings, gluteus maximus.
Secondary: N/A.
Benefits:
An intense but joint-friendly exercise.
No equipment required.
Easy to adjust the difficulty of your workout by changing how hard you push your back into the wall.
Tips:
Adjust the angle of your knees for comfort.
Do not hold your breath.
You can also do this exercise using one leg at a time:
3. Split squat
Lunges and squats are popular leg exercises, but despite their effectiveness, they can also be hard on your knee joints. Split squats are more knee-friendly than both these exercises but still deliver a similarly effective quads workout.
Steps:
Stand with your feet together and your arms by your sides.
Take a large step forward and stop. Your feet should be roughly shoulder-width apart.
Bend your legs and lower your rear knee down to within an inch of the floor. Keep your torso and front shin upright.
Extend your legs and continue for the prescribed number of reps.
Switch lead legs and repeat, doing the same number on the opposite side.
Muscles Targeted:
Primary: Quadriceps, hamstrings, gluteus maximus.
Secondary: Core.
Benefits:
A good exercise for quadriceps strength and hip mobility.
An excellent balance exercise.
Ensures that both legs are developed equally.
Tips:
Do this exercise next to a railing or wall for support if necessary.
You can also do split squats with dumbbells.
Put your front foot on a raised step to increase your range of motion and make this exercise more challenging.
4. Reverse lunges
Lunges are an awesome leg exercise, but unfortunately, they can also be hard on your knees. This is especially true for forward and walking lunges. Reverse or backward lunges are much more knee friendly but no less effective for strengthening your quads.
Steps:
Stand with your feet together and your arms by your sides.
Take a large step backward, bend your legs, and lower your rearmost knee down to within an inch of the floor. Your torso and front shin should remain vertical.
Push off your back foot and return to your starting position.
Do your next rep with your opposite leg.
Continue alternating sides for the duration of your set.
Muscles Targeted:
Primary: Quadriceps, hamstrings, gluteus maximus.
Secondary: Core.
Benefits:
A knee-friendly alternative to regular lunges.
A good exercise for mobility and balance.
Easier to master than forward or walking lunges.
Tips:
Step backward off a raised platform for a bigger range of motion and a more intense workout.
You can also do this exercise with dumbbells.
Take a shorter step to increase knee flexion and therefore quads engagement.
5. Goblet box squats
Bad knees do not have to step you squatting. However, you may find that descending no deeper than parallel is helpful for alleviating knee pain. Squatting to a box ensures you descend slowly and go no further than is comfortable.
Steps:
Stand with your back to a knee-high exercise bench or plyo box. Your feet should be roughly shoulder-width apart.
Hold a kettlebell in front of your chest, upper arms tucked into your sides. Brace your core and pull your shoulders back and down.
Bend your knees and squat down until your butt lightly rests on the bench.
Drive your feet into the floor and stand back up.
Muscles Targeted:
Primary: Quadriceps, hamstrings, gluteus maximus.
Secondary: Core.
Benefits:
A very functional exercise.
A knee-friendly way to overload your quadriceps.
A very scalable movement – use more or less weight as needed.
Tips:
Use a lower box to increase your range of motion and, therefore, the difficulty of the exercise.
Raise your heels on blocks or weight plates to increase quads engagement.
Do this exercise without weights if necessary.
6. Backward sled drags
Most people view sled training as a conditioning tool. However, working with a sled can also build strength and muscle size. Reverse sled drags are a very effective and joint-friendly quads exercise. And yes, that burn and pump you can feel in your quads is entirely normal!
Steps:
Load up your sled and attach a handle to it. Take the handle in your hands and stand facing your sled.
Brace your core and pull your shoulders back and down.
Bend your knees slightly and then take small steps backward.
Continue for the required time or distance.
Muscles Targeted:
Primary: Quadriceps.
Secondary: Trapezius, rhomboids, biceps, core.
Benefits:
A low-impact quads and conditioning exercise.
A very functional workout.
An excellent calorie burner.
Tips:
Keep your torso upright or lean back slightly. Do NOT lead with your butt, as doing so could cause lower back injury.
Go heavy – this is a powerful exercise.
Use a waist harness instead of handles to remove your upper body from this exercise.
7. Deadlifts
Deadlifts are often viewed as a posterior chain exercise, meaning they work your glutes, hamstrings, and back. However, deadlifts also involve your quads, albeit with a relatively short range of motion. This makes deadlifts more knee-friendly than squats while allowing you to lift moderate to heavy weights.
Steps:
Place your barbell on the floor and stand behind it with your feet under the bar, shoulder to hip-width apart.
Squat down and hold the bar with a double overhand or mixed grip.
Straighten your arms, drop your hips, and lift your chest. Pull your shoulders back and down and brace your core.
Drive your feet into the floor and stand up, taking care not to round your lower back or allow your hips to rise faster than the bar.
Lower the weight back to the floor, let it settle for a couple of seconds, and repeat.
Muscles Targeted:
Primary: Hamstrings, gluteus maximus, quadriceps, latissimus dorsi, trapezius, core.
Secondary: Biceps, forearms.
Benefits:
A knee-friendly alternative to squats.
A very functional exercise.
A great way to build a bigger, stronger back.
Tips:
8. Standing quadriceps stretch
Your quads don’t just need to be strong; they need to be flexible too. The standing quads stretch is simple yet effective. Tight quads are a leading cause of knee pain, so stretching is just as important as lifting for people with bad knees.
Steps:
Stand with your feet together and arms by your sides.
Bend your leg, lift your foot behind you, and reach back and grip the top of your ankle with one or both hands.
Keeping your thighs together, gently pull your foot toward your butt to lengthen and stretch your quads.
Hold for 20-60 seconds, increasing the stretch as your quads relax and lengthen.
Lower your foot to the floor, swap legs, and repeat.
Muscles Targeted:
Primary: Quadriceps.
Secondary: Hip flexors.
Benefits:
A simple and convenient exercise.
Ideal for warm-ups.
Good for developing better balance.
Tips:
Push your knee backward to extend your hip and increase the stretch on your rectus femoris muscle.
Lean against a wall and use a hand for balance if required.
Keep your hips and shoulders square and level throughout.
9. Prone quadriceps stretch
While the standing quads stretch is an excellent exercise, it does require a reasonable amount of balance. Also, it’s not easy to hold for lengthy periods, which you may want to do during your cool down. Stretching your quads in the prone (lying face down) position is the obvious solution to both these issues.
Steps:
Lie on your front with your head resting on your folded right arm.
Bend your left leg and reach back with your left arm, taking hold of your foot.
Gently pull your foot into your butt and hold it for 20-60 seconds, increasing the stretch as your quads relax and lengthen.
Lower your foot to the floor, swap legs, and repeat.
Muscles Targeted:
Primary: Quadriceps.
Secondary: Hip flexors.
Benefits:
A very comfortable quads stretch that’s perfect for cooldowns.
Ensures you keep your hips level and square.
A relaxing exercise that’s ideal for longer developmental stretches.
Tips:
Loop a yoga strap or belt around your feet if you cannot reach it without straining.
Increase the depth of the stretch by resting your bent knee on a yoga block.
Rest your head on a cushion or folded towel for comfort.
Related: Quadriceps Stretch Guide: How-To, Muscles Involved, Benefits, and Variations
10. Half-kneeling quads stretch
Most quads stretches are done with the knees together. That’s great for your joint health but not so good for hitting your rectus femoris, which crosses the knee and the hip joints. The half-kneeling quads stretch puts your hips into mild extension, so it stretches the rectus femoris more. However, this exercise may be challenging if you have poor flexibility.
Steps:
Adopt a half-kneeling position with one foot flat on the floor in front of you and your opposite knee roughly two feet behind.
Bend your back leg, grasp your ankle, and pull your foot into your butt. Keep your torso upright, do not twist your hips or shoulders, and do not hyperextend your lumbar spine.
Remain in position for 20-60 seconds or more, increasing the stretch as you feel your muscles relax and lengthen.
Release your foot, swap sides, and repeat.
Muscles Targeted:
Primary: Quadriceps.
Secondary: Hip flexors.
Benefits:
Provides a deeper-than-usual quadriceps stretch.
An excellent hip opener.
A good movement for more advanced exercisers.
Tips:
Place your knee on a folded exercise mat, towel, or foam pad for comfort.
Loop a yoga strap or belt around your feet if you cannot reach it without straining.
Take care not to hyperextend your hip, as doing so could cause injury.
Quad Exercises FAQs
Do you have a question about the best quad exercises for bad knees? No problem, because we’ve got the answers!
1. What are some of the common causes of bad knees?
While some knee pain is idiopathic, meaning it has no obvious or known cause, others are caused by specific conditions or injuries. These include:
Bursitis – inflammation of the bursa, which are fluid-filled sacks that reduce the friction between tendons and bones.
Iliotibial band syndrome – where the iliotibial band, which runs down the outside of the thigh, rubs against the outside of the knee joint, causing inflammation and knee pain.
Knee crepitus – grinding, cracking, or popping within the knee joint, which could be a precursor of osteoarthritis.
Meniscal tears – damage to the meniscus.
Osteoarthritis – wear and tear of the hyaline cartilage within the knee joint.
Patellar tendonitis – inflammation of the tendon that connects the kneecap to the tibia.
Patellofemoral pain syndrome – pain behind the patella or kneecap caused by roughening of the inside of the patella.
Strains and sprains – strains affect the muscles, while sprains affect the ligaments.
Tendonitis – inflamed, swollen tendons, usually caused by overuse.
Tendonosis – degeneration of the tendons, often caused by ignoring chronic tendonitis.
Some knee conditions get better with rest or light training, which others need medical intervention to heal properly. As such, and with so many possible causes, getting knee pain properly diagnosed is vital.
2. How often should I train and stretch my quads?
It’s generally best to train a muscle 2-3 times per week or every 48-72 hours. This allows adequate time for rest, recovery, and muscle growth. Exercising a muscle more often than this could lead to overtraining and poor progress.
In contrast, you can stretch your quads daily or even several times a day. In fact, if you have tight quads, i.e., cannot get your heel to your butt during prone or standing quad stretches, more frequent bouts of stretching will help you restore lost flexibility sooner.
3. So, are squats bad for your knees?
Contrary to common opinion, squats are not bad for your knees (2). The original studies that reported a link between squats and knee pain were performed on veteran NFL players, many of which already had banged-up knees.
Rather, doing squats with appropriate loads and good form can help prevent and control knee pain.
That said, squats are not the only exercise for strengthening your quads. As revealed in this article, there are plenty of other knee-friendly exercises you can use instead.
4. Some exercise hurts my knees – what gives?
While the exercises in this article are all certified knee-friendly, that doesn’t mean they won’t cause some people knee pain. Instead, knee pain can be influenced by a host of factors, from injury status to muscle tightness to leg length to underlying joint structure.
So, if one or more of these exercises bother your knees, cut them from your workout and try something else. You may find that you can return to the offending exercise in a few weeks or months once whatever is affecting your knee has a chance to heal.
5. What should I do if my knees hurt?
If you experience knee pain, you should initially use the RICE method. RICE is an acronym for:
Rest – take a break from the activity(s) that cause pain.
Ice – use ice packs for 15-20 minutes 3-5 times a day to reduce swelling and pain.
Compression – wear knee supports to protect the joint and further reduce swelling.
Elevation – raise your knee above heart height to minimize swelling and keep your weight off the injured limb.
Once the pain subsides, you can gradually return to exercise, backing off it the pain returns or worsens. However, if the pain is severe or long-lasting, you should seek medical attention.
Read more about coping with and preventing knee pain here.
Closing Thoughts
Exercise is good for everybody’s body. Not only can it change the way you look and improve your body composition, but it can also make you healthier and could even lead to a longer life. Ironically, though, being physically active can also take its toll on your joints, and shoulder, hip, lower back, and knee pain are common in exercisers.
The good news is that pain doesn’t mean you have to quit working out. However, you may need to modify your training to work around any aches and pains that have developed.
Use the exercises in this article to train around bad knees while building bigger, stronger quads. In many cases, keeping your quads in shape will enhance knee stability, taking stress off your joints.
However, if your knee pain is new, severe, or long-lasting, get it checked out to make sure your workouts aren’t making it worse.
References:
1 – Susko AM, Fitzgerald GK. The pain-relieving qualities of exercise in knee osteoarthritis. Open Access Rheumatol. 2013 Oct 15;5:81-91. doi: 10.2147/OARRR.S53974. PMID: 27790027; PMCID: PMC5074793. https://www.ncbi.nlm.nih.gov/pmc/articles/PMC5074793/
2 – Hartmann H, Wirth K, Klusemann M. Analysis of the load on the knee joint and vertebral column with changes in squatting depth and weight load. Sports Med. 2013 Oct;43(10):993-1008. doi: 10.1007/s40279-013-0073-6. PMID: 23821469 https://doi.org/https:/link.springer.com/article/10.1007%2Fs40279-013-0073-6
How to Train For 20 Consecutive Pull-Ups and 50 Push-Ups
Pull-ups and push-ups are two of the absolute best exercises you can do. Note we didn’t say best bodyweight exercises, but best exercises – period. Between them, they work every major upper body muscle and teach you how to control and stabilize your body in ways that no machine or freeweight exercise ever will.
Better yet, you can do pull-ups and push-ups almost anywhere. All you need is some space and something to hang from. Get yourself a doorway pull-up bar, and you’re all set. You can also do pull-ups from the top of a power rack, a ceiling joist, the underside of an open staircase, or a tree branch – anywhere you can find to hang will do.
However, some people complain that pull-ups and push-ups are boring, and we respect that point of view. Once you have mastered these exercises and can do a handful of reps, you’ll probably be itching for a new challenge.
One way to reignite your enthusiasm for classic pull-ups and push-ups is to set yourself a repetition goal. Having a training target will make your workouts much more focused and motivating.
Assuming you can do pull-ups and push-ups reasonably well, the next logical goal for reasonably fit exercisers is 20 non-stop pull-ups and 50 push-ups. While these numbers might sound daunting, with time and determination, most people should be able to achieve and even surpass them.
In this article, we share two training programs that’ll have you cranking out 20 non-stop pull-ups and 50 push-ups in just a few months.
Related: How Many Push-Ups Should I Be Able to Do? The Ultimate Guide
Why Train for 20 Pull-Ups and 50 Push-Ups?
Is training for 20 pull-ups and 50 push-ups worth your time and energy? Consider these benefits and then decide!
Increased workout motivation
While any workout is a good workout, training without a goal often means your progress is slow or even non-existent. Following a progressive program toward a definitive goal gives your training focus and purpose, which can be very motivating.
The more motivated you are, the harder you’ll train, and the harder you train, the better your progress will be. This creates a positive feedback loop that will help you maintain your exercise habit and stay on the track to improved fitness and better health.
More dedication and discipline
Sticking to a workout plan as you progress toward your goal forces you to take a more dedicated, disciplined approach to your training. Week after week, you must keep on punching the clock, and missed workouts will hurt your progress.
This teaches you dedication and discipline and spreads to other parts of your life, making you a more productive and successful person in general.
Greater muscle mass
Not so long ago, we (the fitness industry) believed that you had to train in the 6-12 rep range to build muscle. Anything outside of that range was considered a waste of time.
It turns out that this was wrong.
Studies have revealed that you can build muscle by doing as many as 30+ reps per set, provided you work close to failure (1). Training to do 20 pull-ups and 50 push-ups will invariably involve training to failure. As such, you’ll build muscle despite cranking out lots of high-rep sets.
Simply making the switch from 6-12 reps to sets of 20-30 could be the shock your muscles need to trigger renewed growth.
Personal satisfaction
Setting and reaching training goals is very satisfying. It teaches you that if you set your mind to a task, you can complete it. Doing 20 pull-ups and 50 push-ups is a very notable achievement and something that will raise your standing in the fitness community.
Imagine how good you’ll feel when you finally hit 20 pull-ups and 50 push-ups. Pretty damn awesome, right?!
Master the Basics
Before we get into the nitty-gritty of training for 20 pull-ups and 50 push-ups, you need to become an expert in doing these two exercises. Poor form will undermine your performance, lead to injuries, and stop you from achieving your goals.
In addition, sloppy technique makes it harder to quantify your progress as each rep has the potential to be done with different speeds and ranges of motion. Good form standardizes your performance, so you can more acutely measure your improvements.
So, make sure you know how to do these exercises correctly, with your metaphorical eyes tightly closed. Good technique should be automatic and not something you have to think about too much. That way, you’ll be free to focus on pumping out the reps.
Pull-ups 101
Muscles worked:
Latissimus dorsi
Trapezius
Rhomboids
Deltoids
Biceps
Brachialis
Brachioradialis
Forearm flexors
Core
Everyone thinks they know how to do pull-ups but turn into swinging, jerking monkeys when they hang from the bar! Make sure you’re not one of them by following these step-by-step instructions:
Grip an overhead bar with an overhand, slightly wider than shoulder-width grip. Use a full or thumbless grip as preferred.
Your arms should be straight, shoulders down and back, and abs brace.
Bend your legs so your feet are clear of the floor.
Without kicking or swinging, smoothly bend your arms and pull your chin up and over the bar without craning your neck.
Lower yourself back down with control, pause with your arms straight, and repeat.
Push-ups 101
Muscles worked:
Pectoralis major
Deltoids
Triceps
Core
Like pull-ups, most exercisers think they know how to do push-ups. In fact, many are quick to label push-ups as a beginner’s exercise. And yet, even some so-called fitness experts who brag they can do 100 reps manage to murder this classic calisthenic movement. Follow these steps to ensure that your push-ups are a thing of beauty:
Kneel on all fours and place your hands flat on the floor, shoulder-width apart, with your fingers pointing forward.
Pull your shoulders down and back, and brace your core.
Walk your feet out and back until your legs and body are perfectly straight. Tuck your chin in and extend your neck – do not look forward.
Keeping your upper arms close to your sides, bend your arms and lower your chest down to within an inch of the floor.
Push yourself back up to full arm extension and repeat.
Perform all your reps with perfect form and make your inner drill instructor proud!
20 Pull-ups and 50 Push-Ups Workout One: Density Training
The basic premise of density training is simple – you keep your workout volume the same but gradually complete that volume using fewer sets and in less time. This provides the progressive overload your muscles need to get stronger and more enduring.
This workout uses the EMOM (every minute on the minute) method, meaning you start each set at the top of every minute, and whatever time that remains is your recovery.
For example, start your stopwatch and pump out ten push-ups, which will probably take about 20-30 seconds. This leaves 30-40 seconds until the top of the next minute when you’ll do your next set.
The great thing about this workout is that it’s entirely self-regulatory. You only progress when your body is ready for a greater challenge. As such, it’s an open-ended workout plan with no time limit.
If you fail a phase, do as many complete sets as you can and then as many reps as possible for the remaining sets. As you get stronger, you’ll be able to complete more full sets and eventually will graduate to the next level.
It’s broken down into six phases, and you stay with each phase until you complete it. Train 2-3 times per week on non-consecutive days.
You can do the pull-ups and push-ups in the same workout or do them on separate days if you wish. However, because pull-ups and push-ups are your priority, do them at the start of your program, e.g., push-ups at the beginning of your chest-training day and pull-ups before the rest of your back workout.
Plan for 20 Pull-ups
Phase
Sets
Reps
Time allowed
Total reps
1
10
4
10 minutes
40
2
8
5
8 minutes
40
3
7
6
7 minutes
42
4
6
7
6 minutes
42
5
5
8
5 minutes
40
6
4
10
4 minutes
40
After completing phase six, you should be able to do 20 non-stop pull-ups.
Plan for 50 Push-ups
Phase
Sets
Reps
Time allowed
Total reps
1
10
10
10 minutes
100
2
8
13
8 minutes
104
3
7
15
7 minutes
105
4
6
17
6 minutes
102
5
5
20
5 minutes
100
6
4
25
4 minutes
100
After completing phase six, you should be able to do 50 non-stop push-ups.
20 Pull-ups and 50 Push-Ups Workout Two: The Backfill Method
This program involves doing four sets of pull-ups and push-ups per workout. However, as the weeks pass, you do more reps in your first set and less for your last set(s). In essence, you “borrow” reps from your final set(s) and add them to the start of your workout, so the rep count per workout remains the same. This is called backfilling.
While such small increases may seem inconsequential, over almost three months, you’ll gradually progress toward hitting 20 pull-ups and 50 push-ups in a single set.
If you are unable to complete any of the weekly workouts, stick with it for as long as it takes to achieve success and then continue.
Plan for 20 Pull-ups
Week
Set 1
Set 2
Set 3
Set 4
Total Reps
1
10
10
10
10
40
2
11
10
10
9
40
3
12
10
10
8
40
4
13
10
10
7
40
5
14
10
10
6
40
6
15
10
10
5
40
7
16
10
9
5
40
8
17
10
8
5
40
9
18
10
7
5
40
10
19
10
6
5
40
11
20
10
5
5
40
* Rest 2 minutes between sets
Plan for 50 Push-ups
Week
Set 1
Set 2
Set 3
Set 4
Total Reps
1
25
25
25
25
100
2
27
25
25
23
100
3
29
25
25
21
100
4
31
25
25
19
100
5
33
25
25
17
100
6
35
25
25
15
100
7
37
25
23
15
100
8
39
25
21
15
100
9
41
25
19
15
100
10
43
25
17
15
100
11
45
25
15
15
100
12
47
23
15
15
100
13
49
21
15
15
100
14
50
20
15
15
100
* Rest 2 minutes between sets
FAQs
Do you have a question about these workouts or pull-ups and push-ups in general? No problem, because we’ve got the answers!
1. Are pull-ups and push-ups the only exercises I need to do for my upper body?
Between them, pull-ups and push-ups work all your major upper body muscles. Doing these exercises should develop a strong, muscular upper body. However, you may want to supplement your push-up and pull-up workouts with some additional upper-body exercises to build a balanced, aesthetically-pleasing physique.
Good workout additions include:
However, when time is short, it’s reassuring to know that doing just pull-ups and push-ups will deliver a reasonably complete upper body workout, and any additional exercises you perform are a bonus.
Cable Face Pulls
2. How many reps of pull-ups and push-ups should I be able to do before starting these workouts?
Ideally, you should be able to comfortably complete the first stage/week of your chosen workout. This typically means being able to do 10 pull-ups and 25 push-ups, or half your ultimate rep goal.
If you cannot reach these standards, you should work on your pull-up and push-up performance until you can. Straight sets, e.g., three sets of eight, is probably the best way to do this.
Related: 8 Ways to Get Better at Pull-Ups and Chin-Ups
3. How many times a week should I do pull-ups and push-ups?
You can do pull-ups and push-ups almost every day if you wish. Daily workouts are one of the best ways to get really good at an exercise. However, the more often you train, the lower the volume and intensity of your workouts must be. Working too hard or too long will make recovery impossible.
With that in mind, if you do the workouts in this article, you should limit your push-up and pull-up training to 2-3 times per week. This provides an ideal balance between work and recovery.
However, training just once per week probably won’t produce the results you want.
4. Which of the two programs should I do?
With two programs (density training and backfill method) to choose from, you may be wondering which approach is best. The truth is that both of these workouts can be equally effective, so it’s up to you to choose the one that resonates with you the most.
The density training program is more flexible, and you only progress from one stage to the next when you’re ready. The backfill program is a bit more linear, which may appeal more if you prefer a more regimented training plan.
Cannot decide between them? Then why not run both consecutively? For example:
Week 1
Monday – program one
Wednesday – program two
Friday – program one
Week 2
Monday – program two
Wednesday – program one
Friday – program two, etc.
Similarly, you could do the EMOM density workout for push-ups and the backfill workout for pull-ups, or vice versa. Ultimately, there is no right or wrong way to make these programs work for you.
5. What is the best way to warm up for these workouts?
Warming up will prepare your muscles and joints for what you’re about to do. In addition, it may help reduce your risk of injury.
Strength training warm-ups usually consist of the following:
Pulse raise, e.g., 5 to 10 minutes of easy cardio
Mobility and dynamic flexibility for the joints and muscles you’re about to use
Practice/rehearsal, e.g., a couple of sub-maximal sets of pull-ups and push-ups
After that, you should be good to go and ready to start your workout. Read more about warming up for strength training here.
6. Do I have to train for 20 pull-ups and 50 push-ups concurrently?
While it makes a certain amount of sense to train for more pull-ups and push-ups at the same time, you certainly don’t have to. For example, if you have to do a push-up test for work, e.g., an army physical fitness test, you can skip the pull-ups and focus on what you’ll be assessed on instead.
However, if you only do one workout, make sure you also include exercises for the rest of your body. While push-ups (or pull-ups) are a great exercise, they are not a one-step solution for all-around fitness and strength. You also need to develop your pulling, core, and lower body muscles.
7. Can I do chin-ups instead of pull-ups?
Chin-ups and pull-ups are so similar that they’re virtually interchangeable. You perform pull-ups with an overhand grip, while chin-ups use an underhand grip. Because they work the same muscles, you can do pull-ups or chin-ups as preferred. You could also alternate between pull-ups and chin-ups from workout to workout for variety.
Closing Thoughts
You now have two programs you can use to train for 20 pull-ups and 50 push-ups. Besides a pull-up bar, you don’t need any equipment to work toward these targets, so there is no excuse for not rising to the challenge.
Is the thought of doing 20 pull-ups and 50 push-ups a little daunting? Does it feel like it might be impossible?
Good; that’s precisely how a challenge should feel!
It’s only by overcoming difficulties and doing hard things that we develop and grow, not just muscularly but as people.
So, choose your program, commit to the process, and work hard. You CAN do 20 pull-ups and 50 push-ups!
References:
1 – Lasevicius T, Ugrinowitsch C, Schoenfeld BJ, Roschel H, Tavares LD, De Souza EO, Laurentino G, Tricoli V. Effects of different intensities of resistance training with equated volume load on muscle strength and hypertrophy. Eur J Sport Sci. 2018 Jul;18(6):772-780. doi: 10.1180/17461391.2018.1450898. Epub 2018 Mar 22. PMID: 29564973. https://pubmed.ncbi.nlm.nih.gov/29564973/
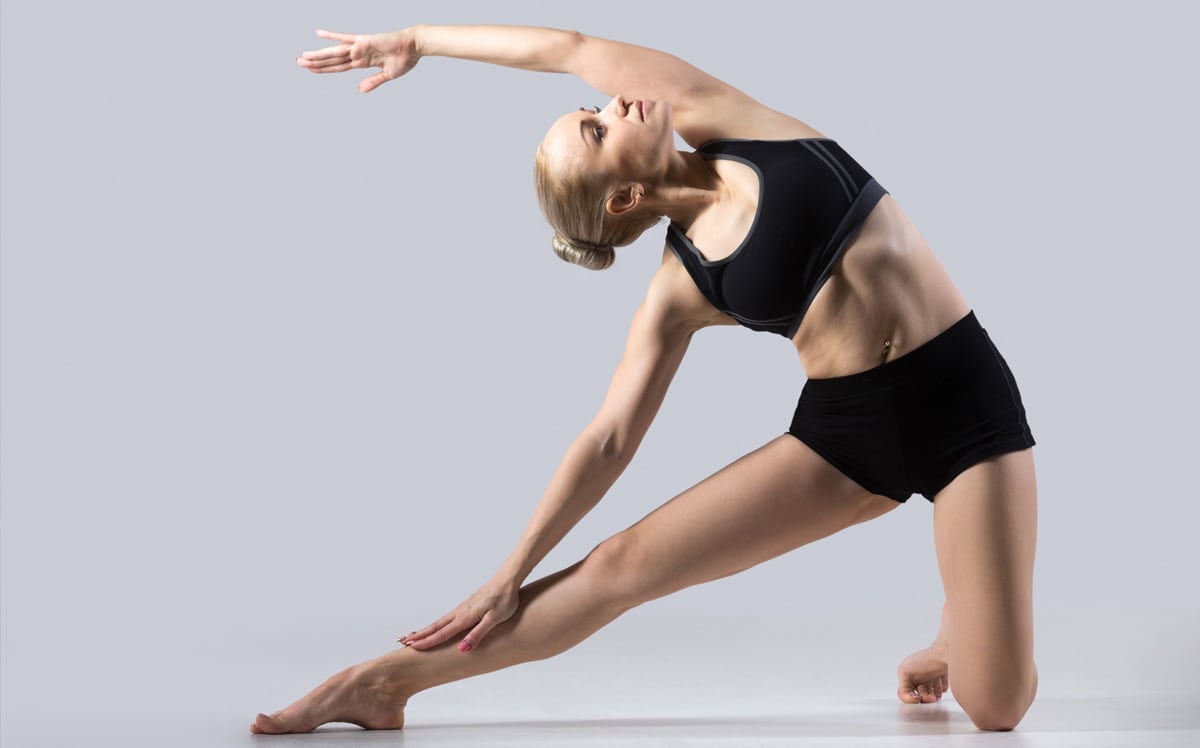
The Best Quadratus Lumborum Exercises and Stretches
When it comes to core and lower back training, most people focus on the well-known muscles, like the rectus abdominis, obliques, transverse abdominis, and erector spinae. This makes a lot of sense as these muscles are the biggest and usually the most visible. Exercisers often know these muscles by name and use carefully-chosen exercises to target them.
However, delve a little deeper, and you’ll find many other muscles that are every bit as important. While you usually can’t see these muscles, they’re always working in the background, providing aid and support.
In some instances, tightness or weakness in these lesser-known muscles can cause pain and dysfunction. After all, a chain is only as strong as its weakest link. For example, a weak rotator cuff can wreak havoc on your shoulder joint.
In this article, we examine the role of the quadratus lumborum muscle and reveal the best stretching and strengthening exercises for this unsung hero of the lower back.
Quadratus Lumborum Anatomy
The quadratus lumborum, or QL for short, is a deep back muscle. That means it lies beneath other muscles, including the lats and paraspinal muscles. QL is a large, flat muscle located between the iliac crest of your upper pelvis and your 12th (lowermost) ribs.
There are two QL muscles – left and right – that can work independently as well as together.
The functions of the quadratus lumborum are:
Lateral flexion of the spine – bending sideways.
Extension of the spine – bending backward.
Stabilizing the spine – preventing unwanted movement.
QL tightness can affect your lower back and pull your spine sideways, putting undue stress on your hips, lumbar spine, and intervertebral disks. In contrast, a weak QL can reduce lumbar spine and hip complex stability, increasing your risk of injury.
7 Best Quadratus Lumborum Stretches
Do you feel like you’re being pulled sideways? Do you have pain in one side of your lower back? Are your hips uneven heights? If so, your QL could be tight. Use these stretches to restore your QL to its ideal resting length.
1. Standing QL stretch
The standing QL stretch is probably the most basic way to lengthen your quadratus lumborum. Requiring no equipment and minimal space, it’s the ideal stretch for home exercisers. You can also do this exercise after long periods of sitting to release any accumulated QL muscle tension.
Steps:
Standing tall, cross your left foot over your right foot.
Raise your left arm above your head.
Lean your upper body over to the side, gently pushing your hips in the opposite direction to intensify the stretch.
Hold for 30-60 seconds, and then relax.
Repeat on the opposite side.
Muscles Targeted:
Primary: Quadratus lumborum, latissimus dorsi, obliques.
Secondary: Erector spinae, rectus abdominis.
Benefits:
An easy exercise to learn.
Very spine-friendly.
Provides a welcome lat stretch as well as elongating your QL muscle.
Tips:
Note any left-to-right flexibility imbalances and spend more time on the side that feels tightest.
Keep your hips and shoulders square to maximize the effect of this stretch.
You can also do this exercise standing next to a wall for support:
2. Gate pose
Gate pose is a yoga exercise for your QL, lats, lower back, abs, and hips. It’s an effective way to stretch and relax all the muscles on one side of your body. Because there are two sets of QL muscles, it’s quite likely that you will find that one side is tighter than the other. If this is the case, spend more time stretching the side that feels most restricted.
Steps:
Kneel down so you’re in good posture, with your torso upright and shoulders down and back.
Move one foot out and away to the side so your leg is straight. Engage your core and glutes.
Next, slide your hand down your outstretched leg while simultaneously raising your other arm above your head.
Lean over as far as is comfortable, taking care not to twist your shoulders or hips.
Hold this position for 30-60 seconds, and then slowly relax.
Swap sides and repeat.
Muscles Targeted:
Primary: Quadratus lumborum, latissimus dorsi, obliques.
Secondary: Erector spinae, rectus abdominis, adductors.
Benefits:
A very comfortable stretch.
Easy to modify based on your current flexibility level.
Quite relaxing and an excellent way to ease tension in your lower back and hips.
Tips:
Kneel on a folded mat for comfort.
Increase the stretch as you exhale and feel your muscles relaxing.
Gently ease your open armpit backward to deepen the stretch.
3. Triangle pose
The triangle pose is another yoga stretch that involves multiple lateral chain muscles, including your QL. The advantage of this pose is that you do it standing, which leads to a deeper quadratus lumborum stretch. However, it’s also a more challenging exercise, so make sure you master the gate pose before trying it.
Steps:
Stand with your feet slightly wider than shoulder-width apart. Your right foot should face forward, while your left foot should be turned out at a slight angle.
Raise your arms so they’re parallel to the floor, palms facing down.
Hinge at your right hip and lower your right hand down your right leg.
Simultaneously extend your left arm up toward the ceiling.
Hold this position for 30-60 seconds.
Switch sides and repeat.
Muscles Targeted:
Primary: Quadratus lumborum, latissimus dorsi, obliques.
Secondary: Erector spinae, rectus abdominis, adductors.
Benefits:
Provides a deep stretch for your QL and other waist and lower back muscles.
Performed standing, so no mat required.
Good for developing full-body positional awareness and balance.
Tips:
Experiment with the width of your stance to see what feels most comfortable.
Place your lowermost hand on a raised surface, i.e., a yoga block, to take the stress off your lower back.
Do this stretch on a non-slip surface, preferably barefoot, for stability and safety.
4. Seated QL stretch
Muscle tightness can strike at any time, but it’s most often caused by prolonged sitting, e.g., while you’re at work. Standing up and stretching is not always convenient – your boss may get upset! The good news is that you can stretch your QL without leaving your desk.
Steps:
Sit on the edge of your chair with your legs bent to 90 degrees, your shins vertical, and your feet planted firmly on the ground. Get into a good, upright posture.
Raise your right arm above your head and gently lean over to the left. Keep both sides of your butt on your chair.
Hold for 30-60 seconds, and then swap sides.
Muscles Targeted:
Primary: Quadratus lumborum, latissimus dorsi, obliques.
Secondary: Erector spinae, rectus abdominis.
Benefits:
An excellent exercise for office workers.
An ideal stretch for beginners.
An easy exercise for those with less mobility, e.g., older or chair-bound.
Tips:
This exercise works best on a chair without wheels.
You can also do this exercise while sitting on a bench or stool.
Sit on the floor with your legs crossed if you wish:
5. Child’s pose
Child’s pose gently eases your spine into a flexed position, stretching your quadratus lumborum and other lower back muscles. This exercise is excellent for releasing tension from your posterior chain. It is ideal for people with mild lower back tightness or pain. A few minutes in child’s pose is a great way to cool down after your workout.
Steps:
Kneel on all fours with your arms straight and shoulders above your hands. Your knees should be below your hips.
Ease your butt back and sit on your heels.
Lower your chest down toward the floor while keeping your arms extended in front of you.
Remain in this position for 1-5 minutes, going deeper as you feel your muscles relax.
Walk your fingers further away from you to deepen the stretch. You can also place your hands on yoga blocks.
Muscles Targeted:
Primary: Quadratus lumborum, erector spinae, latissimus dorsi.
Secondary: Gluteus maximus.
Benefits:
A gentle stretch for your QL and lower back.
A very relaxing, calming exercise.
An ideal exercise for cooldowns.
Tips:
Kneel on a folded mat for comfort.
Breathe slowly through your nose to maximize relaxation.
Experiment with different knee positions to find what’s most comfortable.
6. Knees-to-chest stretch
The knees-to-chest exercise provides a gentle stretch for your quadratus lumborum and other lower back muscles. Using your arms means you can increase the depth of the stretch as you feel your muscles start to relax.
Steps:
Lie on your back with your legs bent and feet close to your butt.
Lift your legs and hold on to the backs of your thighs.
Gently pull your knees toward your chest.
Hold for 30-60 seconds, and then relax.
Muscles Targeted:
Primary: Quadratus lumborum, erector spinae, latissimus dorsi.
Secondary: Gluteus maximus.
Benefits:
A gentle, relaxing stretch.
An ideal stretch for deconditioned exercisers.
Excellent for easing lower back tension and stress.
Tips:
Keep your shoulders and upper back on the floor.
Rest your head on a pillow or yoga block for comfort.
You can also do this exercise by lifting one leg at a time:
7. Dynamic standing QL stretch
Static stretches are great for easing muscle tension and increasing flexibility. Still, they tend to put your muscles to sleep and reduce contractility. As such, static stretches are ideal for cooldowns but less useful for warm-ups. This dynamic stretch won’t deactivate your muscles and is an excellent way to prepare your QL for your upcoming workout.
Steps:
Stand with your feet about shoulder-width apart, knees slightly bent. Hold your arms down by your sides.
Without twisting your hips or shoulders, lean to the left and stretch your hand down the outside of your leg.
Stand upright and repeat for 10-15 reps.
Switch sides and do the same number of reps on the right.
Muscles Targeted:
Primary: Quadratus lumborum, erector spinae, rectus abdominis.
Secondary: Hip abductors.
Benefits:
An excellent warm-up exercise.
Good for mobilizing your lower back before more intense activities.
An easy exercise to learn and ideal for novices and less fit people.
Tips:
Keep your knees slightly bent throughout.
Take care not to twist your hips or shoulders.
You can also do this exercise in an alternating fashion.
7 Best Quadratus Lumborum Strengthening Exercises
Weak quadratus lumborum muscles can increase your risk of back pain and injury. You need strong QLs to stabilize your lumber spine and prevent unwanted lateral movements.
While most people should train both sides of their QL, you may find that one side is weaker than the other. In this case, do an extra few reps or sets for the weaker side so it can catch up with the stronger side.
1. Bird dog
Bird dogs are a useful exercise that works your glutes, core, shoulders, and upper back. It’s also an effective quadratus lumborum strengthener. During this exercise, you must use your QL to stabilize your lumbar spine, which is one of its most critical functions.
Steps:
Kneel on all fours with your arms straight and shoulders above your hands. Your knees should be below your hips. Brace your core.
Extend one arm forward and your opposite leg backward until they’re parallel to the floor.
Return to the starting position and repeat on the other side.
Alternate arms/legs for a desired number of reps.
Muscles Targeted:
Primary: Rectus abdominus, transverse abdominus, quadratus lumborum, erector spinae, gluteus maximus.
Secondary: Hamstrings, deltoids.
Benefits:
A very spine-friendly exercise.
Teaches you how to brace your core while moving your arms and legs.
A great way to warm up before more demanding activities.
Tips:
Kneel on a folded mat for comfort.
Take care not to arch your lower back, as doing so increases your risk of injury.
Keep your core braced throughout.
2. 45-degree back extensions
This exercise provides a great way to overload your lower back and QL to make them stronger. However, to avoid injury, you must keep your spine in a neutral position, i.e., do not allow it to round. 45-degree back extensions are also an awesome glute and hamstring builder.
Steps:
Climb aboard the 45-degree back extension machine. Place your hips against the leg pad and your feet on the footplate. Bend your knees slightly.
Lean as far forward as your flexibility allows and without rounding your lower back.
Push your hips forward and raise your upper body back up so your shoulders, hips, and feet form a straight line.
That’s one rep – keep going!
Muscles Targeted:
Primary: Erector spinae, quadratus lumborum, gluteus maximus, hamstrings.
Secondary: N/A.
Benefits:
An effective way to overload your lower back muscles.
A very accessible exercise as most gyms have a 45-degree back extension machine.
A proven glute and lower back developer.
Tips:
Make this exercise harder by bolding a barbell in your hands or a weight plate across your chest.
You can also do this leg using one leg at a time to increase the overload on your glutes and hamstrings.
No 45-degree back extension machine? No problem – you can also do this exercise with your hips resting on a stability ball:
3. Side plank
Everyone knows that side planks work the obliques. But they’re also an excellent exercise for your quadratus lumborum. Best of all, because they’re isometric or static, they put very little stress on your spine, so they’re ideal for back pain sufferers.
Steps:
Lie on your side and rest on your lowermost forearm and elbow. Brace your core.
Lift your hips off the floor so your body is straight.
Hold this position for the required duration.
Lower your hips to the floor, roll over, and repeat on the other side.
Muscles Targeted:
Primary: Obliques, quadratus lumborum, rectus abdominis, erector spinae.
Secondary: Deltoids, hip abductors.
Benefits:
A very lower-back-friendly core exercise.
Good for increasing lateral stability and strength.
Do this exercise anywhere and anytime, as no equipment is required.
Tips:
Do not hold your breath during this exercise.
Rest your elbow/forearm on a folded exercise mat or foam pad for comfort.
Push your hips up toward the ceiling to maximally engage your QL and obliques.
4. Dumbbell side bend
The great thing about dumbbell side bends is that you can increase or decrease the weight to suit your fitness and how many reps you want to do. Use light weights for high reps to improve your endurance or heavy weights for low reps to build strength. With this exercise, you are the boss!
Steps:
Hold a dumbbell in one hand, arm down by your side.
Stand with your feet shoulder-width apart, knees slightly bent. Brace your core.
Lean sideways and lower the dumbbell down the outside of your leg.
Stand up straight and repeat.
Do the same number of reps on both sides.
Muscles Targeted:
Primary: Obliques, quadratus lumborum, rectus abdominis, erector spinae.
Secondary: Forearms.
Benefits:
An excellent way to overload your lateral chain muscles.
An accessible exercise as all you need is a single dumbbell.
A great exercise for building more muscular abs, a tighter waist, and a stronger lower back.
Tips:
Do NOT use two dumbbells, as doing so make the exercise much less effective.
Keep your hips and shoulders square throughout.
Use lifting straps if your grip fatigues before your core.
5. Single-arm farmer’s walk
Farmer’s walks are a popular conditioning exercise. It’s also one of the events often contested in strongman competitions. However, done using a single dumbbell or kettlebell, the farmer’s walk is also a tremendous quadratus lumborum exercise. Carrying an offset load forces you to use your QL to stabilize your lumber spine. Think of single-arm farmer’s walks as a moving side plank.
Steps:
Stand side-on to a dumbbell or kettlebell.
Squat down and grab your weight with the closest hand. Pull your shoulders down and back, and brace your core.
Stand up straight and then go for a walk around your training area.
Continue for the desired duration or until your grip starts to fail.
Lower the weight to the floor, swap sides, and repeat.
Muscles Targeted:
Primary: Obliques, quadratus lumborum, rectus abdominus, erector spinae, forearms.
Secondary: Upper traps, calves.
Benefits:
A highly functional exercise.
A great way to build a stronger grip and core.
An excellent calorie burner and cardio finisher.
Tips:
Keep your hips and shoulders level throughout your set.
Do this exercise with any heavy implement, including a barbell.
You can also do this exercise with your weight above your head – the waiter’s walk:
6. Kettlebell suitcase deadlift
No space to do farmer’s walks? We hear you! The good news is that you can get all the benefits of farmer’s walks without taking a single step. Suitcase deadlifts work in much the same way, but you do them on the spot. This is an ideal exercise for anyone who works out in a small gym.
Steps:
Stand side-on to a kettlebell. Your feet should be roughly shoulder-width apart.
Squat down and grab your weight with the closest hand. Pull your shoulders down and back, and brace your core.
Drive your feet into the floor and stand up, taking care not to round your lower back or allow your hips to rise faster than your shoulders. Do not lean to the side or twist your hips or shoulders.
Lower the weight back to the floor, reset your core, and repeat.
Continue for the desired number of reps, and then swap sides.
Muscles Targeted:
Primary: Quadriceps, hamstrings, gluteus maximus, obliques, quadratus lumborum, forearms.
Secondary: Upper traps, biceps.
Benefits:
A very functional core, forearm, and lower body exercise.
A great way to fix left-to-right strength imbalances.
A home gym-friendly alternative to conventional deadlifts.
Tips:
Use gym chalk on your hands to stop them from slipping.
You can also do this exercise with a dumbbell or barbell.
Place your kettlebell on a raised platform if you find it hard to bend over and reach the floor without rounding your lower back.
7. Medicine ball rotational slam
Most quadratus lumborum exercises are performed slowly and smoothly. While that’s fine for building endurance and strength, it’s less useful for developing muscle power, which is your ability to generate force quickly and is an integral part of most sports. Power training should be part of your workouts if you’re an athlete. Medicine ball rotational slams are one way to build a more powerful QL.
Steps:
Stand with your feet shoulder-width apart, knees slightly bent. Hold a medicine ball in front of you. Brace your core and set your shoulders.
Raise your arms above your head and, using a twisting motion, throw the ball down at the floor to the outside of one foot.
Catch the ball as it bounces, lift it up, and hurl it down to the other side.
Continue for the desired number of reps.
Muscles Targeted:
Primary: Rectus abdominis, obliques, quadratus lumborum, latissimus dorsi.
Secondary: Deltoids, hip flexors.
Benefits:
An explosive exercise for building core rotational power.
A fun, satisfying workout.
An excellent stress reliever.
Tips:
Do not use a gel-filled medicine ball, as they’re prone to splitting.
Rise up onto your toes and put your entire body into each throw.
Wind up each throw using a circular arm action to increase core and QL engagement.
FAQs
Do you have a question about quadratus lumborum stretching or strengthening exercises? No problem, because we’ve got the answers!
1. How do I isolate my QL muscle?
Whether you are stretching or strengthening, you cannot isolate the quadratus lumborum. Invariably, it works in conjunction with several other muscles, including your obliques, rectus abdominis, and erector spinae.
So, when you try to stretch or strengthen your QLs, you’ll also be working other muscles. This is no bad thing, as that’s how the QL works in nature – with other muscles and never alone.
2. How long should I hold QL stretches for?
The time you hold a stretch depends on what you are trying to achieve. For example, if you are stretching to maintain your current flexibility, you only need to hold a stretch for 15-20 seconds. This should be enough to prevent your flexibility from decreasing.
However, if you want to improve your flexibility, you need to hold your stretches for longer, usually 30-60 seconds. During this time, you should try to increase the depth of your stretch as you feel your muscles relax.
You don’t need to choose between these two durations. You may have one QL tighter than the other, so you could do short maintenance stretches on one side and longer developmental stretches on the other to fix the imbalance.
3. Will training my QL make my waist thicker?
The quadratus lumborum is a relatively long, slender muscle. As such, while training it will produce some hypertrophy or growth, it won’t make your waist thicker. If anything, a better-developed QL with give you a tighter waist.
Too much body fat is a far more common reason for having a thick waist. Too much muscle mass around the midsection is rarely a problem.
4. Some of these QL exercises hurt my back – what gives?
The quadratus lumborum muscles are located on the sides of your lower back. As such, overstretching can cause lower back pain. Also, exercises that affect your QL invariably involve your lower back.
If any of these exercises hurt, you should stop immediately, check that you are doing them correctly, and gently try again. Should the pain persist, skip the movement that bothers you can try something else.
Finally, if you’re still experiencing QL or lower back pain, get it checked out by a medical professional, as it could require treatment. Never train through pain, as that will probably make it worse.
5. Do I really need to stretch or strengthen my QL?
When it comes to prehab and rehab stretching and strengthening, you should choose your exercises based on your needs. For example, if your QL feels tight, limits your lateral movements, or causes pain, stretching could help. In contrast, if you lack lateral stability, you probably need to strengthen your QL.
However, if you have no such issues, you may not need to spend time on your QL. It’s probably getting sufficient indirect work from the rest of the exercises in your training program.
Wrapping Up
While the quadratus lumborum is a lesser-known back muscle, it’s still important. A weak QL can cause lumbar instability and dysfunction. In contrast, a tight QL can affect your posture and cause pain.
Thankfully, stretching and strengthening the QL is relatively simple, and the exercises for both of these purposes are simple and easy to perform. Many can be done at home as they require no special equipment.
But before you head off to stretch or strengthen your QL, you need to understand that it may not need any extra work. If you have no noticeable tightness or weakness in this area, your QL is probably strong and flexible enough.
That said, if you do need to pay more attention to your quadratus lumborum, you now know the best exercises to use.
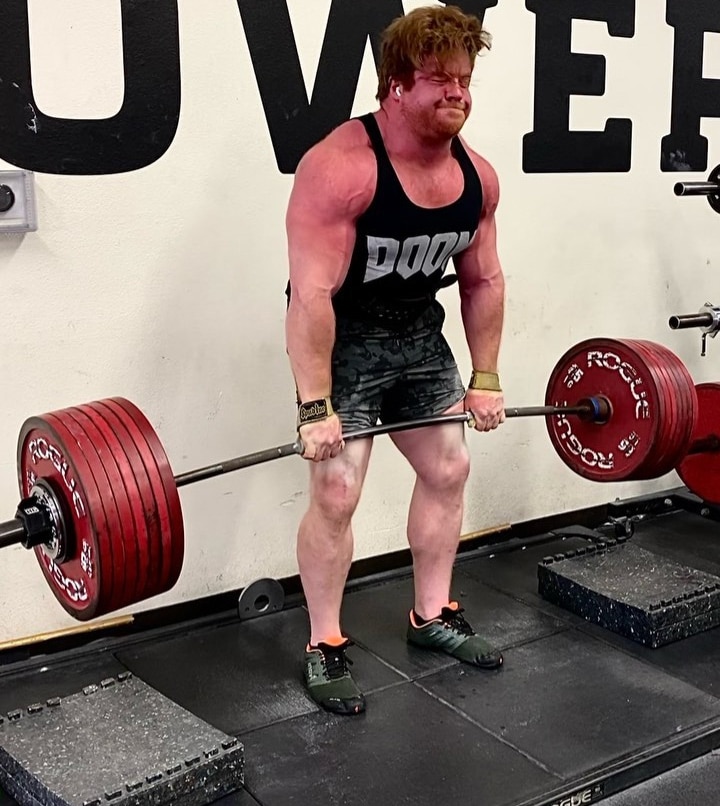
Partial Deadlifts vs. Full Deadlifts – Which One Should You Do?
Barbell back squats are often called the king of exercises. Entire workouts have been built around the back squat, including the classic old-school 20-rep squat routine. It’s safe to say that the squat is a VERY productive exercise for building muscle mass and strength.
All of that said, there are drawbacks to squats. For starters, you need a squat or power rack to perform heavy squats safely. Getting pinned under a heavy bar can cause severe injury. Barbell squats also require a high degree of technical proficiency to perform safely. An ugly squat is often a dangerous squat.
And then there is the whole “squats are functional” thing. While squatting (the movement) is highly functional, when was the last time you did a squat with a heavy weight on your back outside of the gym? Probably never, right?
All this means that the barbell deadlift could be the real king of exercises. You don’t need a rack to do them, and they teach you how to lift heavy weights off the floor, making them a REAL functional exercise. Plus, if you want to build real-world strength and useable muscle mass, the deadlift delivers.
That’s not to say that squats are bad, but deadlifts may be better.
All squats vs. deadlift arguments aside, there are several different types of deadlifts for you to choose from. In this article, we compare and contrast the partial and full deadlifts so you can decide which is the best one for you.
What is Partial Deadlift?
Block Pull / Ken Cooper
The partial deadlift involves starting your rep with the bar higher off the floor than usual. For full or conventional deadlifts, the standard bar height is nine inches. That’s because standard 45lbs/20kg Olympic bumper plates have a diameter of 18 inches.
With partial deadlifts, you raise the bar by placing it on blocks or in a power rack with the safety bars set at your preferred height. This reduces your range of motion and changes several aspects of the lift. Partial deadlifts are also known as block pulls and rack pulls, named after the equipment used to elevate the bar.
Powerlifters frequently use partial deadlifts as an assistance exercise to increase conventional deadlift performance. They also feature in strongman competitions where deadlifts often start from a higher position, e.g., the silver dollar deadlift. Partial deadlifts also offer benefits to bodybuilders and general exercisers.
Muscles Worked
The partial deadlift is a compound exercise involving multiple muscles and joints working together. From top to bottom, the main muscles tested and trained by partial deadlifts are:
Trapezius – upper back
Rhomboids – between the shoulder blades
Deltoids – shoulders
Latissimus dorsi – side of the upper back
Core – muscles of the midsection, including the abs and lower back
Biceps – front of the upper arm
Forearm flexors – gripping muscles
Gluteus maximus – back of the hips
Hamstrings – back of the thigh
Quadriceps – front of the thigh
Triceps surae – calf muscles
Needless to say, partial deadlifts are a very comprehensive exercise that works almost every muscle in your body. Do a few sets of bench presses, dips, or push-ups, and you can theoretically train your entire body with just two exercises.
How To Do Partial Deadlifts
Get the most from partial deadlifts while keeping your risk of injury to the minimum by following these step-by-step instructions!
Set your barbell in a power rack or on blocks so it’s between lower knee and mid-thigh height. The lower the bar, the more work your glutes and hamstrings have to do.
Stand close to the bar so it’s touching your legs. Your feet should be between hip to shoulder-width apart.
Hinge forward from your hips, bend your knees slightly, and grab the bar. Hold it using a shoulder-width double overhand or mixed grip. Flex your lats and upper back.
Brace your core, straighten your arms, and lift your chest. Take any tension out of the bar.
Drive your feet into the floor, push your hips forward, and stand up. Do not bend your arms or round your lower back. Take care not to lean back at the top of your rep.
Lower the bar back down under control, allow it to settle for a second or two, reset your core and grip, and repeat.
Tips:
Use gym chalk and/or lifting straps to reinforce your grip.
Wear shoes with flat soles and low heels for stability.
Use a weightlifting belt for support and safety.
This exercise works best with low reps and heavy weights.
Do not use a deadlift bar for this exercise, as doing so may damage it.
Partial Deadlifts – Pros
Not sure if partial deadlifts deserve a place in your workouts? Consider these advantages and benefits and then decide!
Better for tall and inflexible lifters
Bending down to deadlift a weight from the floor requires excellent hamstring flexibility. Tall people may also find bending over so far challenging. Because of this, some lifters end up rounding their lower backs during deadlifts, increasing their risk of injury.
Partial deadlifts start with the barbell raised, making it easier to reach if you are tall or inflexible. This means that partial deadlifts are often more lower back-friendly than deadlifts from the floor.
Lift heavier weights
Partial deadlifts involve a shorter range of motion than full deadlifts. Because of this, you should be able to lift heavier weights compared to conventional deadlifts. Lifting heavier weights will build more strength, especially in your upper back and grip.
Build a bigger back
Bodybuilders use partial deadlifts to increase back size and width. The partial deadlift involves every major upper, lower, and mid-back muscle, and using heavy weights is one of the best ways to increase back thickness and density.
Overcome your sticking points
Like most freeweight exercises, full deadlifts have sticking points. Some lifters struggle to break the bar away from the floor, while others get stuck at the midpoint of their rep and battle to lock out their hips.
Partial deadlifts allow you to work on your lockout, so you are more likely to be able to complete your conventional deadlift reps successfully.
Fatigue management
Full deadlifts are incredibly fatiguing. They challenge your entire body and central nervous system, especially if you do very low reps, e.g., 1-3 per set. Partial deadlifts are a little less taxing as the range of motion is less.
So, if you are feeling too tired to do full deadlifts, you may find that you can still perform partials. Alternatively, you can alternate between full and partial deadlifts if you want to avoid accumulating too much fatigue, e.g., because you deadlift twice a week.
Partial Deadlifts – Cons
While partial deadlifts are an effective exercise, there are a couple of drawbacks to consider, too:
Equipment
You’ll need pulling blocks, a power rack, or stacks of bumper plates to do partial deadlifts. If you cannot raise the bar off the floor, you won’t be able to do this exercise. In contrast, all you need for full deadlifts is a bar and weight plates.
You can lift more weight
While this is a pro, it can also be a con. Just because you can lift more weight doesn’t mean you should! Some lifters load up the partial deadlift and use way more weight than they can handle safely. This can lead to injury, especially to the lower back.
Not as functional
Most strenuous lifting activities start with a weight resting on the floor. Partial deadlifts begin with the weight raised, so you could become “weak off the floor” if you never do full deadlifts.
What is Full Deadlift?
The full or conventional deadlift is so-called because each rep starts with the weight resting on the floor. In other words, it’s a “dead” weight. When talking about deadlifts, most people are referring to full deadlifts rather than partials.
The deadlift is a popular exercise with all strength athletes and is the final lift contested in powerlifting events. Deadlifts also feature in most strongman competitions. Bodybuilders do deadlifts to build upper and lower body strength and muscle size. Even booty girls do deadlifts as it’s such an effective hip and butt-builder.
The current world record for the deadlift is 501kg/1,104.5lbs, held by strongman Hafþór Júlíus Björnsson. However, Eddie Hall’s 500kg lift is the heaviest ever in strongman competition.
Muscles Worked
Full deadlifts work the same muscles as partials. However, full deadlifts involve more lower-body engagement. This is because you must flex your knees and hips more to reach the floor.
The muscles tested and trained during full deadlifts are:
Trapezius
Rhomboids
Deltoids
Latissimus dorsi
Core
Biceps
Forearm flexors
Gluteus maximus*
Hamstrings*
Quadriceps*
Triceps surae
*Greater involvement compared to partial deadlifts.
How to do full deadlifts
Get the most from full deadlifts while minimizing the risk of injury by following these guidelines!
Place your barbell on the floor. Use standard 45lbs/20kg plates or raise the bar on blocks so it’s around nine inches off the floor.
Stand with your feet between hip and shoulder-width apart, toes under the bar. The bar should lightly touch your shins.
Lean forward and hold the bar with an overhand or mixed shoulder-width grip.
Straighten your arms, drop your hips, brace your core, and raise your chest. Pull the slack out of the bar. Flex your lats and press the bar toward your legs.
Drive your feet into the floor and stand up, pushing your hips forward as you rise. Make sure your hips do not come up faster than your shoulders.
Stand up straight but avoid leaning back.
Lower the bar under control back to the floor, allow it to settle, reset your core and grip, and repeat.
Learn more about perfecting your deadlift form here.
Tips:
If using a mixed grip, switch your hands around set by set to avoid muscle imbalances.
Deadlift in flat shoes or just your socks to maximize posterior chain engagement.
Do not allow your lower back to round during deadlifts, as doing so can cause severe injury.
Use chalk and/or straps to reinforce your grip.
Wear a weightlifting belt for safety and support.
Full Deadlifts – Pros
Are full deadlifts the best variation for you? Consider these benefits and then decide!
A very functional exercise
Full deadlifts teach you how to safely lift heavy objects from the floor. This is a common feat of strength that many people must perform daily, e.g., lifting kids, pets, grocery bags, etc. Full deadlifts develop functional or useful strength that can help you in the real world outside of the gym.
A total muscle builder and strengthener
Full deadlifts work almost every major muscle in your body – upper and lower. As such, they’re an excellent option for time-pressed exercisers who don’t have time for more convoluted workout plans.
So, whether you want more muscular legs, a broader back, or an unbreakable grip, full deadlifts will give you what you want.
A standardized lift
Providing you use Olympic bumper plates, all full deadlifts should be more or less identical and, therefore, comparable. So, if you lift 220lbs in Boston, you should have no problem repeating your lift in New York.
In contrast, partial deadlifts can start from almost any height, making it much harder to compare your performances. Starting with the bar at 12 inches feels very different to 15 or 18.
Lots of options and variations are available
Partial deadlifts are a variation of full deadlifts, and there are plenty more to choose from. Additional full deadlift variations include:
Paused deadlifts
Sumo deadlifts
Deficit deadlifts
Banded deadlifts
Single-leg deadlifts
Touch ‘n’ go deadlifts
Hack deadlifts
Snatch grip deadlifts
All these variations (as well as partial deadlifts) mean your deadlift workouts never need to be repetitive or boring.
Full Deadlifts – Cons
There are also a couple of drawbacks to full deadlifts to consider:
Increased lower back stress
Bending forward to reach a barbell on the floor puts a lot of stress on your lower back. This can be a problem for people suffering from lower back pain. This stress is highest for taller lifters and those with tight hamstrings.
Related: 3 Reasons Your Back Hurts After Performing Deadlifts
A complex exercise
Contrary to what you might think, full deadlifts are quite technical and require skill to perform safely. Common deadlift form faults include rounding the lower back, letting the hips rise faster than the shoulders, “squatting” the bar up, and lifting your heels.
Some lifters, especially beginners, may need help learning the deadlift. Given its potential to cause injury, the deadlift should not be taken lightly!
A very taxing exercise
The full deadlift is so demanding that some lifters only do a few sets a week. In contrast, others only train heavy deadlifts every 10-14 days. A heavy deadlift workout will take a lot out of your body, taxing not only your muscles but your central nervous system.
This could be a problem if you also need energy for other activities, e.g., a sport you’re training for.
Some people hate deadlifts!
Heavy, high-rep deadlifts are tough. It’s not uncommon to feel faint or sick after a set of deadlifts. But, of course, this demand is what makes deadlifts so effective. Still, for those of a less masochistic persuasion, the difficulty of deadlifting means they dread or hate doing deadlifts.
The good news is that deadlifts are NOT compulsory, and there are plenty of exercises you can do instead.
Partial Deadlifts vs. Full Deadlifts
So, now that you know a little more about partial and full deadlifts, let’s judge these exercises by a few different criteria:
Partial Deadlifts vs. Full Deadlifts: Strength
Partial and full deadlifts are both excellent strength-building exercises. They are ideal for low rep, heavy weight training, which is critical for building strength. However, because the movement/range of motion differs between these two exercises, so does the type of strength they develop.
Full deadlifts will develop full-range strength, particularly in your hamstrings and hips. They’re much more lower-body dominant. In contrast, partial deadlifts use a smaller range of motion and less lower-body engagement. They tend to emphasize the upper body more.
Therefore, you should choose the exercise that strengthens the muscles you want to develop – full deadlifts for the lower body and partials for your upper body.
Winner: It’s a draw!
Partial Deadlifts vs. Full Deadlifts: Hypertrophy
Both partial and full deadlifts are potent muscle builders. However, like building strength, each exercise tends to affect different parts of your body. Full deadlifts work your upper body and lower body reasonably equally, but partial deadlifts are more upper-body dominant.
Because of this, you must choose the right deadlift for the muscle groups you want to enlarge.
Winner: It’s a draw!
Partial Deadlifts vs. Full Deadlifts: Safety
While deadlifts can be performed safely, the loads and movements mean there is always a risk of injury, especially to the lower back. Biceps tears are also a problem during deadlifts, especially when using an alternating or mixed grip.
The reduced range of motion and more back-friendly starting position means that partial deadlifts are potentially safer than conventional deadlifts, especially for taller lifters and anyone with tight hamstrings.
Winner: Partial deadlifts!
Partial Deadlifts vs. Full Deadlifts: Ease of learning
The large range of motion and potentially awkward starting position means that full deadlifts can be hard for beginners. In contrast, the partial deadlift is harder to get wrong, as the bar is set at a more comfortable and reachable height.
However, most beginners should be able to learn either type of deadlift with proper instructions. In fact, the deadlift is a critical movement for all exercisers as it teaches you how to safely lift heavy objects off the floor, e.g., when picking dumbbells up off the floor to do curls.
Winner: Partial deadlift, albeit only just!
Partial Deadlifts vs. Full Deadlifts: Equipment
Full deadlifts are a very low-tech exercise. All you need is somewhere flat to stand, a barbell, and enough weight plates. You can do full deadlifts in a fancy gym, your garage, or even in your backyard.
In contrast, you’ll need something to rest the bar on for partial deadlifts, be that a power rack or pulling blocks. Because of this, you may not have the equipment you need to do partial deadlifts.
Winner: Full deadlifts!
Partial Deadlifts vs. Full Deadlifts: Long-term progression
With partial deadlifts, your primary source of long-term progression is adding weight to the bar. You CAN reduce the height of your barbell, which will make the lift more challenging. Still, unless you lower the bar a fraction of an inch at a time, this is not a viable option for long-term progression.
In contrast, while you can add weight the same way with full deadlifts, there are also many variations you can use to maintain your progress, such as deficit and snatch grip deadlifts.
Many of these variations are designed to boost your conventional deadlift performance. However, they probably won’t do much to improve your partial deadlift.
Winner: Full deadlift!
Partial Deadlifts vs. Full Deadlifts: Variety
As discussed above, partial deadlifts are already a variation of full deadlifts, and there are many more for you to try. Lifters do not tend to just do partial deadlifts and use other variations to keep their workouts fresh and productive.
In fact, powerlifters usually use partial deadlifts as an assistance or accessory exercise to improve their conventional deadlift lockout. Only strongmen compete in the partial deadlift.
Winner: Full deadlift!
Partial Deadlifts Vs. Full Deadlifts – Wrapping Up
Back in Victorian times, the deadlift was known as the health lift. It was considered one of the best exercises you could do for strength, endurance, fitness, and well-being. Nowadays, you are more likely to see exercisers doing leg presses than deadlifting, and the squat is arguably more popular than the deadlift.
However, in terms of bang for your buck, deadlifts are hard to beat. Very few exercises work as many muscles or are as functional as the deadlift. Sadly, though, because of prolonged sitting, many people are unsuited to deadlifts, and some gyms have even banned them.
So, are partial deadlifts better than full deadlifts, or is it the other way around? The truth is that both of these exercises are excellent, and either one would make a great addition to your lower body or back workouts.
Do full deadlifts for more of a full-body workout or partial deadlifts to emphasize your upper body.
Ultimately, any deadlift is a good deadlift, providing you perform it correctly, of course!
Read also: Romanian Deadlift Vs. Deadlift: Which One Should You Do?

Full-Body Cable Workout for Functional Fitness
Most workouts have a few cable exercises to add variety and achieve optimal stimulus for muscle growth. However, most folks restrict the cable exercises to isolation lifts, such as the cable crossover and straight-arm lat pulldown. Although there is nothing wrong with these exercises, you’re selling yourself short by limiting your cable exercises to single-joint movements.
Cables are versatile training tools that can be used for various exercises to boost hypertrophy, strength, stability, and mobility. Using cable machines solely for achieving a muscle pump with one or two movements at the end of your workout is an inefficient way to use this versatile training tool.
What is Functional Fitness?
Before we get into cable exercises for improving your functionality, let’s take a minute to learn about functional fitness.
Functional exercises involve movements that can help improve your performance in daily activities. These are generally compound (multi-joint) exercises that target multiple muscle groups, such as the deadlift and overhead press.
Functional exercises help improve your strength, balance, coordination, flexibility, and endurance, boosting your performance in daily activities such as lifting, carrying, bending, and reaching.
Contrary to what most people think, you don’t always need barbells, dumbbells, or kettlebells for functional training. You could complete an effective full-body functional workout just with a cable machine.
In this article, we will go over the nine best cable exercises to improve your overall strength, stability, and mobility and program them into a short and effective workout. We will also discover the benefits of adding a full-body functional cable workout into your training regimen.
Total Body Cable Exercises For Improved Functional Fitness
Cable machines offer a versatile middle ground between the freedom of movement provided by free weights, such as barbells and dumbbells, and the fixed range of motion of traditional weight machines. Adding the following cable exercises to your exercise arsenal can help enhance your stability, mobility, and strength:
Cable Squat
The cable squat is an underutilized exercise in most training regimens. Using a cable machine ensures constant tension on your quads throughout the range of motion. Furthermore, since you’ll be performing this exercise using a rope attachment in the front rack position, it will also boost your core strength and balance.
Steps:
Attach a rope attachment to a cable pulley set at the lowest position.
Grab each end of the rope with a neutral (palms facing each other) grip. Hold your hands in front of your chest, like in a goblet squat.
Take a couple of steps back and assume a hip-width stance.
Push your hips back and down as low as possible. The weights should be engaged at the bottom position.
Explode back to the starting position.
Repeat for recommended reps.
Pro Tip: Focus on keeping your back upright throughout the range of motion. Leaning forward will put unnecessary strain on your lower back.
Check out our complete cable squat guide here!
Cable Reverse Lunge
The cable reverse lunge is an underrated lower body exercise that can take your wheel to the next level. Since this is a unilateral exercise, it will also help boost your stability and balance.
Steps:
Set the cable pulley at the lowest setting and hook up a rope attachment.
Grab the ropes with a neutral grip.
Turn around and take a big step forward. Assume a hip-width stance.
Your hands should be placed against your upper pecs.
Brace your core and glutes, and step back with your left foot.
Lower your rear knee until it touches the floor.
Return to the starting position.
Repeat on the right side.
Alternate between sides for the recommended reps.
Pro Tip: Performing the cable reverse lunge on one side before moving onto the other can help achieve a better muscle pump.
Cable Shoulder Press
The cable shoulder press is an excellent exercise for building big and round deltoids. We recommend using a functional trainer instead of a conventional cable machine for this exercise, as it puts you in a better position. This exercise will help improve your overall strength, stability, and overhead mobility.
Steps:
Adjust each end of the functional trainer at the lower setting and fix up a D-handle attachment.
Grab the handles in each hand with a pronated (palms facing forward) grip and assume a hip-width stance.
Your hands should be right over your shoulders at the starting position.
Press the handles overhead by extending your elbows.
Avoid locking out your elbows at the top, as it will remove the tension from your shoulders and put it on your triceps.
Slowly return to the starting position.
Repeat for reps.
Pro Tip: Avoid using momentum in this exercise by jerking your knees and using your lower body.
Check out our complete cable shoulder press guide here!
Cable Split-Stance Chest Press
Performing the cable chest press while standing involves more muscles than the lying variation, as you need to use your core to stabilize your torso. You’ll also feel a lower body engagement when going heavy on this exercise. Plus, since this is a unilateral exercise, it will help you fix your strength and muscle imbalances.
Steps:
Set the cable pulley at chest height and attach a D-handle bar.
Grab the handle in your right hand with a pronated (palms facing the floor) grip and take a step forward.
Assume a staggered stance while maintaining a slight bend in your knees for better balance.
The handle should be at your chest level at the starting position.
Keeping your core stable, extend your arm so it is parallel to the floor.
Pause and contract your pec at the top.
Repeat for recommended reps before switching sides.
Pro Tip: Folks that are short on time can also perform the bilateral variation of this exercise. However, the unilateral version involves the core to a greater degree.
Check out our complete cable chest press guide here!
Cable Deadlift
This is an excellent deadlift variation for beginners, as it helps you drill the movement while lowering your risk of injury. We recommend performing this exercise on a functional trainer. Stand on an elevated platform like an aerobic step to increase your range of motion.
Steps:
Adjust the arms of a functional trainer at the lowest setting and hook up D-handle bar attachments.
Place an aerobic step between the pulleys and stand on it with a hip-width stance.
Lower toward the floor by driving your hips back, bending your knees, and lowering your torso.
Grab the handle with a pronated grip.
Stand straight by driving through your entire feet and extending your knees.
Slowly return to the starting position.
Pro Tip: If you don’t have access to a functional trainer, you could perform a Romanian deadlift by attaching a straight bar to a cable pulley set at the lowest setting.
Check out our complete cable deadlift guide here!
Cable Seated Row
Rowing exercises are incredibly effective at improving your back thickness and density. Perform this lift while seated on the floor for better stability.
Steps:
Adjust the cable pulley to its lowest position and attach a V-handle bar.
Grab the handle with a neutral grip and take a step up.
Sit on the floor and plant your feet flat on either side of the pulley.
Your torso should be upright throughout the range of motion.
Pull the handle to your belly button while driving through your elbows.
Pause and contract your lats.
Slowly return to the starting position.
Pro Tip: Many lifters tend to round their backs during the eccentric (returning) motion. Doing this removes tension from your upper back and puts it on your lats.
Check out our complete cable seated row guide here!
Cable Triceps Pushdown
Although the cable triceps pushdown is an isolation exercise that trains the back of your upper arms, including triceps exercises in your functional workouts can help improve your pressing strength, which can boost your performance in movements like the shoulder overhead press and cable chest press. Plus, lifting heavy on this exercise (without compromising form) also result in core engagement.
Steps:
Set the cable pulley at the highest position and attach a straight handlebar.
Assume a hip-width stance and grab the bar with an overhand grip.
Bend forward slightly.
Keeping your elbows pinned to your sides, extend your arms so they are perpendicular to the floor.
Return to the starting position.
Repeat for recommended reps.
Pro Tip: You could also perform a unilateral variation of this exercise by using D-handle bars for a better mind-muscle connection and core stimulation.
Check out our complete cable triceps pushdown guide here!
Cable Biceps Curl
This is another single-joint exercise that functions as an accessory movement that can improve your performance in pulling exercises like the cable row. Additionally, training your guns can significantly improve your overall physique aesthetics.
Steps:
Adjust a cable pulley machine to the lowest setting and attach a straight bar.
Stand upright with a shoulder-wide stance and grab the bar with a shoulder-wide supinated (palms facing the ceiling) grip.
Keeping your elbows pinned to your sides, curl the bar to your shoulder level.
Pause and contract your guns at the top.
Slowly return to the starting position.
Rinse and repeat.
Pro Tip: Use a functional trainer to perform the unilateral variation of this exercise. It is the closest you can get to dumbbell curls using cables.
Check out our complete cable biceps curl guide here!
Cable Wood Chopper
Most lifters overlook transverse plane exercises. Transverse plane movements help build rotational and anti-rotational strength, improving overall stability and lowering your risk of injury.
Steps:
Set the cable pulley at waist height and attach a D-handle attachment.
Take a step away from the pulley and assume a shoulder-wide stance.
Your right side should be facing the pulley.
Turn to your side and grab the handle with your right hand using a neutral grip; wrap your left hand around your right hand.
Keeping your pelvis stable and arms extended, rotate your torso to the left side.
Slowly return to the starting position.
Repeat for recommended reps before switching sides.
Pro Tip: The cable wood chopper is one of the best exercises to build core stability and balance. Set the pulley at the highest and lowest setting to train your midsection from different angles.
Check out our complete cable wood chopper guide here!
Cable Ab Crunch
This is the most popular cable ab exercise. Building a solid core improves your stability, which carries over to functional movements, such as the deadlift and overhead press.
Steps:
Set the cable pulley at the highest position and attach a rope handle.
Grab the ropes with a neutral grip and kneel on the floor under the pulley.
Your upper arms should be perpendicular to the floor at the starting position.
Pull your chest to your thighs while driving through your elbows and bringing them close to your knees.
Pause and contract your abs at the bottom.
Return to the starting position.
Repeat for reps.
Pro Tip: To engage your core optimally, exhale sharply as you lower the weight (concentric phase) and inhale during the lifting phase (eccentric motion).
Check out our complete cable crunch guide here!
Best Cable Workout For Functional Fitness
Above, we have covered a couple of exercises for each muscle group. You can pick one exercise for each muscle for your full-body cable workout. Further, feel free to change the reps and sets to alter your training volume and intensity as per your experience level and schedule. Here is the total body cable workout you must try in your next training session:
Exercise
Sets
Reps
Cable Deadlift
3-5
8-12
Cable Squat
3-5
8-12
Cable Shoulder Press
3-5
8-12
Cable Split-Stance Chest Press
3-5
8-12
Cable Biceps Curl
3-5
8-12
Cable Wood Chopper
3-5
8-12
Benefits of Full-Body Functional Fitness Cable Workout
Given below are the advantages of adding a full-body functional cable workout to your training regimen:
Improves Functionality
Folks that train to improve their overall health and physical performance should prioritize functional exercises. Adhering to the functional cable workout listed in this article will improve your overall strength, stability, and mobility, boosting your performance in daily activities.
Furthermore, the cable machine is a versatile training equipment. You can perform several variations of the same lifts by switching your grips, using different handles, or changing the height of the pulley.
Short Workouts
Cable workouts are generally shorter than free-weight workouts, making them a better fit for people running a tight schedule. Changing weights on a barbell back squat takes longer as you have to load and de-load weight plates. On the other hand, cable machines have a selectorized weight mechanism, meaning you can change the weight on the bar using a pin which only takes a few seconds.
Plus, since cable workouts are shorter, they help maintain a higher training intensity, which can result in greater calorie burning. You can also use advanced training principles like supersets and drop sets to turn up the heat.
Flexible Movement Trajectory
Unlike rigid machines, cable machines have a flexible movement path. You can adjust the pulley height to train your muscles from different angles, which is also not possible with free weights. For example, you cannot perform a split-stance chest press using dumbbells. The cable’s flexible movement path allows you to train your pectoral muscles while standing upright and extending your arms in front of your torso.
Most cable exercises have a short learning curve, making them beginner-friendly. Newbies can use the cables to establish a mind-muscle connection to achieve optimal target muscle stimulation.
Keeps Constant Tension on Muscles
This is the main USP of cables. Performing cable exercises help maintain constant tension on your muscles throughout the range of motion, which is not the case with most free-weight exercises.
If your typical training sessions mainly involve barbells and dumbbells, switching to full-body functional cable workouts can help introduce variety to your workouts, aiding in breaking through strength and muscle plateaus.
Reduces the Risk of Injury
Most cable exercises are low-impact movements that don’t overexert your joints. These lifts involve smooth concentric and eccentric motions, lowering your risk of injury during training. You must spend 5-10 minutes before a workout performing a mix of static and dynamic warm-up exercises to further reduce the odds of injury.
Wrapping Up
Lifters that want to build strength, stability, and mobility without overexerting their joints, tendons, bones, and ligaments should try the fully-body cable workout for functional fitness. The versatility of the cable machine allows you to mimic real-world movements, such as bending and lifting, pulling, and pushing, which can improve your performance in daily chores.
Integrating the workout in this article into your training regimen will add variety to your workouts, making your training sessions more interesting and helping you break through strength and muscle plateaus. Do the cable functional workout once weekly for 12 weeks, and the results will speak for themself. Best of luck!

Negative Bicep Curls: The Ultimate Guide to Revolutionizing Your Arm Routine
It’s all about perception. Negatives are not always bad. Sometimes, they can be better than the positives — the negative bicep curls are an excellent example.
The negative bicep curls are biceps curls in reverse, which can help you build chiseled guns. Most lifters assume that curling is the only way to build bigger arms. The negative bicep curl, however, flips this assumption on its head. While performing a negative bicep curl, a lifter focuses on uncurling the weight to build bigger arms.
Many lifters use momentum by swinging their torsos back and forth during the concentric (upward) motion of the negative bicep curl, which removes tension from the target muscle group and puts it on their shoulders and back. In the negative bicep curl, you focus on the eccentric (lowering) motion and use a slow and controlled motion, eliminating the use of momentum, leading to optimal muscle fiber stimulation and hypertrophy.
The negative bicep curls, also known as eccentric bicep curls, focus on recruiting your slow-twitch muscle fibers by increasing your time under tension during the lowering motion of the lift.
Our muscles consist of two types of muscles — fast and slow-twitch. The slow-twitch muscle fibers are endurance-based and engage in exercises with longer time under load. A negative dumbbell bicep curl set generally takes at least twice as long to complete as the conventional exercise.
In this article, we unlock the secrets of negative bicep curls, helping you build bigger, stronger, and more conditioned arms. We also dive into how to perform the negative bicep curls with the perfect form and tips to maximize results, their benefits, safety, and a sample biceps workout.
What are Negative Bicep Curls?
Negative biceps curls are an advanced strength training technique. To an untrained eye, it can be difficult to distinguish between negative bicep curls and conventional bicep curls since they look very similar.
The negative bicep curls differ from the standard curls mainly because of their rep tempo. While the conventional biceps curl follows a 1-1-1-0 rep tempo (one second on the concentric motion, a second’s pause at the top, one second on the eccentric motion, and no rest at the bottom), the negative bicep curls use a 1-1-3-0 rep tempo, where a lifter spend at least three seconds on the lowering motion.
There are two ways to perform the negative biceps curl. The first involves using a spotter who will help you during the concentric part of the lift. The spotter will take most of the weight during the curling motion to ensure your muscle are not fatigued and are fresh for the lowering motion. It’s almost as if your spotter will curl the weight, and you’ll only lower it.
The second method is more prominent as it doesn’t require a spotter. In this technique, you curl the weight as quickly as possible without using momentum and focusing on contracting your muscles. However, you’ll go as slow as possible during the eccentric motion to maximize muscle fiber engagement.
You could use the negative bicep curl training technique on almost every exercise that involves dumbbells, barbells, kettlebells, resistance bands, or machines. It is also suitable with different grips, such as supinated, pronated, or neutral.
How To Perform Negative Bicep Curls
This is how to perform the barbell negative biceps curl using the correct form:
Stand upright with a hip-width stance.
Grab a barbell with a supinated (underhand) shoulder-wide grip and hold it against your thighs.
Curl the barbell to your shoulders while keeping your elbows pinned to your sides.
Slowly lower the barbell to the starting position while only moving at your elbow joint.
The eccentric motion should take at least three seconds. However, you should aim for five seconds as you get better at this training technique.
Pause at the bottom for a second and spend one second on the concentric (upward) motion.
Repeat for recommended reps.
Benefits of Negative Bicep Curls
Here are the advantages of adding negative bicep curls to your exercise regimen:
Helps Build Muscle Mass and Strength
You can lift up to 40% heavier on the negative bicep curls while training with a spotter. Using such big weights will shock your muscles, which can help induce hypertrophy. Perform 8-12 reps if your goal is to build muscle mass. On the other hand, do 1-5 reps while focusing on your form to build strength. [1]
Break Through Strength and Muscle Plateaus
The negative curls are an incredibly effective advanced training technique for folks who have hit a strength or muscle plateau. The added training intensity will help spark new muscle tissue growth. You must also program the negative biceps curl into your training regimen to avoid hitting a plateau and keep making consistent gains.
Eliminates Momentum
The negative bicep curl requires you to lower the weights as slowly as possible, eliminating the possibility of using momentum. Following a strict form ensures optimal muscle fiber recruitment.
On the flip side, you’ll use a spotter during the concentric motion. Since you only have to do half of the usual work in this variation, it helps restrict the use of momentum. However, some people tend to curve their backs during the concentric motion for leverage, which can put undue stress on their backs, increasing the risk of injury.
If you’re not training with a spotter, you must curl the weight while maintaining an upright back and keeping your elbows pinned to your sides. Swinging your torso back and forth will result in secondary muscle recruitment.
Versatility
The negatives are a versatile training technique. You could use them in any dynamic exercise that uses eccentric and concentric motion, such as bicep curls, squats, bench presses, deadlifts, lunges, etc.
You could do it with any training equipment, including dumbbells, barbells, kettlebells, resistance bands, and machines using your preferred grip (overhand, underhand, or neutral). To sum it up, the possibilities of what you can achieve with negative bicep curls are limited only by your imagination.
Beginner-Friendly
Although negatives are technically an advanced training principle, they can also be used by beginners. Negatives involve focusing on the eccentric motion of a lift, meaning a lifter has to concentrate on only half of the range of motion. The limited ROM can help a beginner drill the movement. Furthermore, the longer time under tension will put your muscles under optimal hypertrophy conditions.
Lift Heavy
You can lift up to 40% heavier on the negative bicep curls than the conventional curling exercises; however, you must have a spotter to help you through the concentric motion. Ensure you do not bite off more than you can chew, as it can increase your odds of injury. The biceps curl is an isolation (single-joint) lift. Lifting more weights than you can handle can put your biceps tendons under significant stress, making them susceptible to tears.
Greater Time Under Tension
Negative bicep curls increase your time under tension by at least 30%. The longer time under load will lead to insane muscle pumps, as the target muscles are filled with blood and lactic acid. Blood also carries nutrients to the muscle tissues that can help build bigger and stronger muscles.
Less Fatigue
A 2015 study found that eccentric muscle actions cause less fatigue than concentric movements, especially at higher intensities. Additionally, eccentric movements are also more effective at building power. [2]
According to the findings of this study, performing negative biceps curls at the end of a workout when your muscles have started fatiguing can help step up your training intensity without exhausting your muscles.
Sample Negative Bicep Curl Workout (How To Program)
Although negatives are not as fatiguing as concentric-only movements, you shouldn’t overdo them. Limit your negative curl use to one exercise per workout to avoid overtraining your muscles. Given below is a sample biceps workout that includes an eccentric-only exercise:
In this workout, you’ll use the ‘negative’ advanced training principle on the machine preacher curl. Since this is a machine exercise, we recommend using a spotter to help you through the concentric motion.
Weights
Folks that generally lift 90 pounds on the machine preacher curl for 3-5 sets of 8-12 reps can go up to 125 pounds on the eccentric biceps curl sets. You must ensure that you have a spotter for the concentric movement.
Reps
Even though you’ll only be doing negatives on this exercise, you shouldn’t expect to complete eight reps for 3-5 sets while lifting 40% heavier. Aim to complete 3-5 negative-only reps on the machine preacher curl and spend 3-8 seconds on the lowering portion of the lift.
Tips For Negative Bicep Curls
Use these training tips to make the most of this advanced training technique:
Follow a Picture-Perfect Form
Irrespective of your training goal, whether you are lifting to build muscle mass, strength, or endurance, you must use a textbook form to get the best bang for your buck and reduce your risk of injury.
The negative bicep curls are an isolation exercise and limit movement to the elbow joint. Keep your elbows pinned to your sides while restricting the use of momentum. Maintaining a slight bend in your knees will also limit your lower body engagement.
Rep Tempo
The rep tempo is the main difference between the conventional bicep curls and the negatives. The standard bicep curl variations have a one-second eccentric motion, whereas negative-only exercises involve a three-second or longer eccentric time.
Experiment With Your Grip
Although most people use a supinated (palms facings the ceiling) grip while doing negative biceps curls, incorporating different grips, such as neutral and pronated (palms facing your body), can help improve your biceps stimulation.
How Often To Perform Negative Bicep Curls?
The negative bicep curls are an advanced training technique that can significantly strain your muscles, as they substantially bump up your training intensity. Performing negative curls in each workout for every exercise can lead to overtraining, which can stall your progress.
Your biceps are a small muscle group. We recommend limiting training your biceps to twice a week. Furthermore, you should restrict negative bicep curls to one exercise per training session.
As a rule, you must give your muscle at least 48 hours to recover between workouts. Additionally, since your guns are a supporting muscle group in your back workouts, you should have a 48-hour gap between your back and biceps workout.
Negative Biceps Curls Safety
Most exercisers lift significantly heavy on the negative biceps curl than their conventional bicep curl weight, considerably increasing their odds of injury.
You must adjust your training intensity while doing the negative biceps curl according to your experience level. Beginners should lift at most 20% of their normal curl weight and should only do so under expert supervision to ensure proper training form.
Individuals who exercise without a partner should also refrain from lifting more than 20% of their regular curl weight. Finally, experienced lifters must ensure they only use the eccentric-only advanced training technique once weekly in their biceps training regimen to avoid the risk of overtraining.
Wrapping Up
Contrary to what many people think, biceps training does much more than improve your physique aesthetics. Strong pythons can enhance your performance in compound movements like rows, deadlifts, and clean and jerk and improve your overall functionality.
Incorporating negative curls into your training regime can boost your upper arm strength and hypertrophy. Negative bicep curls are a versatile training technique that can be used in a variety of exercises.
You must, however, start light and work your way up gradually. There is nothing worse than pulling a muscle while trying to impress your gym crush. Now that you know everything there is to learn about the negative bicep curls, put together a training program, and begin curling. Best of luck!
References
Krzysztofik M, Wilk M, Wojdała G, Gołaś A. Maximizing Muscle Hypertrophy: A Systematic Review of Advanced Resistance Training Techniques and Methods. Int J Environ Res Public Health. 2019 Dec 4;16(24):4897. doi: 10.3390/ijerph16244897. PMID: 31817252; PMCID: PMC6950543.
Kelly SB, Brown LE, Hooker SP, Swan PD, Buman MP, Alvar BA, Black LE. Comparison of concentric and eccentric bench press repetitions to failure. J Strength Cond Res. 2015 Apr;29(4):1027-32. doi: 10.1519/JSC.0000000000000713. PMID: 25268291.
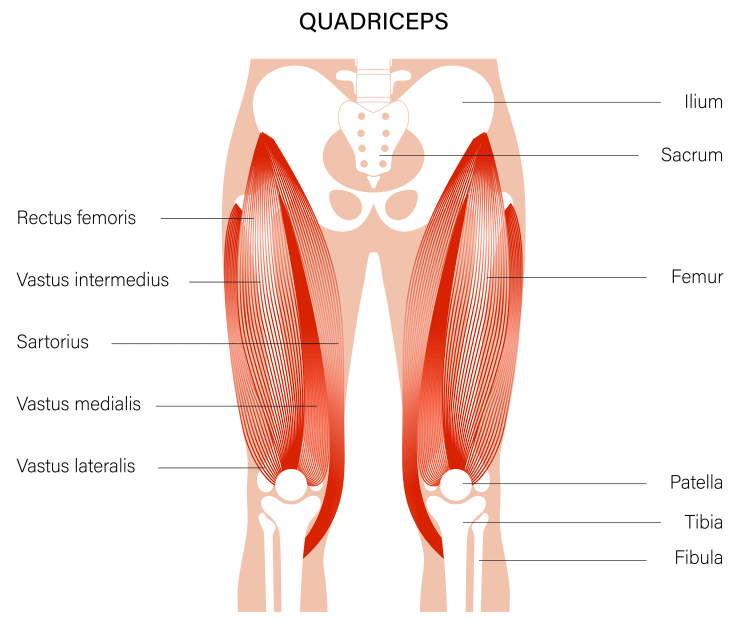
7 Best Knee Extension Exercises for Bigger, Stronger Quadriceps
We’re often told that big compound or multijoint exercises are the best way to build muscle size and strength. Examples of compound exercises include squats, bench presses, push-ups, and pulldowns.
These compound exercises allow you to lift the heaviest weights and are usually very functional, meaning they replicate the actions of daily life or sports.
But, while compound exercises are undeniably effective, the fact they involve multiple muscles and joints can also be something of a drawback.
For example, suppose you want to increase the size of your quads, but your glutes and hamstrings are already well-developed. More squats, leg presses, lunges, etc., will increase size in your entire lower body and not just your quads. As such, the front of your thighs will always be overshadowed by your bigger hammies and glutes, as all your leg muscles will probably grow at the same rate.
With isolation and semi-isolation exercises, you can preferentially target specific muscles so you can build and sculpt them according to your needs and goals.
In this article, we reveal the seven best knee extension exercises for building bigger, stronger quadriceps.
Knee Extension Exercises – Muscles Worked
Knee extension is the biomechanical term for straightening your legs. The muscles responsible for this action are your quadriceps or quads for short. There are four quadriceps muscles, and their names are:
Vastus lateralis (outside of the thigh)
Vastus medialis (inside of the thigh)
Vastus intermedius (middle of the thigh)
Rectus femoris (length of the thigh)
Each of the quadriceps has its own unique origin point. The three vastus muscles originate at different points on your femur or thigh bone, while the rectus femoris originates from the front of the lower pelvis. Because the rectus femoris crosses the hip as well as the knee, in addition to being a knee extensor, it is also a hip flexor.
All four quadriceps come together at a single insertion point on your tibia or shin bone, just below your knee.
All compound leg exercises involve an element of knee extension, but many also involve hip extension. However, there are several exercises that only feature knee extension or involve more knee extension than hip extension. It’s these latter exercises that are the subject of this article.
7 Best Knee Extension Exercises
Not sure which knee extension exercises to do? Wonder no more! Here are seven of the best quad-busting pump-inducing knee extension workout moves.
1. Leg extension machine
Most gyms have a leg extension machine. This popular exercise provides a safe and convenient way to perform knee extensions and isolate your quads. Bodybuilders use leg extensions to increase quadriceps size, but they can also be used by anyone looking to improve general thigh strength.
Steps:
Sit on the leg extension machine so your knees are aligned with the lever arm pivot point. Adjust the backrest and ankle pad for comfort. Brace your core.
Smoothly extend your legs until your knees are straight.
Pause at the top of the rep for 1-2 seconds and squeeze your quads.
Bend your legs but do not allow the weight plates to touch down.
Continue for the desired number of reps.
Muscles Targeted:
Primary: Quadriceps.
Secondary: N/A.
Benefits:
A very straightforward knee extension exercise that’s ideal for beginners.
Infinitely scalable by adjusting the weight up or down.
A very accessible exercise as most gyms have a leg extension machine.
Tips:
Pull your toes up toward your shins to maximize quadriceps engagement.
Pause at the top of each rep to get more from this exercise.
You can also do single-leg and alternating-leg extensions.
2. Dumbbell leg extensions
While machine leg extensions are one of the best ways to isolate your quadriceps, you probably won’t have access to one if you train at home. After all, even compact leg extension machines are big and expensive. The good news is that you can replicate this popular machine with nothing more than a dumbbell and an exercise bench.
Steps:
Sit on a flat exercise bench with your legs together and your knees on the edge.
Clamp a dumbbell between your feet.
Squeezing your knees together, extend your legs so your knees are straight.
Bend your legs to 90 degrees and repeat.
Muscles Targeted:
Benefits:
An accessible alternative to machine leg extensions for home workouts.
A low-tech but high-effect knee extension exercise.
An effective way to target your quadriceps.
Tips:
Wrap a towel around your dumbbell to protect your ankles.
Tie the dumbbell in place with a yoga strap or resistance band to avoid dropping it.
You can also do this exercise with ankle weights instead of a dumbbell.
3. Standing cable leg extensions
Seated leg extensions are very effective for targeting the vastus lateralis, vastus medialis, and vastus intermedius muscles. However, they’re not so good for hitting the rectus femoris. Sitting with your hips flexed puts the rectus femoris in a relaxed position, so it cannot produce much power. Standing cable leg extensions ensure all four quads get an equal workout.
Steps:
Put on an ankle strap and attach it to a low cable machine. Turn so your back is to the weight stack. Take 1-2 steps forward to tension the cable.
Bend your leg and move your hip backward into extension.
Next, drive your leg forward and extend your knee against the resistance offered by the cable.
Return to the starting position and repeat.
Switch legs and do the same number of reps on the opposite side.
Muscles Targeted:
Primary: Quadriceps.
Secondary: Hip flexors, core.
Benefits:
An excellent exercise for athletes, especially martial artists and soccer players.
One of the few exercises that hits all four quads equally.
Good for developing knee mobility, hip stability, and quadriceps flexibility.
Tips:
Keep your core braced to stabilize your lumbar spine and hips.
Hold onto something sturdy for balance, e.g., the back of an upright exercise bench.
You can also do this exercise with a resistance band.
4. Reverse Nordic curl
Nordic curls are usually associated with hamstring training. In fact, they’re arguably one of the best bodyweight hamstring exercises around. However, there is a Nordic curl variation that targets the quads and works like a natural leg extension machine. Like its hammie-hitting cousin, the reverse Nordic curl is a challenging and effective exercise.
Steps:
Kneel down so your thighs and torso are vertical. Your knees should be roughly hip-width apart. Brace your core.
Keeping your hips extended, lean back as far as you can.
Drive your feet into the floor and return to the upright position.
Continue for the prescribed number of reps.
Muscles Targeted:
Primary: Quadriceps.
Secondary: Hip flexors, core.
Benefits:
Works all four quads muscles, including the hard-to-train rectus femoris.
An ideal exercise for home workouts.
Good for improving knee mobility and quadriceps flexibility.
Tips:
Adjust your range of motion based on your flexibility and knee health.
Kneel on a folded exercise mat or foam pad for comfort.
Hold a weight across your chest to make this exercise more demanding.
5. Sissy squat
The sissy squat is an old-school bodybuilding exercise. Despite its somewhat disparaging name, the sissy squat is far from easy and provides a very effective way to overload your quads and work on your knee extension strength.
Steps:
Stand with your feet about hip-width apart. Hold a sturdy post or wall for balance. Brace your core.
Rise up onto your tip toes, push your knees forward, lean back, and squat down as deeply as you can. Try to touch your knees to the floor in front of your feet.
Drive the balls of your feet into the floor and extend your knees to stand up.
That’s one rep – keep going!
Muscles Targeted:
Primary: Quadriceps.
Secondary: Hip flexors, hamstrings, gluteus maximus.
Benefits:
A bodyweight equivalent to the leg extension machine.
A very challenging knee extension exercise.
An excellent exercise for home workouts.
Tips:
Adjust your range of motion according to your flexibility and knee health.
Hold a weight across your chest to make this exercise harder.
Use your arms for assistance if regular sissy squats are too challenging:
6. Heels elevated goblet squat
While this is not a pure knee extension exercise, it does emphasize the quadriceps while deemphasizing your glutes and hamstrings. If you are looking to build your quads while maintaining your posterior leg muscles, this exercise will help.
Steps:
Hold a kettlebell in front of your chest. Tuck your upper arms into your sides and brace your core.
Stand with your feet about hip-width apart, heels on weight plates or a plank. You can also use specially designed heel wedges.
Keeping your torso upright, bend your knees and squat down so your thighs are at least parallel to the floor. Let your knees travel forward beyond your toes.
Drive the balls of your feet into the floor and stand back up.
Continue for the desired number of reps.
Muscles Targeted:
Primary: Quadriceps.
Secondary: Hamstrings, gluteus maximus, core.
Benefits:
You don’t need a lot of weight to benefit from this knee-extension exercise.
An easy way to overload your quads while saving your hamstrings and glutes.
An excellent exercise for home workouts as you only need a single kettlebell to do it.
Tips:
The more you raise your heels, the more quads-centric this exercise becomes.
Experiment with the width of your stance to see what works best for you.
You can also do this exercise with a dumbbell.
Read more: Heels elevated goblet squats guide.
7. Wall squat
Wall squats are an isometric exercise, meaning your muscles generate force but do not change length. Isometric exercises are ideal for home workouts as they require little or no equipment. Done the way described below, wall squats are an excellent knee extension exercise.
Steps:
Stand with your back to a smooth wall. Lean against it and then slide down until your thighs are roughly parallel to the floor. Your shins should be vertical.
Push your lower back into the wall as hard as you can. Imagine you are trying to push your feet forward and away from you.
Keep pushing for the specified duration and then relax.
Muscles Targeted:
Primary: Quadriceps.
Secondary: Hamstrings, gluteus maximus.
Benefits:
A very joint-friendly knee extension exercise.
No equipment required, so an ideal exercise for home workouts.
As hard as you make it – push harder for a more intense workout or ease off to make it less demanding.
Tips:
Change squat depth to hit your quads from a range of angles.
Push as hard as possible to develop muscle strength and size or hold for longer to develop muscular endurance.
You can also do this exercise on one leg, like this:
Knee Extension Benefits
Not sure if knee extension exercises are worth adding to your workouts? Consider these benefits and then decide!
Increased quadriceps mass and strength
Well-developed quadriceps can add a lot to your physique. The quadriceps are the triceps of the lower body, and the more muscular they are, the better your legs will look. The quads are also a critical muscle for squatting and leg pressing big weights, so if you want to put more plates on the bar, you may benefit from bigger, stronger quads.
Better athletic performance
Whether you want to run faster, jump higher, or kick harder, stronger quads will help. Compound exercises will improve general leg strength, but knee extension exercises are the best choice when you want to emphasize your quadriceps.
Stronger, more stable knees
The quads are not just knee extensors. They are also knee joint stabilizers. This is especially true for the vastus medialis, which is crucial in ensuring your knee tracks correctly. Strengthening your quads with knee extension exercises could help prevent joint wear and tear and reduce your risk of developing knee pain in the future.
Drawbacks
While knee extension exercises are mostly safe and beneficial, there are also a few drawbacks to consider:
Risk of knee injury
At the risk of being contradictory, knee extension exercises can be good for your knees, but they can also cause knee pain.
With only one joint bearing the brunt of the workload, some knee extension exercises can be hard on your knees. However, warming up properly, not using too much weight, and always using good form will keep any risks of knee pain to a minimum.
Not as functional
Most everyday and athletic lower body movements involve the hips and knees working together. This is your body’s way of maximizing performance and spreading the work across several joints and muscle groups.
For example, lifting a heavy weight using your knees, hips, spine, and arms is much easier than relying on your arms alone.
As such, some knee extension exercises are not as functional as other multijoint leg exercises. That said, if your goal is to emphasize your quads while using your glutes and hamstrings less, knee extension exercises are still your best option.
FAQs
Do you have a question about the 7 best knee extension exercises or lower body training in general? That’s okay because we’ve got the answers!
1. Are knee extension exercises safe?
All exercises have the potential to be dangerous if you perform them with poor technique or use too much weight. Accidents can also happen, and even seemingly benign exercises can sometimes result in injury.
While some knee extension exercises put a lot of stress on your knee joints, that doesn’t mean they’re automatically risky or dangerous. That stress could help make your joints stronger and more resilient.
That said, if you have a pre-existing knee problem or any of the exercises described above cause pain, you should proceed with caution. Choose the exercises that give you the best results with the least amount of risk.
Make your chosen exercises even safer by always warming up beforehand and never using more weight than you can handle with good form.
2. How often should I do knee extension exercises?
It’s generally best to train major muscle groups twice a week, e.g., Monday and Thursday. This provides a good balance between work and recovery. However, it’s usually best to avoid doing the same exercises for both workouts. Such an approach will soon become boring.
Instead, create two different programs so that your workouts are less repetitive and you train your muscles from a variety of angles.
3. How many reps and sets of knee extension exercises should I do?
Your rep range is not as important as was once thought. Not so long ago, it was generally accepted that to build muscle, you had to work in the 6-12 rep range, and anything outside this range meant your workouts would be less productive.
More recently, studies have shown that you can build muscle with almost any rep count, provided you take your sets close to failure (1). Even high reps with light weights build muscle. This is excellent news for home exercisers and anyone who prefers to avoid heavy lifting.
However, heavy weights are still best if you want to get stronger, and low reps (e.g., 1-5) are more effective than high reps for developing maximal strength.
Regarding the number of sets, you should be able to fatigue your muscles with 3-4 sets of your chosen exercises. If you feel like you need to do more, you have either been resting too long between efforts or not getting close enough to failure.
4. What is the best way to warm up for knee extension exercises?
Given that most knee extension exercises put a lot of stress on your joints, it makes sense to warm up thoroughly before doing any of them. Warming up increases muscle elasticity and blood flow while improving joint mobility.
The best way to warm up before knee extension exercises (and any strength workout) is:
5-10 minutes of progressive cardio, e.g., walking, jogging, and then running or slow, medium, and fast cycling.
Dynamic mobility and flexibility exercises for the joints and muscles you’re about to train.
A couple of light sets of the first 1-2 exercises in your workout for practice and to increase muscle activation.
Read more about warming up for strength training here.
5. Do you have a knee extension workout for me to try?
We sure do! Give this workout a spin the next time you want to pulverize your quads.
Exercise
Sets
Reps
Recovery
1a
Reverse Nordic curls
3
12-20
90 seconds
1b
Sissy squats
8-12
2
Cable leg extensions
2
12-20
60 seconds
3
Heels elevated goblet squat
2
8-12
60 seconds
4
Wall squat
1
Max time
N/A
Perform exercises 1a and 1b as a superset. Do the first exercise and then immediately do the second. Rest a moment, and then repeat the superset a couple more times. And yes, that burning in your quads is entirely normal!
Wrapping Up
Glute and hamstring training are very popular right now, with many exercisers wanting to build a strong and muscular posterior chain. Because of this, quads training has fallen a little out of fashion.
After all, when you dedicate entire workouts to your butt and hammies, it doesn’t leave much time for training your other leg muscles.
While it’s great that the posterior chain is finally getting the attention it deserves, this doesn’t mean that you should neglect your knee extensors. In fact, your quadriceps are every bit as important as your glutes and hamstrings.
Use the information in this article to ensure your quads are just as strong and well-developed as your posterior chain.
References:
1 – PubMed: Effects of different intensities of resistance training with equated volume load on muscle strength and hypertrophy https://pubmed.ncbi.nlm.nih.gov/29564973/