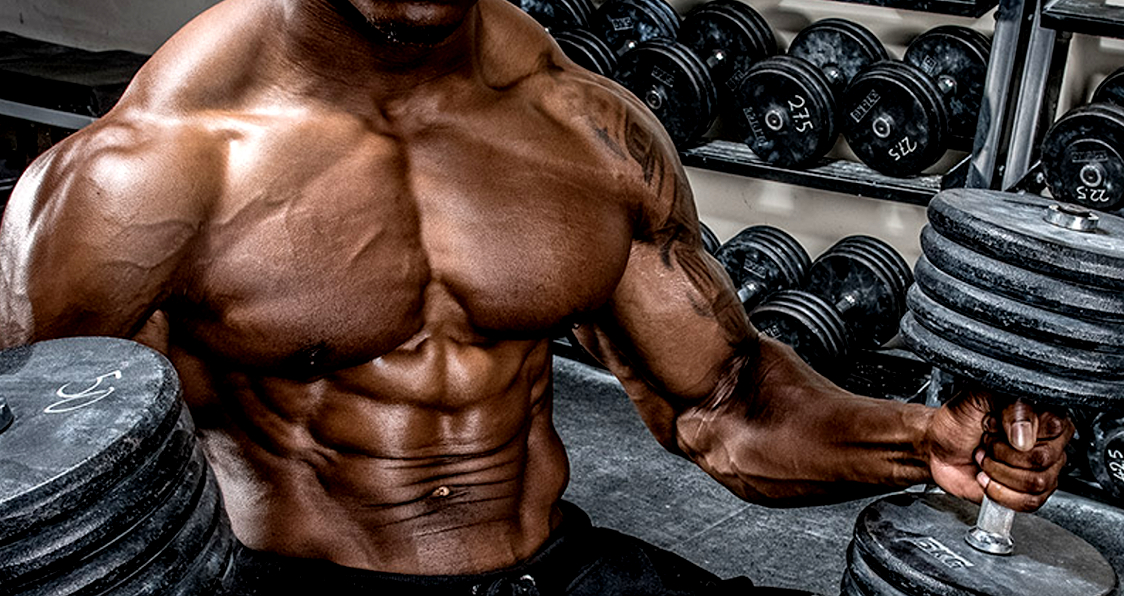
Tag: Training Tips
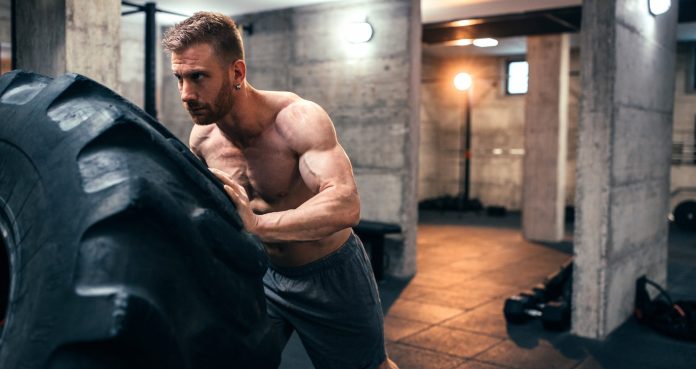
Benefits Of Circuit Style Training For Your Bodybuilding Goals
Circuit style training can improve all of your bodybuilding goals while saving you time for an efficient workout.
While we all love working out, sometimes our workout tend to be longer than we would like. The benefits of a good workout can get our energy up and improve our mindset while promoting positive gains, but dragging on a workout can be a burden on our already busy schedules. Circuit style training is one way to boost growth, get our metabolisms going, and save us time in the gym while still providing for a great workout.
Lifting big weights can also be incorporated into a circuit style workout, but of course that all depends on your goals. If you are going for max reps or sheer strength, then sticking with a few exercises to promote those big lifts is a must. But for those looking to shred and boost athletic performance, circuit style training is a great way to accomplish that.
What Is Circuit Training?
Circuit training is a style of workout performed with different exercises at a higher intensity and less rest between each station or exercise. This allows more muscle groups to be targeted as well as a way to elevate your heart rate to really get you working hard (1). Some people prefer a recovery that allows for proper rest, which could include stretching or simply catching your breath, while others prefer an active recovery, being lightly jogging in place or keeping your heart rate up with other forms of movements.
By working many multiple muscle groups, you will be able to have a longer workout. Switching off between two exercises can fatigue those muscles quickly, but circuit style training is something that can be done over a longer period of time with maximum gains while still providing a shorter time in the gym overall. The beauty of circuit style training is that it can be done in one long circuit, or broken up to target specific movements or muscle groups depending on your goals.
Benefits Of Circuit Training
Combine Strength & Cardio
Circuit style training allows you to combine heavy lifting with high intensity work to improve both strength and cardio. The constant movement will work to get those many muscle groups to failure while also promoting endurance building and an increased aerobic capacity (2). This can lead to an increase in overall athletic ability and functional movements for any sport, competition, or other training style. Putting in big lifts will keep you working on sheer strength and combining that with constant movement will only keep your heart rate high and your lungs fired up.
Boost Metabolism & Burn Fat
This can kickstart your metabolism into a serious fat burning machine. With an elevated heart rate, this exercise will work to really promote calorie burn resulting in you needing more energy to sustain in the workout (3). Relying on excess stores will get your metabolism going and burning through those stubborn fat stores so you see great results. Burning off that stubborn fat can lead to that desired shredded physique you work so hard for.
Promotes Time Efficiency & Effectiveness
By combining multiple exercises into a more intense, higher efficiency workout, you are able to save time in the gym and work to build more effective movements. While being in the gym is something we all love, for the feeling of bettering ourselves in amazing, it can be a burden on our busy lives. Work to eliminate all the excuses of working out by doing what you can to save time and maximize those gains.
Supports Full Body Workout Without Boredom
The monotony of working out can also be challenging and something we desperately want to avoid and circuit style training can offer a new full body workout that can eliminate any boredom that may arise. The great part about this style of training is that you can work your lower body and upper body to provide for great benefits all while keeping that heart rate elevated. Added bonuses like increased range of motion and flexibility will be enhanced by strengthening often times missed stabilizer muscles and a good stretching routine after your workout will only enhance that. Don’t let a boring workout cause you to just move through the motions and really work to promote gains with something new like circuit style training.
How To Design A Good Training Plan
Identifying your goals is the number one place to start. Knowing exactly what you want out of a workout can work to target specific areas of interest for your gains while keeping you engaged in forming that plan. Focusing on your strengths and weaknesses can also promote a solid understanding of what you need to develop further or areas you may need to improve. Once you have this nailed down, look into plans others promote and feel free to mix and match to see exactly what will work for you. You can always swap in and out to cause muscle confusion and to always have a new workout that keeps you having fun while making huge gains.
Wrap Up
Circuit style training is a great way to promote a full body workout while also saving time and allowing you freedom for other things you love. We all need a workout but it is important to make sure it fits with your lifestyle. The benefits of circuit style training will promote great gains to your strength and cardio while also working on shedding that unwanted fat to give you that desired physique you work so hard for. The bonus is that it is time efficient and can promote full body functionality. Look into adopting a good plan for you to see just how this can benefit your lifestyle and keep you from the boredom of the same old workout. You won’t be disappointed with the results!
Let us know what you think in the comments below. Also, be sure to follow Generation Iron on Facebook, Twitter, and Instagram.
*Images courtesy of Envato
References
Klika, Brett (2013). “High-Intensity Circuit Training Using Body Weight: Maximum Results With Minimal Investment”. (source)
Wilke, Jan; Kaiser, Stefanie; Niederer, Daniel; Kalo, Kristin; et al. (2018). “Effects of high-intensity functional circuit training on motor function and sport motivation in healthy, inactive adults”. (source)
Nunez, Tony P.; Amorim, Fabiano T.; Beltz, Nicholas M.; Mermier, Christine M.; et al. (2020). “Metabolic effects of two high-intensity circuit training protocols: Does sequence matter?”. (source)

How To Increase The Time Under Tension To Maximize Your Gains
Increase The Time Under Tension With These Steps
Time under tension (or TuT) plays a vital role in muscle development. As the name suggests, TuT is the amount of time your muscle is put under tension while performing resistance exercises.
Your muscle tissues break while you lift weights and increasing the time under tension can add to the effect as the challenge for the muscles under focus increases. An increase in TuT can set the ground for your muscles to recover stronger, bigger and better.
Change the Rep Tempo
One of the most effective ways to increase the time under tension and annihilate your muscles is to change the rep tempo. For example, if you take one second to lower the dumbbell, one second to curl, and no rest at top and bottom while performing a dumbbell bicep curl, you are spending almost 3-4 seconds while completing a repetition.
You can modify the rep tempo by taking three seconds to lower, two to lift, and one second of rest each at the top and the bottom of the repetition. By the end of the exercise, your muscles will be under tension for 7-8 seconds as compared to the 3-4 seconds mentioned above. Your muscles will be asking you for mercy by the end of the set.
Increase The Number of Repetitions
There is more than one way to skin the cat when it comes to changing the time under tension while resistance training. Increasing the number of repetitions in every exercise you perform is another popular way of making the muscles do more work.
Increasing the TuT will help you in establishing a better mind-muscle connection. Don’t be surprised if you get the best pump of your life as you increase the TuT. Your muscles will be filled with blood and lactic acid as you add to the load on your muscles with the techniques mentioned in the article.
Hold the Rep at Top and Bottom
Holding the reps at the top and bottom of the movement can be a great way of increasing the time under tension and amplifying the muscle pumps. As you pause at the top and bottom, you should squeeze the living hell out of your muscles.
Make sure you don’t convert the pause into rest by overstaying your welcome. You should pause at the top and bottom for not more than two seconds. The purpose of the hold is to increase the TuT and not to give your muscles relief.
Use Advanced Training Techniques
Almost all the advanced training techniques increase the time under tension. The increased TuT is also a reason you get the muscle-ripping pumps while performing one of the advanced training techniques.
Some of the techniques you can try to increase the time under tension are rest-pause sets, intraset stretching, drop sets, forced reps, and negatives. You’ll need a spotter on exercises with forced reps and negatives and it’s important you practice safe measure while performing these sets as a small mistake can lead to an injury.
Follow a full range of motion while performing all the exercises and focus on contracting your muscles with every rep to make the most of your workouts. Don’t rush through the exercises as the pump gets intense. Work with the pain and hit your exercises to complete muscle failure.
Header image courtesy of Envato Elements
Do you use supplements? Let us know in the comments below. Also, be sure to follow Generation Iron on Facebook and Twitter.

Incorporating The Inverted Row Into Your At Home Workouts
A Versatile And Functional Back Exercise That Develops Strength and Size
Rowing exercises are one of the best exercises that can be done to maximize back strength and size development.
There are a number of different rowing exercises to choose from such as the barbell bent row, seated row, dumbbell rows, upright row, and the inverted row.
While all of these have their unique benefits, the inverted row is the variation that can be performed at home without having to rely on having plenty of equipment.
This article will begin by providing information on the inverted row, rowing technique, benefits, and muscles worked. It will also provide a number of inverted row methods and variations.
The Inverted Row Technique
In order to effectively perform the inverted row, run through the following five steps:
Begin by gripping the object (i.e. TRX, sheet, bar) ensuring that the hands are slightly wider than shoulder-width and the arms are fully extended
Walk your feet forward and continue to do so until you are leaning backward at an approximate 45-degree angle
Keep the body entirely straight by engaging the core and pull the shoulder back and down
Pull hard to bring the body up towards the object ensuring that the shoulders stay down and the elbows stay tight to the sides
Squeeze tightly between the shoulder blades and then return to the starting position by reversing the movement in a controlled manner
Inverted Row Muscles Worked
As mentioned, any rowing exercise will highly activate a number of muscles in the back. However, there are a number of other pulling muscles that are worked.
The muscles worked during an inverted row include:
Latissimus Dorsi
Trapezius
Rhomboids
Posterior Deltoids
Scapular Stabilizers
Biceps
Forearm Extensors
Core Musculature
While the lats and trap play the largest role in the row, the rhomboids, posterior deltoids, and scapular stabilizers assist in terms of providing pulling power and joint stability (1).
The biceps contract powerfully to cause flexion at the elbow joints while the forearm extensors ensure that a tight grip is maintained throughout.
Finally, the core muscles maintain a strong contraction throughout to provide the body with stability.
How To Perform The Inverted Row At Home
One of the best things about the inverted row is its versatility. There are a number of pieces of kit that can be used to perform the inverted row.
The following sections will provide three popular and convenient methods for performing the inverted row at home.
1) TRX Inverted Row
The TRX is a suspension trainer that is not only extremely functional but also very simple to use at home or when traveling.
To build strength, the TRX uses your own bodyweight and gravity. The TRX is basically a set of adjustable straps and handles which allow you to perform a range of upper, lower, and core exercises.
It can be attached to door frames, hooked around tree branches, or an appropriate sturdy structure that can be found allowing you to workout pretty much anywhere.
To perform the inverted row, begin by attaching the TRX to an anchor point and adjust the straps. From there, grab the handles and lean back to a 45-degree angle and complete the rowing action.
2) Sheet Inverted Row
An even more basic set-up for the inverted row involves using a bedsheet and a door frame.
Simply tie a knot at the end of the bedsheet, pass it over the top of the door, and then close the door tight. The knot will serve as an anchor and prevent the sheet from sliding.
Once the sheet is anchored, grip the bedsheet with both hands ensuring that the hands are slightly wider than shoulder-width and then row.
A big benefit associated with this variation is the impact it has on your grip. The sheet is inherently difficult to grasp tightly and, therefore, with regular practice, grip strength will improve.
3) Bar Inverted Row
This technique proves the versatility of the inverted row as all you really need for this final variation is a bar. This can literally be any bar – providing that is solidly fixed and runs horizontally.
Many outdoor gyms and parks have an array of bars that allow you to perform callisthenic exercises such as inverted rows.
Depending on the bar you are using, you may need to lift the feet off the floor to increase the lean angle. To do this, elevate the feet by placing them on another object such as a bench or a box.
Inverted Row Variations
For those who are at an intermediate or advanced stage of training, it may be necessary to increase the challenge of the inverted row.
Therefore, this section will highlight a range of inverted row variations to try.
1) Feet-Elevated Inverted Row
As highlighted, lifting the feet from the floor increases the lean angle which makes the exercise a lot more demanding.
For this variation, simply place the feet on any stable object and complete the row as normal.
2) Single-Arm Inverted Row
While the unilateral variation of the inverted row is evidently more challenging on the back muscles, it is also extremely challenging in terms of core strength and stability.
With the bilateral row, the movement is symmetrical and balanced, however, by removing one hand from the equation, it becomes much more challenging to keep the body straight throughout.
3) Single-Arm Rotational Inverted Row
While the previous exercise requires you to prevent rotation, this variation allows rotation through the trunk.
Perform a standard single-arm inverted row, but this time, as you descend, twist the body and reach the hand down to touch the floor.
4) Weighted Inverted Row
One of the most effective methods of progressing the inverted row is to add weight. While some balance weights on the body, this is not recommended as they could fall and cause injury.
Instead, consider wearing a weight vest or a backpack with weights inside to add intensity to the row.
5) Eccentric Inverted Row
There are three different types of muscle contraction. When the muscle lengthens this is known as an eccentric contraction.
Therefore, this variation accentuates the eccentric phase of the inverted row. Complete the pull as normal, however, on the descent, slow down substantially and take three to five seconds to reach the bottom position.
6) Isometric Inverted Row
Another type of muscle contraction is an isometric contraction. This is where the muscle is in a contracted state, however, is neither shortening nor lengthening.
To perform an isometric inverted row, perform the pull and then hold the top position for three to five seconds before descending. During the hold, focus on squeezing the shoulder blades together tightly.
Inverted Row Progressions
When it comes to maximizing progress with the inverted row, there are a number of considerations that you need to make.
The first is in terms of progressive overload. Applying this training principle is vital if you desire to make serious progress with your training.
Progressive overload is simply increasing the intensity of the exercise over time. This forces the body to continually adapt and improve.
Applying progressive overload is easy in a gym setting where there is plenty of additional weight. However, with bodyweight exercises, it can be more challenging.
The first place to start is to consider the body angle. While decreasing the lean angle reduces the intensity, increasing the angle increases the difficulty.
Therefore, over time, gradually begin to increase the lean angle. You can even elevate the feet to increase the angle further.
Alternatively, you can consider performing some of the variations listed above. After all, research suggests making exercise alterations can effectively accelerate strength gains (2).
Inverted Row Training Volume
The inverted row can be performed using a wide range of sets, reps, and intensities. The loading scheme that you use depends on the goal that you currently have.
If your goal is to improve back strength, then it’s important that you focus on intense, low-rep work. Research has determined that this will lead to the most optimal strength progress (3).
However, there is an exception to the rule here. Beginners or those who have never performed the inverted row previously should begin with a lower intensity, even if their goal is strength-based.
Focus more on developing good technique before you start to add intensity to the exercise. This will ensure that you are performing the movement most effectively while also reducing injury risk.
For those who wish to improve muscle size, generally increasing the total training volume should be the priority. The sets and rep scheme that decide you use is of less significance (4).
Final Word
Generally, rowing exercises are excellent for developing the major muscles of the back such as the lats, traps, and rhomboids.
The inverted row is a particularly useful exercise as it is highly versatile and can conveniently be performed at home or outdoors.
Let us know what you think in the comments below. Also, be sure to follow Generation Iron on Facebook, Twitter, and Instagram.
References
1 – https://pubmed.ncbi.nlm.nih.gov/26422610/ Youdas, James W.; Keith, Julianne M.; Nonn, Danielle E.; Squires, Adam C.; Hollman, John H. (2016-07). “Activation of Spinal Stabilizers and Shoulder Complex Muscles During an Inverted Row Using a Portable Pull-up Device and Body Weight Resistance”. Journal of Strength and Conditioning Research. 30 (7): 1933–1941. doi:10.1519/JSC.0000000000001210. ISSN 1533-4287. PMID 26422610.
2 – https://pubmed.ncbi.nlm.nih.gov/24832974/ Fonseca, Rodrigo M.; Roschel, Hamilton; Tricoli, Valmor; de Souza, Eduardo O.; Wilson, Jacob M.; Laurentino, Gilberto C.; Aihara, André Y.; de Souza Leão, Alberto R.; Ugrinowitsch, Carlos (2014-11). “Changes in exercises are more effective than in loading schemes to improve muscle strength”. Journal of Strength and Conditioning Research. 28 (11): 3085–3092. doi:10.1519/JSC.0000000000000539. ISSN 1533-4287. PMID 24832974.
3 – https://www.ncbi.nlm.nih.gov/pmc/articles/PMC4562558/ Mangine, Gerald T; Hoffman, Jay R; Gonzalez, Adam M; Townsend, Jeremy R; Wells, Adam J; Jajtner, Adam R; Beyer, Kyle S; Boone, Carleigh H; Miramonti, Amelia A; Wang, Ran; LaMonica, Michael B (2015-08-13). “The effect of training volume and intensity on improvements in muscular strength and size in resistance-trained men”. Physiological Reports. 3 (8). doi:10.14814/phy2.12472. ISSN 2051-817X. PMC 4562558. PMID 26272733.
4 – https://pubmed.ncbi.nlm.nih.gov/28834797/ Schoenfeld, Brad J.; Grgic, Jozo; Ogborn, Dan; Krieger, James W. (2017-12). “Strength and Hypertrophy Adaptations Between Low- vs. High-Load Resistance Training: A Systematic Review and Meta-analysis”. Journal of Strength and Conditioning Research. 31 (12): 3508–3523. doi:10.1519/JSC.0000000000002200. ISSN 1533-4287. PMID 28834797.

Kai Greene’s Top 10 Training Tips
Kai Greene Workout Special – GET BIG!
Training for bodybuilding means having patience, dedication, and a true desire to want to change your physical form. That also means having a strong mental gain to go along with your physical prowess. The mental game is what sets an amateur apart from a pro. It many fields, athletic or otherwise, the mental game can be the absolute key to either victory or defeat. No one knows this better than Kai Greene.
But not everyone is going to have a powerful metal game right out of the gate. For many people it’s not as simple as waking up one morning with an epiphany. Sometimes it takes the wisdom of a mentor, the ideologies of a seasoned veteran to bolster your confidence and boost not only your mental game, but offer adequate knowledge to the mechanics of your physical game as well.
Well if you’re an avid bodybuilding fan then you should already know the name Kai Greene. The talented bodybuilder has a wealth of knowledge that few athletes possess and now he’s willing to share it to the masses in the hopes that it will improve everyone’s bodybuilding approach.
Kai Greene’s Current Stats
Nickname: The Predator, Mr. Getting It Done
Division: Men’s Open (currently not competing)
Birth date: 7/12/1975
Height: 5’8″
Competition Weight: 248 lbs
#1. First Things First – Mind Muscle Connection
The number one factor in training is the mind-muscle connection. Practicing your poses between sets will eventually have your mind and muscles speaking the same language. Kai used to do pushups everyday until he reached 100 a day. This method really helped him to connect his mind with the pecs because of the continuous resistance he put on the muscle group day in and day out.
The iso-tension effect of flexing the muscles between sets can help to hit the muscle fibers that a set may miss. This can help to target those muscle fibers in the next set. Posing isn’t just something you do on a stage in front of an audience. It should be part of your bodybuilding program in order to really hit all areas of a given muscle group.
#2. Reps, Reps, Reps
In regards to reps, Kai rarely goes under 10 and may do more than 20 depending on how he’s feeling on that particular day. Kai never tries to limit himself as far as rep ranges are concerned. Like mentioned before, he prefers to go by feel and let his muscles determine how many reps they can handle. Sometimes letting the muscles call the shots rather than the mind can yield even further growth as the muscles can take even more punishment than your mind can imagine.
#3. No Half Assing
Speaking of reps, when it comes to contracting and stretching the muscles, Kai avoids half reps. Rather than focus on getting the weight up it’s all about getting that perfect stretch at the bottom of the lift while getting the best contraction possible at the top of the lift. Stretch, hold, and squeeze. There might be an allure to hitting that higher weight – but you’re cheating yourself out of real hypertrophy.
#4. The Cure For Lagging Calves
Where training calves are concerned, Kai alternates his heels either in or out during calf raises as a means of attacking both the inner and outer parts of the calves. Rather than doing separate sets, Kai pauses during the set and changes the position rather than rest. He will alternate this position with pauses each time as a means to really thrash every part of the calf.
#5. Search Your Feelings
If you want to be able to really hit a muscle correctly then you have to go by feel. As Kai puts it, the weight is simply the tool that you utilize. Focusing on lifting the weight itself makes no sense. Just like it was stated before – you should be focusing entirely on the muscle being hit. Don’t focus on the weight! It’s important to know your body. To understand it. This is essential if you want to reach real size on a pro level.
6. It’s all about hypertrophy – not amount of weight.
It’s not about lifting more weight. It’s about bodybuilding not weightlifting. Bodybuilding is more concerned with contracting the muscles against consistently greater amounts of resistance to achieve hypertrophy. The number of weight is not important. The contraction and hypertrophy is. If you have to drop the weight to make better movements, so be it.
7. Warm ups are key.
A great, high paced warm up before hitting your chosen body part will help to give you great conditioning, to maintain lower body fat throughout the year and also helps with recovery time in between sets. This is an essential component to Kai’s workout regimen. The body will get used to this pace and help keep the body firing on all cylinders.
8. We know you hate running but…
Cardiovascular training should be maintained all year around in order to maintain a leaner physique throughout the year. It will also help the body operate efficiently under oxygen deficiency. Shorter rest periods will also help to improve the body’s functionality and conditioning through a hard workout.
9. Leg day, all day.
For Kai Greene – if he’s training his legs that’s the only muscle group he focuses on for the day. Why? Because he can’t physically muster up the power train anything else. That’s the key tip here: when you train your legs you should be putting them through so much hell that you can’t do anything else. Kai Greene has some of the best legs in the IFBB because in between exercises he is dead on the floor. A full blast of intensity from start to finish.
10. It’s all on you.
You’re responsible for your own success. You can’t allow yourself to rely on anyone or anything else to build your success. It’s the willingness to sacrifice and to motivate yourself that will lead you to the body that you seek. Many people focus on end results, but the real goal is to motivate yourself day in and day out to get into the gym and get to work. There’s no coach, no training partner, no well wisher that’s going to push you to train. It has to be on you and the passion you have for building what you perceive as the ultimate physical form.
Here below is a more detailed breakdown on his workouts, diet and supplementation.
On Monday’s, it’s Chest and Calves
Kai Greene performs 6 exercises in one day, for a total of 3 to 4 sets and 15 reps. He also adds calves into this routine with each exercise being performed for a minimum of 4 sets and 10-15 reps.
1. Full Bench Press (3 sets, 12 reps)
2. Dumbbell Fly (3 sets, 12-15 reps)
3. Arm Pullover (3 sets, 15 reps)
4. Decline Bench Press (3 sets, 15 reps)
5. Seated Calf Raise (4 sets, 15 reps)
6. Standing Calf Raise (4 sets, 15 reps)
On Tuesday’s, it’s Shoulders and Forearms
On Tuesday, Kai focuses on his shoulders and forearms workout routine. There are 8 exercises within Greene’s shoulders and forearms routine.
1. Arnold Press (3 sets, 10-12 reps)
2. Lateral Raise (3 sets, 10-12 reps)
3. Neck Press (3 sets, 10-12 reps)
4. Dumbbell Front Raise (3 sets, 10-12 reps)
5. Shrugs (3 sets, 15 reps)
6. Reverse Curls (3 sets, 8-12 reps)
8. Hammer Curls (3 sets, 13-15 reps)
On Wednesday’s, it’s Back day
Kai performs a back routine that focuses on 4 exercises. Every set is around 12-15 reps.
Lats Pulldown (3 sets, 12-15 reps)
2. Barbell Pullover (3 sets, 12-15 reps)
3. Seated Cable Rows (3 sets, 12-15 reps)
4. Bent-Over Barbell Rows (3 sets, 12-15 reps)
On Thursday, it’s Leg day
Kai Greene performs his bodybuilding leg routine for 6 exercises. Each exercise is performed for 3 to 4 sets and 10-15 reps.
1. Squats (3 sets, 10-12 reps)
2. Lying Leg Curls (3 sets, 10-12 reps)
3. Deadlifts (3 sets, 10-12 reps)
4. Lunges (3 sets, 10-15 reps)
5. Seated Calf Raise (4 sets, 10-15 reps)
6. Standing Calf Raise (4 sets, 10-15 reps)
On Friday, it’s Arm day
On Friday, Greene performs an arms workout routine by doing 6 different exercises varying between 10-15 reps.
Hammer Curls (4 sets, 12-15 reps)
2. Reverse Curls (4 sets, 12-15 reps)
3. Preacher Curls (4 sets, 10-12 reps)
4. Bicep Curls (4 sets, 10-12 reps)
5. Dumbbell Kickbacks (3 sets, 12-15 reps)
6. Triceps Pulldown (3 sets, 12-15 reps)
Saturday is cardio day
On Saturday, Greene performs an hour long cardio session on the stair master.
Kai Greene Diet
Kai Greene follows a strict bodybuilding diet that on and off season that comprises of 1.8 grams of protein for each pound of his body mass and 0.5 grams of healthy fats per pound of body weight. He takes his pre-workout at least thirty minutes before starting the workout. And he finishes off his workouts with a protein shake.
Here is Kai Greene’s diet:
Meal 1
6 ounces of grilled chicken
6 egg whites
¼ shredded cheddar cheese
Meal 2
2 scoops of Chocolate Protein Powder
2 cups of Almond Milk
Meal 3
6 ounces of grilled steak
1 teaspoon Flaxseed Oil
2 cups of Brown Rice
Meal 4
6 ounces of boneless Chicken Breast
4 stalks of Asparagus
1/3 cup of quinoa
Meal 5
7-ounces of Wild Salmon
2 medium-sized yams
5 ounces of baked potato
Suppplements
Kai Greene strictly uses the following supplements to help propel his gains:
Find Kai Greene’s tips helpful? Let us know in the comments and forums. Also, be sure to follow Generation Iron on Facebook and Twitter.

Avoid These Training Mistakes To Get The Most Out of Your Workouts
The Mistakes To Avoid In Your Workouts
As much as you would like to have perfect workouts, small mistakes can deprive you of that happiness, especially if you’re a beginner. Most people make the mistakes listed in the article and by doing so leave gains on the table.
Read the article and carefully critique yourself if you’re making the mentioned errors. You might be making the mistakes without realizing it. You’ll notice a substantial improvement in your physique over time by fixing these errors.
Quantity Over Quality
Some people make the mistake of lifting too heavy when they should be focusing on their form. Your muscles don’t know how much weight is on the bar, your ego does. Leave your ego on the door when you enter the gym. Ego lifting does nothing more than increase the chances of injury in the gym.
Focus on your form and contracting your muscles with every repetition. You should also have a strong mind-muscle connection during your workouts. Achieving a pump can be a good indicator if your mind-muscle connection and muscle contractions are on point.
Letting The Intensity Drop
Many people let all their hard work go in vain by letting the intensity drop after they are done with a set. If your goal is to lose weight or build muscle mass, you should keep the intensity of your workouts as high as possible.
Give yourself a deadline and complete the workout within the specified time. Don’t waste the time between sets by using your phone or talking to people. Use the rest time to pose and stretch out the muscle.
Unstructured Training
Some people follow a vanilla training program which isn’t designed for their body. Your workout program should cater to your strengths and weaknesses. You should focus on building up your weaknesses while polishing your strengths to build a symmetrical physique.
Thoroughly analyze your body and look for lagging muscle groups. Design your training so it follows a structured approach to all your muscle groups. You’ll see your weaknesses disappear and aesthetics improve as you follow a customized training plan.
No Warm-Ups Or Cool-Downs
Many people start working out as soon as they hit the gym and walk out right after their last exercise. You are leaving gains on the table by not giving your body the proper warm-up and cool-down.
Prime your muscles for your workout session by stretching them out and doing a couple of lightweight warm-ups. Your muscles are filled with lactic acid and many other toxins after a workout and you can flush them out with a cardio session or foam rolling.
No Tracking
It’s incredibly important to set goals before you start training. Starting training without a goal is like leaving your home without a pre-determined destination. Once you have a goal, write it down on paper and track your progress weekly to ensure you’re heading in the right direction.
Track your body measurements, workouts, and how much weight you use on certain exercises. If you’re improving in all the aspects, keep going or otherwise make the necessary adjustments.
Header image courtesy of Envato Elements
Are you making any of these mistakes? Let us know in the comments below. Also, be sure to follow Generation Iron on Facebook and Twitter.
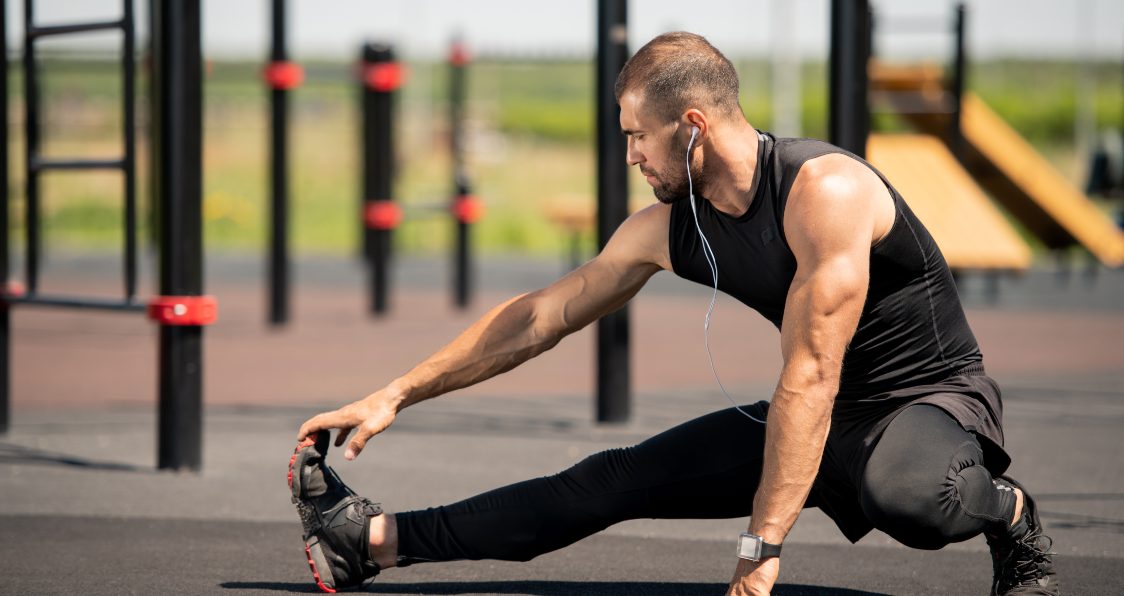
Flexibility Vs. Mobility: The Difference You Need To Know
Flexibility and mobility are often used interchangeably, but there is a big difference that is important for your growth and performance.
People have used the terms flexibility and mobility interchangeably for years, but given that these two are very different, a push to change the rhetoric and separate these two has begun. We all know it is important to stretch. To stay loose and limber for whatever workout comes our way while also improving our posture and keeping us stable and balanced for those big lifts.
But static stretching and dynamic stretching work differently for us and while both work to lengthen and stretch out our muscles, it is important to really dive into the differences this causes for both mobility and flexibility. Flexibility deals with someone’s ability to move joints effectively through a complete range of motion to allow for a passive movement. Mobility is the body’s ability to move through that range of motion with control, which requires flexibility.
The key for both of these is actually stability. When we sat down with coach and fitness entrepreneur Don Saladino to discuss how to improve posture, he broke down for us the importance of stability. Stability equals strength and by combining flexibility with stability we come out with mobility.
What Is Flexibility?
Flexibility, to put it simply, is the quality of bending easily without breaking. It is the range of motion in a joint or a group of joints to move through a complete range of motion effectively. This typically allows a movement to happen passively, thus allowing us to hold a certain stretch without any pain in that joint or the joints surrounding it (1). This could be anything from holding a static stretch to bending down for something or getting out of bed. Flexibility varies from person to person given the differences in muscle length and can increase with exercise and stretching.
What About Mobility?
Mobility is the ability to move or be moved with ease. The key to longevity, mobility is the ability control the entire range of motion. This requires strength, also known as stability, as well as flexibility to improve that range of motion. This allows us to have total control in order to maximize all of our movements functionally and effectively to lift more without any unwanted pain or strain (2).
Isolated mobility is when a certain muscle or muscle group is mobile. This may work for sport specific movements, but overall mobility should be our goal. This is judged by how balanced your entire body is as a whole and is far more important than only being partially mobile. With overall mobility, you will be able to tackle any position or lift thrown your way to really maximize performance.
Why This Difference Matters?
Many people are flexible, meaning they can hold a certain stretch for a long time and even put their legs behind their heads. But that doesn’t mean they are mobile. Muscles that are flexible may be trying to compensate for areas where stability is lacking. If stabilizer muscles are not strong enough, then we rely on our mover muscles to pick up the slack, resulting in pain or poor posture. This ends up limiting mobility (3).
Since flexibility is the muscles ability to be lengthened, that doesn’t solve our problem with range of motion. Performing a big lift requires our joints to be able to move that weight as effectively as possible and that ability to move through range of motion is where are desire for mobility comes into play. So, if flexibility plus stability equals mobility, then we need to both be able to lengthen our muscles and have the proper strength to support range of motion. Control is key here and that comes through strength, coordination of our muscles and the proper functioning of our stabilizers.
Ways To Improve Mobility
To start, it is important for us to work on both strength and balance to enhance our stability and control, as well as working on flexibility to ensure loose muscles that can lengthen to their optimal capacity. Through proper lifts and a solid stretching routine, whether static or dynamic, we can start to see this change really happen.
For mobility, we should focus on:
Mobility Drills: These are geared towards range of motion and involve everything from moving, contracting, and relaxing our muscles. They can be isolated for specific areas or work multiple areas at once.
Stretching: Either static or dynamic, this will work to loosen up any stiff muscles that may be stopping you from moving well. Performing a dynamic stretching routine before your workout can really prime those muscles and a good static stretch post-workout can work to alleviate any muscle soreness and pain that may strike (4).
Coordination: This is important for you to get your body to act how you want it to. Better coordination with your joints and muscles will increase performance and you will feel more aware of the effects of your training.
Balance: Through balancing exercises, you will improve stability to provide a solid foundation to give yourself a good base for training. Activities like yoga and Pilates are great for this.
Massage Techniques: Using a foam roller, massage ball, or a massage gun are great ways to release tight muscles and work to lengthen them to relieve yourself of pain. Looking into a professional massage can also work wonders for you as a massage therapist will know exactly where to target to increase your performance (5).
Check out our list of the best foam rollers here or our list for the best massage guns here!
Wrap Up
While flexibility and mobility may be used interchangeably, they are very different at their cores. Flexibility is the ability to move joints effectively through a complete range of motion, often times passively. Mobility is the body’s ability to move through that range of motion with control, which requires stability. Stability equals strength and building that base is equally as important to mobility as being flexible. A simple equation to remember: Flexibility plus stability equals mobility.
Let us know what you think in the comments below. Also, be sure to follow Generation Iron on Facebook, Twitter, and Instagram.
*Images courtesy of Envato
References
Bushman, Barbara A. (2016). “Flexibility Exercises and Performance”. (source)
Haley, Jimmy. “The Importance of Flexibility and Mobility”. (source)
Hodges, P.; Gurfinkel, V.; Brumagne, S.; Smith, T.; Cordo, P. (2002). “Coexistence of stability and mobility in postural control: Evidence from postural compensation for respiration”. (source)
Harvard Health Letter (2013). “The importance of stretching”. (source)
National Center for Complementary and Integrative Health. “Massage Therapy: What You Need To Know”. (source)
7 Ultimate Training Tips For Developing Forearm Size
Building The Forearms for Fuller Looking Arms
When looking to build significant muscle size, training tends to focus on developing large muscles groups such as the glutes, quads, lats, pecs and delts.
While the arms do often receive a lot of attention too, the focus is predominantly on the muscles of the upper arm – the biceps and triceps.
As a result, the forearms can be neglected and therefore can under-develop in comparison to other areas.
It is important to build size and definition in the forearms in order to develop full-looking arms that matches your overall physique.
The general approach to forearm building is to concentrate on forearm isolation exercises for the forearm flexors and extensors – exercises such as wrist curls.
While these types of exercises can certainly allow for forearm growth, there are a number of other methods that can be employed to accelerate the rate of development.
The 7 Tips For Big Forearms
If you are serious about building size in the forearms, adopt a number of the following 7 tips and look to incorporate them into your training program.
1) Ditch the Straps
Wrist straps can be an excellent training tool which eliminate the detrimental impact of failing grip strength by securing the bar to the hands (1).
With exercise like the deadlift, failing grip strength can cause the individual to cease exercising before they reach absolute muscular failure.
Adding wrist straps will provide a much securing grip on the bar and allow the performer to work through to muscular failure without the grip slackening and failing.
However, when it comes to building size in the forearms, leave the straps in the locker room.
During all pulling exercises, you hold the bar by wrapping the fingers and thumbs tightly around the equipment your using, otherwise it will fall out of your grasp.
The extrinsic muscles of the forearms must work hard to maintain a secure grip throughout the duration of the exercise (2). Over time, these muscles will improve in strength and increase in size.
Furthermore, the heavier the load lifted, the more the forearms flexors must engage. Therefore, when lifting heavy, forget using straps in order to get maximize forearm activation.
There are a number of common pulling exercises that are excellent for forearm development and grip strength – exercises such as the deadlift, barbell row, and chin-ups.
Pushing exercises, such as the bench press and overhead press, are also effective forearm extensor developers – however, pulling exercises are superior for forearm engagement.
2) Grip Hard
Leading on from the last tip, it may be the case that you want to work the forearms but do not want to forgo using wrist straps.
This is absolutely fine. It is still possible to work the forearms effectively while still using the straps.
Here are two methods that are particularly useful for really pumping up the forearms.
Grab a barbell, place it on a power rack and load it up. Grip tightly and look to hold it at arms length for approximately 30 – 60 seconds.
It is also possible to this with dumbbells too. Select two heavy dumbbells, secure your grip and hold, again for 30 – 60 seconds.
Look to repeat this 8-10 times to really get the forearms burning.
3) Utilize Cables
As mentioned earlier, one of the most common forearm exercises is the wrist curl and reverse wrist curl. Barbells and dumbbells are most frequently used with this exercise.
However, the cables may be a better choice when it comes to wrist curls. This is because the cables maintain tension throughout the entirety of the movement.
This places an even greater demand on the wrist flexors and extensors and which may lead to a more efficient development of the forearms.
For the cable wrist curl, attach a short bar to the cable and adjust the pulley to the lowest position. Using D rings for this exercise is also acceptable.
In a kneeling position, place the forearms on the knees and use the thighs like a preacher bench. If preferred, set up a preacher bench in front of the cable machine instead.
Focus on flexing and extending the wrist only and perform the prescribed number of reps. It may be of greater benefit to focus on one wrist at a time rather than both simultaneously.
4) Go Old-School
You don’t need the latest fitness equipment to work the forearms effectively. In fact, there are a number of excellent forearm exercises that use basic kit.
One of the simplest exercises uses a dowel and a length of string. Insert the string through dowel, attach a weight to the string and the look to turn the dowel round and round to bring the weight up.
Once the weight has risen up to the dowel, unravel the string by gradually turning the dowel back and lowering the weight to the floor once again.
The hand gripper is another example of another basic piece of forearm developing kit. You can buy hand grippers with a range of grades.
Some take 60 pounds of pressure to close whereas others can be as high as 360 pounds of pressure! Be aware, this exercise is a lot more challenging than it looks.
5) Increase Wrist Training Frequency
The forearms are made up of dense muscle tissue which can be a little more resistant to change. Therefore, training them more often is crucial to facilitate size improvements.
Furthermore, research indicates that one of the most effective methods of promoting muscular hypertrophy is to increase the frequency of training (3).
Therefore, if looking to accelerate forearm hypertrophy, consider performing forearm orientated exercises more regularly – perhaps as much as every second day.
Be careful not to schedule forearms into your training the day before performing back and biceps. Having sore forearms when performing pulling exercises may negatively impact your performance.
6) Use a High Rep Scheme
Typically, for hypertrophy, a rep range of 6-12 reps will suffice. However, for forearm training, it is recommended to aim a lot higher than that.
Aim to complete high rep sets with a minimum of 15 reps. Feel free to experiment with rep ranges utilizing anything between 15 – 50 reps per set.
Many individuals believe that completing high reps does not positively impact the rate of muscle growth. However, high reps have been found to be beneficial when it comes to hypertrophy (4).
7) Consider Loaded Carries
Finally, it may be worthwhile adding in heavy carry exercises into your training – exercises such as the dumbbell farmers walk.
Not only will these type of exercises place a great demand on your grip strength and forearms, they are also very simple to set-up and execute.
For the dumbbell farmers walk, all that is required is a clear space and a heavy load. Simply pick up the load and take a number of steps forward while keeping the weight tight to the body.
Keeping going until the grip gives in and forces you to stop. Over time, gradually add more load to continuously challenge the forearms and force them to adapt.
Final Word
While wrist isolation exercises are very useful for developing forearm size and strength, there are a number of other strategies that can be adopted to bring about substantial growth.
Consider utilizing a number of the aforementioned forearm tips to your training, train hard, be consistent and over time, the forearms will noticeably grow causing the arms to look comprehensively bigger and fuller.
For more news and updates, follow Generation Iron on Facebook, Twitter, and Instagram.
References:
1-Coswig, Victor S.; Machado Freitas, Diogo Felipe; Gentil, Paulo; Fukuda, David H.; Del Vecchio, Fabrício Boscolo (2015-12). “Kinematics and Kinetics of Multiple Sets Using Lifting Straps During Deadlift Training”. Journal of Strength and Conditioning Research. 29 (12): 3399–3404. doi:10.1519/JSC.0000000000000986. ISSN 1533-4287. PMID 26595133
2-Mitchell, Brittney; Whited, Lacey (2019), “Anatomy, Shoulder and Upper Limb, Forearm Muscles”, StatPearls, StatPearls Publishing, PMID 30725660
3-Ochi, Eisuke; Maruo, Masataka; Tsuchiya, Yosuke; Ishii, Naokata; Miura, Koji; Sasaki, Kazushige (July 2, 2018). “Higher Training Frequency Is Important for Gaining Muscular Strength Under Volume-Matched Training”. Frontiers in Physiology. 9. doi:10.3389/fphys.2018.00744. ISSN 1664-042X. PMC 6036131. PMID 30013480.
4-pubmeddev. “Effects of Low- vs. High-Load Resistance Training on Muscle Strength and Hypertrophy in Well-Trained Men. – PubMed – NCBI”. www.ncbi.nlm.nih.gov.
4 Reasons You Should Have a Deload Week
The Importance of a Deload Week
If you’ve been following the same training protocol and no matter how many tweaks and adjustments you make to your training plan, nutrition, and sleep, you still can’t break past plateaus, you may want to try adding a deload week to your program.
Many people make the mistake of continuously pushing themselves and pushing harder when they reach a plateau, but the reality is that you’ll want to do the opposite and push yourself less. Giving your body a break from the taxing effects of doing a lot of volume at a high intensity is sometimes just what it needs to hit new personal records (PRs) and continue to build the body that you want.
Below, you’ll learn all about what a deload week is and the reasons you should start including them in your training plan.
What Is a Deload Week?
Rest is important for your body and muscles to grow and get stronger. Of course, one way you can rest from working out is by completely taking time away from the gym and being a couched potato in general. However, there are slightly more productive approaches that will have you burning calories and giving you all the other benefits of exercise without having to give up on moving completely.
For one, you can partake in your favorite physical activities, including swimming, hiking, biking, rowing, basketball, etc. This is known as active recovery. Although you won’t be giving your body a complete rest day, which is still important, you’ll be giving your body a break from weightlifting so that your muscles can grow.
Outside of playing different sports, you can follow a method that still allows you to do the exercises and work your muscles in your training plan. This is known as a deload week.
Simply put, you’ll still do the same workouts that you normally do, except instead of pushing yourself on weight and reps, you’ll reduce the workload you do.
4 Reasons to Deload
1. Better Rest and Recovery
Your muscles don’t grow while you’re lifting, they grow while you’re resting. And while taking full rest days — where you do no activities that day — are important, having some weeks that are less intense than other weeks is important as well (1). When you lift weights, you place a lot of stress on your central nervous system (CNS) and muscles. Lifting weights well-rested will allow you to lift the most weight you’re capable of, which will continue to get you stronger and build you muscle. Whereas always lifting weights in a fatigued state won’t allow you to push yourself at your highest capability each workout, hampering your total strength and muscle growth.
2. Hit New PRs
Since you’ll be able to push yourself harder each workout when you’re fully rested and full of energy, you’ll be able to explode your lifts and hit new PRs on movements, including barbell bench press, barbell squats, lat pulldowns, and barbell bicep curls.
This study from the Journal of Strength and Conditioning Research found that collegiate athletes who followed autoregulatory progressive resistance training — increasing or lowering weight based on how they felt — gained more strength than following a linear progression model — a set increase in intensity and weight from week to week (2).
3. Improve Your Joint Health
Resistance training is healthy for your joints, however, doing too much weightlifting can be detrimental to your joint health. Giving your muscles, bones, and joints, a rest from external stimulus can improve your joint health and keep them strong long-term (3).
Adding a deload week to your training plan will reduce your chances of injury and your joints will feel stronger and you’ll have fewer tweaks you’ll have to worry about that may prevent you from using heavier weights.
4. Reduced Stress
Overtraining can decrease your testosterone and increase your cortisol — your stress hormone — which negatively affects your muscle growth and overall health. Taking some time off to allow your body to rest up and reset can prevent this (4).
Weight training and pushing your physique to new heights places a lot of stress on your mind and body, and allowing yourself some time with less volume at a lower intensity can give your mind and body the reduction in stress it needs to increase your lifts when you go back to your normal intensity and volume.
How to Deload
There’s no cookie-cutter method of doing this, but in general, you’ll be using much lighter weight and doing fewer sets.
The best way to do this is to cut back 1-2 sets for each exercise and reduce the weight you use by 40-60% of what you would normally do. With this method, you can still do the same number of reps you usually would do, you’ll just be doing much less volume and intensity.
How Often Should You Deload
There is no set amount of time or cycle you’ll want to follow to do this. It’s best to listen to your body. For example, if you’ve been stuck at the same weight for a while or are feeling extra fatigued, that would be a good time to incorporate a deload week to give your body a break and let it reset. However, it’s recommended that you deload once every 6-12 weeks, depending on each individual and athlete. For example, a powerlifter who is pushing themselves with more intensity and volume should take a deload week more often than an average gym-goer who is pushing themselves at a lower intensity.
Conclusion
When your body stops growing and getting stronger, or you’re feeling fatigued and exhausted from your training plan, adding a deload week can be just what you need to push past plateaus and give your body the rest and reset it needs to continue on its path to building your desired physique.
A deload week improves your rest and recovery process, helps you hit new PRs, improves your joint health, and reduces stress.
Have you ever tried a deload week before? If so, let us know how it went in the comment sections below. Also, share this article on social if you think other people will get value out of it.
References
1 – Cheng, A. J., Jude, B., & Lanner, J. T. (2020). Intramuscular mechanisms of overtraining. Redox biology, 35, 101480. https://doi.org/10.1016/j.redox.2020.101480
2 – Mann, J. B., Thyfault, J. P., Ivey, P. A., & Sayers, S. P. (2010). The effect of autoregulatory progressive resistance exercise vs. linear periodization on strength improvement in college athletes. Journal of strength and conditioning research, 24(7), 1718–1723. https://doi.org/10.1519/JSC.0b013e3181def4a6
3 – O’Brien M. (2001). Exercise and osteoporosis. Irish journal of medical science, 170(1), 58–62. https://doi.org/10.1007/BF03167724
4 – Flavio A. Cadegiani, Claudio E. Kater, Matheus Gazola. (2019) Clinical and biochemical characteristics of high-intensity functional training (HIFT) and overtraining syndrome: findings from the EROS study (The EROS-HIFT). Journal of Sports Sciences 37:11, pages 1296-1307.

Best Bodyweight Partner Exercises To Add To Your Workouts
These bodyweight partner workouts are perfect for those with someone to workout with who don’t have access to a gym!
These are challenging times to workout. The current state of everything with gyms closed or open with limited capacity has probably made it difficult for you to find that stable routine you once had. On top of that, the weather is starting to change, that bitter, cold air moving in faster than we may like. Those valuable runs or outdoor activities are dwindling and you may feel stuck with what to do. Working out at home can be a challenge and we fully understand the struggle of balancing your busy life and your workouts especially with no gym to escape to.
If you have a partner or workout buddy living with you, thankfully there are some great exercises you can do together! Keeping you both on a routine promotes a healthier lifestyle overall, both physically seeing gains and staying mentally sharp during these challenging times. Plus, it is more fun to work out with somebody. If you prefer to workout alone, that is perfectly understandable and we get that, but working with someone can open new doors to exercises, tips, and a great energy that you may be missing out on.
Believe it or not, it is possible to get a good workout in without all the equipment a gym provides. While we get used to grinding in the gym with our favorite machines, maybe its time to switch things up and get a great full body workout in with your partner as the only equipment you need. The right person can keep you accountable and push you to limits you may have not thought possible.
Getting Started
To start, have a conversation with your partner about your goals as well as their goals and work together to achieve them. Any injuries, current or past, sensitive spots, or weight differences can also be discussed to run a safe and efficient workout. While focusing on form and technique together, you both can see great gains with a monster partner workout.
Partner Exercises
Plank With A Clap
Planks are great all around ab builders while also promoting great gains for balance and stabilization as well as low back pain (1). Both you and your partner hold the plank position, keeping your cores engaged with a neutral spine. Facing each other, you can either start a timer or count the claps as reps. While in the plank position, reach your right arm out and clap their left hand as they extend their arm, alternating arms as you go.
Push-Up With A Clap
This is very similar to the plank with a clap but we had to throw this in there. Working your chest, arms, and abs, a push-up is one of those exercises that should be staple in any workout (2). Both you and your partner perform a push-up and clap hands with the opposite arms. Continue alternating for a set amount of time or reps.
Burpees
Burpees are a killer full body workout and that love-hate relationship we have with them may be slightly easier with a partner present. Have your partner lie on the ground flat on their stomach, or they can hold a plank position. Then perform a burpee, jumping over them to the other side as you perform this exercise. The added challenge is jumping over them as opposed to jumping straight up in the air.
Pistol Squat
Pistol squats can be challenging, but with a partner, these exercises become a whole lot easier. Use your partner as support for these. Stand facing each other and join opposite hands, making sure you have a good grip. With one leg off the ground, squat into the sole leg planted firmly on the ground into a one-leg squat. You and your partner will both be performing the exercise and providing balance for each other.
Wheelbarrow Push-Up With Squat
This is an interesting exercise but one you both can have fun with. Your partner will be in a push-up position, but you will hold their ankles at about hip height. Your job is to hold them stable while also maintaining a good, solid squat position. At the same time you will both lower, your partner into a push-up and you into a squat, for your desired number of reps.
Bodyweight Squat
We had to put this in there because the bodyweight squat is a great exercise to perform (3). You can hold one hand to your partners or cross your arms and hold each opposite hand as you both engage in a squat position. With a tight core and flat back, both of you will lower into a squat and control the motion back up.
Side Plank With Rotation And Clap
Side planks can be brutal, but are perfect for your obliques as well as providing balance and promoting good posture (4). You and your partner will be back to back in an opposite arm side plank. Extend your arms at the top and clap hands with your partner, followed by you both rotating down and clapping your hands underneath each other. Keeping a good, stable core is key for this exercise.
Hand Stand Hold
Hand stands can be challenging but are fun exercises to perform for stability as well as using multiple muscles to keep yourself engaged. And you look good doing it! Have your partner help you into a hand stand position, or hop into it on your own if able, and hold for your desired amount of time. Your partner will stand next to you as back-up incase you start to lose your balance. Switch positions and let your partner show off a little.
Wrap Up
Working out with a partner is a great way to be accountable to yourself and someone else while promoting great growth, both physically and mentally. While it can be challenging to get a good workout in, having someone to help you, and someone you can help, can make these more fun and engaging as you seek that desired physique. Give these partner exercises a try and really see the benefits of a great workout.
Let us know what you think in the comments below. Also, be sure to follow Generation Iron on Facebook, Twitter, and Instagram.
*Images courtesy of Envato
References
Gupta, Gautam; Alok, Mayank (2018). “Effectiveness of Plank Exercise in Low Back Pain”. (source)
Contreras, Bret; Schoenfeld, Brad; Mike, Jonathan; Tiryaki-Sonmez, Gul; Cronin, John; Vaino, Elsbeth (2012). “The Biomechanics of the Push-up: Implications for Resistance Training Programs”. (source)
Kritz, Matthew; Cronin, John; Hume, Patria (2009). “The Bodyweight Squat: A Movement Screen for the Squat Pattern”. (source)
Blasimann, Angela; Eberle, Simon; Scuderi, Manuel M. (2018). “Effect of Core Muscle Strengthening Exercises (Including Plank and Side Plank) on Injury Rate in Male Adult Soccer Players: A Systematic Review”. (source)
4 Tips On How To Handle ‘Two-A-Days’ To Maximize Your Gains
Two a-days are a practice reserved for those with luxuries of time and strength of spirit.
In this age of increasing amateur fitness, more and more gym-goers are finding excuses to fit workouts in over 7 times a week. Here are some tips to help manage the grueling but rewarding practice of two- a days.
1. Recovery Is King
Of course this always applies, but extreme attention must be payed when doing two a-days. If one is not getting enough sleep or calories, two workouts a day will start to become a detriment rather than a boost. Also, sitting at a desk for 8 hours in between workouts is a recipe for a stiff inhibited body- vulnerable to injury. Extra care must be taken both during off time, and during warm ups/ cool downs to make sure the body is supple and ready to work.
2. Diversify Workouts
Two a-days are not meant to be just an acceleration of an average workout program. Doing a program twice as fast as intended usually means you’re not working hard enough, or the program sucks. Two a-days are beneficial for the individual looking to attack the body in multiple ways.
Cardio workouts are excellent pairings on heavy bodybuilding days, can be done with a variety of machines, and can be anaerobic or aerobic in focus. As far as weightlifting, hitting the same movements multiple times a week can be beneficial, but the law of diminishing returns always looms large.
Make sure you have multiple ways to hit each body part, and that resistance types, set, and rep ranges are altered to constantly provide a new stimulus while allowing for recovery.
3. Have A Goal
Often, the biggest danger of doing two-a-days is becoming confused in routine- making up workouts on the way to the gym, altering workouts senselessly while at the gym, etc. It’s easy to be swept up in the feeling of ‘the grind,’ doing a ton of work without actually having a specific intention behind any of it.
Write down exactly what you want to accomplish and plan around that, or at least use it to orient yourself every day, so that the work, which often becomes monotonous, does not become mindless. Putting in twice the work and not seeing results because the work had no clear purpose can be a damaging psychological blow.
4. Make sure you have the drive.
From my own experience in sports training, often doing two-a-days becomes half-assing two workouts instead of really pushing through one. When one knows that they will have to work out later in the day, it’s easy to take the first workout lightly. This is a nasty habit. Both workouts don’t need to be balls to the wall, but they need to be complete workouts. Don’t delude you’re doing twice the work if you’re really just taking twice the time every day.
How do you prepare for two-a-days?
Let us know in the comments below. Also, be sure to follow Generation Iron on Facebook, Twitter, and Instagram.