Tag: Training Tips

Powerful Chest Building Exercises
The Key To Chest Developing
Chest development is so often high on the priority list for many bodybuilders, powerlifters and gym regulars. There are a number of exercises that we can perform to place significant demand on the muscles of the chest and increase muscular size and strength. In order to develop the chest to its full potential, we must think about incorporating a number of chest strengthening exercises which place an adequate tensity on all muscles of the chest.
The pectorals are the muscle group of the chest which consists of 4 individual muscles that drive and control movement around the shoulder. The two major pectoral muscles are the pectoralis major and the pectoralis minor. The pec major muscle originates from the sternum (front of the ribcage) and clavicle (collarbone) and inserts directly on the humerus of the upper arm. The role of the pec major is to cause flexion, extension and rotation of the humerus (1). The pec minor, meanwhile, lies beneath the pec major, originates from the ribs and inserts on the scapula (shoulder blade). The pec minors role is different from it’s bigger brother as it works to stabilize the scapula.
There are two small muscles of the pecs which are often overlooked – the subclavius and the serratus anterior. As the name suggests, the subclavius can be found underneath the clavicle where it’s role is to depress or “pull” the clavicle down. The serratus anterior originates from the ribs and inserts on the scapula which allows it to pull the shoulder blade forward and around the side of the body.
If we are looking to add mass to the chest, the primary emphasis should be on exercises that challenge the pectoral major – considering it is the biggest muscle of the 4 and therefore has the greatest growth potential. With that being said, if we are looking for comprehensive chest development it’s important to select exercises which target the smaller pectoral muscles too.
The following exercises have been selected simply because they are supreme mass building exercises. However, a further reason for their inclusion is that they all effectively place a high demand on all 4 muscles of the pectorals and contribute to overall chest growth.
The Best Mass Building Chest Exercises
By reading through these 10 chest building exercises, you may quickly notice some similarities and trends. Many of the exercises do replicate the same or similar movement patterns. However, we will use different equipment or a change in the angle of application (i.e adding an incline) to effectively load the pectorals.
You will also find that the vast majority of the exercises are compound or “multi-joint” exercises. Since the goal is mass orientated, it would be appropriate to perform a number of compound lifts considering the substantial impact they have on the body (2). There are a couple of useful isolation or “single-joint” exercises listed, however, their purpose is to facilitate improvement with the compound exercises and iron out any weaknesses.
As stated, a wide range of equipment is utilized – machines, cables, dumbbells, barbells, and body weight. Each piece of equipment will provide a slightly different challenge and training stimulus for the pectorals.
1. Barbell Bench Press
The undisputed king of chest building exercises for a number of reasons. With free weight exercises, you will find that you can lift the heaviest loads when using the barbell, therefore, you can reasonably expect to lift a substantial weight with the barbell bench press. By lifting heavy, we increase the amount of mechanical load that the muscles are exposed to which will drive muscular hypertrophy (growth).
To execute the bench press, lie back on the bench and align your eyes with the barbell. Keeping feet flat on the floor, bring them under the hips to create a slight arch in the lower back. Grip the bar slightly wider than shoulder width to place maximal demand on the pecs. Having a narrower grip will involve the triceps more heavily, taking some demand away from the pecs. Drive hard through the heels and brace the core muscles before removing the bar from the rack and bringing it over the chest. Drop the bar down until it makes contact with the chest and then drive upward to return to the starting position. It is essential to ensure that the elbows are slightly down from the line of the shoulders throughout the duration of the movement. This is done to reduce any risk of shoulder impingement or injury.
If you are new to bench pressing, always start light and practice form first. As you become more competent you can gradually begin to increase the load lifted. Regardless of your experience in lifting, always prioritize safety when benching with the barbell. This means, setting up the rack appropriately to catch the bar in the case of failure or using a spotter to prevent becoming trapped under the bar.
2. Incline Barbell Bench Press
The flat bench press places the body in a position that is parallel with the floor. With the incline bench press, this angle is altered so that the body is placed at incline angle (typically anywhere between 15° and 50°. The purpose of this is to shift the demand to the upper portion of the pectoralis major however, be aware that if the angle is too steep, we will begin to involve the deltoids (shoulders) to a greater extent rather than the pecs (3). Therefore, it would be wise to keep the bench at a low angle in order to hit the upper chest most effectively.
The form for the incline press is identical to the flat press with the only difference between the two being the bench angle. However, don’t expect to bench the same kind of weight with the incline press as you do with the flat press. Because we are utilizing =the upper portion of the pec rather the entirety of the the muscle, you will find the incline press to be more challenging than a flat press.
The standard approach to “chest day”, is often to perform flat bench first before moving onto incline press later in the session. The problem with this approach is that you approach the incline press already in a fatigue state and therefore cannot lift as heavy as you could if you were fresh. With this in mind, I would recommend alternating the variation you start with on a regular basis so that you can perform at an optimal level for both exercises.
3. Dumbbell Bench Press
The dumbbell bench press is an excellent variation of the barbell version. While you will be capable of driving heavier loads with the barbell, there may come a time where you hit a plateau with your benching. At this point, it may be a good idea to switch to the dumbbell bench press which will provide a slightly different stimulus to the pectorals and recommence progress (4).
One of the biggest benefits to dumbbells is the fact that both sides have to work independently which challenges joint stability to large degree. As a result of this instability, a number of stabilizing muscles are recruited in order to control the movement. A further advantage with the dumbbell press is the fact that range of motion is increased. With the barbell press, as soon as the bar touches the chest you must drive back up – there is no physical way to drop any further. With the dumbbells, there is no restriction to stop you from dropping the weights down to the side of the body thus increasing the distance the weight travels and engaging the muscle to an even greater extent.
Finally, the dumbbell bench press may be a good option for beginners or those who are concerned about heavy barbell benching. With the dumbbell press, there is no concern about getting trapped under the bar or failing, as there is with the barbell variation. If you were to reach muscular failure with the dumbbells, you can simply drop them to the floor – no spotter or rack required.
4. Incline Dumbbell Press
As with the barbell press, the dumbbell press can also be completed on an incline bench. Feel free to play around with the angle of the bench which will allow you to target the muscle from a variety of angles and lead to a more comprehensive development.
One variation that can performed with dumbbells that cannot be before with barbells, is the usage of rotation. With a fixed bar, it is impossible to rotate through the shoulder, however, the individual dumbbells allow for a medial rotation of the humerus which causes considerable activation in the pectoralis major.
5. Incline Dumbbell Pullover
The dumbbell pullover is not only an impressive pec developer, but it actually activates a vast number of upper body muscles – including the lats and the delts. The intention with the pullover is to extend maximally through the shoulders, over the top of the head all while maintaining straight arms. This motion demands a great deal of stabilization, control and drive from the pectorals.
To complete the pullover, set a bench up with a slight incline, lie down, start with the dumbbell above the chest and gradually drop the dumbbell over the top of the head without bending at the elbows before returning to the starting position. Remember, this is a single-joint exercise which should be treated as accessory work and therefore be performed towards the end of your session.
6. Machine Chest Press
The primary benefit of using the chest press machine is the fact that the machine requires no stabilization work from the muscles. Because it is a machine, the handles only move in a fixed range, negating the need for muscular stabilization. This, in turn, removes demand from stabilizing musculature, places it all on the pecs and therefore may enhance hypertrophy. If you are looking to gain mass, it would be wise to complete sets on the machine chest press at the end of the session.
7. Machine Decline Press
The machine decline press is another machine based exercise that will hit the pecs from a different angle. The back support is slightly angled backward which places your upper body in a decline position. In the same way in which the incline targets the upper pecs, the decline will hit the lower portion of the pecs.
8. Machine Pec Deck
As with all machine-based exercise, the primary benefit of the pec deck is the fact that it will only follow one path removing the need for muscular stabilization. The machine starts with the handles out to the side of the body. Grasping the handles with straight arms, the pecs must powerfully contract and drive the arms together until they are approximately in line with the shoulders. Despite the different movement patterns, studies have suggested similar muscular activation of the pectorals with both the bench press and pec deck (5).
9. Incline Cable Fly
The incline cable fly is the next stage up from the pec deck machine. Simply, the chest fly is one of best single-joint exercises for isolating the muscles of the chest. The benefits of using cables for the fly is the fact that, unlike with free weights, the cable maintains tension on the pectorals throughout the entirety of the movement which will apply a large amount of stress to the muscle and enhance muscle growth.
10. Chest Dips
The only bodyweight exercise that makes the cut is the chest dip. This can be performed grounded or suspended; having the feet on the ground simplifies the exercise while holding the entire body of the floor presents a greater challenge. In order to target the chest, ensure you go with a wide grip as a narrow grip will place too much stress on the triceps rather than the pecs. The idea is to flex at the elbow and drop the body down towards the floor until the upper arm is parallel with floor. From there, the pecs and triceps must powerfully contract to drive the body back up to the starting position.
Final Word
Understandably, it will be challenging, if not impossible, to program in all 10 exercises into your training. Instead, adopt a small number of these exercises, integrate them into your strength program and be consistent with your training to bring about significant changes in chest size and strength.
For more news and updates, follow Generation Iron on Facebook, Twitter, and Instagram.
References:
1- Solari, Francesca; Burns, Bracken (2019), “Anatomy, Thorax, Pectoralis Major Major”, StatPearls, StatPearls Publishing, PMID 30252247,
2-Paoli, Antonio; Gentil, Paulo; Moro, Tatiana; Marcolin, Giuseppe; Bianco, Antonino (December 22, 2017). “Resistance Training with Single vs. Multi-joint Exercises at Equal Total Load Volume: Effects on Body Composition, Cardiorespiratory Fitness, and Muscle Strength”. Frontiers in Physiology. 8. doi:10.3389/fphys.2017.01105. ISSN 1664-042X. PMC PMCPMC5744434. PMID 29312007.
3-Travi, Alexandre. “Effects of Variations of the Bench Press Exercise on the EMG Activity of Five Shoulder Muscles”.
4-Welsch, Elizabeth A.; Bird, Michael; Mayhew, Jerry L. (2005-5). “Electromyographic activity of the pectoralis major and anterior deltoid muscles during three upper-body lifts”. Journal of Strength and Conditioning Research. 19 (2): 449–452. doi:10.1519/14513.1. ISSN 1064-8011. PMID 15903389.
5-Stastny, Petr; Gołaś, Artur; Blazek, Dusan; Maszczyk, Adam; Wilk, Michał; Pietraszewski, Przemysław; Petr, Miroslav; Uhlir, Petr; Zając, Adam (February 7, 2017). “A systematic review of surface electromyography analyses of the bench press movement task”. PLoS ONE. 12 (2). doi:10.1371/journal.pone.0171632. ISSN 1932-6203. PMC PMCPMC5295722. PMID 28170449.

Gold Standard Hypertrophy-Specific Training
Driving Muscular Hypertrophy
Before we consider the many facets of Hypertrophy-Specific Training (HST), let’s first consider muscular hypertrophy itself. Hypertrophy is a word that is often thrown around in the health and fitness sector and, while many recognize that it refers to muscular growth, few understand the true demands and requirements necessary to bring about changes in muscle mass.
HST is a training method based on a number of well-researched scientific principles that were first discovered in the laboratory. Over the years, these methods have been refined and adjusted to coincide with the latest research and are seen as essential for all hypertrophy training. An effective HST program will incorporate the following principles in order to elicit maximal muscle growth.
The 4 Muscular Hypertrophy Principles
There are 4 primary principles that are considered foundational for all hypertrophy training. Over time, providing that these principles are applied appropriately, individual muscle fibers will be forced to adapt and grow in cylindrical size leading to an overall increase in total mass.
1. Mechanical Load
The first principle to consider is quite an evident one; it is the application of mechanical load. Mechanical load is the driving force for hypertrophy and appears to be the most important principle for stimulating muscle fibers to grow. Research indicates that muscles are stimulated to grow after being exposed to a certain degree of mechanical loading. This load can be applied through the use of barbells, dumbbells, kettlebells, resistance machines, and even your own bodyweight.
This mechanism involves a number of cellular processes and responses involving satellite cells, growth factors, calcium, and an array of other well-researched factors connected with muscle tissue strain (1). It’s important to recognize that it is not the effort required to lift the weight that causes adaptation to occur. Rather, it is the physical effects of placing a load on the muscle as it moves through concentric and eccentric phases that dictate change. Additionally, it’s important to recognize that building muscular fatigue does not dictate the rate of muscular growth. This, therefore, means that you do not necessarily have to work through to absolute muscle failure in order to stimulate significant growth.
2. Chronic Stimuli for Growth
As stated, muscles will only be stimulated to change after being subject to a certain degree of load. If we fail to regularly expose the muscles to a training stimulus, we fail to see substantial changes in muscle mass. It is essential to create the right environment for maximizing muscle growth; this is something that can be done through manipulating training frequency…
While we must train frequently to elicit growth, the general consensus is to allow for at least 48 hours before training the same muscle group again – this principle is applied with HST. It has been suggested that training any sooner than 48 hours may even hinder and impair protein synthesis and consequent muscular growth (2). The purpose of repeatedly loading the same muscle group every 48 hours is to maintain a high anabolic state and encourage maximal muscular growth.
While some may argue that 48 hours is not a long enough recovery period, research suggests that although the muscles may not have fully recovered structurally, exercising 48 hours later will not negatively impact the muscles recovery ability.
3. Progressive Load
As your muscles are exposed to a training stimulus, significant strength, neural and metabolic adaptations will take place. Initially, the stimulus applied to the muscles is new and in order to deal with the demands of the training, the muscles must adapt. However, if you continue training at the same intensity, you will quickly reach a point where your muscles will no longer adapt or increase in size. This is because they have adapted to the point that they can cope with the training stimulus.
This is why it is essential to apply the progressive load principle to our training. Progressive loading involves gradually increasing the demands of training – typically through manipulating a training principle such as intensity, volume or load. In simpler terms, we can progressively load our training by gradually adding more weight on the bar or by adding additional reps and sets into our workouts (3).
With HST, you will progressively load on a week by week, session by session basis. The goal is always to add more weight with each completed session. If applied correctly, you will continue to provide an effective training stimulus to the muscles thus facilitating muscular growth.
4. Strategic Deconditioning
This principle is the one hypertrophy principle that is most commonly overlooked however, it is vital for efficient progress. The reason that the deconditioning principle is often avoided is that it involves halting all training for a short period of time. On the face of it, a week off may be welcome however, many individuals fail to schedule in deconditioning periods believing them to be unnecessary.
Strategic deconditioning is simply the opposite of progressive overload. Its purpose is to reduce training intensity which allows the body time to recover from previous exertions thus priming the muscles for future growth. As stated, the principle involves a short period of time of no training (typically lasting one to two weeks). A deconditioning period should be applied as soon as improvements are seen to stall. The purpose of this is to allow the muscle to detrain to a certain extent and allow it to become sensitive to the training stimulus once again (4).
Finally, It’s important not to confuse strategic deconditioning and deloading. While the purpose behind both methods is similar, they are applied slightly differently. As mentioned, strategic deconditioning involves a total cessation in all resistance-based activity whereas deloading allows resistance training to continue but at a reduced intensity.
HST Guidelines
Although HST follows these universally recognized principles, HST programs do tend to look slightly different from others. The reason for this is that there are a number of specific guidelines that must be followed with all HST programs – guidelines that are based on scientific studies and backed up with years of research.
HST vs Conventional Training
The first apparent difference between HST and other hypertrophy programs is in regards to training volume. In order to stay true to hypertrophy principles, sets of heavy lifts are spread out through the week, rather than just one bout per week. For example, if there are 6 prescribed sets of squats, instead of completing the entire six in one sitting, the sets are spread out across the course of the week. So, instead of completing the full 6 sets of squats on Monday, as with many conventional programs, you perform 2 sets of squats on Monday, Wednesday and Friday.
This method allows you to apply the training stimulus to the muscle group multiple times per week. In doing so, you promote hypertrophy all while reducing the demand on the nervous system thus reducing the risk of overtraining. Additionally, there are a number of studies which suggest that performing multiple sets may not have a significant impact on hypertrophy and therefore, 1-2 sets will suffice. (5).
While the volume for individual exercises may be low, the total weekly volume for HST is average and actually comparable to universally used “split” hypertrophy programs.
Exercise Choice
For HST, and hypertrophy training generally, it is important to select heavy, compound exercises to provide the most potent training stimulus possible to a number of muscle groups. Compound exercises are movements which demand effort from a muscles groups across a number of joints. A few excellent examples of effective muscle-building compound exercises include squats, bench press, bent rows, and shoulder presses.
Isolation exercises, where the focus is on developing a single muscle group, can play a supplementary role in hypertrophy training, however, as stated, the main focus should predominantly be on compound movements.
Adjusting Reps
HST involves decreasing the number of reps performed every two weeks – starting with 15 reps for the first two weeks and gradually working down to sets of 10 and 5. This is done to accommodate a gradually increasing load as the weeks progress.
It is possible to adjust the rep range on a weekly basis (15, 12, 10, 8, 5), however, whether you adjust reps on a weekly or fortnightly basis has no impact on the rate of adaptation.
Building Fatigue and Lactic Acid
As with many hypertrophy orientated strength programs, HST incorporates high-rep sets. The intention with high-rep sets is to build lactic acid levels to increase the readiness of the muscles and connective tissues for dealing with heavy loads. This will not only work to reduce the risk of sustaining an injury but may promote healing and general health of tendons.
Eccentric Training
One final difference between HST and standard hypertrophy program is the inclusion of a two-week block of eccentric training. As you may already be aware, in order to produce movement, muscles must contract concentrically and eccentrically. Concentric contractions involve the shortening of muscles whereas eccentric contractions lengthen the muscle.
Eccentric training focuses on the lengthening of muscles under a load. For example, let’s analyze the bicep curl. In order to drive the bar upward toward the shoulder, the biceps must concentrically contract followed by an eccentric contraction in order to lower the bar back down to the hips. To complete eccentric bicep curls, this lowering phase must be accentuated with the contraction taking 3 – 5 seconds to complete.Eccentric training has been thoroughly researched over the years and what is clear is that eccentrics are stronger than concentric contractions and can, therefore, tolerate a greater deal of strain (6). Based on this, HST recommends that you perform eccentrics using more than your 5 rep max to increase the mechanical load on the muscle and contribute toward greater muscular hypertrophy.
HST Summary
– Train each muscle group every 48 hours– Look to increase the weight lifted with every workout– Decrease the number of reps every 2 weeks (15, 10, 5)– Add a 2-week block of eccentrics at the end of the training cycle, if necessary– Allow for Strategic Deconditioning, when appropriate
Sample HST Program
The following tables include a sample from a general HST program. You will find week 1 and week 2 workouts displayed below.
Week 1
Day 1 (Monday)
Day 2 (Wednesday)
Day 3 (Friday)
Back Squat2 x 15
Leg Press2 x 15
Back Squat2 x 15
Leg Curl2 x 15
Leg Curl2 x 15
Leg Curl2 x 15
Bench Press2 x 15
Dips2 x 15
Bench Press2 x 15
Chin-Ups2 x 15
Bent Rows2 x 15
Chin-Ups2 x 15
Shoulder Press2 x 15
Shoulder Press2 x 15
Shoulder Press2 x 15
Shrugs2 x 15
Shrugs2 x 15
Shrugs2 x 15
Bicep Curls2 x 15
Bicep Curls2 x 15
Bicep Curls2 x 15
Tricep Press2 x 15
Tricep Press2 x 15
Tricep Press2 x 15
Calf Raises2 x 15
Calf Raises2 x 15
Calf Raises2 x 15
Week 2
Day 1 (Monday)
Day 2 (Wednesday)
Day 3 (Friday)
Leg Press2 x 15
Back Squat2 x 15
Leg Press2 x 15
Leg Curl2 x 15
Leg Curl2 x 15
Leg Curl2 x 15
Dips2 x 15
Bench Press2 x 15
Dips2 x 15
Bent Rows2 x 15
Chin-Ups2 x 15
Bent Rows2 x 15
Shoulder Press2 x 15
Shoulder Press2 x 15
Shoulder Press2 x 15
Shrugs2 x 15
Shrugs2 x 15
Shrugs2 x 15
Bicep Curls2 x 15
Bicep Curls2 x 15
Bicep Curls2 x 15
Tricep Press2 x 15
Tricep Press2 x 15
Tricep Press2 x 15
Calf Raises2 x 15
Calf Raises2 x 15
Calf Raises2 x 15
Final Word
Many hold HST in extremely high regard as it has been found to be very effectual for building significant muscular size. It appears to be an extremely powerful muscle building method and as a result, HST has been adopted by a number of competitive bodybuilders. While HST is a method worth adopting for bodybuilders, over the years it has also proved to be very useful for athletes and participants across a number of sports – specifically, powerlifters and Olympic lifters.
For more news and updates, follow Generation Iron on Facebook, Twitter, and Instagram.
References:
1- The Journal of Strength and Conditioning Research 24(10):2857-72 · October 2010
2- Tipton, K. D.; Wolfe, R. R. (2001-3). “Exercise, protein metabolism, and muscle growth”. International Journal of Sport Nutrition and Exercise Metabolism. 11 (1): 109–132. ISSN 1526-484X. PMID 11255140.
3- Services, Department of Health & Human. “Resistance training – health benefits”. www.betterhealth.vic.gov.au.
4- Häkkinen, K.; Komi, P. V. (1983). “Electromyographic changes during strength training and detraining”. Medicine and Science in Sports and Exercise. 15 (6): 455–460. ISSN 0195-9131. PMID 6656553.
5- Carpinelli, R. N.; Otto, R. M. (1998-8). “Strength training. Single versus multiple sets”. Sports Medicine (Auckland, N.Z.). 26 (2): 73–84. doi:10.2165/00007256-199826020-00002. ISSN 0112-1642. PMID 9777681
6- Hoppeler, Hans (November 16, 2016). “Moderate Load Eccentric Exercise; A Distinct Novel Training Modality”. Frontiers in Physiology. 7. doi:10.3389/fphys.2016.00483. ISSN 1664-042X. PMC PMCPMC5110564

Best Foods To Help You Sleep To Maximize Growth & Recovery
Sleep is so important to our growth and recovery, but too often do we forget that.
How many hours a night do you sleep? No, really think about it? Some nights may see 8 hours, some 7, maybe the occasional sleep in with 9 hours. But if you start saying 4, 5, even 6 hours of sleep a night, you may be hurting all of your gains you worked so hard for. While it is true that some people can run on a full tank of gas with continually 5-6 hours of sleep, it is safe to say that the majority of us cannot. Don’t let this stigma of getting “too much” sleep stop you from getting enough sleep.
How many times has someone said to you, “You sleep too much. You need time to get things done”. Remember how annoying that is? Changing your mindset to say sleep allows you to do more in less time is only stating the facts about sleep. The more recovered you are, the better you will perform.
And that goes for our bodybuilding and fitness goals as well. The more recovered you are, the better you will perform. The gym might be where the gains are created, but recovery is where they actually come to life. When you lift, you are tearing the muscle fiber, thus making space for new muscle to form. But that muscle forms with proper rest and recovery, and a healthy nutrition plan, and sleep should be priority number one.
Let’s talk about sleep and how it helps with muscle growth, then of course, everyone’s favorite topic of which food is best for promoting sleep. Help yourself feel great by taking sleep more seriously.
The Sleep Cycle
There are 5 stages of sleep that scientists categorize during your sleep cycle. Stages 1-4 are considered non-REM and stage 5 is considered REM (1). We’ve all heard of REM and non-REM, but let’s jump into this a little more. It is important to note that changes in brainwave frequencies and amplitudes are what differentiate each stage.
Stage 1: The lightest stage of sleep, your brain frequency is just slightly lower than when you are awake.
Stage 2: Deeper than Stage 1, you are starting to fall into a state where its harder to be awakened.
Stages 3-4: Entering into a deeper sleep, these stages are known as slow-wave sleep and as we age, we spend less time in these stages.
Stage 5: You’ve now entered REM sleep and this is where dreams start to happen. The skeletal muscles don’t move and breathing is elevated.
It is Stage 3 where your muscles are most relaxed, blood supply starts to flow through the muscles more and tissue growth and repair occurs. Energy is restored and growth hormone is released starting to do its magic. REM sleep is where that energy for your brain and body starts to charge up for the next day’s performance (2).
Importance Of Sleep For Growth & Recovery
When paired with a healthy diet, sleep is that vital piece of recovery to really work to repair muscle and see an increase in your muscle growth. When you sleep, your body enters into a higher anabolic state that means your body has more time to repair those torn muscles. Your body also has a higher rate of protein metabolism than when you are awake. Protein is essential for muscle growth and by processing more protein, you allow for more build up which in turn increases muscle strength and size. As human growth hormone spikes, it plays a role in the productions and regeneration of cells to help fix any damage caused by your workout (3).
In terms of cognitive function, adenosine is sent to the brain to signal that it needs rest. During sleep, these levels of adenosine start to decline which in turn make you slightly more alert. This would seem like the brain is recharging and refueling to ensure alertness and focus for whatever the next day brings (4). We all know how it feels to operate the next day after a poor night’s sleep and the ability for its physical growth and recovery should be equally matched by its cognitive recovery as well.
Foods To Help You Sleep
While there are ways to help you sleep like meditation or quality supplements, some foods may help with this as well for a more natural source.
Almonds: A great healthy source of fat, almonds can boost sleep quality by serving as solid sources of melatonin and magnesium, both highly effective for sleep enhancing properties.
Walnuts: Packed with nutrients, aside from multiple benefits of walnuts, when it comes to sleep they are a great source of healthy fats and melatonin. They provide the omega-3 fatty acids ALA and DHA to increase serotonin.
Turkey: Turkey is a popular food source for promoting sleep because it contains tryptophan, an amino acid that encourages sleepiness and increases the production of melatonin (5). Also a great source of protein, turkey can improve your quality of sleep and really aid with muscle growth.
Fatty Fish: Filled with vitamin D and omega-3 fatty acids, both of these have serious benefits when it comes to improving your overall quality of sleep.
Beans: High in fiber, beans can help you spend more time in that vital slow-wave sleep of Stages 3-4. They can control glucose levels to stunt arousals that may come from sugar (6).
Tart Cherry Juice: Can improve sleep and lead to a longer sleep. Filled with melatonin, this works great but just be sure to get 100% juice with no additives.
Chamomile Tea: Has benefits to boost your immune system, reduce anxiety and depression, and improve sleep. It contains an antioxidant called apigenin which promotes sleepiness and reduces insomnia.
Wrap Up
Sleep and its value to our overall growth and performance is more than important when it comes to our training and performance success. Too often do we overlook sleep but we all need it. Getting adequate sleep should not make you feel lazy or unproductive, but quite the opposite. Getting good sleep clearly promotes cognitive functioning and allows for that much desired muscle growth to finally appear. Try these foods before bed and see how they can really boost your sleep to keep you looking and feeling great.
Let us know what you think in the comments below. Also, be sure to follow Generation Iron on Facebook, Twitter, and Instagram.
*Images courtesy of Envato
References
Cell Press (2018). “How REM and non-REM sleep may work together to help us solve problems”. (source)
Waterhouse, Jim; Fukuda, Yumi; Morita, Takeshi (2012). “Daily rhythms of the sleep-wake cycle”. (source)
Dattilo, M; Antunes, H. K. M.; Medeiros, A; Neto, M. M.; Souza, H. S.; de Mello, M. T. (2011). “Sleep and muscle recovery: endocrinological and molecular basis for a new and promising hypothesis”. (source)
Saini, Ekjyot K.; Gillis, Brian T.; Elmore-Staton, Lori; Buckhalt, Joseph A.; El-Sheikh, Mona (2020). “Longitudinal relations between sleep and cognitive functioning in children: Self-esteem as a moderator”. (source)
Hartmann, E. (1982). “Effects of L-tryptophan on sleepiness and on sleep”. (source)
Zhang, Duqin; Wang, Liping; Tan, Bin; Zhang, Weiqing (2019). “Dietary fibre extracted from different types of whole grains and beans: a comparative study”. (source)
How The Zottman Curl Can Build Bigger Arms & Enhance Gains
This exercise is a killer arm builder to really give you strength and size.
We all seek to have the arms the size of cannons. Working both our biceps and triceps are crucial for that overall development of our arms. While that horseshoe shape we all desire comes from working mainly our triceps, it is important to remember that working our biceps should never go unnoticed. While traditional curls and a host of other biceps exercise variations exist, there is one that you may be neglecting, or may not have heard about.
The Zottman Curl is a beastly exercise that can build not only your biceps, but also your forearms, making this a serious gains maker without adding unwanted strain and stress on your biceps or forearms. Named after legendary strongman George Zottman, this exercise can help you see record breaking lifts like it did for him some century or so ago. Standing the test of time, the Zottman curls are really a solid exercise to build those beastly arms.
Putting this exercise into your workout routine can not only increase strength and size, but also give you a new variation to mix in so the monotony of working out doesn’t deter you from seeing those gains come to life. By hitting your biceps on the way up and really hammering your forearms on the way down, this curl is something that will really enhance your overall strength and aesthetic.
Benefits Of The Zottman Curl
Since this works both you’re forearms and biceps, many of the benefits do provide for crossover, but there are some unique to only your forearms or biceps that are worth noting.
Time Efficient & Convenience: By working both your biceps and forearms, this allows for more efficient workouts and less time in the gym. Less time in the gym is not a bad thing, for it could be spent recovering, where muscle is built, or spending time away doing more things you love.
Change Of Pace: Doing the same old exercises can be boring and can also lead to you hitting a plateau. Don’t let your gains stop and throw in this exercise to really shake things up with your muscles. Adding in a fresh workout can enhance growth and keep your training sessions interesting.
Enhanced Grip: Grip strength is something we all take for granted and while we may not need a monster grip to deadlift an ungodly amount of weight, having functional grip strength for everyday tasks is important to have. Through the reverse part of this exercise, you strengthen your grip and hit all the muscles associated with it (1).
Forearm Activation: Finding good exercises to target your forearms can be challenging and many of them can actually hurt (2). This is a perfect exercise to work the forearms without pain while also getting the added benefit of working your biceps too.
Bigger Aesthetic: The Zottman curl is a great exercise to see growth in your biceps to really add more shape and development to enhance your aesthetic and increase your confidence in knowing you are working towards bigger arms.
How To Perform The Zottman Curl
Grab a pair of dumbbells and hold them with your palms facing upwards.
Perform a normal curl, flexing your bicep and really feeling a good squeeze at the top.
Once at the top, rotate your wrist so your palms now face away from you.
Lower towards the ground in the reverse of a curl and feel the stretch in your forearms as you gently guide the weight to the floor.
Once at the bottom, rotate your wrists back so your palms are facing upwards and repeat for desired number of reps.
Zottman Curl Tips
Using lighter weights to start with this exercise will prove more beneficial than jumping right into heavier ones. While you may be able to curl a solid amount of weight, you have to remember that your forearms may not be as strong as your biceps. Forcing more weight on your forearms than they can take will only lead to unwanted pain and stress that can lead to injury.
Performing these nice and slow will also really work on the time under tension you put your muscle through while also enhancing mind-muscle connection to really work on seeing great gains.
How It Differs From The Bicep Curl
While the traditional bicep curl is a great exercise, and one that works well when performed doing drops sets, the Zottman differs in that it provides that extra element by rotating at the top to really hit the forearms on the way down (3). You get all the benefits of a bicep curl with the bonus of targeting more muscles, and even smaller muscles that are often overlooked, while still performing a safe and effective lift. You can do these seated or standing, as well as alternating arms, so all of what you can do with a traditional bicep curl can be done with the Zottman curl and then some.
Wrap Up
Trying to diversify our workouts can be a challenge and one that we often times overlook since we tend to stick to one program and not change anything up. Adding the Zottman curl to your workouts will be a time saver and strength builder by working your biceps and your forearms resulting in huge arm gains. With many variations and helpful tips out there on how to properly and effectively perform the Zottman curl, your chances of seeing huge gains is within your grasp. Unlock all the benefits of this exercise and keep elevating your workouts to new heights with a safe and effective lift in the Zottman curl. You won’t be disappointed with the results of this century’s old exercise.
Let us know what you think in the comments below. Also, be sure to follow Generation Iron on Facebook, Twitter, and Instagram.
*Images courtesy of Envato
References
Incel, Nurgul A.; Ceceli, Esma; Durukan, Pinar B.; Erdem, H. R.; Yorgancioglu, Z. R. (2002). “Grip strength: effect of hand dominance”. (source)
Axelsson, Peter; Sollerman, Christer; Karrholm, Johan (2020). “Validity and Responsiveness of Forearm Strength Measurements in the Evaluation of Distal Radioulnar Joint Implant Arthroplasty”. (source)
Melrose, Don (2014). “Exercise Technique: The Zottman Curl”. (source)
5 Foam Rolling Mistakes Most People Make
Foam Rolling Mistakes to Avoid
Foam rolling is a method of self-myofascial release. Regular foam rolling can help with increasing flexibility, reducing soreness, and eliminating muscle knots. A foam roller is a lightweight, cylindrical tube made of compressed foam.
Your muscles are tightly wrapped around with fascia which holds them together and gives them shape. In brief, foam rolling can help with loosening and warming up the fascia so it can give your muscle fibers room to grow bigger and stronger.
Not Applying the Right Pressure
Most people don’t know how much pressure to apply when they’re foam rolling. They either apply too much or too little pressure and make the process of foam rolling ineffective. If you’re rolling too lightly, it might not have much impact on your tense muscles.
Roll too hard, and you might add to the pain and end up tensing up your muscles. Different rollers put a different amount of pressure on your muscles. The hollow foam rollers apply more pressure as compared to the full cylinders, so choose your rollers accordingly.
Rolling the Joints
Not the joints you’re thinking about. We’re talking about the bone joints here. You should avoid rolling the joints and other boney areas like the shoulder blades, ankles, and parts of the hips and legs (like the knees and shins). Foam rolling these areas will cause nothing more than pain and discomfort.
Rolling the bones doesn’t help in loosening up the bones and tendons. You need to roll the muscles and tissues beneath. You should also avoid rolling the IT band (the tendon that runs along the outside of your thigh from the top of the pelvis to the shin bone) and instead focus on the quads, hamstrings, and glutes.
You’re Not Rolling the Upper Body
Since foam rolling was brought to the spotlight by runners, most people assume that this method of self-myofascial release is only for the lower body. Foam rolling the upper body can be a little tricky and you might need a lacrosse ball for the hard-to-reach muscles.
You should be foam rolling your pectoral muscles, lats, triceps and the muscles around the shoulder blades. The movement of the foam roller while rolling the upper body will be different as compared to the lower body and can take some practice to master.
Spending Too Much Time on Trigger Points
Many people think that spending a lot of time on tense spots will release muscle knots. On the contrary, putting too much pressure on the trigger points can lead to an increase in pain and irritation, and can sore up injured muscle tissues.
If you want to loosen up a tense area, you should start with rolling the general larger surface area around the muscle for 60 to 90 seconds and spend 30 to 60 seconds targetting the knotted tissues.
As you loosen up the area around a trigger point, you’ll likely indirectly decrease the stress and tension you feel in the problematic area.
Rolling the Lower Back and Other Delicate Muscles
While it’s okay to foam roll your upper and middle back, you shouldn’t be working your lower back with a roller. Since it’s difficult to balance a foam roller on your lower back, you might over-reach your spine while getting in the right position to roll out the muscle.
Foam rolling can be especially dangerous for your lower back if you have an exaggerated arch or any other pre-existing lower back issues. If you have a stiff lower back, use a lacrosse ball to target the tense muscles instead of a foam roller.
Header image courtesy of Envato Elements
How often do you foam roll? Let us know in the comments below. Also, be sure to follow Generation Iron on Facebook and Twitter.

The Romanian Deadlift: Muscles Involved, Benefits, Variations, Tips, and Exercise Steps
These tips and insights will make you a Romanian Deadlift master!
The Romanian deadlift (RDL) is at first glance just a conventional deadlift with a few small differences. Well, it is but these minor changes are significant enough that the exercise is more popular than ever.
But, it’s also effective for building a phenomenal physique and lots of full-body strength too…
Now, the Romanian deadlift is a functional movement which will carry over to athletic performance as well, so the benefits reach far beyond just aesthetics and power. But being a perfect posterior chain exercise, the RDL is a do-it-all movement.
So, we want you to get the best out of your workouts and that means familiarizing yourself with the Romanian Deadlift so that you can maximize your results.
Here’s some great important information about the Romanian Deadlift that we think you can benefit from. But first, we’ll start with how the RDL got its actual name…
RDL Origin
The Romanian deadlift admittedly has a name that creates a sense of curiosity about its origins. So, to answer the question… the RDL was named after a very accomplished Romanian weightlifter named Nicolae “Nicu” Vlad.
Apparently, a few American weightlifters spotted Vlad doing his version of the “deadlift” and named the lift after him since he was from Romania.
But, the RDL is technically not a deadlift since it not lifted off the ground, which makes the name a bit confusing.
Muscles Involved
Like previously mentioned, the RDL works the entire posterior chain (Backside of the body) of muscles. But there are also muscles which receive a lot of stimulation due to their assistance in the exercise.
A study showed hamstring activity to be very high during the RDL and this is a main target muscle. (1)
But, overall the rear muscles are worked pretty equally.
The muscles involved include:
Back (Rhomboids, Latissimus Dorsi, Trapezius and Erector Spinae)
Legs (Quadriceps, Hamstrings, and calves)
Gluteus Maximus
Core (Abdominals, Obliques)
Hip flexors
Biceps
Forearms
Benefits
There are numerous benefits to doing the Romanian deadlift.
From muscle and strength building to functionality and overall performance… the RDL is an excellent movement.
If you play sports, you need a strong posterior chain plus hip extension/flexion for pretty much all athletic movements (Jumping, running, bending, etc). But, fitness competitors and even people rehabbing from injury can benefit from the RDL. (2)
Now, another benefit is that you can learn hip flexion and extension independent of spine flexion. (3)
Variations
The beauty of weight training is that there is something for everyone. Some people may not have the mobility to train with barbells and so dumbbells can offer a great alternative. But, the Smith machine and even a trap bar can be very beneficial as an effective training method.
Here are the popular variations:
Dumbbell Romanian deadlift
Single-leg Romanian deadlift
Smith machine Romanian Deadlift
Trap bar Romanian deadlift
All of these variations have their own unique benefits.
Dumbbells – The dumbbell deadlift is a very effective variation for the RDL because it develops balance, stabilization, a freer range of motion, and motor control. (4)
Single-leg deadlift – This variation is ideal for unilateral (Affecting one side) development and being able to isolate each muscle is great for several reasons… (5)
Unilateral benefits:
Correct muscle imbalances
Increase core strength
Improve Balance
Rehabilitation
Smith machine deadlift – This variation is great for people who don’t quite have good balance or who prefer to only have to focus on moving the weight. There’s not much stabilization required and you can safely use heavy weights too.
Trap bar deadlift – The trap bar deadlift is very beneficial because it lessens the stress on your spine by allowing you to pull closer to your center of gravity and allows you to move through a more natural range of movement. (6, 7)
But, the grip placement is also different since it’s more like when training with dumbbells.
Training Tips
Since the Romanian deadlift varies in certain aspects from the conventional deadlift, it’s important to know how to execute the movement.
So, here are some tips for your training days to ensure you get the results you’re looking for…
Form
Keep your knees slightly bent during the exercise and your back should be straight while slightly arched. Then, keep your shoulders back and down.
You want to keep the weight as close to your body as possible and positioning yourself correctly will ensure this.
The movement
You can start the RDL with the bar on the ground or on a power rack. But make sure the bar is set high on the rack so you can start closer to the top of the movement.
Now, the deadlift isn’t technically a “deadlift,” which implies you’re pulling the bar from off of the ground. And the movement involves no contact with the ground except for the initial lift-off.
On the concentric (Positive) phase of the movement, you want to push upward through your heels and midfoot. But then you want to thrust your hips forward halfway through the movement to complete the lift in an erect position.
The hips are doing a lot in the RDL and even more so than with conventional DL where the quads are more heavily involved.
Range of motion
This is where the Romanian deadlift really differs from the Standard deadlift.
Instead of lowering the bar all the way down until it touches the floor, you’ll lower the bar to about mid-calf level with the RDL. This keeps constant tension on the posterior chain of muscles (Especially the hamstrings and glutes).
Then, you’ll come all of the way up until you’re erect as you would with a standard deadlift.
Sets/Reps
The Romanian deadlift is not much different than a conventional deadlift training structure. However, the RDL is not quite as taxing on the body, and therefore you can generally do a little more.
And of course, sets/reps schemes vary based on training experience. But, warming up and doing a pyramid up in weight is recommended to get the joints and nervous system conditioned for more intense sets with heavier weights.
Beginner – If you’re a beginner, it’s best to do about 3 sets with good form and light to moderate weight. This will help you stay injury-free and develop the best form possible. Reps should stay at around 10-15 until more advanced.
Intermediate – If you’re an intermediate lifter, go with 3-4 sets and train with more moderate to moderate/heavy resistance loads.
Intermediate lifters can train heavier and with lower rep ranges of 8-10 but it’s best to mix it up sometimes with higher reps.
Advanced – If you’re more advanced, then you likely know your body by now and can get away with more sets and more volume. So, 4 sets with heavier resistance loads should be completely appropriate for sufficient stimulus.
Advanced lifters have an advantage when it comes to training because they know their bodies very well. So, anywhere from 6 reps and up is perfectly fine, in combination in varying rep ranges.
Exercise Steps
If you want to experience all that the Romanian deadlift has to offer, then you’re going to need to know how to do it effectively.
It’s not like a regular deadlift regarding the focus of the movement and like mentioned before, the differences are notable.
So, here’s a quick step by step guide…
Start with the barbell on the floor or elevated on a power rack. If on a rack, start in a higher position at about mid-thigh level or even slightly higher.
Grip the bar at a shoulder-width or slightly wider position.
Arch your back and slightly bend your knees.
If starting from the floor, stick your butt out and keep your upper legs slightly above parallel to the floor. Now, push through your heels and midfoot while extending the hips until you’re standing straight.
If starting from the rack, bend your knees slightly and extend your hips upward to lift the weight off the bars until you’re standing straight.
Slowly lower the bar to mid-calf level by focusing on hip flexion while keeping your back arched.
Extend through your hips while keeping the pressure of the weight in your heels until you’re standing straight. Your shoulders should be down and back.
Then, you can repeat this movement as desired for repetitions.
Sample Workout Routine:
Warm up with 2 sets of progressive RDL’s at about 30 and 60% of your one-rep max before doing your working sets.
Romanian deadlift
3 sets x 10-12 reps
(Rest 60 seconds in between sets)
Lying hamstring curls
2 x 10-12
(Rest 30-45 seconds in between sets)
Alternating lunges
3 sets x 10-12 reps
(Rest 45 seconds in between sets)
Leg press calf raises
3 sets x 15 reps
(Rest 30 seconds in between sets)
Wrapping Up
The Romanian deadlift is a must for overall posterior chain development. It’s also an excellent variation and/or alternative to the conventional deadlift depending on your training goals.
But, it’s important to learn and develop proper technique while implementing progressive resistance to experience maximum results.
Now, since there are several variations, feel free to experiment to find what works best for you. There’s no one best method of training when doing the Romanian deadlift as long as the movement stays the same.
…We hoped you enjoyed this useful information about the much popular Romanian Deadlift and now you have everything you need to make some serious gains!
For more news and updates, follow Generation Iron on Facebook, Twitter, and Instagram.
References:
1– McAllister, Matt J.; Hammond, Kelley G.; Schilling, Brian K.; Ferreria, Lucas C.; Reed, Jacob P.; Weiss, Lawrence W. (2014-6). Muscle activation during various hamstring exercises. Journal of Strength and Conditioning Research. 28 (6): 1573–1580. doi:10.1519/JSC.0000000000000302. ISSN 1533-4287. PMID 24149748.
2– Deane, Russell S.; Chow, John W.; Tillman, Mark D.; Fournier, Kim A. (2005-8). Effects of hip flexor training on sprint, shuttle run, and vertical jump performance. Journal of Strength and Conditioning Research. 19 (3): 615–621. doi:10.1519/14974.1. ISSN 1064-8011. PMID 16095411
3–ACE – ProSource™: January 2016 – ACE Technique Series: Romanian Deadlift.
4–Free weights or machines? Choose what’s right for you
5–The Benefits of Unilateral Training
6–UCSB Science Line. scienceline.ucsb.edu.
7–Biomechanics of Safe Lifting. ergo.human.cornell.edu.
Header image courtesy of Envato Elements
3 Compound Exercises For Massive Biceps and Triceps
Do these three compound exercises to build massive biceps and triceps.
For many people, the size of their arms is directly proportional to their self-esteem. Arms are one of the first muscle groups people focus on when they start working out. Even though arms are such a popular muscle group, only a few people have shirt ripping guns. While it may seem like a daunting task to get those bulging biceps and horseshoe-shaped triceps, knowing exactly what to do to challenge your muscles to see growth is imperative in actually achieving that.
Let’s take a look at some compound exercises for arms to really work those muscles into something you will love. Whether it be a compound bicep exercise or a compound tricep exercise, your entire arm will start to see great definition and something you can be proud of.
Benefits Of Strong Arms
Aside from the obvious benefit of a ripped aesthetic, strong arms play an important role in both sport specific and functional movements. The ability to provide stability to those vulnerable joints like your shoulders and elbows is something we shouldn’t take for granted. Also, by working those arms, you will start to see increased grip strength (1) as a results of those exercises you are performing. This will greatly increase the output you do during training for those results during performance.
What Are Compound Exercises?
Compound exercises are multi-joint movements which help in building size and strength and can increase your volume and intensity for all exercises (2). Isolation exercises (involving single joint), on the other hand, help in building muscle definition and separation. If you’re just starting out or have hit a plateau, compound exercises will help take your gains to the next level. By performing compound exercises, you will work multiple muscles with just one exercise to save time while also building better mind-muscle connection. For those looking to shed some weight, by working more muscle groups, you are burning more calories, thus leading to a decrease in weight for a more shredded aesthetic.
Compound Tricep Exercises
Close Grip Bench Press
Majority of the people have weaker triceps as compared to their biceps. This is why we like starting our workouts with triceps. Close grip bench press is one of the best exercises to build size and strength in your triceps.
Make sure you maintain a full range of motion while performing this exercise. Your triceps consist of three heads; lateral, medial and long. You need to train them equally to ensure an overall growth. The close grip bench press works the medial and lateral triceps heads.
Barbell Skullcrushers
Overhead movements like the barbell skull crushers work the long head of your triceps. The long head is the hardest to develop as only a few exercises target it. If you haven’t done this exercise in the past, ask for a spot from someone at your gym.
Lie on a flat bench with your arms stretched outwards while holding a barbell. Keep your elbows fixed at a position as your lower the barbell so it is a couple of inches away from your forehead. Return to the starting position and squeeze your triceps at the top of the movement.
Dips
You don’t always need to use additional weights to build muscle. Bodyweight dips are a great exercise to add mass to your triceps. If the bodyweight variation feels too easy, feel free to add resistance by using weights.
You don’t need to lift heavy weight to build muscle mass in your arms. Pumping blood into the muscle by performing higher reps and following a full range of motion will do the trick. Your chest should be parallel to your hands at the bottom of the movement and your elbows should be locked out at the top of the movement.
Compound Bicep Exercises
Barbell Curls
Bicep curls are one of the most effective bicep building exercises. Take a five-minute rest after you finish your triceps workout so the blood leaves your triceps. Muscle pumps occur when blood enters your target muscle group.
Use an Olympic barbell for the barbell curls. Maintain a strict form as you curl the barbell. Don’t swing your back or use momentum to lift the weights. Using improper form can lead to an injury.
Alternate Dumbbell Curls
Alternate dumbbell curls are a textbook bicep exercise. This exercise helps you in establishing a mind-muscle connection with your biceps as you’re targeting one bicep at a time. Maintain a full range of motion and avoid using momentum.
Pause and squeeze your biceps at the top of the movement. Stand with the dumbbells at your sides with your palms facing each other. Your palms should be supinated at the top of the movement.
Underhand Pull-Ups
Underhand pull-ups are the ultimate bicep finisher. This exercise is incredibly effective as you lift your entire bodyweight using your biceps. If you can’t perform bodyweight pull-ups, use an assisted pull-up machine or a spotter.
By the end of this exercise, your pythons will be filled with lactic acid. Holding the pull-up bar with a wide grip will focus on your inner biceps and a narrow grip will work your outer biceps.
Compound Exercises For Arms
These exercises above will greatly influence your arm growth so you start to see some real muscle definition and shredded arms you want most. To help with increase energy and muscle pumps, look towards using a great pre-workout supplement to really provide for a solid workout. On top of that, check out a high-quality protein supplement in order to advance muscle growth and help with recovery so you bounce back faster for that next workout.
Exercises
Sets
Reps
Close Grip Bench Press
3
12
Barbell Skullcrushers
3
12
Dips
3
20
Barbell Curls
3
12
Alternate Dumbbell Curls
3
15
Underhand Pull-Ups
3
20
Wrap Up
For those looking get those shredded arms, compound exercises are where you want to look. These will work multiple muscle groups while also giving you the edge when it comes to burning calories and saving time in the gym. Whether it be a compound bicep exercise or a compound tricep exercise, knowing which compound exercises for arms to perform will prove to be worthwhile for those gains. Give these exercises a try and be confident in showing off those absolutely shredded arms.
Let us know what you think in the comments below. Also, be sure to follow Generation Iron on Facebook, Twitter, and Instagram.
*Images courtesy of Envato
References
Lee, Julia-Ann; Sechachalam, Sreedharan (2016). “The Effect of Wrist Position on Grip Endurance and Grip Strength”. (source)
Mangine, Gerald T.; Hoffman, Jay R.; Gonzalez, Adam M.; Townsend, Jeremy R.; et al. (2015). “The effect of training volume and intensity on improvements in muscular strength and size in resistance-trained men”. (source)

How Stress Affects Your Fitness Goals And How To Manage It
Exercise can positively help reduce stress, but too much stress can have a negative effect on your workouts.
Our lives are filled with busy schedules. Between work, relationships, personal self care, and trying to stay active and healthy, stress can creep in and disrupt a healthy lifestyle. It can be overwhelming and hard to control much of the time and without knowing the proper ways to manage stress, easing our minds can be a difficult challenge.
Your mind and body feed off of one another, working together to keep you both physically and mentally healthy. Exercise is a common and very beneficial stress relieving aid for being active works to boost endorphins to make you feel good (1).
Along with that, knowing you are actively building muscle or improving cardio can really enhance confidence and self-image, thus improving your mood and allowing you to relax and start to settle those stressful thoughts.
Unfortunately, stress can work against us at times and although we may embark on our fitness journey as best we can, the effects of stress can negatively impact our workouts. As a serious de-motivator, it can be hard to lace up our shoes and go for even a short run, let alone a high intensity workout, so learning to manage stress as best we can goes a long way in improving all aspects of our fitness goals.
Negative Effects Of Stress
Hinder Recovery
Recovery is an essential part of seeing big gains and overall growth and being overly stressed can make for a longer time to recover. Leaving you feeling tired and sore, your muscles will not have a chance to repair themselves (2). A lack of recovery not only leaves you feeling fatigued, but it increases your risk of injury potentially putting you out of the gym. Hydrating is key and adding in a good supplement like a whey protein can aid recovery but also ensure you get enough sleep so your muscles have time to fully recover.
Increase Muscle Tension
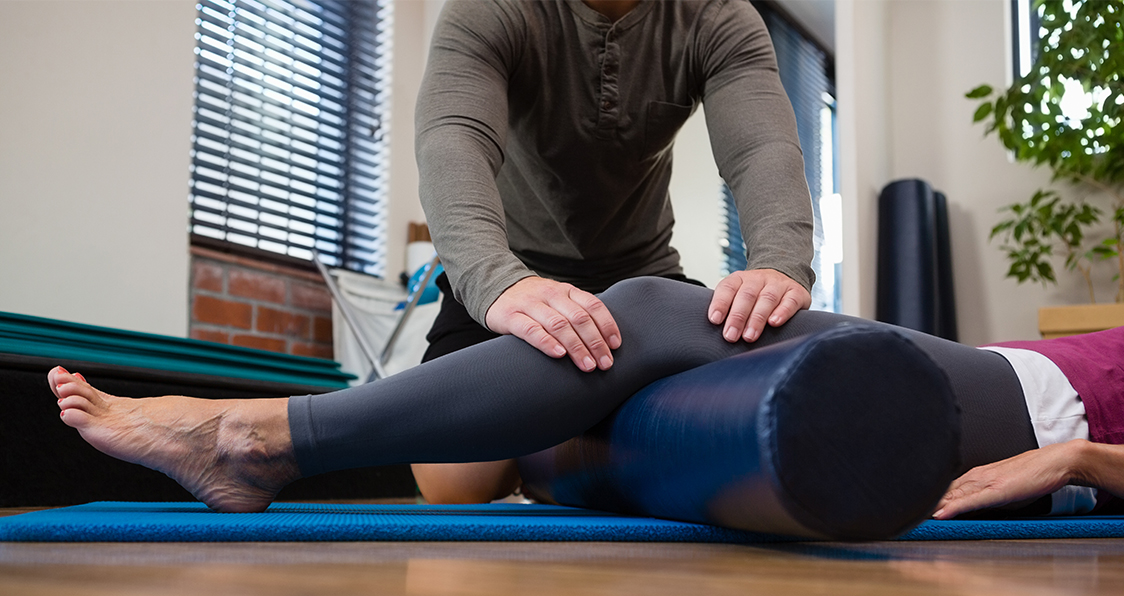
When you are stressed, your muscles tense up to protect against injury, and if not properly recovered, this can lead to unfortunate injury and pain. With tight muscles, your room to grow is seriously diminished and if you are in a constant state of stress, your muscles never truly get a chance to relax. This can also affect posture and trigger increased levels of cortisol, which triggers a fight or flight response leaving you in a continued state of tension. Working with a physical therapist or getting a massage can really help relieve a lot of this tension. Massage guns are also great at-home muscle relieving tools.
Affect Concentration
Stress forces your mind to wander and that loss of focus just makes you feel as if you are going through the motions. Working on mind-muscle connection in the gym will help you see growth and if a lack of concentration is present, you won’t perform to full potential. Poor concentration also makes it easier for mistakes to occur with form and technique, also increasing your risk of injury. Yoga and other forms of meditation are healthy ways to really gain clarity when it comes to boosting your concentration and focus.
Increase Appetite and Body Fat
We’ve all experienced an unfortunate binge when we are stressed. That is the result of a hormone called cortisol which is considered the “stress hormone” but also performs functions like aiding metabolism, increasing blood sugar, and modulating the immune system (3). Cortisol can increase your cravings for more sugary foods and mix that with a stressed out person, it leads to binge eating causing an increase in your caloric intake and unfortunate weight gain.
Cortisol also causes your body to store fat, increasing your body fat and making it hard to get that desired physique (4). This works in a vicious cycle of cortisol being released, increasing your cravings leading to a binge or just unhealthy eating, only to have cortisol then store fat to make it harder for you to lose weight. Working on stress relief and finding a good diet you can stay consistent with will help with this problem big time.
Ways To Reduce Stress
Stressors in our lives will always be present and knowing how to deal with stress will prove to be huge for our overall health and wellness. Exercise is key, so even when you feel down and out, find an excuse to get moving and get those endorphins flowing because you will feel better after (5). Too much caffeine or other stimulants can cause stress so working to reduce your caffeine intake will also help. Try meditation, yoga, or other mindfulness activities to really work to calm your mind and stay on top of your game. But most importantly, reach out to people. Whether it be family or friends, talk about what’s going on and let them help you. Your fitness goals are important but so is your overall quality of life so don’t let stress take you down.
Wrap Up
We all deal with stress in different ways. For those of us who love fitness and take our health seriously, stress can unfortunately work against us and force us into deep holes of despair keeping us from what we love and hurting our fitness progress. Hindering recovery, increasing muscle tension, promoting poor concentration, and leading us to weight gain are all ways that stress hurts our fitness goals. Working to reduce stress through mindfulness activities, talking with family and friends, and of course, pushing ourselves to exercise, are great ways to combat stress so you always win. Don’t let your hard work be taken down by stress and work to reduce it for your overall health and wellness.
Let us know what you think in the comments below. Also, be sure to follow Generation Iron on Facebook, Twitter, and Instagram.
*Images courtesy of Envato
References
Jackson, Erica M. (2013). “Stress Relief: The Role of Exercise in Stress Management”. (source)
Stults-Kolehmainen, Matthew A.; Bartholomew, John B. (2012). “Psychological stress impairs short-term muscular recovery from resistance exercise”. (source)
Christiansen, Jens J.; Djurhuus, Christian B.; Gravholt, Claus H.; Iversen, Per; Christiansen, Jens S.; Schmits, Ole; Weeke, Jorgen; Jorgensen, Jens Otto Lunde; Moller, Niels (2007). “Effects of Cortisol on Carbohydrate, Lipid, and Protein Metabolism: Studies of Acute Cortisol Withdrawal in Adrenocortical Failure”. (source)
Kandhalu, Preethi. “Effects of Cortisol on Physical and Psychological Aspects of the Body and Effective Ways by Which One Can Reduce Stress”. (source)
Kim, Jong-Ho; McKenzie, Larry A. (2014). “The Impacts of Physical Exercise on Stress Coping and Well-Being in University Students in the Context of Leisure”. (source)
Build a Chest of Steel With This Workout
Workout For a Bigger and Striated Chest
If you’re planning to make a statement with your physique, moobs surely aren’t going to help your case. Having a broad chest can make you stand apart from the crowd and get the attention you deserve.
Building a ripped chest takes more than doing a few pushups and presses. You need to have a combination of compound and isolation exercises in your workouts to develop the perfect size and conditioning.
Cable Crossovers – 4 Sets 15 Reps
You’ll be starting this workout with an isolation exercise to pre-exhaust your pecs before you get into the compound lifts. Exhausting your chest at the beginning of the workout eliminates the need for lifting super heavyweights to recruits and target your pectoral muscles later in the workout.
Grab a D-handle attachment in each hand and take a long stride with either of your feet to get in position for the exercise. Make sure there is tension on your pecs at the starting position. Maintain a slight bend in your elbows while performing the cable crossovers to target your pecs efficiently.
Barbell Bench Press – 4 Sets 15 Reps
The barbell bench press is what squats are for the legs. If you’re new to resistance training or are using a challenging weight, it’s wise to get the help of a spotter. The barbell bench press is a great exercise to build strength and volume in your pectoral muscles.
While performing the bench press, keep your elbows slightly angled towards your sides to eliminate any tension on your rotator cuffs. Contract your pecs with every repetition while performing the exercises in the workout.
Incline Dumbbell Flyes – 3 Sets 15-12-10 Reps
For the majority of people, the upper chest is a weak muscle group. It’s harder to establish a mind-muscle connection with the upper pecs as it’s a very small (one-third of your chest) muscle group.
The key while performing the incline bench dumbbell flyes is to contract your pecs at the top of the movement and target the inner chest. Maintain a slight bend in your elbows and push your chest out as you reach the bottom of the movement.
Decline Dumbbell Press – 3 Sets 15-12-10 Reps
The decline dumbbell press is an incredibly effective exercise in building the separation between your chest and the abdomen. You’ll be able to lift relatively heavier weights in the decline presses as compared to the flat and incline presses.
The dumbbells should be at the sides of your chest at the bottom of the movement. Pause and contracts the life out of your pecs at the top of the movement. While the pressing movements help in developing the size in your chest, the flyes target the separation and conditioning.
Barbell Rollout Flyes – 3 Sets 10 Reps
The barbell rollout flyes are the ultimate chest workout finisher. If you’re lacking the separation between your pecs, the barbell rollout flyes should be a part of your exercise arsenal.
Place a weight plate at each end of a barbell and place the barbells parallel to each other on the floor. Get into a push-up position in the center of the two barbells and grab the barbells with a neutral (palms facing each other) grip.
Your arms should be extended in a straight line and the barbell should be under your shoulders at the starting position. Slowly push the barbell away while mimicking the dumbbell fly movement.
Your chest should be a 5-6 inches away from the floor at the bottom of the movement. Return to the starting position and squeeze your pecs. Repeat for the recommended repetitions.
Which is your favorite chest exercise? Let us know in the comments below. Also, be sure to follow Generation Iron on Facebook and Twitter.
Header image courtesy of Envato Elements
10 Reasons Why You’ll Never Have Big Calves
Calves are one of the most underrated body parts. A pair of chiseled calves can arguably overshadow shirt-ripping arms. But it’s easier said than done, lower legs can be a stubborn muscle group to develop.
Look around your gym, and you’ll see many guys flexing their arms and pecs in their mirror, but you’ll hardly see anyone showing off their calves. Turning your calves into full-grown bulls tests your grit and mettle. It’s also what separates the men from the boys.
Don’t get us wrong, this article is not meant to discourage you. We have put together a list of reasons why most people fail to build their calves. Avoid committing these mistakes, and you’ll be the owner of two big and beautiful cows.
10 Reasons Why You’ll Never Have Big Calves
Treating Calf Workouts Like Accessory Work
If we got a dollar every time someone called it a day after completing two exercises in a calf workout, we’d have our own Bitcoin fund by now. Some people think that since calves are a relatively small muscle group, they don’t need to go too hard on them.
Your lower legs are used to carrying around your bodyweight throughout the day. If you want them to grow, you’ll have to do more than just a few sets on the seated calf raises. Treat your calves like accessories, and they are going to remain that way.
Using Too Much Weight
Most people let their egos get the better of them in the gym. They put on more weights on the bar than they can handle. A limited range of motion is one of the most common mistakes people make while training their little toothpicks.
Range of motion is the name of the game when it comes to calf development. You should be on your toes (just like a ballerina) at the top of the movement and your heels should be a few centimeters off the floor at the bottom of the lift.
Training Too Little
Overtraining is one of the most misunderstood concepts in bodybuilding. Gym bros love to flaunt their broscience on the subject whenever they get a chance. Noobs are advised by the bros to not train their muscles more than twice a week.
The sad news here is that most people can’t train, if they wanted to, with the intensity and volumes required to hit the state of overtraining. There is a big difference between being sore and being overtrained.
Overtraining can impact your CNS (central nervous system) and immunity. How many people do you think can train with the fervor required to overtrain in every single workout? Since your calves are used to taking a beating, the rule of thumb for calf training should be to train them every day if they aren’t sore.
Training in the State of Exhaustion
Many people train their calves after they have been exhausted by a leg workout. These people follow their intuitions and get to the lower leg workout without any planning due to which they end up doing the exercises they’re comfortable performing.
If your calves are lagging, you should train them at the beginning of your workouts. Your other option would be to train them along with your upper legs using super-sets. You can’t expect to build monster calves while you’re out of gas and running on fumes.
Not Hitting Failure
Not training to failure is the extension of the overtraining mentality. Calves get the nastiest of pumps when you train to failure. Not everyone can handle the pain and hence people fall off after doing 10-12 reps.
You aren’t going to see any gains in that rep range. Your calves are used to taking a lot more workload as compared to what you do in your workouts. Training until muscle annihilation and then pushing through it is where the gains lie.
Low Intensity
When it comes to training calves, it’s best to avoid the intensity and volume debate. You need to get the best of both worlds and should be doing high reps with lower weights as well as lower reps with higher weights.
You can add a new dimension to your workouts by using time stops for your sets instead of the usual repetition stops. Instead of doing 12-15 reps of a calf exercise, perform a set straight for two minutes without any rest.
Time under tension (TuT) can also play a major role in developing your calves. Follow the 5:2:2:2 rep tempo (five seconds while lowering the weights, a two-second hold at the bottom, two seconds on the way up, and a two-second contraction at the top) to annihilate your calves.
Training Calves as Single Muscles
You’ll never be able to develop the inverted heart-shaped muscle on the back of your lower leg if you treat it as a single muscle. Your calves consist of three heads and you need to target each head separately.
On a calf raise exercise, keep your feet parallel to each other on the platform to target the medial head. Keeping your toes together and heels apart (forming an ‘A’) will target your outer calf head, and placing your toes apart and heels together (forming a ‘V’) will hit the inner head.
Using the Same Exercises
If your calf exercise arsenal consists only of seated and standing calf raises, you’re not going too far in the lower leg game. The stubborn calf muscles will get used to your workouts soon and stop responding if you don’t keep switching your exercises frequently.
Donkey, smith machine, bodyweight, leg press calf raises, to name a few, should be a part of your lower leg workouts. Your goal should be to not repeat the lower leg exercises before a couple of weeks if you train your lower legs four times a week.
Recovery – massages
Every person has a different muscle composition. Most people with tiny calves have a tight fascia which can require some extra work other than the workouts. Visiting a physiotherapist and getting deep-tissue massages every week can help ignite growth in your calves.
Not Deploying Different Training Principles
Most people use advanced training principles like dropsets, supersets, intraset stretching, BFR training for every muscle group except their calves. Calves are a muscle group that needs these advanced techniques for breaking the plateau.
If you’re serious about building your lower legs, you’ll have to stop this step-motherly behavior. It’d be great if you showed your calves the love they deserve and made up for all the times you screwed up.
How often do you train your calves? Let us know in the comments below. Also, be sure to follow Generation Iron on Facebook and Twitter.