Tag: Workout Plans

Best 12-Week Bodyweight Training Plan To Build Muscle Mass and Lose Fat
Most people relate body transformations with high-end training facilities, the latest machines, and jacked trainers. Although these things can add to your workout experience, they aren’t necessary for carving your dream physique. Most people never start their fitness journey because they cannot make the time to hit the gym. Others fall off the bandwagon because […]
The post Best 12-Week Bodyweight Training Plan To Build Muscle Mass and Lose Fat appeared first on Fitness Volt.
The Best Barbell Shoulder Workout for Bigger, Stronger Delts
Go to any gym, and you’ll find numerous machines you can use to target your upper and lower body muscles. Name any body part, and there will be at least a few machines that you can use to develop it.
However, as useful as machines can be, they do have drawbacks. For example, despite being adjustable, most machines are made for average-sized lifters. If you are very tall or short, you may not fit the machine correctly and be unable to use it safely.
In addition, machines tend to lock you into a fixed movement pattern. This means you won’t have to use your stabilizing muscles much during your workout, which is why machines are often viewed as non-functional.
Finally, machines are big and expensive, putting them beyond the reach of most home exercisers.
Freeweight, and, more specifically, barbell training, can help you navigate around these drawbacks. Barbells might be low-tech, but they are most assuredly high-effect!
In this article, we share a basic but big barbell workout for stronger, more muscular shoulders.
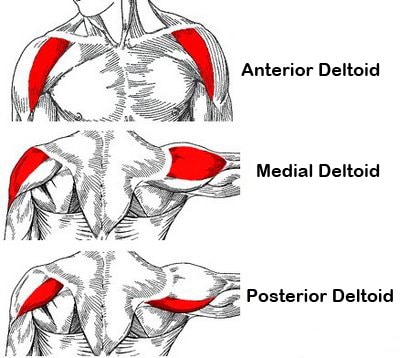
Deltoid Anatomy Basics
The deltoids are your most prominent shoulder muscles. They’re made up of three groups of fibers, usually referred to as heads. The three deltoid heads commonly work together, but it’s also possible to emphasize each one by performing specific shoulder joint movements.
The three deltoid heads and their functions are:
Anterior head – located at the front of your shoulder, the anterior deltoid head is arguably the hardest working of the three. That’s because it’s involved in all chest and overhead pressing exercises. Its functions are flexion, horizontal flexion, and medial rotation of the shoulder joint.
Medial head – also known as lateral deltoid, this head is located on the side of your shoulders. The medial head gives your upper body its width and contributes to your V-taper. The function of the medial deltoid is the abduction of your arm, which means lifting out and away from the midline of your body.
Posterior head – located on the back of your shoulder, the posterior deltoid is also known as the rear deltoid. It works in opposition to the anterior head and is responsible for horizontal extension, extension, and exterior rotation of the shoulder joint. The posterior is usually the weakest and least developed of the three deltoid heads.
Building big, strong, aesthetically pleasing deltoids involves training all three heads relatively equally. If one head is allowed to get too big, it could unbalance the look of your upper body and even lead to imbalances and joint dysfunction. Use a variety of exercises to make sure you work all three deltoid heads.
Barbell Deltoid Exercises – Benefits
Not sure if barbells are the right choice for building those boulder shoulders you’ve always dreamed of? Well, worry not! Take a look at the following benefits and then decide:
Great for building size and strength – do you want to look strong and be strong, too? Barbell shoulder exercises are the way to go. Lifting heavy weights will add slabs of meat to your deltoids while improving functional strength.
Widely available – no matter where you train, you should have access to barbells and weights. Every decent gym has them, and they’re available for home exercisers, too. As such, wherever you work out, you should be able to perform this barbell shoulder workout.
Adaptable and versatile – you can modify most barbell deltoid exercises according to your needs and goals. Adjust your hand position, range of motion, and the angle of your arms to hit your muscles the way you want to, and make your chosen exercises as safe and efficient as possible.
Workout satisfaction – barbell training is challenging and fun. Few things are as satisfying as hoisting a heavy barbell over your head. Training with just a barbell might be somewhat old-school, but that has a certain appeal for some exercisers.
Barbell Deltoid Exercises – Drawbacks
While barbells are an excellent deltoid training tool, there are a couple of drawbacks to consider, too:
Safety – while barbell training can be safe, there is an increased risk of accident and injury if you train alone or without a power rack. Many barbell shoulder exercises involve lifting or holding a weight above your head.
A failed rep could see that weight crashing down on your head or neck. As such, you should stop your set with 1-2 reps left in the tank or, if you plan on training to failure, make sure you have a spotter on hand.
Heavy starting weight – most Olympic bars weigh 45 pounds or 20kg. This is not insignificant! Even an empty barbell may be too heavy for some lifters, particularly for beginners or when doing isolation exercises like front raises.
Not suitable for drop sets – a drop set is where you rep out to failure, reduce (or drop) the weight by 10-15%, and then rep out again. This training system allows you to expose your muscles to a higher-than-usual level of fatigue.
However, stripping weight plates off a barbell is time-consuming, making most barbell exercises impractical for drop sets. In contrast, drop sets work best with machine and dumbbell exercises.
It’s hard to hit the medial deltoid – while your medial deltoid is involved in all barbell shoulder exercises, it’s all but impossible to isolate this important muscle. So, if you want to prioritize medial deltoid size, you’ll need to supplement your barbell workout with some form of lateral raise, e.g., cable, dumbbell, or resistance band.
Barbell Deltoid Workout – Overview
Now your deltoid anatomy and physiology knowledge is up to scratch, it’s time to hit the gym and train!
Do the following deltoid workout 1-2 times per week as part of a weekly training split, where you train your remaining body parts on different days.
For example:
Monday
Tuesday
Wednesday
Thursday
Friday
Saturday
Sunday
Chest & Triceps
Legs
Rest
Back & Biceps
Rest
Shoulders
Rest
But before you jump into lifting any weights, it’s crucial to warm up and prepare your body for the challenges that await.
Begin with a few minutes of easy cardio, and then move on to dynamic mobility and flexibility exercises that target your muscles and joints, focusing on your shoulders, elbows, and lower back. These steps will set you up for a safer and more effective workout session.
Related: How to Warm Up for Strength Training
Warmed-up and ready? Then let’s get to work!
Exercise
Sets
Reps
Recovery
1
Barbell push press
4
6-8
3 minutes
2
Barbell upright row
3
8-10
2 minutes
3
Barbell Bradford press
3
10-12
90 seconds
4
Barbell front raise
3
10-12
90 seconds
5
Barbell shrug
3
12-15
60 seconds
Exercise Instructions
There are two ways to do any barbell shoulder exercise – the right way and the wrong way. The right way is safe and effective, while the wrong way is dangerous and usually less productive, even if it allows you to lift heavier weights.
So, follow these instructions to ensure you’re doing the exercises in your barbell shoulder workout correctly!
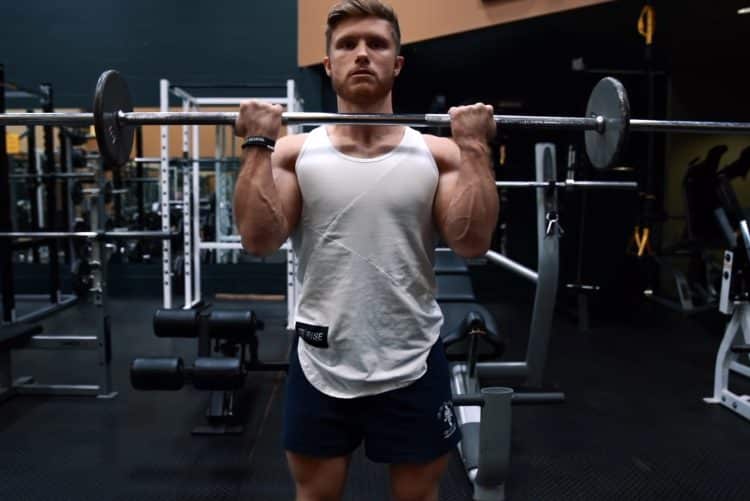
1. Barbell push press
Muscles targeted: Deltoids, triceps, core, legs.
It’s often said that cheats never prosper, but a little strategic cheating could help you unlock a whole new level of shoulder strength and size. The barbell push-press is a dynamic exercise where you use your legs to help you lift the weight. This means you can use heavier than normal loads, exposing your muscles to more tension. So, in this instance, cheating may actually do you good!
Steps:
Begin by standing with your feet shoulder-width apart and the barbell resting on your front shoulders, hands slightly wider than shoulder-width apart, and elbows pointed forward. Brace your core and stand in good posture with your head up and chest lifted.
Bend your legs and descend into a quarter squat.
Explosively extend your legs and use this momentum to help you push the barbell overhead to arm’s length.
Slowly lower the barbell back to your shoulders and repeat.
Benefits:
Builds explosive strength and functional muscle mass.
Exposes your muscles to more weight and tension than usual.
An excellent exercise for athletes from all sports.
Tips:
Keep your core engaged and maintain a neutral spine throughout the exercise.
Lower the weight under control to increase time under tension for better muscle growth.
Use 10-20% more weight than you can use for strict overhead presses.
2. Barbell upright row
Muscles targeted: Deltoids, trapezius, biceps, forearms.
The barbell upright row is a somewhat controversial exercise because some people find it hard on their shoulders. However, providing it doesn’t bother your joints, this movement is a great way to add width to your deltoids and beef up your upper traps at the same time. Also, as it’s a pulling exercise, it provides your already fatigued triceps with a useful break before your next challenge.
Steps:
Hold a barbell in front of your legs using a shoulder-width overhand grip. Stand with your feet roughly shoulder-width apart, knees slightly bent for balance, core braced, and shoulders pulled down and back.
Leading with your elbows, bend your arms and pull the bar up the front of your body to around mid to upper-chest height.
Extend your arms, lower the bar, and repeat.
Benefits:
One of the few pulling exercises for the deltoids.
Hits all three deltoids, especially the medial head.
An effective exercise for building a bigger “yoke.”
Tips:
Experiment with your grip width to find what’s comfortable and works best for you.
The higher up your chest you pull the bar, the more punishing this exercise will be for your joints.
Shrug your shoulders up at the midpoint of each rep to maximize upper traps engagement.
3. Barbell Bradford press
Muscles targeted: Deltoids, triceps.
The barbell Bradford press is named after a professional weightlifter and a renowned strength coach, Jim Bradford. It’s a unique exercise that hits all three deltoid heads reasonably equally. It also keeps the target muscles under constant tension, which may be beneficial for triggering a pump and maximizing muscle growth.
Steps:
Begin by standing with your feet shoulder-width apart and the barbell resting on your front shoulders, hands slightly wider than shoulder-width apart, and elbows pointed forward. Brace your core and stand in good posture with your head up and chest lifted.
Without using your legs for help, press the bar up so it’s level with the top of your head.
Push the bar backward and lower it behind your neck.
Next, push the bar back up and over your head, lowering it to the front of your neck.
That’s one rep – keep going!
Benefits:
A novel exercise that can help you break through your current deltoid training plateau.
Hits your deltoids from several angles at once.
An excellent exercise for getting a deep pump and burn in your deltoids.
4. Barbell front raise
Muscles targeted: Deltoids, trapezius.
Barbells make it very hard to isolate any part of your deltoids. Invariably, whether you are pushing or pulling, all three deltoid heads, plus your biceps and triceps, end up working together. Barbell front raises are one of only a small number of deltoid isolation exercises.
Steps:
Hold a barbell in front of your legs using a shoulder-width overhand grip. Stand with your feet roughly shoulder-width apart, knees slightly bent for balance, core braced, and shoulders pulled down and back.
Keeping your arms straight, lift the bar forward and up to about shoulder-height.
Lower the bar back down to your legs and repeat.
Benefits:
One of only a few deltoid isolation exercises you can do with a barbell.
A very shoulder and lower back-friendly exercise.
An effective way to emphasize and prioritize your anterior deltoid.
Tips:
Avoid using momentum to lift the barbell.
Brace your core throughout to stabilize your lower back during the exercise.
Take care not to lean forward and back, as doing so will take the stress off your deltoids.
5. Wide grip bent-over row
Muscles targeted: Deltoids, trapezius, rhomboids, biceps.
Bent-over rows are usually seen as a back exercise. However, when you widen your grip and pull the bar into your chest, they turn into an excellent posterior deltoid exercise. Your rear delt is notoriously hard to train and often neglected as a result. This movement ensures your rear deltoid receives the love and attention it deserves.
Steps:
Hold your barbell with an overhand wider than shoulder-width grip. Stand with your feet about shoulder-width apart, knees slightly bent, shoulders back and down, and core braced.
Hinge forward from your hips until your upper body is roughly parallel to the floor. Let your arms hang straight down from your shoulders.
Leading with your elbows, row the bar up and into your chest.
Extend your arms and repeat.
Benefits:
An excellent rear deltoid.
A great move for building stronger mid-traps and rhomboids.
Good for improving posture.
Tips:
Do not round your lower back, as doing so could lead to injury.
Lead with your elbows to maximize rear deltoid and upper back engagement.
Keep your wrists straight throughout.
FAQs
Do you have a question about our barbell shoulder workout or building bigger delts in general? Don’t worry because we’ve got the answers!
1. Is the barbell shoulder workout suitable for beginners?
Dedicating an entire training session to what is essentially a small muscle group will be too much for most beginners and could soon lead to injuries and overtraining. Most beginners would do better following a less advanced workout, such as an upper/lower body split of a full-body training routine. Return to this workout in a year or so when you’ll be better prepared.
2. How many times per week should I perform this barbell shoulder workout?
Most exercisers will get good results by doing this program 1-2 times per week. However, you should avoid doing it the day before or the day after chest day, as both workouts involve many of the same muscles. Training chest and shoulders on consecutive days could hurt your recovery and progress.
3. Can I make changes to this workout?
Feel free to modify this workout according to your needs and goals. If there is an exercise you don’t like, replace it with one you find more enjoyable. However, resist the temptation to switch out exercises you find hard, as, invariably, they are the ones that drive muscle growth. Easy workouts don’t build muscle!
4. Can women do this barbell shoulder workout, or is it only for men?
While this workout was written by a man for men, that doesn’t mean women cannot do it. However, please bear in mind that it is a muscle-building workout, so it may not align with some women’s fitness goals. So, if you don’t want bigger, more muscular shoulders, don’t follow this program.
5. What should I do if I experience shoulder joint pain during the workout?
Shoulder joint pain is a common problem for ardent bodybuilders and weightlifters. It can be caused by general wear and tear, and some exercises can make it worse, such as upright rows or behind-the-neck presses.
If any of the exercises in this workout cause shoulder pain, you should stop e and follow these steps:
Review your form – back technique can cause pain.
Use less weight – lifting more than you can safely handle is a leading cause of injury.
Use a different exercise – even changing your grip can help.
Seek medical advice – if your shoulder pain persists, get it checked out to determine if you have an injury.
6. What warm-up exercises should I do before starting the barbell shoulder workout?
Your pre-shoulder workout warm-up should consist of the following:
5-10 minutes of easy cardio
Dynamic mobility and flexibility exercises for your entire upper body, e.g., shoulder rolls, arm circles, overhead arm reaches, fist clenches, etc.
2-3 progressively heavier “ramped sets” of push-presses.
Spend as much time on each stage as necessary to ensure your muscles, joints, and brain are ready for the workout you’re about to do.
Read more about warming up for strength training here.
7. How long should I follow this program?
Even a great program like our barbell shoulder workout will eventually lose some of its effectiveness. Your muscles gradually get used to any training plan, and it’ll lose some of its potency. If your progress stalls, your training feels stale, or you haven’t been able to increase your weights for more than a few weeks, you probably need a new workout.
How long this takes varies from individual to individual, but you should expect to change your training plan every 4-8 weeks.
Check out our library of training programs for your next workout!
More Shoulder Workouts:
More Barbell Workouts:
Wrapping Up
Armed with our barbell shoulder workout, you have everything you need to take your deltoid gains to the next level. Combining heavy low-rep compound exercises with lighter higher-rep movements ensures that no fiber of your delts will go unstimulated.
Of course, your shoulders are just one of several critical muscle groups, so you must incorporate this workout into a balanced weekly training program that also works your chest, back, arms, and legs. Warm-up before each workout with cardio and dynamic exercises for a safer and more effective session.
Sadly, building bigger muscles can be a slow and laborious process, so you’ll have to commit to the long haul. That said, with dedication and determination, you can build the boulder shoulders of your dreams.
Build Muscle Size and Strength with Our Full Body Barbell Workouts
When it comes to exercise variety, commercial gym members are spoiled for choice. With access to an array of resistance machines, exercisers can train their muscles in a variety of ways, often targeting individual muscles with laser-like precision. Name a muscle, and there is probably a machine to train it.
Popular resistance training machines include:
Leg extension
Arm curl
Leg press
Chest press
Pec deck
Seated row
Lat pulldown
Leg curl
Triceps pushdown
However, while machines are safe and convenient, they’re not always the best way to train for functional strength and size. For starters, real-life weights don’t move in perfectly straight lines because they’re not guided on rods.
Also, it’s rare to use a muscle or single joint in isolation. Most human movements are the result of several muscles and joints working together.
Finally, some exercise machines bear little resemblance to the movements of daily life. After all, apart from pulling yourself upright in your La-Z-Boy chair, when was the last time you did a seated leg curl outside of the gym?
None of this means that machine exercises are bad. It’s just that, in some situations, free weights are better. Plus, not all exercisers have access to all machines. For example, if you work out at home, your equipment choices may be much more limited.
In this article, we celebrate the barbell by providing you with two full-body barbell workouts – one that involves a bench and squat rack and one that doesn’t.
Why Barbell Training Rocks!
Jeff Nippard doing Barbell Training
A lot of exercisers are quick to dismiss barbells as low-tech or old-school. While both of these criticisms are true, that doesn’t mean you can’t have a great workout with just a barbell and a stack of weights. In fact, barbells offer a wide range of benefits. These include:
Affordable – while barbells are available in a wide range of prices, basic models are not expensive. As such, barbell training can be very cost-effective, which is great news if you are working out on a budget.
Versatile – think of a muscle or muscle group, and there is a barbell exercise to train it. You can develop your entire body with a single barbell and weights, making it an incredibly versatile piece of equipment. In contrast, most resistance machines are one-trick ponies and can only be used for a single exercise.
Ideal for heavy weights – barbells are perfect for building strength with heavy loads. Lifting heavy weights can also increase muscle density. Barbells are made for loading with heavy weights, and most barbell exercises are compound, meaning they involve multiple muscle groups. This allows you to lift even heavier loads, pushing and developing your strength to its limit.
Time-efficient – barbells require minimal set-up time, and you can transition from one exercise to the next very quickly. That’s especially true when you keep things really simple and train with just a bar and skip benches, racks, etc.
Functional – many barbell exercises replicate the movements and demands of physical activity outside of the gym. Exercises like squats, deadlifts, and overhead presses will help build functional strength, which transfers to life out in the real world. The same cannot always be said for some machine exercises. For example, pec deck flies and leg extensions are a pretty unusual movements outside of the gym.
Fun – while this is a largely personal point of view, lifting heavy barbells is both challenging and fun. Seeing more plates on the bar than last week is rewarding and motivating and will make it easier to stick with your training program.
Barbell Training Considerations and Drawbacks
While barbell training is mostly effective and practical, in the name of fairness, there are a few drawbacks to consider, too:
Safety – unfortunately, barbell training can sometimes be dangerous. A failed rep can leave you pinned under a heavy weight, and serious injuries and even death can be the result. Avoid mishaps by working out with a spotter or stopping your set a couple of reps before failure. Better yet, work out in a power rack. Exercise your common sense alongside your muscles.
Relatively few isolation exercises – most barbell exercises are compound in nature. That means they involve multiple joints and muscles working together. While this is usually viewed as a good thing, it may be a drawback if you want to prioritize a specific muscle, e.g., your medial deltoids. Barbell training can make you big and strong, but you may need to hone your physique with some specific isolation exercises.
Heavy starting weight – most Olympic barbells weigh 45 pounds or 20kg. As such, even an empty barbell may be too heavy for some lifters, particularly for beginners or when doing isolation exercises like front raises. However, there so-called fitness bars available which weigh about half as much as an Olympic bar, and are ideal for beginners.
Not suitable for drop sets – a drop set is where you rep out to failure, reduce (or drop) the load by 10-15%, and then rep out again. This training method allows you to push your muscles beyond their usual quitting point.
However, stripping weight plates off a barbell is time-consuming, which means most barbell exercises are impractical for drop sets. Drop sets work best with machine and dumbbell exercises, where weight changes can be completed more quickly.
Full-Body Workout #1 – Barbell Only
If you work out at home, you may not have space for a bench or squat rack. However, you should have no problem finding room for a barbell and weight plates. The good news is that you can still get a great workout, even if your list of gym equipment is limited to a barbell and weights.
All you need for the following workout is a barbell, plates, collars, and enough space to wield them without breaking anything!
Do the following free weight workout 2-3 times per week on non-consecutive days.
For example:
Monday
Tuesday
Wednesday
Thursday
Friday
Saturday
Sunday
Workout
Rest
Workout
Rest
Workout
Rest
Rest
But before you start lifting any weights, it’s crucial to warm up and prepare your body for the challenges that await.
Begin with a few minutes of easy cardio, and then move on to dynamic mobility and flexibility exercises that target the muscles and joints you are about to use. These preparatory steps will set you up for a safer and more effective workout session.
Related: How to Warm Up for Strength Training
Warmed-up and ready to go? Then let’s get to work!
#
Exercise
Sets
Reps
Recovery
1
Zercher squat
2-4
6-20
60-90 seconds
2
Romanian deadlift
2-4
6-20
60-90 seconds
3
Floor press
2-4
6-20
60-90 seconds
4
Meadows row
2-4
6-20
60-90 seconds
5
Lunge
2-4
6-20
60-90 seconds
6
Cuban press
2-4
6-20
60-90 seconds
7
Biceps curl
2-4
6-20
60-90 seconds
8
Skull crusher
2-4
6-20
60-90 seconds
9
Barbell rollout
2-4
6-20
60-90 seconds
10
Barbell crunch
2-4
6-20
60-90 seconds
Workout #1 Exercise Instructions
There are two ways to do any barbell exercise – the right way and the wrong way. The right way is safe and effective. In contrast, the wrong way is dangerous and usually less productive, even if it allows you to lift heavier weights.
So, follow these instructions to ensure you’re doing the exercises in your barbell workout correctly!
1. Zercher squat
Muscles trained: Quadriceps, hamstrings, gluteus maximus, core.
The Zercher squat was invented by American powerlifter and strongman Ed Zercher when he needed a way to do squats without a squat rack. While this exercise does put a lot of pressure on your arms, which may limit the amount of weight you can lift, this is an excellent option for anyone who wants to train their legs but only has access to a barbell.
Steps:
Hold your barbell in the crook of your elbows. Bend your arms, clasp your hands together, and pull your upper arms into your sides. Pull your shoulders down and back, and brace your core.
Step out and into a shoulder-width stance, feet turned slightly outward.
Bend your legs and squat down until your thighs are roughly parallel to the floor.
Stand back up and repeat.
Tips:
Use a rolled towel, folded exercise mat, or a squat bar pad to protect your arms if necessary.
Push your knees out as you descend to maximize glute engagement.
Take care not to round your lower back, as doing so could lead to injury.
2. Romanian deadlift
Muscles trained: Gluteus maximus, hamstrings, core.
With no leg curl available, you may be wondering how you’re supposed to train your hamstrings using only a barbell. This exercise is the answer! The hamstrings are a biaxial muscle that crosses two joints – the knee and the hip. As such, it affects both these joints. So, as well as flexing your knees, the hamstrings also extend the hips, which is what you’ll be doing during this exercise.
Steps:
Hold a barbell with an overhand or mixed shoulder-width grip and stand with your feet hip-width apart. Brace your core, pull your shoulders back and down, and bend your knees slightly.
Hinging from your hips, lean forward and lower the bar down the front of your legs until you feel a stretch in your hamstrings.
Stand back up and repeat.
Tips:
Adjust your range of motion according to your flexibility.
Do not round your lower back.
Keep your knees slightly bent but rigid throughout. Do not straighten your legs.
Check out our complete guide Romanian deadlift.
3. Floor press
Muscles trained: Pectoralis major, deltoids, triceps.
The bench press is arguably the most popular barbell chest exercise around. No bench? No problem, because you can work all of the same muscles with floor presses. In fact, this exercise predates bench presses by many years, as commercial training benches were only really available after the 1940s. Before that, if you wanted to press while lying on your back, this is how you did it.
Steps:
Holding a barbell with an overhand, slightly wider than shoulder width overhand grip, lie on your back with your arms straight and the weight over your chest. Press your upper back into the floor for stability.
Bend your elbows and lower your upper arms to lightly touch the floor.
Extend your arms and repeat.
Tips:
You can do this exercise with straight or bent legs as preferred.
Lower the weight slowly to avoid hitting the floor too hard with your elbows and upper arms.
Adjust your grip to match your goals – move your hands closer together to emphasize your triceps or further apart to hit your pecs more.
4. Meadows row
Muscles trained: Latissimus dorsi, trapezius, rhomboids, deltoids, biceps, forearms.
The Meadows row was invented by professional bodybuilder and coach John “Mountain Dog” Meadows. This exercise is somewhat unique because, unlike most barbell movements, you only use one arm at a time. This is probably the most lower back-friendly barbell rowing exercise around.
Steps:
Place your barbell on the floor with one end against a wall. Stand perpendicular to the other end. Stand with your feet shoulder-width apart and knees slightly bent.
Lean forward and grip the end of the barbell with an overhand grip. Pull your shoulder back, brace your core, and turn your hips away from the bar to put your lats into a slightly stretched position. Use your free hand for support if required.
Leading with your elbow, bend your arm and pull the end of the bar up and into your ribs.
Extend your arm and continue for the prescribed number of reps.
Switch sides and repeat.
Tips:
Chalk your hands to prevent them from slipping off the end of the barbell.
You can let the weight settle on the floor between reps if you wish.
Do the same number of reps on both sides to develop all your muscles equally.
5. Lunge
Muscles trained: Quadriceps, hamstrings, gluteus maximus, abductors, adductors, core
Most barbell leg exercises are bilateral or two-limbed. While they’re great for building muscle size and strength, they may disguise left-to-right strength imbalances. While slight imbalances are normal, bigger differences can cause dysfunction, pain, and injuries. Lunges are a great way to ensure both of your legs are developed equally.
Steps:
Hold a barbell across your upper back. Stand with your feet together, core braced, and shoulders pulled down and back.
Take a large step forward, bend your legs, and lower your rear knee down to within an inch of the floor.
Push off your front leg and bring your feet back together.
Do your next rep with your other leg.
Continue alternating legs for the duration of your set.
Tips:
Take a shorter step to maximize quads engagement or a longer step to work your glutes and hamstrings more.
Lean forward slightly to hit your glutes and hamstrings more.
Rest the bar on your upper back and not on your neck, which would be uncomfortable and could even be dangerous.
6. Cuban press
Muscles trained: Deltoids, trapezius, rhomboids, biceps, triceps.
The Cuban press is one of the only barbell exercises to hit all three deltoid heads – anterior, medial, and posterior – fairly equally. It’s also an excellent exercise for improving shoulder mobility and stability as it works your rotator cuff, too. This is an awesome one-stop shoulder exercise!
Steps:
Hold a barbell with a slightly wider-than-shoulder-width, overhand grip. Stand with your feet about hip-width apart, knees slightly bent, shoulders down and back, and core braced.
Bend your elbows and row the bar up the front of your body to your lower chest.
Next, rotate the bar forward and up to your forehead.
Press the bar overhead to arm’s length.
Reverse the movement, return to the starting position, and repeat.
Tips:
Adjust your grip width for comfort.
Go light – any momentum will take work away from the target muscles.
Lead with your elbows during the row to maximize upper trap and deltoid engagement.
7. Biceps curl
Muscles trained: Biceps brachii.
No full-body workout would be complete without a biceps exercise. After all, the biceps are the most famous muscle in the human body, and almost every person who ever lifted weights wants stronger, more muscular arms. The barbell curl is arguably one of the best exercises for building great biceps.
Steps:
Hold your barbell with an underhand, shoulder-width grip. Stand with your feet about shoulder-width apart, knees slightly bent, core braced, and shoulders back and down.
Starting with your arms straight, flex your elbows and curl the bar up to your shoulders.
Extend your arms and repeat.
Tips:
Keep your upper arms close to your sides throughout.
Do not use your back or legs to lift the weight. If you need to cheat the bar up, it’s too heavy.
Lean your upper back against a pillar or wall if you cannot do biceps curls without cheating.
8. Skull crusher
Muscles trained: Triceps.
The barbell skull crusher is traditionally performed while lying on a bench. However, it works just as well as a floor exercise. This is a great triceps builder, but you should take care not to lower the bar too quickly, or skull crushers could live up to their name!
Steps:
Holding a barbell with an overhand, shoulder-width grip, lie on your back with your arms straight and the weight over your chest. Press your upper back into the floor for stability.
Keeping your upper arms vertical, bend your elbows and lower the bar to your forehead.
Extend your arms and repeat.
Tips:
Perform this exercise with legs bent or straight as preferred.
Avoid doing skull crushers to failure to prevent potentially serious accidents.
Rest the bar on the floor behind your head to make getting into position easier.
9. Barbell rollout
Muscles trained: Rectus abdominis, obliques, transverse abdominis.
While there is nothing wrong with bodyweight abs exercises, many are too easy to do much for your strength or muscular development. Barbell rollouts are much more challenging and will help you develop the rock-hard abs you’ve always dreamed of.
Steps:
Load your barbell and secure the weight plates with collars. Place your barbell on the floor.
Kneel behind your barbell and hold it with an overhand, shoulder-width grip. Brace your abs.
Push the bar away from you and lower your upper body down toward the floor.
Using your abs and lats, pull the bar back into your knees.
Continue for the prescribed number of reps.
Tips:
Do not hyperextend your lower back. Reduce your range of motion if you feel this exercise in your lumbar spine.
Keep your abs contracted throughout.
Make this exercise harder by starting each rep in the standing position.
10. Barbell crunch
Muscles trained: Rectus abdominis, obliques, transverse abdominis.
Bodyweight crunches are a decent abs exercise, but if you can do more than 30 reps, they probably don’t make the best use of your training time. Barbell crunches provide a simple way to overload your muscles, reducing the number of reps and time you need to reach failure.
Steps:
Holding a barbell with an overhand, shoulder-width, overhand grip, lie on your back with your arms straight and the weight over your chest.
Bend your legs and plant your feet firmly on the floor.
Lift your head, shoulders, and upper back off the floor, pushing the barbell up toward the ceiling.
Lie back down and repeat.
Tips:
Don’t go too heavy too soon; this exercise is harder than it looks.
Exhale as you lift your shoulders to maximize abs engagement.
Anchor your feet if necessary, e.g., under another barbell.
Full-Body Workout #2 – Barbell, Bench, and Squat Rack
While you can have a great workout using just a barbell, you’ll have access to a wider range of exercises if you also have an adjustable bench and a squat or power rack. These simple tools will make your workouts much more varied and interesting.
The following workout assumes you have a barbell, a bench, and a squat rack and, like the previous plan, trains your entire body. As before, you should do this workout 2-3 times per week on non-consecutive days, e.g., Monday, Wednesday, and Friday.
However, do not attempt this workout until you’ve completed a thorough warm-up.
#
Exercise
Sets
Reps
Recovery
1
Paused squat
2-4
6-20
60-90 seconds
2
Rack pull
2-4
6-20
60-90 seconds
3
Incline bench press
2-4
6-20
60-90 seconds
4
Pendlay row
2-4
6-20
60-90 seconds
5
Lateral lunge
2-4
6-20
60-90 seconds
6
Bradford press
2-4
6-20
60-90 seconds
7
Pull-up
2-4
6-20
60-90 seconds
8
Close grip bench press
2-4
6-20
60-90 seconds
9
1½ rep biceps curl
2-4
6-20
60-90 seconds
10
Barbell leg raises
2-4
6-20
60-90 seconds
Workout #2 Exercise Instructions
Get more from your workouts while keeping your risk of injury to a minimum by always training with good form. Follow these step-by-step instructions to make sure you’re doing each exercise correctly.
1. Paused squat
Muscles trained: Quadriceps, hamstrings, gluteus maximus, core.
Barbell squats are a great exercise, but they’re even better when you pause at the bottom of each rep. This pause breaks up the stretch-shortening reflex, making each rep more challenging while increasing your time under tension. Paused squats turn the king of exercises into something approaching god-like status!
Steps:
In a squat rack, rest and hold a barbell across your upper back. Stand with your feet shoulder-width apart and core braced.
Bend your legs and squat down until your thighs are roughly parallel to the floor.
Without relaxing, stay in this position for 1-3 seconds.
Drive your feet into the floor and stand up.
That’s one rep – keep going.
Tips:
Stay tight at the bottom of each rep; do not relax!
The longer you pause, the harder this exercise becomes.
Experiment with your stance width to determine what works best for you.
2. Rack pull
Muscles trained: Gluteus maximus, hamstrings, core, latissimus dorsi, trapezius, biceps, forearms.
The deadlift is a great exercise, but tall and inflexible people often find lifting a barbell from the floor awkward or uncomfortable. This modified variation works the same muscles as conventional deadlifts but is much more lower-back friendly.
Steps:
Place your barbell in a squat rack set to just above or below knee height.
Stand behind the bar and hinge forward from your hips. Hold your barbell with an overhand or mixed shoulder-width grip.
Straighten your arms, pull your shoulders down and back, lift your chest, and brace your core.
Drive your feet into the floor, push your hips forward, and stand up straight.
Lower the bar back to the pins, let the weight settle for a second, and repeat.
Tips:
Wear a weightlifting belt to support and protect your lower back.
Keep the bar pressed back toward your legs to maximize lat engagement.
Take care not to round your lower back, as doing so could cause severe injury.
3. Incline bench press
Muscles trained: Pectoralis major, deltoids, triceps.
The flat bench press might be the world’s favorite chest exercise, but for some lifters, it’s not an effective pec builder. Instead, many lifters feel bench presses more in their shoulders than their chests, and it can even cause joint pain. Incline bench presses may be better for both chest development and shoulder health.
Steps:
Adjust the backrest of your bench to about 30 degrees and place it in your squat rack.
Lie on the bench and hold the bar over your chest using a slightly wider than shoulder-width grip.
Bend your arms and lower the bar to your upper chest.
Push the bar back up and repeat.
Tips:
Experiment with the angle of your bench to see what works best and feels more comfortable. 10-30 degrees is generally best, and a steeper angle soon becomes more of a shoulder exercise.
Consider using wrist wraps if you need more joint support for this exercise.
Use a wider grip to emphasize your chest or a narrower grip to hit your triceps more.
4. Pendlay row
Muscles trained: Latissimus dorsi, trapezius, rhomboids, deltoids, biceps, core.
Pendlay rows are named after American weightlifting and powerlifting coach Glen Pendlay. Each rep starts and ends with the barbell resting on the floor, so it’s also known as dead stop rows. This mini-break between reps allows you to reset your core and grip, which should enhance your performance of this back-building exercise.
Steps:
Place your barbell on the floor and stand behind it so your toes are under the bar, feet about shoulder-width apart.
Lean forward and hold the bar with an overhand, slightly wider than shoulder-width grip.
Straighten your arms, pull your shoulders down and back, and brace your core.
Bend your arms and pull the weight off the floor and into your abdomen.
Lower the weight back to the floor, reset your grip and core, and repeat.
Tips:
Do not use your legs or lower back to lift the weight, as doing so takes stress off the target muscles.
Keep your lower back slightly arched throughout. A rounded lower back is a weak lower back.
Use lifting straps to reinforce your grips if necessary.
5. Lateral lunge
Muscles trained: Quadriceps, hamstrings, gluteus maximus, abductors, adductors.
Lunging sideways instead of forward adds a whole new dimension to this popular lower-body exercise. Lateral lunges are an excellent exercise for athletes from all sports and anyone who wants to develop their inner and outer thighs, glutes, and hips. Go light – this exercise is more strenuous than it looks. Expect some gnarly DOMS after doing this exercise the first few times.
Steps:
Rack and hold a barbell across your upper back. Stand with your feet together and core braced.
Take a large step out to the right and bend your right knee. Descend until your right thigh is roughly parallel to the floor. Keep your left leg straight.
Push off your right foot and bring your legs back together.
Do your next rep to the left.
Continue alternating sides for the duration of your set.
Tips:
A good exercise for improving hip strength and mobility.
An effective way to identify and fix left-to-right strength imbalances.
An excellent exercise for athletes that have to zigzag, e.g., basketball and soccer players.
6. Barbell Bradford press
Muscles targeted: Deltoids, triceps.
The barbell Bradford press is named after American weightlifter and strength coach Jim Bradford. It’s a unique exercise that hits all three deltoid heads reasonably equally. It also keeps the target muscles under constant tension, which boost your pump while maximizing muscle growth.
Steps:
Begin by standing with your feet shoulder-width apart and the barbell resting on your front shoulders, hands slightly wider than shoulder-width apart, and elbows pointed forward. Brace your core and stand in good posture with your head up and chest lifted.
Press the bar up so it’s level with the top of your head.
Push the bar backward and lower it behind your neck.
Next, push the bar back up and over your head, lowering it to the front of your neck.
That’s one rep – keep going!
Tips:
Keep the bar close to your head at all times.
Go light and focus on keeping tension on your deltoids for the duration of your set. Do not use your legs to help you bump the weight over your head.
Skip this exercise if you have a history of shoulder pain.
7. Pull-up
Muscles trained: Latissimus dorsi, trapezius, rhomboids, biceps.
Okay – you caught us! While pull-ups aren’t a barbell exercise, you can do them in most squat and power racks. The mighty pull-up is one of the best exercises for building a broader, more muscular back. Frankly, it would be a crime not to include them in one of the workouts in this article.
Steps:
Hold an overhead bar, such as a barbell set high in a power rack, with an overhand, slightly wider than shoulder-width grip. Hang with your arms straight, shoulders down and back, and core braced.
Bend your arms and pull your chin up and over the bar.
Extend your arms and repeat.
Tips:
Pull your elbows down and behind you to maximize back engagement.
Experiment with your grip width to see what feels most comfortable and effective.
Do not swing or kick with your legs, as doing so takes work away from the target muscles.
8. Close grip bench press
Muscles trained: Triceps, pectoralis major, deltoids.
The close grip bench press is a compound exercise emphasizing your triceps while also working your chest and shoulders. Using several muscle groups together means you should be able to lift a substantial weight to build both muscle size and strength. This exercise is best done in a power rack for safety.
Steps:
Place a flat workout bench in the middle of your squat rack.
Lie on the bench and hold the bar over your chest using a slightly narrower than shoulder-width grip.
Bend your arms and lower the bar to your chest.
Push the bar back up and repeat.
Tips:
Keep your upper arms close to your sides to maximize triceps engagement.
Do not use a very close grip, as doing so can hurt your wrists, elbows, or shoulders.
Do this exercise with a spotter or end your set 2-3 reps before failure for safety.
9. 1½ rep biceps curl
Muscles trained: Biceps.
While barbell biceps curls are an excellent exercise, you could become somewhat immune to them if you do that variation all the time. 1½ rep biceps curls add a twist to that classic arm-building exercise, ensuring your biceps gains never stall. However, this IS a very intense exercise, so don’t use too much weight too soon.
Steps:
Hold your barbell with an underhand, shoulder-width grip. Stand with your feet about shoulder-width apart, knees slightly bent, core braced, and shoulders back and down.
Starting with your arms straight, flex your elbows and curl the bar up to your shoulders.
Extend your arms and lower the barbell halfway down, i.e., to 90 degrees.
Curl it back up to your shoulders.
Lower it all the way down until your arms are straight, and repeat the entire 1½-rep sequence.
Tips:
Do not use your legs or back to help you lift the weight.
Keep your upper arms close to your asides to maximize biceps engagement.
Lean your back against a wall or pillar if you cannot perform this exercise without cheating.
10. Barbell leg raises
Muscles trained: Rectus abdominis, obliques, transverse abdominis, hip flexors.
There are lots of bodyweight abs exercises to choose from, many of which can be very effective. However, weighted exercises are often a better choice as they allow you to adjust the load according to your strength and goals. Barbell leg raises combine a classic bodyweight abs exercise with weights to deliver an intense core workout.
Steps:
Lie on the floor and hold a barbell over your chest using a slightly wider than shoulder-width grip. Brace your core and press your lower back into the floor. Lift your feet a few inches off the floor.
Keeping your legs straight, raise your legs until they’re vertical. Lift your hips a few inches off the floor to maximally engage your abs.
Lower your legs back down, stopping just before they touch the floor.
Continue for the prescribed number of reps.
Tips:
Bend your legs to make this exercise a little easier.
Start light – even an empty barbell will be challenging for many people.
Keep your lower back pressed into the floor at all times.
FAQs
Do you have a question about either of our full-body workouts or barbell training in general? No worries because we’ve got the answers!
1. How many reps per set should I do?
Not so many years ago, most fitness experts believed that you had to do 6-12 reps to build muscle, and higher reps were best for building endurance. While this made sense, research now suggests that almost any rep range can build muscle, provided you take your sets to within 1-3 reps of failure. It seems that there is no optimal rep range for hypertrophy or endurance. (1).
So, base your reps per set on your personal preferences and how much weight you have available. Some people prefer lower-rep sets, e.g., 6-8, while others prefer higher reps, i.e., 20-30. Both options can build muscle mass.
However, if you want to build pure strength, lower reps with heavy weights are still the way to go. That said, not all of the exercises in these programs are suitable for heavy strength training, and the workouts are more for general fitness and muscle building.
2. Can I build a good physique training with just a barbell?
You certainly can! Before resistance machines gained popularity, most people trained with barbell and dumbbell exercises, which they often supplemented with calisthenics or bodyweight training.
Gyms were often known as “barbell clubs,” and typical bodybuilding workouts revolved around basic compound barbell exercises. Even the legendary Arnold Schwarzenegger used simple barbell workouts in the off-season to build mass and strength.
So don’t feel you are missing out because you only have a barbell to train with; it’s arguably one of the most potent strength and muscle-building tools available.
3. Are these cutting or bulking programs?
Cutting (losing fat) and bulking (building muscle) have more to do with your diet than they do your workout. Getting leaner invariably requires a caloric deficit, while you need a calorie surplus to build appreciable amounts of muscle.
Providing you’ve got your diet straight, your workout will help you achieve your training goal, be that losing fat or gaining muscle.
So, adjust your eating plan and train hard – you’ll soon be on your way to achieving your body composition goals.
4. Can I do these workouts every day?
It’s estimated that a muscle or muscle group takes 48-72 hours to recover from an intense workout. Training before you have recovered will undermine your progress, and your workout performance will probably suffer as a result. You could also end up feeling overtrained.
You can train more often than the suggested 2-3 times per week, but you’ll need to adopt a split routine where you work different muscles on different days. This will provide adequate time for recuperation between similar workouts, e.g.:
Days
Workout
1
Monday
Chest, Shoulders & Triceps
2
Tuesday
Back & Biceps
3
Wednesday
Legs, Calves & Abs
4
Thursday
Chest, Shoulders & Triceps
5
Friday
Back & Biceps
6
Saturday
Legs, Calves & Abs
7
Sunday
Rest
5. Are these workouts suitable for women as well as men?
While these workouts are kinda manly, there is no reason that women cannot do them, too. That said, they are muscle-building programs, so if that isn’t your goal, you should seek out programs that more closely match your needs and objectives.
Check out our library of female workouts and fitness articles here.
Full Body Barbell Workouts – Closing Thoughts
While fitness fashions and trends come and go, barbells are here to stay and will always be one of the most powerful training tools available. Armed with nothing but a barbell and weight plates, you can develop every muscle in your body for almost any fitness goal, including building strength and muscle mass.
Add a bench and a squat rack to your equipment list, and you really have all you need to build a head-turning physique. That’s good news for anyone who prefers simple old-school style workouts or who trains at home with minimal training kit.
Use these full-body barbell workouts to build muscle and strength without resistance machines. Bodybuilders have long relied on basic equipment, exercises, and workouts to increase strength and muscle mass. It worked for them, and it’ll work for you, too.
References:
1- Grgic J, Schoenfeld BJ, Orazem J, Sabol F. Effects of resistance training performed to repetition failure or non-failure on muscular strength and hypertrophy: A systematic review and meta-analysis. J Sport Health Sci. 2022 Mar;11(2):202-211. doi: 10.1016/j.jshs.2021.01.007. Epub 2021 Jan 23. PMID: 33497853; PMCID: PMC9068575.
Barbell Triceps Workout for Mass and Strength
When it comes to triceps training, most exercisers make a beeline to the cable machine and start cranking out triceps pushdowns like their gains depend on it. And while all those sets of straight-bar, rope, and EZ bar pushdowns can be effective, cable triceps exercises have their limitations.
For starters, always doing your triceps training with your upper arms by your sides means you’re always emphasizing the same triceps head. In addition, it’s hard to go really heavy with any triceps pushdown variation, which could limit growth and strength gains. Use too much weight, and you could well feel pushdowns more in your core than your arms. Finally, if you work out at home, you may not even have access to a cable machine.
The good news is that you can address all these workout shortfalls with an old-school barbell. Barbell training is arguably one of the best ways to build mass and strength, even in your triceps.
In this article, we share a no-frills but high-effect barbell triceps workout that’ll kick your arm development into overdrive.
Triceps Anatomy Basics
Before we unleash our barbell triceps workout on the unsuspecting masses, let’s take a moment to look at the anatomy and physiology of this critical arm muscle.
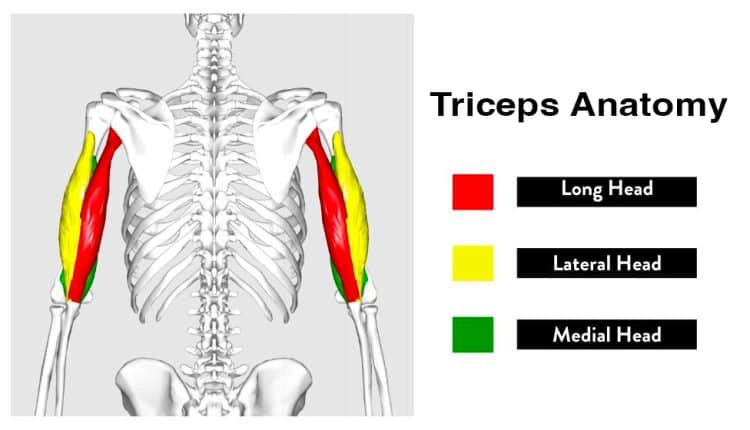
The triceps brachii, commonly known as the triceps, is a three-headed muscle located at the back of the upper arm. Its primary function is elbow extension, which means it straightens the elbow joint. The triceps are also involved in shoulder extension.
The three triceps heads are:
Long head: The long head originates from the scapula (shoulder blade) and extends down the back of the arm. It plays a crucial role in shoulder extension and contributes to the overall size and shape of the triceps. Overhead triceps exercises emphasize the long head of the triceps.
Medial head: The medial head is located on the inside of the arm. It works with the other triceps heads to extend your elbows and contributes to the overall width/thickness of the triceps muscle. Exercises where your arms flare away from your sides emphasize the medial triceps head.
Lateral head: Located on the outside of the upper arm, the lateral head is responsible for the horseshoe shape often associated with well-developed triceps. It assists in stabilizing the elbow joint during extension. The lateral head works hardest when your upper arms are close to your sides.
Incorporating various exercises with different arm positions into your triceps workout routine ensures that you hit all three heads of the triceps effectively. That’s why focusing almost exclusively on pushdowns could hurt your triceps’ shape and size.
Barbell Triceps Workout – Overview
Now you’ve refreshed your triceps anatomy and physiology knowledge, it’s time to hit the gym and train!
Do the following workout 1-2 times per week as part of a weekly training split, where you train your remaining body parts on different days.
For example:
Days
Workout
1
Monday
Chest
2
Tuesday
Back
3
Wednesday
Shoulders
4
Thursday
Legs
5
Friday
Triceps
6
Saturday
Biceps
7
Sunday
Rest
But, before you lift any weights, make sure you warm up to reduce your risk of injury while improving workout performance. Start with a few minutes of easy cardio followed by dynamic mobility and flexibility exercises for your muscles and joints, focusing on your shoulders, elbows, and lower back.
Related: How to Warm Up for Strength Training
Warmed-up and ready? Then let’s get to work!
Exercise
Sets
Reps
Recovery
1
Barbell close grip floor press
4
6-8
3 minutes
2
Barbell overhead triceps extension
3
8-10
2 minutes
3a
Barbell skull crusher
3
10-12
90 seconds
3b
Barbell close-grip bench press
4
Barbell behind-the-back triceps extensions
2
12-15
60 seconds
Exercises 3a and 3b are to be performed as a superset. Do the skull crushers and then, without pausing, switch to close grip bench presses using the same bar and weight. Rest a moment and then repeat the pairing twice more to make three triceps-blasting supersets.
Exercise Instructions
There are two ways to do any barbell triceps exercise – the right way and the wrong way. The right way is safe and effective, while the wrong way is dangerous and usually less productive, even if it allows you to lift heavier weights. Follow these instructions to ensure you’re doing the exercises in your barbell triceps workout correctly.
1. Barbell close grip floor press
Muscles targeted: Pectoralis major, triceps, deltoids.
A lot of exercisers view the barbell floor press as the poor man’s bench press. While the floor press IS a good workout option when you don’t have a bench, it’s actually an excellent exercise in its own right.
The floor press forces you to lower the bar under control and push it up from a dead stop, and the close grip will hammer your triceps. Go heavy with this movement; it’ll pack on triceps mass like nothing else.
Steps:
Lie flat on your back on the floor. Grip your barbell with an overhand grip, hands slightly narrower than shoulder-width apart. Hold the bar over your chest with your arms extended. Pull your shoulders down and back, and brace your abs.
Bend your elbows and slowly lower the barbell towards your chest until your upper arms lightly touch the floor.
Drive the barbell back up to full arm extension without locking your elbows at the top to maintain muscle tension.
Continue for the prescribed number of reps.
Benefits:
A very shoulder-friendly exercise.
The close grip provides an excellent triceps workout.
No bench required, so it’s a great movement for home workouts.
Tips:
You can do this exercise with your legs straight or bent as preferred.
Lower the bar slowly and then extend your arms explosively to maximize muscle engagement.
Keep your upper arms close to your sides to maximize triceps engagement.
2. Barbell overhead triceps extension
Muscles targeted: Triceps.
The barbell overhead triceps extension is also known as the French press, although the reason why is unclear. Regardless of the origin of the name of this exercise, it’s a great way to build bigger, stronger triceps and preferentially targets that all-important long head. However, you will need good shoulder mobility to pull it off.
Steps:
Hold your barbell with a narrower-than-shoulder-width overhand grip. Raise the bar overhead so your arms are next to your ears.
Bend your elbows and lower the bar down behind your head.
Extend your arms and repeat.
Benefits:
An excellent triceps builder.
Preferentially targets the long head to the triceps.
Requires and develops good shoulder and elbow mobility.
Tips:
This exercise can be done seated or standing as preferred.
Avoid arching your lower back during this exercise. Keep your core braced to support your spine and maintain your posture.
Use a grip that feels comfortable for your shoulders, elbows, and wrists and doesn’t cause pain in any of these areas.
3a. Barbell skull crusher
Muscles targeted: Triceps.
If awards were given for the exercise with the most bad@$$ name, barbell skull crushers would be the outright winner! This exercise is so-called because if you fail mid-rep, you could hit yourself in the head with the bar. So, take care when doing this exercise, and always leave a rep or two in the tank.
Steps:
Lie on a bench and hold a barbell over your chest with an overhand, slightly narrower than shoulder-width grip.
Keeping your upper arms stationary, bend your elbows and lower the bar down slowly to lightly touch your forehead.
Extend your arms and repeat.
On completion, transition immediately to the next exercise.
Benefits:
A very effective triceps isolation exercise.
A low-tech but high-effect exercise for building bigger, stronger triceps.
Works well even with lighter loads.
Tips:
Lower the barbell under control, avoiding any sudden or jerky movements.
Keep your elbows tucked in and pointing upward throughout.
Use the same bar and weight for the next exercise. There is no need to change your position.
3b. Barbell close-grip bench press
Muscles targeted: Pectoralis major, triceps, deltoids.
Following skull crushers with close-grip bench presses will blow your triceps up! This demonic combo isolates your triceps and then uses your pecs and deltoids to push your triceps even further beyond failure. It’s gonna hurt, but this pairing will add slabs of muscle to the backs of your arms.
Steps:
Lie on a bench and hold a barbell over your chest with an overhand, slightly narrower than shoulder-width grip.
Bend your elbows and lower the bar down to your chest
Drive the weight back up and repeat.
Benefits:
A great way to finish off your triceps after skull crushers.
Delivers a skin-splitting pump and deep triceps burn.
An excellent exercise for mass and strength.
Tips:
Keep your shoulder blades together and your chest up to maintain stability during the exercise.
Keep your upper arms close to your body to emphasize the triceps.
Use a spotter to assist you, especially when using heavy weights.
4. Barbell behind-the-back triceps extensions
Muscles targeted: Triceps.
You won’t see many people doing this exercise, but that’s their loss! Barbell behind-the-back triceps extensions are a kind of kickback exercise that hammers your triceps, especially the long head. This is your final exercise, so push yourself to failure on both sets.
Steps:
Hold a barbell behind your back using an overhand, hip-width grip.
Bend your knees slightly and lean forward until your shoulders are level with your hips.
Extend your elbows so your arms are straight, and then bend them until the bar lightly touches the back of your legs. Keep your upper arms parallel to the floor.
Continue for the prescribed number of reps.
Benefits:
A uniquely challenging old-school triceps exercise.
Prioritizes the triceps’ long head.
The perfect end to a barbell triceps workout!
Tips:
Keep your upper arms close to your body to emphasize the triceps.
Avoid using your legs or lower back to help you lift the weight. Do as much work as possible with your triceps.
Go light – this exercise is much more challenging than it looks.
Barbell Triceps Exercises – Benefits
Not convinced that barbells are the best tool for building massive horseshoe triceps? Consider the following benefits and then decide:
Time-efficient
Barbell triceps exercises train both arms simultaneously, which could save you a lot of time compared to working each limb individually.
Ideal for heavy weights
Barbells are ideal for building strength with heavy loads. Lifting heavy weights can also increase muscle density. Most barbell triceps exercises are compound, meaning they involve multiple muscle groups. This means you can lift even heavier loads, pushing and developing your strength to its limit.
Accessible
No matter where you train, you should have access to barbells and weights. Most commercial gyms have rows of barbells, and they’re standard equipment in most home and garage gyms, too. While home cable machines do exist, they’re pretty big and expensive, so they may not be practical for many people.
Versatile
There are lots of different barbell triceps exercises to choose from. Whether you want to hit each triceps head with laser-like precision or just build the strongest muscles possible, barbell triceps training will help.
Barbell Triceps Exercises – Drawbacks
While barbells are an excellent triceps training tool, there are a couple of drawbacks to consider, too:
Safety
Exercises that involve holding a weight over your chest, neck, or head can be dangerous. A failed rep can leave you pinned under a heavy load. As such, you should stop your set with 1-2 reps left in the tank or, if you plan on training to failure, make sure you have a spotter on hand.
Joint stress
Some barbell triceps exercises can be hard on your joints. In contrast, the same movements done with dumbbells are often more joint-friendly, allowing you to rotate your wrists, elbows, and shoulders more naturally.
Not practical for drop sets
A drop set is where you rep out to failure, reduce (or drop) the weight by 10-15%, and immediately rep out again to take your muscles beyond failure.
Taking weight plates off a bar takes too long for drop sets to be practical. You’d need to use fixed-weight barbells to do drop sets effectively. That’s why most drop-set workouts involve dumbbells or selectorized weight machines, both of which allow for quick load changes.
Starting weight
The average Olympic barbell weighs a not insignificant 45 pounds or 20kg. This may be too heavy for some lifters, especially beginners or when doing barbell triceps isolation exercises like skull crushers.
FAQs
Do you have a question about our barbell triceps workout or building bigger arms in general? Don’t worry because we’ve got the answers!
1. Can beginners do this workout, or is it more suitable for experienced lifters?
The volume, training methods, and difficulty of some of the exercises in this workout mean that it’s better suited to intermediate and advanced lifters. It’ll probably be too long and hard for a beginner.
If you are new to working out, focus on building some basic strength and improving your training tolerance before attempting this program. Even then, consider doing fewer sets and stopping each set short of failure to get used to this type of training.
2. How many times a week should I do this workout?
Most exercisers will get good results by doing this program 1-2 times per week. However, avoid doing it immediately before or after your chest and/or shoulder workouts, as both also strongly involve your triceps, which might be too much for you to recover from. Arrange your workouts so you do this program before a leg, back, or biceps workout.
3. Can I use an EZ-curl bar for the exercises mentioned in the workout?
While this is a straight barbell workout, there is no reason you can’t use an EZ bar if that’s what you prefer. The angled handles of an EZ bar may put your wrists, elbows, and shoulders in a more comfortable position. Also, you could use an EZ bar for some exercises and a straight barbell for others. Experiment with both options and see which you prefer.
4. Can I combine this barbell triceps workout with other muscle groups on the same training day?
This barbell triceps workout would combine well with a similar biceps program. You could also do it after a back workout. However, it’s already quite lengthy, so expect to spend well over an hour in the gym if you combine this workout with another.
Related: Biceps and Triceps Superset Workout
5. How long should I rest between sets during this workout to optimize performance and recovery?
Generally, the harder and heavier you train, the longer you need to rest between sets. In this program, you’ll rest for three minutes between heavy compound lifts but just 60 seconds between lighter isolation exercises. This is both logical and practical.
However, you should rest for as long as it takes for your muscles to recover and feel ready to attack your next set. If your reps drop significantly or you need to reduce the weights, you probably need to rest a little longer. It’s generally best to rest too long rather than not rest long enough.
6. Can women do this barbell triceps workout, or is it tailored more for men?
While this IS a fairly guy-orientated workout, that doesn’t mean women can’t do it, too. However, its purpose is to build muscle and strength rather than improve muscle tone or burn fat, so bear that in mind if you’re a woman considering this program.
7. Can I combine barbell triceps exercises with other training modalities?
There is no law that says you have to use the same type of equipment for your entire workout. Using different equipment will make your program more varied and interesting, leading to a more enjoyable training experience. For example, instead of using a barbell for all the exercises in our workout, another approach would be:
Diamond push-ups
Cable overhead triceps extension
Barbell skull crusher
Barbell close-grip bench press
Dumbbell triceps kickbacks
The movements are largely the same, but you’ll be using different tools and methods to for some of the exercises.
Barbell Triceps Workout – Wrapping Up
Building bigger, stronger triceps is seldom easy, but this workout is designed to help you achieve the arm size and strength you’ve always dreamed of.
Keep in mind that while barbell triceps exercises are incredibly effective, it’s usually best to combine them with other types of training to keep your workouts fun and challenging. You don’t have to go all barbell all of the time.
Now, armed with your new knowledge of triceps anatomy and the power of the barbell, go forth and conquer your triceps-building goals! Remember, though, that muscles don’t grow overnight, but with determination and consistent effort, you WILL see the results you desire.

Best Exercises to Lose Belly Fat After 50 — Get Fit and Fabulous
Once you pass your fifth decade, everything gets harder. Building muscle is a great struggle. Getting stronger takes a more dedicated effort. And maintaining a healthy body weight becomes a massive uphill battle. The reasons are clear; your metabolism is slowing down, your testosterone levels are depleting, and you’re naturally losing muscle and strength. So, what can you do about it?
Once you’re past 50, adopting a more intelligent approach to training becomes essential to conquer the innate obstacles to maintaining a healthy weight. Following the gym crowd and doing the old stand-by exercises to lose belly fat won’t cut it.
This article lists the best exercises to lose belly fat after 50. I’ll also lay out the other aspect of weight loss over 50 — how to eat to lose belly fat.
Importance of Losing Belly Fat Over 50
There are two types of fat in your body, subcutaneous and visceral. The fat that is beneath your skin is referred to as subcutaneous fat. This type of fat may be easily grabbed by hand and gathered in the usual “problem areas,” including the thighs, hips, neck, and arms. It accounts for around 80% to 90% of our total body fat.
The remaining 10 to 20 percent is called visceral fat and is found around the liver, spleen, intestines, kidneys, and other internal organs, as well as beneath the stomach muscles. It sometimes goes by “deep fat” since it covers your internal organs and fills the spaces between your stomach, intestines, liver, and other organs. [1]
Subcutaneous fat differs from belly fat, which is far more hazardous because it increases the risk of type 2 diabetes, cardiovascular disease, and inflammatory disorders. Belly fat forces the abdominal muscles outward because it is harder than subcutaneous fat.
These deep abdominal fat cells transfer their free fatty acids directly to the liver rather than releasing them into the bloodstream. Triglycerides and cholesterol are other types of fat that the liver creates in reaction and release into the bloodstream. Free fatty acids are the types of fat that are released from fat cells and carried into the blood, whereas triglycerides are another type of blood-borne fat that the body uses as an energy source. Increased risk of cardiovascular disease is linked to high cholesterol and triglyceride levels.
Challenges of Losing Belly Fat Over 50
Once past 50, you will find it increasingly difficult to keep your belly fat down to healthy levels. It’s not that your willpower to resist tempting foods is lower. Here are four physiological reasons you’re more prone to putting on belly fat over 50:
1. Reduced Metabolism
At around 30, most people’s metabolisms decline by about 1% every two years. Although the exact cause of our aging metabolism is unknown, it most likely involves a decline in muscle mass and a shift in hormone levels. Men produce less testosterone, while women’s estrogen levels decrease after menopause. [2]
2. Less Muscle
Age-related muscle loss, or sarcopenia, kicks in from about the age of 40. Because muscle is more active metabolically than fat, having less of it negatively affects our metabolic rate. As a result, you won’t burn as many calories at rest, making it easier for that spare tire to develop around your belly. [3]
3. Lifestyle
Most people tend to slow down as they age. By the time they reach their 50s, most folks stop playing sports, no longer play with the kids, and spend more time on the couch. That means fewer calories burned throughout the day.
4. Stress
When we experience chronic stress, our cortisol levels increase dramatically. This can indirectly contribute to higher levels of belly fat. As we get older, our stress levels can increase due to many factors, including work stressors, financial problems, and the concerns of looking after elderly parents.
Cortisol can increase the desire for comfort foods with high caloric content, particularly those high in carbohydrates and fats. These are the very foods that contribute to increases in belly fat.
Cortisol encourages fat storage, particularly visceral fat, which builds up around the abdominal organs. In fact, the hormone can actually redistribute subcutaneous fat to visceral fat.
Cortisol also has a catabolic effect on muscle tissue, causing a breakdown of amino acids. This can contribute to age-related muscle loss. [4]
15 Diet & Nutrition Tips To Lose Belly Fat Loss Over 50
As we’ve learned, excess belly fat is aesthetically unpleasing and dangerous. It puts you at a higher risk of cancer, coronary heart disease, type 2 diabetes, arthritis, and depression. Fortunately, it is possible to reduce your belly fat levels dramatically.
Here are 15 diet and nutrition tips that will complement your exercise-based efforts to reduce the spare tire:
1. Increase Your Fiber Intake
You can shed belly fat by increasing the amount of soluble fiber in your diet. This is because fiber will assist in lowering your blood sugar levels. You’ll experience stable insulin levels as a result.
Fiber, which is incredibly filling, also serves as the body’s natural cleaner. It enhances digestion and improves waste excretion. A 2011 study found that a 10-gram increase in soluble fiber consumption over a five-year period reduced belly fat accumulation by 3.7%. [5]
The best sources of fibrous carbs are brightly colored vegetables and berries, including strawberries, blueberries, blackberries, beans, lentils, and other legumes.
2. Reduce Your Alcohol Intake
Unsurprisingly, overindulging in alcohol can lead to a ‘beer gut.’ In fact, if you are trying to reduce your belly fat, alcohol will be one of your worst enemies. Alcohol contains zero proteins, carbohydrates, or fats. In other words, it has no nutritional benefit whatsoever, and every gram of alcohol adds seven calories to your system.
After you drink alcohol, your body prioritizes metabolizing it. That means your body will first burn alcohol instead of fat, postponing your ability to burn off the spare tire.
Alcohol puts almost twice as many calories per gram into your body than carbs and protein (seven versus four). And those calories are much easier to consume than the solid foods we eat to get macronutrients into our system. As a result, it is extremely easy to take in hundreds, even thousands, of zero-nutrition calories from alcohol in an evening.
Alcohol slows down the central nervous system and lowers inhibitions. One of the effects of this is that people eat more when they are drinking. And the foods that are normally consumed on these occasions are those that are high in simple carbs. All of this is a sure-fire recipe for fat gain.
Alcohol hurts food digestion, leading to reduced efficiency in breaking down fats for fuel, impeding the weight loss process.
Alcohol has a negative effect on testosterone production. Testosterone is an important hormone for fat loss, so its alcohol-induced lowered release will directly impact fat-burning ability.
The bottom line here is if you’re serious about getting rid of visceral body fat, you need to cut back on the booze. [6]
3. Consume More Omega-3 Fatty Acids
Your feelings, behavior, and physique aesthetics will change dramatically if you consume more omega-3 fatty acids, particularly while following a weight loss program.
Here’s what increasing your omega-3 intake will do for you:
Boost your insulin sensitivity
Aid with fat burning
Boost your metabolism
Reduce cortisol production and increase your energy
Assist with muscle growth
The best sources of omega-3 fatty acids are eggs, fatty fish, chia seeds, walnuts, and flaxseeds. [7]
4. Eat More Monounsaturated Fats
Monounsaturated fats have the power to lower insulin and LDL cholesterol levels. Here are five excellent sources of monounsaturated fats:
Olive
Nuts
Avocado
Avocado Oil
Coconut Oil
5. Eliminate Processed Grains
Processed grain products include cereal, bagels, pasta, bread, and bagels. The nutritional content of the grains is reduced while the calorie density is increased by milling, refining, and bleaching. That’s not a healthy combination.
Although whole grain types are preferable because they still contain some fiber and nutrients, even these are processed to some extent and may be high in calories.
However, you should only consume only whole grains going forward. That means avoiding products made from white pasta, rice, or flour. [8]
6. Prepare for Snack Time
A vital tactic for effective weight loss is predicting and planning when you’re likely to feel hungry throughout the day. When hunger strikes, having ready-to-eat, homemade snacks can come in handy.
Here are five tasty, straightforward snacks:
Apple crisps
Almonds
A nutritious smoothie
Hard-boiled eggs
A can of water-packed tuna
7. Reduce Liquid Calorie Intake
Liquid calories have several significant issues. Refined sugars are frequently used in weight loss smoothies as flavoring. Others use preservatives to enhance flavor and mixability. Those who consume solid meals feel satiated longer than those who use meal-replacement beverages.
In a 2007 study, test subjects were given solid food and a meal replacement shake, and their degree of satiety was monitored over the next four hours.
The satiety levels were much higher in the solid food group. In fact, the meal replacement group’s body didn’t even recognize that they had eaten from a chemical standpoint. [9]
8. Increase Water Intake
Hydration is crucial to a successful weight-loss strategy. Water can also help increase metabolism. Participants in a study who drank 16 ounces of water daily experienced a 30% rise in their metabolism. [10]
Always keep a water bottle with you. To stay full, regularly sip from it. Drinking water will also assist you in satisfying your thirst so that you don’t confuse it with hunger.
9. Begin Meal Prepping
One of the keys to sticking to your smart eating plan is prepping your meals in advance. This involves keeping a couple of hours aside, usually on the weekend, to prepare your weekly meals.
This greatly eases your search for nutritious options that adhere to your macronutrient guidelines. Meal planning will also significantly reduce your likelihood of reverting to poor eating patterns.
10. Avoid Trans Fatty Acids
Unsaturated lipids become trans fatty acids when hydrogen is introduced. They have been demonstrated to increase belly fat in addition to being connected to heart disease and insulin resistance. According to one study, eating a lot of trans fats can increase belly fat by 33%. [11]
11. Do a 14-Day Detox
To get rid of toxins and other impurities in your body, try a 14-day detox. The doors of fat loss may effectively be flung open by this. It’s not necessary to starve during a cleanse. It involves giving your body the proper nutrients to remove toxins and restore its natural equilibrium.
12. Increase Coconut Oil Consumption
Recent years have seen a lot of research focused on the coconut. Many of these studies have focused on how they can aid in weight loss.
Coconut oil contains medium-chain fatty acids that do not circulate in the bloodstream like long-chain fatty acids. Instead, they are sent to the liver, which turns them into energy. As a result, your body turns to coconut oil for energy rather than storing the calories as fat.
According to some studies, switching from olive oil, which contains long-chain fatty acids, to coconut oil, which contains medium-chain fatty acids, results in greater fat reduction. Coconut oil is particularly helpful for decreasing weight around the abdomen, where visceral fat collects. Because it is linked to so many ailments, visceral fat is the most harmful type of fat.
In a recent study, one ounce of coconut oil was added to women’s diets with excessive abdominal fat. Both their waist circumference and their BMI significantly decreased after 12 weeks. This was accomplished without any exercise or other dietary changes. [12]
13. Add Herbs to your Meals
Several plants have been used by indigenous peoples worldwide for centuries to help with weight loss. In recent decades, science has confirmed the effectiveness of some of them. Here are three of the best:
Turmeric
Cumin
Ashwagandha
14. Consume More Protein
Protein aids in fat loss in addition to helping you develop muscle. This is because protein has the strongest thermogenic effect of all the macronutrients, is very filling, and reduces hunger. As a result, it requires more energy to digest than fats or carbohydrates.
When paired with weight resistance exercise, protein’s ability to build muscle also aids in belly fat reduction. Maintaining muscle demands five times as many calories as maintaining body fat. Therefore, the more muscular you are, the leaner you will be!
Plan to consume one gram of protein per pound of body weight, with your preferred protein sources being eggs, chicken, fish, legumes, Greek yogurt, and cream cheese. [13]
Related: Try Our Protein Calculator
15. Cut Yourself Some Slack
It is important to be realistic when trying to lose belly fat. When you try to lead a healthy lifestyle, you’ll find yourself moving in the opposite direction from the vast majority of people. The environment you are in will constantly provide you with temptations. It’s ridiculous to expect yourself to never make a mistake. Remember that a poor eating decision won’t halt your progress.
The key takeaway is that you shouldn’t punish yourself if you make a poor nutritional choice or skip an exercise. Your ability to succeed depends on developing long-lasting habits that you can maintain. An occasional slip-up won’t hamper your results.
Best Exercises to Lose Belly Fat Over 50
Losing weight, and keeping it off, is all about consistency. Sticking to a balanced training and diet plan to create a calorie deficit will help you shed unwanted pounds effectively and sustain your weight loss progress over time.
The key to success is incorporating a sustainable exercise schedule into your lifestyle. Let’s find out how it should (and shouldn’t) be done.
How Not to Lose Belly Fat
Let’s get it straight from the outset, you will not lose belly fat by doing hundreds of sit-ups, crunches, leg raises, or other exercises for your abdominal muscles. The reason is simple; you cannot spot-reduce belly fat. In other words, doing a thousand crunches will not burn fat off your belly fat.
Fat comes off the body evenly. So, when you do a calorie-burning exercise, you cannot dictate what part of the body it will come from. Depending on your genetics, the fat might come off the belly and the sides of the waist (the dreaded love handles) last. When you build muscle, you will also increase your metabolism to burn more calories.
Exercise Type: Fast or Slow?
There is a lot of confusion about what type of cardiovascular exercise is best for weight loss. It boils down to two options — long and slow cardio or fast and short cardio. Both sides have their passionate advocates, yet the current scientific consensus is squarely on the side of fast, short, high-intensity sessions. High-intensity interval training (HIIT) involves quick bursts of high-intensity training followed by short rest periods.
The best HIIT exercises will allow you to use maximum exertion to burn maximum calories. Running is a great choice, allowing for hard-out sprints (imagine a Doberman is chasing you) followed by a slow jog. Incorporating HIIT training into your exercise schedule thrice weekly will help you burn calories while exercising and turn your body into a fat-burning furnace by boosting your metabolism for the next 24 hours. [14]
The best exercises to reduce belly fat for men are those that burn the most calories. Combine this with a healthy diet, and your belly girth will decrease. Here are the six effective belly fat exercises to reduce fat from your midline:
Treadmill
Exercising on a treadmill is the most popular form of cardio exercise in gyms worldwide. However, most people do not do it with enough intensity. Walking at 2 miles an hour while reading a book will not cut it. A far better way to go is HIIT. This involves interpreting short sprints with even shorter rest periods for multiple bouts.
Tabata is another effective form of HIIT workout for fat loss. It involves a slow two-minute warmup and a 20 seconds max speed sprint. You then throw your legs out to the side of the running belt for 10 seconds. That is one round. The workout involves performing eight rounds. It is extremely hard work but burns a ton of calories. Then, thanks to what is known as the enhanced post-exercise oxygen consumption (EPOC) effect, you will have an elevated metabolism for the next 24-36 hours!
Rowing Machine
The rowing machine is another excellent exercise that will help you reduce fat around your belly. This exercise involves your whole body and gets your heart and lungs in good shape. While rowing, stay upright and move through a full range of motion, pushing through the legs. [15]
Here’s an awesome fat-burning rowing machine workout that combines the rowing machine with body weight and free-weight exercises:
Row at a steady pace for 10 minutes.
Jump off the machine and do 10 dumbbell overhead presses.
Do 10 standing torso twists or cross-body punches.
Row at a steady pace for 10 minutes.
Jump off the machine and do 10 lateral shuffle walks.
Now do 15 kettlebell swings.
Row at a steady pace for 10 minutes.
Jump off the machine and do a 30-second plank.
Now do 10 step-ups.
Jumping Jacks
Jumping jacks is a classic old-school cardio exercise you can do anywhere, anytime, to burn off those excess calories. To perform them, start with your legs together and your arms by your sides. Take a small jump straight up and, as you do, move your legs apart. At the same time, swing your arms up above your head into a clap. Take another small jump and return your arms and legs to their starting position.
You can use jumping jacks to burn off calories as a stand-alone exercise or add them to your workout routine. For example, if you are doing a weight training program, do 20 jumping jacks between each set.
Burpees
The burpee is another old-school bodyweight exercise that must be a part of your training regimen. This is, in fact, one of the highest calorie-burning exercises that you can do without any equipment.
Here is how to perform the burpee:
Stand with feet shoulder-width apart and your arms by your sides.
Drop down into a push-up position, kicking your feet back behind you.
Perform a push-up.
Jump your feet back toward your hands.
Spring up into the air to return to the start position.
Burpees can be performed in HIIT fashion, making them an even more effective fat burner. Here is an example of how you can do this:
Do burpees for 20 seconds.
Rest for 10 seconds.
Do another 20-second round of burpees.
Rest for 10 seconds.
Repeat until you have completed eight rounds, aiming to maintain the same number of burpees in each round.
Step-Ups
Step-ups are another effective calorie burner that you can do without any equipment. Besides helping you reduce belly fat, this exercise will work on your quads, glutes, hamstrings, and calves. Here is how to perform step-ups:
Stand out 12 inches away from a step or bench with a hip-width stance.
Place your right foot on an elevated surface while the left is grounded.
Drive your right foot into the surface and extend your leg. Both your feet should be together at the top.
Reverse the movement to lower yourself to the floor.
Switch between legs or complete recommended reps on the same side between changing sides.
Always keep your body straight and tall. Avoid the temptation to lean forward from your hips. Hold a pair of dumbbells in your hands to burn even more calories.
Shuttle Sprints
This is a challenging cardio calorie burner that will also improve your agility.
Set up two markers on the floor 3 yards apart.
Begin with your hand on one of the markers in a sprint stance.
Sprint to the other marker and touch it with your hand.
Immediately sprint back to the other marker.
Lift Weight to Lose Weight
The second tier of your weight loss exercise regimen needs to involve some form of resistance training. There is conclusive evidence that exercise involving muscle contraction burns more calories and assists in fat loss.
Incorporating weight training into your exercise schedule will not only boost your fat-burning efforts but also ensure that you are not losing vital muscle tissue. In the process, it will help build your dream physique. [16]
Lifting weights burns a considerable amount of calories. That is especially the case when you perform what are known as compound moves, such as deadlifts, that involve several muscle groups working together. But there’s an extra benefit. After you finish your workout, your body will have a greater need for oxygen to meet the demands that your workout has placed on your muscles. This brings on the EPOC effect.
EPOC stands for excessive post-exercise oxygen consumption, and it leads to a higher metabolic rate for up to 24 hours. That means you burn more calories for up to a day after your workout.
When you work a muscle with weights, you place stress on that muscle. This can cause micro-tears in the muscle fiber. When you recover after the workout, your body uses energy to rebuild the muscle. That, too, is burning calories from stored body fat.
Weight training is the best way to add muscle mass. Muscle is much more dense than fat. It takes up more space and burns five times more calories than fat. So, every ounce of muscle you add makes you more of a fat-burning machine. That’s why resistance training should be integral to your belly fat loss program. I recommend doing resistance exercises at least twice weekly.
Rather than doing multiple sets of the same exercise before moving to the next one, you will do all five exercises consecutively, with a minimum amount of rest between exercises. Don’t rest at all between exercises one and two. Then give yourself 30 seconds to regain your breath before doing exercises three and four. Rest another 30 seconds before doing exercise number five.
Go through this circuit thrice, resting for two minutes between each circuit.
For each consecutive workout, your goal will be to add more resistance to the bar. However, only do so when you are confident that you have optimized your form on that movement.
Here is your six exercises resistance training circuit for weight loss:
Dumbbell Bench Press
Prime Mover: Pectorals
Sit on the end of a bench with dumbbells resting on your thighs. Roll back onto the bench, bringing the dumbbells up to arm’s length above your chest.
Breathe in as you expand your chest and lower the dumbbells to the sides of your chest. Be sure to go down to a point at least an inch lower than your nipples.
In the bottom position, your scapulae should be squeezing together. Now breathe out as you power back to the start position.
Farmer’s Walk
Prime Mover: Quadriceps
Select a pair of light dumbbells of an appropriate weight.
Stand between the dumbbells and bend down to grip the handles. Lift the dumbbells by driving up through your heels while keeping your back straight and your head up.
Take an exaggerated step that requires you to lunge. The longer the step, the more emphasis is placed on your glutes, while shorter steps maximize the effect on the thighs.
Pushing off with your forward leg, continue lunge walking until you have covered the set distance.
Deadlift
Prime Mover: Upper Back
Stand in front of the bar so that your midfoot is under the bar and your feet are shoulder-width apart.
Grab the bar by bending the knees but maintaining a neutral spine. Hold the bar with a shoulder-wide mixed grip.
Push through your heels as you pull with your hips, not your arms. Your hips should be higher than the knees at the start of the pull.
Bring the hips, shoulders, and chest up together as the bar comes off the floor. You want the bar to travel directly up and close to your body.
As the bar reaches the mid-thigh level, squeeze your glutes tightly to prevent pulling with your lower back. At the same time, pull your shoulders back.
Continue pulling until you are standing erect.
Kettlebell High Pull
Prime Movers: Quadriceps / Glutes
Holding a light kettlebell, and with your feet shoulder-width apart, squat down with a neutral spine and your hips slightly higher than your knees. Your shoulders should be ahead of the kettlebell.
Simultaneously pull down through your feet while driving your hips up and forward. Pull the kettlebell up toward your chin. This movement should bring you up on your toes.
Immediately squat back down into the start position.
Incline Dumbbell Curl
Prime Mover: Biceps
Set an incline bar at a 45-degree angle. Grasp two dumbbells with an underhand grip.
Curl the weights towards your shoulders.
Stop and squeeze your biceps when the dumbbells are 6 to 8 inches in front of your shoulders. Hold the contraction, squeezing tight, for 2 seconds.
Slowly return the dumbbells to the starting position. Be sure to resist gravity during eccentrics.
Lying Triceps Extension
Prime Mover: Triceps
Lie face up on a bench with a pair of dumbbells in your hands.
Extend your arms directly above your upper chest.
Keeping the elbows in, bend at the elbows as you bring the dumbbells down at the sides of your forehead.
Contract the triceps to return to the start position.
Putting It Together
Now that we’ve identified the types of exercise that best fit your weight loss exercise schedule, let’s consider the frequency of performing those movements. You must exercise five days a week. You will perform your HIIT exercises on Monday, Wednesday, and Friday. As already explained, HIIT involves short-duration workouts. In fact, you’ll only have to allocate six minutes to your workouts on those days.
Here’s how it will look:
Choose an exercise you are comfortable performing with maximum intensity (sprinting, cycling, and skipping are good options).
Perform a medium-intensity warmup for two minutes.
Perform 20 seconds of maximum intensity.
Recover for 10 seconds.
Repeat this sequence until 4 minutes are up.
On Tuesday and Thursday, you will perform your resistance training workout. On each exercise, you will perform 12 repetitions. Then move directly to your next exercise until you have completed the six-exercise circuit. Work up to doing four rounds of this circuit workout.
Supplement Strategies to Lose Belly Fat Over 50
The are four mechanisms used by fat loss supplements to help users strip off body fat:
Appetite suppression
Increased metabolism
Increased fat oxidation
Boosted energy levels
Here are five supplements you can consider for your weight loss program:
Caffeine
Caffeine has been a foundational ingredient in fat burners from the very start. Its main appeal is its ability to speed up metabolism. Each milligram of caffeine you add to your body has been shown to increase your metabolic rate by about one calorie to a maximum of about a hundred calories daily. Caffeine also reduces perceived exertion during exercise. That means you can work harder for longer and burn more calories.
Caffeine also can focus your energy consumption during exercise on your fat reserves rather than stored glucose. The evidence that caffeine suppresses the appetite is not very strong.
Too much caffeine, however, is not a good thing. The maximum daily dosage should be limited to around 300 mg (250 mg for women).
Coffee Caffeine
L-Carnitine
L-Carnitine is added to fat burners to increase fat oxidation. That’s because it has been shown to play a key role in transporting long-chain fatty acids into the cell’s mitochondria, where energy is produced. The body naturally produces carnitine, but it quickly depletes when exercising. Adding it to your fat burner will help to replenish your carnitine levels and speed up fat oxidation.
Look for a supplement that provides 1-3 grams of carnitine daily.
Green Tea
Green tea comes from the camellia sinensis plant. It is rich in polyphenols, including catechins and flavonoids. Catechins have been shown to be especially beneficial for fat loss, boosting the metabolism. The star among the catechins when it comes to fat burning is a compound called epigallocatechin gallate (EGCG). EGCG will boost your metabolism and work with L-carnitine to promote fat oxidation.
Green tea also gives you an energy boost. The ideal daily dosage of green tea for fat loss is 100 mg. Some products will individually list EGCG on the ingredient label. In that case, look for 500 mg.
Green Tea
Capsicum
Capsicum contains a polyphenol known as capsaicinoids. This compound provides a hot and spicy flavor to hundreds of foods. It has been shown to have some pretty impressive fat-burning benefits. For one thing, capsaicinoids increase the core temperature of the body. Your body will then work overtime to bring the temperature back to a state of homeostasis. This takes up energy, which burns calories.
Capsaicinoids also break down adenosine triphosphate (ATP), the main form of energy in the body. It has also been shown to boost the body’s lipase production, which breaks down fat for energy.
Glucomannan
The roots of the konjac plant are used to make the dietary fiber glucomannan. It has an incredible capacity for water absorption, which transforms it into a thick, gel-like substance. It multiplies to many times its original size when ingested because it combines with bodily fluids. Your stomach has to make place for this, which causes you to feel full. In this manner, glucomannan aids in appetite suppression so that you consume fewer calories throughout the day and finish with a net calorie deficit.
In addition to making more room in your stomach, glucomannan also delays stomach emptying and lessens the absorption of fats and proteins. The recommended dosage is one gram taken three times daily.
Summary
This article provided a complete blueprint for losing belly fat over 50. You’ve been given the ideal balance of cardiovascular exercises to burn calories and resistance training to increase muscle mass and stoke your fat-burning furnace. At the same time, you’ve been given a wealth of nutrition and dietary tips to get you beyond the barriers to belly fat loss.
It’s now over to you to put all this belly fat-burning knowledge into action. Don’t let procrastination hold you back. Instead, resolve to start your workout program tomorrow, starting with the three weekly HIIT workouts and then adding in two circuit weight training sessions. Then, work through the 14 nutritional tips, incorporating one new tip daily into your routine over the next two weeks. Stay positive, remain consistent, and you will steadily lose that stubborn belly fat.
References
Tchernof A, Després JP. Pathophysiology of human visceral obesity: an update. Physiol Rev. 2013 Jan;93(1):359-404. doi: 10.1152/physrev.00033.2011. PMID: 23303913.
Palmer AK, Jensen MD. Metabolic changes in aging humans: current evidence and therapeutic strategies. J Clin Invest. 2022 Aug 15;132(16):e158451. doi: 10.1172/JCI158451. PMID: 35968789; PMCID: PMC9374375.
Hunter GR, Singh H, Carter SJ, Bryan DR, Fisher G. Sarcopenia and Its Implications for Metabolic Health. J Obes. 2019 Mar 6;2019:8031705. doi: 10.1155/2019/8031705. PMID: 30956817; PMCID: PMC6431367.
Van der Valk ES, Savas M, van Rossum EFC. Stress and Obesity: Are There More Susceptible Individuals? Curr Obes Rep. 2018 Jun;7(2):193-203. doi: 10.1007/s13679-018-0306-y. PMID: 29663153; PMCID: PMC5958156.
Burton-Freeman B. Dietary fiber and energy regulation. J Nutr. 2000 Feb;130(2S Suppl):272S-275S. doi: 10.1093/jn/130.2.272S. PMID: 10721886.
https://www.researchgate.net/publication/11892225_How_does_the_body_deal_with_energy_from_alcohol
Zivkovic, Angela M, et al. “Dietary Omega-3 Fatty Acids Aid in the Modulation of Inflammation and Metabolic Health.” California Agriculture, U.S. National Library of Medicine, July 2011,
Harris Jackson K, West SG, Vanden Heuvel JP, Jonnalagadda SS, Ross AB, Hill AM, Grieger JA, Lemieux SK, Kris-Etherton PM. Effects of whole and refined grains in a weight-loss diet on markers of metabolic syndrome in individuals with increased waist circumference: a randomized controlled-feeding trial. Am J Clin Nutr. 2014 Aug;100(2):577-86. doi: 10.3945/ajcn.113.078048. Epub 2014 Jun 18. PMID: 24944054; PMCID: PMC4095661.
Stull, April J, et al. “Liquid and Solid Meal Replacement Products Differentially Affect Postprandial Appetite and Food Intake in Older Adults.” Journal of the American Dietetic Association, U.S. National Library of Medicine, July 2008
Boschmann, Michael, et al. “Water-Induced Thermogenesis.” The Journal of Clinical Endocrinology and Metabolism, U.S. National Library of Medicine, Dec. 2003
Dorfman, Suzanne E, et al. “Metabolic Implications of Dietary Trans-Fatty Acids.” Obesity (Silver Spring, Md.), U.S. National Library of Medicine, June 2009
Assunção, Monica L, et al. “Effects of Dietary Coconut Oil on the Biochemical and Anthropometric Profiles of Women Presenting Abdominal Obesity.” Lipids, U.S. National Library of Medicine, July 2009
Batterham, Rachel L, et al. “Critical Role for Peptide YY in Protein-Mediated Satiation and Body-Weight Regulation.” Cell Metabolism, U.S. National Library of Medicine, Sept. 2006
Atakan MM, Li Y, Koşar ŞN, Turnagöl HH, Yan X. Evidence-Based Effects of High-Intensity Interval Training on Exercise Capacity and Health: A Review with Historical Perspective. Int J Environ Res Public Health. 2021 Jul 5;18(13):7201. doi: 10.3390/ijerph18137201. PMID: 34281138; PMCID: PMC8294064.
Hansen RK, Samani A, Laessoe U, Handberg A, Mellergaard M, Figlewski K, Thijssen DHJ, Gliemann L, Larsen RG. Rowing exercise increases cardiorespiratory fitness and brachial artery diameter but not traditional cardiometabolic risk factors in spinal cord-injured humans. Eur J Appl Physiol. 2023 Jun;123(6):1241-1255. doi: 10.1007/s00421-023-05146-y. Epub 2023 Feb 13. PMID: 36781425; PMCID: PMC9924870.
Willis LH, Slentz CA, Bateman LA, Shields AT, Piner LW, Bales CW, Houmard JA, Kraus WE. Effects of aerobic and/or resistance training on body mass and fat mass in overweight or obese adults. J Appl Physiol (1985). 2012 Dec 15;113(12):1831-7. doi: 10.1152/japplphysiol.01370.2011. Epub 2012 Sep 27. PMID: 23019316; PMCID: PMC3544497.

The 30-Day Arm Challenge for Dramatic Size & Strength Gains
Big arms demand immediate respect.
They are the body’s “show muscles,”; the most frequently displayed part. So the faster we can add size to our biceps, triceps, and forearms, the better.
However, most lifters fail to grow their arms. You might be one of them.
Are you having trouble making your forearms bigger? Have your biceps reached the height of their potential? Are you unable to get that amazing triceps horseshoe out?
What’s needed is an intervention — a short, sharp arms shock that will leave your bis, tris, and forearms no choice but to respond.
This 30-day arm challenge is designed to do just that.
Understanding the Arm Muscles
The arms consist of the following three muscle groups:
Biceps
Biceps Anatomy
The biceps brachii muscle comprises two heads — long and short. The short head originates higher than the long head on the scapular. The radius, or forearm bone, is connected to the one tendon that traverses the elbow joint and receives both the long and short heads.
The biceps are responsible for extending the elbow. They also have a small impact on shoulder flexion, which occurs when the arm extends in front of the body.
Triceps
The triceps is situated behind the biceps, on the upper arm. The biceps and triceps are opposing muscle groups so that when one contracts, the other relaxes. Since its purpose is to straighten the arm, any exercise that requires you to do so while facing resistance will engage your triceps.
The triceps muscle has three heads:
Medial
Lateral
Long
The region immediately below the side of the shoulder is known as the outer or lateral head. This head gives the arm a thicker, more robust appearance when fully developed and originates at the shoulder socket on the scapula. The long and medial heads originate at the top of the humerus, or upper arm. The triceps tendon is attached to the olecranon process of the ulna, the bigger of the two forearm bones, where all three heads of the triceps insert.
When completely developed, the triceps give the back of the upper arm a horseshoe shape.
Forearms
The muscles of the forearms can be divided into four groups:
Flexors
Extensors
Rotators
Extrinsic muscles
The flexor muscles are located on the side of the palm. The extensor muscles are on the side of the back of your hand. The forearm rotators supinate the hand, rotating it externally. They also pronate it to move in internally.
The fingers are moved by very small muscles divided into extrinsic muscles on the forearm and intrinsic muscles in the hand itself.
The forearm is capable of six actions. These are:
Wrist Flexion
Wrist Extension
Wrist Abduction
Wrist Adduction
Forearm Supination
Forearm Pronation
Should Women Train Their Arms Differently?
No, women should not train their arms differently from men. Men and women should not only perform the same forearm, biceps, and triceps movements, but they also shouldn’t use different rep ranges. In the past, women have been advised to tone their arms by using those lovely pink lightweight dumbbells and focusing on high repetitions. That counsel, however well-intentioned it may have been, will not produce the outcomes that most women desire.
Any lady I have ever met with strong, athletic arms has managed to lift what seemed like a heavy object to them. These women’s lack of testosterone, rather than their training methods, was the main reason their arms didn’t get bulky.
The musculature of men and women is the same despite our hormones being different. As a result, this 30-day arm challenge is just as effective for women as it is for men.
30-Day Challenge Overview
The 30-day Arm Challenge is divided into four 7-day phases as follows:
Strength A
Hypertrophy A
Strength B
Hypertrophy B
Strength and size go hand in hand. You can’t have one without the other. Each week you will develop greater arm strength to propel muscle growth. You will train each body part (biceps, triceps, and forearms) twice to thrice weekly.
Let’s now drill down on each of the four training phases:
Phase One: Strength
Rep ranges: 4-6 & 6-8
Focus: Strength development / Balanced strength across arm muscles
Rep Style: Straight sets
Main Stimulus: Central nervous system
The exercises selected for this stage are those that most people struggle with. As a result, you can improve your arm strength and balance, preparing you for the hypertrophy phase.
You will gradually increase the weight with each set during each strength phase. Your final set will be the heaviest weight you can lift while maintaining perfect technique. As a result, if you are performing eight reps, a ninth rep would be impossible for you to complete with good form.
Phase Two: Hypertrophy
Rep range: 10-12, 12-15, 15-20
Focus: Muscular development (hypertrophy) / targeting muscle heads
Rep Style: Tri-sets
Main Stimulus: Muscular system
The goal of Phase Two is to build the various muscle heads. Tri Sets are a part of your Phase 2 exercises. You perform these three exercises back-to-back. You can rest for 10 seconds between exercises and 120 seconds before your next round.
Phase Three: Strength
Rep ranges: 3-5 / 5-7
Focus: Strength development / Balanced strength across arm muscles
Rep Style: Straight sets
Main Stimulus: Central nervous system
During your second strength phase, you will lower your reps slightly from Phase One. Your body has already adapted to the 4-6, 6-8 rep range, so you need to go lower to continue getting stronger. You will be alternating between biceps and triceps exercises over four exercises. Rest between sets ranges between 60 and 120 seconds.
Phase Four: Hypertrophy
Rep range: 12
Focus: Muscular development (Hypertrophy) / targeting muscle heads (double emphasis)
Rep Style: Supersets
Main Stimulus: Muscular system
During this phase, you will double down on a particular muscle head by performing supersets (i.e., Scott curls and prone incline curls for the short biceps head). This forces the body to recruit maximal muscle fibers. After each superset, you will rest for 90 seconds. The workout will consist of a bicep superset (A1 & A2) followed by a triceps superset (A3 & A4). Then, move on to your second biceps superset (B1 & B2) and a final triceps superset (B3 & B4).
The Workouts
Here’s what the workout split for the four phases looks like for this 30-day arm challenge:
Strength A: Days 1-8
Hypertrophy A: Days 9-16
Strength B: Days 17-23
Hypertrophy B: Days 24-30
You won’t train your arms daily, as it can lead to over-training. Instead, you will train them every 48 hours. Recent research shows this is the ideal time frame for optimal hypertrophy and recovery. [2]
Here is an overview of your training days:
Day 1
Workout One
Day 2
Day 3
Workout Two
Day 4
Day 5
Workout Three
Day 6
Day 7
Day 8
Workout Four
Day 9
Day 10
Workout Five
Day 11
Day 12
Workout Six
Day 13
Day 14
Workout Seven
Day 15
Day 16
Workout Eight
Day 17
Day 18
Workout Nine
Day 19
Day 20
Workout Ten
Day 21
Day 22
Workout Eleven
Day 23
Day 24
Workout Twelve
Day 25
Day 26
Workout Thirteen
Day 27
Day 28
Workout Fourteen
Day 29
Day 30
Workout Fifteen
Phase One Workouts: Days 1-8
Your phase one workout consists of a pair of superset exercises that have you alternate a biceps and triceps exercise. Moving between the superset exercises should take you at most 10 seconds. That means you must have each exercise set and ready to go before you begin your workout. Rest for 90-120 seconds between supersets.
Superset A
Optimized Exercise Form:
Preacher Cable Curls:
Take an underhand grip on the barbell or EZ curl bar before settling into a preacher curl bench position. Your chest and upper arms should be in touch with the arm pad once you adjust the seat.
Keeping your chin tucked the entire time, extend your arms down the pads with a slight bend in the elbows. Keep your wrists in a neutral position and use a relaxed grip.
Squeeze your biceps and bend your elbows to start the upward movement while keeping your upper arms in touch with the arm pad. Lift until your shoulders are in line with the barbell or EZ bar.
Squeeze your biceps in the top contracted position.
Slowly straighten your elbows to bring the barbell back to the beginning position.
Close-Grip Bench Press:
Lay down on a flat bench with your feet planted on the floor. Grab a barbell with a grip that is just inside your shoulder width.
Unrack the bar.
From a starting position with the bar hovering above your chest, slowly lower the bar to your lower chest while keeping your elbows close to your body.
Press the bar firmly back up to the starting position.
SuperSet B
Close-Grip Chin-Ups: 4 x 8,6,6,4
Dips: 4 x 8,6,6,4
Forearms:
Reverse Curls: 3 x 12,10, 8
Optimized Exercise Form:
Close-Grip Chin-Ups
Reach up and hold the bar with a supinated grip and your little fingers about six inches apart.
Pull your chin up to and over the bar by pulling with your biceps and back.
Holding your arms in the highest contracted position, squeeze your biceps as hard as possible for a two-second hold.
Lower back to starting position under control.
Dips
Grab parallel bars with a neutral grip, then lift yourself until your arms are completely extended. Maintain an upright body position with straight legs.
Now, descend by bending your elbows to bring your torso toward the floor (do not allow your elbows to flare out to the side).
Push through the triceps to return to the start position.
Reverse Curls
Stand with your feet shoulder-width apart and a pair of dumbbells held at arm’s length with a pronated grip in front of your thighs.
Maintaining a neutral spine and keeping your elbows at your sides, bring the weights up to shoulder level.
Lower under control and repeat.
Phase Two Workouts: Days 9-16
Your phase two workout consists of a pair of tri-sets. Moving between each exercise in the tri-sets should take at most 10 seconds. Rest for 120 seconds between tri-sets.
TriSet A
Alternate Dumbbell Curls: 3 x 20/15/10
Tricep Pushdowns: 3 x 20/15/10
Incline Dumbbell Hammer Curls: 3 x 20/15/10
Optimized Exercise Form:
Alternate Dumbbell Curl
Hold dumbbells at your sides with your palms facing inward towards your thighs while standing with your feet shoulder-width apart.
Turn your right wrist to the front while keeping your elbow at your sides. Curl the weight up until your bicep is fully contracted.
Lower under control reversing the wrist motion so that your palms face your thighs in the bottom position again.
Repeat with the other arm.
Tricep Pushdown
Stand in front of a high pulley cable with a rope attachment. Hold the bottom of the rope handles with your elbows pinned to your sides.
Your hands should be at mid-chest level at the start position. Extend your arms down and slightly outward to fully extend the triceps.
Return to the start position under control and repeat.
Triceps Kickbacks
Grab a light dumbbell in your right hand and stand with your torso at a 45-degree angle and your left hand resting on your thigh.
Fully extend your right arm back from the starting position.
Revere and repeat, making sure not to use momentum to lift the weight.
TriSet B
Skullcrusher: 3 x 20/15/10
Barbell Curl: 3 x 20/15/10
Triceps Kickbacks: 3 x 20/15/10
Forearms:
Zottman Curl: 3 x 20/15/10
Optimized Exercise Form:
Skullcrusher
Lie on a flat bench with your feet firmly set on the floor. Hold a pair of dumbbells in your hands and hold them above your chest. Angle your arms slightly toward your head.
Keeping your elbows in, bend at the elbows to slowly bring the weight down and over your head. Do not move the position of your upper arms as you lower the dumbbells.
Press through the triceps to return to the start position.
Barbell Curls
Grab a barbell with your hands at shoulder width.
Keeping your elbows at your sides, bring your forearms up while squeezing your biceps. Contract as strongly as you can in the top position.
In that position, your knuckles should be at the level of your shoulders.
Now, slowly lower the bar to the start position. This eccentric portion of the rep should take twice as long as the concentric lifting portion.
Zottman Curls
Stand with your feet shoulder-width apart and a pair of dumbbells held at arm’s length with a neutral grip.
Supinate the dumbbells during the eccentric motion. Your palms should face the ceiling when your hands are at your chest level.
Rotate your hands into a pronated (palms down) position.
Slowly lower the dumbbells to the start position.
Rinse and repeat.
Phase Three Workouts: Days 17-23
In phase three, you will do straight sets. Your total focus is on lifting maximum weight with perfect form. Rest as long as needed between sets to fully recover for the next set. At this stage, you should use a dip belt to add poundage to your bodyweight exercises.
Close-Grip Bench Press: (warmup 15 reps) 4 x 7,5,5,3
Close-Grip Chin-Up: 4 x 7,5,5,3
Barbell Curls: 4 x 7,5,5,3
Dips: 4 x 7,5,5,3
Reverse Wrist Curls: 4 x 12, 10, 8, 8
Optimized Exercise Form:
Reverse Wrist Curls
Sit on the edge of a bench with a pair of dumbbells held with a palms-down grip. Your hands should be about eight inches apart. Rest your forearms on your knees with your wrists hanging over the edge of your knees. Make sure your forearms are parallel to each throughout the movement.
Extend your wrists down all the way as you allow the dumbbells to roll down your fingers.
From the bottom position, flex your forearms to bring the dumbbells back to the start position.
Phase Four Workouts: Days 24-30
Your phase four workouts consist of nine exercises. They are divided into four supersets, two each for biceps and triceps and a standard set for forearms. Rest for 90 seconds after each superset.
Superset A1
Preacher Cable Curls: (warmup 15 reps) 4 x 12
Incline Dumbbell Curls: (warmup 15 reps) 4 x 12
Optimized Exercise Form:
Incline Dumbbell Curl
Set the angle on an incline bench to 45 degrees.
Grab a pair of dumbbells and sit on the bench with your arms hanging at your side.
Rather than starting with your arms hanging down in a fully vertical or neutral position, begin the exercise with your forearms about 10 percent from the vertical position. Your palms should be facing the ceiling.
Flex at the elbow to bring the right-handed dumbbell to the shoulder; contract the bicep in the top position.
Lower under control, again stopping 10 percent short of full extension.
Repeat with the left arm and continue alternating to complete your rep count.
SuperSet A2
Single-Arm Triceps Pushdown: 4 x 12
Reverse Dips: 4 x 12
Forearms:
Farmer’s Walk: 3 x 20 paces
Optimized Exercise Form:
Single-Arm Triceps Pushdown
Attach a single-handle attachment to a high pulley cable.
Stand in front of the pulley, facing it. Grasp the handle in your right hand and hold it at chest level with your elbows at your sides. Adjust your positioning so that the cable is taut in the start position.
Extend your arm and contract your triceps.
Reverse the motion to return to the start position, keeping your elbow at your sides.
Reverse Dips
Position yourself in front of a chair with your palms resting on the chair seat and feet on the ground about two feet in front of it. Your hands should be about six inches apart and your knees bent.
Lower your body toward the floor by bending at the elbows, going down all the way.
Push through the triceps to return to the start position.
Farmer’s Walk
Grab a heavy pair of dumbbells off the rack and hold them at arm’s length by your sides.
Walk around your workout area, taking 20 paces away from the dumbbell rack and then returning. This should take 3-60 seconds.
Replace the dumbbells on the rack.
SuperSet B1
Close-Grip Chin-Up – (warmup 15 reps) 4 x 12
Alternate Cable Curls – (warmup 15 reps) 4 x 12
Optimized Exercise Form
Alternate Cable Curls
Set the cable pulleys at their lowest level.
Stand in front of the machine, facing away from it, and grab the cable handles.
Adjust your position so the cables are taut, with your arms slightly behind your torso and elbows at your sides.
Flex the right elbow to curl your hand up to your shoulder. Squeeze the biceps tightly in the top position.
Lower under control and repeat with the left arm.
Alternate sides to complete your rep count.
SuperSet B2
Close-Grip Bench Press: 4 x 12
Triceps Push-Ups: 4 x 12
Optimized Exercise Form:
Triceps Push-Ups
Get down in the standard push-up position, but with your hands together under your body so that your thumbs and first fingers are touching. The gap between your hands will form a diamond shape.
Maintaining a tight core and a straight line from head to toe, lower your chest to the floor.
Push back to the start position.
30-Day Arm Challenge Nutrition
You will never grow your arms unless you eat a personalized nutrient-dense diet. Your body can only work with the building materials you provide it. Even if you are following the best arm workout on the planet, you will not add a single gram of muscle to your body without creating the right sort of caloric surplus.
Your workout places stress on your muscles. The type of workouts in this program will cause micro-tears in the muscle fibers. As a result, when you walk out of the gym, you will be weaker and smaller. Only when you feed the muscle with the protein and carbs needed to repair the micro-tears in your muscle fibers can you benefit from all your hard work. Besides repairing the muscle, your body will add a little bit more size to the muscle fiber to meet a similar challenge in the future.
You must create a daily caloric surplus to give your body the nutrients needed to build muscle. That means you are taking in more calories than you use.
To determine how many calories you need, multiply your body weight by 20. So, a 180-pound guy needs to consume 3,600 calories to give his muscle cells the building blocks for creating new mass.
Those 3,600 calories should be divided into six meals of equal size and spaced around three hours apart to get the most benefit from them. Each meal should have 50% carbohydrates, 30% protein, and 20% healthy fats as its macronutrient ratio. Aim for one gram of protein per pound of body weight.
These are the best protein sources to include in your mass gain diet:
Eggs
Dairy products
Whey protein powder
Lean beef
Chicken breast
Lean pork
Fish
You should also be consuming generous servings of these starchy and fibrous carbohydrates:
Potatoes
Yams
Brown rice
Corn
Pumpkin
Broccoli
Asparagus
Brussels sprouts
Cauliflower
Maintaining Your Gains
The week after you complete the 30-day arm challenge, you should take a break from training your biceps. Then follow a periodization program where you spread out each training phase from a week to a month. Here’s how it will look:
Month One: Hypertrophy 1
Month Two: Strength 1
Month Three: Hypertrophy 2
Month Four: Strength 2
Take a week off from training at the end of the second and fourth phases. You can follow this periodization program continuously to make ongoing gains.
Myths Around Arm Training
Several persistent myths surrounding arm training must be wiped away before every lifter can get the best bang for his lift. Let’s put straight the four most common arm workout fallacies:
Myth #1: You Can Build Arms with a Partial Range of Motion
Everywhere you look, whether in your local gym or on YouTube, you see guys doing partial reps, usually with weights that are far too heavy for them. Make no mistake; this is not a smart way to train. You need to work a muscle through its full range of motion for full development and maximum strength.
Myth #2: Standing Barbell Curls Are All You Need
The standing barbell curl has been the go-to exercise for the biceps since the beginning of organized weight training. As a result, you see a lot of guys rely on it as their sole bicep builder. That, however, is a mistake. Barbell curls allow you to use a lot of weight but have limitations. They do not allow for grip supination to target the different heads of the biceps.
When it comes to the triceps, a lot of guys spend their time on exercises of dubious value that do not allow for much weight, such as triceps kickbacks, when they could be doing moves that allow for a lot of weight, like close grip bench press and dips.
The bottom line is that you do not want to rely on just one or two exercises for arm development – variation is a must for overall development.
Myth #3: It’s All About the Weight
The standing barbell curl has got to be the most abused exercise in the gym. The reason is simple — people try to impress others with how much weight they can curl. As a result, they use so much body swing and momentum that their biceps are getting no stimulation at all.
Don’t be like those guys — leave your ego behind and focus on perfecting your exercise form and increasing your strength. Remember, 5 pounds curled perfectly is much better than 10 pounds with a bad form.
While we’re on the subject of weight, progressive overload should be gradual. So, rather than jumping from a 10-pound to a 15-pound dumbbell on the curl (a 50% increase), look to add just a single pound on the next set (a 10% increase). If your gym has microplates, you can make jumps of just 1-2%, which is even better.
Myth #4: You Can Wing It
The old saying that those who fail to plan, plan to fail is as true on the gym floor as anywhere else. You cannot turn up and train by feel if you are serious about getting results. Instead, you should record every exercise, set, rep, and weight in a training journal. That will allow you to know exactly how many sets, reps, and pounds to target on the next workout.
Most Common Arm Training Mistakes
There is generally no shortage of enthusiasm when it comes to arm training. There are, however, many common mistakes that tend to hold people back from getting anywhere near achieving their potential. Here are three of the common arm training mistakes and what to do about them:
Over-Reliance on Isolation Exercises
Which exercise will get you to bigger arms faster, curls or chin-ups? Pushdowns or triceps dips?
When you encounter someone who trains frequently but has poor arm development, they are usually weak for their body weight in the fundamental heavy compound pulling and pushing exercises.
All exercises can be divided into two main groups — isolation (single joint motions) or compound (gross motor activities). Compound movements often involve two joints, whereas isolation movements only involve one. Curls are single-joint exercises solely using the elbow, whereas chin-ups are compound exercises using both the elbow and the shoulder. Compound movements are the type of exercise that contribute the most to muscle growth. So, you won’t be able to add inches of thick, powerful muscle if you don’t focus on getting stronger at challenging pulling and pushing exercises like chin-ups or presses.
Lack of Arm Training Frequently
In the early stages of weight training, before drugs and protein powders, the training methods differed significantly from those employed today. They worked out their entire bodies three to five days a week, including their arms. Nowadays, training a body part more than twice per week is uncommon. In fact, the most popular bro split involves working out one body part per day and then working out every body part once weekly.
The introduction of steroids is credited with starting the tendency to train body parts sparingly. After bodybuilders began using steroids, training more than once weekly became unnecessary. All they had to do to gain muscle was pound a muscle group long and hard once every week. But for the vast majority of natural lifters, this simply does not work.
You transmit a signal to your muscles to grow when you lift weights. This signal can be measured using a process known as “muscle protein synthesis.” According to studies, this signal increases significantly after exercise, peaks at around 24-48 hours, and then rapidly declines. It reaches baseline and even deviates from baseline after 48 to 72 hours. [1]
This is not a concern for steroid users, but it is for natural lifters. Additionally, studies reveal that the duration of this muscle-building signal decreases with expertise. Only 14 hours may pass with an elevated signal for advanced lifters. You need to frequently send that muscle-building signal if you are like most participants in these trials. Maybe even every day. Sounds simple enough, but if you train and pound your arms daily, the cumulative damage will make you extremely sore, swollen, and over-trained. So, how can we circumvent this issue?
By adjusting the intensity.
Start by exercising your arms thrice weekly at a relatively high intensity. On these days, work out hard, but don’t lift to failure; instead, stop one or two reps shy of it. Divide the volume you currently perform for your arms each week into three workouts.
For most people, this translates to 12–21 sets overall per week for each muscle. For instance, if your objective is to complete 12 sets over the week, perform four sets on Mondays, Wednesdays, and Fridays.
Allowing Workouts to Get Stale
The saying “everything works, but nothing works forever” is certainly true when it comes to gaining muscle. No matter how great your training plan, exercise, and rep range, your body will eventually stop responding. People who find themselves in this scenario frequently increase the intensity or make minor adjustments, such as concentrating more on muscle contractions. They usually end up hitting the dreaded training plateau.
Unless you regularly alter your programming, your body won’t be able to build muscle consistently. Although switching up your workouts is crucial, switching up your rep range is even more important. Most rep ranges are beneficial for gaining muscle, but training in each one is a completely distinct experience.
Consider contrasting sets of 20 reps with sets of doubles. Both rep ranges create muscle, although being very different. Low reps (1–5 reps), moderate reps (8–12 reps), and high reps (15–20 reps) are the three main rep ranges for gaining muscle. Each one of them has been shown to increase muscle mass.
Use low rep ranges to maximize the development of grinding strength, use the low rep ranges. The traditional bodybuilder rep range for muscular development is the moderate rep range. In research, the 8–12 rep range consistently produces the highest muscle growth when other rep ranges are compared head-to-head. Most people undoubtedly get trapped in this rep range for this reason, and after being locked for a few months, their muscles cease reacting.
When used in a cycle with other rep ranges, going as high as 30 reps, this rep range is fantastic. Workouts with this rep range may seem like marathon sessions. They produce the craziest skin-bursting muscle pumps, but they are also draining. Remember that up to 70% of your arm’s volume consists of fluid and non-muscle fiber components. By increasing the ability of your arms to hold more non-muscle fiber structures and fluids, they will grow bigger if you train them to produce insane pumps with high reps. Start with a single rep range, then switch to a different range after a few weeks. Each time, observe how your arms respond.
Key Arm Training Principles
Here are five principles that need to form the foundation of your 30-day arm challenge:
1. Intensity + Volume
Many people who want to focus on arms development are relatively weak in terms of their arm strength. As a result, they cannot lift enough weight to build bigger arms consistently. You will not progress unless you combine intensity with volume.
2. Variety
If you repeatedly do the same thing, your body will adapt and stop responding. As a result, periodization has been a part of organized weightlifting from the beginning. That is why you must switch between intensification (strength work) and accumulation (hypertrophy work).
3. Targeted Stimulation
The key job of the arm muscles is elbow flexion and extension. The elbows flexors consist of four muscles:
The brachialis
The brachioradialis
The pronator teres
The bicep brachii (long head + short head)
Each of these muscles responds differently to stimuli. For example, the brachialis responds better to force, while the brachioradialis responds better to speed. Changing the grip also changes the focus of the exercise. A pronated grip targets the brachialis, while a supinated grip hits the biceps brachii. Even though the exercises may seem similar, they have a very different effect on the arm muscles.
4. Prioritization
To prioritize your arm development, you must train them at the beginning of the week. This applies to your training week cycle and your specific workout. So, arm training should be on Day One, and you should train your arms first during that workout. That way, you can pour all your training energy into your arm workout while you are fresh.
5. Progressive Overload
When you work a muscle, the stress leads to micro tears within the muscle fiber. Proper nutrition and rest allow the muscle to get bigger and stronger to meet that stress in the future. So the muscle can meet the previous stress level in the next workout. Unless you add extra stress in the form of either more weight or reps, it will not be overly stressed, and the micro-tears that lead to growth will not occur.
Read also: Progressive Overload: The Science Behind Maximizing Muscle Growth
Bonus Section: How To Improve Arm Vascularity
Nothing says badass like a pair of big and vascular arms. Vascularity refers to the clearly visible veins running throughout the body. A vast network of veins crisscross your body. These veins are typically not visible as they are covered by body fat that lies underneath the skin.
The pinnacle of fitness is having a muscular body that is also vascular. It announces that you are in excellent physical condition with little body fat. Of course, there are a lot of folks who have never set foot inside a gym but have visible veins. Some people are genetically predisposed to develop insane vascularity. There are also several medical problems that increase a person’s vascularity.
Even if you were born on the wrong side of the veiny genetic pool, there are definitely things you can do to improve your vascularity:
1. Reduce Your Body Fat Percentage
The more fat you have, the less noticeable your veins will be. Therefore, reducing your body fat percentage is the first thing you should do to highlight your vascularity.
Men must be in the 10 to 12 percent body fat range to have clearly visible veins. On the other hand, women must be even lower.
The first thing you need to do is enter a negative calorie balance. The difference between the calories you burn off and consume should ideally be 500 calories.
Second, drastically reduce your complex carb intake. The timeframe immediately following your workouts is the only time you should be eating carbohydrates. Approximately an hour after your workout, consume a meal or smoothie that is 50% carbs and 30% protein.
Add steady-state cardio to your weight training sessions if you’re trying to get vascular. Most of the calories you burn while exercising with high-intensity interval training (HIIT) will come from your glycogen stores. The calories you burn from steady-state cardio will come from your body fat reserves.
2. Strength Training
Contrary to popular belief, doing a lot of high rep sets with lesser weights is not the greatest approach to developing arm vascularity. The best technique to develop size and vascularity simultaneously is through heavy training in the 8–12 rep range. Blood pumps through the body more intensely the harder you train. The veins enlarge as a result, making them easier to observe.
You should end your workout with high-repetition sets to achieve a maximum pump. This will saturate the working muscle with blood, giving it the impression that it is about to explode. This kind of exercise is a component of Hany Rambod’s FST-7 program for bodybuilders trying to get into a super-ripped (and veiny) condition.
3. Include Isometrics
You should perform isometric holds during your recovery period and after your workout to further improve your vascularity.
4. Cut Water
A layer of fat beneath the skin will prevent your veins from peeking through. Water can also get between your veins and your skin. The bodybuilders on the Mr. Olympia stage appear so diced because they have removed most of the water from under their skin.
Wrap Up
The 30-Day arm challenge works. So long as you stick to the plan, you will develop significantly bigger and stronger biceps, triceps, and forearms. And those arms will not only be big but also defined. Put your all into this program with total dedication, belief, consistency, and grit, and you’ll be rewarded with arms to impress!
References
MacDougall JD, Gibala MJ, Tarnopolsky MA, MacDonald JR, Interisano SA, Yarasheski KE. The time course for elevated muscle protein synthesis following heavy resistance exercise. Can J Appl Physiol. 1995 Dec;20(4):480-6. doi: 10.1139/h95-038. PMID: 8563679.
https://www.patreon.com/posts/frequency-66701244
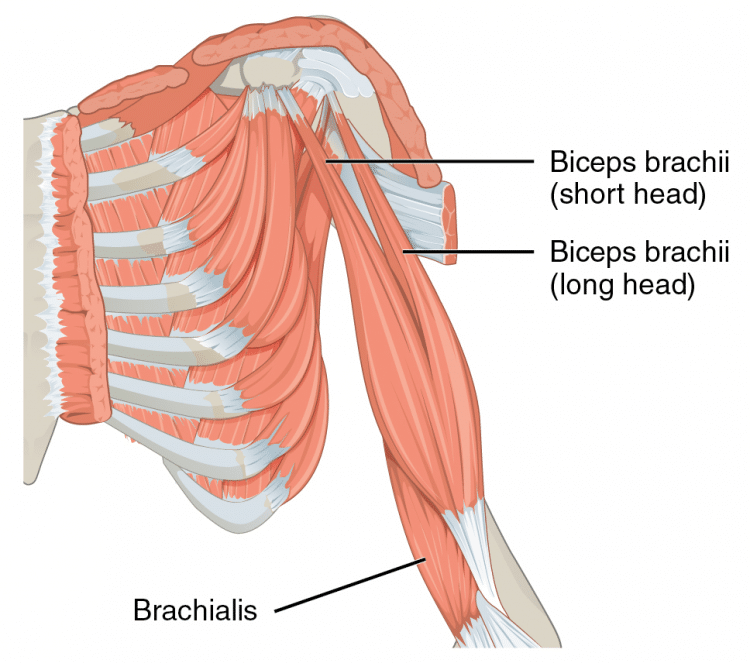
Biceps and Triceps Superset Workout for Huge, Pumped Arms
There isn’t a bodybuilder alive who doesn’t want bigger, more muscular arms. And anyone who tells you they think their arms are too big is probably lying! Whether you compete in bodybuilding or are just a recreational lifter, big arms are the badge of honor that every exerciser wants. Average Biceps Size: How Do You Measure Up?
To build impressive arms, you need to work on your biceps and triceps equally. This can come as a bit of a shock to novice lifters, who wrongly assume that their biceps are the most important muscle for arm size.
In fact, it’s the triceps that make up the larger proportion of your upper arm mass, so they need your attention too.
One of the best ways to make sure you train your biceps and triceps with the same volume is to do biceps/triceps supersets. As well as providing a balanced workout, supersets are also more time efficient and deliver a skin-splitting pump.
While you could write your own biceps and triceps superset workout, we’ve created one for you. Do this workout 1-2 times a week to turn your peashooter arms into cannons!
Arm Anatomy Basics
While you don’t need an in-depth knowledge of arm anatomy and physiology to build bigger biceps and triceps, it can help you make better decisions about which exercises to include in your workouts. Understanding how a muscle works means you will have a better understanding of the best way to train it.
So, feel free to skip this section if you just want a workout to follow. Otherwise, let’s go back to school and learn a little more about how the biceps and triceps function.
Biceps brachii
Credit: Salix, Licensed under Creative Commons 2.0.
Biceps brachii means two-headed arm muscle. However, we usually shorten this to biceps for ease. The biceps are located on the front of your upper arm and crosses your elbow and shoulder joints. This means it’s a biarticular muscle and affects both of these joints.
The functions of your biceps are:
Elbow flexion
Forearm supination
Shoulder flexion
The biceps have two origin points and one insertion point, which means it has two heads – the long head and the short head. The long head is attached to the back of the scapula, while the short head attaches more toward the front. The long head is responsible for your biceps peak, while the short head gives your biceps their width.
Both heads always work together, but it is possible to emphasize each one slightly by altering the position of your upper arm.
Brachialis
All biceps exercises also hit the brachialis, which is best thought of as another biceps muscle. Like the biceps, the brachialis is an elbow flexor but is not involved with shoulder flexion or forearm supination.
Located partially beneath the biceps brachii, the brachialis helps prop up your biceps to make them look even more impressive. It also contributes to upper forearm size.
Triceps brachii
Located on the back of your arm, the triceps brachii, or triceps for short, is a three-headed muscle. Like the biceps, the triceps cross two joints – the elbow and the shoulder – making it a biarticular muscle.
The functions of the triceps are:
Elbow extension
Shoulder extension
The three triceps heads work together, but it’s possible to emphasize each one by altering the position of your arm. The long head is located on the inside of the upper arm, while the lateral head is found toward the outside. The medial head is between the long and medial heads.
An Introduction to Supersets
Before we reveal the nuts and bolts of this biceps and triceps workout, let’s take a moment to discuss supersets, explaining what they are and why they’re so beneficial and effective. That way, you’ll not only understand how to perform the workout, but you’ll understand why it works.
Firstly, supersets involve doing two exercises back-to-back. So, you do the first exercise and then, without resting, immediately do the second. On completion of exercise number two, you rest for the prescribed period and then repeat the pairing a couple more times.
For example:
Pull-ups x 8
Push-ups x 15
Rest 1-2 minutes and repeat
Types of Superset
There are several recognized types of superset, including:
Agonist supersets – two exercises for the same muscle group, e.g., bench press and push-ups.
Agonist/antagonist supersets – two exercises for opposing muscle groups, e.g., leg extensions and leg curls.
Agonist/opposing synergist supersets – one exercise for a large muscle group and one for an opposing small muscle group, e.g., pull-ups and triceps pushdowns.
Lower body/upper body supersets – one leg exercise followed by one torso or arm exercise, e.g., lunges and shoulder presses.
Agonist/distant agonist supersets – two exercises for anatomically dissimilar muscle groups, e.g., biceps curls and calf raises.
Pre-exhaust supersets – an isolation followed by a compound exercise for the same muscle group, e.g., leg extensions and leg presses.
Post-exhaust supersets – a compound exercise followed by an isolation exercise for the same muscle group, e.g., bench press and cable crossovers.
Superset Benefits
What’s so super about supersets? Good question! The benefits of supersets include:
Shorter workouts – doing two exercises back-to-back means you half the amount of time you spend resting. This can turn a long workout into a much shorter one. Alternatively, you can cram more training volume into the same duration. Either way, supersets make your workouts more time-efficient.
A better pump – doing two similar exercises back to back or two opposing exercises will drive a lot of blood into the area you are training, and you’ll get a great pump as a result. A pump pushes oxygen and nutrients into your muscles and may also help stretch the surrounding fascia, making more room for growth. Bodybuilders love a good pump, and it’s often considered an indicator of future muscle size.
A balanced workout – assuming you do agonist/antagonist supersets, organizing your exercises into opposing pairs means that you automatically train both muscles equally. This ensures they grow at a similar rate and can help prevent muscle imbalances.
Superset Drawbacks
While supersets are largely beneficial, there are a couple of superset drawbacks to consider, too:
Monopolizing training equipment – supersetting your exercises means you’ll need to monopolize two sets of equipment, one of which you won’t be actively using. This can be a problem in busy gyms, and doing supersets could make you unpopular with your fellow exercisers.
This issue can be avoided by doing supersets with the same piece of equipment or pairing body weight with equipment-based exercises, e.g., lat pulldowns and push-ups.
Cardiovascular fatigue may be an issue – moving quickly from one exercise to another won’t just challenge your muscles; it could also affect your heart and lungs. If you lack cardiovascular fitness, you could find that your performance in the second exercise is impacted.
This should be less of an issue with biceps/triceps supersets, as these muscles are relatively small and shouldn’t demand much from your cardiovascular system. However, if you find yourself feeling very out of breath, you should take this as an indicator that you need to do more cardio.
Lower training weights – while this won’t be an issue with agonist/antagonist supersets, which can actually increase strength by firing up your nervous system, doing pairs of similar exercises back-to-back will invariably necessitate using lighter weights for the second movement. This will limit your strength gains but shouldn’t hurt hypertrophy or muscle building.
No time to dawdle or dillydally – if you like to stop and chat between exercises, supersets are not for you. Most types involve moving immediately from one exercise to the next, and taking more than a few seconds will make your workout less effective.
If you are new to supersets and usually stop to gossip between exercises, get ready to say, “Can’t stop – doing supersets,” as you move quickly from one movement to the next.
Read more about supersets in this detailed guide.
Biceps and Triceps Superset Workout – Program Overview
Now you know a little more about biceps and triceps anatomy and how and why supersets work, it’s finally time to hit the weights and train your arms!
Do the following workout 1-2 times per week on non-consecutive days, e.g., Monday and Thursday. Make it part of a weekly training split, where you train your remaining body parts on different days.
For example:
#
Days
Workouts
1
Monday
Biceps & Triceps
2
Tuesday
Legs & Shoulders
3
Wednesday
Rest
4
Thursday
Back and Chest
5
Friday
Rest
6
Saturday
Biceps & Triceps
7
Sunday
Rest
But, before you lift any weights, make sure you prepare your muscles and joints for what you are about to do to minimize your risk of injury and improve workout performance. Begin with 5-10 minutes of easy cardio followed by dynamic mobility and flexibility exercises for your muscles and joints, focusing on your elbows, shoulders, and lower back.
Related: How to Warm Up for Strength Training
Warmed-up and ready? Good; let’s get to work!
#
Exercise
Sets
Reps
Recovery
1a
Chin-up
4
6-8
2 minutes
1b
Close-grip bench press
2a
EZ barbell curls
3
8-10
90 seconds
2b
EZ barbell skull crushers
3a
Concentration curls
3
12-15
60 seconds
3b
Triceps kickbacks
4a
Biceps cable curl
2*
15-20
30 seconds
4b
Biceps cable pushdown
*Drop set on your final superset.
Exercise Instructions
When it comes to getting the best results from your workout, exercise technique really matters. Doing exercises the right way is generally safer and better for keeping your muscles under tension. In contrast, poor exercise form usually takes work away from the muscles you want to train and can cause injury.
Follow these instructions to ensure you’re doing the exercises in your workout correctly.
1a. Chin-up
Muscles targeted: Biceps, latissimus dorsi, forearms.
No, you haven’t inadvertently strayed onto a back workout, although you’d be forgiven for thinking that’s the case. Chin-ups are a GREAT lat exercise, but also one of the best ways to overload your biceps. Pulling down from above means you don’t have to worry about maintaining good posture or using your legs to help you lift the weight. This means you can go really heavy to build hard, dense, muscular biceps.
Steps:
Hang from your pull-up bar using an underhand, slightly narrower than shoulder-width grip. Brace your core, pull your shoulders back and down, and lift your feet off the floor.
Without kicking or swinging, bend your arms, drive your elbows down and back, and pull your chest up to meet the bar.
Descend smoothly and repeat.
Tips:
Wear a weighted vest to make this exercise harder and keep you within the specified 6-8 rep range.
Use gym chalk or lifting straps to reinforce your grip if necessary.
Do underhand-grip lat pulldowns if you cannot do chin-ups.
1b. Close-grip bench press
Muscles targeted: Triceps, pectoralis major, anterior deltoids.
While this might not be your usual triceps exercise, it’s one of the best for building mass and strength. Yes, your pecs and delts will also get a workout, but it’s your triceps doing the bulk of the work. The good news is that as your close-grip bench press performance improves, so too will your conventional bench press.
Steps:
Lie on your bench with your eyes directly beneath the bar. Hold it with an overhand, slightly less than shoulder-width grip.
Pull your shoulders back and down and press them into the bench. Brace your abs and plant your feet firmly on the floor.
Unrack the bar and hold it over your chest.
Bend your elbows and lower the bar to your chest. Keep your upper arms tucked into your sides.
Drive the weight up to arm’s length and repeat.
Tips:
2a. EZ barbell curls
Muscles targeted: Biceps, brachialis, forearms.
EZ barbell curls are a classic biceps exercise. They put your wrists in a semi-supinated position for a more comfortable, effective workout. Also, you should be able to use the same weight for the next exercise, making this an excellent superset for quick changeovers and busy gyms.
Steps:
Hold your EZ bar with a medium-width, underhand grip. Stand with your feet about shoulder-width apart, knees slightly bent. Brace your core, pull your shoulders back and down, and look straight ahead.
Without using your legs or back for assistance, bend your elbows and curl the bar up to around shoulder height.
Lower it back down to full arm extension and repeat.
Tips:
Do not use your legs or back to help you lift the weight.
Push your elbows forward at the top of each rep to increase biceps engagement.
Pause at the top of each rep and flex your biceps as hard as possible.
2b. EZ barbell skull crushers
Muscles targeted: Triceps.
Skull crushers are so-called because that’s what could happen if you fail to complete a rep or lower the bar too quickly. Use a spotter to prevent accidents but enjoy this challenging yet effective triceps-building exercise. Use the same bar/weight that you used for EZ barbell curls.
Steps:
Lie on your back on a flat bench. Using a medium-width overhand grip, press and hold the barbell over your chest.
Pull your shoulders back and down and plant your feet firmly on the floor. Brace your core.
Keeping your upper arms vertical, bend your elbows and carefully lower the bar to your forehead.
Extend your arms and repeat.
Tips:
Try a slightly declined bench to increase triceps long-head engagement.
Lower the weight toward the top of your head to get a bigger stretch in your triceps.
Take care not to turn this exercise into bench presses. Keep your upper arms vertical and stationary throughout.
3a. Concentration curls
Muscles targeted: Biceps.
Concentration curls are an excellent exercise for building a higher biceps peak. Working one arm at a time, they also allow you to identify and fix any left-to-right imbalances.
Don’t go too heavy with this exercise. Instead, go slow, contract your biceps as hard as possible at the top of each rep, and put your mind in your muscle to fully engage your biceps. Do one set for each arm before moving on to the next exercise.
Steps:
Sit on the end of an exercise bench with a dumbbell in one hand.
Lean forward and rest the back of your upper arm against the inside of your thigh so your elbow is straight and the weight hangs straight down.
Bend your elbow and curl the weight up toward your shoulder. Pause and squeeze your biceps hard.
Extend your arm and repeat.
Switch arms and do the same number of reps on the opposite side.
Tips:
Squeeze your biceps as hard as possible at the top of each rep.
Use your free hand to help you finish your last few reps if necessary.
Supinate (rotate) your forearm as you bend your elbow to maximize muscle engagement.
3b. Triceps kickbacks
Muscles targeted: Triceps.
Many exercisers are quick to dismiss triceps kickbacks, saying they’re too easy or only suitable for women. However, the truth is that kickbacks are an excellent movement, especially for the long head of the triceps. That said, if done correctly, you won’t be able to use a heavy dumbbell, which can be a knock to the ego. Despite this, kickbacks are very effective.
Steps:
Place one hand and one knee on a bench so your upper body is parallel to the floor.
Hold a dumbbell in your other hand, bend your elbow, and pull your elbow up and into your ribs. Your arm should be bent to 90 degrees.
Without moving your upper arm, extend your elbow and push the dumbbell back toward your hip.
Bend your arm back to 90 degrees and repeat.
Switch arms and do the same number of reps on the opposite side.
Tips:
Go light – focus on squeezing and not swinging the weight up.
You can also do this exercise with a cable machine or a resistance band.
Extend your shoulder slightly at the mid-point of each rep to maximize triceps long-head engagement.
4a. Biceps cable curl
Muscles targeted: Biceps.
While there is nothing wrong with freeweight biceps and triceps exercises, cable machines offer a couple of advantages. For starters, they keep your muscles under near-constant tension, creating an incredible pump. Secondly, they’re ideal for drop sets, which are an excellent way to finish your arm workout. Any way you slice it, cable exercises are a great addition to your arm workout.
Steps:
Attach a revolving bar to a low cable machine. Grip the bar with an underhand, slightly narrower than shoulder-width grip.
Stand with your feet about shoulder-width apart, knees slightly bent, core braced, and upper arms by your sides.
Starting with your arms straight, bend your elbows and curl the handle up to your shoulders.
Extend your arms and repeat.
Do 2-3 drop sets on your last set.
Tips:
Pause at the top of each rep and squeeze your biceps to maximize muscle engagement.
Push your elbows forward slightly at the top of each rep to increase biceps long-head recruitment.
You can also do this exercise with a cable EZ bar if preferred.
4b. Triceps cable pushdown
Muscles targeted: Triceps.
Triceps cable pushdowns are an excellent way to finish your arm workout. They’re a low-skill exercise that leaves you free to focus on cranking out the reps and pushing your triceps to failure. Plus, they’re the perfect exercise for drop sets. Work hard; this is your final exercise.
Steps:
Attach a straight revolving bar to a high pulley machine. Grip the bar with a slightly narrower than shoulder-width overhand grip.
Pull your upper arms down to your sides and stand with your feet hip-width apart, core braced, and knees slightly bent.
Push the bar down toward your upper thighs. Straighten your arms hard to fully engage your triceps.
Bend your elbows as far as possible while keeping your arms next to your sides.
Do 2-3 drop sets on your last set.
Tips:
Pause at the midpoint of each rep and flex your triceps.
Brace your abs and keep your torso stationary throughout.
You can also do this exercise with a rope or EZ bar handle.
Biceps and Triceps Superset Workout – FAQs
Do you have a question about our biceps and triceps superset workout or arm training in general? No sweat because we’ve got the answers!
1. Can I change any of the exercises in this workout?
You are free to make whatever changes you like to these workouts. For example, if you don’t have a cable machine, you could do freeweight, resistance band, or bodyweight exercises instead. Also, if you find any exercise uncomfortable or painful, go ahead and swap it for something more suitable.
However, avoid changing an exercise just because it’s hard. It’s those challenging exercises that drive your progress.
2. What diet should I follow with this workout?
Our superset workout is a bodybuilding program designed to increase upper arm strength and size. To build muscle, you need a calorie surplus and to consume enough protein – typically one gram for every pound of body weight. Also, you should try to eat healthy, as your body needs plenty of vitamins and minerals.
Align your diet to your training to ensure you get the best possible results from your workouts.
3. Will this program work with blood flow restriction training?
Blood flow restriction (BFR) or occlusion training involves working out with snug-fitting elastic bands around your limbs. This reduces or occludes blood flow into the area, making your workout harder while creating more metabolic stress. According to some fitness experts, blood flow training can enhance muscle building.
While you may not want to use BFR wraps for your entire arm workout, you could certainly use them for the final 1-2 exercises.
4. What weights should I use for the exercises in this workout?
Unfortunately, we can’t answer this question because we don’t know how strong you are. So, while it will take a workout or two, you’ll need to experiment to find the right weight.
This weight should take you close to failure within the prescribed rep ranges. For example, for the first two exercises, if you can do more than eight reps, the weight is too light, but if you can’t do six, it’s too heavy. Finetune your workout until you’re in the rep-range sweet spot.
However, you should also strive to increase your weights every week or two. This will ensure you keep making progress. That said, never sacrifice good form for more weight on the bar. Your technique should not change even though you’re using heavier loads.
5. What about forearm training? How can I incorporate that into my arm workout?
Bigger, more muscular forearms can add a lot to the appearance of your arms. Some people find their forearms grow because of their general back and arm training. However, others need to train their forearms more directly to make them grow.
If you fall into the latter category, you could add a forearm superset to your biceps and triceps workout. Choose a wrist flexion and a wrist extension exercise and do them back to back.
For example:
6. How long should I follow this superset arms workout?
Even the best workouts lose their effectiveness after a while, but how long that takes depends on you. People respond differently to the same workout, and while one person may plateau after six weeks, another may still be making gains after three months.
So, stick with the plan for as long as you feel it’s working. Switch to another arm workout when your progress begins to stall. You can always come back to this workout in a few months when, after a break, your muscles should respond to it again.
Closing Thoughts
A lot of exercisers wish they had bigger arms, but you need more than wishes if you want your biceps and triceps to grow. Instead, you must work hard and commit to a long, arduous road of consistent training. Big arms don’t happen by accident.
In terms of time efficiency and effectiveness, superset workouts are hard to beat. They allow you to pack a lot of volume into a short timeframe and also deliver that all-important pump.
Do our biceps and triceps superset workout 1-2 times week for the next couple of months, and your arms are guaranteed to grow. Let’s turn those pistols into rocket launchers!
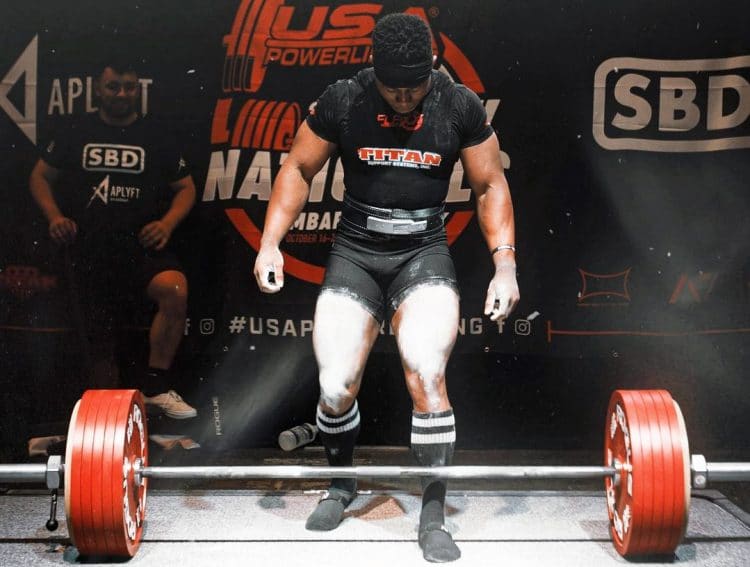
Get Super-Strong with The Best Powerlifting Exercises + Workout
Powerlifting is all about getting strong in the squat, bench press, and deadlift. Between them, these three exercises test and develop your entire body. As such, powerlifters are among the strongest people on the planet. Many famous strongman competitors started as powerlifters, and some continue to compete in both disciplines.
Most gymgoers are familiar with squats, bench presses, and deadlifts and do them as part of their leg, chest, and back workouts. However, these movements are the priority in powerlifting, and all other exercises are secondary, chosen to improve their performance.
In this article, we take a look at the squat, bench press, and deadlifts and reveal the best accessory exercises you can use to increase your strength in these key lifts. We’ve also got a powerlifting-inspired training program for you to try.
Powerlifting Exercises – The Big Three
Russel Orhii / Instagram
The competitive lifts in powerlifting are often called “the big three” and are the barbell back squat, bench press, and deadlift. Each powerlifting exercise is governed by rules so that all competitors perform each exercise in a similar fashion. This ensures that performances can be compared and judged fairly.
Needless to say, the squat, bench press, and deadlift should always be at the top of any list of powerlifting exercises.
Barbell Back Squat
Target muscles: Quadriceps, gluteus maximus, hamstrings, abductors, adductors, core.
Powerlifting meets start with the barbell back squat. Lifters have three attempts and perform a single rep. For their squat to count, powerlifters must descend until their thighs are at least parallel to the floor. This is deeper than many recreational exercisers squat and takes flexibility, mobility, and practice.
Because of the danger of failing a rep, squats should always be performed in a power rack or with strong spotters on hand.
Steps:
Rack and hold your barbell across your upper back. It should not rest on your neck. The lower you can hold the bar, the shorter the lever from the weight to your hips will be, and that means less stress on your lower back. This is called a low-bar squat.
Stand with your feet about shoulder-width apart, toes turned slightly outward.
Pull your shoulders down and back, brace your core, and inhale deeply.
Bend your knees and hips and squat down until your thighs are parallel to the floor. Push your knees out as you descend. Take care not to round your lower back, as doing so can lead to injuries.
Drive your feet into the floor and stand up straight. Exhale as you ascend.
Rerack the bar or reset your core and do another rep.
Tips:
Experiment with your stance width to see what feels strongest and most comfortable.
If squats hurt your neck, you’re resting the bar too high. Move it further down your back so it’s resting on a pad of muscle and not directly onto bones.
Wear knee sleeves to support and protect your joints if necessary.
Use a lifting belt to increase intra-abdominal pressure and support your lumbar spine.
Wear hard-soled shoes to increase your stability and balance, e.g., weightlifting shoes.
Bench press
Target muscles: Pectoralis major, triceps, deltoids, rotator cuff.
Most exercisers are very familiar with the bench press as it’s a popular chest exercise. However, the powerlifting bench press is slightly different, as the aim is not to build muscle but to lift as much weight as possible.
A lot of powerlifters, especially in the lighter divisions, bench press with a very pronounced back arch. This reduces the distance the weight has to travel, which saves energy and should lead to a bigger lift. In powerlifting, the bar must briefly touch your chest, and you cannot press it back up until the referee tells you to.
Steps:
Lie on the bench so your eyes are directly under the bar. Grip the bar with a slightly wider than shoulder-width grip.
Push your upper back into the bench and drive your feet into the floor. Pull your shoulders back and down, inhale, and lift your chest up toward the barbell. Brace your core. Make sure your entire body is tense.
With help from a spotter, unrack the bar and hold it over your chest.
Without moving your feet, bend your arms and lower the bar to the highest point of your chest. Tuck your elbows in as the bar descends. Pause for 1-2 seconds with the weight touching but not resting on your chest.
Drive the bar up and slightly back until your elbows are straight, letting your arms flare out slightly as the weight ascends.
Rerack the bar or reset and do another rep.
Tips:
Use wrist wraps to support your wrists when lifting very heavy weights.
Move your feet closer to your hips to increase your arch, making sure you keep your butt on the bench.
Squeeze the bar as hard as possible to increase upper body tension and strength.
Try to push the bar up as fast as you can to blast through your sticking point.
Imagine pulling the bar apart to maximize upper back engagement and increase stability.
Deadlift
Target muscles: Hamstrings, gluteus maximus, quadriceps, latissimus dorsi, trapezius, rhomboids, biceps, forearms, core.
Powerlifting competitions end with the deadlift. In many instances, the result of the meet hangs on the deadlift. Powerlifters have a choice between conventional and sumo deadlifts. While the muscles involved in these exercises are similar, stance width affects how much work they have to do.
Narrow-stance conventional deadlifts involve more back, glutes, and hamstrings engagement, while wide-stance sumo deadlifts hit the quads and glutes more.
Prospective powerlifters should try both types of deadlifts to see which one they prefer.
Read more about Sumo vs. Conventional Deadlifts here.
Sumo deadlift steps:
Position your barbell so it’s roughly nine inches from the floor. Stand behind the bar and adopt a wide stance so your feet are close to the weight plates. Turn your toes out slightly. The bar should be almost touching your shins.
Hold the bar with a shoulder-width overhand or mixed grip. Your back should be slightly arched, arms straight, shoulders down and back, and hips higher than your knees. Brace your core and inhale.
Drive your feet into the floor and extend your knees, keeping the bar close to your legs. Do not round your lower back.
As the bar passes your knees, push your hips forward to finish the lift.
Stand up straight but do not lean back or bend your arms, which could cause injury.
Push your hips back, bend your knees, and lower the weight back to the floor.
Release the bar and stand up, or reset your core and grip and perform another rep.
Conventional deadlift steps:
Position your barbell so it’s roughly nine inches from the floor. Stand behind it with your toes under the bar, feet about hip to shoulder-width apart.
Reach down and hold the bar with an overhand or mixed grip.
Straighten your arms, pull your shoulders down and back, and brace your abs. Your lower back should be slightly arched, with your hips lower than your shoulders.
Without bending your arms or rounding your lower back, drive your feet into the floor and stand up. Push your hips forward as the bar passes your knees.
Stand up straight but do not lean back or bend your arms, which could cause injury.
Push your hips back, bend your knees, and return the weight to the floor.
Release the bar and stand up, or reset your core and grip and perform another rep.
Tips:
Use lifting chalk to maximize your grip and prevent slipping.
Wear flat-soled shoes or lift barefoot for increased stability.
Use a weightlifting belt to support your lumbar spine.
Imagine you are jumping with a weight in your hands to blast past your sticking points more easily.
Do at least some of your sets with a double overhand grip and with your mixed grip reversed to avoid developing muscle imbalances.
Powerlifting Exercises – Accessory Lifts
While you can get big and strong doing nothing but squats, bench presses, and deadlifts, this is not the ideal way to maximize your performance. Powerlifters use accessory exercises to improve their performance in the big three lifts.
Accessory, sometimes called assistance, exercises help strengthen the weak links that might otherwise hold you back. These exercises are usually performed after the main lift for the day, or during a separate workout.
You should choose your accessory exercises according to your weaknesses. For example, if you round your lower back during squats and deadlifts, you need to strengthen your spinal erectors and core to prevent this problem.
These are the best powerlifting accessory exercises for the squat, bench press, and deadlift.
1. Paused squat
Target muscles: Quadriceps, gluteus maximus, hamstrings, abductors, adductors, core.
Paused squats involve stopping at the midpoint of each rep for 3-5 seconds. This breaks the eccentric/concentric stretch-shortening reflex, which forces you to work harder on the ascent. This is a good exercise for improving speed out of the hole and reinforces proper squat depth.
Steps:
Adopt your normal squat stance.
Descend smoothly and then pause with your thighs parallel to the floor. Hold this position for 3-5 seconds, maintaining tension throughout your body.
Drive your feet into the floor and stand up as powerfully as possible.
Reset your core and repeat.
Tips:
Start light and increase weights gradually; this exercise is harder than it looks.
Do not relax during the pause. Instead, stay tight and keep your chest up and knees out.
Try to explode out of the pause to increase muscle power and engage your muscles fully.
2. Box squats
Target muscles: Quadriceps, gluteus maximus, hamstrings, abductors, adductors, core.
Like paused squats, box squats break up your descent and ascent, so you have to work harder to stand up. However, resting on a box means you also have to control the speed of your descent and have a depth target to aim for. If you sometimes find yourself squatting too shallow, this exercise could help.
Steps:
Stand with your back to a knee-high bench or box and adopt your normal squat stance.
Push your hips back, bend your knees, and descend until your butt touches the platform. Keep your chest up.
Drive your feet into the floor and stand back up.
Rest your core and repeat.
Tips:
Place to foam pad on your box to avoid shock-loading your spine.
Stay tight on the box – do not relax.
Lower the height of the box as your mobility and flexibility improves.
3. Leg press
Target muscles: Quadriceps, gluteus maximus, hamstrings, abductors, adductors.
Leg presses allow you to strengthen your legs without using your core or back muscles. Needless to say, strong legs are critical for a big squat! If your back and core are tired after squats or deadlifts, a few sets of leg presses will allow you to continue strengthening your legs. However, your primary focus should always be squats and squat variations. Leg presses are not one of the big three!
Steps:
Sit on your leg press machine with your lower back and butt pressed into the seat. Place your feet on the footrest, shoulder to hip-width apart.
Unrack the weight, bend your knees, and descend as deeply as you can without rounding your lower back.
Push the weight back up and repeat.
Rerack the weight on completion.
Tips:
Experiment with the position of your feet to determine what feels the most comfortable and effective.
Keep your core braced and your lower back pressed into the seat throughout. Do not allow your lower back to round, as doing so can cause severe injuries.
Leg press machine designs vary, so ensure you know how to use the machine in your gym. Ask an instructor if you are unsure.
4. Bulgarian split squat
Target muscles: Quadriceps, gluteus maximus, hamstrings, abductors, adductors.
Barbell back squats are a bilateral or two-legged exercise. However, it’s common to have one leg stronger than the other. Slight strength imbalances are no problem, but more significant differences can lead to injuries and could hurt your performance. Bulgarian split squats are an excellent exercise for fixing left-to-right strength imbalances and improving balance and hip mobility.
Steps:
Stand with your back to a knee-high bench. Bend one leg and place your foot on the bench with your laces facing downward. Hop forward into a split stance.
Bend your legs and lower your rear knee down to within an inch of the floor.
Stand back up and repeat.
Switch legs and do the same number of reps on the other side.
Tips:
Hold dumbbells or use a barbell to make this exercise harder.
Pause at the bottom of each rep to make this exercise more challenging.
Lean forwards slightly from your hips to increase glute and hamstring engagement.
5. Squat jumps
Target muscles: Quadriceps, gluteus maximus, hamstrings, abductors, adductors.
While powerlifting squats are invariably performed slowly, your intention should always be to move fast. Trying to explode up out of the hole increases muscle recruitment and helps you avoid stalling partway up. As such, it makes sense to include low-load but high-speed exercises in your powerlifting squat workout.
Steps:
Stand in your normal squat stance.
Bend your legs and descend down to parallel.
Using your arms for added momentum, jump up as high as possible.
Land on slightly bent knees to absorb the shock of landing and repeat.
Try to minimize ground contact time between jumps – imagine the floor is hot.
Tips:
Do this exercise on a mat for comfort and safety.
Increase the load by holding dumbbells in your hands or a barbell on your back.
End your set when your jump height starts to decrease.
6. Paused bench press
Target muscles: Pectoralis major, deltoids, triceps.
Competition-style bench presses involve pausing with the bar touching your chest. This stops lifters from bouncing rather than pushing the bar up. Paused bench presses prepare you for powerlifting meets and also increase your strength off your chest, which is a common sticking point for many lifters.
Steps:
Adopt your usual bench press position and unrack the weight.
Bend your arms and lower the bar to your chest.
Pause with the bar touching your chest for 3-5 seconds.
Drive the weight back up and repeat.
Tips:
Use less weight than usual, as pausing makes the load feel heavier.
The longer you pause, the more difficult this exercise becomes.
Do not relax with the bar on your chest. Instead, stay tight like a compressed spring.
7. Close grip bench press
Target muscles: Deltoids, pectorals major, triceps.
While bench presses are usually described as a chest exercise, the triceps are equally involved. However, because the triceps are smaller and weaker than the pecs, invariably, they fail first. Close grip bench presses emphasize your triceps and can help make them less of a liability. Stronger triceps usually mean a bigger bench press.
Steps:
Lie on your bench and hold the bar with a shoulder-width grip. Plant your feet on the floor, push your upper back into the bench, and lift your chest.
Unrack the bar and hold it over your chest.
Bend your arms and lower the bar to your sternum. Keep your upper arms tucked into your sides throughout.
Drive the weight back up and repeat.
Tips:
Experiment with the width of your hands to see what feels most comfortable and effective.
You can also combine close grip bench presses with a pause to make them more demanding.
Avoid doing very close grip bench presses, which can be hard on your wrists, elbows, and shoulders.
8. Wide grip bench press
Target muscles: Pectoralis major, deltoids, triceps.
Wide grip bench presses emphasize your pecs, which are the engine that drives your bench press. Isolation exercises like dumbbell flys and cable crossovers are great for building bigger pecs but won’t do much for your strength. Wide grip bench presses are a critical accessory exercise if you want to press more weight.
Steps:
Lie on your bench and hold the bar so your hands are about six inches wider than your regular grip.
Plant your feet on the floor, push your upper back into the bench, and lift your chest.
Unrack the bar and hold it over your chest.
Bend your arms and lower the bar to your sternum. Keep your upper arms tucked into your sides throughout.
Drive the weight back up and repeat.
Tips:
Keep your upper back engaged to take stress away from your shoulders.
Do this exercise with a pause for a more challenging workout.
Experiment with the width of your hands to see what feels most comfortable and effective.
Read also: Learn how to absolutely nail the wide grip bench press to push your chest muscles to the max!
9. Floor press
Target muscles: Pectoralis major, deltoids, triceps.
Bench presses can be hard on your shoulders. It’s no coincidence that many powerlifters also suffer from chronic shoulder pain. Floor presses allow you to keep working on your bench press while giving your joints a well-deserved break. They’re also excellent for increasing triceps and lockout strength.
Steps:
Lie on the floor with your legs bent and feet flat. Hold your barbell over your chest using a medium-width grip. Press your upper back into the floor and lift your chest up.
Bend your arms and lower the bar until your elbows and triceps lightly touch the floor.
Press the bar back up and repeat.
Tips:
Lower the weight slowly to avoid jarring your elbows.
You can also do this exercise with straight rather than bent legs.
Try using dumbbells instead of a barbell to see which you prefer.
10. Plyo push-up
Target muscles: Pectoralis major, deltoids, triceps.
Plyometric or plyo push-ups develop explosive strength. After pausing, it can be hard to get the bar moving off your chest, which is where your explosive strength comes in. Plyo push-ups are one of the best upper body power and speed exercises around, and you don’t need any equipment to do them.
Steps:
Adopt the push-up position with your arms, legs, and body straight. Brace your core.
Bend your arms and lower your chest to within an inch of the floor.
Explosively extend your arms and push yourself up so your hands leave the floor.
Land on slightly bent elbows, lower your chest back down to the floor and repeat.
Tips:
Do this exercise on a mat for comfort and safety.
End your set when you start losing height.
Try to minimize ground contact time between reps by imagining the floor is hot.
11. Paused deadlifts
Target muscles: Hamstrings, gluteus maximus, quadriceps, latissimus dorsi, trapezius, rhomboids, biceps, forearms, core.
The most common sticking point in the deadlift is as the bar passes your knees. This is because you are in a mechanically disadvantageous position, as the bar is also furthest from your base of support. Paused deadlifts address this common weakness and should help you blast through this sticking point more easily.
Steps:
Set up for sumo or conventional deadlifts as usual.
Drive your feet into the floor and pull the bar up to about knee height. Pause for 3-5 seconds.
Push your hips forward and stand up straight to complete the lift.
Lower the bar back to the floor, reset your core and grip, and repeat.
Tips:
Stay tight during the pause, and do not allow your lower back to round.
The longer you pause, the more demanding this exercise becomes.
Don’t go too heavy too soon, as paused deadlifts are far more challenging than regular conventional or sumo deadlifts.
12. Romanian deadlifts
Target muscles: Hamstrings, gluteus maximus, erector spinae, rhomboids, biceps, forearms, core.
Romanian deadlifts target your posterior chain, which is the engine that drives your deadlift. Posterior chain is the collective term for your glutes, hamstrings, and lower back. Weakness in this area will not only reduce your deadlift performance but could also open you up to injuries. As such, Romanian deadlifts are doubly-important for powerlifters.
Steps:
Stand with your feet hip-width apart, knees slightly bent. Hold a barbell in front of your thighs with a mixed or double overhand grip. Brace your core and pull your shoulders back and down.
Hinging from your hips, lean forward and lower the bar down the front of your legs as far as your flexibility allows.
Stand back up and repeat.
Tips:
Do not round your lower back, as doing so can lead to injury.
Tuck your chin in and lengthen your neck to avoid stressing your spine.
Push your hips back and keep your weight on your heels to maximize posterior chain engagement.
Read also: Learn how to build a powerful posterior chain with Romanian deadlifts, or RDLs for short.
13. Good mornings
Target muscles: Hamstrings, gluteus maximus, erector spinae, core.
Good mornings get their name because, when you do this exercise, it looks like you are bowing to greet a Victorian-era friend! Weird images aside, this is an excellent posterior chain exercise and, because it doesn’t involve your arms, won’t tax your already overworked forearms and grip.
Steps:
Rack and hold a barbell across your upper back like you are doing squats. Stand with your feet shoulder to hip-width apart and knees slightly bent.
Hinging from your hips, lean forward as far as your flexibility allows. Do not round your lower back.
Stand back up and repeat.
Tips:
Use a squat bar pad for comfort.
Pull the bar down onto your upper back to step it moving as you lean forwards.
Push your hips back and keep your weight on your heels to maximize posterior chain engagement.
14. Barbell hip thrusts
Target muscles: Hamstrings, gluteus maximus, erector spinae, core.
This is another posterior chain exercise. However, unlike the previous few movements, it puts very little stress on your lower back, providing a welcome break for that already hard-working group of muscles. Barbell hip thrusts will improve your lockout strength and give you a better-looking butt.
Barbell Hip Thrust
Steps:
Sit on the floor with your upper back against a stable bench. Rest and hold a barbell across your hips. Bend your legs and plant your feet firmly on the floor.
Drive your feet into the floor and push your hips to form a straight line with your knees and shoulders.
Lower your butt back down to the floor and repeat.
Tips:
Use a bar pad or folded mat for comfort if required.
Drive your heels into the floor and not the balls of your feet to maximize hamstring and glute engagement.
You can also do this exercise with a dumbbell instead of a barbell or using one leg instead of two.
15. Ab wheel rollouts
Target muscles: Core, latissimus dorsi, triceps.
Your core can make or break your deadlift. Core is the collective term for the muscles of your midsection, which act like a weightlifting belt during deadlifts, squats, and most other strength training exercises. If your core fails, your midsection will collapse, and some of the force generated by your legs or arms will get lost. A rounded lower back is also weaker and more prone to injury.
Rollouts are one of the most powerlifting-specific core exercises, as they also involve your lats and triceps, both of which are very active during deadlifts.
Ab Wheel Rollouts
Steps:
Kneel down and place your ab roller on the floor in front of your legs. Hold the handles with an overhand grip. Brace your core and straighten your arms.
Push the roller away from you and lower your chest toward the floor.
Keeping your arms straight, use your core to pull the roller back up to your knees.
Tips:
Kneel on an exercise mat or foam pad for comfort.
The further you roll the wheel away from you, the more demanding this exercise becomes.
Reduce your range of motion if this exercise causes lower back discomfort.
Four-Day Powerlifting Workout
While the exercises listed above will make you stronger, you’ll get much better results from your training if you follow a more structured program. This workout plan emphasizes the big three powerlifts and also includes several complimentary accessory exercises to balance your musculature and improve your performance.
However, before beginning any of these workouts, make sure you prepare your muscles and joints with an appropriate warm-up. Begin with 5-10 minutes of easy cardio followed by dynamic mobility and flexibility exercises for the joints and muscles you’re about to use.
Finish off your warm-up with a couple of progressive sets of your first exercise to dial in your technique and get your nervous system ready for heavier weights.
Read more about warming up for strength training here.
Your Training Week
To avoid overtraining and allow adequate time for rest and recovery, this workout plan involves no more than two training days in a row and no more than two back-to-back rest days. This provides the ideal balance between work and recovery. Try not to change which days you train unless absolutely necessary.
#
Day
Exercise
1
Monday
Squat & accessory exercises
2
Tuesday
Bench press (1) & accessory exercises
3
Wednesday
Rest
4
Thursday
Deadlift & accessory exercises
5
Friday
Rest
6
Saturday
Bench press (2) & accessory exercises
7
Sunday
Rest
Workout 1 – Squat & accessory exercises
#
Exercise
Sets
Reps
Recovery
1
Squat
5
5
3-minutes
2
Paused squat
3
6-8
2-minutes
3
Bulgarian split squat
3
10-12 per leg
60 seconds
4
Leg press
3
10-12
60 seconds
5
Squat jump
3
8-10
90 seconds
Workout 2 – Bench press (1) & accessory exercises
#
Exercise
Sets
Reps
Recovery
1
Bench press
5
5
3-minutes
2
Paused bench press
3
6-8
2-minutes
3
Plyo push-up
3
8-10
90 seconds
4
Triceps pushdown
3
10-12
60 seconds
5
Face pull
3
10-12
60 seconds
Workout 3 – Deadlift & accessory exercises
#
Exercise
Sets
Reps
Recovery
1
Deadlift
5
5
3-minutes
2
Paused deadlift
3
6-8
2-minutes
3
Romanian deadlift
3
6-8
2-minutes
4
Hip thrust
3
10-12
90 seconds
5
Ab wheel rollout
3
12-15
60 seconds
Workout 4 – Bench press (2) & accessory exercises
#
Exercise
Sets
Reps
Recovery
1
Close grip bench press
5
5
3-minutes
2
Wide grip bench press
3
6-8
2-minutes
3
Floor press
3
8-10
90 seconds
4
Seated cable row
3
10-12
60 seconds
5
EZ bar skull crusher
3
10-12
60 seconds
FAQs
Do you have a question about the best powerlifting exercises or our workout? No problem, because we’ve got the answers!
1. What weight should I use for these exercises?
The one thing we can’t tell you is how much weight to use for these exercises and workouts. After all, strength is determined by many factors, including age, gender, experience, and genetics.
So, spend your first week of training estimating your training weights. If an exercise calls for 6-8 reps, increase your weight over several sets until you feel you will get close to failure within the specified range. Use your final weight the next time you repeat that workout.
Use this process for all the exercises.
Then, week by week, work at increasing the loads, even if it’s only by 2.5 to 5.0 pounds. These small but gradual increases are the key to getting stronger. This is called progressive overload.
2. How long can I follow this workout plan?
Stick with our powerlifting workout plan until you notice your big three progress starting to slow. This could be 4-8 weeks or several months. Then, as the workout loses some of its, take a one-week deload (easy training week) and try and squeeze a couple more weeks of progress out of your training.
Then, when your progress grinds almost to a halt, quit this plan and start another one.
Check out our library of powerlifting programs here.
3. What diet should I follow with this workout plan?
Training to get stronger invariably means training to build muscle mass. Yes, some strength gains are neurological and not the result of muscle growth. However, a bigger muscle is a stronger muscle. It’s no coincidence that powerlifters are big and muscular.
To build muscle, you need a calorie surplus and at least one gram of protein per pound of body weight. Use this protein calculator to determine your precise protein needs. You also need to consume plenty of carbohydrates for energy and unprocessed fats for hormonal balance and general health.
Ideally, your meals should contain plenty of unrefined foods, including vegetables, whole grains, and other natural ingredients. While the occasional junk food treat probably won’t harm you, the healthier your diet is, the healthier you will be. After all, you are what you eat.
As such, there is no standard powerlifting diet, and you can follow any meal plan that meets your needs.
4. How do I get big like a bodybuilder but strong like a powerlifter?
While powerlifters are strong, bodybuilders are often bigger and are almost always leaner with more aesthetic physiques. Because of this, and depending on their goals, most people choose to follow either a powerlifting plan or a bodybuilding plan.
However, if you want the best of both worlds, you may want to consider powerbuilding. A powerbuilding approach builds muscle mass and strength in equal measure and uses training methods from both types of workout.
You can read more about powerbuilding here.
5. Can I make changes to any of the workouts?
You certainly can, but make sure you avoid changing the exercises too much. For example, while switching barbell for dumbbell floor presses would be fine, hitting the pec deck instead of the bench press would not as the exercises are too dissimilar.
So, look at the muscles involved in the exercise you want to replace and choose a similar alternative. And don’t replace an exercise just because it’s hard – it’s those challenging exercises that are responsible for your strength gains.
6. Can I train for powerlifting even if I don’t want to compete?
While powerlifting competitions are a lot of fun and can be very rewarding, training for one requires a lot of time and dedication.
Your training will need to peak at the right time, and you may also have to lose or gain weight to qualify for your chosen class. You’ll also need to decide whether you will compete equipped or raw and in which federation. There is a risk of injury as you train with ever more weight, and you may have to take time off work and travel to find a suitable meet.
Because of these details, many people follow a powerlifting program with no intention of ever stepping into the limelight and competing. They just enjoy lifting heavy weights and getting stronger, which, for them, is rewarding enough.
The good news is that you can always compare your performance against other lifters in your demographic and compete against your previous best lifts by tracking your one-repetition maximums in the squat, bench press, and deadlift. You can also use the Wilks calculator to compare your strength against other lifters, irrespective of weight and gender.
7. Is powerlifting safe?
Like all sports, powerlifting has some inherent risks. Lifting very heavy weights, failed reps, poor form, and simple accidents can all lead to mild to severe injuries. However, using the proper equipment and correct technique, respecting your body’s need for rest, staying within your limitations, and training hard but smart will mitigate many of these risks.
In reality, powerlifting is no more dangerous than basketball, soccer, football, etc. However, there ARE safer workouts, so if you are only training for general strength and health, you should probably consider something less risky, like progressive calisthenics or general strength training.
Closing Thoughts
Powerlifting is a very accessible strength sport. Unlike competitive strongman, you don’t need lots of specialist equipment, and you can train for powerlifting in almost any commercial gym.
Based on three common gym exercises – the squat, bench press, and deadlift – powerlifting is relatively easy to learn and much less difficult to get into than Olympic lifting. Buy a squat rack, bench, barbell, and weights, and you can even do powerlifting at home.
If you are looking for a way to build muscle and get super-strong, powerlifting is a great choice. More functional than bodybuilding, powerlifting is an excellent standalone activity and compatible with many other sports.
Use the exercises and workouts in this article to get stronger than ever before!
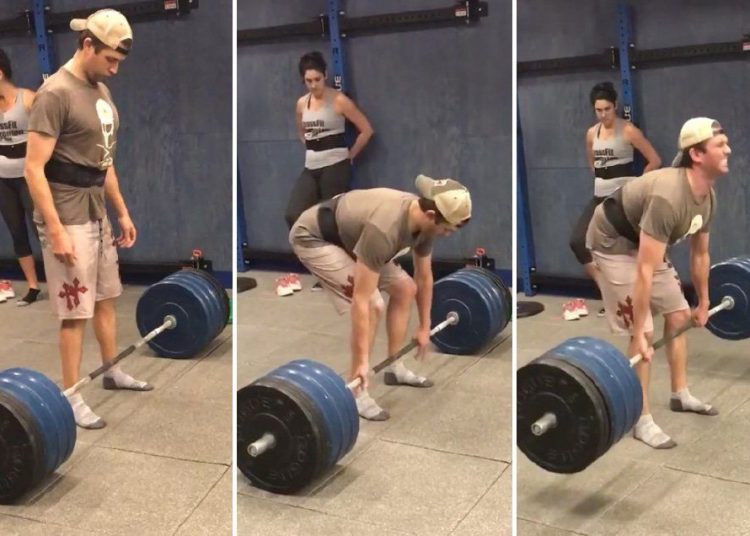
Beginner Deadlift Program – 1 and 2 Workouts a Week
There aren’t many exercises that build muscle mass and strength like deadlifts. Working almost every muscle in your body, deadlifts are arguably the most productive thing you can do with a weighted barbell.
Deadlifts are highly functional, teaching you how to bend and lift heavy objects off the floor safely, i.e., using your legs and back together and without rounding your lumbar spine.
Regardless of what you’re training for, you’ll probably reach your goals sooner if you include deadlifts in your workouts.
All that said, deadlifts can also be intimidating, and many beginners are reticent to try them. Some so-called fitness experts make matters worse by labeling the deadlift as dangerous, stating that they cause back injuries.
The truth is that any exercise can cause injuries when performed incorrectly. Deadlifts are actually pretty safe when done properly and with an appropriate load. So, by all means, respect the deadlift but don’t fear it.
The programs in this article are designed to help you go from zero to certified deadlifting hero!
Deadlifting Form Basics
A correctly performed deadlift is a thing of beauty. With all your joints and muscles working in synergy, even heavy weights come off the floor relatively smoothly. However, while a well-performed deadlift is one of the best back-building exercises around, an ugly deadlift can expose you to a whole world of hurt.
So, it makes sense to start this article with an overview of how to deadlift. Follow these steps to make sure you are deadlifting with good technique. If in doubt, seek out a knowledgeable trainer and get some hands-on coaching.
Read more about mastering the deadlift here and common deadlift technique faults and how to fix them here.
Place your loaded barbell on the floor so it’s about mid-shin height. Officially, the bar should be nine inches off the deck. Using standard-sized Olympic plates means the bar should be at the correct height.
Stand in the center of the bar with your feet about hip-width apart. Keep your feet parallel or turn them slightly outward. The bar should be directly over the middle of your feet and around an inch from your shins.
Lean forward and hold the bar using a shoulder-width double overhand or mixed grip. Wrap your hands tightly around your bar and put your thumb on top of your first two fingers to reinforce your grip and avoid slipping. Use chalk if you’ve got sweaty palms.
Straighten your arms, lift your chest, arch your lower back, and pull your shoulders down and back. Your hips should be below shoulder height. Look at the floor around ten feet in front of you.
Inhale, brace your abs and get ready to lift. Pull the slack out of the bar, so your entire body feels coiled like a spring. Flex your lats and press the bar backward against your legs. It doesn’t have to drag up your shins and thighs but should be in light contact at all times.
Without bending your arms, press your feet into the floor and extend your knees and hips simultaneously. As you break the bar away from the floor, drive your hips forwards, continue extending your knees, and stand up.
Do not allow your hips to rise faster than the bar, as this increases the distance between the weight and your feet/legs, putting unnecessary stress on your lower back.
Your knees and hips should be locked out at the top of the movement, but there is no need to lean backward. Just stand up straight and proud!
Keeping your arms straight, push your hips back, bend your knees, and lower the bar down the front of your legs to the floor. Maintain control of the weight – don’t just drop it – but there is no need to go super-slow.
Let the weight settle on the floor, reset your grip and core, and blast out another rep!
Beginner Deadlift Program – 1 Day a Week
This program is for anyone who knows how to deadlift but doesn’t do it regularly. It’s also a good option for exercisers returning from a training break.
One deadlift workout per week might not sound like a lot, but this exercise is intense and cause severe residual systematic fatigue. Most beginners will soon start to feel overtrained if they deadlift more frequently. This workout also includes some basic deadlift accessory exercises to boost your general strength and deadlift performance.
Finally, make sure you warm up before doing this or any other strenuous workout. Begin with some light cardio followed by dynamic mobility and flexibility exercises for your lower body and back. Finish off with 1-2 sets of light deadlifts for practice and reinforce good technique.
#
Exercise
Sets
Reps
Recovery
1
Deadlift
3
6-8
2-3 minutes
2
Leg curl
2
10-12
90 seconds
3
Hip thrust
2
10-12
90 seconds
4
Romanian deadlift
2
12-15
90 seconds
5
RKC plank
3
20 seconds
90 seconds
Exercise Instructions
You’ll get more from this workout if you perform all the exercises with perfect form. The correct technique is generally safer and more effective, so make sure you follow these instructions.
1. Deadlift
Target muscles: Gluteus maximus, hamstrings, quadriceps, erector spinae, core, latissimus dorsi, trapezius, rhomboids, deltoids, biceps, triceps, and forearms.
What would a deadlift program be without deadlifts? According to Joe Weider’s priority principle, you should always put the most important exercises at the start of your program, which is why you’ll be deadlifting first.
Use a weight that allows you to perform 6-8 clean reps per set. This will take a little experimentation to identify, but you should get it within a workout or two.
Check out the instructions above to ensure you are deadlifting like a boss!
Tips:
Use gym chalk (not lifting straps) to reinforce your grip.
If you use a mixed grip, make sure you switch your hands around set by set.
Do your deadlifts in flat minimalist shoes or barefoot if possible.
2. Leg curl
Target muscles: Hamstrings.
The hamstrings play a big role in deadlifts, working alongside your glutes to extend your hips. Weak hamstrings will severely undermine your deadlift performance, and leg curls are one of the best ways to isolate and strengthen this vital muscle group.
Steps:
Lie on your front of the leg curl machine with your knees in line with the lever arm pivot point. Hold onto the handles and brace your core. Press your hips down onto the bench.
Bend your legs and curl your heels up toward your butt.
Extend your legs and repeat.
Tips:
Do not allow the weights to touch down between reps.
Squeeze rather than jerk the weight up to make this exercise as safe and effective as possible.
Do seated or standing leg curls if preferred.
3. Hip thrust
Target muscles: Gluteus maximus, hamstrings.
The barbell hip thrust is an awesome glute and hamstring exercise that’s also very lower back-friendly. It’s a popular deadlift accessory exercise that targets two vital muscles – the glutes and hammies. In most cases, as you get stronger with hip thrusts, your deadlifts will get stronger, too.
Steps:
Sit on the floor with your upper back against a sturdy bench. Rest and hold a barbell across your hips. Bend your legs and place your feet flat on the floor.
Drive your feet into the floor and lift your hips up so they form a straight line with your shoulders and knees.
Lower your butt back to the floor and repeat.
Tips:
Rest the bar on a squat bar pad or folded mat for comfort.
You can also do this exercise without a bench if more convenient.
Drive your heels into the floor, not your toes, to maximize posterior chain engagement.
4. Romanian deadlift
Target muscles: Gluteus maximus, hamstrings.
Unlike conventional deadlifts, Romanian deadlifts start from standing, and the weight never touches the floor. However, differences aside, this is an excellent posterior chain exercise that will boost your deadlift by improving your lockout strength. It’s also good for your upper back, grip, and hamstring flexibility.
Steps:
Stand with your feet hip-width apart and hold a barbell in front of your thighs. Bend your knees slightly, brace your core, and pull your shoulders down and back.
Hinging from the hips, push your butt back and lean forward, lowering the weight down the front of your legs. Do not round your lower back.
Drive your hips forward and stand back up.
Continue for the desired number of reps.
Tips:
Use a double overhand or mixed grip as preferred.
Lean as far forward as your flexibility allows, but do not round your lower back, as doing so can cause injury.
Use chalk or lifting straps to reinforce your grip as necessary.
Related: Complete Romanian Deadlifts (RDLs) guide.
5. RKC plank
Target muscles: Core.
The core is the collective term for the muscles of your midsection. Encircling your internal organs like a weightlifting belt, the core muscles contract inward when you brace to support your lumbar spine. As such, a strong core is critical for a big, safe deadlift. RKC planks are a very time-effective way to build core strength.
Steps:
Kneel on all fours and then rest your upper body on your forearms, hands parallel. Brace your core and walk your feet out and back so your body is straight.
Tense your legs, glutes, core, chest, shoulders, and arms as hard as possible.
Without holding your breath, maintain this position for 20 seconds.
Relax, rest, and repeat!
Tips:
Clench your fists to generate more full-body tension.
Imagine you are pulling your toes toward your elbows to engage your abs as much as possible.
If you can do this exercise for more than 20 seconds, you probably weren’t tensing your core hard enough!
Beginner Deadlift Program – 2 Days a Week
If you are already a regular deadlifter or have been doing our once-a-week deadlift program for a couple of months, you are probably ready to graduate to deadlifting twice a week.
However, to avoid burnout and injury, you won’t be doing the exact same workout both times. Instead, you’ll alternate between two types of deadlifts and several different accessory exercises.
As always, you must start your workouts with a thorough warm-up to ensure your joints, muscles, and nervous system are ready for what you’re about to do.
Do the following workouts several days apart, e.g., Monday and Thursday, to provide adequate time for rest and recovery. Take an extra rest day between workouts if you still feel tired.
Workout 1
#
Exercise
Sets
Reps
Recovery
1
Deadlift
5*
5
2-3 minutes
2
Snatch grip deadlift
3
6-8
2-3 minutes
3
Leg curl
3
10-12
90 seconds
4
Box jump
3
6-8
90 seconds
5
Stability ball dead bug
3
10-12
90 seconds
*Two moderately-heavy sets and three heavy sets.
Workout 2
#
Exercise
Sets
Reps
Recovery
1
Deficit deadlift
5*
5
2-3 minutes
2
Paused deadlift
3
4-6
2-3 minutes
3
Rack pull
3
4-6
2-3 minutes
4
Kettlebell swing
3
12-15
90 seconds
5
Ab wheel rollout
3
12-15
90 seconds
*Two moderately-heavy sets and three heavy sets.
Workout 1: Exercise Instructions
You’ll get more from these workouts if you perform all the exercises with perfect form, so make sure you follow these instructions:
1. Deadlift
Target muscles: Gluteus maximus, hamstrings, quadriceps, erector spinae, core, latissimus dorsi, trapezius, rhomboids, deltoids, biceps, triceps, and forearms.
The five by five (5 x 5) set and rep scheme is one of the best ways to build muscle mass and strength. It’s been popular for close to a century, and that’s because it works! Do your first two sets with a moderate weight, and then go heavy for your last three efforts. However, don’t go so hard that you cannot maintain that all-important perfect technique.
Tips:
Consider wearing a lifting belt for added lower back support.
When in doubt, rest longer between sets to maximize your performance.
Increase your weights by 2.5 to 5 pounds every week or two.
2. Snatch grip deadlift
Target muscles: Gluteus maximus, hamstrings, quadriceps, erector spinae, core, latissimus dorsi, trapezius, rhomboids, deltoids, biceps, triceps, and forearms.
Snatch grip deadlifts put you into a less biomechanically efficient position at the start of each rep. Making things harder will increase your speed and power off the floor, translating to a bigger deadlift a few months later. Don’t go too heavy too soon with this exercise; it’s harder than it sounds!
Steps:
Stand behind your barbell with your toes under the bar, feet shoulder to hip-width apart.
Reach down and grab the bar using a wider-than-shoulder-width double overhand grip.
Straighten your arms, lift your chest, drop your hips, and brace your abs.
Drive your feet into the floor and, without rounding your lower back, stand up straight.
Lower the weight back to the floor and repeat.
Tips:
Use straps and or chalk if necessary.
Tuck your thumbs under your fingers (hook grip) for a more secure hold on the bar.
The wider you put your hands, the more challenging this exercise becomes, so adjust your grip accordingly.
3. Leg curl
Target muscles: Hamstrings.
If you’ve done our once-a-week program, you’ll have already done leg curls for your hamstrings. If you haven’t, you are sure to appreciate how good this exercise is for isolating and strengthening your hammies. Use the seated leg curl machine if you used the prone model last time, or vice versa.
Check out the instructions above to ensure you are doing leg curls correctly.
4. Box jump
Target muscles: Quadriceps, gluteus maximus, hamstrings, calves.
A good deadlift starts with a powerful extension of the hips and knees. Because of the weight involved, you might move slowly, but you should always try to lift explosively. Box jumps are one of the most accessible lower body power exercises around. They’re also pretty knee-friendly.
Steps:
Stand a couple of feet away from a sturdy knee-high box. Your feet should be roughly hip-width apart. Ideally, use the same stance as you do for deadlifts.
Bend your knees, flex your hips, and swing your arms behind you.
Swing your arms forward and use this momentum to help you jump forward and up.
Land on the box with slightly bent knees to absorb the shock of landing.
Step down, reset your feet, and repeat.
5. Stability ball dead bug
Target muscles: Core, hip flexors.
Your core acts like a natural weightlifting belt during deadlifts, and the stronger it is, the more weight you’ll be able to lift. The stability ball dead bug might look like a simple abs exercise, but it’s actually very intense and one of the best ways to strengthen your anterior and deep core muscles.
Steps:
Lie on your back with your legs bent and knees over your hips. Brace your core and press your lower back into the floor. Hold a stability ball against your knees with both hands.
Extend your right leg and left arm, lowering them down toward the floor. Meanwhile, press your left leg and right hand into the ball.
Return to the starting position and then switch sides.
Continue for the desired number of reps.
Tips:
The more forcefully you push against the ball, the more demanding this exercise becomes.
Use a medium-sized stability ball for this exercise – 45-55cm is ideal.
Press your lower back into the floor throughout to fully engage your abs.
Workout 2: Exercise Instructions
1. Deficit deadlift
Target muscles: Gluteus maximus, hamstrings, quadriceps, erector spinae, core, latissimus dorsi, trapezius, rhomboids, deltoids, biceps, triceps, and forearms.
Deficit deadlifts force you to squat deeper at the start of each rep. This increases the range of motion and reduces your mechanical advantage for lift-off. As such, you’ll need to work harder at the start of each rep. This will make you stronger and faster off the floor.
Steps:
Place your barbell on the floor and place a bumper plate in the center. Stand on it with a narrow stance.
Reach down and grab the bar using a shoulder-width mixed or double overhand grip.
Straighten your arms, lift your chest, drop your hips, and brace your abs.
Drive your feet downward and, without rounding your lower back, stand up straight.
Lower the weight back to the floor and repeat.
Tips:
The thicker the plate you stand on, the more demanding this exercise becomes.
Take care not to round your lower back.
Use less weight than for conventional deadlifts; this exercise is TOUGH!
2. Paused deadlift
Target muscles: Gluteus maximus, hamstrings, quadriceps, erector spinae, core, latissimus dorsi, trapezius, rhomboids, deltoids, biceps, triceps, and forearms.
A lot of people struggle to lock out a heavy deadlift. This is called a sticking point. Paused deadlifts train you how to push past sticking points by stopping precisely where deadlifts are hardest. Incorporating this exercise into your deadlift workouts should mean fewer failed reps.
Steps:
Set up for deadlifts as normal.
Drive your feet into the floor, extend your hips and knees, and stand up. Pause for 2-3 seconds when the bar reaches your knees. Stay tight!
After pausing, push through to lock out and stand up straight.
Lower the bar back to the floor and repeat, pausing midway through every rep.
Tips:
Use 30-40% less weight than for conventional deadlifts.
Pause above and below your knees to see which works best for you.
The longer you pause, the more challenging this exercise becomes.
3. Rack pull
Target muscles: Gluteus maximus, hamstrings, quadriceps, erector spinae, core, latissimus dorsi, trapezius, rhomboids, deltoids, biceps, triceps, and forearms.
Rack pulls are partial deadlifts that start from just above knee height. This reduced range of motion allows you to lift heavier weights and work on your lockout strength. Rack pulls are also an excellent upper back and trap builder. A bigger, more muscular back will enhance your deadlift performance.
Steps:
Using a power rack, raise your barbell just above knee height.
Stand behind the bar and hold it with an overhand or mixed shoulder-width grip.
Hinge forward at the hips, brace your core, and pull your shoulders down and back.
Drive your hips forward and stand up.
Lower the bar back to the rack and repeat.
Tips:
Do not use a deadlift bar for this exercise, as doing so could damage it.
You can also do this exercise by raising the weights on blocks, i.e., block pulls.
It’s okay to use straps for rack pulls, as you could potentially be lifting more weight than you’re used to.
4. Kettlebell swing
Target muscles: Gluteus maximus, hamstrings, quadriceps, erector spinae, core.
Like box jumps in the previous workout, this exercise is designed to improve speed and power. The more explosively you break the bar away from the floor, the more likely you are to blast through your sticking points. Kettlebell swings are a safe, accessible, and effective explosive hip hinge exercise.
Steps:
Hold a kettlebell in front of your thighs and stand with your feet about shoulder-width apart. Brace your core and pull your shoulders back and down.
Bend your knees slightly, push your butt back, and hinge forward at the hips, lowering the weight between your knees.
Drive your hips forward and use this momentum to swing the weight forward and up to shoulder height.
Lower the weight and repeat.
Tips:
Imagine you are jumping forward to properly engage the correct muscles.
Do not swing the weight above shoulder height, as doing so increases the risk of injury.
Take care not to round your lower back or hyperextend your spine at any point.
5. Ab wheel rollout
Target muscles: Core, latissimus dorsi.
Ab wheel rollouts are one of the most effective core exercises. They’re basically a moving plank but also involve your lats and even the long head of your triceps. These are the same muscles you use during deadlifts to keep the barbell close to your legs. As such, the rollout is a very deadlift-specific core exercise.
Steps:
Kneel on the floor and place your wheel/roller in front of your knees. Use a folded exercise mat for comfort.
Hold the handles with an overhand grip. Brace your core and pull your shoulders down and back.
Keeping your arms straight, roll the wheel out in front of you and lower your torso down toward the floor. Do not hyperextend your lower back.
Pull the wheel back up to your knees and repeat.
Tips:
Shorten your range of motion if you feel this exercise in your lower back.
No ab wheel or roller? No problem! You can use a barbell loaded with small plates instead.
If your core is strong, you can do this exercise standing instead of kneeling.
Deadlift Program – FAQs
Do you have any questions about these programs or deadlifts in general? That’s okay because we’ve got the answers!
1. What weight should I use for deadlifts?
Sadly, this is the one question we can’t answer! Lots of things determine how much weight you should use for deadlifts, including your gender, experience level, genetics, and current one-repetition maximum.
The best advice we can give you is to use a weight that allows you to complete the prescribed number of reps, but only just. The last rep or two should feel challenging but not impossible. Leave about 1-3 reps in reserve. Think of this load as quite heavy and not your absolute max.
As you get stronger, gradually increase the weight by 2.5 to 5 pounds, so you continue to improve.
If you get to the end of a set and feel you have more to give, feel free to do an extra rep or two. Then, make a note in your training journal to put more weight on the bar next time.
Put these tips into action, and progress is all but guaranteed.
2. Do I need to wear a belt for deadlifts?
While you don’t have to wear a lifting belt for deadlifts, many people find them helpful. A belt gives you something to brace your abs against, so you can create more intra-abdominal pressure. IAP helps support your lumber spine and prevents it from rounding as you lift.
You should be able to produce plenty of IAP without a belt, but when lifting heavy weights, more support is seldom a bad thing.
If you wear a belt, save it for your heaviest sets so you can practice bracing naturally. Then put on your belt when you need some extra assistance.
3. What’s the difference between a double overhand and mixed grip for deadlifts?
A mixed grip, where one hand faces forward and one faces backward, stops the bar from rolling out of your fingers, making you less likely to drop the weight unexpectedly. Most lifters use a mixed grip for heavy deadlifts.
However, using a mixed grip puts a lot of tension on your supinated biceps and can result in muscle tears. You may also develop muscle imbalances if you always turn your hands the same way.
You can avoid these issues by alternating sides when using a mixed grip and using an overhand grip for your earlier, easier sets. Save your mixed grip for your heaviest sets.
Alternatively, you can just stick with the double overhand grip for all your sets, which is safer and more balanced despite being weaker. However, your grip will probably fail before your legs and back.
Weigh up all the options and decide which is right for you.
4. Are deadlifts dangerous?
All exercises can be dangerous when performed incorrectly, including the deadlift. However, because of the weights, joints, and muscles involved, improper deadlift form can cause serious injury. That said, deadlifts also teach you how to safely lift heavy weights from the floor, i.e., using your legs and lower back together.
Most deadlift injuries are caused by lifting too much weight or sloppy form. Avoid these mistakes, and deadlifts are probably no more dangerous than any other barbell exercise.
5. Can I change any of the exercises in the workouts?
Providing you keep the main exercises the same (deadlifts!), you are free to make alterations to these programs. However, you should select similar movements so as not to change the intended effects of the program. For example, you could do stiff-legged deadlifts instead of Romanian deadlifts. However, doing leg presses instead of leg curls would be a mistake.
Finally, don’t switch out an exercise simply because you find it difficult. It’s the hard exercises that drive most of your fitness and strength increases. Embrace the suck and don’t try and hide from it!
6. How should I incorporate these workouts into my weekly training program?
These deadlift workouts are designed to be part of a weekly split routine. As such, you need to slot them into your training plan. The main thing to remember is that you need to keep your deadlift workouts separate from your leg and back workouts. Training your legs and/or back the day before or after a deadlift workout will be too taxing for most people.
Possible splits include:
Monday – Deadlifts
Tuesday – Chest and Shoulders
Wednesday – Rest
Thursday – Legs (focusing on the quads and calves)
Friday – Back and Arms
Saturday – Rest
Sunday – Rest
Or:
Monday – Deadlifts (1)
Tuesday – Chest and Triceps
Wednesday – Legs (focusing on the quads and calves)
Thursday – Back and Biceps
Friday – Rest
Saturday – Deadlifts (2)
Sunday – Rest
Experiment with a few different training setups to see which you prefer.
7. What is the best diet when training for a bigger deadlift?
Sadly, there is no such thing as an official deadlift diet. Ultimately, your diet needs to match your body composition and performance goals and support your training.
If you want to get stronger and build muscle, the main thing you need is a daily calorie surplus of about 300-500 calories. This will give your body the energy it needs to recover and grow.
However, if you want to lose fat and get leaner, you need a 300-500 per day calorie deficit. This will force your body to burn fat for fuel. That said, you probably won’t build much muscle or get as strong when you are in a deficit.
Adopt the eating plan that best meets your caloric and nutrient goals. However, whether you want to lose or gain weight, make sure you are consuming adequate protein – typically one gram per pound of body weight.
More on Deadlifts:
Wrapping Up
While the occasional deadlift workout can be beneficial, you’ll get better results if you follow a more structured training plan. Powerlifters, who are arguably the best deadlifters on the planet, dedicate entire training sessions to this awesome exercise. This approach works for them, and it’ll work for you.
Use our beginner deadlift workouts, and your strength and performance will soon start to improve. However, remember that the deadlift is just one exercise, and your deadlift training should be part of a more-rounded workout plan.

Two Best Love Handle Workouts For Building a Shredded Midriff
Love handles poking through your shirt can be the first sign of trouble. Most people are in denial at first when they start accumulating body fat. They blame their ‘ill-fitting’ shirts for their love handles or consistently tug on their shirts throughout the day to conceal them. Since you’re reading this article, I assume you are guilty of doing at least one of these at some point.
Ignoring these signs can worsen your spare tire situation, and it will require more work in the future to fix. Love handles can be notoriously difficult to lose. These are among the last fat stores to disappear during a fat loss program.
Before we get into the nitty gritty of love handle workouts, let’s get to the basics. Do you know how love handles got their name? I thought so.
Love handles is a colloquial expression that refers to excess fat deposits around the waistline, specifically on the sides of the abdomen and lower back. They got their name as an individual’s partner or loved ones often embrace them around the hips. Furthermore, it is often the body part your partner holds onto during a love-making session. The term ‘love handles’ will never be the same for you from this moment. You’re welcome!
In this article, we go over everything you need to know about love handles, including their causes, the associated risks, the holy grail of losing love handles, the best workouts and exercises, and the best lifestyle tips to see quick results.
What are Love Handles?
Love handles are protruding fat stores that sit above your hip bones and cover your external obliques. They are among the most stubborn areas to lose fat from. “Muffin tops” are a sign of poor physical fitness. Plus, they can hamper your physique aesthetics. The V-taper, characterized by broad shoulders and a narrow waist, is widely regarded as the epitome of aesthetic perfection. Love handles, on the other hand, hamper your shoulder-to-waist ratio.
Genetics, hormonal changes, poor diet, sedentary lifestyle, and overall body composition can influence love handle development. Besides their impact on your overall fitness and aesthetics, love handles can also lead to health conditions, such as cardiovascular disease and diabetes.
Contrary to what most people think, performing a few exercises in the transverse (axial) plane isn’t enough to shed the spare tire. Additionally, you cannot spot-reduce your love handles. You must follow a balanced diet and exercise regimen to achieve overall fat loss.
The love handles can be a tricky area to target with exercises. Performing the exercises with a picture-perfect form is crucial to achieving the desired results. You must also make mindful lifestyle choices to lose the love handles and keep them off.
Causes of Love Handles
Love handles develop as a consequence of weight gain. You gain weight when you are in a calorie surplus for a prolonged period, which includes consuming more calories daily than you expend. Your body converts the food into glycogen to use as fuel. However, your body stores excess glycogen as fat. Love handles tend to be the primary area where surplus fat accumulates in the body.
Besides a calorie surplus, here are the other factors that can cause weight gain — and love handles:
Genetical predisposition
Sedentary lifestyle
Hormonal changes
Age
Gender
Stress
Lack of sleep
Medication
Certain health conditions
Risks of Love Handles
While some may perceive muffin tops as endearing and dismiss them, it is important to acknowledge that love handles can have significant health implications. Here are some potential risks associated with love handles: [1]
Obesity
Increased risk of chronic diseases
Higher chances of contracting cardiovascular diseases
Insulin resistance and diabetes
Metabolic syndrome
Body image and psychological well-being
Kidney disease
The Secret To Losing Love Handles
If eating more calories daily than you can burn leads to excess fat accumulation and love handle development, guess how you can lose the spare tire? Right, by burning more calories in a day than you consume. It is known as a calorie deficit.
Many people believe they can trim their belly fat by doing abdominal exercises and do not need to change their diet. Unsurprisingly, most of these folks never achieve their weight loss goals and end up shopping for new pants and loose-fitting shirts to hide their body fat.
Weight loss ultimately comes down to calories in versus calories out. You can enter a calorie deficit by cutting your calorie intake or burning more calories through exercise. Using a combination of the two will get you the fastest results.
Two Best Workouts To Lose Love Handles
There are two popular ways of training your core. You could do it after a strength training workout to tone your midsection and develop a six-pack. The other method involves performing a high-intensity full-body workout to burn calories and increase fat loss. The HIIT workout is more prevalent among people that want to focus on losing weight, whereas the first type of core workout is favored by lifters that want to build muscle mass and strength.
Core-Strengthening Workout To Lose Love Handles
This type of workout consists of three to four exercises and is done after a resistance training session. Focus on your breathing pattern and contracting your target muscle group with each rep to get the best bang for your buck.
Here is how to perform each exercise in this workout:
Russian Twist
Sit on the floor with an upright torso, your knees bent, and heels on the ground. Lean back until your torso is at a 45-degree angle with the floor. Lift your feet off the floor and extend your arms so they are parallel to the floor and over your knees. Turn to your right side while breathing out. Contract your abs and obliques at the isometric contraction point. Return to the starting point and repeat on the other side. Alternate between sides for recommended reps. Advanced exercisers can hold onto a weight plate to make this exercise more challenging.
Woodchopper
Stand upright with a hip-width stance while holding a dumbbell with both hands in front of your hips. Interlace your fingers around the dumbbell’s handle for a firm grip. Lift the dumbbell across your body and over your right shoulder. Twist your left foot slightly during the upward motion and fix your eyes on the dumbbell. Bring down the dumbbell diagonally across your body so it is at the side of your left knee. Pause and contract your core during the downward motion. Repeat for recommended reps before switching sides.
Bicycle Crunch
Lie on your back on the floor. Hold your hands next to your ears and lift your legs so your thighs are perpendicular to the floor. Bring your left knee toward your chest while reaching across with your right elbow. Pause and contract your core. Return to the starting position and repeat on the other side.
Side Plank
Lie on your side on the floor. Place your elbow under your shoulder and stack your hips and legs. Plant your forearm on the floor so it is perpendicular to your body. Lift your hips off the floor; your body should be in a straight line from head to toe. Place your top hand on your hip. Hold this position for a minute. Without stopping for rest, repeat on the other side.
HIIT Workout To Burn Calories, Boost Fat Loss, and Get Rid of Love Handles
Given below is a full-body high-intensity interval training (HIIT) workout that will spike your heart and metabolic rate. This 17-minute HIIT workout will help you shed excess fat and build a shredded core. Perform two rounds of these exercises and limit rest duration between exercises to 30 seconds. You are allowed a two-minute breathing time after completing the first circuit. Also, do not stop for rest while changing sides in the side plank pulse.
Given below are step-by-step guides to performing these exercises:
High Knees
Stand upright with a shoulder-wide stance and place your hands on your hips. Brace your core, bend one leg, and lift your knee until your thigh is roughly level with the floor. Return the leg to the ground and repeat on the other side. Establish a steady rhythm.
Mountain Climber
Assume the push-up position; your hands should be under your shoulders and legs extended behind you. Your body should be in a straight line from head to toe. Lift one foot off the floor, bend at the knee, and bring it toward your chest. Return it to the start position and repeat on the other side. Alternate between sides in a rhythm.
Plank Jack
Get into the high plank position. Place your hands on the floor under your shoulders. Extend your legs behind you and place your feet together. Maintaining the high plank, jump and place your feet wider than shoulder-width apart. Jump and return to the starting position. Repeat in a rhythm.
Side Plank Pulses
Get into the side plank position so your body is in a straight line from head to toe. Lower your hips to the floor and return to the starting position. Repeat for the recommended reps before switching sides.
Sledgehammer Overhead Strikes
Grab a sledgehammer in front of your body with your left hand at the bottom of the handle and your right hand just above it. Swing the hammer around your right side and behind and over your head. Smash the tire in the center with full force. Switch hands and return the hammer to the overhead position while swinging the hammer around your left side. Repeat for recommended reps.
Cross-Body Mountain Climber
Get into the high plank position. Maintaining your body in a straight line from head to toe, lift one foot off the floor, bend your knee, and bring it toward the opposite shoulder. Contract your core at the top. Return to the start position and repeat on the other side. Perform this exercise using a steady rhythm.
Sit-Up Twist
Lie on your back on the floor, bend your knees, and plant your feet on the ground. Hold your hands next to your ears. Contract your abs and lift your torso off the floor. Turn to your side and bring your left elbow to your right knee during the upward motion. Return to the start position and repeat on the other side.
Most Effective Love Handle Exercises
Sticking to the same exercises can get really boring, really fast. If you dread doing the same movements in every workout, we have got you covered. Below is an exhaustive list of additional exercises that will help tone your love handles. Add these movements to your exercise arsenal to keep your workouts exciting.
Standing Dumbbell Side Bend
Stand upright with a hip-width stance while holding a dumbbell in each hand at your sides. Keeping your elbows locked, brace your core, and slowly lower the right dumbbell as low toward the floor as possible. It should at least be at your knee level at the bottom. Return to the start position. Complete the recommended reps on one side before switching to the other side. Read more about standing dumbbell side bend here.
Oblique V-Ups
Lie on your right side on the floor. Stack your legs while maintaining a slight bend in your knees. Place your right arm on the floor so it is perpendicular to your torso. Hold your left hand behind your head. Lower your head and left arm to the floor behind you; this will be your starting position. In a single motion, lift your legs off the floor and raise your knees toward the ceiling while bringing your left elbow to your knees.
Cable Side Crunch
Set a cable pulley at the highest setting and attach a D-handle bar. Grab the handle with a neutral (palm facing inward) grip and take a big step away from the pulley. Place your other hand on your hip. Holding the handle to your ear, perform a side crunch. Contract your core at the bottom of the movement. Repeat for reps before switching sides.
Read more about cable side crunch.
Side Jackknives
Lie on your left side on the floor; your hips and legs should be stacked. Place your left upper arm on the floor in front of your body so it is perpendicular to your torso. Keep your right hand on your right hip. Lift your right foot toward the ceiling while performing a side crunch. Pause and contract your obliques at the top. Rinse and repeat.
Read more about side jackknives.
Side Plank Twist
Get into the side plank position. Place your top hand behind your head. Your top elbow should be in line with your shoulders at the starting position. Bring your top elbow to the floor under your shoulders while keeping your legs stacked. Contract your core during the lowering movement and hold for a two-count at the bottom. Repeat for recommended reps before switching sides.
Standing Torso Twist
Stand upright with a hip-width stance. Extend your arms in front of your body so they are parallel to the floor. Interlace your fingers and turn to your right side as far as possible without bending your elbows. Twist your left leg during the turn for optimal range of motion and contract your abs and obliques. Return to the starting position and repeat on the other side. Experienced exercisers can hold onto a dumbbell or kettlebell to make this exercise more challenging.
Flutter Kicks
Lie supine on the floor with your legs extended. Place your hands under your hips for leverage. Brace your core and lift your feet a few inches off the floor. Raise your head off the floor. Without bending your knee, lift your right leg toward the ceiling while keeping your left leg in place. Return the right leg to the starting position while lifting the left leg toward the roof. Maintain a steady tempo for recommended reps. More on flutter kicks here.
Side Plank Knee Tucks
Get into the side plank position. Place your top hand next to your ear. Simultaneously, elevate your upper leg towards your chest while bringing your elbow to your knee, all in one fluid motion. Breathe out and contract your abs throughout the range of motion. Return to the start position and repeat for recommended reps before switching sides.
Standing Side Leg Lifts
Stand with your left side facing a sturdy elevated surface like a cable pulley machine. Hold on to the pulley machine with your hand. Hold your right leg slightly in front of your body. Bring the right leg toward the pulley while keeping your knee locked. Raise the leg out to your side as high as possible. Return to the starting position and repeat for recommended reps. You could also perform an oblique crunch during the concentric motion for better muscle contraction.
Side-to-Side Medicine Ball Slams
Place a medicine ball on the floor. Stand upright with a shoulder-width stance so the medicine ball is at your left foot’s side. Bend over and lift the ball off the floor. In a sweeping motion, lift the ball over your head. Raise onto the balls of your feet and slam the ball on your right side as hard as possible. Bend over and lift the ball. Alternate between sides for reps. Learn more about side-to-side medicine ball slams here.
Lateral Band Walk
Wear a loop resistance band around the bottom of your thighs. Take a wide stance so that band is engaged. Bend your knees slightly and hinge at your hips. Hold your hands in front of your chest. Take a wide step to your right side. Walk 10 steps to your right side and return to the starting position. Start with the opposite leg on the subsequent set.
Side Plank with Leg Lift
Get into the side plank position. Raise your top leg as high toward the ceiling as possible. Exhale and contract your core during the upward motion. Hold the position for a two-count. Slowly lower the leg to the starting. Repeat for recommended reps before switching sides. Experienced exercisers can wear ankle weights while performing this exercise for optimal oblique engagement. Also, perform a side crunch to target your love handles.
Side Plank Reach-Throughs
Assume the side plank position. Raise the top arm toward the ceiling so it is perpendicular to the floor; this will be your starting position. Lower your arm toward the floor and thread it between your body and the floor. Breathe out and contract your abs during this lowering motion. Repeat for reps and switch sides.
Clamshell
Lie on the floor on your side. Bend your knees while keeping your hips and legs tacked. Place your bottom arm under your head for support. Place the hand of your top arm on the floor for support. Keeping your ankles stacked, lift your top leg toward the ceiling as high as possible. Hold the contraction for two seconds. Tie a resistance band around your knees for better glute engagement.
Seated Side Bend with Dumbbell
Sit upright on an elevated surface, such as a flat bench, while holding a dumbbell in each hand. Place your feet on the floor wider than shoulder-width apart for better stability. While breathing out, lower the right dumbbell to the floor. Explode back to the starting position. Repeat for recommended reps before switching sides.
More Love Handle Exercises
Here are a few more love handle exercises that will help burn off the spare tire and give you the coveted sex lines:
Cable Woodchoppers
Stability Ball Side Bend
Side Lunge with Twist
Plank with Knee Tucks
Side Plank with Arm Reach
Crunch and Twist on Stability Ball
Side Plank Clamshells
Side Plank with Dumbbell Row
Kettlebell Windmill
Standing Side Bend with Resistance Bands
Heavy Farmer Walk
Single-Arm Dumbbell Row
Box Jump
Floor Wipers
Hanging Windshield Wiper
Tips For Losing Love Handles
Here are a few tips to speed up your fat loss and build a shredded six-pack:
Follow a Balanced and Healthy Diet
Folks serious about losing the spare tire must avoid following a cookie-cutter diet plan. You must follow a personalized diet plan that helps you lose 1-2 pounds weekly. According to the CDC, you must maintain a daily 500-1,000 calorie deficit to achieve this goal. [2]
Use this total daily calorie expenditure (TDEE) calculator to determine your goal daily calorie intake. Then, break it down into a suitable macronutrient split to lose fat and build muscle mass simultaneously.
Exercise
Although training is not mandatory on a weight loss program, it can help speed up your progress. Perform two daily cardio training sessions for optimal results — one HIIT and another low-intensity steady state (LISS).
Seeking professional help can help beginners save time and effort. A personal trainer can give you a customized training program and will teach you the correct exercise form. On the other hand, a registered nutritionist will ensure you are hitting your daily macro and micronutrient goals.
Make Healthy Lifestyle Choices
Losing weight and love handles and keeping them off might require a complete lifestyle change. Folks with desk jobs must add more physical activity to their days. You must choose the stairs over the elevator and bike to work when possible.
Start with a goal of walking 5,000 steps daily and slowly make your way up until you are logging 10,000 daily steps. Staying physically active will help burn calories throughout the day and keep your metabolic rate high.
Stay Hydrated
Drinking water at regular intervals can keep you satiated. Furthermore, it can help curb cravings. Drink at least a gallon of water daily to ensure optimal body functioning and overall well-being. Switch calorie-laden sugary drinks and sodas with plain water to speed up your weight loss.
Adequate hydration can also boost your metabolism. Your body is more effective at metabolizing stored fat and converting it into energy when you are hydrated. It can help improve your fat-burning process. Staying hydrated also enhances digestion and nutrient absorption, supporting your overall weight loss efforts.
Rest
Many people tend to overexert themselves while trying to lose weight and love handles, which can be counterproductive. Remember, you lose weight while you are asleep, and you must give your body enough to recover. Sleep at least seven to eight hours each night for optimal results.
Also, learn to listen to your body. If you are very sore after a workout, it is best to skip a training session and allow your body time to recuperate. Pushing too hard in the gym can lead to overtraining, which can negatively impact your central nervous system.
Avoid Stress
Your cortisol levels rise when you are under stress, which can increase your appetite, slow down your metabolism, and increase fat storage. Chronic stress can lead to greater inflammation, emotional eating, and impaired sleep.
Elevated cortisol levels can make it more challenging to lose weight, even when you are following a balanced diet and training program. Meditation, yoga, and journaling can help deal with chronic stress. However, you must consult a healthcare professional if these three methods don’t work for you.
Set a Goal and Track Your Progress
Starting your transformation journey with a specific, measurable, attainable, relevant, and time-bound goal can increase your chances of success. Having a deadline will also motivate you to stick to your fitness regimen.
You must have long-term and weekly goals. Track your progress every week to ensure you are on the right path. Stick to your regimen if the progress is favorable. Conversely, make necessary adjustments if the needle is not budging in the right direction.
Stay Consistent and Dedicated
Love handles can be a stubborn muscle group. Depending on your current and goal physique, it might take you weeks, if not months, to achieve your objective. Nonetheless, you must stick to your fitness regimen with military discipline and ensure you never miss a training session or meal.
You must also consistently challenge yourself by increasing your training intensity and volume to avoid hitting a plateau. Establishing healthy habits will reduce the friction in your training regimen and help you stick to the fit lifestyle for the long term.
FAQs
Can I lose love handles without exercise?Yes. The love handles vanish when there is a reduction in your overall body fat, which requires you to be in a calorie deficit. You can lose your love handles by limiting your calorie intake. That said, adding exercise to your fitness regime can help speed up your results.
Is it possible to have a flat stomach and love handles simultaneously?Some skinny individuals can also develop love handles, known as skinny fat. Skinny fat can result from several factors, including genetics, sedentary lifestyles, medication, or certain health conditions.
How much time will it take for me to lose my love handles?It will depend on your starting physique and ultimate objective. You cannot spot-reduce your love handles and must work toward overall body fat loss. A 500-1,000 daily calorie deficit can help you lose 1-2 pounds weekly.
Note: The content on Fitness Volt is for informative purposes only. Do not take it as medical advice to diagnose, prevent, or treat health problems. If you’re suffering from a health issue, are pregnant, or are under 18 years old, you should consult your physician before starting any new supplement, nutrition, or fitness routine.
Wrapping Up
Love handles can be stubborn, requiring dedication, determination, and consistency to burn them off. Avoid falling into the spot-reduction trap and focus on reducing your overall body fat to see quick, favorable results.
This article has two highly effective workout routines specifically designed for strength trainers and those engaged in full-body HIIT exercises to effectively target and eliminate love handles. So, what are you waiting for? Lace-up your shoes and get moving. Best of luck!
References
Patel P, Abate N. Body fat distribution and insulin resistance. Nutrients. 2013 Jun 5;5(6):2019-27. doi: 10.3390/nu5062019. PMID: 23739143; PMCID: PMC3725490.
Centers for Disease Control and Prevention. (2021). Losing Weight. Retrieved from https://www.cdc.gov/healthyweight/losing_weight/index.html