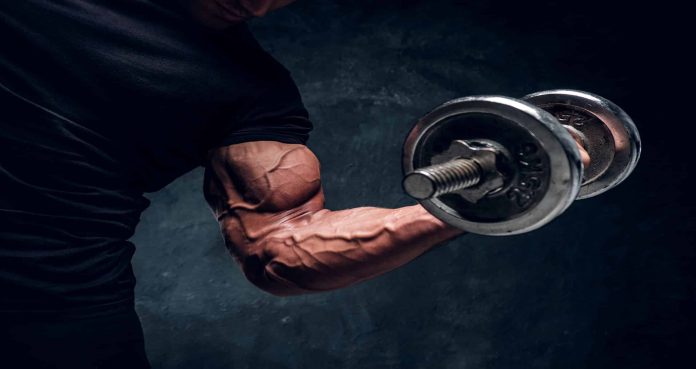
Tag: Exercise Guides

Machine Lateral Raise Exercise Guide: How To, Benefits, Muscles Worked, and Variations
What do Superman, Batman, the Incredible Hulk, Thor, and most other macho superheroes have in common? All of them have round, big, and full shoulders. You’ll never see a superhero that oozes masculinity with sloping shoulders. We’d go as far as to say that most of these heroes have a machine lateral raise in their training equipment…
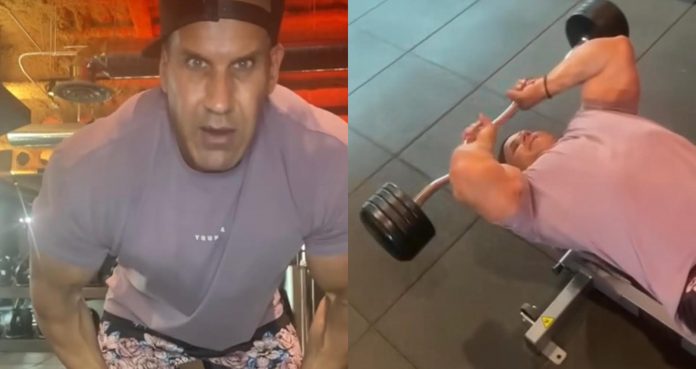
Jay Cutler Shows Off Lying French Press, Discusses Benefits When Growing Triceps
Jay Cutler explained the difference between the Lying French Press and Skull Crusher.
Jay Cutler is one of the top bodybuilders of all-time and continues to share his wisdom on different workouts. This time, he highlighted an exercise. The four-time Olympia champion recently showed off the Lying French Press and how it is used to grow triceps.
The French Press and skull crusher are two very similar exercises that pump triceps using extension and stretching. For his “tip of the day,” Cutler demonstrated the Lying French Press using a cambered bar.
“So tip of the day today. It is going to be skull crushers or this is called the French press. So this is for the triceps. I can do this with either a straight bar, cambered bars, dumbbells, cables.”
What Is The French Press?
The French Press is a similar motion to the Skull Crusher. It can be performed with many types of bars, with the hands being extended over the shoulders. When the bar is lowered, it goes behind the head and near the top of the back. This is be done with one or two hands when using a dumbbell.
“This is going to give us an extension of the tricep, okay. Anytime you train tricep, we do a lot of pushdowns or you do kickbacks or some kind of extension.”
The French Press can be performed in a standing or seated position. This exercise provides a greater stretch as the bar goes lower and puts more strain on the long head of the tricep.
In the video, Cutler opts to lie further up on the bench. This means his head and shoulders are lower than his back. The range of motion differs from a Skull Crusher and is more challenging. The bar does not go below the forehead as Cutler lowers it each rep.
“I am going to focus on 12 repetitions, 80 pounds and I am going to use a cambered bar,” Cutler explained.
The overall benefits of the French Press is the fact that it isolates the triceps and hits all areas. The exercise activates stabilizers in both the upper and lower body, which helps in many other areas. It can add size and strength during the exercise and should be added to arm days.
For more news and updates, follow Generation Iron on Facebook, Twitter, and Instagram.

PNBA Athlete Joe Carabase Shares 6 Exercises to Explode Your Shoulders and Biceps
Image via Instagram @joecarabase
PNBA athlete Joe Carabase has 6 movements for you if you want bigger biceps and shoulders.
Muscular biceps and shoulders vastly enhance your physique. The more muscle you have in your shoulders, the broader you are, and of course, the more muscles you have in your biceps, the better flexes you can do. Professional Natural Bodybuilding Association (PNBA) athlete Joe Carabase has 3 shoulder exercises and 3 biceps exercises that you should try for your next arm workout.
Joe Carabase recently made his pro debut in the PNBA at INBA PNBA Pro/Am Internationals in Oakville, CT, on August 20th, 2022. He received second in his division and looks ahead to make improvements for Pro/Am Natural Universe in Tampa, FL, on September 2-3.
Of course, Carabase’s muscular and ripped biceps and shoulder played a crucial part in becoming a professional natural bodybuilder and placing well at his recent show. Fortunately, Carabase shared 3 shoulders and biceps exercises on his social media that anyone can add to their routine. Carabase stated:
“These 3 variations kicked my a$$ today!
1). Arnold Press
2). Viking Press (I used Hack Squat today)
3). Reverse Press —-this one! And @bgf_lirio got me doing reps for dayyyyyyyys.”
“Hit this Biceps Tri-Set to DEFINE your arms! The name of this game is VOLUME.
Hit 45 seconds per exercise per arm, rest only 15 seconds for 3 total rounds:
1). Seated hammer curl
2). Concentration curls
3). Supine curls”
Joe Carabara’s 6 Exercises
Joe Caraba performed Arnold, Viking, and reverse press for his shoulders. And seated hammer curl, concentration curls, and supine curls for his biceps.
Arnold Press
They don’t call it “Arnold” press for nothing. This movement hits multiple angles of your deltoids and allows you to use moderately heavy weight. It separates this one from others because it will enable you to activate all three deltoid muscles–posterior, lateral, and anterior.
Viking Press
Viking press is another shoulder exercise that doesn’t coin its name for anything. Viking presses will give you a massive boost in your shredding and growing shoulders. In addition, this movement removes wrist pain from the equation, placing more tension on your core and less stress on your back.
Reverse Press
The starting position to this one is similar to the Arnold press (palms facing you), except you won’t be externally rotating when you press up. So it’s pretty much the exact opposite of a standard shoulder press.
Hammer Curl
This biceps movement is a neutral grip (palms facing each other), so it builds your forearms and allows you to use a heavier weight. Plus, it reduces wrist pain compared to standard biceps curls.
Concentration Curls
This great stabilizing and isolation bicep movement allows an excellent mind-muscle connection to strengthen each side of your biceps and correct any lagging muscle.
Supine Curls
Since this movement is seated, it will prevent other muscle groups from aiding you during the lift and force your biceps to lift the weight. A supinated grip (palms facing up) will target your biceps’ short head.
Follow us on Instagram, Facebook, and Twitter for more natural bodybuilding workouts!
Seated Lateral Raises for Big Delts
Boulder Shoulders Start with Seated Lateral Raises
What is a key component in creating the iconic v-taper physique? Shoulder size. So you want to give your shoulders that 3-dimensional look, you want broad rounded shoulders, you want them to really stand out to make your physique look complete. Without those big shoulders, what will you look like? Sure your arms can be big, but without Death Star delts, they will not look fully developed. But, how do you build them?
The shoulder is composed of three different parts, the anterior deltoid, lateral deltoid, and posterior deltoid. The anterior is your front, lateral, is your side, and posterior is the rear.
There are so many exercises to do to blow your shoulders up like barbell military press, the Arnold press, rear delt flies, but you cannot forget to throw in the classic and simple, but largely effective exercise: the seated lateral raise.
In this article we are going to cover just exactly how to properly perform the seated lateral raise; what you need for the exercise, sets and reps, everything you need to know to build that broadness.
Table of Contents
How to perform the seated lateral raise
Benefits of the seated lateral raise
Who should use the seated lateral raise
FAQs
How to do the Seated Lateral Raise
There are a few things to cover as far as completing the exercise. Let’s start by checking out what you need.
The Tools
Starting off with the equipment you need to complete the seated lateral raise, there are a few simple things on the list. For starters, you need a bench. It is a seated exercise, so the bench is key here, because well, that is what you’ll be sitting on during the exercise. Next, you’ll need some dumbbells, or kettlebells if you so desire.
The Setup
Setting up the Seat: You can put the bench vertically so your back will rest against it, or you can lay the bench flat so you will be sitting upright with no back support.
Grab Your Dumbbells: You can do this exercise one handed or use both
Sit Upright: Place your feet flat on the floor and arms at your sides. Your body should be in an L shape
Raise the Weight: Raise the dumbbells, or dumbbell if you are doing a single arm variation. Bring them up to shoulder height, your hands should be level with your shoulders
Reset and Repeat: Control the weight back down to your sides and repeat this motion.
Pro Tip: For a visual representation of the exercise check out this video from Tiger Fitness on the seated lateral raise:
[embedded content]
Sets and Reps
The seated lateral raise is not a lift to be going too heavy on. It is something you want good form, and controlled reps (for the most part but we will cover this later). In fact, it is more often recommended to go lighter, with higher reps and more controlled form. The medial head of the deltoid is not a large muscle, so it does not require massive loads to grow.
Simply put, you can try out 3-4 sets of 15-20 controlled reps. If you are more experienced and have a good mind to muscle connection, you can increase the weight and focus on sets of 12-15 reps.
If you are more advanced, you can maybe even kick it up a notch and do sets of 10-12, then take your sets to failure, or do partial reps after your full reps are completed. It all depends on your goals as far as strength and hypertrophy.
Benefits of the Seated Lateral Raise
There are plenty of benefits that stem from such a simple movement. The seated lateral raise brings not only size and isolation, but also health benefits to the table. Let’s dive in.
Muscular Hypertrophy
As stated before, if hypertrophy is your goal and you want to build boulder shoulders, the seated lateral raise is a great incorporation. There are so many exercises that blast the front and rear delts, but seated lateral raises build up that middle part of the delt, the part that is heavily associated with creating a more v-tapered look in the physique.
Specific Muscle Targeting
Being that the shoulder is made up of three distinct parts, all of them need to be hit individually in order to grow. The seated lateral raise is a great isolation exercise for the middle part (lateral deltoid) of the shoulder, which can be tricky to hit sometimes. If you are performing your seated lateral raises properly, that middle part of your delt will get absolutely demolished and have no choice but to grow.
Shoulder Health
You always want a healthy body. Healthy shoulders are a huge plus because you use your shoulders for so much throughout the day, maybe even without realizing it. Someone with perfectly healthy shoulders is able to perform all ranges of motion painlessly and with stability.
The seated lateral raise challenges and stimulates shoulder stability, in the rotator cuff in particular, as well as the range of motion. This contributes to overall shoulder health.
Who Should Use the Seated Lateral Raise?
Quite honestly, there is no real limit or restriction on who should or should not incorporate this exercise into their regiment. Still, let’s explore the different demographics.
Bodybuilders
A bodybuilder is judged on their physique, and if that physique is not complete, then the judging will more than likely not be in their favor. One thing sought after in the sport of bodybuilding is the v-taper, and as discussed before, the v-taper is greatly contributed to through developed shoulders. The seated lateral raise can be a key component in developing the hypertrophy of the shoulders and pushing them to become more filled out to achieve that iconic v-shape.
Weightlifting Athletes
The weightlifting demographic can be comprised of powerlifters, crossfitters, Olympic lifters; athletes that are overhead pressing weight in some way. Being that the seated lateral raise can contribute to overall shoulder health, it could be a good idea for athletes that focus on heavy overhead presses to incorporate these into their programming. The seated lateral raise can also serve as a nice alternative to overhead pressing to still gain/maintain muscle in the shoulders without beating down the shoulders as much as a movement like an overhead press.
The Average Gym Goer
Sure, athletes like bodybuilders and weightlifters can benefit from the seated lateral raise, but what about the people just in the gym to stay in shape, be healthy, or look good? Yes! The seated lateral raise is something that everyone can benefit from, no matter your status in the gym. Training shoulders can be intimidating to some as there are so many movements to hit all three heads. The lateral raise is great, simple movement for getting started and getting those shoulders pumped up and developing the overall muscle.
Seated Lateral Raise FAQs
The seated lateral raise is a relatively simple exercise, yes, but you still may have some questions surrounding the movement that you want answered. So, let’s take a look.
Partial Reps and Sets to Failure
Is it a good idea to perform partial reps, or even take your sets to failure when performing the seated lateral raise? Actually, on this movement, it could be beneficial to perform partial reps and sets to failure.
Once you are fatigued from completing the movement with a full range of motion, you can perform partials. This is done by moving the weights six to eight inches from your sides but keeping the tension on the lateral head of the shoulders. You can do this for a set number of reps, or do it until you cannot anymore.
Training Tip: Check out this video from the late John Meadows on doing partial reps during side lateral raises:
[embedded content]
How Often can I do Seated Lateral Raises
This is heavily dependent on your experience in the gym. If you are new to the gym, one to two times per week for the movement is plenty of stimulation to a muscle that is rather small. As you grow more experienced in the gym, you may need to increase frequency to see progression. But, if you are too sore, it is best to rest before hitting some seated lateral raises again!
More on Shoulders
Seated lateral raises are only one movement for your shoulders, but there are plenty more to choose from! Don’t miss out on the rest of our shoulder workouts:
Side Lateral Dumbbell Raise – Exercise Guide
Front Dumbbell Raise – Exercise Guide
Seated Dumbbell Shoulder Press – Exercise Guide
References
Deltoid muscles: What are they, anatomy, Location & Function. Cleveland Clinic. (n.d.). Retrieved August 18, 2022, from https://my.clevelandclinic.org/health/body/21875-deltoid-muscles
Ferri, B. (2022, July 4). The anatomy of the deltoid muscle. Verywell Health. Retrieved August 18, 2022, from https://www.verywellhealth.com/deltoid-muscle-anatomy-4688693
The 8 Best Triceps Exercises for Thick Arms
These are the best 8 triceps exercises to build massive mass in your arms.
Thick arms are manly, and nothing screams masculine more than robust and massive triceps. That’s because your triceps make up two-thirds of your arms. Therefore, it’s critical to focus more on your triceps than your biceps to build burly arms. There are various exercises, but this article will cover the 8 best triceps exercises.
Best Triceps Exercises
Bench Dips
Dips
Triceps Dumbbell Kickback
Seated Triceps Press
Skull Crusher
Cable Triceps Extension Pushdown
Dumbbell Overhead Triceps Extension
Cable Rope Overhead Triceps Extension
Bench Dips
[embedded content]
As the name implies, bench dips are dips performed on a bench. All the resistance you need for this movement is your body weight. Your triceps will have to work hard to push your body weight. And you’ll be able to get a greater range of motion since the height of the bench will allow you to dip down lower.
Benefits of Bench Dips
It allows you a greater range of motion for your triceps.
This exercise tests your ability to lift and move your body weight.
You’ll be able to perform higher reps on this movement, which builds more endurance in your triceps.
How to Do Bench Dips
Face perpendicular to a bench, put your palms down on the bench with your fingers firmly gripping the edge of the bench (glutes facing the ground). For beginners, place your feet on the floor with your hips flexed at a 90-degree angle. Advanced lifters can have their legs straight out with their heels on the ground for support.
Dips
[embedded content]
Dips test your relative strength (strength for your body weight) and will challenge your triceps ability to lift your entire body weight. This movement is a compound exercise that will also target your shoulders and chest muscle. And you can add extra weight by attaching a load to a belt, increasing the resistance you lift.
Benefits of Dips
Dips are a compound movement that targets your chest and shoulders too.
You can attach weight to a belt to lift more than your body weight.
It will get you strong for your size.
How to Do Dips
Grab parallel bars, jump up, and extend your arms to get into the starting position. Next, lower your body down until your arms create a 90-degree angle, then push your body up.
Triceps Dumbbell Kickback
[embedded content]
Triceps dumbbell kickback emphasizes the lateral head of your triceps, the most visible of the three heads. It’s a great isolation movement to add volume to your triceps. It also increases your shoulder and arm stability and flexibility.
Benefits of Triceps Dumbbell Kickback
This exercise isolates your most visible tricep head.
It increases your shoulder and arm stability.
How to Do Dumbbell Kickback
Bend over and use a bench or dumbbell rack for support with one arm. Then, with your back straight, bring the other arm to your side holding a dumbbell, keep your elbows stable, and use your triceps to “kick” the weight back.
Seated Triceps Press
[embedded content]
A seated triceps press is performed on a triceps pushdown machine. The machine will allow you to use heavier loads than other triceps exercises. Plus, it’s safer than free weights since it’s a machine.
Benefits of Seated Triceps Press
It’s safer than free-weight triceps exercises.
The machine facilitates a more significant load than other triceps isolation movements.
How to Do Seated Triceps Press
Find a triceps pushdown machine and sit down with your back and feet in points of contact with the bench and foot support/ground. Push the weight down until your arms are fully extended, and then bring the weight back up until the machine plates touch.
Skull Crusher
[embedded content]
The skull crusher is arguably the most effective triceps exercise. That’s because the skull crusher is done using a barbell, allowing you to use a heavy load with free weights. It’s best to perform this exercise with an EZ bar to comfort and protect your wrists.
Benefits of Skull Crusher
Skull crushers allow you to use a heavier load with free weights to gain size and strength in your triceps.
It challenges your core stability.
How to Do Skull Crusher
Lie supine on a bench and extend an EZ bar over your head. While keeping your elbows stable, use your triceps to lower the barbell to your forehead, then extend the barbell back to the starting position.
Cable Triceps Extension Pushdown
[embedded content]
Cable triceps extension pushdown is an excellent movement for keeping tension on your triceps through each degree of the extension since it’s performed on a cable machine. Grasping the cable will improve grip strength and engage your core, back, and shoulders.
Benefits of Cable Triceps Extension Pushdown
This movement engages your core, back, and shoulders.
It keeps the tension the same throughout the entirety of the exercise.
This exercise strengthens your grip strength.
How to Do Cable Triceps Extension Pushdown
Set a cable machine to its highest point. Make sure the extension is a small cable bar. Grab the bar with a pronated grip and push down until your arms are fully extended; keep your elbows locked. Lastly, bring the barbell back up until the plates touch for a full triceps extension.
Dumbbell Overhead Triceps Extension
[embedded content]
Dumbbell overhead triceps extensions target all three triceps heads and allow a full range of motion. It also increases your shoulder and elbow stability. Plus, you can use decent weight since you’re using two hands.
Benefits of Dumbbell Overhead Triceps Extension
This exercise gives you a full range of motion with moderate weight to target your triceps.
It increases your shoulder and elbow stability.
This movement activates all three triceps heads.
How to Do Dumbbell Overhead Triceps Extension
Sit on a bench with an upright posture. Lift a dumbbell over your head with both hands, grasping the top end of the dumbbell (dumbbell perpendicular to the floor). Lower the dumbbell until your triceps are as far down as they can go comfortably, then fully extend the dumbbell back overhead.
Cable Rope Overhead Triceps Extension
[embedded content]
Cable rope overhead triceps extension targets the long head of your triceps and is an exercise that requires focus to improve your mind-muscle connection. The cables provide constant tension on your triceps through the entire range of motion. And this study concluded that overhead triceps extension builds more muscle than pushdowns (1).
Benefits of Cable Rope Overhead Triceps Extension
It keeps the tension the same on your triceps.
This exercise targets the long head of your triceps.
Cable rope overhead triceps extension improves your mind-muscle connection for more significant muscle growth.
How to Do Cable Rope Overhead Triceps Extension
Put a cable machine at its highest point with a rope attachment. Grab the rope, and turn the opposing away in a staggered stance for support. Then, bend over slightly and extend the cable rope overhead. Next, return the cable rope down to the starting position.
About the Triceps
The triceps muscle is the antagonist of the biceps muscles on your arm. And it’s composed of three heads: medial, lateral, and long, which explains why your triceps make up ⅔ thirds of your arm. Your triceps is responsible for extending your arms. And different triceps movements will target other heads of your triceps more, depending on the exercises (2). For example, cable overhead triceps extension targets more of your long head due to the elevation.
You use your triceps on pushing movements (anything that extends your elbows). And it plays a crucial role in big compounds chest movements, such as barbell bench press, since it’s a secondary muscle targeted during pressing exercises.
How to Get Your Triceps Stronger
It would be best to get your triceps stronger as you would for bigger muscle groups like your chest–increase the weight you lift as often as possible. However, since your triceps is a smaller muscle group, you won’t be able to advance in weight as fast. Therefore, you’ll want to focus on higher reps and more volume via more sets to increase the size and strength of your triceps since you’ll be using lighter weight.
We recommend you perform 2-3 sets of 12-15 reps for your triceps exercises if you’re doing a split routine that includes a bigger muscle group and tricep movements at the end. So, for example, if you’re training your chest and triceps one day, you’ll perform two triceps exercises after your chest movements and do 2-3 sets of 12-15 reps for each exercise. And if you have a separate day just for arms, then you can do three triceps exercises (and three biceps exercises) and perform three sets each in the 12-15 rep range.
Rules to Follow
Keep Your Elbows Fixed
It’s easy to swing your arms on triceps movements to use heavier weight, but that takes the tension off your triceps. Using a lighter weight with your elbow in a fixed position better targets your triceps.
Warm-Up
Although your triceps is a smaller muscle group compared to a bigger muscle group like your chest, it’s still important to do a thorough warm-up to increase your triceps strength on exercises and prevent injury. If you’re training your chest on the same day, the chest exercises you do will act as a warm-up since you use your triceps as a secondary muscle for pushing movements. However, if you’re training your triceps on separate days, we recommend you perform 2-3 sets with lighter weight before using heavier weights on your first triceps exercise.
References
Maeo, S., Wu, Y., Huang, M., Sakurai, H., Kusagawa, Y., Sugiyama, T., Kanehisa, H., & Isaka, T. (2022). Triceps brachii hypertrophy is substantially greater after elbow extension training performed in the overhead versus neutral arm position. European journal of sport science, 1–26. Advance online publication. https://doi.org/10.1080/17461391.2022.2100279
Kholinne, E., Zulkarnain, R. F., Sun, Y. C., Lim, S., Chun, J. M., & Jeon, I. H. (2018). The different role of each head of the triceps brachii muscle in elbow extension. Acta orthopaedica et traumatologica turcica, 52(3), 201–205. https://doi.org/10.1016/j.aott.2018.02.005
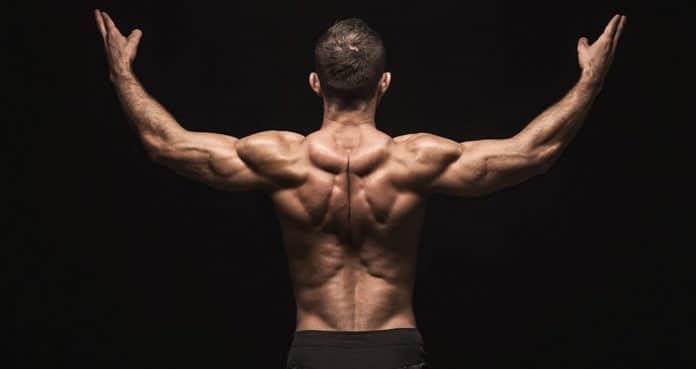
Pendlay Row: How to and Exercise Guide
A full guide on how to properly execute the Pendlay Row to achieve optimal back gains
There are all sorts of rows you can be doing; dumbbell, T-bar, machines; but are you incorporating the Pendlay row into your back workouts? The Pendlay row is a movement crafted by the late Olympic Weightlifting Coach, Glenn Pendlay, to help in pulling movements. Conducted in a very similar fashion to the barbell row, the Pendlay row aids in back gains for both muscular size and strength.
This guide will be covering how to do the Pendlay Row, the benefits, alternatives, Dos and Don’ts, and suggestions.
Editor’s Note: Generation Iron’s content is meant to be informative and should not take the place of advice and/or supervision from a medical professional/trainer. The articles and opinions on this site are not meant to be used as diagnosis, prevention, and/or treatment of health problems. Speak with your physician/trainer if you have any concerns.
How to Do The Pendlay Row
Form is more important than weight, words to live by. It is also an accessory movement, and you want to nail the proper form before going heavy. Proper form helps contribute to better results, such as strength, size, and hypertrophy.
Step 1: Setting up
The barbell should be on the floor, and grip should be approximately shoulder width apart with the hips setup like you are about to deadlift.
Step 2: Pull
Brace your core, and in a controlled manner, pull the barbell to the base of your chest, but do not allow your shoulders or hips to come forward.
Step 3: Do it Again
Return the bar all the way to the floor with control, reset, then repeat the movement for the desired amount of repetitions.
Check out this video from Jeff Nippard if needed:
[embedded content]
What are the Benefits of the Pendlay Row?
Muscular Development
Transfer to Other Lifts
Pulling Power
The Pendlay Row has plenty of benefits in both muscular development, improving performance in other lifts, as well as developing both strength and power.
Muscular Development
The Pendlay Row forces the lifter to use strict form and a full range of motion, focusing mainly on the lats and rhomboids. Combine that with proper loading, maintained tension throughout the movement, and some decent volume, muscle hypertrophy will improve as you stay consistent and practice the movement.
Transfer to Other Lifts
The Pendlay Row is something that helps the development of all pulling exercises, as well as a few others. Being that the lifter is bracing their back and core with this movement, it can be transferred over to movements such as the big three compounds: squat, bench, and deadlift. It transfers to compound lifts where the stress on the back will be greater as the lifter is adding more weight or has a technique that involves more activation from the back.
Pulling Power
The Pendlay Row also contributes massively to overall pulling power. The movement comes from a dead stop and contributes massively to concentric strength. The strength and power here can be transferred to becoming stronger in other pulling movements such as the snatch, clean and jerk, and deadlift.
The Pendlay Row also improves grip strength, which can be applied to lifts as simple as bicep curls or even farmer carries.
Sets and Reps
The Pendlay Row is considered both a compound and an accessory movement, so just how heavy should you go? How many sets should you do? How many reps? Well, this all depends on what your personal goals are.
Strength: For strength gains, 3-4 sets of 1-5 with relatively heavy weight (but not heavy to the point where form is sacrificed)
Size and Hypertrophy: For the goal of gaining more muscle mass and definition, 4-5 sets with the rep ranges of 6-12 are ideal with moderate weight.
Endurance: Endurance athletes should be aiming for 3-4 sets of 12+ with light weight.
Tip: The lifter can increase weight throughout the exercise, but not to the point of compromising form!
Rep ranges may vary depending on the exercise as well as the goals of the lifter. Check out this video from Gravity Transformation for more on rep ranges.
[embedded content]
What to Avoid
Unlike a barbell row, the Pendlay row does not give the lifter that momentum to help complete each rep. There are a lot of things you could do when performing the Pendlay Row that could hinder performance or the desired results.
Poor Form
Form can easily be compromised with the Pendlay Row, specifically the angle of the back. Maintain the hip hinge throughout the movement, pulling mostly with your arms and shoulders, without jerking your back up just to achieve a completed rep.
Elbow flare is also another way that form can be compromised which in turn does not deliver the best results because this can lead to more activation of the rear deltoids rather than the lats and middle back. Elbows do not completely need to be tucked to your side, but you certainly do not want to chicken wing your arms; this will put more of the stress and tension on shoulders and arms rather than the lats.
To keep yourself in check, use cues to guide yourself throughout the lift. Remind yourself to pull the bar to your hips, keep your elbows close, etc.
Too Much Weight
Just about everyone loves to lift heavy, no doubt about it. However, going too heavy can lead to not only poor form, but also injuries, something that may affect your progress moving forward. Go lighter, nail that form, get that good contraction, and grow! As your technique improves, the strength will come along with it.
Pendlay Row Alternatives
Maybe you have not been fully convinced of throwing the Pendlay Row into your programming, and that’s okay. There are a couple of great alternatives that are similar movements which provide similar benefits.
The Barbell Row
Classic, iconic, infamous. Three words to describe the movement, also known as the bent-over barbell row. The simple yet effective movement has been a staple in back workouts across the globe since the dawn of time. Maybe not that long, but it has been around for a while.
The barbell row can be done with overhand or underhand grip and is performed almost exactly the same as the Pendlay Row, but you do not rest the weight on the floor after each repetition. This in turn puts more stress on the lower back as well as the hamstrings when compared to the Pendlay row, where the bar would be going to a dead stop after each repetition.
Form Tip: Because the bent-over barbell row puts more stress on the lower back, the lifter should consider using less weight and hitting higher repetitions (better for muscular development and hypertrophy).
The Seal Row
The seal row is something that completely removes stress on the lower back and hamstrings from the equation, but still provides great back gains for both size and strength wise.
In this movement, the lifter will be laying face down on a bench with the barbell underneath the bench. From there they will pull the weight to their chest, which would essentially be the underside of the bench. This can be done on a flat bench, or an incline bench where the lifter will set up the same way but drag the bar along the metal piece that props the bench up into its incline position. Both variations can help grow that extra thick and strong back.
Form Tip: When performing a seal row on a flat bench use smaller plates to get a better range of motion. If smaller plates are not available, you can also elevate the bench on small boxes.
Frequently Asked Questions (FAQs)
Congratulations, you made it all the way to the end of the article! Now it’s time for the questions that need to be answered.
How can I Improve My Form?
Should I use the Pendlay Row?
Do I Need to use a Barbell?
Let’s take some time and answer these questions!
How can I Improve My Form?
One of the biggest things to improve form is by using cues. Cues are specific actions you tell yourself to reinforce your technique during a lift. They remind the individual of key points needed to complete the lift or weak points to focus on.
For example, when performing the Pendlay Row the lifter can remind themself:
To dig their feet in – for lifters that are using their legs for momentum and doing almost a Romanian deadlift.
Pull the bar to their hips – for lifters that are not completing a full range of motion to help them squeeze at the top of the lift.
Keep the elbows tight – for lifters that might be flaring their elbows and have trouble engaging their lats.
Should I use the Pendlay Row?
Yes. Do not be afraid to program these into your workouts! The Pendlay Row is beneficial for muscle building and strength as a whole. This does not just pertain to people who compete in things such as weightlifting or powerlifting! This is a great exercise for bodybuilders, crossfitters, or recreational gym-goers that want to improve their overall core and back.
Do I Need to Use a Barbell?
A barbell is only one way to perform the exercise! Yes, originally the Pendlay Row was created using just a barbell. However, you can absolutely complete a Pendlay Row with dumbbells or even kettlebells.
References
Brennan, Dan (2021). “The Difference Between Strength Training and Hypertrophy Training”. (Source)
Healthline (2018). “All You Need to Know about Concentric Muscle Contractions”. (Source)
Hosford, Beverly (2015). “4 Critical Exercise Technique Cues”. (Source)
Personal Touch Fitness (2019). “Muscular Endurance”. (Source)
Spider Curls: How to & Exercise Guide
An effective exercise to help blow your biceps up
Biceps. A favorite muscle to train amongst almost all gym goers. Who doesn’t enjoy a good bicep pump? Barbell curls, preacher curls, cable curls; they are all effective movements to blow up your biceps. However, after a while you’re going to want to throw in something different that can make those biceps really pop. What should it be?
Enter…the spider curl. One of the simplest, yet one of the most effective curl variations you can utilize for your biceps. Spider curls are a movement that provides a great contraction and amazing tension throughout the movement, making it a great exercise to build those peaks.
In this article we will cover just exactly how to properly perform spider curls, how they work, training tips, and if you should be throwing this all time classic exercise into your workouts. Additionally we’ll be answering some FAQs to help you get the most out of your biceps!
Editor’s Note: Generation Iron’s content is meant to be informative and should not take the place of advice and/or supervision from a medical professional/trainer. The articles and opinions on this site are not meant to be used as diagnosis, prevention, and/or treatment of health problems. Speak with your physician/trainer if you have any concerns.
How to Do Spider Curls
While spider curls are indeed a rather simple exercise to execute, there are some things to keep in mind as far as doing them properly in order to maximize the benefits.
The Tools
Spider curls can be done in a variety of different ways, all effective, which is what makes it such a useful exercise. All you need is an incline bench, and something to curl. The movement can be completed using an incline bench with dumbbells, an EZ bar, a barbell, or even cables!
Setting up for Spider Curls
For setting up this exercise, begin by adjusting the incline bench on a slight angle
Typically a 45 or 60 degree angle works great
Grab whatever you are using to curl; again you can choose from dumbbells, barbells, EZ bar, or cable attachments, all while using an underhand grip
Lie on the bench with your torso and stomach pressed against the backrest (The top of the bench should be at armpit length)
Keep shoulders and upper arms locked in place, with the forearms being the only part of the arm moving through the bending of the elbows
Curl towards your shoulders, squeezing the biceps throughout the whole movement and hold the contraction at the top of the movement. Make sure to really focus on that squeeze
In a controlled manner, lower the weight back to your initial starting point
Repeat this for your targeted rep range
See the Pro use it: To see some spider curls in action, check out this video from 4x Mr. Olympia Champ, Jay Cutler:
[embedded content]
Sets and Reps
Due to spider curls being an isolation movement for a relatively smaller muscle group, it is not an exercise you will want to go too heavy on. You do not want to be hitting one rep PRs or sets of low reps. Instead you want to do this movement with moderate weight and higher reps to maximize hypertrophy.
Aim for 3-5 sets of 12-15 reps. Really get the most out of each rep, focusing on good control on the way up, a tight squeeze at the top, and extending the bicep back down slowly.
Training Tip: When using cables for your spider curls, you can use a variety of attachments such as a straight bar, D-Handle, or rotating curl bar (shaped like an EZ bar)
Benefits of Spider Curls
So…what does this movement have over other bicep movements? For starters, it is a great bicep isolation exercise that keeps the muscle under constant tension. The way the lifter is positioned makes it hard for them to cheat the rep up, making this exercise really tear up the biceps.
Another reason this movement is beneficial is the range of motion. Unless you have abnormally long arms or your incline bench is too low to the floor, you will get a full range of motion with each rep.
Muscles Targeted
The biceps brachii are the main muscles worked within this exercise. You are targeting both the long head and the short head of the biceps.
The spider curl also hits secondary muscle groups, these include the brachioradialis, brachialis, and forearms as well. The forearms and grip strength also come largely into play once the biceps start to fatigue.
Image Credit: @MuscleEngineered Instagram
Variety
As stated before, spider curls can be performed with a number of different pieces of equipment. This includes barbells, dumbbells, or cable attachments. This is another reason the spider curl is an exercise that can easily be added into any arm day routine. It provides so many different ways to effectively hit the muscle.
Switching up what you are using, whether that be barbells, dumbbells, or cable attachments, attacks the muscles from different angles and can help with squeezing and contracting. Find what works best for you and ditch those baby biceps.
Common Mistakes of Spider Curls
Although it is hard to cheat on the spider curl due to positioning of the lifter on the bench, there is plenty of room for error within the movement to hinder effectiveness and results.
Too Much Weight
Too much weight is a problem on just about any exercise. You never want to go too heavy, not only at the risk of injury, but also going too heavy ruins the contraction. You will not be able to get that good squeeze, which is something you want for the best results.
Too much weight can also cause your biceps to fatigue sooner. As your biceps fatigue, a lifter may sacrifice form for reps thus losing the strict focus on the bicep.
Range of Motion
Image Credit: @fitkill instagram
On this exercise you really want that full range of motion. Curling all the way up towards your shoulders, and extending all the way down slowly back to the starting point. Your arms have a lot of freedom in the spider curl, so utilize it.
Poor Form
Poor form could be caused by the issue of too much weight, but with moderate weight you should be able to focus on good form. You want your upper arms and shoulders locked in, while the forearms are really doing the work to curl that weight up to get the most out of this exercise.
Training Tip: Start with extremely light weight just to get the feel for the movement. Nail the form, and then increase the weight to maximize those gains.
Frequently Asked Questions (FAQs)
Now that we are at the end of the article, you may not be completely sold on trying out the spider curl and may have a few questions regarding this exercise.
Are Spider Curls Actually Worth it?
Can I Perform Half Reps or Cheat Reps During Spider Curls?
Let’s dive in.
Are Spider Curls Actually Worth it?
Short answer, yes. The spider curl is worth throwing into your workout routines when it comes time to hit biceps.
As stated before, the position of the lifter on the bench really stabilizes your upper body and lets you really focus on hitting the targeted muscle, due to cheat reps being harder to perform. The spider curl is an exercise that can help yield great results because of it forcing the lifter to complete quality reps.
Can I Perform Half Reps or Cheat Reps During Spider Curls?
Technically, you could do cheat reps or half reps, like the 21’s bicep exercise. No one is really stopping you from doing this, but cheat reps and half reps may cause you to lose focus on the full contraction of the bicep.
Cheat on your diet before you cheat on this exercise (do not take that literally). But don’t get it wrong, cheat reps on other bicep exercises can help build great arms. Just take a look at the late Rich Piana’s take on it!
[embedded content]
More on Biceps
Don’t limit yourself to boring biceps exercises, blow them up with some exercises from the archives!
References
Hughes, Chrisman (2021). “4 Important Tips for Better Biceps: Engage Both Sides of Your Bicep”. (Source)
Mayo Clinic (2021). “Overuse Injury: How to Prevent Training Injuries”. (Source)
Physiopedia (2022). “Biceps Brachii”. (Source)
Physiopedia (2022). “Range of Motion”. (Source)
Sweeny, H.L., et. al (2018). “Muscle Contraction”. (Source)
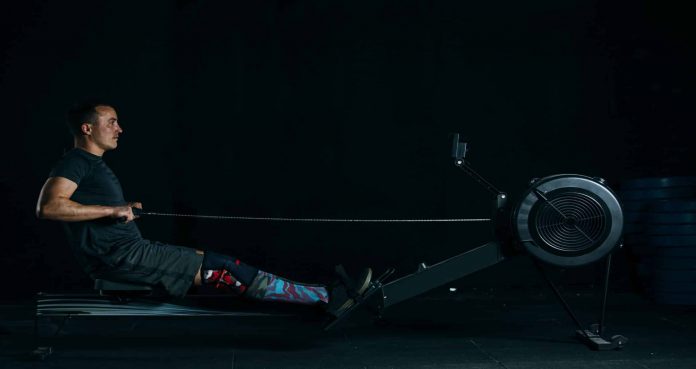
Benefits of Rowing Machines
A full explanatory guide on what rowing machines can do for YOU
Cardio, the enemy of the people. Powerlifters, bodybuilders, crossfitters, the average gym goer, they dread doing it. However, everyone knows how beneficial it can be. So what are your options to choose from in order to get it done?
We have all heard it before, “I want to lose weight, but I hate running.” Luckily, running is not the only option there is for cardio. You actually have a few options as far as cardio equipment, but they all certainly have their pros and cons.
Walking on the treadmill can be boring, but running on the treadmill can be hard your shins or knees. The stationary bike seats aren’t always the most comfortable things to sit on. Then there’s the Stairmaster, the true villain of every gym. What do these all have in common? They focus mainly on your lower body.
But, what about a type of cardio that does not just work the lower half? The rowing machines. These tend to be heavily overlooked and under-appreciated. There are so many benefits of rowing machines. Let’s dive in.
Editor’s Note: Generation Iron’s content is meant to be informative and should not take the place of advice and/or supervision from a medical professional/trainer. The articles and opinions on this site are not meant to be used as diagnosis, prevention, and/or treatment of health problems. Speak with your physician/trainer if you have any concerns.
Bodily Benefits of Rowing Machines
Rowing machines can be extremely beneficial to the body. Engaging you from head to toe, building up endurance, providing a variety of training, and much more!
Total Body Engagement
Hopping on the stairs, treadmill, or bike for your cardio definitely gets the job done, but as stated before, mostly work only your lower body. The rowing machines on the other hand bring your whole body into play. Rowing machines utilize more than just your arms or just your legs, as some people may think.
Your back, shoulders, and biceps are all being contracted during the pulling motion, while your legs (specifically hamstrings and glutes) are being used to perform that driving motion. All the while you’re bracing your core during the movement.
You are getting all the cardiovascular benefits, all the while developing your muscles at the same time.
Endurance and Strength from Rowing Machines
Just like any other type of cardio, the rowing machines build up your cardiovascular endurance. Whether you are doing high intensity interval training (HIIT), low intensity endurance training, or just casually rowing, you’ll find that the more time you spend on it, the easier it gets.
Not only does cardiovascular endurance improve, but also muscular endurance and strength. Being that the rowing machines engage the whole body and your muscles are being worked, plus it is like doing repeated repetitions, your muscles are really being put to work the entire time you are on the rowing machine.
The range of motion for movements on a rowing machine is also large. Think of it like doing repetitions of squats or a leg press while rowing at the same time, repeatedly. This builds up both the strength, and endurance of the muscle groups being worked!
Versatility
HIIT training, distance training, you name it, it can be done on a rowing machine. No matter what training style you are utilizing, your cardiovascular fitness is improving during it.
Fat Loss
As with almost any cardio, the rowing machine can be beneficial for fat loss while still preserving and even possibly increasing muscle. It is an aerobic exercise, meaning it uses the body’s carbs and fats for fuel.
Rowing Machines vs. Other Cardio Equipment
There are plenty of benefits to every piece of cardio equipment, so how does the rowing machine stack up against them?
Rowing Machines are Low-Impact
Compared to other pieces of cardio equipment, such as the treadmill, the rowing machine is low-impact. This means you do not have your joints pounding on the ground as you would with something such as a treadmill. Rowing machines being low impact makes it easier for people with disabilities or other health conditions to do their cardio.
For example, someone with a spinal condition or things like shin splints would possibly be able to benefit from a rowing machine rather than something such as a Stairmaster. This is due to the rowing machine being a low impact piece of equipment! They may be able to even strengthen those weakened areas of the body.
Full-Body Engagement
As stated before, you are being engaged from head to toe when on a rowing machine. This differs from things like the treadmill, Stairmaster, or bike, that only engage mainly the lower body. Now the elliptical also engages the upper body, but the rower forces more abdominal engagement.
With the full body engagement, you are also seeing full body coordination. Everything needs to work together to perform the movement on a rowing machine, as opposed to equipment like the Stairmaster where your legs are the only thing being utilized.
Rowing Machine for Recovery
Believe it or not, rowing machines can actually be used for recovery, specifically after lifting. After intense strength training, the rowing machine can be used as a cool down tool. This is due to the low impact aspect, and during the movement you are stretching out your whole body. Even on a rest day, if you are up for it, you can hop on the rowing machine.
Frequently Asked Questions (FAQs)
Now that you’ve read through all of the good things the rowing machine has to offer, you may have a few questions!
How do I use the Rowing Machine?
This is one of the biggest reasons people do not try out new equipment, they are unclear on how to use it. So let’s go step by step just to make sure you got the hang of it!
Set the Drag: This is the level of resistance, and typically can be found on the screen next to the flywheel.
Place Hands/Feet: Strap your feet in, grab the handles with both hands, keep wrists straight.
Lean Forward: Shoulders should in front of your hips.
Leg Drive: Drive feet down, push with your legs. This is done in a similar movement to that of the squat or leg press.
Lean Back: Lean your torso back, but only slightly, you do not want to go so far that you are parallel to the floor.
Pull: With your hands, pull the handles towards your body.
Advice From the Pros: If you want some visual instruction, check out this video from Deadspin where United States Olympians demonstrate the rowing machine:
[embedded content]
When Should I Use a Rowing Machine?
Rowing machines can be thrown anywhere in your schedule, whenever you are up for it! That is another benefit of rowing machines, it can fit anywhere you want.
Utilizing a rowing machine can be done before you lift, as a warm up. This gets the blood pumping throughout the body and gets you ready to go for your lift!
The rowing machine can also be utilized after a lift, as a recovery/cool down movement. Some people prefer to do their cardio after they lift, and if you fit that category then feel free to throw it in at the end!
Active rest days are also a good time for the rowing machine. It is low impact, you can go at your own pace, do whatever type of workout you want. This makes rowing machines a perfect option for an active rest day.
Should I use a Rowing Machine Over Other Cardio Equipment?
The answer to this is all up to you. If you are able to and have access to a rowing machine, why not switch it up every now and then? At this point, you have read about all the benefits of rowing machines compared to other pieces of cardio equipment, why not give it a try?
Wrap Up
There are so many benefits of rowing machines that were discussed. It is low-impact, fit for versatility in your training, and can be used to build strength and endurance along with being beneficial for recovery. There are numerous reasons to give it a try. If you know where to place it in your workout routine, know how you want to use it for your training, and are willing to put the work in, there is no reason to not try the rowing machines!
Top 4 Back Exercises To Protect Your Lower Back
Take a look at a guide on how to work your back with little discomfort!
How often have you seen people performing improper form, and putting their lower back at certain risk?
Well, one of the easiest body parts to injure is the lower back, or lumbar area.
One study from 2020 studied 93 patients from the ages of 16-26, ‘all of whom partook in weightlifting’. 43 of them had pain in the back area. With ‘pain radiating to the left side was found in 31 patients (33%), while pain radiating to the right was found in 19 patients (21%).
All the participants (100%) reported their pain to be initiated during or after weightlifting maneuvers. The table below provides more details.
Sex
Pain Characteristics
Surgery
Lumbar Level
Male
Female
Localized
Left
Right
Yes
No
L3-L4
L4-L5
L5-S1
87
6
43
31
19
23
70
6
44
43
Table credit below *
The importance of protecting your lower back:
In fact ‘out of all 291 conditions studied in the Global Burden of Disease 2010 Study, Lower Back Pain (LBP), ranked highest in terms of disability, and sixth in terms of overall burden Prevalence and burden increased with age’
Back pain is also one of the leading reasons as to why people miss work, as a ‘sample stud(y) included 220 persons between the ages of 16-65, who had either acutely declared themselves unable to work because of low back pain (acute patients, n = 50) or who had been ill because of low back pain for one month (subacute patients, n = 50) or for three months (chronic patients, n = 70).’ The remaining 50 patients included,had not been absent for work.
The figures here equate to one half of all working Americans.
And lower back pain does not discriminate, as the mayo clinic ‘estimated that 15% to 20% of adults have back pain during a single year and 50% to 80% experience at least one episode of back pain during a lifetime.’
So what is the solution?
Working out with correct form will always be crucial and also building up strength in the lower back area will also be beneficial.
However if you have never exercised your lower back you’ll want to go in with caution. Start off lifting with a light weight, maybe even the bar just so that you can get a feel on how the exercise feels on your lower back.
What exercises should I do?
To significantly lower your chances of back injury and gain strength in your lower back, consider incorporating these isolation exercises into your lower back workout.
1. Deficit Deadlift
How To Do It:
Start by standing on a platform, 1-5 inches in height
Make sure that your feet are hip width apart.
Bend at the hip to grip the bar at shoulder width, allowing your shoulder blades to protract.
Lower your hips and bend knees until your shins contact the bar.
Look forward, keep chest up and back arched, and begin driving through the heels to move the weight upward.
After the bar passes the knees, aggressively pull it back, bringing your shoulder blades together as you drive your hips forward into the bar.
Lower the bar by bending at the hips and guiding it to the floor.
Perform 3 sets of 10-12 reps
2. Good Mornings
How To Do It:
Set up a bar (with sufficient weight) on a rack that best matches your height.
Step under the bar and place the back of your shoulders (slightly below the neck) across it.
Hold on to the bar using both arms at each side and lift it off the rack by first pushing with your legs and at the same time straightening your torso.
Step away from the rack and position your legs using a medium, shoulder-width stance.
Keep your head up at all times and maintain a straight back.
Lower your torso forward by bending at the hips until it is parallel with the floor.
Elevate torso back to starting position.
Perform 4 sets of 15-20 reps
3. Hyperextensions
How to Do it:
Lie face down on a hyperextension bench.
Ensure your upper thighs lie flat across the wide pad, leaving enough room for you to bend at the waist.
With your body straight, cross your arms in front of you (or place behind your head).
Then start to bend forward slowly at the waist as far as you can while keeping your back flat.
Without rounding your back, keep moving forward until you feel a nice stretch on the hamstrings and you can no longer keep going without a rounding of the back.
Slowly raise your torso back to the initial position without arching your back.
Perform 4 sets of 15-20 reps
4. Supermans
How To Do It:
Lie on your stomach with the arms extended in front of you, and with the feet straight
Lift your hands and feet off the ground at the same time by about 6 inches, so it looks like you are mimicking superman as he is flying (hence the name), at this point you will feel an contraction in your lower back area
Hold this position for a few seconds
Then return to the starting position
Perform 4 sets of 10 reps
So there you have it, use this guide to keep your back nice and protected while building strength.
So until next time, keep pumping!
References
https://www.ncbi.nlm.nih.gov/pmc/articles/PMC7417116/
https://www.ncbi.nlm.nih.gov/pmc/articles/PMC7417116/table/TAB1/?report=objectonly *
https://www.ninds.nih.gov/health-information/patient-caregiver-education/fact-sheets/low-back-pain-fact-sheet
https://www.ncbi.nlm.nih.gov/pmc/articles/PMC3099170/
https://sportsmedicine-open.springeropen.com/articles/10.1186/s40798-019-0199-7
https://journals.sagepub.com/doi/pdf/10.1177/216507999003800703
https://www.umms.org/ummc/health-services/orthopedics/services/spine/patient-guides/low-back-pain-athletes
https://pubmed.ncbi.nlm.nih.gov/24665116/
https://pubmed.ncbi.nlm.nih.gov/3161177/
https://pubmed.ncbi.nlm.nih.gov/17445733/
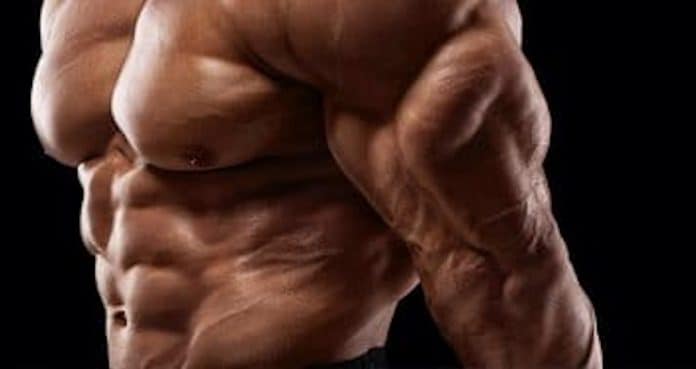
Three Heads Are Better Than One: How To Hit Different Parts Of The Tricep
There are different ways to work the different heads of your triceps.
Three beads are better than one, right? Before I continue get your mind out of the gutter, as I am obviously referring to the tricep muscle. As the tricep is composed of three heads.
It is comprised of the long head, the lateral head and the medial head.
Now let’s look at each head in more depth:
Long Head
The long is attached to the shoulder and elbow joints (hence the long head), and is located at the back of your arm.
Best Workouts:
The optimal workouts for the long head would be exercises that consist of a full range of contraction and with the arms overhead, so the best workouts would be overhead extensions and skullcrushers.
Lateral Head
The lateral head is the most visible and sits on the outside of your arm.
Best workouts:
The optimal workouts would be the ones with your arms by your side with a pronated grip (overhand). So exercises such as bench dips, cable extensions, kickbacks and overhand grip press downs are ideal.
Medial Head
This is the least visible of the three and sits lower down than the long head closer to the torso.
Best Workouts:
The optimal workouts would be ones with the hands by your side with a supinated grip (underhand), so exercises such as reverse grip press downs would be best suited.
Now some exercises will undoubtedly target more than one head at one time, so exercises such as skull crushers actually target the long head and lateral head, and exercises such as close grip bench press, kickbacks, press downs (pushdowns) and even diamond push ups will actually hit all 3 heads.
So now you know how the triceps are broken down, and below I have listed a series of exercises that will ensure all 3 heads are hit during your next triceps workout.
Close Grip Bench
Now this is a multi joint (compound) exercise that will hit all 3 heads and will allow you to build up more strength as you can go heavier.
Tip: Position the hands approx 7-8 inches away from each other, so just a bit further apart than the centre knurl on the barbell (which is usually about 5 inches), as going too close could risk injury.
Dips
This is another compound exercise and great when done with weights (either dipping belt or dumbbell in between your feet). This will also help you build more strength and also hits all 3 heads simultaneously, with the medial head being activated at the top of the extension.
Tip: Keep the body upright, as leaning forward will put more emphasis on the chest.
Cable Tricep Pushdown/ Press Down
This exercise will hit all 3 heads, but by changing the cable attachment you can and stress to specific heads.
Tip: Do not stand too close to the cable tower, take a step away and lean forward into the pulley, and then begin your set with the arms away from the torso.
You want to make sure that your forearm and triceps are at a right angle (90 degrees) at the loading phase of the movement.
Attachment variations
Wide grip bar attachment: This grip would be a wider than shoulder width grip and would focus on the medial head.
Rope attachment: This grip would add stress to the medial and lateral heads.
Straight bar attachment: The bar will add stress on the long head of the triceps.
V bar attachment: This bar will add more stress on the lateral head of the triceps.
French Press
Some of you may think the french press is the same as the lying down tricep extension, but the difference is that the french press is done either seated or standing up, and is preferably done with an EZ bar.
The french press also targets the long head, as it is done overhead.
Tip: Try to perform the reps without shifting stress into the elbows or shoulders and do not lock out at the top of the movement.
Reverse Grip Press Down
The reverse grip press down may not be as popular but it is great for targeting the medial head.
Tip: Similar to the standard version, keep the elbow and triceps at 90 degrees at the eccentric portion of the movement and try to eliminate your elbows from flaring out.
Common Mistakes
Elbow movement:
Some common mistakes people make when doing the standard version pushdown and reverse grip press down, is too much elbow movement. Keep the elbows nice and tight and close to the body and eliminate that motion, this will allow the triceps to do more of the work.
Elbow Flare:
For overhead movements like the french press or the overhead dumbbell tricep extension or even skull crushers, minimise elbow flare, as this takes away stress from the triceps and adds more stress to the chest. If your elbows are flaring then the weight may be too heavy.
Fatiguing too soon:
Start the workout strong and start the workout with compound exercises like the weighted dips and close grip bench and then move onto the isolation moves. This will allow you to get the most from your workout.
Not Targeting All 3 heads
After reading this you have zero excuse now, so be sure to target all 3 heads of the tricep muscle, so the long, lateral, and medial are all hit.
Be sure to add the overhead and reverse grip movements into your routine.
So there you have it, by the time summer comes around your triceps should be bursting through your Generation Iron tee’s.
So until next time, keep pumping!