Tag: Pull-ups
5 Simple Exercises – A Routine for Daily Calisthenics Training
There are several variables you need to consider when writing a workout plan. Once you’ve determined your training goal, you must choose a split, pick your exercises, put those exercises in the correct order, select a set and rep scheme, and allocate appropriate loads and interset rest times.
Invariably, your first draft won’t be perfect, so you’ll need to make changes on the fly, finetuning your workout until you’re 100% happy with it.
It’s no wonder some fitness professionals charge so much to design programs!
However, even the most well-designed workout routine is not worth the paper it’s written on if you don’t actually do it.
And that’s the rub, isn’t it?
You’ve got your gym membership, new workout, training shoes, lifting belt, knee sleeves, chalk, and all that other stuff you drag around in your gym bag. But, if you can’t get your butt in the gym and work out, you’ll never build muscle, get fit, or lose weight.
So, while variables like your training split, set and rep scheme, and exercise sequence ARE undeniably important, the most critical consideration for effective training is consistency, and consistency is KING!
In this article, we share an excuse-free calisthenic workout you can do at home. It’s designed to create an unbreakable exercise habit and make skipped workouts a thing of the past.
Use this workout when you are too busy to hit the gym or as an alternative to complicated, time-consuming gym-based programs.
Calisthenics for Excuse-Free Workouts
While there is nothing wrong with dumbbells, barbells, and machine-based strength training, you’ll need access to all this stuff if you want to use it. Of course, that usually means joining a gym.
Unfortunately, gym memberships can be expensive, and just getting to and from a gym can be time-consuming. When time is short, your workout will probably be the first casualty. After all, exercise is a leisure activity, and things like your job and family commitments will always take precedence.
While you could buy some equipment and build a home gym, this is not always practical; you’ll need enough space for your training equipment and the money to buy it.
The good news is that you can get a GREAT workout using just your body weight. In fact, the only equipment you really need is a pull-up/chin-up bar, which can be purchased very cheaply.
Calisthenics, or bodyweight training, has a long and storied history. The word calisthenics has its roots in ancient Greek and comes from the words for beauty and strength. Bodyweight workouts are the ultimate in fitness convenience, as you can do them almost anywhere and anytime.
And because you won’t have to travel to train, you should have no problem squeezing your workouts into even the busiest of schedules. With fewer barriers, sticking to your exercise routine should be a breeze.
But you’ll need to do more than a few push-ups a day to get fit, lose weight, or build muscle. Instead, you’ll need an effective but straightforward routine. And that’s where we come in.
In the next section, we share a simple yet powerful bodyweight workout program that always delivers excellent results!
The 5 Simple Exercises Routine – Overview
As its name implies, the 5 Simple Exercises Routine revolves around five basic calisthenic movements performed five days per week. You get weekends off for rest and recuperation.
The exercises are:
Push-ups
Air squats
Pull-ups
Reverse lunges
Hanging knee raises
However, rather than do the same number of sets and reps each day, you’ll do one set of four of the exercises and five sets of the other. This adds up to nine high-quality sets per week, which is more than enough to produce good results (1).
This is a form of daily undulating periodization, where the volume/intensity of your workouts varies from day to day. However, the exercises are sequenced in such a way that you do each one back-to-back, which makes for a very time-efficient workout. In fact, even if you take it easy, you should be finished in 15-20 minutes.
Here are your workout plans:
Monday
Focus exercise: Push-ups
#
Exercise
1
Push-ups
2
Air squats
3
Push-ups
4
Pull-ups
5
Push-ups
6
Reverse lunges
7
Push-ups
8
Hanging knee raises
9
Push-ups
Tuesday
Focus exercise: Air squats
#
Exercise
1
Air squats
2
Pull-ups
3
Air squats
4
Reverse lunges
5
Air squats
6
Hanging leg raises
7
Air squats
8
Push-ups
9
Air squats
Wednesday
Focus exercise: Pull-ups
#
Exercise
1
Pull-ups
2
Reverse lunges
3
Pull-ups
4
Hanging leg raises
5
Pull-ups
6
Push-ups
7
Pull-ups
8
Air squat
9
Pull-ups
Thursday
Focus exercise: Reverse lunges
#
Exercise
1
Reverse lunges
2
Hanging leg raises
3
Reverse lunges
4
Push-ups
5
Reverse lunges
6
Air squats
7
Reverse lunges
8
Pull-ups
9
Reverse lunges
Friday
Focus exercise: Hanging leg raises
#
Exercise
1
Hanging leg raises
2
Push-ups
3
Hanging leg raises
4
Air squats
5
Hanging leg raises
6
Pull-ups
7
Hanging leg raises
8
Reverse lunges
9
Hanging leg raises
How many reps?
The number of reps you perform depends on your current abilities and how you feel on any given day. So, for single sets, you do as many reps as possible (AMRAP), and for the five sets of your focus exercise, you do about 50-60% of your last AMRAP score.
For example, if you can do 25 push-ups in a single set, do five sets of 12 to 15 reps on your push-up focus day.
It’ll probably take you a week to get used to this program and zero in on the correct number of reps. That’s okay and no different from finetuning your weights for a gym-based workout. So long as you a) take your sets to within 1-3 reps of failure and b) strive to do more reps week by week, you WILL make progress!
As for rest periods, these, too, are based on how you feel. Move as quickly as you can between exercises but don’t feel you need to rush. Rest long enough that you can perform at your best, but don’t dawdle, either. You may need to rest longer between some exercises than others, e.g., after a leg exercise that leaves you feeling out of breath.
As you get fitter and more accustomed to the routine, you should find you can move more quickly between exercises and complete each program a little faster.
Related: Sets vs. Reps: Everything You Need to Know
The 5 Simple Exercises Routine – Exercise Instructions
One of the best ways to maximize the effectiveness of any workout is to perform each exercise with perfect form. This keeps the tension on the muscles you want to work and stress off your joints. So, not only will your workout be more productive, but it’ll also be safer.
While you may be familiar with the simple exercises in this program, review the instructions below to ensure you are performing them correctly.
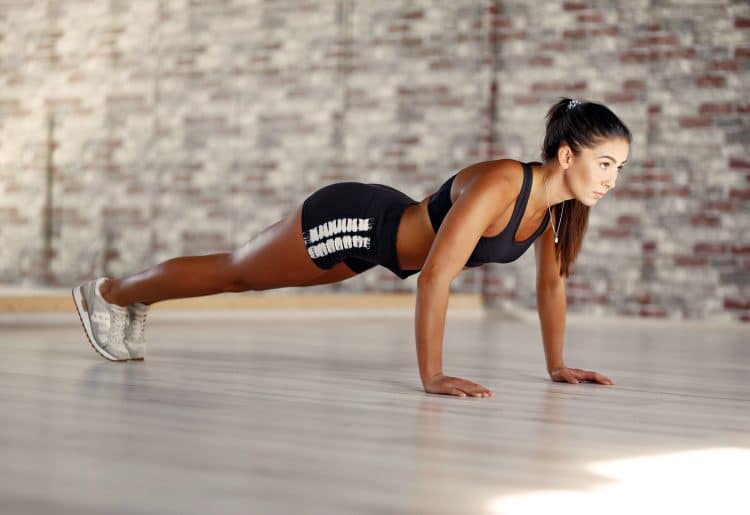
1. Push-ups
Push-ups are the most widely performed exercise in the world, yet many people fail to do them properly. That’s a shame because a well-performed push-up is a thing of beauty! So make sure your push-ups are perfect – make your inner drill instructor proud!
Steps:
Place your hands on the floor roughly shoulder-width apart and your fingers pointing forward.
Walk your feet out and back until your legs and body are straight. Brace your core, rotate your elbows in toward your sides to engage your lats, and pull your shoulders down and back.
Bend your arms and lower your chest to within an inch of the floor.
Push yourself back up and repeat.
Do not allow your hips to lift or drop out of alignment at any time.
Muscles targeted:
Primary: Pectoralis major, deltoids, triceps.
Secondary: Core.
Benefits:
One of the best upper body exercises – period!
Teaches you how to use your whole body in a coordinated, synergistic way.
Can be modified and adapted for all levels of exerciser.
Tips:
Use push-up handles to increase your range of motion and take stress off your wrists.
Bend your legs and rest on your knees to make this exercise easier.
Raise your feet to put more weight on your arms and make push-ups more challenging.
2. Air squats
The bodyweight or air squat is a CrossFit staple. Working all your major lower body muscles, air squats are also great for hip and knee mobility and health. A high-rep set of air squats is very cardiovascularly demanding, so it’ll help improve your fitness and burn lots of calories, too.
Steps:
Stand with your feet roughly shoulder width apart, toes turned slightly outward.
Brace your core and pull your shoulders back and down. Look straight ahead.
Bend your legs and squat down until your thighs are roughly parallel to the floor. Do not round your lower back. Extend your arms in front of you for balance if required.
Stand back up and repeat.
Muscles targeted:
Primary: Quadriceps, hamstrings, gluteus maximus.
Secondary: Core, abductors, adductors.
Benefits:
The undisputed king of lower body exercises.
Highly functional.
Great for improving knee and hip health and mobility.
Tips:
Raise your heels on a one-inch block for a more quads-centric workout.
Use a wider stance to increase inner and outer thigh and hip engagement.
Pause for 2-3 seconds at the bottom of each rep to make this exercise more challenging.
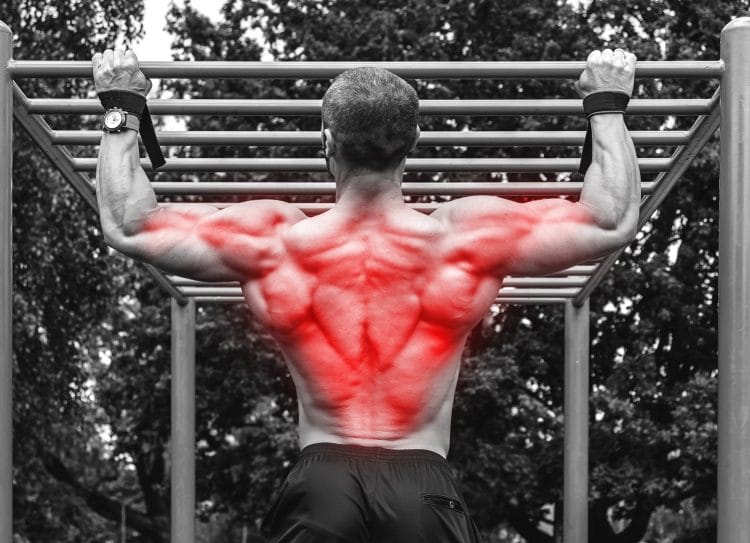
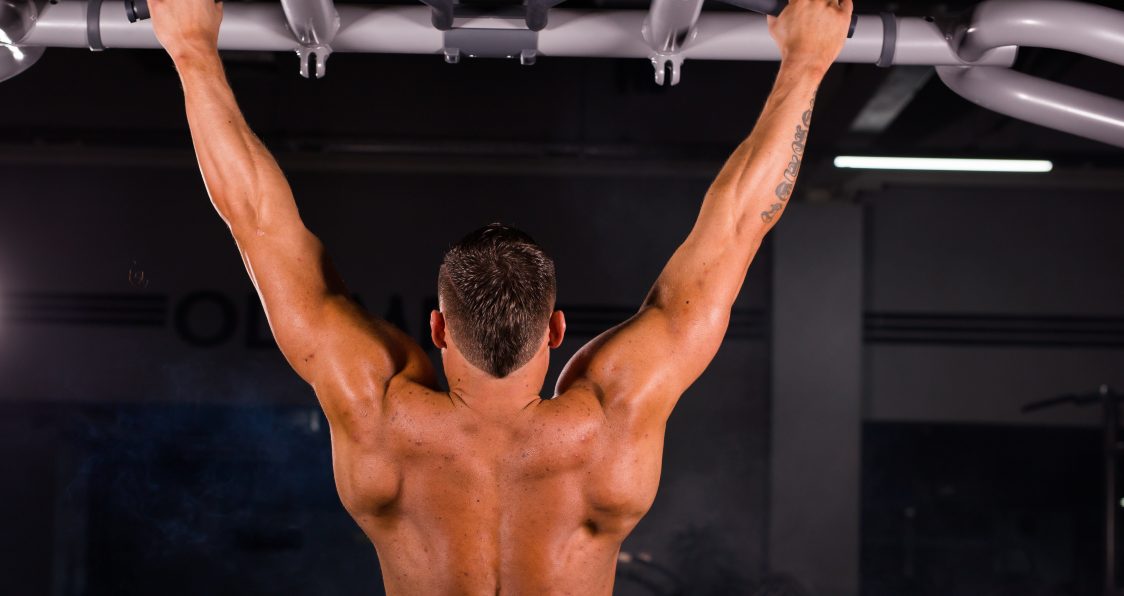
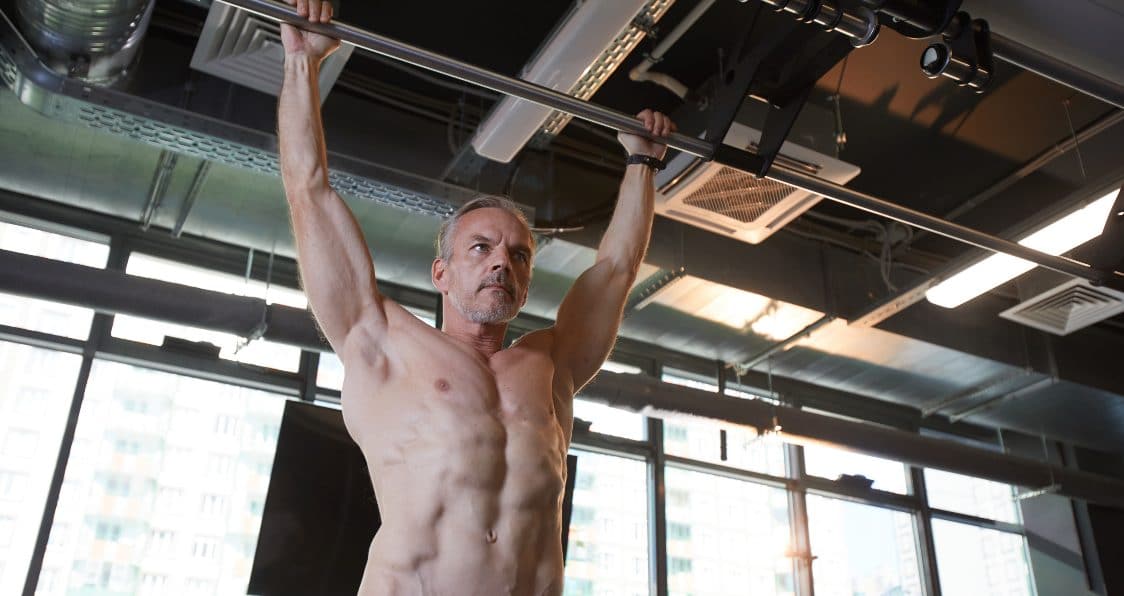
3. Pull-ups
Pull-ups are probably the most challenging exercise in this workout routine. However, by doing one to five sets of pull-ups five days per week, it’s an exercise you’ll soon master. If you can’t do pull-ups, you can do inverted rows instead, which work the same muscles but involve lifting less of your body weight.
Steps:
Hang from your pull-up bar with an overhand, slightly wider than shoulder-width grip.
Pull your shoulders back and down and brace your core. Bend your legs if necessary, so your feet are clear of the floor.
Leading with your elbows, bend your arms and pull your chest up toward the bar.
Extend your arms and lower yourself back down under control.
That’s one rep – keep going!
Muscles targeted:
Primary: Latissimus dorsi, biceps, forearms.
Secondary: Core.
Benefits:
An excellent back and biceps builder.
A good indicator of body weight.
An effective way to stretch and decompress your spine.
Tips:
Start each rep from a dead hand – no swinging or kicking your legs.
You can also do underhand grip chin-ups if you prefer.
Use a resistance band for assistance if required, like this:
4. Reverse lunges
Working your posterior chain with simple bodyweight exercises is not always easy. Most effective movements for this region involve weights, e.g., deadlifts, kettlebell swings, reverse hypers, etc. Reverse lunges are more glute and hamstring-centric than forward lunges and are a great complementary exercise to air squats, which are more quads-dominant.
Steps:
Stand with your feet together and arms by your sides. Brace your core and look straight ahead.
Take a step back, bend your legs, and lower your rearmost knee down to within an inch of the floor.
Push off your back foot and bring your legs back together.
Switch legs and repeat on the opposite side.
Alternate legs for the duration of your set.
Muscles targeted:
Primary: Gluteus maximus, hamstrings, quadriceps.
Secondary: Abductors, adductors.
Benefits:
Good for identifying and fixing left-to-right strength imbalances.
An excellent mobility and balance exercise.
Provides an effective indirect cardiovascular workout.
Tips:
Lean forward slightly as you step back to increase glute and hamstring engagement.
Start each rep standing on a two to four-inch platform to increase your range of motion and the difficulty of this exercise.
Do this exercise next to a wall or handrail for balance if required.
5. Hanging knee raises
With so many bodyweight core exercises to choose from, it can be hard to decide which one to do. However, most are too easy to deliver much of a core strengthening effect. Hanging leg raises are much more challenging and effective, which is how they made it into this workout program.
Steps:
Hang from your pull-up bar with your arms, legs, and body straight.
Brace your core, bend your legs, and pull your knees up to at least level with your hips. Tilt the bottom of your pelvis forward to maximize abs engagement.
Lower your legs and repeat.
Muscles targeted:
Primary: Rectus abdominus, transverse abdominus, hip flexors.
Secondary: Obliques, forearms.
Benefits:
A challenging and effective core exercise.
An excellent way to strengthen your grip.
Provides a useful way to stretch and decompress your spine.
Tips:
Use chalk or lifting straps to reinforce your grip.
Progress to straight legs if your abs are strong enough.
You can also do this exercise sat on the end of a bench for a similar but easier workout:
Simple Exercises Routine – FAQs
Do you have a question about this workout routine or any of the exercises in it? No worries because we’ve got the answers!
1. Is it safe to do the same exercises every day? What about recovery?
While it’s generally accepted that muscles take 48-72 hours to recover from a workout, that’s only true when you do intense bodybuilding-style workouts consisting of several exercises and multiple sets per muscle group
Simple bodyweight exercises are much less taxing, and providing you keep the volume relatively low, you should have no problem recovering from one workout to the next. In fact, you are only doing one hard training session per exercise per week, and the workouts themselves are very short.
So, rather than being dangerous or difficult to recover from, you should find that daily workouts lead to quicker improvements in your fitness and strength, plus you’ll master the exercises and become more proficient at doing them.
2. Can I change the exercises?
You can, and we actually encourage you to do so! Doing the same exercises daily could become boring, so use variations to keep your workouts fresh and interesting. For example, you could rotate between push-ups, decline push-ups, deficit push-ups, paused push-ups, and diamond push-ups.
While so much variation will make it a little harder to manage your rep count, provided you take each set to within 1-3 reps of failure, it will have the desired results.
3. How can I work some cardio into this routine?
The best cardio options for home exercisers are those you can either do at home or start and finish at home. This avoids having to travel for your workout, e.g., driving to the gym to ride an exercise bike, which is a colossal waste of time.
So, good cardio options that complement this workout routine include:
Try to accumulate a minimum of 10,000 steps (or the equivalent) per day for your fitness and health.
4. Are push-ups and pull-ups enough to build bigger arms?
While push-ups are predominately a chest exercise and pull-ups mainly work your upper back, both also involve your arms. Push-ups hit your triceps, while pull-ups also work your biceps.
In fact, your arms will probably fail before your bigger chest and back muscles when you do these exercises.
As such, push-ups and pull-ups have the potential to help, you build bigger arms.
That said, if more muscular arms are one of your training goals, you may want to finish your workouts with a couple of sets for your biceps and triceps. For example, you could do a biceps and triceps workout 2-3 times per week or train your biceps one day and your triceps the next.
However, avoid the temptation to do lots of direct arm training. Too much could lead to overtraining and interfere with your pull-up and push-up performance. That would be unfortunate given how productive these exercises are.
5. What is the best way to warm up for this workout
One of the great things about bodyweight exercises is how joint-friendly they tend to be. As such, you won’t need a long, in-depth warm-up before your workouts. However, you should still spend 5-10 minutes preparing your muscles and joints for what you’re about to do. This will not only reduce your risk of injury but also improve your performance, leading to a better workout.
Start with five minutes of easy cardio followed by dynamic mobility and flexibility exercises for your main muscles and joints. Finish your warm-up with one sub-maximal set (e.g., 50% of your normal reps) of each exercise. After that, you should be good to go!
6. Is 20-30 minutes of exercise per day enough for weight loss and fat burning?
Weight loss and fat burning have more to do with your diet than your workout plan. It’s much easier to eat less than it is to exercise more. Providing you have a sufficient caloric deficit, your body will have no choice but to burn fat for fuel. Adding exercise into the mix merely increases your energy expenditure and raises that deficit.
If you aren’t losing weight with 20-30 minutes of exercise per day, the chances are that you are still consuming too many calories. Adjust your diet to create a large calorie deficit. More exercise is not always the best way to lose weight, as it’s seldom sustainable.
Closing Thoughts
The 5 Simple Exercises Routine probably sounds too easy to be effective. After all, most workouts are much longer and harder, right? However, those workouts are also much more difficult to do consistently, and sticking to them requires cast-iron willpower, motivation, and lots and lots of time.
And that’s the problem, isn’t it?
For any workout to be effective, you actually have to do it. Not just for a week or a month, but for as long as it takes to get and stay in shape.
In other words, forever!
And that’s where following a simple, convenient workout comes up trumps. With fewer barriers to participation, you’ll start completing more workouts than you miss, and that’s what will give you the results you want.
Simple, frequent workouts will always produce better progress than complicated workouts you hardly ever do.
So, if you are fed up with starting workout programs you can’t stick to, try doing something so straightforward that it’s excuse-proof. Don’t let the power of simplicity fool you. It WILL deliver results.
References:
Baz-Valle E, Fontes-Villalba M, Santos-Concejero J. Total Number of Sets as a Training Volume Quantification Method for Muscle Hypertrophy: A Systematic Review. J Strength Cond Res. 2021 Mar 1;35(3):870-878. doi: 10.1519/JSC.0000000000002776. PMID: 30063555. https://pubmed.ncbi.nlm.nih.gov/30063555/
Forearm Pull-Up Pain – Causes, Treatment, and How to Avoid
Pull-ups are one of the best exercises you can do for your upper body. Doing pull-ups will widen your lats, build your biceps, strengthen your lower traps, and develop your grip. Pull-ups also let you know if you are getting a little too chunky, as excess body fat always makes them feel harder!
Unfortunately, even good exercises go bad, and pull-ups can sometimes cause forearm pain.
While this could be nothing more than a mild annoyance, pain often worsens and can become debilitating. As the forearms are involved in almost every upper and many lower body exercises, pain in your lower arms could even stop you from training.
In this article, we explain why pull-ups can cause forearm pain, how to treat it, and how to stop it from returning.
Please Note: This article is for educational and informational purposes only. It should not be used for diagnosing or treating health problems or diseases. Those seeking medical advice should consult with a licensed physician.
Why Pull-Ups Cause Forearm Pain
So, why do your forearms hurt when you do pull-ups? While we can’t diagnose the precise cause of your forearm pain, there are several reasons that pull-ups can cause lower arm discomfort.
These include:
Forearm overload
Compared to the other muscles involved in pull-ups, the forearms are the smallest and weakest link in the kinetic chain. As such, it’s not surprising that pull-ups sometimes cause forearm pain.
Think about it; those slender muscles must produce enough force to support your entire body weight. This is no mean feat. Overloading the forearms could cause a lot of localized discomfort.
Forearm muscle weakness
In addition, unless you actually train your forearms, they’re probably not as well-developed as the other muscles in your arms. Apart from dedicated bodybuilders and powerlifters, exercisers tend not to do additional training for their forearms.
Stronger muscles tend to be more resilient and enduring. If pull-ups hurt your forearms, they could be telling you that they need some extra work to make them stronger.
Forearm overuse
The forearms are a hard-working group of muscles, and they’re involved in almost all upper-body and some lower-body exercises. As such, doing pull-ups could be “the straw that broke the camel’s back” that causes pain in this overused body part.
Overuse is often accompanied by inflammation and swelling. But, because you keep on training, this never gets a chance to subside. Instead, your forearm pain worsens, affecting your ability to perform all your upper-body exercises.
Depending on what tissues have become inflamed, your pain may have a specific name, such as carpal tunnel syndrome, radial tunnel syndrome, or tennis elbow. However, such conditions require a medical diagnosis to confirm.
Prevent Forearm Pain
Forearm muscle stains
Muscle strains are tears that disrupt the integrity of your muscle fibers. Muscle strains usually occur when you stretch a muscle too fast or too far or lift more weight than you are used to. For example, if you are new to pull-ups, have weak forearms, or have started doing weighted pull-ups, you may have strained your forearm muscles.
Muscle strains are graded according to their severity and depth. Grade one strains are mild and involve minimal amounts of muscle fiber damage. In contrast, grade three muscle strains are much more severe and involve complete muscle or tendon ruptures which usually require surgery to repair.
Forearm tendonitis
Tendons attach muscles to bones. They’re made of tough, inelastic connective tissue, and they transmit the forces produced by your muscles into the joints you want to move.
While tendons are very robust, they also have a poor blood supply, which means they take a long time to heal when damaged. Tendons are also prone to overuse and inflammation, which is called tendonitis.
If you have recently started doing more pull-ups than usual or just doing more grip or forearms training, your forearm tendons may be inflamed and painful, which you feel when doing pull-ups.
Forearm splints
Forearm splints are an injury where overuse leads to inflammation of the connective tissue in the forearm region. This could be the fascia surrounding the forearm muscles, the periosteum that covers the bones, the muscles, or the tendons and ligaments.
Forearm splints are usually caused by overuse and increasing training volume and intensity too quickly. Shock loading and high-impact movements, e.g., plyometric pull-ups, can also cause forearm splints, as can doing heavy negatives.
General forearm pain is often referred to as forearm splints. The lower body equivalent of forearm splints is shin splints, which is a common lower leg injury in runners.
Forearm compartment syndrome
Muscles are enclosed in a layer of connective tissue called fascia. Fascia is tough, relatively inflexible, and surrounds, separates, and connects all the muscles and organs in your body.
If your forearms get too big for the fascia surrounding them, pain can be the result. This is called compartment syndrome. This condition makes your forearms feel tight and restricted, and the muscles may burn and throb. The pain tends to be worse when you’re training but lessens soon afterward. This is because getting pumped makes the muscles expand within their fascial sheath.
Compartment syndrome is more common in the calves but can also affect the forearms.
Delayed onset muscle soreness
Doing more exercise than usual often causes delayed onset muscle soreness or DOMS for short. This is thought to be caused by localized inflammation and the accumulation of metabolic waste products, such as lactate. DOMS typically comes on 12-24 hours after training and can last several days.
The good news is that DOMS tends to decrease as you get used to your new workout, which is called the repeated but effect.
Tight forearm muscles
Muscle tightness is a common source of pain. Tight muscles usually have a reduced blood flow which leads to an accumulation of irritating waste products. They may also have localized tenderness, called trigger points.
While most exercisers know to stretch their hamstrings, quadriceps, and even their pecs, fewer spend time stretching their forearms. As such, there is a high probability that your forearms are tight and are causing your forearm pull-up pain.
Improper grip/technique
There is more to a safe, effective set of pull-ups than simply grabbing the bar and heaving your chin up to meet it. Your grip needs to be firm but not so tight your hands go into spasm, and you need to avoid jerking the bar. Shock-loading your forearms increases the risk of pain and injury.
The bar itself is also important. If it’s too thin or too thick, it’ll put undue stress on your fingers, hands, and forearms. A very narrow grip is also harder on your wrists and forearms.
So, make sure you grip the bar correctly – not too tight or too wide – and do your reps smoothly and without swinging or jerking. These techniques will make pull-ups harder, but they’ll also be safer.
How to Treat Pull-Up Forearm Pain
Most pull-up forearm pain originates in your soft tissues, i.e., muscles, tendons, and ligaments. Soft tissue injuries are generally treated the same way – with PRICE.
No, PRICE is not a miracle drug or special taping method. Instead, it is an acronym for the steps you need to take to promote healing.
Please note: This information is not meant to replace advice from a trained medical professional.
P – Protection: Protect your forearms from further injury. Invariably, this means dropping pull-ups from your workouts until the pain subsides. After all, if pull-ups hurt your forearms, it doesn’t make a lot of sense to keep doing them, as you’ll probably make the problem worse.
Find exercises that don’t cause pain and do them instead. For example, lighter lat pulldowns may allow you to continue training without aggravating the affected area.
R – Rest: Depending on the severity of your injury, you may need to take a break from training. Or, at least, you may need to stop doing exercises that directly challenge your forearms, such as most back and biceps exercises.
You may be able to continue doing upper body pressing exercises, provided you don’t grip the bar/dumbbells/handles too tightly.
Avoid testing your injury to see if it still hurts. This can lead to reinjury and a longer recovery period. Rest a little longer than you think you need to allow the tissues to fully heal.
I – Ice: Ice reduces inflammation and also provides natural pain relief. Apply ice to the affected area for 15-20 minutes, 3-5 times per day. Reduce the duration and frequency of your icing sessions as the injury heals.
Avoid painful ice burns by never applying ice directly to your skin. Instead, use an ice pack or washcloth as a barrier between the ice and your forearm.
C – Compression: Like ice, compression helps reduce inflammation and swelling. Wrap the affected area with an elastic bandage or use a forearm sleeve to apply medium, even pressure to the affected area. However, make sure you unwrap your forearm from time to time to ensure there is good blood flow into the affected area. If your fingers are cold or numb, you have probably cut off the blood supply.
E – Elevation: Raising your forearm above head height will help reduce swelling and inflammation. There is no need to keep your arm raised all the time, but you may get some pain relief if you elevate your arm when seated for long periods, e.g., at night when relaxing in front of your TV.
Other strategies that may enhance recovery and reduce forearm pain include:
NSAIDs and OTC painkillers
If your forearm pain is severe, you may want to dull it by using over-the-counter (OTC) anti-inflammatory drugs like ibuprofen or aspirin. You can also use painkillers like paracetamol.
In addition, there are pain-relieving and anti-inflammatory gels that you can apply directly to your injured forearm. This is useful for people who find taking pills upset their stomachs.
However, do not use medicines to mask the pain so you can continue training. That will just make things worse.
Massage
Massage can help speed up the healing of chronic injuries. It’s also valuable for the latter stages of injury repair, i.e., 5-7 days after it happened. Massage improves blood flow and speeds up the removal of waste products from the injured area. It also provides natural pain relief and can help restore range of motion.
The forearms are very easy to self-massage, so you don’t need to hire a therapist to do it for you.
Apply even pressure with your non-injured hand and work up the forearm toward your heart. Use oil to lubricate your skin and make the massage go more smoothly. Start with light pressure and increase gradually as the area warms up.
You can also use a massage gun to help speed up your recovery. Still, good massage guns can be expensive and offer little additional benefit compared to a hands-on massage. That said, they allow you to get a good massage without using oil or even rolling up your sleeves, so some people may find them more convenient.
Stretch
Gentle stretching can help ease the tension in your forearms, increase blood flow, and promotes proper soft tissue remodeling. There are several ways to stretch your forearms, but the most convenient is probably the prayer stretch:
Place the palms of your hands together in front of your chest.
Gently press your hands downward to extend your wrists and stretch your forearms.
Hold for 30-60 seconds, increasing the depth of the stretch as you feel your muscles relax.
Take care not to force this movement, and ease off if you feel burning or shaking in your muscles.
Be a patient patient!
No one likes being injured, and it can be tempting to try and rush the recovery process so you can get back in the gym sooner. However, returning to training before you are ready could result in reinjury and an even longer layoff.
So, be patient and let nature run its course. It’s better to rest a little longer than return to training too soon, hurt yourself again, and then have to restart the recovery process.
For most people, being patient is the hardest thing to cope with when injury strikes.
Use this time to work on other aspects of your fitness, such as training your legs and core or doing more cardio and stretching. There is no need to be completely inactive.
How To Avoid Forearm Pain In The First Place
As the old saying goes, an ounce of prevention is worth a pound of cure. In other words, it usually takes less effort to avoid injuries than it does to treat and heal them. Use the following tips to reduce your risk of developing forearm pain in the first place.
Warm up properly
While we can’t guarantee that warming up will prevent all injuries, it should reduce your risk. Warmer muscles stretch and contract more efficiently, so they’re less likely to be damaged when you start working hard.
Most people focus on their warm-ups on big joints and muscle groups, such as the hips and shoulders, hamstrings, and pecs. However, if you are doing a very forearm or grip-centric exercise like pull-ups, you should warm up your lower arms, too.
So, in addition to your usual warm-up, make sure you include some wrist rotations, forearm flexions and extensions, and some light stretches to ensure this area of your body is as ready as possible for what you’re about to do.
Take care when using overly thin and thick pull-up bars
Very thin or thick pull-up bars put a lot of stress on your forearm muscles, increasing your risk of injury. Skinny bars force you to close your hand tighter than usual, putting your fingers in a mechanically disadvantageous position. Thicker grips force you to keep your hands more open, which makes it harder to maintain your grip.
Avoid forearm pain by introducing thick bar pull-ups gradually into your program and avoiding thin bars whenever possible. You can make a thin bar less stressful to grip by wrapping it in tape, wearing gloves, or using clip-on handles.
Don’t grip the bar too tightly
Pull-ups are a very grip-centric exercise. However, a lot of people make the mistake of gripping the bar too tightly. This “death grip” could be the reason for your forearm pain. Avoid this by only holding the bar hard enough to support your weight. There is no need to try and crush the bar. Use no more and no less hand pressure than you need.
Use lifting straps
Lifting straps provide more friction between your hands and the bar, so you don’t have to grip it as tightly. This takes the stress away from your forearms. While many people avoid using straps so they can develop a firmer grip, if you experience forearm pain during pull-ups, reducing lower arm engagement may help cure the problem.
Learn how to use lifting straps here.
Use gym chalk
Sweaty hands mean you’ll need to grip the bar tighter during pull-ups. This increases the stress on your forearms. Like lifting straps, lifting chalk increases the friction between your hands and the bar, so you won’t need to hold on so tightly.
Keep a bag of powdered chalk or a bottle of liquid chalk in your gym bag so you can use it before every set of pull-ups. Chalk is a real forearm and grip saver!
Stretch your forearms between workouts
A lot of strength training exercises involve your forearms. Your forearms are also often flexed during everyday activities, such as driving and using a computer keyboard. As such, tight forearms are common. Despite this, relatively few people spend much, if any, time stretching their lower arm muscles.
Avoid tight forearms and the pain they can cause by stretching them between workouts. This kneeling forearm stretch is one of the best ways to do it:
Kneel down and place your hands on the floor, fingers facing your knees. Your arms should be straight and your palms flat.
Gently lean back and press the heels of your hands into the floor.
Hold for 30-60 seconds, and then relax.
You can also stretch the muscles that extend your wrists by turning your hands over and pressing the backs of your hands into the floor.
Train your finger extensors
Muscles are generally arranged in opposing pairs. For example, the biceps oppose the triceps, and the quadriceps oppose the hamstrings. These paired muscles affect the same joint, with one flexing and the other extending it.
If one muscle in the pair gets much stronger than the other, an imbalance will occur. Muscular imbalances can cause pain and dysfunction.
As such, you need to work on your finger extension strength as well as your grip. While your finger extensors will never be as strong as the finger flexors, they still need to be trained so they are not weak.
One easy way to do this is to include rubber band finger extensions in your grip workouts. Just a few sets a couple of times per week will be sufficient for most people.
With your fingers straight and together, take a large rubber band and loop it around your fingertips and thumb. A standard stationary-type band should suffice.
Open your hand and spread your fingers and thumb apart as far as possible.
Slowly close your hand and repeat.
Try some different grips
There is more than one way to position your hands during pull-ups. You may find that some feel more comfortable and are less stressful for your forearms than others. For example, if overhand medium-width pull-ups with a full grip around the bar bother your forearms, you could try a thumbless narrow grip instead.
You may also find that underhand and neutral grip pull-ups are more comfortable than the overhand version.
Experiment to see which feels best. You could change hand positions workout-by-workout to spread the stress to different forearm muscles and avoid overloading the same ones repeatedly.
Read more about your grip options here.
Strengthen your forearms
Weak forearms are more prone to injury than stronger forearms. If you know your grip and lower arms are weak, it’s time to start training them. There are lots of exercises you can do to strengthen your forearms and grip, including wrist and reverse wrist curls, hammer curls, and dead hangs. Add a forearm exercise or two to your upper arm workouts or train your grip on separate days as preferred.
However, take care not to train your grip and forearms too hard or too often, as doing so could result in more forearm pain.
Forearm Pull-Up Pain – FAQs
Do you have a question about treating or preventing forearm pain? No problem, because we’ve got the answers!
1. How do I know what type of forearm pain I have?
There are several different conditions that cause forearm pain, including compartment syndrome, tendonitis, and muscle strains. However, they can sometimes present similar symptoms, so you may not be able to determine which one you’ve got.
For this reason, it’s always best to seek qualified medical advice and get an accurate diagnosis.
This is important because the treatment for one condition could actually make another problem worse.
So, use the PRICE protocol, but if the pain is severe or persists, get it checked out by a sports injury doctor.
2. Can I train around forearm pain?
Forearm pain doesn’t always mean you can’t train. So, while you should avoid exercises like pull-ups, pulldowns, deadlifts, rows, and curls, you still do leg presses, leg extensions, leg curls, and may even be okay doing squats, bench presses, overhead presses, etc.
In simple terms, exercises that involve a tight grip are out while you let your injuries heal. However, activities involving minimal forearm engagement should be fine, provided they don’t cause pain.
Learn more about how to safely train around injuries here.
3. How long does it take for forearm pain to subside?
Sadly, this question is unanswerable as it depends on the cause of your pain and the nature of your injury. Other factors affecting the healing process include how much you rest the painful area and what other treatments you use.
The one thing you must avoid doing is trying to rush the healing process; it will take as long as it takes. Returning to training before you’ve healed could result in reinjury and more time off.
4. If pull-ups hurt my forearms, can I do lat pulldowns instead?
Overhand lat pulldowns and pull-ups work many of the same muscles. The main difference between these exercises is the amount of weight used.
You can scale pulldowns to match your current level of strength, but doing pull-ups means lifting your entire body weight with just your arms. Pull-ups are much more strenuous than pulldowns.
As such, you can do pulldowns instead of pull-ups if you wish, providing they don’t also hurt your forearms.
5. Are hand grippers a good way to strengthen my forearms and grip?
Hand grippers are a convenient, time-efficient, and cost-effective way to train your forearms and grip. You can use them at home while relaxing in front of the TV, at work between meetings or phone calls, or even while on your morning commute.
There are lots of different strengths and styles of hand grippers to choose from, so shop around to find one you like. Also, don’t use your hand gripper too often, i.e., every day; otherwise, you could end up with an overuse injury, negating the benefits of forearm and grip training.
Read More on Forearm Pain:
Forearm Splints — All You Need to Know
How To Prevent Forearm Pain When Curling
Closing Thoughts
Like all types of pain, forearm pain tells you something is wrong and you should stop what you are doing. Ignoring pain could make the problem worse.
The good news is that most types of forearm pain are due to soft tissue injuries, which usually heal fully in a relatively short time. Resting and controlling the inflammation will have you back in the gym in no time.
However, if the pain is severe or persists despite resting and icing the area, you should get your forearm pain checked by a medical professional. While serious forearm injuries are rare, it’s always better to be safe than sorry.
How to Train For 20 Consecutive Pull-Ups and 50 Push-Ups
Pull-ups and push-ups are two of the absolute best exercises you can do. Note we didn’t say best bodyweight exercises, but best exercises – period. Between them, they work every major upper body muscle and teach you how to control and stabilize your body in ways that no machine or freeweight exercise ever will.
Better yet, you can do pull-ups and push-ups almost anywhere. All you need is some space and something to hang from. Get yourself a doorway pull-up bar, and you’re all set. You can also do pull-ups from the top of a power rack, a ceiling joist, the underside of an open staircase, or a tree branch – anywhere you can find to hang will do.
However, some people complain that pull-ups and push-ups are boring, and we respect that point of view. Once you have mastered these exercises and can do a handful of reps, you’ll probably be itching for a new challenge.
One way to reignite your enthusiasm for classic pull-ups and push-ups is to set yourself a repetition goal. Having a training target will make your workouts much more focused and motivating.
Assuming you can do pull-ups and push-ups reasonably well, the next logical goal for reasonably fit exercisers is 20 non-stop pull-ups and 50 push-ups. While these numbers might sound daunting, with time and determination, most people should be able to achieve and even surpass them.
In this article, we share two training programs that’ll have you cranking out 20 non-stop pull-ups and 50 push-ups in just a few months.
Related: How Many Push-Ups Should I Be Able to Do? The Ultimate Guide
Why Train for 20 Pull-Ups and 50 Push-Ups?
Is training for 20 pull-ups and 50 push-ups worth your time and energy? Consider these benefits and then decide!
Increased workout motivation
While any workout is a good workout, training without a goal often means your progress is slow or even non-existent. Following a progressive program toward a definitive goal gives your training focus and purpose, which can be very motivating.
The more motivated you are, the harder you’ll train, and the harder you train, the better your progress will be. This creates a positive feedback loop that will help you maintain your exercise habit and stay on the track to improved fitness and better health.
More dedication and discipline
Sticking to a workout plan as you progress toward your goal forces you to take a more dedicated, disciplined approach to your training. Week after week, you must keep on punching the clock, and missed workouts will hurt your progress.
This teaches you dedication and discipline and spreads to other parts of your life, making you a more productive and successful person in general.
Greater muscle mass
Not so long ago, we (the fitness industry) believed that you had to train in the 6-12 rep range to build muscle. Anything outside of that range was considered a waste of time.
It turns out that this was wrong.
Studies have revealed that you can build muscle by doing as many as 30+ reps per set, provided you work close to failure (1). Training to do 20 pull-ups and 50 push-ups will invariably involve training to failure. As such, you’ll build muscle despite cranking out lots of high-rep sets.
Simply making the switch from 6-12 reps to sets of 20-30 could be the shock your muscles need to trigger renewed growth.
Personal satisfaction
Setting and reaching training goals is very satisfying. It teaches you that if you set your mind to a task, you can complete it. Doing 20 pull-ups and 50 push-ups is a very notable achievement and something that will raise your standing in the fitness community.
Imagine how good you’ll feel when you finally hit 20 pull-ups and 50 push-ups. Pretty damn awesome, right?!
Master the Basics
Before we get into the nitty-gritty of training for 20 pull-ups and 50 push-ups, you need to become an expert in doing these two exercises. Poor form will undermine your performance, lead to injuries, and stop you from achieving your goals.
In addition, sloppy technique makes it harder to quantify your progress as each rep has the potential to be done with different speeds and ranges of motion. Good form standardizes your performance, so you can more acutely measure your improvements.
So, make sure you know how to do these exercises correctly, with your metaphorical eyes tightly closed. Good technique should be automatic and not something you have to think about too much. That way, you’ll be free to focus on pumping out the reps.
Pull-ups 101
Muscles worked:
Latissimus dorsi
Trapezius
Rhomboids
Deltoids
Biceps
Brachialis
Brachioradialis
Forearm flexors
Core
Everyone thinks they know how to do pull-ups but turn into swinging, jerking monkeys when they hang from the bar! Make sure you’re not one of them by following these step-by-step instructions:
Grip an overhead bar with an overhand, slightly wider than shoulder-width grip. Use a full or thumbless grip as preferred.
Your arms should be straight, shoulders down and back, and abs brace.
Bend your legs so your feet are clear of the floor.
Without kicking or swinging, smoothly bend your arms and pull your chin up and over the bar without craning your neck.
Lower yourself back down with control, pause with your arms straight, and repeat.
Push-ups 101
Muscles worked:
Pectoralis major
Deltoids
Triceps
Core
Like pull-ups, most exercisers think they know how to do push-ups. In fact, many are quick to label push-ups as a beginner’s exercise. And yet, even some so-called fitness experts who brag they can do 100 reps manage to murder this classic calisthenic movement. Follow these steps to ensure that your push-ups are a thing of beauty:
Kneel on all fours and place your hands flat on the floor, shoulder-width apart, with your fingers pointing forward.
Pull your shoulders down and back, and brace your core.
Walk your feet out and back until your legs and body are perfectly straight. Tuck your chin in and extend your neck – do not look forward.
Keeping your upper arms close to your sides, bend your arms and lower your chest down to within an inch of the floor.
Push yourself back up to full arm extension and repeat.
Perform all your reps with perfect form and make your inner drill instructor proud!
20 Pull-ups and 50 Push-Ups Workout One: Density Training
The basic premise of density training is simple – you keep your workout volume the same but gradually complete that volume using fewer sets and in less time. This provides the progressive overload your muscles need to get stronger and more enduring.
This workout uses the EMOM (every minute on the minute) method, meaning you start each set at the top of every minute, and whatever time that remains is your recovery.
For example, start your stopwatch and pump out ten push-ups, which will probably take about 20-30 seconds. This leaves 30-40 seconds until the top of the next minute when you’ll do your next set.
The great thing about this workout is that it’s entirely self-regulatory. You only progress when your body is ready for a greater challenge. As such, it’s an open-ended workout plan with no time limit.
If you fail a phase, do as many complete sets as you can and then as many reps as possible for the remaining sets. As you get stronger, you’ll be able to complete more full sets and eventually will graduate to the next level.
It’s broken down into six phases, and you stay with each phase until you complete it. Train 2-3 times per week on non-consecutive days.
You can do the pull-ups and push-ups in the same workout or do them on separate days if you wish. However, because pull-ups and push-ups are your priority, do them at the start of your program, e.g., push-ups at the beginning of your chest-training day and pull-ups before the rest of your back workout.
Plan for 20 Pull-ups
Phase
Sets
Reps
Time allowed
Total reps
1
10
4
10 minutes
40
2
8
5
8 minutes
40
3
7
6
7 minutes
42
4
6
7
6 minutes
42
5
5
8
5 minutes
40
6
4
10
4 minutes
40
After completing phase six, you should be able to do 20 non-stop pull-ups.
Plan for 50 Push-ups
Phase
Sets
Reps
Time allowed
Total reps
1
10
10
10 minutes
100
2
8
13
8 minutes
104
3
7
15
7 minutes
105
4
6
17
6 minutes
102
5
5
20
5 minutes
100
6
4
25
4 minutes
100
After completing phase six, you should be able to do 50 non-stop push-ups.
20 Pull-ups and 50 Push-Ups Workout Two: The Backfill Method
This program involves doing four sets of pull-ups and push-ups per workout. However, as the weeks pass, you do more reps in your first set and less for your last set(s). In essence, you “borrow” reps from your final set(s) and add them to the start of your workout, so the rep count per workout remains the same. This is called backfilling.
While such small increases may seem inconsequential, over almost three months, you’ll gradually progress toward hitting 20 pull-ups and 50 push-ups in a single set.
If you are unable to complete any of the weekly workouts, stick with it for as long as it takes to achieve success and then continue.
Plan for 20 Pull-ups
Week
Set 1
Set 2
Set 3
Set 4
Total Reps
1
10
10
10
10
40
2
11
10
10
9
40
3
12
10
10
8
40
4
13
10
10
7
40
5
14
10
10
6
40
6
15
10
10
5
40
7
16
10
9
5
40
8
17
10
8
5
40
9
18
10
7
5
40
10
19
10
6
5
40
11
20
10
5
5
40
* Rest 2 minutes between sets
Plan for 50 Push-ups
Week
Set 1
Set 2
Set 3
Set 4
Total Reps
1
25
25
25
25
100
2
27
25
25
23
100
3
29
25
25
21
100
4
31
25
25
19
100
5
33
25
25
17
100
6
35
25
25
15
100
7
37
25
23
15
100
8
39
25
21
15
100
9
41
25
19
15
100
10
43
25
17
15
100
11
45
25
15
15
100
12
47
23
15
15
100
13
49
21
15
15
100
14
50
20
15
15
100
* Rest 2 minutes between sets
FAQs
Do you have a question about these workouts or pull-ups and push-ups in general? No problem, because we’ve got the answers!
1. Are pull-ups and push-ups the only exercises I need to do for my upper body?
Between them, pull-ups and push-ups work all your major upper body muscles. Doing these exercises should develop a strong, muscular upper body. However, you may want to supplement your push-up and pull-up workouts with some additional upper-body exercises to build a balanced, aesthetically-pleasing physique.
Good workout additions include:
However, when time is short, it’s reassuring to know that doing just pull-ups and push-ups will deliver a reasonably complete upper body workout, and any additional exercises you perform are a bonus.
Cable Face Pulls
2. How many reps of pull-ups and push-ups should I be able to do before starting these workouts?
Ideally, you should be able to comfortably complete the first stage/week of your chosen workout. This typically means being able to do 10 pull-ups and 25 push-ups, or half your ultimate rep goal.
If you cannot reach these standards, you should work on your pull-up and push-up performance until you can. Straight sets, e.g., three sets of eight, is probably the best way to do this.
Related: 8 Ways to Get Better at Pull-Ups and Chin-Ups
3. How many times a week should I do pull-ups and push-ups?
You can do pull-ups and push-ups almost every day if you wish. Daily workouts are one of the best ways to get really good at an exercise. However, the more often you train, the lower the volume and intensity of your workouts must be. Working too hard or too long will make recovery impossible.
With that in mind, if you do the workouts in this article, you should limit your push-up and pull-up training to 2-3 times per week. This provides an ideal balance between work and recovery.
However, training just once per week probably won’t produce the results you want.
4. Which of the two programs should I do?
With two programs (density training and backfill method) to choose from, you may be wondering which approach is best. The truth is that both of these workouts can be equally effective, so it’s up to you to choose the one that resonates with you the most.
The density training program is more flexible, and you only progress from one stage to the next when you’re ready. The backfill program is a bit more linear, which may appeal more if you prefer a more regimented training plan.
Cannot decide between them? Then why not run both consecutively? For example:
Week 1
Monday – program one
Wednesday – program two
Friday – program one
Week 2
Monday – program two
Wednesday – program one
Friday – program two, etc.
Similarly, you could do the EMOM density workout for push-ups and the backfill workout for pull-ups, or vice versa. Ultimately, there is no right or wrong way to make these programs work for you.
5. What is the best way to warm up for these workouts?
Warming up will prepare your muscles and joints for what you’re about to do. In addition, it may help reduce your risk of injury.
Strength training warm-ups usually consist of the following:
Pulse raise, e.g., 5 to 10 minutes of easy cardio
Mobility and dynamic flexibility for the joints and muscles you’re about to use
Practice/rehearsal, e.g., a couple of sub-maximal sets of pull-ups and push-ups
After that, you should be good to go and ready to start your workout. Read more about warming up for strength training here.
6. Do I have to train for 20 pull-ups and 50 push-ups concurrently?
While it makes a certain amount of sense to train for more pull-ups and push-ups at the same time, you certainly don’t have to. For example, if you have to do a push-up test for work, e.g., an army physical fitness test, you can skip the pull-ups and focus on what you’ll be assessed on instead.
However, if you only do one workout, make sure you also include exercises for the rest of your body. While push-ups (or pull-ups) are a great exercise, they are not a one-step solution for all-around fitness and strength. You also need to develop your pulling, core, and lower body muscles.
7. Can I do chin-ups instead of pull-ups?
Chin-ups and pull-ups are so similar that they’re virtually interchangeable. You perform pull-ups with an overhand grip, while chin-ups use an underhand grip. Because they work the same muscles, you can do pull-ups or chin-ups as preferred. You could also alternate between pull-ups and chin-ups from workout to workout for variety.
Closing Thoughts
You now have two programs you can use to train for 20 pull-ups and 50 push-ups. Besides a pull-up bar, you don’t need any equipment to work toward these targets, so there is no excuse for not rising to the challenge.
Is the thought of doing 20 pull-ups and 50 push-ups a little daunting? Does it feel like it might be impossible?
Good; that’s precisely how a challenge should feel!
It’s only by overcoming difficulties and doing hard things that we develop and grow, not just muscularly but as people.
So, choose your program, commit to the process, and work hard. You CAN do 20 pull-ups and 50 push-ups!
References:
1 – Lasevicius T, Ugrinowitsch C, Schoenfeld BJ, Roschel H, Tavares LD, De Souza EO, Laurentino G, Tricoli V. Effects of different intensities of resistance training with equated volume load on muscle strength and hypertrophy. Eur J Sport Sci. 2018 Jul;18(6):772-780. doi: 10.1180/17461391.2018.1450898. Epub 2018 Mar 22. PMID: 29564973. https://pubmed.ncbi.nlm.nih.gov/29564973/
Pull-Up Bar Options & What To Look For In Your Pull-Up Bar
Maximize gains with these pull-up bar options.
We often times neglect what pull-up bars and the many pull-up bar options can do for our gains. The right piece of equipment will be durable and made of the highest quality to make sure you aren’t using some poor-quality pull-up bar. This is important for this piece of exercise equipment can greatly influence our gains and lead to effective growth, among other benefits. Whether you use one at the gym or at home, pull-ups are a convenient exercise that we should all definitely consider putting into your routines, if they aren’t there already.
What you will find with pull-up bars are that you can work your muscles, and many different muscles at that, to affect growth, but also work to improve things like mobility and range of motion. What you will find are those results you want most can come easily if these are placed into a well-structured training plan.
Let’s take a look at pull-up bars and see what makes this piece of exercise equipment so great. We will jump into the benefits of pull-up bars and offer up some great pull-up bar options so you know what is out there and how best to see results. Plus, we will offer up what to look for so you know how to find a worthwhile product.
Benefits Of Pull-Up Bars
Pull-up bars work for many benefits like increasing strength, mobility, and much more.
Benefits of pull-up bars include:
Increased strength: Using pull-ups bars are a great way to build strength and size for a shredded aesthetic, but also build functional strength to use for everyday activities (1).
Enhance grip strength: Grip strength is important for functional movements, as well as those big lifts, and pull-up bars can help you get there (2).
Better posture: By working muscles that support better posture, you will sit upright, walk taller, and have more confidence (3).
Get that V-shape: Pull-ups work the lats to a great extent which have great control in forming that desired V-shape we all know and love.
Convenient: With a pull-up bar in your home, you can enjoy a workout whenever you want to really boost your gains.
Pull-Up Bar Options
Let’s take a look at some pull-up bar options for you so you can better tackle those exercise needs. With the right piece of equipment, you won’t have to deal with a piece of junk and can better see those gains unfold.
Doorway Pull-Up Bars
These pull-up bars are great for those who want a bar in their home for convenience. These will come in a few different designs so research is needed for exactly what you want, however, all of them are great for convenience, versatility, and ease when it comes to getting a workout like this in your home.
Sometimes these bars may not feel as sturdy or supported as people would like so that is something to consider. Many are high-quality and durable, but what you will find is the means of securing in a doorway may not be exactly what you are looking for.
Free Standing Pull-Up Bar
A free standing pull-up bar is an interesting choice, but does require space. For this piece of equipment, you can perform other exercises as well, but most likely this is best to use either outside or in a larger indoor home gym space. If you feel as though you will be performing movements that require a lot of room, then this would be the option for you.
Pull-Up Bar Station
For those who want to invest a little more money into a pull-up bar, consider a pull-up bar station and what you will find is a great machine that can do pull-ups, as well as other exercises for a nice home workout. Depending on the brand and design, on the more simple side, dips and those respective handles would be included. On the more complex side, you may get a bench or some other exercises as well.
Fully Mounted Bar
A fully mounted bar allows for comfort in knowing this is secure and working for your benefit. What you will get with a fully mounted bar is a great piece of equipment with many grip options able to be drilled or screwed into a wall to add to your home gym. However, once this is in the wall, you don’t have the luxury to really move it around. Something to consider for those looking to maybe a more versatile option.
What To Look For
When it comes to finding the right pull-up bar, you want to be sure to look for certain factors that can play into your decision to buy. First, you want to know where and what you are going to use this for. If you have a door where you can put a bar in, then you will look towards those door frame pull-up bars to buy. However, if you are someone who wants something more secure or free standing, then a mounted or larger free-standing pyramid may be a better option.
You also want to look for grip options, for challenging your grip can add that level of growth you want most, while also considering versatility and extra padding. Depending on where this pull-up bar is in your home, you want to not damage any property while also having this bar be something you can have the freedom to move if need be.
Check out our list of the Best Pull-Up Bars for more great lifting and exercise products!
Wrap Up
Pull-up bars and those respective pull-up bar options are great for those looking to beef up their home gym while also seeking the best gains possible. Pull-up bars are versatile and convenient and can work wonders for all your gains if you find the right product that is worthwhile and working for your benefit. Check out some great bars and the best pull-up bar options to really get the best workout possible.
Let us know what you think in the comments below. Also, be sure to follow Generation Iron on Facebook, Twitter, and Instagram.
*Images courtesy of Envato
References
Ronai, Peter; Scibek, Eric (2014). “The Pull-up”. (source)
Lee, Julia-Ann; Sechachalam, Sreedharan (2016). “The Effect of Wrist Position on Grip Endurance and Grip Strength”. (source)
Harvard Health Publishing Healthbeat (2015). “Why good posture matters”. (source)
The Best 6 Exercises To Use Elbow Sleeves For Pain-Free Support
Work for pain-free support with elbow sleeves and these top exercises.
You may have seen elbow sleeves before but haven’t used them. There are certain exercises where elbow sleeves can be of great help and offer pain free support so you can lift big, plow through any workout and see gains. With a snug, comfortable fit, yet still versatile for all of those lifting wants and needs, elbow sleeves are the perfect fitness accessory to have in your gym bag.
Able to provide nice compression, elbow sleeves work to improve blood flow and enhance recovery, all while supporting the elbow to distribute tension evenly. With better blood flow and circulation, you bring comfort to the muscle and thus only enhance your ability to see great gains. Using these with certain exercises will only help you in the long run.
We’ve pulled together some of the top exercises to use an elbow sleeve so you can see better gains and overall pain free support.
Best Exercises For Elbow Sleeves
Bench Press
Pull-Ups
Lat Pulldown
Squats
Farmer’s Walks
Shoulder Press
Bench Press
[embedded content]
The bench press is something we all love to do and putting up big numbers is something to easily show your dominance over others in the gym. Great for working your chest, what you’ll find is the enhancement of many pushing movements (1).
An elbow sleeve will help you here as you hold heavy weight and need to bend your elbow to complete the movement. That strain can be a lot, but with the right support, you won’t feel as tight in the elbow.
Bench Press Benefits
Bigger chest: By working to push that weight, this targets your chest the most and you can really beef up your chest strength that way.
Enhance pushing power: Since this lift is all about the push to get the weight up, your power output will be enhanced for better performance.
How To Do The Bench Press
Lie on the bench with your feet planted on the floor. Grab the bar with your hands a little more than shoulder-width apart. Lift the bar off the rack and gently lower to your chest as you breathe in. Your forearms should be about 90 degrees from the ground as you touch your chest and with your feet planted on the ground, initiate the upward movement to return to the starting position.
Pull-Ups
Pullups | GI Exercise Guide – YouTube
The pull-up is an upper body strength exercise performed with the pull-up bar and most likely your bodyweight. The added bonus is the ability to add weight if need be to really beef up those gains (2).
Since this exercise requires you hanging and taking the load in your arms, elbow sleeves will offer that compression needed so you can lift yourself up with no problem.
Pull-Ups Benefits
Strengthen arms and back: This is a great muscle builder for your arms and back, while also working to develop that V-shape taper.
Functional exercise: Able to build muscle and allow for those gains to be made for sport specific movements, this also works well for functional ones and everyday activities.
How To Do Pull-Ups
Grab the pull-up bar with your palms down and hang from the bar. With an engaged core, pull yourself by the elbows up to the bar until your chin passes it. Lower yourself down and repeat for your desired number of reps.
Lat Pulldown
[embedded content]
The lat pulldown is a serious lat builder and one that works other upper body muscles well. Used with the pulldown machine, this allows you to get a great exercise while also enhancing spine stabilization and enhancing shoulder health (3).
Elbow sleeves are great here for the fact that this movement requires serious load on those elbows. As the point of movement, although your lat muscles do get work, your elbows will feel supported as you lift big weight.
Lat Pulldown Benefits
Effective lat builder: This exercise will build lat strength and allow you to maximize those pulling movements, since your lats are pivotal.
Enhance spine stabilization: By strengthening those back muscles, you work to stabilize the spine and provide for better support.
How To Do The Lat Pulldown
Position yourself on the machine and grab the handles with your desired grip. As you pull down towards your chest, squeeze your shoulder blades, keep your core engaged and feet planted on the ground. Slowly return to the starting position for the pulldown and repeat for your desired number of reps.
Squats
[embedded content]
The squat is a staple exercise for many since it will enhance lower body growth, so you only see the best gains. This is certainly one of those exercises that you will see promote muscle while also working to improve power and explosivity (4).
Given the position of your elbows, an elbow sleeve can alleviate some of the pressure of supporting the barbell so you can get low into that squat pain free.
Squats Benefits
Increase lower body strength: Working your quads, glutes, and hamstrings, this is a great lower body exercise to boost strength, stability, and certain sport specific and functional movements.
Better power: The nature of this movement requires the best for power and explosivity and will promote both as you look to optimize performance.
How To Do Squats
Place the barbell on your traps and shoulders with your feet shoulder width apart. With a tight core, bend your knees while keeping your spine neutral, squatting down to your optimal range of motion. Once at the bottom, drive through your feet to return back to your starting standing position.
Farmer’s Walks
Farmer’s walks are perfect for those looking to maximize their upper body routine. Great for building muscle and enhancing stability, what you will find is improved core strength and better grip (5).
With such a load given the amount of weight, you will find that elbow sleeves will relieve pressure and tension felt in the elbows, while also improving blood flow since your arms stay in one position.
Farmer’s Walks Benefits
Improve core strength: Since your core is engaged to keep your body neutral, you will see great work done for improving core strength.
Promote grip strength: Grip strength is important and can greatly help with both sport specific and functional movements.
How To Do Farmer’s Walks
Stand with your feet shoulder width apart and grab the weights, whether they be dumbbells, kettlebells, or a barbell. With a tight core and neutral spine, walk for a set distance, keeping your body tight and engaged.
Shoulder Press
[embedded content]
Building up our shoulders can be a challenge, but the shoulder press is one of those exercises to do just that. Building those boulder shoulders, this exercise also works to boost core strength and allow for better overhead pressing movements (6).
Since this requires load on the elbows, and that load going overhead, elbow sleeves offer great support as you push that weight to see great gains.
Shoulder Press Benefits
Increase shoulder strength: This exercise will really work those shoulders and allow for the best by optimizing your range of motion and overhead mobility.
Core work: Since this exercise requires quite a load overhead, keeping your core tight is important and will prove to pay off in the long run.
How To Do The Shoulder Press
Choose your desired amount of weight and stand with your feet shoulder width apart. Grab either dumbbells, kettlebells, or a barbell so it is at about your upper chest and engage your core for stability. When ready, lift the weight overhead, extending your arms and locking them out at the top. Continue this overhead press movement for your desired number of reps.
Benefits Of Elbow Sleeves
Elbow sleeves can benefit you in a number of ways and it is important to put a focus on support and your physical health in order to lift big weight. Benefits of elbow sleeves include:
Offer compression: A snug fit will work well as you look to warm the elbow and provide for better blood flow (7).
Support your elbow: This helps distribute tension differently so other smaller muscles also feel supported, better assisting the elbow.
Increase stability: Provide that increased stability for big lifts so you see increased strength.
Promote better recovery: Improved blood flow and circulation will enhance recovery to optimize your physical health and see better gains.
What To Look For In Elbow Sleeves
When choosing your elbow sleeve, it is important to look for fit. You want the sleeve to offer support and compression, but also allow for optimal movement, for this will affect the exercise as a whole. The kind of material used is important as well, for you want the sleeve to physically feel comfortable and not too scratchy, itchy, or any of those uncomfortable feelings. Since you will use these for plenty of lifts, it is also important to note the durability of the product. A product worth your time and money will last you a while no matter how much you use it.
Check out our list of the Best Elbow Sleeves for more great products to maximize pain-free support!
Wrap Up
These top exercises for elbow sleeves are great to put into your routine and can really enhance all areas of your gains. With the right elbow sleeve, you can work to promote support and better compression to allow for only the best in terms of blood flow, recovery, and growth. Check out some top elbow sleeves and see how they can improve your performance today.
Let us know what you think in the comments below. Also, be sure to follow Generation Iron on Facebook, Twitter, and Instagram.
*Images courtesy of Envato
References
Tungate, P. (2019). “The Bench Press: A Comparison Between Flat-Back and Arched-Back Techniques”. (source)
Ronai, P.; et al. (2014). “The Pull-up”. (source)
Newton, H.; et al. (1998). “The Lat Pulldown”. (source)
Kubo, K.; et al. (2019). “Effects of squat training with different depths on lower limb muscle volumes”. (source)
Winwood, P.; et al. (2015). “A Biomechanical Analysis of the Farmers Walk, and Comparison with the Deadlift and Unloaded Walk”. (source)
McKean, M.; et al. (2015). “Overhead shoulder press- In-front of the head or behind the head?”. (source)
Pereira, M.; et al. (2014). “The Effects of Graduated Compression Sleeves on Muscle Performance: A Randomised Controlled Trial”. (source)
How The Burpee Pull-Up Boosts Heart Rate & Strength
See how the burpee pull-up is an all-around amazing exercise.
When it comes to seeing huge gains, exercises like the burpee pull-up can work both those strength goals and endurance ones to give you a well-rounded and seriously effective exercise. Building strength while also working to boost endurance can be challenging but it is absolutely possible.
We all know the burpee and we all know the pull-up but put these two together and the result is something else. With the right guidance and ability to grind in the gym, having a workout like this in your routine will only skyrocket your gains.
The burpee is one of those exercises some try and avoid like the plague. Maybe the same goes for the pull-up. But at the end of the day, to neglect these two exercises is only a disservice to us and our gains, for what they can really do is allow for serious muscle building with the right approach to cardio work. Too often do we neglect cardio work and chalk it up to just lifting. We need both and this exercise is able to provide us with both.
Let’s dive right into this and see what makes this exercise so great. From what it is, to muscle worked, the many benefits of it, and how best to perform it, you will have a complete guide into this exercise to place in your routine for any occasion. Plus, the gains you will see to strength and endurance are hard to match with other exercises.
What Is The Burpee Pull-Up?
This exercise combines the movement of a burpee with that of a pull-up to provide for an effective worthwhile exercise in any routine. What you will find is that this total body workout can fire up your muscles so they grow and so you build that valuable aerobic capacity.
It is important to perform this workout safely and to follow strict technique to avoid injury, but once you get going, there will be no turning back. The nice part is all you need is a pull up bar.
Muscles Worked
When it comes to muscles worked, the burpee will work a host of muscles. Those lower body muscles include your quads, hamstrings, and glutes and will require those muscles for power and explosivity. Your upper body muscles worked include erector spinae, triceps, pecs, shoulders, and core, as you need a solid core to stay as engaged as possible.
For the pull-up portion of this lift, you will see work done in your triceps, biceps, shoulders, and core, but primarily in your lats. Pull-ups are a great lat builder and can really give you the best when it comes to all things gains.
Benefits Of The Burpee Pull-Up
The benefits of combining the burpee with the pull-up are hard to ignore and can greatly affect all areas of your gains. The power and explosiveness of the burpee in tandem with the strength and development builder of the pull-up will only enhance all your gains for the better so you see the best results possible. Benefits of this exercise include:
Great strength builder: As an exercise to work many muscles, and till failure, you get a nice strength builder to see great gains to all your muscle building goals (1).
Increase in endurance: Building endurance and aerobic capacity is something to consider for this will enhance those strength building goals while also taking your endurance to the next level.
Calorie burner: Shed calories as a result of the high-intensity movement to aid in weight loss and those fat loss goals (2).
Enhance power and explosiveness: The movement requires you to be explosive and to use real power to get off the ground. By enhancing this part of the exercise, you work for more power when it comes to certain sport specific movements (3).
Total body workout: Give yourself a great total body exercise to feel good about your workout.
Plenty of variations for each portion: Both the burpee and pull-up portions have great alternatives to mix up your workout and add to your workout plan.
Promotes posture: Building strength and keeping your body aligned will promote better posture for athletic movements and everyday life.
Builds grip strength: Building grip strength is important and this will work to do so with the pull-up portion of the exercise (4).
How To Perform It With A Pull Up Bar & Push-Up Position
Here are the steps for performing the burpee pull-up:
Your starting position is in a squat position with feet shoulder width apart and feet forwards. Explode off the ground and as you land, go into a push up position.
Once here, perform a push-up so your chest touches the ground and explode back onto your feet.
Jump up and grab the pull-up bar with an overhand grip, engage your core, and perform a pull-up movement, with your feet hanging.
With a controlled motion, bring yourself back to the ground and set yourself back up in a push-up position, before performing a push-up, then coming back to the squat position with feet shoulder width apart.
Repeat for your desired number of sets and reps aiming for perfect form before rest.
Alternatives To Burpees & Pull-Ups
When it comes to alternative exercises and mixing in variations, finding exercise to replace this can be challenging. However, there are exercises that will separately replace the burpee and the pull-up. We wanted to share a few with you so you can better tackle those workout goals to only see the best gains possible.
Alternatives of the burpee will still give you the ability to get your heart rate going to get some cardio work while also boosting strength. These exercises include:
Alternatives of the pull-up will build strength and overall lat development while also working other muscles in your upper body. These exercises include:
Wrap Up
This is a great exercise to see effective gains and will really enhance all areas of your strength and endurance needs. With the right approach, you can increase your gains for the better and provide for only the best out of two effective exercises put into one. The benefits are hard to ignore so place this into your routine today and watch your gains take off.
Let us know what you think in the comments below. Also, be sure to follow Generation Iron on Facebook, Twitter, and Instagram.
*Images courtesy of Envato
References
Ronai, P.; et al. (2014). “The Pull-up”. (source)
Roy, M.; et al. (2018). “High-Intensity Interval Training in the Real World: Outcomes from a 12-Month Intervention in Overweight Adults”. (source)
Haff, G.; et al. (2012). “Training Principles for Power”. (source)
Lee, J.; et al. (2016). “The Effect of Wrist Position on Grip Endurance and Grip Strength”. (source)
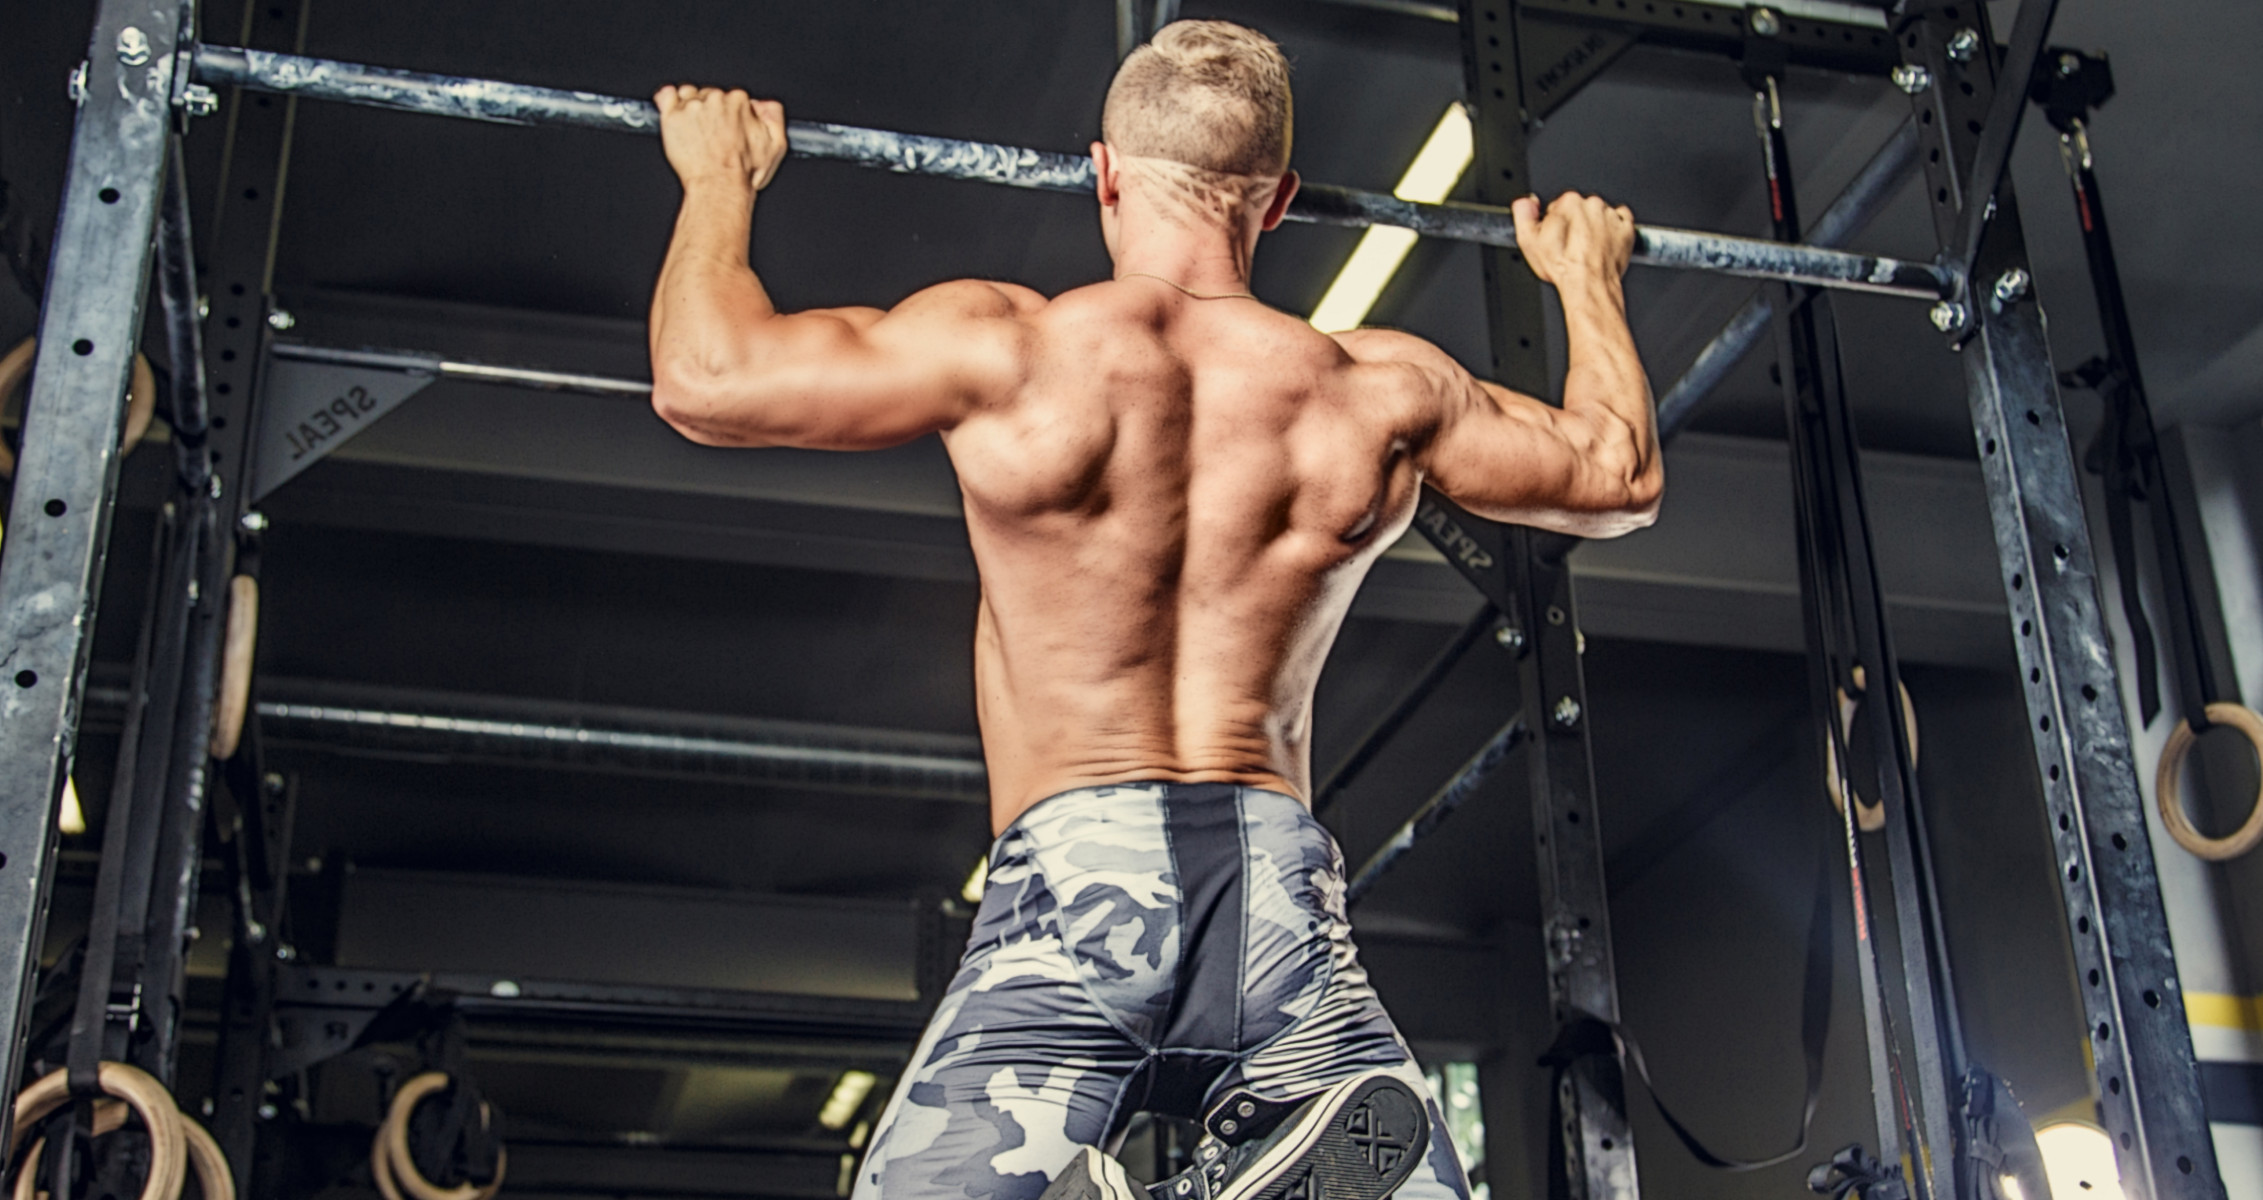
Programming Vertical Pulling For Greater Back Gains
Programming Vertical Pulling
Achieving a chiseled body requires a lot of work and some methodical training. And by methodical, I’m talking about doing a bit more vertical pulling. Vertical pulling exercises (pull-ups and pulldowns) stresses a lot of muscles, but particularly the lats, biceps, and upper back muscles. As a result, you get a wider and fuller back along with some juicy biceps. You can even make the argument that with enough vertical pulling, horizontal pulling becomes obsolete.
Let’s talk about how to incorporate 2 key vertical pulling variations.
1. PULL-UPS/CHIN-UPS
Pull-ups and chin-ups are often mistaken as the same exercise because they only differ in grip position. These exercises also considered bodyweight exercises, but any advanced lifter (especially men) should be able to do them weighted with a weight belt or squeezing a small dumbbell between your legs.
STANDARD GRIP
Pull-ups use an overhand grip which targets the mid/lower traps more especially if you arch your back which you’ll likely have to in order to get the bar to tap your chest. Pull-ups are generally harder to perform.
On the other hand, chin-ups target the biceps more and are easier to perform. I prefer to start females with chin ups and males with pull ups. Women also have more mobility and anecdotally, they seem to tolerate the wrist position better than men.
As for setting up the exercise, be sure to use a box or some sort of assistance to the bar. Jumping up the bar is fine too, but can cause some momentum being used the first few reps. Not a good habit.
Anyways, with pull-ups the standard grip is about 5 inches wider than shoulders. With chin ups, you’ll be a couple inches closer in, but feel free to adjust based on personal preference on both. Then lift your body until your chest touches the bar. Chin being over the bar is not enough. There is still room for muscles to shorten if your chest isn’t touching the bar. Pausing at the top for about a second can help you lower with control.
Rinse and repeat for gains.
NEUTRAL/HAMMER GRIP PULL-UP
Some people may experience elbow pain when doing either pull-ups or chin-ups because the wrist positions aren’t as natural especially with chin-ups.
Switching to a neutral or hammer grip often solves any joint pain. This is the position where your palms are facing each other and many pull up bars should offer this grip position.
This position is also great for lat development.
If joint pain is still an issue, the most joint friendly position isn’t on a fixed bar. Instead find a way for the wrist and elbows to move freely based on your anatomy. Gymnastic rings will be your best friend.
This is the most pain free variation although it’s also the most unstable, so it can be suboptimal for hypertrophy if you’re not strong or stable enough.
MODIFICATIONS
If you’re too weak to do full range pull-ups. You can use the assisted pull-up machine or add a band to assist you.
As you get stronger, use less weight to assist you or use a lighter band to lighten the assistance.
If you’re too strong for unweighted pull-ups and chin-ups, add weight or pause longer at the top of the exercise.
2. PULL-DOWN
Pulldowns can also be a viable alternative as a variation when pull-up progression plateaus or as a regression to work up to your first pull-up or chin-up.
EXECUTION
Sit comfortably with feet flat on the floor. Adjust the height of the bar where your outstretched arms is grabbing the bar. You may have to stand to do so.
Take a wider grip. This is the standard position. We can get fancy with grips later.
Then find a stable seated position. Pull the bar towards your chest using some, but minimal momentum. Keep your forearms straight and bring the bar towards your chest until it touches. Arch your back hard and this will give you a very full range of motion that biases the upper back muscles.
This is a traditional pulldown which I like to call a wide grip pulldown instead of a lat pulldown because the lats don’t produce as much force as most people think in this position.
To make the pulldown more lat focused, use a neutral grip attachment or do single arm version. If possible, you can also change the seat angle so you’re no directly under the handles. This allows your arms to pull from in front of you and to put the lats in a better position to produce force.
Lastly, brace your abs and don’t arch your back to prevent the upper back muscles like the traps and rhomboids from taking over.
That’s a true lat pulldown to hypertrophy the lats.
As always, return the bar slowly with control.
FORM CONSIDERATIONS
Excessive yanking on any vertical pulling exercise can lead to a waste of time or worse, a snapping injury. Beginners should focus on being as controlled as possible.
Once you get more advanced, some momentum is ok to get to the fully shortened position because that’s where most of the tension is during a vertical pull.
This is primarily a back/lat exercise, but it’s also common for people to feel it more in their biceps. This isn’t necessarily bad, but switching to a more pronated grip can help.
Anecdotally, pulling more from the pinky, ring, and middle fingers while using the thumb over grip will reduce contribution from the biceps. Straps or Versa grips also help.
PROGRAMMING CONSIDERATIONS
The key to overall strength and fitness is to incorporate both over the course of the same program or across multiple programs.
Pull ups teach you to lift your whole body weight while enhancing the upper body muscles especially the back and biceps. If you load them properly, they can be very fatiguing, so don’t program them too frequently.
Easier horizontal pulling like db rows and inverted rows make great program additions if you’re keen on improving your pull-ups. These variatons are also less fatiguing.
Vertical pulling also tax the forearms significantly, so use straps if needed and if possible, don’t pair them with deadlift or row variations.
Vertical pulling also decompresses the spine and oppose vertical pressing, so supersetting vertical pulling with vertical pressing like overhead presses are a great idea.
Aiming for a variety of rep range will be best for hypertrophy
At least three sets of vertical pulling per week should be the bare minimum especially for advanced lifters.
Switching between upper back and lat focused variations or switching grip width is great for variation.
For more news and updates, follow Generation Iron on Facebook, Twitter, and Instagram.