Tag: exercises
3 Best Beginner Leg Workouts: Turn Your Chicken Legs Into Tree Trunks
Leg workouts are the most skipped workouts in a resistance training routine. It’s almost as if most lifters think that leg workouts are optional. So many lifters have such polarizing views about leg workouts because they had a shaky start with lower-body training.
Many beginners try to do too much too soon in their leg workouts; it gives them suboptimal results and increases their risk of injury. One of the most common mistakes a beginner lifter can make is to incorporate advanced exercisers, such as the Bulgarian split squat and the Jefferson squat, in their training regimen. Although these exercises look dope and can help induce hypertrophy, these lifts are best left to advanced trainers.
Starting the leg workouts on the right foot will set you on the correct trajectory toward your fitness goals. An effective beginner leg workout will help you drill the basic movements and make you look forward to your lower body workouts every week.
In this article, we go over the three best beginner leg workouts to unlock new strength and muscle gains. We also cover the advantages of performing leg workouts as a beginner and the tips to get the best bang for your buck.
Best Beginner Leg Workouts
This article contains three beginner-friendly workouts that will help you build bigger wheels.
But why three and not one, you ask?
A complete beginner should always begin with a bodyweight workout and stick to it for four to eight weeks. The first workout in this article will be a bodyweight workout to help you master the basic movements. The third workout introduces additional resistance to the mix.
What about the second workout? That’s a surprise!
The first workout will help you develop the necessary muscle mobility and strength to perform the exercises using weights with a full range of movement.
Although the bodyweight beginner leg workout might sound boring, it is a must for newbie lifters as it will help you build the necessary bone, tendon, ligament, and muscle strength to support weights for the more advanced workouts.
Bodyweight Beginner Leg Workout
Beginners must begin their lower body training journey with compound (multi-joint) exercises as it helps ignite strength and muscle gains while improving overall functionality, which boosts their physical performance in everyday tasks.
Here is how to perform each exercise with the correct form:
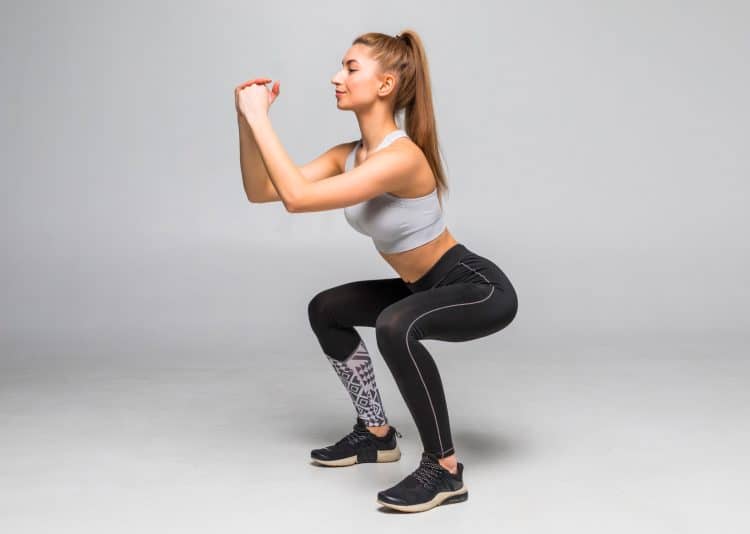
Air Squat
The squat is the king of leg exercises and should be a part of each lower-body training session. It helps develop strength and muscle mass, improve balance and mobility, and build a solid core. There are enough squat variations to keep your workouts interesting.
Steps:
Stand upright with a shoulder-wide stance.
Turn your toes outward slightly for a more comfortable ankle position.
Hold your hands in front of your chest throughout the exercise.
Push your hips back and down to lower yourself into a deep squat.
Pause at the bottom.
Explode back to the starting position while driving through your heels.
Repeat for recommended reps.
Pro Tip: Maintain the natural curvature of your spine throughout the movement. Avoid bending forward, as it will strain your lower back.
Check out our complete air squat guide here!
Step-Up
The step-up is a lunge variation. It is a potent booty builder and will help improve your mobility as it involves moving through a more extensive range of motion than the conventional lunge.
Steps:
Stand tall, facing an elevated platform, such as a flat bench or a plyo box. The height of the box should be at least 20 inches.
Lift your right foot off the floor and plant it on the elevated platform.
Drive through the right foot to lift your left leg off the floor. Place your left foot beside your right foot.
Return to the starting position.
Start with your left foot for the next rep.
Alternate between sides for the recommended reps.
Pro Tip: Avoid using your rear leg to push yourself off the floor. Further, keep an upright torso throughout the exercise.
Check out our complete step-up guide here!
Lateral Lunge
The lateral lunge is one of the most overlooked lower body movements. It is excellent for improving your hip mobility. The lateral lunge will boost your performance in leg exercises, especially those that require a wide stance, such as the sumo squat and deadlift.
Steps:
Stand erect with a hip-width stance.
Hold your hands in front of your chest.
Take a big step to your right while keeping your left foot planted on the floor.
Bend your right knee to lower yourself toward the floor. Your right thigh should at least be parallel to the floor at the bottom.
Forcefully push off from your foot to return to the starting position.
Repeat on the left side.
Alternate between sides for the recommended reps.
Pro Tip: As you gain more experience, you can achieve more depth by lifting the toes of the planted foot off the floor.
Check out our complete lateral lunge guide here!
Glute Bridge
This exercise targets your glutes and hamstrings. The glute bridge might look inconsequential but will leave you with a muscle-ripping pump.
Steps:
Lie on the floor on your back. Your arms should be at your sides.
Bend your knees and plant your feet flat on the floor.
Lift your hips toward the ceiling. Your body, from knees to head, should be in a straight line at the top.
Pause and contract your glutes at the top.
Slowly return to the starting position.
Repeat for recommended reps.
Pro Tip: Place the soles of your feet together for a greater emphasis on the outside of your glutes.
Check out our complete glute bridge guide here!
Stability Ball Leg Curl
The stability ball leg curl will smoke your hamstrings. This exercise also requires decent core strength to perform correctly.
Steps:
Lie supine on the floor with your feet on top of an exercise ball.
When your legs are extended, your ankles should be on top of the ball. This will be your starting position.
Raise your hips off the floor, keeping your weight on your shoulder blades and feet.
Bend your knees to bring the ball as close to your butt as possible.
Pause and contract your hams at the top.
Return to the starting position.
Pro Tip: You could start with a heavy wall ball if doing this exercise using an exercise ball feels too difficult.
Standing Calf Raise
Calves are often overlooked in a bodyweight training regimen. However, this is no ordinary training program.
Steps:
Place your toes on the edge of an elevated object, such as an aerobic step.
Place your hands on a wall for stability.
Lower your heels as close to the floor as possible.
Lift your heels as high as possible.
Pause and contract your calves at the top.
Slowly return to the starting position.
Pro Tip: Imagine getting on your toes like a ballerina at the top of the movement for optimal gastrocnemius muscle stimulation.
Check out our complete standing calf raise guide here!
Bodyweight HIIT Leg Workout For Beginners
Beginners can ramp up the intensity of the bodyweight leg workouts using the HIIT (high-intensity interval training) protocol. HIIT workouts involve short bursts of intense activity followed by periods of rest or lower-intensity exercise. Besides helping build muscle mass and strength, HIIT workouts can improve cardiovascular health, increase metabolic rate, and promote weight loss. Furthermore, since this type of workout takes less time to complete than conventional workouts, it is more suitable for people on a tight schedule. [1]
We’ll program the bodyweight beginner leg workout exercises into a HIIT format. Perform three rounds of the following circuit. Do each exercise for 45 seconds. You are allowed a 15-second rest after each exercise and a two-minute rest after finishing each round. This workout will take you 21.25 minutes to complete.
Weighted Beginner Leg Workout
The weighted beginner leg workout includes basic lower body exercises; these will help add size and strength to your wheels.
After doing the bodyweight leg workout for four to eight weeks, you can switch to the weighted beginner leg workout. It includes a balance of compound and isolation exercises to ignite new growth. Use a weight that allows you to reach muscle failure in the 8-12 rep range to boost muscle hypertrophy. Also, limit your rest duration between sets to 60-120 seconds to keep your training intensity high. [2]
Below is the form breakdown of each exercise:
Barbell Squat
The barbell back squat is a variation of the air squat and involves holding a bar across your shoulders while performing the lift.
Steps:
Stand erect with a hip-width stance with a barbell placed across your shoulders.
Keeping an upright torso, lower yourself into a squat by pushing your hips back and down.
Lower toward the floor until your thighs at least break parallel.
Explode back to the starting position.
Pro Tip: Keep your core and glutes braced throughout the exercise for better balance and stability.
Check out our complete barbell squat guide here!
Walking Lunge
The barbell walking lunge is more challenging than the forward or reverse lunge as it demands greater balance and core stabilizer engagement.
Steps:
Stand upright with a barbell placed across your shoulders.
Step forward with your right foot.
Lower until your left knee touches the floor and your right thigh is parallel to the floor.
Bring your left foot next to your right foot.
Alternate between sides for recommended reps.
Pro Tip: Use a weight that you can handle comfortably. You can switch to dumbbells if you’re having difficulty maintaining your balance with a barbell.
Check out our complete walking lunge guide here!
Leg Press
The leg press is one of the most abused training equipment. Most lifters load more weights onto the machine than they can handle and end up moving the sled only a few inches. Ensure you follow a full range of motion for optimal muscle stimulation.
Steps:
Load an appropriate weight onto the leg press machine.
Take a seat on the machine while maintaining the natural curvature of your spine.
Plant your feet shoulder-width apart on the foot platform.
Unrack the sled and unhook the safety bars.
Slowly lower the sled until your thighs are a few inches away from your chest.
Extend your legs while driving through your whole foot.
Avoid locking out your knees at the top.
Repeat for recommended reps.
Pro Tip: Use different foot positions to target your legs from different angles. A wider-than-shoulder-width stance targets your inner thighs, whereas a narrow foot placement targets your quad sweeps.
Check out our complete leg press guide here!
Leg Extension
The leg extension is a staple in most leg workouts. It is an isolation exercise that focuses on your quads.
Steps:
Sit on the leg extension machine and place your ankles behind the foot pad.
While keeping your hips glued to the seat, extend your knees so your legs are in a straight line.
Pause and contract your quads at the top.
Slowly return to the starting position.
Repeat for reps.
Pro Tip: Train to failure on this exercise to achieve a quad-ripping pump.
Check out our complete leg extension guide here!
Leg Curl
Similar to how the machine preacher curl targets the biceps, the leg curl targets and strengthens the hamstrings.
Steps:
Lay face down on the machine.
The ankle pad should be just above the back of your ankles.
Squeeze your hamstrings and curl the weight. The pad should touch your hips at the top of the movement.
Pause and contract your hams at the top.
Slowly return to the starting position.
Repeat for reps.
Pro Tip: Keep your toes pointed during this exercise for better hamstring isolation.
Check out our complete leg curl guide here!
Seated Calf Raise
While the standing calf raises stimulate the gastrocnemius muscle, the seated calf raise works the soleus muscle.
Steps:
Sit on the calf raise machine. Place your toes on the foot platform and the bottom of your quads under the thigh pads.
Unrack the machine and lower your heels as close to the floor as possible.
Raise your heels as high as possible.
Contract your calves at the top.
Pro Tip: Calves can be a stubborn muscle group to develop. Increase your training volume by doing more sets and reps if you have lagging lower legs.
Check out our complete seated calf raise guide here!
Benefits of Beginner Leg Workout
Here are the advantages of doing the beginner leg workout:
Builds Strength and Muscle Mass: These beginner leg workouts will help you pack on muscle mass and strength. It will also improve your overall physique symmetry and balance.
Helps Builds a Solid Foundation: Leg workouts can help build a solid foundation by increasing your overall strength, improving your posture, and boosting your athletic performance.
Improves Balance and Stability: Lower body exercises, especially unilateral movements like the lunge, can improve your balance and stability. It will also strengthen your stabilizer muscles.
Boosts Functionality: Most exercises in beginner leg workouts are compound movements that will improve your overall functionality and make you perform better in daily activities.
Burns More Calories: Leg workouts involve training half your body in a single workout, which results in greater calorie burning than training other smaller muscle groups.
Develops a Strong Mindset: Leg workouts demand more grit and determination than any other muscle group. Going hard and heavy in leg workouts will help you develop a killer mindset.
Tips To Consider During a Beginner Leg Workout
Use the following tips to make the most of your lower body training sessions:
Warm-Up: Spending 5-10 minutes warming up will improve your mobility and flexibility and lower your injury risk.
Cool Down: Stretching after a leg workout is an excellent way to kickstart your recovery process.
Mobility: You must have decent overall mobility to perform leg workouts. Poor mobility will limit your range of motion and make achieving depth in exercises like the squat and leg press uncomfortable.
Progressive Overload: You must consistently challenge your muscles by increasing your training intensity and volume to ensure constant growth and limit the risk of hitting a plateau. Increase the weights, number of sets, reps, and exercises, or reduce the rest between sets to progressively overload your muscles. You could also use advanced training techniques like super sets and drop sets to achieve this feat.
Diet and Recovery: Whether you are training to build muscle mass or strength, you must follow a macro-focused diet and sleep for at least seven to eight hours each night to speed up your recovery and get the best bang for your buck.
Wrapping Up
The three beginner leg workouts detailed in this article are an excellent starting point for those looking to build strength and size in their lower bodies. These will also help boost your overall functionality, improve your balance and stability, burn more calories, and develop a killer mindset.
You must start slowly and gradually increase the intensity and duration of the workouts. Seek expert help to nail down your training form and limit your risk of injury. Finally, back up the beginner leg workouts with balanced diet and recovery programs to unlock stellar gains. Best of luck!
References
Ito S. High-intensity interval training for health benefits and care of cardiac diseases – The key to an efficient exercise protocol. World J Cardiol. 2019 Jul 26;11(7):171-188. doi: 10.4330/wjc.v11.i7.171. PMID: 31565193; PMCID: PMC6763680.
Krzysztofik M, Wilk M, Wojdała G, Gołaś A. Maximizing Muscle Hypertrophy: A Systematic Review of Advanced Resistance Training Techniques and Methods. Int J Environ Res Public Health. 2019 Dec 4;16(24):4897. doi: 10.3390/ijerph16244897. PMID: 31817252; PMCID: PMC6950543.
Are Calves Genetic? Unlocking The Mystery of Lower Leg Growth
“Are calves genetic?”
If you’ve ever seen someone who clearly has never stepped foot in a gym with full, rounded calves, the question has probably crossed your mind; especially if you’ve been hitting your lower legs with calf raises for years with little result. You’ve probably also noticed that some pro bodybuilders, with massive development in every other muscle group, just can’t seem to bring up their calves.
If calf development is genetic, it means those of us who have lucked out in the genetic lottery will never turn our calves into bulls. However, if that’s not true, we’ve still got hope. Let’s dig into the facts to find out.
Calf Anatomy
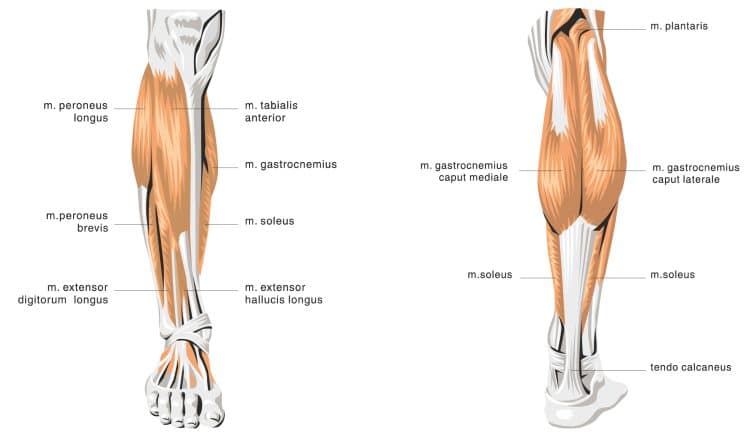
The calves are generally understood to comprise two separate muscles: the gastrocnemius and the soleus. However, some people contend that they are actually two parts of the same muscle. That’s because they both converge at the Achilles tendon and produce the same action; plantar flexion (ankle extension).
The meaty part of the muscle that we generally consider as the calf is the gastrocnemius or gastro. The soleus is a flat muscle that lies under the gastro and has minimal growth potential.
The gastro comprises two parts; the inner and outer head. Both heads originate at the base of the femur, on the medial and lateral condyles (the rounded structure at the end of the bone). These origin points are just above the knee joint.
The soleus originates just below the knee. The gastro and the soleus then converge into the Achilles tendon, which then connects to the heel bone.
Role of Genetics on Calf Development
Genetics does, indeed, have a part to play in your ability to build your calves. Three key genetic factors contribute to the size potential of your lower legs:
Muscle Fiber Type
Muscle Fiber Density
Muscle Belly/Tendon Length
Muscle Fiber Type
There are two types of muscle fiber; slow twitch (Type I) and fast twitch (Type II). Slow twitch fibers are created for endurance work required for repetitive movements like walking and running. The soleus comprises more fast twitch fibers, while the gastro, though it still has more slow twitch fibers, has a higher percentage of fast twitch fibers. Fast twitch fibers are designed more for explosive, strength-type work, as is required when doing calf raises. These fibers have greater growth potential than slow twitch fibers.
A study by Gollnick et al., published in the European Journal of Physiology, analyzed the muscle fiber make-up of the soleus and gastro and other lower body muscles. They found that, on average, the soleus contained 80% of slow twitch fibers, while the gastro averaged just 57% of fast twitch fibers. [1]
This study also revealed that there is quite a variance in the percentage of fast twitch and slow twitch fibers among the study subjects. The range of fast twitch fibers in the soleus was between 64% and 100%. Regarding the gastro, the range was between 34% and 82%. These differences are the result of the genetic lottery.
So, a person whose gastro comprises 34% fast twitch fibers (and therefore 66% slow twitch fibers) will have a genetic advantage regarding muscle-building potential compared to a person with 82% fast twitch and only 18% slow twitch.
This leads to whether changing your muscle fiber type with training is possible. In other words, could a guy with 82% fast twitch fibers in his calves train a certain way to reduce that down to 50% to have more slow twitch fibers?
The short answer is that researchers don’t know. There is debate among scientists on this question, with some believing that you’re stuck with what you were born with, while others contend that, by doing more of a specific type of training, you may be able to make up to a 10% change. So, you may have a 10% window to develop more slow twitch muscle fibers by doing a calf raise exercises. You would engage in running, cycling, and other endurance work to develop more fast twitch fibers for endurance.
Related: The Average Calf Size for Men and Women
Muscle Fiber Density
Your muscle fiber density refers to the number of muscle fibers per unit of muscle volume. Your genetics determines this. Some people will be born with more muscle fibers in their calves than others. As a result, they will have more muscle-building material to work with. Their muscles will be able to grow bigger and stronger than a person who is born with fewer muscle fibers in the calves.
There is scientific debate about whether it is possible to grow more muscle fibers. This is known as hyperplasia (contrasted with hypertrophy, which refers to making your existing muscles bigger). The current consensus is that if hyperplasia does occur, it would only be possible to a small degree. [2]
Muscle Belly/Tendon Length
Genetics determines the length of a person’s calf muscle belly. A long muscle belly runs down from the back of the knee at least halfway to the ankle. A short muscle belly sits much higher on the lower leg. The ideal for muscle development is having a long belly and a short Achilles tendon. However, the length of your muscle bellies and tendons is entirely a matter of genetics.
High calf bellies are better suited for endurance exercise. In fact, you will notice that many high-level sprinters, basketball players, and endurance athletes have noticeably high calves. It is believed that their longer Achilles tendon provides for more force production in the way that a longer rubber band would.
It is important to remember that, for most people, their genetic predisposition to building calves will be about the same as for the rest of their bodies. So, you’ll probably have the same proportion of slow-twitch to fast-twitch muscle fibers in all your muscles. The length of your muscle bellies will likely also be proportionate throughout your body.
Sometimes, what appears to be a genetic predisposition to weak calves is actually the result of training style and focus. A classic example is when Arnold Schwarzenegger came to America in 1968. Back in Europe, the bodybuilding focus was on the upper body. As a result, Arnold did very little calf work in the gym. Looking at him onstage at the 1968 IFBB Mr. Universe (in which he came second to Frank Zane), you may have concluded that he had terrible calf genetics.
Arnold Schwarzenegger / Instagram
Yet, when Arnold came to appreciate that he needed to seriously focus on his lower legs to start winning competitions, he undertook an amazing transformation. Rather than hiding his weakness, he actually cut all of his training pants off at the knee so that he could be reminded every day of what he needed to focus on. He performed 500-pound sets of standing calf raises, along with seated and donkey calf raises six times per week. Within a few years, during which he once said he invested 5,000 hours on calf training, he was able to turn his biggest weakness into one of his greatest strengths.
Factors Beyond Genetics That Impact Calf Development
So far, we’ve seen that genetic factors affect your calf-building potential. The length, muscle fiber type, and density of your calves will not change much over the course of your life. So, if you’ve got high muscle bellies and long Achilles tendons, there’s nothing you can do about that.
You can’t, for example, alter your calves’ shape by modifying how you do your calf exercises. You may have heard that you can better target the inner or outer head of the gastro by angling your toes in or out when doing calf raises. This is not the case. That’s because the inner and outer heads pull on a single Achilles tendon. This causes the ankle to extend in just one direction. If it were possible for the ‘inner’ calf to work differently from the ‘outer’ calf, each head would require its own separate tendon and separate attachment to the heel bone. That would allow each one to act separately based on toe angling.
So, while you can’t change your calf muscle shape, what you can do is maximize what you’ve been given. Let’s now consider the best way to train to maximize your genetic calf-building potential.
The most commonly seen calf training exercise in the gym is the standing calf raise. This involves placing your shoulders under a pad that is connected to a weight stack. You then place your feet on a block that allows you to lower your heels below your toes level.
I often see people doing this exercise with just their toes on the block. However, this is a limiting foot position that would be akin to doing barbell curls by gripping the bar with only your fingertips.
The best foot position when doing calf raises will provide the most support for the movement to follow. When it’s just your toes on the block, you’ll find those toes slipping off as you progress through your reps, probably resulting in a shortened set.
So, rather than just your toes, you should place the balls of your feet on the block. This is the large, bony pad just below your big toe. Each toe has its own sesamoid bone, running on a diagonal rather than horizontally across the foot. So, to give your foot the most support, you should place the ball of your foot on a slight diagonal from the big toe down to the little toe. This will result in a ‘toes in’ position.
By the way, if you feel your feet slipping off the block while doing a set, you should pause and reset your position. If you don’t, you will compromise your ability to get a full extension and contraction on every rep.
Ideal Range of Motion on Calf Raises
You will never achieve your genetic muscle-building potential unless you move your calves through their full range of motion. Yet, it’s common to see people using an extremely abbreviated range of motion that often equates to a short ‘bouncing’ movement. This usually happens when the person uses more weight than they can properly handle.
The whole reason that you have a block to stand on when doing calf raises is to allow you to get a contraction in the bottom part of the rep. So, if you’re doing reps where your heels don’t even come down to the level of your toes, you’re defeating the purpose of having a block!
It is far better to reduce the weight to achieve a full range of motion.
Knees Straight or Bent During Calf Raises?
If you have completely straight legs (with no knee bend) during the standing calf raise, you might experience some knee discomfort. To avoid this, you should slightly bend your knees throughout the exercise, especially when you start to go heavy. Make sure, though, that you keep your legs locked in this slight knee position to avoid bringing your quads into the movement.
How Much Weight for Calf Raises?
To maximize your calf muscle growth potential, you need to achieve maximum effort on your lower leg workouts. There are two ways you can do this:
Muscle fatigue that results from performing high reps in the 20 to 50 range.
Using a weight that limits you to 80-90% of one rep max, with low reps in the 4-10 range.
The weight you choose for the calf raise, along with every other exercise, should be based on the following parameters:
How many reps do you plan to do
Using a full range of motion
Eliminating momentum
Using proper technique
Maximum effort
Don’t let your ego get in the way when selecting your training resistance. It doesn’t matter what weight your training partner is using; if you cannot tick off each of the criteria listed above, the weight is not right for you.
When it comes to the rep range, the calves require more than the conventional 8-12 rep range for hypertrophy. That’s because of the high slow-twitch fiber makeup of the calves. Slow-twitch fibers are highly resistant to fatigue. As a result, they respond better to higher reps. On the other hand, your fast-twitch fibers require lower reps with heavier weight.
Here is a suggested rep scheme over six sets of calf raises, with the weight increasing on each set:
Set One (Warm-up): 50 reps
Set Two: 30 reps
Set Three: 20 reps
Set Four: 15 reps
Set Five: 10 reps
Set Six: 8 reps
6 Best Calf Exercises
Your gym-based calf training options are quite limited. After all, the calves only do one thing; flex the ankle. So every move must be a variation of the calf raise. These resistance-based exercises will primarily work your fast-twitch muscle fibers. However, there are other things you can do to also work your slow-twitch fibers. By including each exercise in your weekly routine, you will cover all bases:
1. Standing Calf Raise
Steps:
After loading the weight stack, slide under the shoulder pads and grab the handles.
Place your feet on the block, with the balls of your feet and toes pointed slightly inward.
Bend your knees slightly, and then keep your legs locked in that position.
Rise on your toes to complete calf extension.
Now lower your heels to below the level of your toes, going down as far as possible. Perform your reps in a smooth, fluid manner.
2. 45-Degree Leg Press Calf Raise
Steps:
Load the weight stack and then position yourself in the leg press machine with your lower back firmly against the back pad.
Place the balls of your feet on the base of the footplate.
Fully extend your calves by pushing your toes away from you. Keep your knees supple (slightly bent). Hold for a second.
Now lower your heels to below the level of your toes, going down as far as possible.
3. Seated Calf Raise
Steps:
Sit on a seated calf raise machine with your thighs tucked under the pads. Set the weights on the machine. Adjust the pad for your height. Place the balls of your feet on the footplate.
Fully extend your calves by raising your heels. Hold for a second.
Now lower your heels to below the level of your toes, going down as far as possible.
4. Jump Rope
Steps:
Stand with a jump rope in hand; feet shoulder together.
Rotate the wrists to bring the rope overhead.
Jump slightly to allow the rope to travel under your feet.
5. Toe Farmer’s Walk
Steps:
Grab a pair of dumbbells or other heavy objects in your home gym.
Walk up and down your gym floor on your toes until you have walked for 30 seconds.
6. Explosive Box Jumps
Steps:
Stand before a 24-inch high plyometric box. Hinge your hips and swing your arms to load the jump.
Jump both legs onto the box.
Immediately jump down on the other side.
Change direction and repeat.
Wrap-Up
While there is a genetic component to calf training, that doesn’t mean you can’t make the most of what you were blessed with. You can’t change the shape of your calf muscles and can only make minor changes to your muscle fiber type and density. However, you can increase the size of your calf muscle fibers by following a variable resistance workout program across a wide rep range. Besides the conventional gym moves like the standing leg press and seated calf raise, add jumping rope, plyometrics, and the toe farmer’s walk to transform your calves into bulls.
References
Gollnick PD, Sjödin B, Karlsson J, Jansson E, Saltin B. Human soleus muscle: a comparison of fiber composition and enzyme activities with other leg muscles. Pflugers Arch. 1974 Apr 22;348(3):247-55. doi: 10.1007/BF00587415. PMID: 4275915.
MacDougall JD, Sale DG, Alway SE, Sutton JR. Muscle fiber number in biceps brachii in bodybuilders and control subjects. J Appl Physiol Respir Environ Exerc Physiol. 1984 Nov;57(5):1399-403. doi: 10.1152/jappl.1984.57.5.1399. PMID: 6520032.
The Best HIIT Ab Workout: Get Ripped Abs in Record Time
Most people perform a few ab exercises at the end of their strength training session. It’s no surprise they are nowhere close to their six-pack goal.
High-intensity interval training (HIIT) involves short bursts of high-intensity exercise followed by brief periods of rest or lower-intensity exercise. HIIT workouts for your abs are an incredibly effective method of trimming down your waistline and shedding the excess fat to reveal your abs.
HIIT ab workouts will increase your heart rate, help burn fat, and improve your overall fitness level in a shorter period than traditional cardio workouts. It makes these workouts the perfect fit for people with a busy schedule who cannot afford to spend 45-60 minutes in the gym.
In this HIIT ab workout, we will not only do the most intense abdominal exercises, but we will narrow down on the movements that will also increase your heart rate so that you are actively burning calories.
12 Best HIIT Ab Exercises
Add these ab movements to your exercise arsenal to build a cover photo-worthy six-pack:
High Knees
We will kick off the HIIT ab workout with high knees. It will warm up your abs and get your cardiovascular system going. Think of this exercise as a unilateral variation of the hanging knee-to-chest.
Steps:
Stand upright with a hip-width stance.
Hold your hands in front of your chest, palms facing down.
Lift your right foot off the floor and bring your thigh as close to your chest as possible. Simultaneously, lift your left heel off the floor so that your left toes are the only point of contact with the floor.
Return your right foot to the ground.
Immediately repeat on the left side.
Alternate between sides for the recommended time.
Speed up the exercise to bump up your training intensity. Both your feet should be off the floor during the leg transition.
Pro Tip: You want to keep your core braced throughout this exercise for optimal midsection stimulation.
Check out our detailed high knee exercise guide!
Mountain Climber
The mountain climber is a high knee variation; however, it places more tension on your core as you perform it in a high plank position. Perform this exercise for long enough, and it will also tax your shoulders and pectoral muscles.
Steps:
Start in a high plank position. Your hands should be under your shoulders and your body, from head to heels, in a straight line.
Brace your core muscles, bend your right knee, and bring it toward your chest.
Return it to the starting position.
Alternate between sides for the recommended time.
Start slow and increase the tempo while maintaining your form.
Both your feet should be off the floor during the leg transition.
Pro Tip: Avoid forming a bridge with your hips or letting them drop during the exercise, as it removes tension from your core and puts in on your lower back.
Check out our detailed mountain climber exercise guide!
Flutter Kick
The flutter kick is an often overlooked exercise in most ab workouts. However, it is an excellent movement to target the more stubborn lower abs.
Steps:
Lie on your back on the floor. Your body should be in a straight line from head to heels, and your legs should be placed together.
Place your hands under your hips for leverage.
Raise your legs and head off the floor. Keep your core braced throughout the exercise.
Lift your right leg as high as possible while keeping your left leg in place.
Return the right leg to the starting position while raising your left leg toward the ceiling.
Alternate between sides for the recommended time.
Pro Tip: Ensure your back is placed flat against the floor throughout the exercise. Arching your back will result in hip flexor stimulation and put unnecessary strain on your spine.
Check out our detailed flutter kick exercise guide!
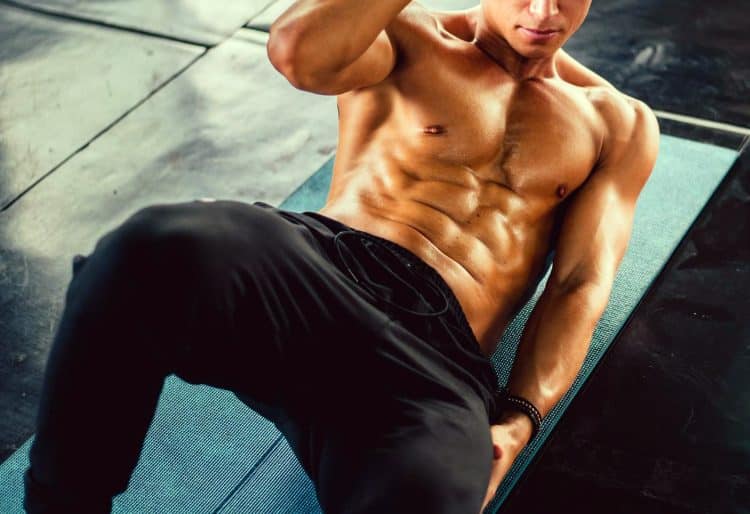
Sit-Up
The sit-up is a staple in most ab training routines. However, you’ll be performing this exercise with high intensity in the HIIT ab workout to fire up your midsection.
Steps:
Lie supine on the floor. Bend your knees and place your feet flat on the floor.
Hold your hands next to your ears throughout the exercise.
Take a deep breath and lift your torso off the floor by contracting your abs.
Your torso should be perpendicular to the floor at the top of the motion. Exhale sharply and squeeze your abs.
Slowly lower to the start position.
Pro Tip: Avoid interlacing your fingers behind your head as it can sprain your neck during the concentric motion. Alternatively, hold your hands in front of your chest during the exercise.
Lying Leg Raise
The lying leg raise is one of those exercises that look super easy but will smoke your abs in no time. You must keep your legs straight for optimal lower ab engagement.
Steps:
Lie with your back on the floor. Your body should be in a straight line.
Place your hands under your hips for leverage.
Lift your legs off the floor so your heels are a few inches off the ground. This will be your starting position.
Raise your legs as high as possible while driving your lower back into the floor.
Slowly return to the starting position.
Repeat for the recommended time.
Pro Tip: Perform this exercise on an elevated surface, such as a flat bench, for an extended range of motion.
Check out our detailed lying leg raise exercise guide!
Bicycle Crunch
The bicycle crunch is an incredibly effective exercise that works your entire core, including your obliques and rectus abdominous.
Steps:
Lie supine on the floor.
Place your hands at the sides of your ears.
Lift your legs off the floor so your ankles are a few inches off the floor.
Bend your right knee, and bring it as close to your chest as possible.
Simultaneously, perform a cross-body crunch and touch your right knee with your left elbow.
Return to the start position.
Alternate between sides for the recommended time.
Pro Tip: Exhale sharply and contract your abs at the static contraction point at the top for optimal ab stimulation.
Check out our detailed bicycle crunch exercise guide!
Alternating Jackknife
This full-body exercise can help improve your flexibility and posture, besides giving you a shredded midsection.
Steps:
Lie with your back on the floor.
Extend your arms overhead.
Lift your right leg off the floor as high as possible. Simultaneously, lift your torso off the ground and bring your arms toward your toes in a sweeping motion.
Return to the starting position.
Alternate between sides for the recommended time.
Pro Tip: Feel free to bend your knees if you cannot touch your toes with straight legs.
Check out our detailed jackknife exercise guide!
Plank Jack
The plank jack will help you develop explosive lower body strength and a robust core. It involves jumping your feet out to the sides while holding a plank.
Steps:
Assume a high plank position. Your hands should be under your shoulders and legs together and extended behind you.
Brace your core and jump both feet out wide to each side as if you were doing a horizontal jumping jack.
Jump back to the starting position.
Rinse and repeat.
Pro Tip: Keep your shoulder blades pulled back and down throughout the exercise and actively push into the floor with your hands to maintain balance.
Side Plank Dip
This oblique exercise requires decent core strength to perform with a full range of motion.
Steps:
Lie on your side on the floor. Your legs should be stacked.
Place your elbow under your shoulder. Your forearm should be placed on the floor perpendicular to your body for balance.
Place your top arm on your side.
Lift your hips off the floor. Your body should be in a straight line.
Lower your hips toward the floor until they are a few inches off the ground.
Return to the starting position.
Repeat for the recommended time.
Switch sides.
Pro Tip: Lift your top arm toward the ceiling so it is perpendicular to the floor to take some weight off your core and make the exercise a little easier.
Wood Chopper
Although you could perform this exercise without additional resistance, we recommend using a light dumbbell for optimal core stimulation.
Steps:
Stand upright with a hip-width stance.
Hold a dumbbell with both hands.
Twist your torso to the right side and lift the weight up and across your body with straight arms.
Lower the dumbbell across your body toward the floor. Bend your knees slightly during the lowering motion.
Repeat for the recommended time before switching sides.
Pro Tip: Keep your eyes fixed on the dumbbell throughout the exercise.
Check out our detailed wood chopper exercise guide!
Floor Wiper
The floor wiper is one of the most challenging exercises in this workout. Beginners can substitute this exercise with the floor windshield wiper until they develop the required core strength to perform this movement with a full range of motion.
Steps:
Lie on your back on the floor.
Extend your arms on your sides and place your hands on the floor for stability.
Lift your legs off the floor so your heels are a few inches from the ground.
Contract your core and bring your feet as close to your left hand as possible in a sweeping motion while keeping your legs straight.
Return to the starting position.
Repeat on the right side.
Alternate between sides for the recommended time.
Pro Tip: As you gain more experience, hold a barbell over your chest for upper-body engagement during this exercise.
Check out our detailed floor wiper exercise guide!
Hollow Hold
The last exercise of the HIIT ab workout takes the intensity down a notch. However, this isometric exercise will leave you with a sore midsection.
Steps:
Lie on your back on the floor. Extend your arms overhead.
Lift your legs, arms, and head off the floor as high toward the ceiling as possible.
Your body should resemble a “V” during the isometric hold.
Keep your core contracted throughout the exercise.
Hold this position for the recommended time.
Pro Tip: Interlacing your fingers while holding the hollow hold position will make the exercise a little easier. However, this technique should only be used by beginners.
Check out our detailed hollow hold exercise guide!
HIIT Ab Workout For a Shredded Midriff
Now that you know the best exercise for a HIIT ab workout, it is time to put them to work. Perform two rounds of the HIIT ab workout circuit given below. Do each exercise for 40 seconds. You are allowed a 20-second rest after completing each exercise to catch your breath. Plus, rest for two minutes before starting the second round. Complete this HIIT workout within 25 minutes.
Exercise
Time (in seconds)
Rest (in seconds)
High Knees
40
20
Mountain Climber
40
20
Flutter Kick
40
20
Sit-Up
40
20
Lying Leg Raise
40
20
Bicycle Crunch
40
20
Alternating Jackknife
40
20
Plank Jack
40
20
Side Plank Dip
30 (each side)
20
Wood Chopper
30 (each side)
20
Floor Wiper
40
20
Hollow Hold
40
120
Perform the side plank dip and wood chopper for 30 seconds on each side. Transition to the other side without stopping for rest. You can rest for 20 seconds after doing these exercises for 60 seconds.
Benefits of HIIT Ab Workout
Adding a HIIT ab workout to your training regimen entails the following advantages:
Helps Target the Midriff and Burn More Calories
Studies show that HIIT workouts are more effective than conventional strength training workouts at burning calories, which can help you shed excess fat. Furthermore, the exercises in this HIIT ab workout will target your midsection, helping you achieve a toned midriff [1]. A study also found that HIIT workouts can help reduce body fat and waist circumference. [2]
Improves Endurance and Stamina
HIIT workouts can improve performance in both anaerobic and aerobic activities [3]. Performing the HIIT ab workout detailed in this article for 12 weeks will help improve your endurance and stamina.
Quick and Impactful
HIIT workouts are usually shorter than conventional weight training sessions as you perform each exercise for a specific length of time and rest for a short period between exercises. This training method is excellent for folks with a packed schedule.
Reduce The Risk of Lower Back Pain and Injury
Training your abs will also strengthen your lower back, reducing the risk of lower back pain and limiting the chances of injury while performing compound exercises, such as the deadlift, squat, and good mornings.
FAQs
Are HIIT workouts better than conventional ab workouts for building a six-pack?It depends on your current physique and training objectives. HIIT workouts should be favored over the conventional strength training style ab workouts if you need to burn fat while toning your abs. However, if you have a decent body fat percentage, the strength training ab workouts will help you achieve better results and a carved six-pack.
How often should I do the HIIT ab workout?Since this is a relatively long and intense HIIT ab workout, you should avoid doing it more than twice weekly. Also, you must space them out so that you have 48 hours to recover between your ab workouts.
Can HIIT ab workout help spot reduce body fat?HIIT workouts cannot help you spot reduce body fat. However, since this is an ab workout, it will help you tone your abs. Plus, HIIT workouts help you burn calories and lose overall body fat, which can reduce abdominal fat over time.
Wrapping Up
The 12 HIIT ab exercises and kickass workout detailed in this article will help you achieve a strong, defined core. This workout will be challenging, so be prepared to push yourself to the limit. Also, you must back up this HIIT ab workout with a balanced diet and recovery program to achieve your dream midsection.
This HIIT ab workout will improve your abdominal strength and definition and also boost your overall fitness level and energy. Keep your training intensity high and focus on your breathing to make the most of this workout. Best of luck!
References
Falcone PH, Tai CY, Carson LR, Joy JM, Mosman MM, McCann TR, Crona KP, Kim MP, Moon JR. Caloric expenditure of aerobic, resistance, or combined high-intensity interval training using a hydraulic resistance system in healthy men. J Strength Cond Res. 2015 Mar;29(3):779-85. doi: 10.1519/JSC.0000000000000661. PMID: 25162652.
Wewege M, van den Berg R, Ward RE, Keech A. The effects of high-intensity interval training vs. moderate-intensity continuous training on body composition in overweight and obese adults: a systematic review and meta-analysis. Obes Rev. 2017 Jun;18(6):635-646. doi: 10.1111/obr.12532. Epub 2017 Apr 11. PMID: 28401638.
Ouerghi N, Fradj MKB, Bezrati I, Khammassi M, Feki M, Kaabachi N, Bouassida A. Effects of high-intensity interval training on body composition, aerobic and anaerobic performance and plasma lipids in overweight/obese and normal-weight young men. Biol Sport. 2017 Dec;34(4):385-392. doi: 10.5114/biolsport.2017.69827. Epub 2017 Sep 20. PMID: 29472742; PMCID: PMC5819474.
Best Ab Exercises You’re Not Doing
The Most Underrated Ab Exercises You Should Be Doing
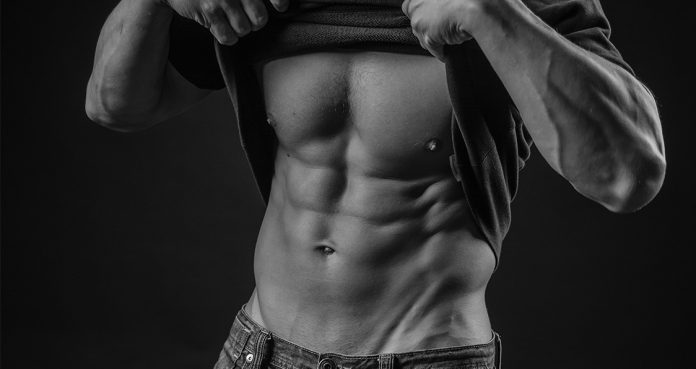
Abs are the unsexiest thing ever, said no one ever. Go around and ask people around you if they want abs. Most people will answer in a yes if they’re being honest. Over the years, a ripped set of abs has become the symbol of fitness.
Abs are one of the most desired muscles, and yet only a few people have the classic dashboard abs. Adding a few ab exercises to your arsenal can take your abdominal gains to the next level.
Reverse Crunches
Reverse crunches are the opposite of the orthodox crunches. The reverse crunches work the lower abs and can help you shed the lower belly fat and tone up the muscles. Lie down on an exercise mat with your torso facing the roof.
Place your hands under your hips and place your feet flat on the floor by bending your legs at the knees. Breathe in, lift your legs off the floor and bring your knees to your chest. Return to the starting position while exhaling and contracting your abdomen.
Landmine Twists
The obliques are one of the most overlooked muscles when it comes to ab training. The obliques are the fish gill-like muscles on the side of your abs. A set of abs can’t be deemed complete without a pair of chiseled obliques.
Place one end of a barbell in a corner so that it doesn’t move as you perform the exercise. Grab the other end with both your hands and hold it in front of your chest. While keeping your elbows locked in a position, twist your torso to your right side without turning your lower body. Return to the starting position and repeat on your left side.
Ab Wheel
Ab wheel is one of the most insane ab exercises and will set your abdomen on fire. The key to having a six pack is to have a strong core and the ab wheel can help you achieve a rock-solid midriff.
Get in position by kneeling down on the floor and holding the ab wheel with both your hands. Bend over and place the wheel on the floor so your arms are perpendicular to the floor. While keeping your core tight, roll the wheel forward until your arms and torso are fully stretched out. Return to the starting position and repeat for the recommended reps.
Decline Bench Crunches
Most people treat their ab training like accessory work and thrown in a few sets of crunches at the end of their workouts. If you want a shredded abdomen, you’ll have to prioritize ab training and add new exercises to your arsenal.
Decline bench crunches can prove brutal for your upper abs and can help unwrap the abs from underneath the fat. Sit on a decline bench, take a deep breath and go down until your back touches the bench. Return to the starting position while breathing out and repeat for the recommended reps.
TRX Knee Tucks
If you haven’t tried the TRX knee tucks, you are leaving a lot of ab gains on the table. The TRX helps in improving core stability, strength, and conditioning. We should also acknowledge the fact using the TRX looks completely badass.
Get into a planking position on the floor and place your feet inside the TRX loops. Get the help of a spotter if you’re a beginner. Your body should be in a straight line at the starting position. While keeping your core tight, bring your knees to your chest. Return to the starting position while breathing out and contracting your abs.
Header image courtesy of Envato Elements
How often do you train your abs? Let us know in the comments below. Also, be sure to follow Generation Iron on Facebook, Twitter, and Instagram.
Three Heads Are Better Than One: How To Hit Different Parts Of The Tricep
There are different ways to work the different heads of your triceps.
Three beads are better than one, right? Before I continue get your mind out of the gutter, as I am obviously referring to the tricep muscle. As the tricep is composed of three heads.
It is comprised of the long head, the lateral head and the medial head.
Now let’s look at each head in more depth:
Long Head
The long is attached to the shoulder and elbow joints (hence the long head), and is located at the back of your arm.
Best Workouts:
The optimal workouts for the long head would be exercises that consist of a full range of contraction and with the arms overhead, so the best workouts would be overhead extensions and skullcrushers.
Lateral Head
The lateral head is the most visible and sits on the outside of your arm.
Best workouts:
The optimal workouts would be the ones with your arms by your side with a pronated grip (overhand). So exercises such as bench dips, cable extensions, kickbacks and overhand grip press downs are ideal.
Medial Head
This is the least visible of the three and sits lower down than the long head closer to the torso.
Best Workouts:
The optimal workouts would be ones with the hands by your side with a supinated grip (underhand), so exercises such as reverse grip press downs would be best suited.
Now some exercises will undoubtedly target more than one head at one time, so exercises such as skull crushers actually target the long head and lateral head, and exercises such as close grip bench press, kickbacks, press downs (pushdowns) and even diamond push ups will actually hit all 3 heads.
So now you know how the triceps are broken down, and below I have listed a series of exercises that will ensure all 3 heads are hit during your next triceps workout.
Close Grip Bench
Now this is a multi joint (compound) exercise that will hit all 3 heads and will allow you to build up more strength as you can go heavier.
Tip: Position the hands approx 7-8 inches away from each other, so just a bit further apart than the centre knurl on the barbell (which is usually about 5 inches), as going too close could risk injury.
Dips
This is another compound exercise and great when done with weights (either dipping belt or dumbbell in between your feet). This will also help you build more strength and also hits all 3 heads simultaneously, with the medial head being activated at the top of the extension.
Tip: Keep the body upright, as leaning forward will put more emphasis on the chest.
Cable Tricep Pushdown/ Press Down
This exercise will hit all 3 heads, but by changing the cable attachment you can and stress to specific heads.
Tip: Do not stand too close to the cable tower, take a step away and lean forward into the pulley, and then begin your set with the arms away from the torso.
You want to make sure that your forearm and triceps are at a right angle (90 degrees) at the loading phase of the movement.
Attachment variations
Wide grip bar attachment: This grip would be a wider than shoulder width grip and would focus on the medial head.
Rope attachment: This grip would add stress to the medial and lateral heads.
Straight bar attachment: The bar will add stress on the long head of the triceps.
V bar attachment: This bar will add more stress on the lateral head of the triceps.
French Press
Some of you may think the french press is the same as the lying down tricep extension, but the difference is that the french press is done either seated or standing up, and is preferably done with an EZ bar.
The french press also targets the long head, as it is done overhead.
Tip: Try to perform the reps without shifting stress into the elbows or shoulders and do not lock out at the top of the movement.
Reverse Grip Press Down
The reverse grip press down may not be as popular but it is great for targeting the medial head.
Tip: Similar to the standard version, keep the elbow and triceps at 90 degrees at the eccentric portion of the movement and try to eliminate your elbows from flaring out.
Common Mistakes
Elbow movement:
Some common mistakes people make when doing the standard version pushdown and reverse grip press down, is too much elbow movement. Keep the elbows nice and tight and close to the body and eliminate that motion, this will allow the triceps to do more of the work.
Elbow Flare:
For overhead movements like the french press or the overhead dumbbell tricep extension or even skull crushers, minimise elbow flare, as this takes away stress from the triceps and adds more stress to the chest. If your elbows are flaring then the weight may be too heavy.
Fatiguing too soon:
Start the workout strong and start the workout with compound exercises like the weighted dips and close grip bench and then move onto the isolation moves. This will allow you to get the most from your workout.
Not Targeting All 3 heads
After reading this you have zero excuse now, so be sure to target all 3 heads of the tricep muscle, so the long, lateral, and medial are all hit.
Be sure to add the overhead and reverse grip movements into your routine.
So there you have it, by the time summer comes around your triceps should be bursting through your Generation Iron tee’s.
So until next time, keep pumping!
3 Lost Exercises Of The Golden Era That Build Guaranteed Champions
Gone, but not forgotten.
In our current day and age, a common train of thought is that newer is always better. In a fast-moving world of science and technology, 1 year is a decade, and 50 years is an ice age. But even though smith machines and state of the art ellipticals are definitely great tools in our arsenal. There’s something to be said about old school creativity.
Pioneers of yesteryear had to find a way to look superhuman by very simple means, and even fewer resources. Those old school bodybuilder and strongman exercises have seemed to have fallen out of view and out desire to have the latest smart technology has clouded our judgement. We can’t blame ourselves. Fitness tech is a booming industry and if it gets more people to work out then let’s keep thinking of these new ideas.
But for those of us looking to stick to the basics and get back to those golden era physiques, it is time to revive some of these lost exercises. Let’s take a look at 3 lost exercises from the golden era that certainly helped build muscle, create monster aesthetics, and guarantee a top spot on the podium.
3 Lost Exercises From The Golden Era
These three exercises are great for putting in your routine. You can still play around with all your machines and smart stuff, but a few of these basic exercises can enhance growth and give you a physique you want to see most.
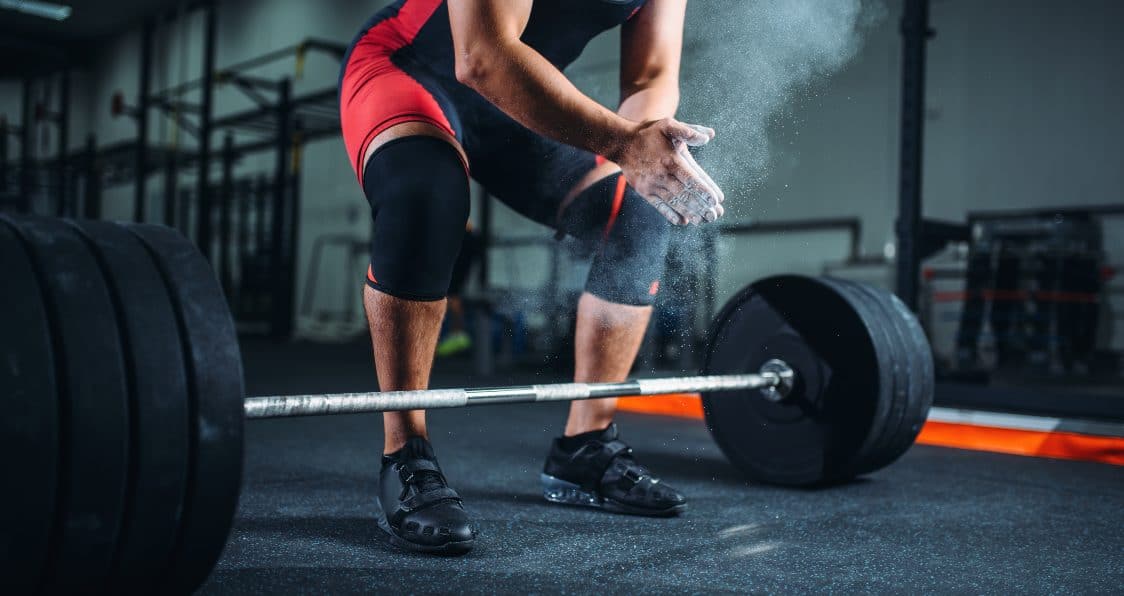
1. Pinch Grip Deadlift
Created by 1950’s Mr. Olympia winner Steve Reeves, this is the exercise he credits to widening his already wood barrel chest. The pinch grip deadlift is a great way to incorporate back, legs, and grip strength into your arsenal. Essentially, this lift is performing the deadlift but instead of holding the barbell, like normal, you hold the plates to perform the movement.
What you will find with this movement is full body engagement with a target on your upper back while also increasing range of motion, hip mobility, and your overall deadlift form.
How To: Place plates at each end of the barbell and grasp the rim of the plates. Bend at the knees, lowering the hips, and when ready, pull the weight until you stand up straight. After a short pause, return the weight to the ground by bending at the waist and knees.
2. The Spider Curls
The first ever Mr. Olympia Larry Scott loved this exercise because it helped him to further develop already big biceps as spider curls improve inside and outside of the biceps. A great isolation exercise, this will work your biceps and forearms to really increase strength and size. This is also a great exercise to perform at the end of your workouts when your muscles have hit a little fatigue and you wish to challenge them further.
What you will find with spider curls are an increase in muscle growth and better range of motion to build as much muscle as possible. Also, as an isolation exercise, these work to build symmetry to even out strength and size and aid in your overall physique.
How To: Lay on a bench at around 45-degrees with your stomach pressed on the back rest. With a dumbbell in each hand, curl the weight towards your shoulders and give a good squeeze at the top. Lower back to the starting position in a controlled motion and repeat.
3. The Double Barbell Press
One barbell isn’t enough. This exercise was first thought of by two-time Mr. Universe Reg Parker. Famous for experimenting with balance and technique, Parker developed an exercise that develops the shoulders, triceps, and pecs while improving balance and concentration at the same time.
What you will find aside from strength and muscle growth are balance and concentration, as mentioned above, as well as stability, really working to stabilize a load and use proper technique to engrain that movement into your memory.
How To: Lay with your back on a flat bench. Place your feet about shoulder width apart. Get two spotters to hand you both barbells at the same time. Press both barbells straight up in the air without losing form. If you perform this exercise improperly or with too much weight, you have a great chance of injury due to wide range of weight distribution. Start off slow and concentrate on perfect form.
Why Try New Exercises
Trying new exercises is important because your body does get used to the same movements every now and again. That is why pros will switch up their routines. If you continue to do the same exercises, without increasing in weight at that, you will find that you plateau more often and growth is severely stunted.
A training plateau is when your training stalls and there isn’t much progress to be made. Eventually your muscles get used to the same movements and you won’t see that progress you want most. To avoid training plateaus, you can perform accessory work like drop sets and supersets, both of which can really challenge your muscles and give you the best chance at growth. However, looking to those old school pros to see how they did it will also eliminate any fear of a plateau occurring.
Giving these old school exercises a try will allow you to experiment with those golden era movements that once produced champions while also allowing your body the ability to try something new to challenge your muscles. So, while sticking to the same thing is comfortable, the only way to see real gains is to be uncomfortable.
Wrap Up
There you have it. Three exercises you’re not doing that the golden era champions of bodybuilding gave you for free. Take advantage of their blood, sweat, and tears by adding these to your arsenal and step on stage with a modern yet classic physique. You won’t be disappointed with the results and you will see serious gains.
Let us know what you think in the comments below. Also, be sure to follow Generation Iron on Facebook, Twitter, and Instagram.
*Images courtesy of Envato
Best Dumbbell Exercises For Building Muscle & Toning
Build muscle and tone your physique with a great pair of dumbbells.
Using dumbbells in your routine seems to be a staple now. With so much equipment to use, we often stick to those exercises we know will build muscle and help us tone so we see only the best gains. However, with dumbbells, you will find you can really enhance every muscle with the wide variety of exercises available to you.
Dumbbells are not foreign to us, as they are a staple piece of equipment. But we often neglect to realize that dumbbells can help us tone and shape our physique. By working to counter act muscle imbalances, dumbbells are great for giving us a symmetrical aesthetic and a well-rounded physique, on top of building worthwhile muscle.
As we get into these exercises below, you may disagree with our “best of” list. That’s okay because certain exercises work better for others. If you find you ever want to change up your workouts for better growth and gains, then definitely check out some of these awesome exercises.
Let’s jump into dumbbells and take a look at what exercises really make dumbbells work to our advantage. These exercises are the best for each muscle group and will definitely take your workouts to new heights.
Benefits Of Dumbbells
The benefits of using dumbbells in your workouts are too hard to ignore. Great for training and for small spaces, dumbbells can be a game changer when it comes to building muscle and toning your physique. As convenient and versatile pieces of equipment, what you will find is something that cannot be replaced easily for what it can do for all your gains.
Benefits of dumbbells include:
Perfect for building muscle: Dumbbells are perfect for increasing muscle growth by creating time under tension and adding nice resistance to your workouts. Plus, you can always increase in weight for continued gains (1).
Adjust for strength and symmetry: You can work one arm or one leg at a time with dumbbells and this will be perfect when it comes to strength and symmetry for the ideal physique. This helps avoid any muscle imbalances (2).
Add variety and versatility to workouts: With dumbbells, you get the best of all worlds as they can be used for a variety of workouts and different exercises to challenge you. If you don’t feel like a barbell or kettlebell, then use dumbbells!
Best For Each Muscle Group
Let’s take a look at these exercises and explore what we think are the best dumbbell exercises for each muscle group. What you will find is that maybe you have different ones you enjoy best. Let us know and maybe you will change our minds.
Quads: Goblet Squat
The goblet squat is the perfect exercise to replace the barbell squat and can improve strength, mobility, and build mind-muscle connection when you do transfer over to the back squat. You will find you can really work your range of motion with this exercise.
Biceps: Alternating Bicep Curls
Of course, the alternating bicep curl is a classic exercise and one that has stood the test of time. By working each arm independently you start to build each arm to its respective size while working on symmetry. These are great during your workout, or for an end of the workout punisher to push through fatigue and build real strength.
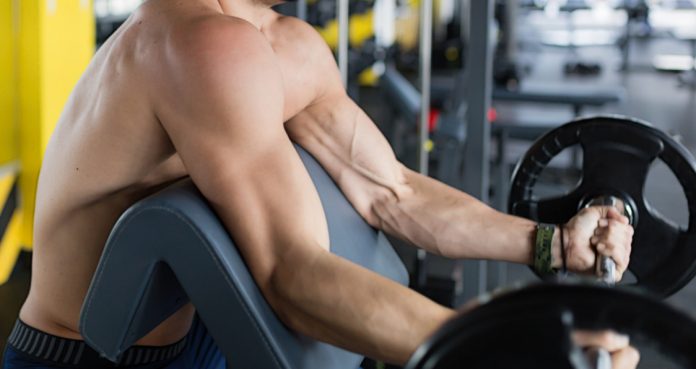
Triceps: Triceps Kickbacks
A great triceps isolation exercise, kickbacks allows you to build strength and size effectively and with ease. Not only does this build muscle and strength, but it also will enhance stability in your shoulders and arms to assist sport specific and functional movements. And you need a great triceps workout to develop that horseshoe-shaped arm.
Chest: DB Bench Press
This exercise gives you a chance to work towards chest growth in a slight variation of the traditional bench press. If anything, this exercise makes it a bit more challenging because you have to balance two dumbbells as opposed to the even feel of one barbell. You won’t lift as much weight, but you will certainly still build muscle.
Back: Renegade Rows
Renegade rows work to build upper back and lat size while improving stability. With you in the push-up position working to row each dumbbell from that fixed point, you will find your core will be challenged as well as your lats. It is important to keep your feet planted on the ground and to not rotate your trunk so as to avoid injury and also get the most out of this exercise.
Shoulders: Arnold Press
The Arnold press is one of those shoulder exercises that you must know about for it can create those boulder shoulders in no time. What you will find with this exercise is a great movement perfect for developing arm strength and size while working to achieve a nice physique. This exercise is effective, but with the twisting of the dumbbell and the load on your shoulders, stretching and being careful are essential.
Hamstrings: Romanian Deadlift
The Romanian deadlift is one to build functional ability while also building up those hamstrings so they perform better overall. A real test of balance and stability, what you will find with this exercise is something to challenge you but also be rewarding in the end. A great way to target muscle imbalance, RDL’s are your one stop shop for hamstring gains.
Check out our list of the Best Dumbbells for more great muscle building and toning products!
Wrap Up
Dumbbells and their ability to boost our workouts are not to big ignored. A necessary piece of equipment in our workouts, what you will find is serious gains can be made to each muscle group. These exercises are the best of each, in our opinion, but let us know if you have a different one. The best part is, what works for one may not work for another, but with so many options out there, we can certainly try to find them all.
Let us know what you think in the comments below. Also, be sure to follow Generation Iron on Facebook, Twitter, and Instagram.
*Images courtesy of Envato
Resources
Saeterbakken, A.; Tillaar, R.; Fimland, M. (2011). “A comparison of muscle activity and 1-RM strength of three chest-press exercises with different stability requirements”. (source)
Franettovich, M.; Hides, J.; Mendis, M.; Littleworth, H. (2011). “Muscle imbalance among elite athletes”. (source)
Top 10 Exercises For Increasing Bicep Size
Top 10 Exercises For Increasing Bicep Size
Everyone wants have some impressive guns to show off when they rip off their shirt at the beach. In order to get extraordinary looking biceps it requires hard work, dedication, and the right programming for ultimate success. This article breaks down all the requirements needed to build some awesome biceps!
Isolation Exercises for The Biceps
While the biceps are a relatively small muscle, many look to improve their appearance by increasing the size of their biceps. This is most commonly done by incorporating a number of bicep “isolation” exercises which place a maximal stress on the muscle and force it to adapt.
The biceps are a muscle found in the upper arm which are primarily responsible for flexing the elbow. It is a two headed muscle which means that the muscle originates from two different points on the scapula (shoulder blade). This therefore means that, along with flexing the elbow, the biceps assist in generating and controlling movement of the shoulder too.
With this understanding, in order to properly perform bicep isolation exercises, the movements involved with each exercise must revolve around elbow flexion, extension and shoulder rotation.
Muscular Growth Requirements
Before assessing 10 of the best bicep exercises, we must consider two major influencers in the muscle building process. To optimize the rate of muscle growth, it is essential to increase the number of calories and protein consumed in the daily diet. Failing to do so will not allow significant changes in muscle mass to be made.
Consuming more calories is the first requirement of muscle building. Calories are a unit of measurement for energy and therefore, the higher the amount of calories consumed, the greater amount of energy available for the body.
This additional energy is needed by the body to speed up the recovery process after resistance training sessions. The amount of calories required will vary from person to person as a result of sex, physical characteristics and activity levels.
Increasing the amount of protein consumed daily should also considered when looking to enhance muscle size. Protein is the macronutrient responsible for all growth and repair within the body and therefore, it also plays a crucial role in building muscle size. For those aiming to increase muscle size, the recommendation for daily protein consumption is to consume between 1.0 – 1.6 grams per kilogram of Bodyweight (1).
Only once these two factors have been put in place can physical training be considered. For building size in the biceps, a combination of compound and bicep isolation exercises should be used. Compound exercises are “big” movements which utilize many muscles whereas isolation exercises focus on just one muscle group. As suggested previously, isolation exercises are highly important for maximizing bicep development.
When it comes to strength training there are a number of factors that need to be considered, such as training frequency and training volume. Research suggests that for optimal muscle growth, each muscle group should be trained multiple times per week. By repeatedly placing a demand on the muscles of the body, they must adapt rapidly which leads to an increase in muscle strength and size (2).
Lastly, training volume is a topic that has been rigorously researched over the years – specifically the impact of heavy weight, low reps and light weight, high reps training on hypertrophy. While there are a number of differing opinions on this topic, studies indicate that both methods are equally as effective for building muscle (3). Providing training is kept regular, the method that is used to elicit hypertrophy is of little consequence.
The Top 10 Bicep Builders
As will soon be apparent, there is a lot more to bicep training than just the simple bicep curl. The following list includes exercises which manipulate the hand position and use different pieces of gym equipment to apply a stimulus to the bicep in a different way. Training doesn’t have to be boring and I hope that the following list will provide a bank of interesting and diverse bicep exercises that can be added to workouts.
Let’s begin with some barbell-based exercises…
1) Conventional Barbell Curl
Probably the most common bicep builder in the list. This barbell curl will allow the greatest amount of weight to be lifted in comparison to any other exercise. This is because a barbell forces the body into a fixed position and therefore stability becomes enhanced. Being more stable while moving through the range of any exercise will have a positive impact on performance and allow for heavier loads to be lifted.
A recent study reviewed the EMG levels during three bicep exercises and found that the barbell brought about a greater activation of the muscle than dumbbells. EMG simply refers to the electrical activity present within the muscle. Therefore, the barbell curl is extremely effective at targeting the biceps (4).
To perform the barbell curl, grab the barbell with hands approximately shoulder-width apart and stand tall with the chest up. From that position, with arms extended, pin the elbows in tight to the ribcage and focus on hinging only at the elbow. By doing so, the forearm should rise up until the hands are approximately in line with the shoulder before lowering the bar back to the starting position.
It is thought that by adjusting the width of the grip, it is possible to target different parts of the bicep. By narrowing the grip the demand will be placed more on the long head of the bicep whereas a wider grip will shift the demand onto the short head.
2) Wide-Grip Barbell Curl
Leading directly on from this, we have the wide-grip barbell curl. For comprehensive bicep development, it’s important to target the different heads equally and, as mentioned, this is a superb variation that can be used to target the short head of the bicep.
The reason the wide-grip is so effective for short head activation comes down to the biceps control over shoulder movement. By gripping the bar slightly wider than shoulder-width, external rotation of the shoulder occurs. This external rotation changes the position of the upper arm which has a direct impact on the activity of the short head.
3) EZ-Bar Curl
The final barbell-based bicep exercise is the EZ-bar curl. The EZ bar is an undulating barbell which allows the user to grasp the bar with a greater degree of comfort. The bends in the bar take away some of the tension in the wrists and forearm which can be a great help, especially when lifting heavy loads.
In the same bicep study (4), the EZ-bar was also found to activate the biceps brachii to a greater extent when compared to a dumbbell curl. Small, insignificant differences were found between the conventional and EZ curl and therefore, personal preference should dictate which variation to use.
With all barbell exercises and heavy loads, it can be tempting to use other body parts in order to get the bar up. One of the more common ways of doing this is to drive the hips through powerfully to get the barbell moving. Remember, that the bicep curl is an isolation exercise with the purpose of stressing only the biceps and, as a result, the only joint that should move is the elbow.
4) Dumbbell Bicep Curl
Next, we have dumbbell-based bicep exercises. Although the previous study suggested that the bicep curl with dumbbells may not be as effective for bicep activation, it should certainly not be disregarded. As stated earlier, dumbbells are far less stable than barbells; one of the benefits of this is that the surrounding stabilizing musculature is forced to engage in order to facilitate form.
Another positive regarding dumbbells, is their versatility. With the barbell curl, there is a limit to the number of variations that can be performed; not so with the dumbbells, as will soon become clear.
Furthermore, the dynamic of the curl can be altered by adjusting the grip used. With the dumbbell, it is possible to apply a load to the biceps in many different ways by using different grips or by manipulating the arm position. By using two individual weights, shoulder rotation can take place with exercises such as the dumbbell bicep curl. The barbell, on the other hand, only allows for a limited number of different grips and does not allow for any rotation to take place.
5) Dumbbell Hammer Curl
One final benefit that the dumbbells have over the barbell is that the dumbbells may allow for a slightly greater range of motion. With the barbell, as soon as the bar touches the hips, it can go no further. With dumbbells however, the arms can fully extend so that the weight is held by the side of the hips. This stretches out the bicep to its maximum potential prior to contracting.
The hammer position involves holding the dumbbells with a neutral grip (palms facing the hips) and requires a great deal of work from all elbow flexing muscles. This grip may allow for a more powerful contraction from the biceps and therefore, some individuals may find this variation easier to perform than the conventional curl.
6) Zottman Curl
This is potentially a new exercise for many however, it’s an extremely effective bicep developer. This is one exercise that effectively combines dumbbells and rotation. The biceps assist in the action of rotating of the forearm which explains why rotation is utilized in this exercise.
With the Zottman curl, the arms start extended down by the hips with the palms facing away from the body. A standard curl is performed until the dumbbells are elevated in line with the shoulders. A short pause is taken at that point of peak bicep contraction to allow a rotation through the shoulder to take place. Once this full rotation has occurred, the dumbbells are then lowered back to the original position and the movement repeated for the desired number of reps.
7) Dumbbell Concentration Curl
The concentration curl is an important exercise for anyone who is struggling to move only through the elbow. The technique required for this exercise involves using the knee to support the arm thus preventing the upper arm from moving back or forth. By preventing this from occurring, it is impossible to “cheat” and therefore, the biceps must complete all the work.
To complete the concentration curl, either from a standing or seated position, place the elbow on the inside of the knee. Starting with the arm fully extended, drive the dumbbell up to the shoulders and return in a controlled manner.
8) Incline Dumbbell Curl
By placing a bench on an incline and lying back on it, the elbows moves away from the side of the ribcage to behind the body. Research indicates that this change in position increases the stretch placed on the long head of the biceps (5). Additionally, the bench can be considered a useful addition as it minimizes movement from the trunk of the body and therefore may facilitate better form.
As a consequence of both of these, the incline curl is likely to be more challenging to complete in comparison to free-standing bicep curl exercises.
9) Incline Dumbbell Inner-Biceps Curl
This exercise is almost identical to the aforementioned incline bicep curl and also stretches the long head maximally. The only difference between the two exercises is the position that the dumbbells are held. For the inner-bicep curl, the dumbbells should start wider than the hips and that angle should then be maintained throughout the duration of the movement.
10) Overhead Cable Curl
The final bicep exercise moves away from dumbbells and barbells and instead uses the cables. The overhead cable curl involves adjusting the pulleys so that they are approximately in line with the shoulders. From that position, grasp the handles and ensure that the wrist, elbow and shoulder are all in a straight line, parallel to the floor. From that position, brace hard to enhance stability, and focus on powerfully contracting the biceps so that the hands come in towards the side of the head.
Final Word
Providing a calorie deficit, high protein diet and adequate resistance training are all implemented, muscles will begin to grow. Now, this is not intended to be a comprehensive list of all bicep exercises, rather the purpose was to provide a number of options to keep training interesting and the bicep growing!
For more news and updates, follow Generation Iron on Facebook, Twitter, and Instagram.
References:
1- Food Funct. 2016 Mar;7(3):1251-65. doi: 10.1039/c5fo01530h. PMID: 26797090 DOI: 10.1039/c5fo01530h
2- Schoenfeld, Brad J.; Ratamess, Nicholas A.; Peterson, Mark D.; Contreras, Bret; Tiryaki-Sonmez, Gul (2015-7). “Influence of Resistance Training Frequency on Muscular Adaptations in Well-Trained Men”. Journal of Strength and Conditioning Research. 29 (7): 1821–1829. doi:10.1519/JSC.0000000000000970. ISSN 1533-4287. PMID 25932981.
3- Schoenfeld, Brad J.; Peterson, Mark D.; Ogborn, Dan; Contreras, Bret; Sonmez, Gul T. (2015-10). “Effects of Low- vs. High-Load Resistance Training on Muscle Strength and Hypertrophy in Well-Trained Men”. Journal of Strength and Conditioning Research. 29 (10): 2954–2963. doi:10.1519/JSC.0000000000000958. ISSN 1533-4287. PMID 25853914.
4- Marcolin, Giuseppe; Panizzolo, Fausto Antonio; Petrone, Nicola; Moro, Tatiana; Grigoletto, Davide; Piccolo, Davide; Paoli, Antonio (July 13, 2018). “Differences in electromyographic activity of biceps brachii and brachioradialis while performing three variants of curl”. PeerJ. 6. doi:10.7717/peerj.5165. ISSN 2167-8359. PMC PMCPMC6047503. PMID 30013836.
5- Oliveira, Liliam F.; Matta, Thiago T.; Alves, Daniel S.; Garcia, Marco A.C.; Vieira, Taian M.M. (March 1, 2009). “Effect of the shoulder position on the biceps brachii emg in different dumbbell curls”. Journal of Sports Science & Medicine. 8 (1): 24–29. ISSN 1303-2968. PMC PMCPMC3737788. PMID 24150552.
Why Working Out Is Important to Recover After Rehab
The road to recovery is never an easy journey, whether you are a person with an injury sustained in an accident, operation or addiction. In all three of these cases having a regular workout will assist the body to heal. No, we aren’t asking you to sign on for the next marathon just yet.
It is Important to consult with your doctor before you start your routine. A doctor should be able to tell you which exercises to stay away from permanently and which ones to start off with. For example, one of the side effects of cocaine abuse is heart arrhythmia, running could cause further harm.
In the first two cases above you will need to ensure that your new exercise routine will not affect the injured part of the body. In the case of recovery from addiction, your body is already under stress from your withdrawal symptoms which can be really painful, so you don’t want to overexert yourself. If you have ever been for drug tests with urine, you know firsthand that drugs affect your entire body.
Your mind and your moods are affected. When you take drugs you’re adding a foreign chemical to your body and while it feels great at the time it wreaks havoc to your system.
Exercise can be a great way to kick start the natural chemicals for recovery in your body. Your new routine will also help your body to release the toxins faster. Having just finished rehab, creating a new routine with different forms of exercise throughout your week will also help to create a new structured lifestyle.
Exercise can be a healthy form of distraction. When cravings start, getting up and moving around will help to take your mind off it and prevent you from filling the gap with another bad habit. Eat healthy foods. Just as people who quit smoking sometimes play with pens or keep paper clips in their pockets to keep their hands busy and chew gum or carrot sticks to keep their mouth busy until the craving for a cigarette passes.
An Exercise routine is a great form of stress relief. Simple exercises can help to release feel-good chemicals, serotonin and endorphins, making you feel calmer and happier. This will help to alleviate depression. The movement will keep your body and mind engaged in the activity. The key is to try something that you will enjoy doing even if it is a little difficult at first. It builds your physical strength and reduces your risk of chronic diseases.
Exercise helps to build your confidence. How? Exercise helps to get the blood flowing to the different parts of your body. The increased blood flow will get more oxygen to your body. Your hair will start to look better. Your skin improves. Most drug users lose weight, this will be a great way to get your body looking and feeling healthy again. You have more energy. The more you exercise the more energy you have.
If you decided to join a gym, you start to make friends. You can sign up for different classes, light weight training, kickboxing, yoga, tai chi, swimming. The variety will keep you interested. Talking to people with similar interests in keeping fit and eating healthy is a great way to have a positive support circle around you. Join a running or hiking club. There are few things in the world that will make you feel as good as a walk in nature or a run on the beach.
Like I have mentioned before, it does not have to be complicated. Start simple. Try some stretching exercises.
It helps improve the quality of your sleep. One of the most important requirements for a healthy body and mind is your sleep. This should help to keep your mind clearer. Great way to burn off negative energy.
When someone goes through addiction their families go through a lot of strain and pain as well. While healing these relationships may be a long road, exercise could be a great way to reconnect. Taking family hiking trips and a picnic there after could prove to be a great relaxed environment to start enjoying each other company again. Going for a daily jog with your partner will also count as a way to reconnect and support each other through this. Trying something new together such as a dance class could be fun and exciting.
Exercise has become popular as part of the aftercare treatment. With all the benefits mentioned above, the greatest one should be, that it decreases the chances of relapse. When we have put in so much effort to start over, we all know that a moment of weakness can prove to be disastrous, but if we are feeling happier and healthier, in those moments we may turn to a better coping strategy like going to the gym or a session instead. Keep fit and keep healthy.
For more news and updates, follow Generation Iron on Facebook, Twitter, and Instagram.
Ruby J. Franke is a freelance blogger at noncouont.com and a mother. Ruby loves to read articles online and write about family, fitness, food, cooking, relationships and more.
The 10 Best Band Exercises
Best Resistance Band Exercises You Should Be Doing
The resistance band exercises are some of the most undervalued and underutilized exercises. Bands are one of the few types of training equipment which change its resistance level at different positions throughout an exercise’s range of motion.
A band will add resistance as its being extended and will reduce the added tension as it returns to the starting position. A resistance band’s variable resistance property is fantastic in improving your weak muscle groups and building explosive strength.
MORE: Check out our list of the Best Resistance Bands here!
Assisted Pull-Ups
If you’re a fitness noob and can’t do a pull-up, the baned pull-ups are an incredibly effective way of building upper body strength. You might need different types of bands for different exercises. You should reduce the band strength as you get better at the pull-ups.
Banded Push-Ups
The banded push-ups are the only push-up variation which allows you to have constant tension on your pectoral muscles throughout the movement. You can change the resistance of the bands by grabbing them at different lengths.
Bicep Curls
You could train virtually every muscle group using the resistance bands which leaves you with no excuses to ever miss a workout. The bicep curls are a simple exercise which can help in building definition in your guns.
Wood Choppers
Performing banded ab exercises can leave your midsection sore for days. Tie one end of the band at waist height to a vertical bar and grab the other end with both your hands. You should stretch out your arms to the sides at the starting point of the movement. Turn to the other side while breathing out and squeezing your abs. Return to the starting position and repeat for recommended reps.
Chest Flyes
Attach a resistance band to a pole and mimic the movement of the cable chest flyes. You should pause and squeeze your muscles with every rep while performing the exercises mentioned on the list.
Banded Leg Press
The resistance band use is limited by your imagination. You can add the bands to machines and put additional tension on your muscles. The banded leg press machine will have the highest tension at the top of the movement and the least at the bottom.
Tricep Extensions
Although the triceps is one-half of your arms, they don’t get the same love as the bis. Doing the banded tricep extensions will fill your tris with blood and lactic acid. You could perform variations like the standing, overhead, and bent over tricep extensions with the resistance bands.
Banded Bench Press
The banded bench press is an advanced exercise and should only be attempted by seasoned lifters. The resistance bands bring your core into action. As a result, your muscle stabilizers grow stronger.
Squats
In the big three compound lifts (bench press, squats, and deadlifts), you can keep one end of the band planted on the floor by tying it around a heavy dumbbell. The other end should be wrapped around the barbell.
Shoulder Front Raises
Performing the banded shoulder front raises will annihilate your anterior deltoids by keeping them under constant tension. We highly recommend adding resistance band exercises to your training routine as they can take your gains to the next level.
Which is your favorite resistance band exercise? Let us know in the comments below. Also, be sure to follow Generation Iron on Facebook and Twitter.
*Header image courtesy of Envato Elements.