Tag: exercise
Kneeling Cable Pullover Exercise Guide: How To, Benefits, Muscles Worked, and Variations
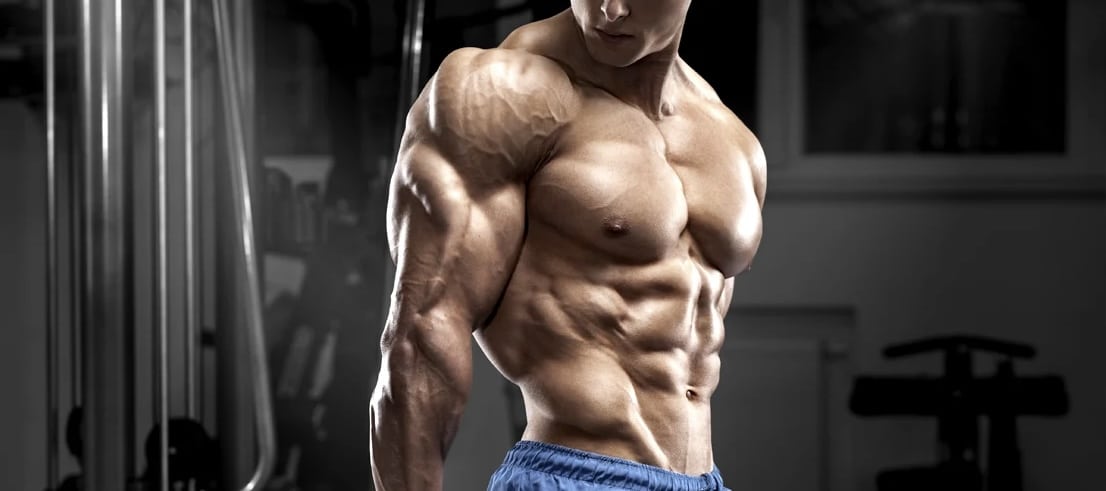
Your back is the second biggest muscle group. A developed back can take your physique aesthetics to the next level. Wide latissimus dorsi muscles can accentuate your V-taper and add to the illusion of broad shoulders and a narrow waist.
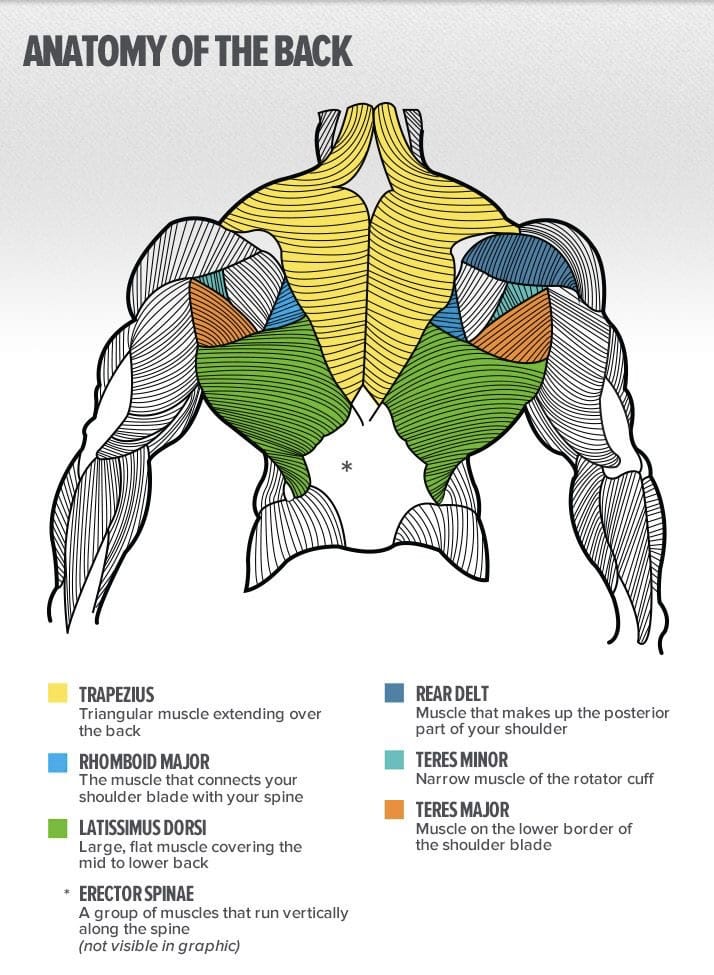
The back includes muscles like lats, rhomboids, teres major and minor, traps, and erector spinae. Horizontal pulling movements like the lat pulldown and pull-ups help improve your back width, whereas rowing movements like the cable row and barbell and dumbbell bent-over row build your back thickness.
The problem with most back training routines is that they lack isolation exercises. Compound lifts like the barbell row, deadlift, and cable pulldown will help build size and strength. Still, you cannot overlook isolation exercises as they help fix muscle imbalances and improve strength and conditioning. This is where the cable pullover variations shine.
The kneeling cable pullover is a dumbbell pullover variation that primarily targets the lats. Using a cable instead of a dumbbell allows you to maintain constant tension on your lats throughout the range of motion.
During the dumbbell pullover, when the dumbbell is above your head, there is no tension on your lats. This is, however, not the case with the cable pullover. The cable will pull on your lats even when the bar is in front of your chest.
In this article, we cover everything you need to learn about the kneeling cable pullover to step up your lat game. You’ll discover this exercise’s correct form, benefits, target muscle groups, common mistakes, and best variations and alternatives.
What is a Kneeling Cable Pullover?
The kneeling cable pullover is a dumbbell pullover variation that primarily targets your lats. Most latissimus dorsi exercises result in biceps engagement, as your biceps are involved in the pulling motion required in most back exercises.
Since your biceps are a small muscle group, they fatigue before your lats, hampering your performance and leading you to leave gains on the table. The kneeling cable pullover eradicates this problem as the movement is limited to your shoulder joint in this exercise. There is no elbow flexion and extension involved in the kneeling cable pullover, which helps limit your pythons’ role in this exercise.
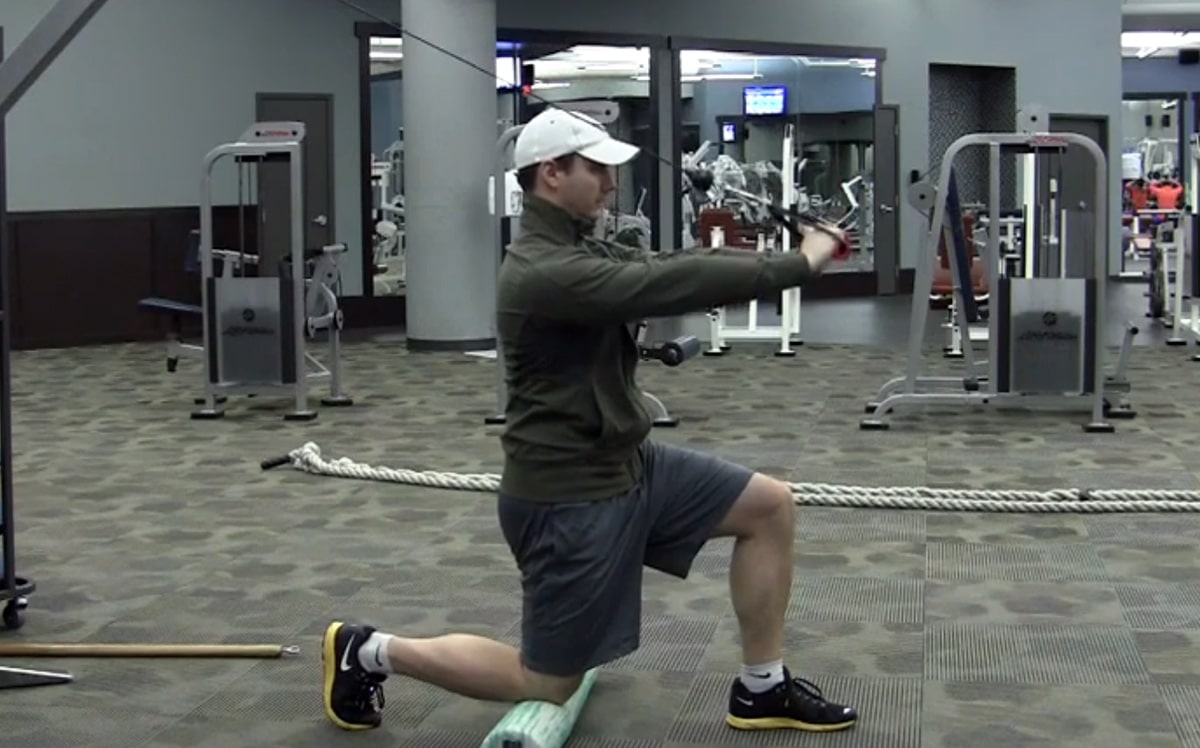
As the name suggests, the kneeling cable pullover is performed on a cable machine while kneeling. You’ll be facing away from the pulley during the exercise to achieve an optimal range of motion.
The kneeling cable pullover requires a strong core, especially if you plan to lift heavy on this exercise. We’ll also touch upon the half-kneeling cable pullover in this article, which is a preferred variation of this exercise, as its setup allows better balance and stability.
Muscles Worked During Kneeling Cable Pullover
The kneeling cable pullover works the following muscles:
Primary Muscles
The latissimus dorsi is the primary target muscle group of the kneeling cable pullover. Your lats are the primary movers in this exercise and help move your arms through the eccentric and concentric parts of the lift.
Secondary Muscles
The serratus anterior (located on the upper rib cage), triceps, shoulders, and core are the supporting muscle groups in the kneeling cable pullover. If you feel more tension in your secondary muscles than your lats, it is a sign that you’re doing something wrong and must fix your form.
Benefits of Kneeling Cable Pullover
Adding the kneeling cable pullover to your training regimen entails the following advantages:
Build a Bigger Back
The kneeling cable pullover keeps your target muscle under constant tension throughout the range of motion, resulting in better muscle stimulation and hypertrophy. You should stay in the 8-12 rep range if your goal is to build muscle mass [1]. Furthermore, since the kneeling cable pullover is an isolation exercise, it can also improve your back conditioning.
Improves Shoulder Mobility
The kneeling cable pullover involves movement at the shoulder joint. Furthermore, it stretches your lats and triceps, which are crucial in your overhead mobility. Performing kneeling cable pullovers will help achieve greater shoulder stability and control, improving your performance in compound lifts like the bench press, overhead press, and snatch.
Boosts Core Stability
Since you’ll be facing away from the pulley machine, you must keep your core engaged throughout the exercise to maintain a stable torso. You’ll also experience core stimulation during the eccentric and concentric motion of the kneeling cable pullover.
How To Do a Kneeling Cable Pullover
This is how to perform the kneeling cable pullover with the correct form:
Steps:
Set the cable pulley machine at the highest setting and attach a straight bar handle.
Grab the handle with a pronated (overhand) grip.
Kneel down half a step in front of the pulley with your back toward the pole.
Plant your toes on the floor for stability. Your torso should be perpendicular to the floor throughout the range of motion.
Your arms should be extended overhead, your hands should be over your calves at the starting position, and the cable should be taut at the start position.
While maintaining a slight bend in your elbows, pull down the straight bar until it is at your chest level.
Your arms should be parallel to the floor at the bottom.
Pause and contract your lats at the static contraction point.
Slowly return to the starting position.
Repeat for recommended reps.
Kneeling Cable Pullover Tips:
Keep your core and glutes engaged throughout the exercise for optimal balance and stability.
Sit on your heels if you have trouble maintaining a stable core while performing this exercise. However, your goal should be to build a strong core so you can do this exercise while kneeling.
Using a rope attachment in this exercise offers an enhanced range of motion.
Avoid arching your back during the eccentric (upward) motion of the exercise, as it can put unnecessary strain on your lower back.
Similarly, avoid rounding your back during the concentric (lowering) motion, as it can result in chest and ab engagement.
In This Exercise:
Target Muscle Group: Back
Secondary Muscle Groups: Shoulders, Triceps, and Abs
Type: Strength
Mechanics: Isolation
Equipment: Cable Machine
Difficulty: Beginner
Best Rep Range:
Hypertrophy: 8-12
Strength: 1-5
Common Mistakes While Performing a Kneeling Cable Pullover
Steer clear of the following lapses to make the most of the kneeling cable pullover:
Kneeling Too Far Away From The Pulley
Most people kneel too far away from the pulley. A significant gap between your torso and the pulley increases the risk of the cable rubbing into your head during the concentric (lowering) motion. Staying close to the pulley will ensure the cable misses your head.
Not Following a Full Range of Motion
You must follow a full range of motion to make the most of this exercise. Some lifters lower the bar to their neck level and stop the eccentric motion when their arms form a 90-degree angle with the floor. Limiting your range of motion will restrict your muscle fiber recruitment.
Using Momentum
Many lifters let their egos get the better of them in this exercise. They put more weight on the stack than they can handle and end up swinging their torso back and forth to lift the weight. Using momentum removes tension from your target muscle groups and puts it on your shoulders, triceps, and core. It also increases your risk of injury.
Variations and Alternatives of Kneeling Cable Pullover
Here are a few kneeling cable pullover variations and alternatives to add variety to your training regimen:
Half-Kneeling Cable Pullover
The half-kneeling cable pullover helps maintain better upper body stability as you have a better center of gravity. The steps for this exercise will remain the same as the conventional kneeling cable pullover. While performing this exercise, ensure that the upper and lower leg of the front leg is at a right angle, and the quad of the other leg is perpendicular to the floor.
Resistance Band Kneeling Cable Pullover
Folks that don’t have access to a cable pulley machine can use a resistance band to train their lats without taxing their biceps.
Steps:
Attach one end of the resistance band to an elevated object that is 8-10 feet high, such as a squat rack or a door.
Kneel down on the floor facing away from the door with the other end of the band wrapped around your hands.
Your arms should be extended overhead, and your hands over your calves at the starting position.
Brace your core and glutes, and bring your arms to your chest level.
Pause at the bottom and contract your lats.
Slowly return to the start position.
Pro Tip: Place your hands at varying distances to train your back from different angles. Alternate between holding your hands together, shoulder-wide, and in a snatch grip.
Lying Cable Pullover
The lying cable pullover is the closest you get to the dumbbell pullover while using a cable machine.
Steps:
Set the cable pulley machine at the lowest setting and hook up a rope attachment.
Set up a flat bench at an appropriate distance from the cable pulley so that the weight doesn’t rack at the bottom of the movement.
Place your upper back on the bench and your feet on the floor. You should be at a 90-degree angle to the bench.
Your hips should be as close to the floor as possible. This allows an optimal range of motion.
Hold the rope attachment with a neutral grip (palms facing each other).
Extend your arms so that your hands are over your chest.
Slowly lower your hands toward the pulley while maintaining a slight bend in your elbows.
Pause at the bottom and focus on stretching your lats.
Return to the starting position.
Pro Tip: As you get better at this exercise, you can increase the difficulty by performing it on a decline bench. The decline position helps isolate your lats better, resulting in a better mind-muscle connection.
Incline Cable Pullover
The incline cable pullover can deliver optimal lat engagement because of the lat stretch at the top of the rep.
Steps:
Set the cable pulley at the highest setting and connect a rope attachment.
Set up an incline bench facing away from the pulley. Adjust the bench’s incline to a 45-degree angle with the floor.
Lie on the bench and grab the rope attachment. Ensure that the cable is taut at the bottom of the movement.
While maintaining a slight elbow bend, pull the cable until your hands are in front of your chest.
Slowly return to the starting position.
Repeat for reps.
Pro Tip: Keep your back flat against the bench’s back pad. Arching your back and lifting your chest can result in pectoral engagement.
Straight Arm Lat Pulldown
The straight arm lat pulldown is a popular cable exercise to work the lats. It helps work your back without engaging your biceps.
Steps:
Set the cable pulley to the highest setting and affix a straight bar.
Grab the bar with an overhand grip and take a couple of steps back.
Bend your knees slightly, push back your hips, and lower your torso until it is at a 45-degree angle with the floor.
Brace your core and pull down the bar to your thighs while maintaining a slight bend in your elbows.
Slowly return to the starting position.
Repeat for reps.
Pro Tip: You can also perform this exercise while kneeling on the floor. It ensures you don’t use your lower body to generate momentum to pull down the weight.
Dumbbell Pullover
This is the OG pullover exercise. Add this movement to your exercise arsenal to build wider lats.
Steps:
Place your shoulders on a bench and your feet on the floor. You should be at a 90-degree angle to the bench.
Hold a dumbbell over your chest with both hands. Your arms should be extended and perpendicular to the floor.
Keep your hips low to the floor throughout the exercise for optimal lat engagement.
While maintaining a slight bend in your elbows, lower the dumbbell toward the floor behind your head.
Pause at the bottom.
Slowly return to the starting position.
Pro Tip: Use a barbell on this exercise to target your lats from a different angle. Also, avoid going super heavy on this exercise as the weight is directly over your head at the top. You don’t want to hit failure in this position.
Medicine Ball Slams
You probably weren’t expecting medicine ball slams on this list. However, it is a great movement to work your lats and core, as it involves explosive strength and power.
Steps:
Stand upright with a shoulder-wide stance.
Hold a medicine ball in front of your chest with both hands.
Squat down slightly to load the spring.
Lift the medicine ball overhead while extending your knees and raising your heels off the floor. Your body should be in a straight line, from hands to toes, at the top of the movement.
Use your lats, core, and arms to slam the medicine ball between your feet with as much force as possible.
Power the slam by lowering into a partial squat.
Repeat.
Pro Tip: Focus on contracting your lats in the overhead position and throwing the ball to the floor.
Wrapping Up
The kneeling cable pullover is an incredibly effective exercise to target your lats. Using a cable allows you to keep constant tension on your target muscle throughout the range of motion. This exercise will help you annihilate your lats without exhausting your biceps, which is the case with most pulling-based exercises.
We have also listed the kneeling cable pullover variations and alternatives in this article that will help you keep your training sessions interesting. Add 1-2 exercises from this list into your back training regimen for building an aesthetically-appealing back. Best of luck!
References
Krzysztofik M, Wilk M, Wojdała G, Gołaś A. Maximizing Muscle Hypertrophy: A Systematic Review of Advanced Resistance Training Techniques and Methods. Int J Environ Res Public Health. 2019 Dec 4;16(24):4897. doi: 10.3390/ijerph16244897. PMID: 31817252; PMCID: PMC6950543.

Machine Lateral Raise Exercise Guide: How To, Benefits, Muscles Worked, and Variations
What do Superman, Batman, the Incredible Hulk, Thor, and most other macho superheroes have in common? All of them have round, big, and full shoulders. You’ll never see a superhero that oozes masculinity with sloping shoulders. We’d go as far as to say that most of these heroes have a machine lateral raise in their training equipment…
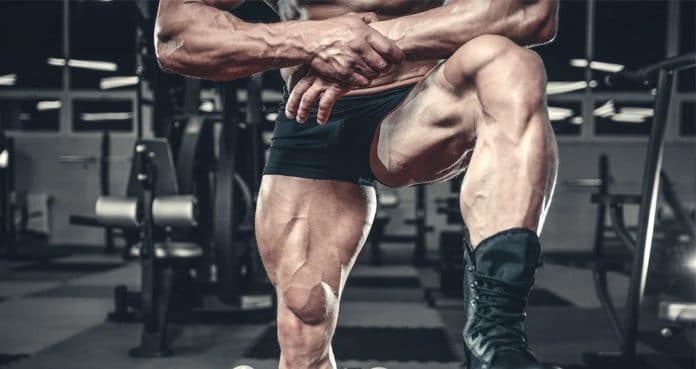
3 Better Muscle Builders Than The Barbell Back Squat
Try out these three exercises during your next leg day to replace the barbell squat!
Gym culture is oddly obsessed with impressing powerlifters. Somehow the sport of powerlifting has bled into everyday gym goers to worship the big 3 including the barbell back squat.
However, most gym goers simply want to have jacked legs.
And if you want jacked legs, you would ditch the barbell back squat for other quad builders. I know, that sounds blasphemous, but the barbell back squat is not as good of a quad builder as other exercises.
And this is not a matter of opinion. This is undeniable physiology and biomechanics. It’s like water being wet. You can’t debate it. So if you have any ounce of an open mind, let’s me explain everything to you.
How Quads Grow
For most bilateral squats, the goal is to build the quads with some glute development as well. Quads like any other muscle grow from mechanical tension, the force produced by your muscles. This is often confused with load because the barbell back squat is generally a heavy exercise, so people assume it builds tons of muscle.
However, your muscles have no idea how much weight is on the bar, nor it give a flying fairy about it. Your muscles only detect tension, so your quads can only detect the tension placed on it. Lifting heavy is great, but only if that load is applying mechanical tension across the quads.
This is why the barbell back squat is a poor quad builder for many people. Despite it’s heavy load and absolute obsession among the fitness community, the barbell back squat forces a bar over your center of mass or else you would topple over like a losing Jenga tower. Based on your mobility and limb ratios, you will likely not get much knee flexion from this position.
Knee flexion is simply a fancy word meaning the knee bend you achieve especially as your knees travel forward. Due to structural and mobility limitations, most people can’t barbell back squat deep with an upright posture without butt wink. That’s the position needed to stimulate more quad growth.
Furthermore, barbell back squatting is highly fatiguing.
So when you’re feeling dead after 2 heavy sets of barbell back squatting, that’s not because your quads are generating much muscle growth. It’s because your entire body is collecting tons of fatigue. The exercise has a deeply poor stimulus to fatigue ratio.
This is not to say it doesn’t build muscle. It certainly does, but it builds a less than expected amount for a higher price point.
Better Muscle Builders
So to build your quads, you need deep knee flexion. This position trained through a full range of motion while minimizing fatigue is far more important than total load. In fact, arguably the best exercise on this list is also the lightest.
Here’s the list starting with the front foot elevated split squat.
1 – Front Foot Elevated Split Squat
You’re essentially doing split squats with your front foot elevated. Pretty straightforward.
This exercise trains each leg individually with the rear leg for support. The position allows you to manipulate the joint angle of one leg to maximize knee flexion. In addition, it requires less mobility and will also help your lower body mobility in the hips and ankles.
For the elevation, use anything that is about 5-10 inches off the floor. Press through your entire front foot as you keep you push your knee forward and sink down with an upright or relatively upright torso down. If your knees are able to go past your toes, that’s a good thing!
Don’t listen to outdated coaches who tells you that’s bad for your knees. That’s how you build mobility and more importantly, that’s called deep knee flexion. It means your quad is actually contracting through it’s full range of motion and experiencing the mechanical tension needed to grow in size.
Start this exercise off with dumbbells. You will notice as you progress and use heavier dumbbells, they might hit the box you’re using to elevate your front foot and limit range of motion. This is where it’s best to use an elevation with minimal surface area or simply switch to having a barbell on your back.
For a barbell set up, use a squat rack. And yes, you can do split squats in a rack, not just barbell squats.
Finally, if you want even more quad growth, you can get more knee flexion by elevating the front heel.
2 – Hack Squat
It’s odd that machines get such a bad rep. Some people see barbell exercises as the meat and potatoes of a program while they describe machines as “accessories” whatever the flying fairy that means.
Ironically, the hack squat takes all the pitfalls of the traditional barbell back squat and fixes it allowing for more quad growth.
The angle and stability of the machine allows for more knee flexion without worrying about the weight folding you over. In other words, the hack squat fits everybody’s structure allowing for more quad growth. You are able to get deeper with a hack squat as well.
[embedded content]
Although, for my fellow short lifters, most hack squat machines will end at the bottom when you can still go lower. An easy fix is to slap on some yoga blocks underneath the pad to extend the range of motion.
There are also 2 setups I particularly like with hack squats. Banded and unbanded. With an unbanded version, you load the bottom stretched position more. Adding bands to the hack squat increases the resistance at the top of the movement where you’re typically stronger.
I’ve also noticed banded hack squats tend to be more joint friendly with my clients as well, but certainly train both versions.
3 – Leg Press
For whatever reason, people are sticklers about barbell back squat depth and form. If you don’t go low enough, you’re wimpy dork who didn’t squat like a man. However, all of these critics will happily slap on a billion plates on the leg press and do a bunch of reps with a microscopic range of motion.
Not to mention people leg press with bouncy uncontrolled reps. They like seeing the weight they’re lifting more than actually growing their quads.
However, if you’re serious about your leg day, doing proper full range of motion leg presses are brutal for the quads. The angle allows for a deep range of motion that will fit most people’s structure.
I like to have clients do them for both lower and higher reps. The lower reps allow for some heavier strength work which can feed a person’s ego.
Higher rep work really pumps your quads into a new dimension and skyrockets your mental strength.
A bit of an exaggeration there, but the leg press will grow you bigger quads than the barbell squat regardless of the rep range.
[embedded content]
Learning to Think For Yourself
Look, I don’t hate the barbell back squat. It’s cool and required for powerlifting. However, it has it’s major limitations that nobody talks about. People do it because they’ve been taught to without rhyme or reason. As a result, they’ve grown an emotional attachment towards it.
This is clearly the case when you tell a bro that the barbell back squat is not a great muscle builder and they’re so triggered, they’re about to have a heart attack. That scenario is more common than you think.
But anyways, you need to reassess your exercise selection if you want actual quad muscles. The type that have lines of definition, not those flabby dimensionless chunks most guys have.
5 Uncomfortable Truths About Exercise Form
The Truth About Exercise Form
Exercise form refers to the specific way of performing a movement, often a strength training exercise, to avoid injury, prevent cheating and increase strength. Before we go any further, we want to tell you that perfect form is a newbie myth.
This article is not just for fitness enthusiasts, it’s for form nazis who love exercising their fingers on their phone screens and critiquing the way people workout. We want you to take a deep breath before you continue reading as many of your previously held beliefs will be shattered.
The Perfect Form Doesn’t Exist
We’re sure, at some point or the other, you’ve heard someone talk about the perfect form of performing an exercise. The harsh truth is that there is no perfect form. Many people follow a different technique that they will advocate over others.
Forget about being perfect, instead focus on following an acceptable, competent, safe, efficient, optimal, improved, or good exercise form. The less obsessed you’re with following the perfect form, the more focused you can be on things like contracting the muscles and a mind-muscle connection.
Form Doesn’t Guarantee Safety
While it’s true a bad form increases your odds of an injury, following the correct form can’t guarantee you immunity. An injury mostly occurs when external forces exceed the tissue’s ability to withstand them.
If you’re pushing your body past what it can handle, there will be a higher possibility of you getting hurt. Irrespective of your form, you’ll be injured if you put too much weight on the bar or simply exert more force against a load than your tissues can tolerate.
It’s Not Always Pretty
Many people always say that following the correct form will make your workouts look pretty. This is as far from the truth as it can be. Your form will always depend on the weights you’re using.
You can’t expect to deadlift 800lbs with the same form you would follow during a 100lb dead. You should start with the textbook technique but shouldn’t be afraid to improvise if it causes pain or discomfort.
The Right Form is Goal Dependent
Your goal will have a big impact on your training form. A powerlifter who wants to lift as heavy as possible will bench press with a very different technique as compared to a bodybuilder looking to add on muscle mass.
Powerlifters bench press with a big back arch and lock their elbows at the top of the eccentric movement to get the three white light from the judges. Pro bodybuilders have a little-to-no arch and don’t lockout at the top. Similar differences always prevail depending on the end goal of training.
Go With What Works For You
Every individual’s body is slightly different and will respond to different exercise techniques. There are no universal forms when it comes to building muscle mass. While performing the front dumbbell shoulder raises, some people might see incredible gains by raising the dumbbells until they are parallel to the floor.
On the other hand, some people might not feel tension unless their arm is perpendicular to the floor at the top of the movement. If your goal is to build muscle, find the hardest way of performing an exercise, and you’ll experience the highest degree of muscle stimulation.
Which is your favorite exercise? Let us know in the comments below. Also, be sure to follow Generation Iron on Facebook and Twitter.
Best Kettlebell Exercises For A Massive Full Body Workout
Try these kettlebell exercises to beef up all of those full body workouts.
When we look to kettlebell exercises, there are a few that stand out. However, there are so many out there, and many including variations of traditional ones, that it is a huge disservice to neglect them. When it comes to our full body gains, sure, there are plenty of workouts available. However, it should be said that we can’t just settle for any old exercises and expect to see the best growth.
So much equipment exists that it can be hard to know what to use, and if you are working on a home gym, what to buy. But going through a bit of an inventory can be helpful as we navigate what we really need versus what we don’t. And when it comes to kettlebells, we can’t ignore what these can do.
Kettlebells are interesting for they offer a unique grip perfect for strength building and high-intensity exercise. Why this is great is it gives us a chance to enhance all areas of our gains with a versatile and convenient piece of equipment.
Let’s take a look at some of the best kettlebell exercises for each muscle group so you know how to enhance your workouts and see full body gains. We will get into the benefits of kettlebells and break down an exercise for each body part so you know exactly how best to tackle those full body gains.
Benefits Of Kettlebells
When looking at kettlebells, it is important to note the powerful benefits associated with this fitness equipment. Knowing what kettlebells can do will make you want to include them into your workouts.
Full body workout: Targets many muscle groups and increases strength, endurance, and flexibility for the best overall gains (1). With variations for each exercise, you can work for sport specific and functional results.
Promote strength & power: Improved power output for increased explosivity and increased lean muscle mass (2,3). This will enhance those other bigger lifts that require such power to complete.
Improved balance, stability, & coordination: Enhance mind-muscle connection and work to improve technique and form for enhanced coordination and stability. This doesn’t only affect our training and performance, but also every day life as well.
Simple & convenient tools: No changing weights and easy to learn for great workouts and added versatility to increase your results. As you build strength, you can start to put together a full rack of different kettlebells for a wide array come future workouts.
Best Kettlebell Exercises For Full Body Workouts
These exercises for each muscle group will provide for a well-rounded workout to increase full body gains and give you the best chance at seeing success. With kettlebells, it is important to know that variations of these exercises to exist, so if an exercise looks familiar, know that a kettlebell can make a difference in the long run.
Chest: Kettlebell Push-Ups
Kettlebell push-ups will work to challenge your grip, giving your chest a different workout while still increase strength and size. Typically what you will find are your hands spread out on the floor for better support when performing a traditional push-up. But with a kettlebell, your grip is more narrow thus working your muscles differently.
Back: Kettlebell Renegade Rows
Renegade rows with kettlebells are a great way to challenge your body when it comes to strength, stabilization, and posture. The movement of this exercise will build strength while your core needs to be braced to enhance stability. Plus, you will have the ability to press and pull better with more support for other big lifts.
Shoulders: Kettlebell Shoulder Press
The shoulder press is obviously a staple in a shoulder day routine and while this can be done with a barbell or dumbbells, it is important to know this can also be done with kettlebells. All this will do is offer a nice variation while building shoulder strength and size and enhancing your arm definition.
Biceps: Kettlebell Bicep Curl
By curling with kettlebells, you challenge your grip and develop your biceps differently. A versatile variation of the traditional bicep curl, you will find this works well to switch off sets with dumbbells for that added challenge and substantial muscle growth.
Triceps: Kettlebell Skullcrusher
This exercise variation may be unknown to you, but yes, you can perform the skullcrusher exercise with kettlebells. While this is often done with an EZ bar or a barbell, kettlebells simply give you another form of weight to try and challenge those triceps to grow.
Quads: Goblet Squat
The goblet squat is a real quad builder, but also enhances other lower body muscles as well. The kettlebell allows you to comfortably hold the weight while increasing time under tension for real growth to take place. You also start to build better mechanics for those bigger lifts as well.
Hamstrings: Kettlebell Romanian Deadlift
Romanian deadlifts are nice for building sport specific and functional movements to really fire up those hamstrings. Required with this movement is core engagement for stability and the kettlebell offers a nice grip so you can move with ease and take advantage of a full range of motion.
Core: Russian Twists
We can’t leave out Russian twists for a core exercise for these work those middle abdominals and obliques. Using a kettlebell allows you to hold weight easily while still challenging those core muscles to grow.
Check out our list of the Best Kettlebells for more great lifting and fitness products!
Wrap Up
These best kettlebell exercises will offer a great base for a full body workout and gains while taking full advantage of what a kettlebell can do for you. Using a kettlebell is a great piece of equipment to enhance gains while building both sport specific and functional movements. What you will find with these exercises are many of the traditional ones with a kettlebell twist for a worthwhile variation. Give these kettlebell exercises a try and see what they can do for all your goals today.
Let us know what you think in the comments below. Also, be sure to follow Generation Iron on Facebook, Twitter, and Instagram.
*Images courtesy of Envato
References
Kravitz, Len. “Kettlebell Research Update”. (source)
Beardsley, Chris; Contreras, Bret (2014). “The Role of Kettlebells in Strength and Conditioning: A Review of the Literature”. (source)
Manocchia, P.; et al. (2013). “Transference of Kettlebell Training to Strength, Power, and Endurance”. (source)
The Ultimate Cable Tricep Extension Guide – Benefits, Muscles Worked, and Variations
The cable tricep extension is an important exercise for any arm day!
Cable tricep extension, also known as the straight bar tricep pushdown, is one of the most common and effective tricep exercises. It is also one of the first exercises people learn to perform when they join a gym, but still, most people leave gains on the table while performing the lift.
With this article, we are going to dive deep and help you make the most of the exercise.
Cable Tricep Extension – Introduction
Chest striations and visible abs are cool, but nothing says badass like a pair of sleeve-ripping horseshoe triceps. It is no secret that biceps are one of the most-loved muscle groups. However, triceps do not get as much love as their siblings.
The reason behind the step-motherly treatment with the triceps? The bicep flex is a much easier pose to strike compared to the side chest that puts your triceps on display in their full glory.
Not focusing on the triceps is one of the most common rookie mistakes, especially if you are into bodybuilding.
Bodybuilding is a game of illusions. The bodybuilders you see on the Olympia stage are not as big as they appear on camera. Okay, Big Ramy is actually a giant, but we hope you get the point we are trying to make here.
Bodybuilders with small joints and waists, full muscle bellies, and perfect muscle symmetry look larger than life. Muscle proportionality plays a vital role in this sorcery.
Coming back to the triceps, if you lay an equal emphasis on your triceps as you do on your pythons, your arms will look bigger and more defined. And yes, you would turn heads with your front double bicep pose.
Side note: You seriously need to get over your bicep obsession.
Check Out: Best on the Planet – Triceps That Need Horseshoes of Their Own
Benefits of Cable Tricep Extension Exercise
Adding the cable tricep extension to your exercise arsenal has the following benefits:
1. Convenient and Effective in Building Muscle Mass
If you are anything like most lifters, you probably start most of your tricep workouts with the cable tricep extension. This exercise is a great way to pump your horseshoes and flush them with lactic acid at the beginning of your workout.
Besides, would you ever perform an exercise if it did not help you put on muscle mass? Oh wait, we completely forgot about the CrossFitters for a second, our bad.
2. Improves Conditioning
Compound exercises like barbell row and deadlift involve multiple muscle groups and are great for building strength and muscle mass but do little to improve your muscle conditioning.
However, since the cable tricep extension is an isolation (single-joint) lift, it helps you focus on a single muscle group at a time. While performing the cable pushdown, your goal should be to pump your triceps with blood and lactic acid and take your muscles beyond the point of exhaustion.
Doing a higher number of reps with controlled rep tempos can help you improve the conditioning of your triceps.
3. Improves Your Performance on Pressing Movements
Your triceps are responsible for elbow extension and elbow/shoulder/wrist stability in the extended position. These are key factors for a strong lockout in Olympic lifts like bench press, overhead press, snatch, clean and press, etc.
Not only this, but stronger triceps can also help you perform bodyweight exercises like push-ups and dips.
4. Offers Numerous Variations
The cable tricep extension or tricep press-down is a versatile exercise and offers the option of adding variety to your workouts by using one of the many variations it offers.
Must Read: Have Non-Existent Triceps? Use These Horseshoe Building Tricks
Muscles Worked While Performing the Cable Tricep Extension
When you extend your arm, the long, lateral, and medial heads of the tricep move together. It is also the reason why it is called tricep brachii. The literal translation for the same is “three-headed muscles of the arm.”
However, while performing the cable tricep extension (straight bar tricep pushdown), you are only working the medial and lateral heads of your tricep.
How To Perform Cable Tricep Extension
Follow these steps to perform the cable tricep extension correctly:
Attach a straight bar to a cable pulley set at the highest setting.
Stand at an arm’s length from the pulley.
Grab the straight bar with a pronated (palms facing the floor) grip.
Lean forward slightly by hinging at your hips.
Without using momentum, initiate the movement by extending your elbows.
Push down the handle until your elbows are almost locked out.
Squeeze the life out of your triceps at the bottom of the movement.
Return to the starting position with a slow and controlled motion.
Repeat for recommended reps.
Related: Chest Dips Vs. Triceps Dips: What’s The Real Difference?
Common Mistakes While Performing Cable Tricep Extension
Most people leave gains on the table while performing this exercise due to their incorrect form. The cable tricep extension might look like a walk in the part, but it can drain you out if done correctly. Here are the most common mistakes people commit while doing the lift:
1. Locking Out Elbows
While performing the cable tricep extension, you need to maintain constant tension on your triceps, and you can only do that if you do not lock out your elbows at the top or bottom of the movement.
Some lifters use the excuse (see what we did there?) that they lock out their elbows to get a proper tricep contraction. While in reality, they just lock out to give their triceps a few extra seconds of rest.
2. Position of Your Elbows
If you did not realize it yet, elbows are where the magic happens in the tricep press-downs. Make sure you are not flaring out your elbows while performing the exercise.
Keeping your elbows pinned to your sides will help you direct all the tension towards the medial and lateral tricep heads. However, letting your elbows flare takes off the tension from the target muscles and puts it on the long tricep head.
3. Leaning Forward Too Much
The position of your torso plays a vital role in cable tricep extensions. How much you lean while performing the exercise can determine the effectiveness of your set.
While some lifters stand upright while performing the exercise, the others maintain a 45-degree angle with the floor. Both these techniques are sub-optimal.
While performing the cable tricep press-down, your upper body should be at a 60-degree angle with the floor. This position gives you enough leverage to lift heavy without engaging secondary muscle groups.
4. Rounding Your Back
Rounding your back while performing the lift gives you an edge. It puts you in a position to lift heavier. At any point during the exercise, if you feel that you have rounded shoulders and you are leaning over the bar, it is a sign that you are ego lifting.
Lifting with a rounded back takes off the tension from your triceps and puts it on your shoulders. Your shoulder blades should be retracted throughout the exercise.
Related: Top 12 Triceps Building Exercises
Variations
The pulley machine gives you the freedom to use a variety of extensions for this exercise. Some variations of the cable tricep extension include:
1. Rope Pushdown
[embedded content]
Rope pushdown is probably the most famous variation of the tricep pushdown. The rope extension allows a higher degree of tricep recruitment as you can spread the rope handles apart at the bottom of the movement.
Steps:
Attach a double rope handle to a cable pulley machine set at the highest notch.
Face the pulley and stand at arm’s length from the machine.
Pin your elbows to your sides and grab the ropes with a neutral grip.
Push down the rope explosively and spread the handles apart at the bottom.
Pause and contract at this position for a couple of seconds.
Slowly return to the starting position.
Repeat for reps.
2. Overhead Tricep Extension
[embedded content]
Overhead tricep exercises like the overhead cable tricep extension primarily target the long tricep head. You could perform this exercise with a straight bar, rope, or V-bar attachment. For the sake of this example, we are going to use a V-bar.
Steps:
Attach a V-bar attachment and set the pulley around hip level.
Stand at an arm’s length from the pulley.
Grab the V-bar with an overhand grip.
In one swift motion, turn your body away from the cable station and place your arms behind your head so that your elbows are bent, and your triceps are stretched.
Keep your elbows close to your head throughout the exercise.
Lift the weight by extending your elbows.
Pause and contract your triceps at the top of the movement.
Return to the starting position with a slow and controlled motion. In the pulley exercises, the eccentric movement is as important as the concentric. Focus on contracting your triceps as you return to the starting position.
Repeat for recommended repetitions.
Must Read: THE NATURAL WAY TO FIX YOUR PROBLEM AREA: TRICEPS
3. Skull Crusher
[embedded content]
Skull crushers aka head smackers are one of the most brutal tricep exercises. Your triceps will be begging for mercy by the time you are done with this exercise.
Tip: If you are a beginner, you should not perform this exercise without a spotter.
Steps:
Sit on a flat bench with an EZ bar placed on your thighs.
As you lie down on the bench, thrust the bar to your chest.
Press the bar so that your arms are extended straight over your chest and are perpendicular to the floor.
While keeping your elbows fixed at this position, slowly lower the bar towards your forehead by bending at your elbows.
At the bottom of the movement, the bar should be a few inches off your forehead.
You could also increase your range of motion by lowering the bar behind your head.
Pause and push the bar explosively to the starting position.
Pause and contract your triceps at the top for a couple of seconds.
Repeat for recommended res.
4. Reverse-Grip Tricep Pushdown
[embedded content]
The reverse grip tricep push-down is an incredibly effective cable tricep extension alternative. Although this is a push-down exercise, it primarily focuses on the medial and long tricep heads.
Steps:
Attach a straight bar to a cable pulley set at the highest setting.
Stand at an arm’s length from the pulley.
Grab the straight bar with a supinated (palms facing upwards) grip.
Lean forward slightly by hinging at your hips.
Without using momentum, initiate the movement by extending your elbows.
Pause and contract your triceps at the bottom.
Slowly return to the starting position with a slow and controlled motion while focusing on your triceps.
The movement should look like a strict bicep curl but in reverse.
Repeat for recommended reps.
Many lifters make the mistake of lifting too heavy in this exercise. Contracting at the bottom is the key to optimal tricep recruitment in this exercise.
Make sure you have a solid grip throughout the exercise. Keep your wrists and forearms in a straight line and locked. Do not curl your wrists while performing the movement.
5. Dumbbell Tricep Kickback
[embedded content]
Dumbbell tricep kickbacks are a great exercise to isolate your medial and lateral tricep heads. Most people leave gains on the table while performing this lift by lifting heavier than they should.
Steps:
Hold a dumbbell in each hand with your palms facing in toward each other.
While keeping your knees bent slightly, engage your core and maintain a straight spine as you hinge forward at the waist, bringing your torso almost parallel to the floor.
Pin your elbows to your sides.
Keep your head in line with your spine and tuck your chin in slightly. Imagine holding an egg under your chin.
Push the dumbbell back explosively by straightening your elbows.
Pause and contract your triceps at the top.
Slowly return to the starting position.
Repeat for recommended reps.
Next Read: The Best Cable Exercises For Your Triceps
Wrapping It Up
Cable tricep extensions can open the doors to ultimate horseshoe gains. Now that you have all the tools you need to turn your twigs into venomous pythons, you need to ensure you are not half-assing your way through your workouts.
Focus on establishing a mind-muscle connection, perform the exercises with perfect form, channel the power of visualization, and soon enough, it will look like a horse kicked you in the back of your arm. Good luck!
Which is your favorite tricep exercise? Let us know in the comments below. Also, be sure to follow Generation Iron on Facebook and Twitter.
Sexercise – A Guide To Becoming a Legend in the Bedroom
Become a sex and exercise expert.
Apart from being an incredibly fun word to say, sexercise can help improve your libido and make you a much sought-after individual. Okay, the last part could be an exaggeration.
There is more to sex than most people realize. Not only does it help you have better (and more frequent) orgasms, but studies have also shown that sex can help improve your cardiovascular and immune health, intimacy with your partner, boost your self-confidence, and enhance your IQ and EQ. Oh and also, it is how humans reproduce, keeping our race from going extinct. So for the sake of humanity, get it on tonight, but only after you are done reading this article.
What is Sexercise?
As per Wikipedia, “Sexercise is a physical exercise performed in preparation for sexual activity and designed to tone, build, and strengthen muscles.”
Or as I would put it, sexercise is a physical exercise that helps you get laid and perform at your best. It also results in more satisfying sex.
The (s)exercises improve and quicken the flow of oxygenated blood, in higher and consistent amounts, along with other beneficial chemical compounds, to the genitalia. These compounds can improve fertility and your love-making session.
Related: Should You Have Sex Or Masturbate Before A Workout?
Origins of “Sexercise”
The term “sexercise” was coined by celebrity trainer Jason Rosell. He created a workout that combines exercises like squats, glute bridges, and core exercises with other strength-training moves to increase your stamina and sex drive.
The word “sexercise” could also refer to the act of using sex as a way to exercise and stay fit.
The best part about sexercise, you ask?
You do not have to be a gym rat to work on your libido. Cardio exercises like swimming, running, jogging, cycling, and even dancing (any physical activities that raise your heart rate, get your blood pumping, and bring more oxygen to your heart and body) are just as effective.
Check Out: The Anabolic Doc: The Truth About Sex Problems Post-Steroids
Benefits of Sexercise
Exercise and sex have their own benefits, but combining the two can bring you the best of both worlds. Sexercise can lead to the following benefits:
1. Improves Your Sex Life
We have all been in a position at some point (me excluding) where we wanted to try out a new position with our partner but could not simply because our bodies didn’t allow it.
There are two ways of tackling this problem. First, loosen up your body, improve your flexibility, and build strength through sexercise. Second, give up your Kamasutra subscription and settle for what you can do in the bedroom.
Certain exercises can also help strengthen the pelvic floor muscles used during sex. Kegel exercises can facilitate orgasms in the bedroom and help with urine leakage and incontinence.
Next Read: Eating These 6 Foods Will Heat Up Your Sex Life
2. Facilitates Conception
A study found that moderate to high-intensity aerobic exercises (running or walking) can be effective in combating erectile dysfunction (ED).
Couples trying to conceive often complain about sex feeling like a chore. Sexercises can help you try out new positions and spice things up under (or over) the sheets. Since sexercise can improve your overall health, it can have a positive effect on your fertility.
3. Enhances Your Immunity
Medical conditions like diabetes, depression, anxiety, and hormonal imbalances can harm your sexual function (desire, arousal, or orgasm). Sexercise can aid in fighting sexual dysfunction by improving your immune system.
Must Read: Pre Workout Before Sex – Pumps Whilst Pumping
4. Builds Strength and Endurance
Regular sexercise will advertently make you fit. As a result, it can make positions that require strength easier (think: ‘yourself on the shelf‘). At the same time, sexercise can build endurance and stamina and help you last longer in bed.
Remember, the stronger your muscles are (arms, legs, core, heart), the better your sexual performance.
5. Improves Overall Health
Both sex and exercise are known to have positive effects on your body. A landmark study found that sexual intercourse (not masturbation) can lower systolic blood pressure. That’s the first number on your blood pressure test.
Good sex life is good for your heart. Besides being a great way to raise your heart rate, sex helps keep your estrogen and testosterone levels in balance.
Check Out: These Are The Sexiest Male Body Parts As Rated By Women
6. Uplifts Mood
If you have ever had a good training or love-making session, you would agree that it is virtually impossible to walk away feeling sad, angry, or depressed. The hormones released during sexercise can help lighten up your mood.
7. Builds Connection
Last but not least, sexercise can help build and improve connection with your partner. Whether you are in the gym working out with your partner or going at it in your bedroom, sexercise can improve your bonding and intimacy.
Pro tip: Sexercise is better done with someone rather than alone – if you know what I mean.
Check Out: This Actor and Bodybuilder is Marrying his Sex Doll
The Ultimate Sexercise Regimen
Depending on your current fitness level and your goal, you can choose from the following exercises to improve your sex drive:
1. Yoga
Yoga is one of the best ways to improve your flexibility, functional movement, and core strength. We are sure you know what a little strength and flexibility can do in the bedroom.
Yoga can also help improve your balance. The best part about yoga is that you do not have to be a pro to try it. You can start with basic poses and advance to harder asanas as you gain experience.
On top of that, yogi kamasutra fans will also be less prone to cramping up in the middle of a steamy session.
Tip: The downward-facing dog pose is great for stretching and circulation, and the tree pose is good for balance. You could also try partner poses to turn up the heat.
Watch: Sex, Love & Bodybuilding: How Post-Competition Depression Affects Relationships
2. Pelvic Floor Exercises
When it comes to sex, what’s happening on the outside is just as important as what’s happening on the inside. If you want to improve your sex drive, you need to work your pelvic floor muscles.
Kegel exercises are indispensable in a sexercise routine as they strengthen your pelvic floor muscles, which support your uterus, bladder, small intestine, and rectum.
Different people have different pelvic muscle strength levels. The worst part? This strength deteriorates with age. Meaning – kegel exercises are a good option to improve sex in the long term, as they help maintain the function of these muscles.
Kegel exercises can help keep your pelvic and vaginal muscles strong and healthy. This can lead to more intense orgasms. Over and above that, the versatility of kegel exercises makes them extremely convenient. You could do them anywhere at any time, and you do not need any equipment.
Check Out: THROWBACK: Rich Piana Explains Sex and Gains
A quick How-to do Kegel guide:
Locate the right muscles while urinating.
The muscles you use to stop urine mid-flow are the same muscles you will use while performing Kegels.
Contract your pelvic floor muscles and hold for 10 seconds. Release for 10 seconds. Repeat five times.
If you cannot hold for 10 seconds at first, try holding for as long as you can and slowly build your way up to 10 seconds.
3. Cardio
Cardio workouts are great sex drive boosters as they help build stamina and endurance, something we can never have enough of in the bedroom. Aerobic exercises increase your heart rate and improve blood flow and circulation.
As a result, cardio can help an individual maintain moderate weight, improve blood pressure, boost overall physical fitness, and may help with erectile dysfunction and general sexual performance.
Cardio sexercise includes:
Swimming
Walking
Jumping Rope
Running
Dancing
Zumba
Related: 8 Factors That Can Kill Your Gains Faster Than Masturbation
4. Strength Training
Strength training sexercise can take your libido to another level.
Why is that, you ask?
Lifting your partner and throwing them around can be fun, and at the same time, taxing on your muscles.
While training for better performance in bed, you should focus on your core, arms, and hips. Adding compound movements like deadlift and bench press to your sexercise arsenal will help you be the DOM you have always wanted to be.
Some of our favorite strength training exercises for improving sex drive include:
Squats
Hip Thrust
Glute Bridge
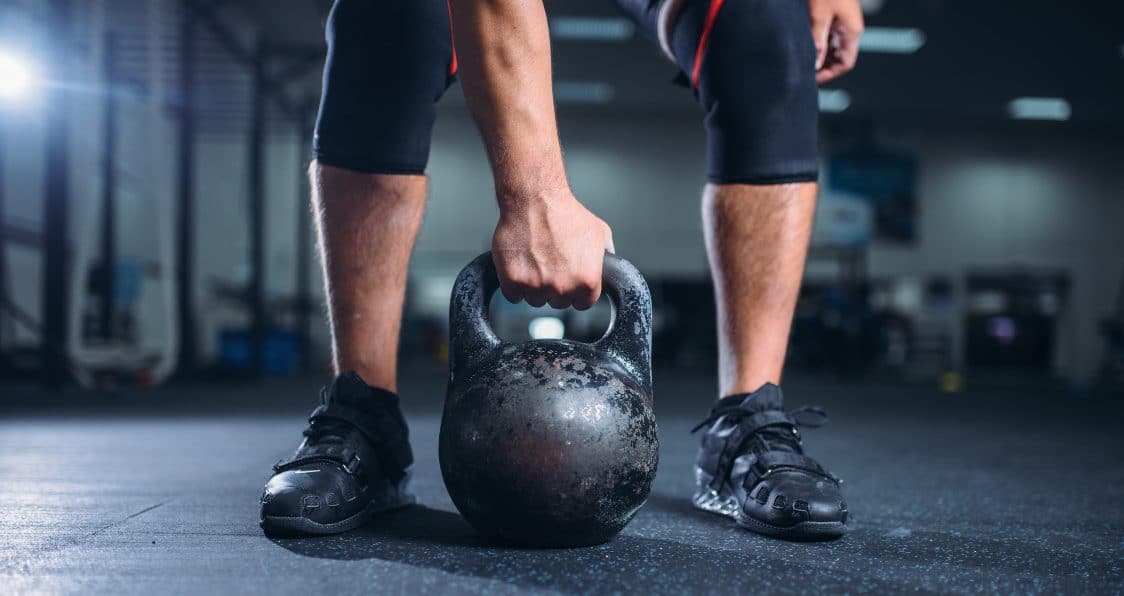
Kettlebell Swing
Bench Press
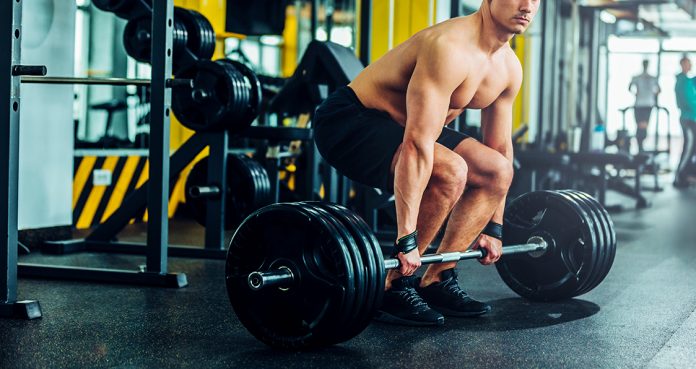
Deadlift
Barbell Bicep Curl
Related Read: 4 Awful Strength Training Mistakes You’re Making That Cost You Muscle
5. Sex
Do you remember that adage, “practice makes perfect?” Turns out, the folks knew what they were talking about.
We know what you are thinking, “but sex does not count as an exercise.”
And that, my friend, is the beauty of sex.
You can turn up the heat in the bedroom depending on the kind of intensity you want from your workout. You could turn vanilla sex into a sexercise by doing positions that are strenuous enough to help you shed calories and build muscle.
For example, one partner can lift the other, stretch to new positions, try a more vigorous rhythm, or simply have standing sex. Let your imagination run wild!
Sexercise Routine You Need To Try Today
Now that you know everything there is about sexercise, here is a routine you need to try if you want to improve your libido:
1. Running (HIIT): 10 minutes
Start your workout with a HIIT running session on a treadmill. It will get your blood pumping and prime you for the resistance workout.
Steps:
Walk at a brisk pace for one minute.
Perform an all-out sprint for the next one minute.
Repeat until you complete 10 minutes.
2. Downward Facing Dog: 5 minutes
The downward-facing dog is a great way to stretch and warm-up.
Steps:
Lie down on the floor with your wrists underneath the shoulders and your knees underneath the hips.
Curl your toes under and push back through your hands to lift your hips and straighten your legs.
Spread your fingers and ground down from the forearms into the fingertips.
Outwardly rotate your upper arms to broaden the collarbones.
Let your head hang and move your shoulder blades away from your ears towards your hips.
Engage your quads to take the burden of your body’s weight off your arms. This action goes a long way toward making this a resting pose.
Rotate your thighs inward, keep your tail high, and sink your heels towards the floor.
Exhale and bend your knees to release and come back to your hands and knees.
3. Squat: 3 sets of 12, 10, 8 reps
Make sure you are not resting for more than 60 seconds between sets. Your sexercise routine should not last more than 60 minutes.
Steps:
Stand with your feet a little wider than hip-width, toes facing front, and a barbell on your shoulders.
Drive your hips back while bending at the knees and pressing your knees slightly open.
Squat as deep as you can comfortably.
Press into your heels and straighten your legs to return to the starting position.
4. Barbell Bicep Curl: 3 sets of 12, 10, 8 reps
Strong arms go a long way during a steamy session in the bedroom.
Steps:
Stand with your torso upright and hold a barbell at arm’s length with a shoulder-width grip.
Grab the barbell with an underhand grip, so your palms are facing forward, and pin your elbows to your sides.
Exhale and lift the barbell using your forearms while keeping your elbow and upper arms stationary.
Curl the barbell until it is at your shoulder level.
Pause and contract your biceps at the top of the movement.
Slowly return to the starting position while breathing in.
5. Barbell Bench Press: 3 sets of 12, 10, 8 reps
Steps:
Lie down with your back on a flat bench and grab a barbell with a shoulder-width grip.
Get in the starting position by unracking the barbell and extending your arms forward so that they are perpendicular to the floor.
Lower the barbell by flexing your elbows until the bar touches your chest.
Reverse the motion and push the bar upwards by extending at your elbows while breathing out.
Contract your pecs at the top of the movement.
6. Hip Thrust: 3 sets of 12, 10, 8 reps
Steps:
Set up with your back against an elevated surface (like a bench or a box) with your knees bent and feet flat on the ground.
The bench should hit just below your shoulder blades, and your feet should be about shoulder-width apart. You can rest your elbows on the bench.
Place a barbell across your hips.
Keeping your chin tucked, push through your heels until your thighs reach parallel to the floor — your legs should form a 90-degree angle.
Squeeze your glutes at the top, then return to start.
7. Plank: 3 sets of 1 minute each
Steps:
Lie down in a prone position with your chest facing the floor.
Support your weight on your toes and your forearms.
Your arms should be bent directly under your body, and your upper arms should be perpendicular to the floor.
Keep your body in a straight line and maintain a tight core throughout the exercise.
Hold the position for as long as possible.
8. Kegel: (as mentioned above)
9. Happy Ending: Preferably at home.
Conclusion
Sex and exercise have a lot in common. Both can make us sweat and can lead to better health, improved mood, and increased energy levels. If you are looking to improve your sex drive, perform the sexercise workout laid out in the article once a week.
You could also switch the exercises in the article or perform variations depending on your experience level.
Which is your favorite sexercise? Let us know in the comments below. Also, be sure to follow Generation Iron on Facebook, Twitter, and Instagram.
3 No-Equipment Workouts That Will Make You Cancel Your Gym Membership
Best No-Equipment Workouts You Can Do At Your Home
“I don’t have enough time” and “gym memberships are so expensive” are probably the two most common excuses for not working out. Since you’re reading this article, chances are you too take comfort in these statements.
Some people fail to realize that they don’t necessarily need to go to a gym to workout and resistance workouts aren’t the only type of training. A solid grit is all you need to get and stay in shape.
Apart from the annihilating workouts, this article will show you that you don’t need fancy equipment to build the physique of your dreams, and that complicated isn’t always better when it comes to working out.
In this article, we’ll give you three different workouts that you can do at your home or on the move. The muscle pumps at the end of each of these workouts will make you wonder if you ever need to step inside a gym again.
Out of the three workouts, one will be an outdoor session, and the other two can be done inside a room. This program is designed to keep your muscular and cardiovascular conditioning in top shape.
Workout 1 – Run For Your Life
Run – 0.5 Miles
Lunges – 10 Each Leg
Jumping Jacks – 25 Reps
Circuits – 3 | Time – 15-20 Minutes
Remember, this isn’t one of your leisure runs. Each exercise on this list is meant to be done with the highest intensity possible. After you run half a mile, keep your hands on your sides and start performing the lunges.
Get into the jumping jacks as soon as you’re done with the lunges. Rest for a minute and start the circuit again until you’re done with the three rounds. Not only do you need to complete the number of reps, but you also need to do them within the time mentioned.
Keep a stopwatch running and if – god forbid – you’re not able to complete the workouts within the time target, your punishment is to do one additional round. Make sure you don’t compromise on your form while performing the exercises.
Workout 2 – The Rep Attack
Pushups
Squats
Situp
Burpees
Step-Ups
Reps – 10, 9, 8, 7, 6, 5, 4, 3, 2, 1 | Time – 20-25 minutes
The second training session is a rep pyramid workout. You’ll start the workout by performing ten reps of each exercise in the first circuit. The second round will have nine reps, eight reps in the third and so on until you perform one rep of each exercise in the last circuit.
You will not stop for rest between exercises. However, you’ll be taking a 30-second breather after completing each circuit. This is a great workout to do anywhere. You pack in a ton of quality work – 55 reps of 5 different exercises – and perform the entire workout in one spot.
Workout 3 – Make The Time Count
Skier Abs – 30 Seconds
Jump Squats – 30 Seconds
Diamond Pushups – 30 Seconds
Mountain Climber Twist – 30 Seconds
Touchdown Jack – 30 Seconds
Circuits – 3 | Time – 15-20 Minutes
Time will be the focus of the third workout. You’ll be performing each exercise for the time mentioned in front of it. As with the other two workouts, you can take a 30-second break after completing a circuit and nothing in between.
The workout should get harder as you get into the second and third circuits. Make sure you’re not compromising on your form. If you’re a beginner, you can perform the high plank leg lifts in place of the skier abs and Russian twists instead of the mountain climber twists.
How often do you circuit train? Let us know in the comments below. Also, be sure to follow Generation Iron on Facebook and Twitter.
*Header image courtesy of Envato Elements.
Close Grip Lat Pulldown For a Cobra Back: Techniques, Benefits, and Variations
Close grip lat pulldown is a great back workout and here is a closer look at the exercise!
Close Grip Lat Pulldown is a variation of the lat pull down. In this exercise, you target your back differently compared to the traditional variation by keeping your hands and arms close together. Although the close grip lat pulldown primarily works your lats, you will experience a decent amount of bicep and middle back activation.
But why do we need close grip lat pulldown when we already have the orthodox exercise, you ask?
Since your back is the second largest muscle group (after your legs), you need to perform a plethora of exercises and variations to train it optimally and ensure overall development. So, do not be afraid of experimenting with several different hand positions and angles to maximize your back gains.
Due to its versatility, the close grip lat pulldown can be incorporated in your back, upper body, pull, and full-body workouts.
Next Read: The 6 Best Exercises for Annihilating Back Fat for Men and Women
Muscles Worked
Since the lat pulldown is a compound movement, it works multiple muscles, including:
Lats: No points for guessing here. As the name suggests, latissimus dorsi (lats) are the primary target muscles of the close grip lat pulldown.
Biceps: Although the lat pulldown is primarily for your back, secondary muscle recruitment, especially the biceps, is unavoidable.
Shoulders: If you follow the correct form (discussed below), you will experience shoulder recruitment at the top and bottom of the movement.
Upper Back: While the close grip lat pulldown is essentially for your lats (flat muscle covering the width of your middle and lower back), you cannot factor out upper back stimulation.
Abs: People who think there is no core engagement during the lat pulldown have never gone heavy on the exercise.
Check Out: Build A Thick and Wide Cobra Back With This Workout
Benefits
The close grip lat pulldown is an incredibly effective exercise for:
1. Building Bigger and Stronger Lats
Compared to the traditional lat pulldown, the close-grip version offers an increased range of motion as your elbows are relatively closer to your body throughout the exercise. Holding the bar with a close grip allows you to pull the bar slightly further than you could while holding the bar with a wider grip.
The increased range of motion maximizes your lat contraction at the bottom of each rep resulting in a higher degree of muscle tissue recruitment and stimulation. The additional workload helps build wider, bigger, and stronger lats.
Must Read: Isolation Vs. Compound Exercises: Strength, Weight Loss & More
2. Improving Your Posture
Our current lifestyle, especially with the onset of WFH, has us bent over our computer screens or phones for the majority of the day. This posture causes underuse of your lats and other muscles resulting in slouching, pain, and tension in your shoulders and back.
Close grip lat pulldown helps strengthen your posterior chain and reduces the chances of developing a hunch. The exercise can also help treat your pre-existing slouching posture.
Related: Top Tips & Stretches For Improved Posture With Don Saladino
3. Helping Build a V-Taper
Well-developed lats help carve the much sought-after V-taper. A solid V-taper amplifies the illusion of a small waist and broad shoulders, making you look bigger and stronger than you actually are IRL.
Watch: How To Truly Develop A Bodybuilding V-Taper
4. Great For Beginners
The lat pulldown is an easy exercise to perform. It is, for a reason, one of the first exercises a newbie learns to do when he joins a gym. The lat pulldown is a godsend for individuals who lack the upper body strength to do a pull-up.
How To Perform Close Grip Lat Pulldown
Step by step instructions of how to perform a close grip lat pulldown:
Attach a wide grip handle to the lat pulldown machine.
Adjust the thigh pad so that your legs fit snuggly under the cushion.
Grab the handle at slightly narrower than shoulder-width with a pronated (overhand) grip
Get into the starting position by unracking the weight and locking your legs under the thigh pad.
Start the movement by depressing your shoulder blades and flexing your elbows while extending the shoulders. Keep your chest raised and your back arched throughout the movement.
Pull the handle toward your body until your elbows are in line with your torso.
Bring the attachment as close to your upper chest as possible.
Pause and contract your lats at the bottom of the movement.
Return to the starting position with a slow and controlled motion.
Repeat for recommended reps.
Common Mistakes
Although the close grip lat pulldown is a fairly simple exercise, most lifters make the following mistakes:
1. Using Momentum
Many lifters make the mistake (read: sin) of utilizing momentum to lift the weight. If you look like a pendulum while performing the exercise, you are doing it wrong.
If you cannot move the weight without leaning back more than 20-degrees, you should drop the weight (and your ego). Swinging back and forth takes off the tension from the primary muscle (lats) and puts it on the helping muscles.
Also, when you are using more weight than you can handle, you will not be able to pause and contract your lats at the bottom of the movement, leaving gains on the table in the process.
Watch: When Ego Lifting Goes Wrong
2. Going Too Low
This mistake is mostly made by people who use relatively easy weight.
It is the mirror opposite of the first mistake mentioned above. Overdoing the range of motion takes away the tension from the target muscles and puts it on your joints.
As mentioned above, you should not be going below your upper chest level while performing the close grip lat pulldown. If the weight feels too easy, contact your lats for longer at the bottom of the movement, instead of overdoing the ROM.
3. Using Your Arms
We understand that it is virtually impossible to eliminate your arms from the exercise, but you need to have a strong mind-muscle connection so that your back gets the most work done.
If you feel your biceps are taking over the exercise and your back is underactive, you should consider using a false grip. In a false grip, you do not wrap your thumbs around the bar. It is also called a monkey grip.
Pro tip: Focus on pulling the bar towards your body using your elbows. Leading with your bis will leave you with nothing more than a bicep pump.
Related: Full Range Of Motion Vs Partials: Which Is The Way To Go?
4. Body Posture
Many lifters tend to round their backs as they bring the bar down. Hunching over the bar elevates the tension off your back and puts it on your shoulders.
While performing the close grip lat pulldown, ensure that your lower body is locked under the knee pads.
Pro tip: Do not place your feet flat on the floor. Keeping your heels raised ensures a better fit under the thigh pads.
Variations
“I know more exercise variations than I will ever need.” – No one ever
Utilizing exercise variations can help target your muscles differently and induce growth by shocking your CNS.
Here are some of the most effective close grip lat pulldown variations:
1. Underhand Close Grip Lat Pulldown
In this variation, you will be grabbing the bar with a supinated (palms facing you) instead of a pronated grip. The underhand close grip lat pulldown is great for targeting your lower lats.
Note: You might experience a higher degree of bicep recruitment in this variation.
Steps:
Sit facing a lat pulldown machine and grab the bar with an underhand grip.
Pull the bar towards your upper chest while leading through your elbows.
Keep your elbows as close to your body as possible while pulling the bar down.
Pause and squeeze the life out of your lats at the bottom of the movement.
Slowly return to the starting position and repeat for recommended reps.
Also Read: Chris Bumstead Back Workout For A Sprawling Christmas Tree
2. V-Bar Lat Pulldown
[embedded content]
The V-bar pull-down is commonly mistaken for the close grip lat pulldown. The neutral hand placement in this variation can aid in alleviating stress placed on your shoulders during the vertical pulling movement pattern.
Holding the bar with a hammer grip is an excellent option to improve the center of your back while still targeting your lats.
The V-handlebar lat pulldown variation brings your hands closer to each other and, hence, allows a larger range of motion and better contraction at the bottom of the movement.
Note: While performing this variation, you will have to lean back slightly more than normal to allow for a full range of motion.
Steps:
Attach a V-bar to the lat pulldown pulley.
Grab the handle with a neutral (palms facing each other) grip.
While keeping your chest raised and back arched, pull the bar down until it is a few inches away from your upper chest.
Pause and contract at the bottom.
Return to the starting position slowly and repeat for reps.
Must Read: Chris Bumstead Back Workout For A Sprawling Christmas Tree
3. Behind the Neck Lat Pulldown
Behind the neck variation of the lat pulldown is slightly harder to execute as compared to the traditional version, especially for people with a limited range of motion in their shoulders and rotator cuffs.
Most lifters who incorporate behind-the-neck lat pulldown in their back training routines report a better range of motion in their lats and a deeper contraction in their lats and middle back at the bottom of the movement.
Caution: The risk of injury is higher with behind-the-neck lat pulldowns. If you are a beginner, consider starting with a lighter weight and a higher number of reps.
Steps:
Attach a wide bar to the lat pulldown machine.
Sit with your back towards the lat pulldown machine and your lower back supported against the thigh pad.
Grab the bar with a wider than shoulder-width pronated grip.
Pull down the bar using your elbows until it nearly touches the back of your neck.
Pause and contract at the bottom.
Slowly return to the starting position and repeat for reps.
Tips:
Keep your head pointed forward slightly throughout the exercise.
Do not use momentum and bring the bar down too fast as it can lead to an injury.
Check Out: The Ultimate Guide to a Ripped Back
4. Single Arm Lat Pulldown
The single-arm lat pulldown is an incredibly effective unilateral exercise. The benefits of unilateral movement include:
Helps correct muscle imbalances
Improves core stabilization
Boosts sports performance
Reduces chances of an injury
Improves muscle recruitment and stimulation
Allows you to train around an injury
Improves mind-muscle connection
Develops motor skills
Steps:
Attach a D-handle to the lat pulldown pulley.
Reach up and grasp the handle with a neutral grip (palm facing in).
Keep your chest raised and your back arched throughout the movement.
With your working arm fully extended, lean back 10–15 degrees.
Squeeze your shoulder blades together, take a deep breath and pull the handle to your upper chest, focusing on the lats and pulling your elbow back and down.
Pause and contract at the bottom.
Slowly return to the starting position and repeat for reps.
Related: The Benefits Of Unilateral Training & Why It Matters
5. Pull-up
It does not matter who you are, what you do, or where you live, pull-ups should be a part of your training routine. No exercise comes close to helping you build a V-taper as the pull-up.
Steps:
Start with your hands on the bar approximately shoulder-width apart with your palms facing forward.
With arms extended above you, stick your chest out and curve your back slightly.
While breathing out, pull yourself up towards the bar using your back until the bar is at chest level.
Slowly lower yourself to the starting position.
Repeat for recommended repetitions.
Tip: If you are a beginner and cannot complete a bodyweight pull-up, you could use an assisted pull-up machine, a spotter, or a resistance band.
Next Read: These Machines Are Better Than Free Weights
Conclusion
When it comes to building a solid back, most lifters limit themselves to rows and deadlifts. The close grip lat pulldown is a great exercise to amp up your back and should be a part of your exercise arsenal.
At the same time, do not get stuck with a single exercise. Maximize your results and build a venomous cobra back by alternating between the variations mentioned in the article.
Which is your favorite back exercise? Let us know in the comments below. Also, be sure to follow Generation Iron on Facebook and Twitter.
The Ultimate Landmine Row Guide: Benefits, How To, and Variations
The landmine row is a classic exercise to build a strong back.
The landmine row is an incredibly effective exercise to work your upper body. It is a compound exercise that can help you build strength and add muscle mass to your back.
Your back is the second largest muscle group (after legs). To train it optimally and ensure overall development, you need to perform a variety of exercises to ensure optimal muscle fiber recruitment.
Since you only need a barbell for the landmine rows, you could do it even in a bare-bone gym. The anchored barbell also allows you to get maximum contraction and muscle fiber recruitment in your back while performing the exercise.
What is a landmine?
If the information above has you sold on the benefits of landmine rows but has left you wondering if you would be walking blindfolded across a landmine-ridden field, do not fret. We have got you covered.
To set up a landmine row, you could:
Place a weight plate at one end of the barbell to anchor it to the floor.
Anchor the barbell in the corner of a wall or squat rack in your gym.
Use a piece of specialized equipment like a landmine tube.
Ask your training partner to step onto the other end of the barbell while you complete your set.
Must Read: How The Landmine Press Boosts Strength Training
Muscles Worked
Since the landmine row is a compound (multi-joint) life, it engages multiple muscles, including:
Rhomboids
Teres Major & Teres Minor
Erector Spinae
Posterior Deltoid
Trapezius
Infraspinatus
Latissimus Dorsi
Brachialis
Brachioradialis
Biceps Brachii
Lower Pectoralis Major
Benefits
1. Allows a Bigger and Controlled Range of Motion
Since the barbell is anchored at one end while performing the landmine row, the other end moves at an angle. The angle of the bar allows you to apply force vertically and horizontally. You use a steady, controlled speed to move the barbell in a natural arc instead of in a straight line.
Since the bar follows a natural arc, you will feel more in control while performing the lift and might experience greater muscle fiber recruitment and better muscle pumps as you’ll be able to hold for longer at contraction points.
But why is that, you ask?
Because…
2. Changes in “Strength Curve“
The strength curve of an exercise refers to how “heavy” an exercise is at different points. While using a regular barbell, you will experience the same amount of force whether you are holding it one foot or five feet off the ground. The landmine, however, varies at different points.
When you first lift a landmine off the ground (do not try this in a war-infested zone), it is a horizontal movement, and so you are fighting against gravity – making the movement harder in the process.
However, as you go further up, the weight moves in an arc, increasing the slope. Meaning – Even though there is the same amount of weight on the bar, the higher the bar is, the “lighter” it will feel.
Related: How The Horizontal Row Enhances Solid Back Development
3. Great For Beginners
Since the landmine row has a pre-defined pattern of movement, it makes it easy for beginners to perform the exercise with the correct form. And because the bar moves in an arc, it increases your shoulder stabilizer muscle recruitment which can be very hard to achieve for a noob in exercises like the barbell or dumbbell row.
Check Out: 5 Tips For A Weight Room Beginner
4. Improves Muscle Balance and Stability
The landmine row can be easily adapted into a unilateral exercise which can help improve your muscle imbalances, core stability, and overall body balance.
Related: The Benefits Of Unilateral Training & Why It Matters
5. Reduces Chances of Injury
The landmine row is a great alternative for people with pre-existing back issues as it allows a greater degree of freedom to work around your injuries.
This exercise also places less pressure on your shoulders and spine as compared to the barbell or T-bar row.
Must Read: 4 Golden Rules You Need To Follow To Lift For Decades Injury-Free
Technique
This is how to perform the landmine row correctly:
Secure one end of a barbell in a corner or a landmine attachment.
Load appropriate weight on the free end.
Face away from the anchor point and stand near the shoulder of the other end.
Stand over the barbell with one foot on either side with a slightly wider than shoulder-width stance.
Bend down and grab the barbell with both hands.
Hinge at your lower back and push your hips back as you lower your upper torso until it is at a 30-40 degree angle with the floor.
Slightly bend your knees and keep your back straight. Maintain this position throughout the exercise.
Take a deep breath and brace your core.
Pull the barbell towards your chest while leading with your elbows.
Focus on pulling back your shoulder blades as you elevate the bar.
Pause and contract your lats at the top of the movement.
While exhaling, return to the starting position with a slow and controlled motion.
Repeat for recommended reps.
Pro Tip: You could also use a V-handle bar attachment in this exercise as it can help you get a better grip on the bar.
Common Mistakes
Here are some of the most common mistakes that lifters commit while performing the landmine row:
1. Bending Too Low
Many gym-goers overdo the movement by bending over way too much. Bending over too low has a couple of drawbacks:
You cannot lift heavy as your center of gravity is off. This is a major setback as optimal back training requires both volume and intensity.
Makes your lower back vulnerable to an injury.
On the other hand, some lifters do not bend over at all. You need to be at a 30-40 degree angle with the floor to train your target muscles effectively.
Related: 7 Common (But Lethal) Fitness Mistakes You Need To Avoid
2. Flairing Out Your Elbows
Bodybuilding requires optimal muscle fiber recruitment and annihilation that you can only achieve through a solid mind-muscle connection.
If you flair out your elbows while performing the landmine row, you will not be able to contract your shoulder blades and lats at the top of the movement. Keep your elbows as close to your body as possible to make the most of the exercise.
3. Incorrect Back Posture
You need to ensure that you maintain a neutral spine throughout the exercise. Most lifters either make the mistake of arching their back or worse – hunching over.
The most common reason for a bad form is excessive use of weight. If you cannot maintain a neutral spine or cannot bend over to the 30-40 degree mark, you should drop the weight (and your ego) and try again.
4. Not Trying New Things
Apart from trying advanced training techniques like dead stops, intraset stretching, and varied TuTs, the anchored barbell allows you to try many variations to train your back from different angles. This point is also a perfect segue into…
Variations
Trying different variations and alternatives of the landmine row is a great way to ensure you never hit a plateau. Here are some variations that you need to try in your next back workout:
1. Parallel One-Arm Landmine Row
Since unilateral exercises allow you to focus on one side at a time, they are a great alternative if you are dealing with muscle or strength imbalances.
Steps:
Anchor a barbell in a corner.
Stand on the right side of the barbell so that your left foot is a few inches away from the bar.
Assume a shoulder-width stance.
Hinge at your hips and bend over while maintaining a neutral spine until your torso is at a 30-40 degree angle with the floor.
Grab the shoulder of the barbell with your left hand and place your right elbow on your right knee to help stabilize your lower back and pelvis.
Take a deep breath and pull the bar towards your chest.
Pause and contract at the top of the movement.
Return to the starting position slowly while breathing out.
Repeat for recommended reps before switching sides.
2. Meadows Row
[embedded content]
This variation was made famous by the late, John Meadows. Although the Meadows row primarily targets your back, it also challenges one’s grip and indirectly targets the bicep.
Steps:
Position a barbell in a landmine attachment or the corner of a wall.
Stand at one end of the barbell so that your body is perpendicular to the bar.
Assume a split stance with the inside leg back and the outside leg forward.
Bend forward until your chest is just above parallel to the floor.
Grab the bar with a pronated grip.
Begin the movement by driving the elbow behind the body while retracting the shoulder blade.
Pause and contract your lat at the top of the movement.
Return to the starting position.
Repeat for recommended reps before switching sides.
Pro Tip: In the Parallel One-Arm landmine row and Meadows row, you could also use a bench to add variety to the exercise. Using a bench reduces your core engagement and allows you to focus on contracting your lats and shoulder blades during the movement.
3. Inverted Row
Inverted rows are one of those exercises that look super easy but will have you running on fumes by the time you are done with them – or they are done with you.
Steps:
Stand in front of a squat rack or Smith machine.
Set the bar at the desired setting. If you are a beginner, consider setting it at your waist height as it will allow your arms to fully extend while keeping your body off the floor.
Get under the bar and grab it with a pronated shoulder-width grip.
At the start of the movement, your body will be suspended or just off the floor, with your heels being the only body part in contact with the floor.
Contract your core and glutes and pull yourself up, leading with your chest.
Your body should remain in a straight line throughout the movement.
Pause and contract for a second at the top of the movement and ensure that your shoulder blades are retracted (imagine squeezing a small ball between the shoulder blades) before slowly lowering to the starting position, with your arms fully extended.
Repeat for recommended reps.
4. Seal Row
Seal row is an isolation exercise that will take your back gains to the next level.
Steps:
Elevate a flat bench by placing an aerobic step under each side.
The height of the bench should be adequate so that the weight plates do not touch the floor when your arms are fully extended.
Grab the bar with an overhand grip, slightly wider than shoulder-width apart.
Inhale and pull the bar towards your abdomen.
Pull the bar until it touches the underside of the bench.
Pause and contract your shoulder blades and lats at the top of the movement.
With control, lower the bar back to the starting position.
Repeat for recommended reps.
Related: T-Bar Row Your Way To A Cobra Back: How-To, Muscles Worked, and Variations
5. Pendlay Row
[embedded content]
Developed by Olympic weightlifting coach Glenn Pendlay, the Pendlay row is a bodybuilding exercise that activates muscle groups throughout your body—including your lats, rhomboids, biceps, glutes, hamstrings, and rear deltoids.
Steps:
Stand upright in front of a barbell with a shoulder-width stance.
Hinge at your hips and begin to bend your hips and knees to lower your body toward the barbell.
Grab the bar with an overhand grip and engage your back muscles by rotating your shoulders outward.
Maintain a flat back and keep your chin tucked throughout the movement (as if you were holding an egg under your chin).
Initiate the upward movement by squeezing your lats and pulling the barbell toward your lower chest. Keep your elbows as close to your body as possible.
Pause and contract your lats at the top of the movement.
While maintaining your rowing alignment, straighten your elbows and allow the barbell to travel back toward the floor until the weight plates contact the ground.
Pause for a second at the starting position.
Repeat for recommended repetitions.
Next Read: Annihilate Your Workout with These Landmine Exercises
Conclusion
The landmine row is an effective back builder and should be a part of every lifter’s exercise arsenal. Switching up your time under tension and rep tempos while performing the exercises mentioned above will give you enough variations that will keep you busy for a long time.
Which is your favorite back exercise? Let us know in the comments below. Also, be sure to follow Generation Iron on Facebook and Twitter.