Tag: forearm exercises
The 30-Day Arm Challenge for Dramatic Size & Strength Gains
Big arms demand immediate respect.
They are the body’s “show muscles,”; the most frequently displayed part. So the faster we can add size to our biceps, triceps, and forearms, the better.
However, most lifters fail to grow their arms. You might be one of them.
Are you having trouble making your forearms bigger? Have your biceps reached the height of their potential? Are you unable to get that amazing triceps horseshoe out?
What’s needed is an intervention — a short, sharp arms shock that will leave your bis, tris, and forearms no choice but to respond.
This 30-day arm challenge is designed to do just that.
Understanding the Arm Muscles
The arms consist of the following three muscle groups:
Biceps
Biceps Anatomy
The biceps brachii muscle comprises two heads — long and short. The short head originates higher than the long head on the scapular. The radius, or forearm bone, is connected to the one tendon that traverses the elbow joint and receives both the long and short heads.
The biceps are responsible for extending the elbow. They also have a small impact on shoulder flexion, which occurs when the arm extends in front of the body.
Triceps
The triceps is situated behind the biceps, on the upper arm. The biceps and triceps are opposing muscle groups so that when one contracts, the other relaxes. Since its purpose is to straighten the arm, any exercise that requires you to do so while facing resistance will engage your triceps.
The triceps muscle has three heads:
Medial
Lateral
Long
The region immediately below the side of the shoulder is known as the outer or lateral head. This head gives the arm a thicker, more robust appearance when fully developed and originates at the shoulder socket on the scapula. The long and medial heads originate at the top of the humerus, or upper arm. The triceps tendon is attached to the olecranon process of the ulna, the bigger of the two forearm bones, where all three heads of the triceps insert.
When completely developed, the triceps give the back of the upper arm a horseshoe shape.
Forearms
The muscles of the forearms can be divided into four groups:
Flexors
Extensors
Rotators
Extrinsic muscles
The flexor muscles are located on the side of the palm. The extensor muscles are on the side of the back of your hand. The forearm rotators supinate the hand, rotating it externally. They also pronate it to move in internally.
The fingers are moved by very small muscles divided into extrinsic muscles on the forearm and intrinsic muscles in the hand itself.
The forearm is capable of six actions. These are:
Wrist Flexion
Wrist Extension
Wrist Abduction
Wrist Adduction
Forearm Supination
Forearm Pronation
Should Women Train Their Arms Differently?
No, women should not train their arms differently from men. Men and women should not only perform the same forearm, biceps, and triceps movements, but they also shouldn’t use different rep ranges. In the past, women have been advised to tone their arms by using those lovely pink lightweight dumbbells and focusing on high repetitions. That counsel, however well-intentioned it may have been, will not produce the outcomes that most women desire.
Any lady I have ever met with strong, athletic arms has managed to lift what seemed like a heavy object to them. These women’s lack of testosterone, rather than their training methods, was the main reason their arms didn’t get bulky.
The musculature of men and women is the same despite our hormones being different. As a result, this 30-day arm challenge is just as effective for women as it is for men.
30-Day Challenge Overview
The 30-day Arm Challenge is divided into four 7-day phases as follows:
Strength A
Hypertrophy A
Strength B
Hypertrophy B
Strength and size go hand in hand. You can’t have one without the other. Each week you will develop greater arm strength to propel muscle growth. You will train each body part (biceps, triceps, and forearms) twice to thrice weekly.
Let’s now drill down on each of the four training phases:
Phase One: Strength
Rep ranges: 4-6 & 6-8
Focus: Strength development / Balanced strength across arm muscles
Rep Style: Straight sets
Main Stimulus: Central nervous system
The exercises selected for this stage are those that most people struggle with. As a result, you can improve your arm strength and balance, preparing you for the hypertrophy phase.
You will gradually increase the weight with each set during each strength phase. Your final set will be the heaviest weight you can lift while maintaining perfect technique. As a result, if you are performing eight reps, a ninth rep would be impossible for you to complete with good form.
Phase Two: Hypertrophy
Rep range: 10-12, 12-15, 15-20
Focus: Muscular development (hypertrophy) / targeting muscle heads
Rep Style: Tri-sets
Main Stimulus: Muscular system
The goal of Phase Two is to build the various muscle heads. Tri Sets are a part of your Phase 2 exercises. You perform these three exercises back-to-back. You can rest for 10 seconds between exercises and 120 seconds before your next round.
Phase Three: Strength
Rep ranges: 3-5 / 5-7
Focus: Strength development / Balanced strength across arm muscles
Rep Style: Straight sets
Main Stimulus: Central nervous system
During your second strength phase, you will lower your reps slightly from Phase One. Your body has already adapted to the 4-6, 6-8 rep range, so you need to go lower to continue getting stronger. You will be alternating between biceps and triceps exercises over four exercises. Rest between sets ranges between 60 and 120 seconds.
Phase Four: Hypertrophy
Rep range: 12
Focus: Muscular development (Hypertrophy) / targeting muscle heads (double emphasis)
Rep Style: Supersets
Main Stimulus: Muscular system
During this phase, you will double down on a particular muscle head by performing supersets (i.e., Scott curls and prone incline curls for the short biceps head). This forces the body to recruit maximal muscle fibers. After each superset, you will rest for 90 seconds. The workout will consist of a bicep superset (A1 & A2) followed by a triceps superset (A3 & A4). Then, move on to your second biceps superset (B1 & B2) and a final triceps superset (B3 & B4).
The Workouts
Here’s what the workout split for the four phases looks like for this 30-day arm challenge:
Strength A: Days 1-8
Hypertrophy A: Days 9-16
Strength B: Days 17-23
Hypertrophy B: Days 24-30
You won’t train your arms daily, as it can lead to over-training. Instead, you will train them every 48 hours. Recent research shows this is the ideal time frame for optimal hypertrophy and recovery. [2]
Here is an overview of your training days:
Day 1
Workout One
Day 2
Day 3
Workout Two
Day 4
Day 5
Workout Three
Day 6
Day 7
Day 8
Workout Four
Day 9
Day 10
Workout Five
Day 11
Day 12
Workout Six
Day 13
Day 14
Workout Seven
Day 15
Day 16
Workout Eight
Day 17
Day 18
Workout Nine
Day 19
Day 20
Workout Ten
Day 21
Day 22
Workout Eleven
Day 23
Day 24
Workout Twelve
Day 25
Day 26
Workout Thirteen
Day 27
Day 28
Workout Fourteen
Day 29
Day 30
Workout Fifteen
Phase One Workouts: Days 1-8
Your phase one workout consists of a pair of superset exercises that have you alternate a biceps and triceps exercise. Moving between the superset exercises should take you at most 10 seconds. That means you must have each exercise set and ready to go before you begin your workout. Rest for 90-120 seconds between supersets.
Superset A
Optimized Exercise Form:
Preacher Cable Curls:
Take an underhand grip on the barbell or EZ curl bar before settling into a preacher curl bench position. Your chest and upper arms should be in touch with the arm pad once you adjust the seat.
Keeping your chin tucked the entire time, extend your arms down the pads with a slight bend in the elbows. Keep your wrists in a neutral position and use a relaxed grip.
Squeeze your biceps and bend your elbows to start the upward movement while keeping your upper arms in touch with the arm pad. Lift until your shoulders are in line with the barbell or EZ bar.
Squeeze your biceps in the top contracted position.
Slowly straighten your elbows to bring the barbell back to the beginning position.
Close-Grip Bench Press:
Lay down on a flat bench with your feet planted on the floor. Grab a barbell with a grip that is just inside your shoulder width.
Unrack the bar.
From a starting position with the bar hovering above your chest, slowly lower the bar to your lower chest while keeping your elbows close to your body.
Press the bar firmly back up to the starting position.
SuperSet B
Close-Grip Chin-Ups: 4 x 8,6,6,4
Dips: 4 x 8,6,6,4
Forearms:
Reverse Curls: 3 x 12,10, 8
Optimized Exercise Form:
Close-Grip Chin-Ups
Reach up and hold the bar with a supinated grip and your little fingers about six inches apart.
Pull your chin up to and over the bar by pulling with your biceps and back.
Holding your arms in the highest contracted position, squeeze your biceps as hard as possible for a two-second hold.
Lower back to starting position under control.
Dips
Grab parallel bars with a neutral grip, then lift yourself until your arms are completely extended. Maintain an upright body position with straight legs.
Now, descend by bending your elbows to bring your torso toward the floor (do not allow your elbows to flare out to the side).
Push through the triceps to return to the start position.
Reverse Curls
Stand with your feet shoulder-width apart and a pair of dumbbells held at arm’s length with a pronated grip in front of your thighs.
Maintaining a neutral spine and keeping your elbows at your sides, bring the weights up to shoulder level.
Lower under control and repeat.
Phase Two Workouts: Days 9-16
Your phase two workout consists of a pair of tri-sets. Moving between each exercise in the tri-sets should take at most 10 seconds. Rest for 120 seconds between tri-sets.
TriSet A
Alternate Dumbbell Curls: 3 x 20/15/10
Tricep Pushdowns: 3 x 20/15/10
Incline Dumbbell Hammer Curls: 3 x 20/15/10
Optimized Exercise Form:
Alternate Dumbbell Curl
Hold dumbbells at your sides with your palms facing inward towards your thighs while standing with your feet shoulder-width apart.
Turn your right wrist to the front while keeping your elbow at your sides. Curl the weight up until your bicep is fully contracted.
Lower under control reversing the wrist motion so that your palms face your thighs in the bottom position again.
Repeat with the other arm.
Tricep Pushdown
Stand in front of a high pulley cable with a rope attachment. Hold the bottom of the rope handles with your elbows pinned to your sides.
Your hands should be at mid-chest level at the start position. Extend your arms down and slightly outward to fully extend the triceps.
Return to the start position under control and repeat.
Triceps Kickbacks
Grab a light dumbbell in your right hand and stand with your torso at a 45-degree angle and your left hand resting on your thigh.
Fully extend your right arm back from the starting position.
Revere and repeat, making sure not to use momentum to lift the weight.
TriSet B
Skullcrusher: 3 x 20/15/10
Barbell Curl: 3 x 20/15/10
Triceps Kickbacks: 3 x 20/15/10
Forearms:
Zottman Curl: 3 x 20/15/10
Optimized Exercise Form:
Skullcrusher
Lie on a flat bench with your feet firmly set on the floor. Hold a pair of dumbbells in your hands and hold them above your chest. Angle your arms slightly toward your head.
Keeping your elbows in, bend at the elbows to slowly bring the weight down and over your head. Do not move the position of your upper arms as you lower the dumbbells.
Press through the triceps to return to the start position.
Barbell Curls
Grab a barbell with your hands at shoulder width.
Keeping your elbows at your sides, bring your forearms up while squeezing your biceps. Contract as strongly as you can in the top position.
In that position, your knuckles should be at the level of your shoulders.
Now, slowly lower the bar to the start position. This eccentric portion of the rep should take twice as long as the concentric lifting portion.
Zottman Curls
Stand with your feet shoulder-width apart and a pair of dumbbells held at arm’s length with a neutral grip.
Supinate the dumbbells during the eccentric motion. Your palms should face the ceiling when your hands are at your chest level.
Rotate your hands into a pronated (palms down) position.
Slowly lower the dumbbells to the start position.
Rinse and repeat.
Phase Three Workouts: Days 17-23
In phase three, you will do straight sets. Your total focus is on lifting maximum weight with perfect form. Rest as long as needed between sets to fully recover for the next set. At this stage, you should use a dip belt to add poundage to your bodyweight exercises.
Close-Grip Bench Press: (warmup 15 reps) 4 x 7,5,5,3
Close-Grip Chin-Up: 4 x 7,5,5,3
Barbell Curls: 4 x 7,5,5,3
Dips: 4 x 7,5,5,3
Reverse Wrist Curls: 4 x 12, 10, 8, 8
Optimized Exercise Form:
Reverse Wrist Curls
Sit on the edge of a bench with a pair of dumbbells held with a palms-down grip. Your hands should be about eight inches apart. Rest your forearms on your knees with your wrists hanging over the edge of your knees. Make sure your forearms are parallel to each throughout the movement.
Extend your wrists down all the way as you allow the dumbbells to roll down your fingers.
From the bottom position, flex your forearms to bring the dumbbells back to the start position.
Phase Four Workouts: Days 24-30
Your phase four workouts consist of nine exercises. They are divided into four supersets, two each for biceps and triceps and a standard set for forearms. Rest for 90 seconds after each superset.
Superset A1
Preacher Cable Curls: (warmup 15 reps) 4 x 12
Incline Dumbbell Curls: (warmup 15 reps) 4 x 12
Optimized Exercise Form:
Incline Dumbbell Curl
Set the angle on an incline bench to 45 degrees.
Grab a pair of dumbbells and sit on the bench with your arms hanging at your side.
Rather than starting with your arms hanging down in a fully vertical or neutral position, begin the exercise with your forearms about 10 percent from the vertical position. Your palms should be facing the ceiling.
Flex at the elbow to bring the right-handed dumbbell to the shoulder; contract the bicep in the top position.
Lower under control, again stopping 10 percent short of full extension.
Repeat with the left arm and continue alternating to complete your rep count.
SuperSet A2
Single-Arm Triceps Pushdown: 4 x 12
Reverse Dips: 4 x 12
Forearms:
Farmer’s Walk: 3 x 20 paces
Optimized Exercise Form:
Single-Arm Triceps Pushdown
Attach a single-handle attachment to a high pulley cable.
Stand in front of the pulley, facing it. Grasp the handle in your right hand and hold it at chest level with your elbows at your sides. Adjust your positioning so that the cable is taut in the start position.
Extend your arm and contract your triceps.
Reverse the motion to return to the start position, keeping your elbow at your sides.
Reverse Dips
Position yourself in front of a chair with your palms resting on the chair seat and feet on the ground about two feet in front of it. Your hands should be about six inches apart and your knees bent.
Lower your body toward the floor by bending at the elbows, going down all the way.
Push through the triceps to return to the start position.
Farmer’s Walk
Grab a heavy pair of dumbbells off the rack and hold them at arm’s length by your sides.
Walk around your workout area, taking 20 paces away from the dumbbell rack and then returning. This should take 3-60 seconds.
Replace the dumbbells on the rack.
SuperSet B1
Close-Grip Chin-Up – (warmup 15 reps) 4 x 12
Alternate Cable Curls – (warmup 15 reps) 4 x 12
Optimized Exercise Form
Alternate Cable Curls
Set the cable pulleys at their lowest level.
Stand in front of the machine, facing away from it, and grab the cable handles.
Adjust your position so the cables are taut, with your arms slightly behind your torso and elbows at your sides.
Flex the right elbow to curl your hand up to your shoulder. Squeeze the biceps tightly in the top position.
Lower under control and repeat with the left arm.
Alternate sides to complete your rep count.
SuperSet B2
Close-Grip Bench Press: 4 x 12
Triceps Push-Ups: 4 x 12
Optimized Exercise Form:
Triceps Push-Ups
Get down in the standard push-up position, but with your hands together under your body so that your thumbs and first fingers are touching. The gap between your hands will form a diamond shape.
Maintaining a tight core and a straight line from head to toe, lower your chest to the floor.
Push back to the start position.
30-Day Arm Challenge Nutrition
You will never grow your arms unless you eat a personalized nutrient-dense diet. Your body can only work with the building materials you provide it. Even if you are following the best arm workout on the planet, you will not add a single gram of muscle to your body without creating the right sort of caloric surplus.
Your workout places stress on your muscles. The type of workouts in this program will cause micro-tears in the muscle fibers. As a result, when you walk out of the gym, you will be weaker and smaller. Only when you feed the muscle with the protein and carbs needed to repair the micro-tears in your muscle fibers can you benefit from all your hard work. Besides repairing the muscle, your body will add a little bit more size to the muscle fiber to meet a similar challenge in the future.
You must create a daily caloric surplus to give your body the nutrients needed to build muscle. That means you are taking in more calories than you use.
To determine how many calories you need, multiply your body weight by 20. So, a 180-pound guy needs to consume 3,600 calories to give his muscle cells the building blocks for creating new mass.
Those 3,600 calories should be divided into six meals of equal size and spaced around three hours apart to get the most benefit from them. Each meal should have 50% carbohydrates, 30% protein, and 20% healthy fats as its macronutrient ratio. Aim for one gram of protein per pound of body weight.
These are the best protein sources to include in your mass gain diet:
Eggs
Dairy products
Whey protein powder
Lean beef
Chicken breast
Lean pork
Fish
You should also be consuming generous servings of these starchy and fibrous carbohydrates:
Potatoes
Yams
Brown rice
Corn
Pumpkin
Broccoli
Asparagus
Brussels sprouts
Cauliflower
Maintaining Your Gains
The week after you complete the 30-day arm challenge, you should take a break from training your biceps. Then follow a periodization program where you spread out each training phase from a week to a month. Here’s how it will look:
Month One: Hypertrophy 1
Month Two: Strength 1
Month Three: Hypertrophy 2
Month Four: Strength 2
Take a week off from training at the end of the second and fourth phases. You can follow this periodization program continuously to make ongoing gains.
Myths Around Arm Training
Several persistent myths surrounding arm training must be wiped away before every lifter can get the best bang for his lift. Let’s put straight the four most common arm workout fallacies:
Myth #1: You Can Build Arms with a Partial Range of Motion
Everywhere you look, whether in your local gym or on YouTube, you see guys doing partial reps, usually with weights that are far too heavy for them. Make no mistake; this is not a smart way to train. You need to work a muscle through its full range of motion for full development and maximum strength.
Myth #2: Standing Barbell Curls Are All You Need
The standing barbell curl has been the go-to exercise for the biceps since the beginning of organized weight training. As a result, you see a lot of guys rely on it as their sole bicep builder. That, however, is a mistake. Barbell curls allow you to use a lot of weight but have limitations. They do not allow for grip supination to target the different heads of the biceps.
When it comes to the triceps, a lot of guys spend their time on exercises of dubious value that do not allow for much weight, such as triceps kickbacks, when they could be doing moves that allow for a lot of weight, like close grip bench press and dips.
The bottom line is that you do not want to rely on just one or two exercises for arm development – variation is a must for overall development.
Myth #3: It’s All About the Weight
The standing barbell curl has got to be the most abused exercise in the gym. The reason is simple — people try to impress others with how much weight they can curl. As a result, they use so much body swing and momentum that their biceps are getting no stimulation at all.
Don’t be like those guys — leave your ego behind and focus on perfecting your exercise form and increasing your strength. Remember, 5 pounds curled perfectly is much better than 10 pounds with a bad form.
While we’re on the subject of weight, progressive overload should be gradual. So, rather than jumping from a 10-pound to a 15-pound dumbbell on the curl (a 50% increase), look to add just a single pound on the next set (a 10% increase). If your gym has microplates, you can make jumps of just 1-2%, which is even better.
Myth #4: You Can Wing It
The old saying that those who fail to plan, plan to fail is as true on the gym floor as anywhere else. You cannot turn up and train by feel if you are serious about getting results. Instead, you should record every exercise, set, rep, and weight in a training journal. That will allow you to know exactly how many sets, reps, and pounds to target on the next workout.
Most Common Arm Training Mistakes
There is generally no shortage of enthusiasm when it comes to arm training. There are, however, many common mistakes that tend to hold people back from getting anywhere near achieving their potential. Here are three of the common arm training mistakes and what to do about them:
Over-Reliance on Isolation Exercises
Which exercise will get you to bigger arms faster, curls or chin-ups? Pushdowns or triceps dips?
When you encounter someone who trains frequently but has poor arm development, they are usually weak for their body weight in the fundamental heavy compound pulling and pushing exercises.
All exercises can be divided into two main groups — isolation (single joint motions) or compound (gross motor activities). Compound movements often involve two joints, whereas isolation movements only involve one. Curls are single-joint exercises solely using the elbow, whereas chin-ups are compound exercises using both the elbow and the shoulder. Compound movements are the type of exercise that contribute the most to muscle growth. So, you won’t be able to add inches of thick, powerful muscle if you don’t focus on getting stronger at challenging pulling and pushing exercises like chin-ups or presses.
Lack of Arm Training Frequently
In the early stages of weight training, before drugs and protein powders, the training methods differed significantly from those employed today. They worked out their entire bodies three to five days a week, including their arms. Nowadays, training a body part more than twice per week is uncommon. In fact, the most popular bro split involves working out one body part per day and then working out every body part once weekly.
The introduction of steroids is credited with starting the tendency to train body parts sparingly. After bodybuilders began using steroids, training more than once weekly became unnecessary. All they had to do to gain muscle was pound a muscle group long and hard once every week. But for the vast majority of natural lifters, this simply does not work.
You transmit a signal to your muscles to grow when you lift weights. This signal can be measured using a process known as “muscle protein synthesis.” According to studies, this signal increases significantly after exercise, peaks at around 24-48 hours, and then rapidly declines. It reaches baseline and even deviates from baseline after 48 to 72 hours. [1]
This is not a concern for steroid users, but it is for natural lifters. Additionally, studies reveal that the duration of this muscle-building signal decreases with expertise. Only 14 hours may pass with an elevated signal for advanced lifters. You need to frequently send that muscle-building signal if you are like most participants in these trials. Maybe even every day. Sounds simple enough, but if you train and pound your arms daily, the cumulative damage will make you extremely sore, swollen, and over-trained. So, how can we circumvent this issue?
By adjusting the intensity.
Start by exercising your arms thrice weekly at a relatively high intensity. On these days, work out hard, but don’t lift to failure; instead, stop one or two reps shy of it. Divide the volume you currently perform for your arms each week into three workouts.
For most people, this translates to 12–21 sets overall per week for each muscle. For instance, if your objective is to complete 12 sets over the week, perform four sets on Mondays, Wednesdays, and Fridays.
Allowing Workouts to Get Stale
The saying “everything works, but nothing works forever” is certainly true when it comes to gaining muscle. No matter how great your training plan, exercise, and rep range, your body will eventually stop responding. People who find themselves in this scenario frequently increase the intensity or make minor adjustments, such as concentrating more on muscle contractions. They usually end up hitting the dreaded training plateau.
Unless you regularly alter your programming, your body won’t be able to build muscle consistently. Although switching up your workouts is crucial, switching up your rep range is even more important. Most rep ranges are beneficial for gaining muscle, but training in each one is a completely distinct experience.
Consider contrasting sets of 20 reps with sets of doubles. Both rep ranges create muscle, although being very different. Low reps (1–5 reps), moderate reps (8–12 reps), and high reps (15–20 reps) are the three main rep ranges for gaining muscle. Each one of them has been shown to increase muscle mass.
Use low rep ranges to maximize the development of grinding strength, use the low rep ranges. The traditional bodybuilder rep range for muscular development is the moderate rep range. In research, the 8–12 rep range consistently produces the highest muscle growth when other rep ranges are compared head-to-head. Most people undoubtedly get trapped in this rep range for this reason, and after being locked for a few months, their muscles cease reacting.
When used in a cycle with other rep ranges, going as high as 30 reps, this rep range is fantastic. Workouts with this rep range may seem like marathon sessions. They produce the craziest skin-bursting muscle pumps, but they are also draining. Remember that up to 70% of your arm’s volume consists of fluid and non-muscle fiber components. By increasing the ability of your arms to hold more non-muscle fiber structures and fluids, they will grow bigger if you train them to produce insane pumps with high reps. Start with a single rep range, then switch to a different range after a few weeks. Each time, observe how your arms respond.
Key Arm Training Principles
Here are five principles that need to form the foundation of your 30-day arm challenge:
1. Intensity + Volume
Many people who want to focus on arms development are relatively weak in terms of their arm strength. As a result, they cannot lift enough weight to build bigger arms consistently. You will not progress unless you combine intensity with volume.
2. Variety
If you repeatedly do the same thing, your body will adapt and stop responding. As a result, periodization has been a part of organized weightlifting from the beginning. That is why you must switch between intensification (strength work) and accumulation (hypertrophy work).
3. Targeted Stimulation
The key job of the arm muscles is elbow flexion and extension. The elbows flexors consist of four muscles:
The brachialis
The brachioradialis
The pronator teres
The bicep brachii (long head + short head)
Each of these muscles responds differently to stimuli. For example, the brachialis responds better to force, while the brachioradialis responds better to speed. Changing the grip also changes the focus of the exercise. A pronated grip targets the brachialis, while a supinated grip hits the biceps brachii. Even though the exercises may seem similar, they have a very different effect on the arm muscles.
4. Prioritization
To prioritize your arm development, you must train them at the beginning of the week. This applies to your training week cycle and your specific workout. So, arm training should be on Day One, and you should train your arms first during that workout. That way, you can pour all your training energy into your arm workout while you are fresh.
5. Progressive Overload
When you work a muscle, the stress leads to micro tears within the muscle fiber. Proper nutrition and rest allow the muscle to get bigger and stronger to meet that stress in the future. So the muscle can meet the previous stress level in the next workout. Unless you add extra stress in the form of either more weight or reps, it will not be overly stressed, and the micro-tears that lead to growth will not occur.
Read also: Progressive Overload: The Science Behind Maximizing Muscle Growth
Bonus Section: How To Improve Arm Vascularity
Nothing says badass like a pair of big and vascular arms. Vascularity refers to the clearly visible veins running throughout the body. A vast network of veins crisscross your body. These veins are typically not visible as they are covered by body fat that lies underneath the skin.
The pinnacle of fitness is having a muscular body that is also vascular. It announces that you are in excellent physical condition with little body fat. Of course, there are a lot of folks who have never set foot inside a gym but have visible veins. Some people are genetically predisposed to develop insane vascularity. There are also several medical problems that increase a person’s vascularity.
Even if you were born on the wrong side of the veiny genetic pool, there are definitely things you can do to improve your vascularity:
1. Reduce Your Body Fat Percentage
The more fat you have, the less noticeable your veins will be. Therefore, reducing your body fat percentage is the first thing you should do to highlight your vascularity.
Men must be in the 10 to 12 percent body fat range to have clearly visible veins. On the other hand, women must be even lower.
The first thing you need to do is enter a negative calorie balance. The difference between the calories you burn off and consume should ideally be 500 calories.
Second, drastically reduce your complex carb intake. The timeframe immediately following your workouts is the only time you should be eating carbohydrates. Approximately an hour after your workout, consume a meal or smoothie that is 50% carbs and 30% protein.
Add steady-state cardio to your weight training sessions if you’re trying to get vascular. Most of the calories you burn while exercising with high-intensity interval training (HIIT) will come from your glycogen stores. The calories you burn from steady-state cardio will come from your body fat reserves.
2. Strength Training
Contrary to popular belief, doing a lot of high rep sets with lesser weights is not the greatest approach to developing arm vascularity. The best technique to develop size and vascularity simultaneously is through heavy training in the 8–12 rep range. Blood pumps through the body more intensely the harder you train. The veins enlarge as a result, making them easier to observe.
You should end your workout with high-repetition sets to achieve a maximum pump. This will saturate the working muscle with blood, giving it the impression that it is about to explode. This kind of exercise is a component of Hany Rambod’s FST-7 program for bodybuilders trying to get into a super-ripped (and veiny) condition.
3. Include Isometrics
You should perform isometric holds during your recovery period and after your workout to further improve your vascularity.
4. Cut Water
A layer of fat beneath the skin will prevent your veins from peeking through. Water can also get between your veins and your skin. The bodybuilders on the Mr. Olympia stage appear so diced because they have removed most of the water from under their skin.
Wrap Up
The 30-Day arm challenge works. So long as you stick to the plan, you will develop significantly bigger and stronger biceps, triceps, and forearms. And those arms will not only be big but also defined. Put your all into this program with total dedication, belief, consistency, and grit, and you’ll be rewarded with arms to impress!
References
MacDougall JD, Gibala MJ, Tarnopolsky MA, MacDonald JR, Interisano SA, Yarasheski KE. The time course for elevated muscle protein synthesis following heavy resistance exercise. Can J Appl Physiol. 1995 Dec;20(4):480-6. doi: 10.1139/h95-038. PMID: 8563679.
https://www.patreon.com/posts/frequency-66701244
The 10 Best Forearm Exercises for Arm Wrestling
While strength matters in arm wrestling, technique matters, too. There are several tricks you can use to beat a stronger opponent, such as moving your hand higher up their fingers and thumb to maximize your leverage while weakening theirs. This is called climbing.
But, at its heart, arm wrestling is a test of strength, and arm wrestlers often have very muscular arms and forearms. Most pros train with weights to develop the strength they need to beat their opponents and minimize their risk of injury.
In this article, we reveal the best forearm exercises for arm wrestling.
Arm Wrestling History
Arm wrestling (also spelled armwrestling) is an ancient strength sport. Evidence shows that arm wrestling was practiced in Egypt and Greece over 2,000 years ago. In America, native Americans did a type of arm wrestling, and on seeing it, settlers called it Indian wrestling. Arm wrestling was also popular in Spain, Japan, Cuba, Russia, Norway, and many others.
However, what started as an informal and spontaneous activity eventually became a professional sport. Pro arm wrestlers are now viewed as legitimate athletes.
Organized national and international arm-wrestling bouts started gaining popularity in the early 1950s. Like boxing, there are now several governing bodies, including the World Armwrestling Federation (WAF), The International Armwrestling Federation (IAF), and the World Wristwrestling Championship (WWC).
Despite being a legitime sport governed by rules, a lot of people enjoy casual arm wrestling and like to test their strength against friends and acquaintances. Informal bouts often happen in barrooms, with the loser having to buy the beers.
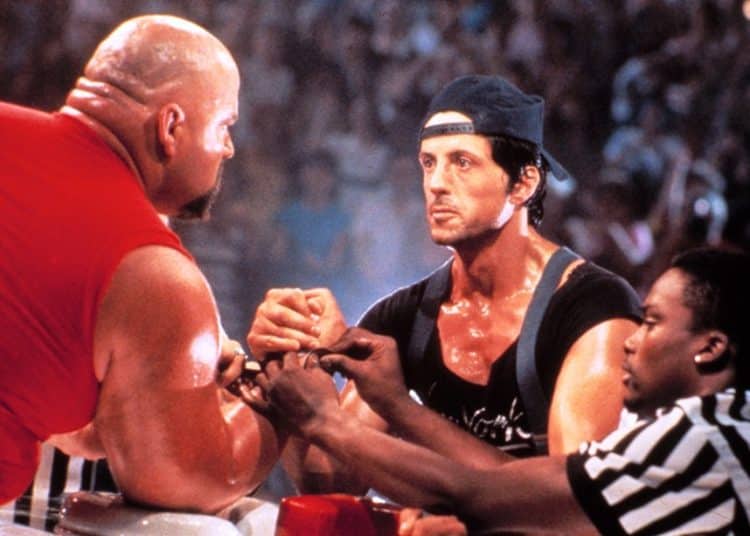
Arm wrestling has also been featured in movies, most notably Over the Top with Sylvester Stallone.
The 10 Best Forearm Exercises for Arm Wrestling
Build the strength you need to pin your opponents with the ten best forearm exercises for arm wrestling!
1. Barbell wrist curls
Wrist curls are a cornerstone of arm wrestling forearm training. They strengthen the muscles you need to use to top-roll your opponent so their palm is turned upward. This is a weak position which makes it easier to push their arm downward. Most pro arm wrestlers do plenty of wrist curls.
Steps:
Sit on an exercise bench and lean forward so your forearms rest at the top and your wrists are free to move. Hold a barbell in your supinated (upturned) hands.
Extend your wrists and lower the bar down toward the floor. Open your hands and let the bar roll down your fingers.
Next, close your fingers and curl the weight upward. Finally, flex your wrist as far as possible to maximally engage the target muscles.
Continue for the desired number of repetitions.
Muscles Targeted:
Forearm flexors.
Benefits:
A very arm wrestling-specific forearm exercise.
A good exercise for increasing forearm size.
Increases forearm and wrist flexibility as well as strength.
Tips:
Do this exercise with a light load for high reps to build endurance and heavier weights and lower reps for strength.
Lower the weight slowly and then lift it quickly to make this exercise more effective.
You can also do this exercise with dumbbells or just one dumbbell to train one forearm at a time.
2. Cable wrist curl
While there is nothing wrong with barbell wrist curls, they have an uneven strength curve, making some parts of the exercise harder than others. Using a cable machine keeps the target muscles under near-constant tension, which may mean this is a more effective, efficient way to wrist curls.
Steps:
Place an exercise bench in front of a cable machine and attach a straight bar to the lowest pulley.
Sit on the bench, and grab the handle with an underhand grip. Rest your forearms on your legs so your wrists are just past your knees.
Extend your wrists and lower the bar down toward the floor. Open your hands and let the bar roll down your fingers.
Next, close your fingers and curl the bar upward. Finally, flex your wrist as far as possible to maximally engage the target muscles.
Continue for the desired number of repetitions.
Muscles Targeted:
Forearm flexors.
Benefits:
More even tension on the target muscles compared to freeweight wrist curls.
Quick and easy to change the weights.
You can adjust the loading angle by moving the bench closer or further away from the pulley.
Tips:
You can also do this exercise with a single D-shaped handle and train one arm at a time.
Rep out to failure, lower the weight by 15-20%, and then rep out again to improve endurance, build muscle, and get a great pump. This is called a drop set.
Use a thick bar to challenge your grip more.
3. Behind-the-back wrist curls
No bench? No problem! You can get a great forearm workout with a barbell and some space to stand. This old-school exercise will pump up your forearms in seconds and build a cast-iron grip.
Steps:
Hold a barbell behind your back with your palms facing away from you.
Flex your wrists and curl the bar out and away from your body.
Pause with your forearms flexed for 1-3 seconds.
Lower the weight and repeat.
Muscles Targeted:
Forearm flexors.
Benefits:
A convenient exercise for home lifters.
A good movement for heavier weights and low reps.
A very effective old-school forearm and grip exercise.
Tips:
Use gym chalk to stop the bar from slipping out of your hands.
Use a thick bar to challenge your grip and develop more muscular forearms.
End your set with a 15-30 second dead hold to fully exhaust your forearms.
4. Single-arm hammer curls
Pulling your forearm toward your chest increases your leverage while decreasing your opponent’s. Once your arm is close to your body, you should find it easier to press the other guy’s arm down and pin it. Single-arm hammer curls are very arm wrestling specific and deserve a place in your arm-wrestling workouts.
Steps:
Hold a dumbbell in one hand, arm by your side, palm facing your leg.
Stand with your feet shoulder-width apart and your knees slightly bent. Brace your core and pull your shoulders down and back.
Bend your arm and curl the weight up to your shoulder. Do not rotate your wrist. Instead, maintain your neutral or thumbs-up grip.
Lower the dumbbell and repeat.
Switch sides and do the same number of reps on the other side.
Muscles Targeted:
Biceps, brachialis, brachioradialis.
Benefits:
A very effective exercise for arm wrestling.
Identify and fix left-to-right strength imbalances.
A great way to build stronger, more muscular upper and lower arms.
Tips:
Use a thumbless grip to increase forearm engagement.
Use clip-on fat grips to work your forearms even more.
Pause for 1-3 seconds at the top of each rep for a more challenging workout.
Use your non-working arm to perform a few end-of-set forced reps.
5. Sledgehammer pronation and supination
Some arm-wrestling techniques involve twisting your opponent’s wrist. As such, you must strengthen the muscles responsible for pronating and supinating your forearm. Strength in these muscles will also make it harder for your opponent to gain the upper hand and turn your wrist.
Steps:
Hold a sledgehammer about a quarter to a third of the way down the handle. Bend your arm to 90 degrees and tuck your upper arm into your side.
Keeping your upper arm stationary, slowly turn the sledgehammer clockwise and then counterclockwise through about 90 degrees in each direction.
Continue until your forearms begin to burn and get pumped.
Muscles Targeted:
Biceps, pronators, supinators.
Benefits:
One of the best ways to train pronation and supination at the same time.
Easy to scale by moving your hand up or down the handle.
A low-tech but high-effect grip and forearm exercise.
Tips:
The further your hand is from the head of the sledgehammer, the more challenging this exercise becomes.
Use a light sledgehammer, as this exercise is more strenuous than it looks. 7-10 pounds should be sufficient for most people.
No sledgehammer? Load one end of an adjustable dumbbell bar and use that instead.
6. Towel wringing
While you can train your forearms for arm wrestling in a gym, you can also get a productive workout at home. This exercise works your grip and forearms using nothing but a water-logged towel. However, don’t let the simplicity of this exercise fool you into thinking it’s easy – it’s actually a beast!
Steps:
Dunk a towel in a bowl or bucket of water.
Remove the towel from the water and grip one end in both hands.
Twisting your hands, wring the water out of the first section of towel, move your hands down a few inches, and then wring it out again.
Continue down the length of the towel until you have wrung out as much water as you can.
Rest a moment, re-dunk the towel, and repeat.
Muscles Targeted:
Forearm flexors and extensors.
Benefits:
An excellent exercise for home workouts.
Very joint-friendly.
A great way to increase grip and forearm strength simultaneously.
Tips:
The thicker the towel, the more challenging this exercise becomes.
Don’t use your best towels for this exercise, as they may rip.
Reverse hand positions/wringing directions to ensure that you train both arms equally.
7. Wrist roller
The wrist roller is an old-school forearm and grip exercise that’s perfect for arm wrestling. While you can use it with heavy weights for low reps to build strength, it’s better for developing endurance so your muscles can cope with the demands of a lengthy arm-wrestling bout.
Steps:
Start with the cord unraveled and the weight resting on the floor. Hold the handle with an overhand grip.
Raise your arms in front of you, and then start rolling your wrists to wrap the cord around the handle. Use an alternating hand action, and try to wrap as much cord as possible per wrist turn.
Continue until you have done the desired number of reps or the weight reaches the handle.
Slowly lower the weight back down to the floor – no dropping!
Muscles Targeted:
Forearm flexors and extensors.
Benefits:
A low-tech exercise that’s ideal for home workouts.
Wrist rollers are widely available and cheap to buy.
Easy to modify by adding or subtracting weight plates.
Tips:
Alternate between rolling your wrists forward (flexion) and backward (extension) to train the muscles on both sides of your forearms equally.
Lower your arms and hold the handle in front of your hips to take pressure off your shoulders.
Make your own wrist roller for just a few dollars – instructions here.
8. Towel pull-up
While towel pull-ups might not be an obvious exercise for arm wrestling, they’re actually an excellent choice. Towel pull-ups not only strengthen your forearms, but they’ll also build a vice-like grip, battering-ram biceps, and rock-hard lats, which are all muscles used during arm wrestling. Simply switching from regular pull-ups to this variation will help make you a stronger, more successful arm wrestler.
Steps:
Hang two gym towels over your pull-up bar.
Grip the ends of the towels and squeeze them tightly together.
Hang with your arms straight, shoulders down and back, and core braced.
Bend your arms and pull your shoulders up toward your hands.
Descend under control and repeat.
Muscles Targeted:
Biceps, forearm flexors, latissimus dorsi.
Benefits:
A total upper body/arm/grip workout for arm wrestlers.
Builds bigger, stronger forearms.
An easy exercise to add to your regular back workout.
Tips:
Wear a weighted vest to make this exercise more challenging.
Thicker towels make this exercise more grip-centric.
Just hang from the towels to build a stronger grip and muscular forearms if you cannot do pull-ups.
9. Hand grippers
Hand grippers are ideal for those times you want to work on your grip and forearms but don’t have time to go to the gym or do a full workout. Keep a hand gripper at home so you can train while watching TV or in your desk drawer at work so you can sneak in a set between phone calls. Buy heavy-duty hand grippers to ensure your workout is as effective as possible.
Steps:
Wrap all four fingers and your thumb around the hand gripper.
Squeeze it closed and then hold for a few seconds.
Slowly relax your hand and then repeat.
Muscles Targeted:
Forearm flexors.
Benefits:
Highly portable, so you can train your grip anywhere and anytime.
Hand grippers are available in a wide range of closing strengths, so they’re ideal for all levels and abilities.
Hand grippers are cheap and widely available.
Tips:
Buy grippers that you can only just close. Easy-to-close hand grippers are of limited value.
Make sure you balance your hand gripper training with a few sets of finger extensions to balance your muscular development (see below).
Resist the temptation to use your hand grippers every day. This could lead to overuse injuries, such as tendonitis. Include a few rest days on your arm-wrestling forearm workouts.
10. Finger extensions
Most arm wrestling exercises focus on your forearm flexors. This makes sense, given how important these muscles are. However, you must also work on your finger extensors to ensure that the muscles that open your hands are strong and well-developed. Imbalances between flexors and extensors can lead to injuries. The good news is that training your finger extensors is easy and requires no special equipment.
Steps:
With your fingers straight and together, take a large rubber band and loop it around your fingertips and thumb. A standard stationary-type band should suffice.
Open your hand and spread your fingers and thumb apart as far as possible.
Slowly close your hand and repeat.
Muscles Targeted:
Forearm extensors
Benefits:
A good exercise for promoting recovery.
Helps to prevent muscle imbalances.
Simple and easy to do – anywhere and anytime.
Tips:
Do one set of finger extensions for every few sets of forearm and hand flexion you perform.
Use a wide band so it stays in place and doesn’t slip off your fingers.
Loop the band around each finger to make your workout harder and make sure the band remains in place.
Keep a finger extension band in your pocket so you can do a set whenever you have a few minutes spare.
FAQs
Do you have a question about forearm exercises for arm wrestling? No worries because we’ve got the answers!
1. Will more muscular forearms make me a better arm wrestler?
Almost every great arm wrestler has big biceps and thick forearms. This is not a coincidence! However, the guy with the most muscular arms is not always the winner, and technique is also important. The small, skilled wrestler can often beat someone bigger but less experienced.
So, work on your forearm and arm strength, but don’t underestimate the importance of learning how to arm wrestle properly. Practice your skills by arm wrestling against a range of opponents.
2. How often should I train my forearms for arm wrestling?
While it may be tempting to train your forearms every day, you’ll probably get better results if you limit yourself to 2-3 intense workouts per week. This will provide plenty of time for recovery and muscle growth while reducing the risk of overuse injuries.
Build each workout around a few different exercises, so you hit your muscles from all the available angles, e.g.,
Single-arm hammer curls – 3 sets of 6-10 reps
Barbell wrist curls – 3 sets of 10-15 reps
Sledgehammer supination/pronation – 3 sets of 15-20 reps
Choose different exercises for your next workout.
3. What is the best rep range for arm wrestling training?
Arm wrestlers need to be strong, powerful, and have good endurance so they’re ready for every type of bout and opponent. For example, being fast and explosive may help you win an arm-wrestling bout quickly. Still, you also need endurance in case the battle lasts longer than you expected.
As such, you should train your muscles with different rep ranges to ensure you are ready for all the demands you are likely to face. This means:
Power – 3-5 reps with heavy weights lifted quickly
Strength – 4-6 reps with heavy weights lifted slowly
Size – 8-12 reps with moderate weights*
Endurance – 15-20+ reps with light weights
*Optional
Use a variety of exercises and rep ranges in your workouts to ensure you have all the tools you need to dominate at the arm-wrestling table. There is no point in being strong if your muscles are tired in 10 seconds. Similarly, unlimited endurance won’t help you if you get pinned straight away by stronger opponents.
4. Do I need to train any other muscles besides my forearms?
While strong forearms are a must for successful arm wrestling, there are other muscles that also deserve your attention. After all, arm wrestling involves your entire upper body, not just your lower arms.
So, make sure you also train your chest, shoulders, back, biceps, triceps, and core in your quest to become an unbeatable arm wrestler.
You should also train your legs simply to ensure your body is well-proportioned and balanced. Friends don’t let friends skip leg day, even if they are arm wrestlers.
5. Are arm wrestlers strong?
Arm wrestlers are very strong, but that strength is often specific to their chosen activity. For example, a powerful arm wrestler may not be a good bench presser or deadlifter. Arm wrestlers also tend not to be as muscular as bodybuilders.
There are exceptions, such as Larry Wheels, who excels in many different strength sports, including powerlifting, strongman, and arm wrestling.
However, as Wheels himself knows, size is not everything in arm wrestling, and smaller, more experienced competitors can sometimes beat much bigger opponents.
6. Is arm wrestling dangerous?
Any activity that tests maximal strength can be dangerous – including arm wrestling. Most arm-wrestling injuries affect the soft tissues and include ligament sprains and muscle strains. However, humerus (forearm bone) fractures also occur from time to time (1).
These injuries can be to the wrist, forearm, elbow, upper arm, or shoulder. Chronic overuse injuries are probably more common than acute injuries, although the latter tend to be more serious. Strength training can reduce the risk of injury by ensuring the structures of the body are up to the demands of arm wrestling.
You should also warm up before arm wrestling, stretch and mobilize your wrists, elbows, and shoulders between workouts and bouts, and use recovery tools such as massage guns, foam rolling, ice, and trigger point therapy to stop minor aches and pains turning into more serious problems.
Also, be wary of arm wrestling too often, wrestling against much stronger opponents, not using good technique, or not submitting once you know you’ve lost a bout, all of which increase your risk of injury.
More Forearm Exercises:
Wrapping Up
Arm wrestling is a popular activity and sport. Some people are naturally good arm wrestlers, while others need to work at it.
There is more to arm wrestling than just gripping your opponent’s hand and trying to push it down. There are several techniques and tricks you can use to improve your chances of success. Arm wrestling is a skill, and it’s worth becoming a student of the game if you want to get better.
That said, arm wrestling is a strength sport, and training your forearms will help you become a better arm wrestler. Building more muscular forearms could also protect you from injury.
So, train your forearms, as well as the rest of your upper body, and you’ll soon be king of the arm-wrestling table!
References:
1 – Moloney DP, Feeley I, Hughes AJ, Merghani K, Sheehan E, Kennedy M. Injuries associated with arm wrestling: A narrative review. J Clin Orthop Trauma. 2021 Apr 20;18:30-37. doi: 10.1016/j.jcot.2021.04.010. Erratum in: J Clin Orthop Trauma. 2021 Jul 30;20:101539. PMID: 33996446; PMCID: PMC8091050.